

Introduction
After discussing the basic features of Azure Machine Learning and how to clean the data from Azure Machine Learning, let us look at how to perform prediction in Azure Machine Learning. Prediction is one of the important aspects of Machine Learning as it will help to make strategic decisions.
Data Selection and Data Cleaning
Like we did in the last two articles, let us quickly select a data source, Bike Buyer, and apply the normalization if needed after choosing only the relevant columns as shown in the below screenshot.
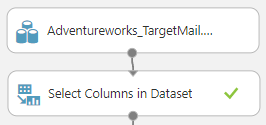
In the above configuration, columns such as addresses, names, keys, and attributes with different languages other than English were removed. These columns were ignored to improve the Prediction in Azure Machine Learning as those columns do not make major contributions towards buying a bike. For example, a customer’s name and address will not make any contributions towards a bike buyer.
Data Split
In most of the Machine Learning techniques, we need to have two datasets, Training and Testing datasets. The training dataset is used to build the model while the Testing dataset is used to evaluate the trained model. Though there are different techniques available for data splitting, like SQL Server, in Azure Machine Learning, the percentage split is the available technique to split the data. In this technique, random data of a given percentage will be split to train and test data.
Under Data Transformation -> Sample & Split, there is a control called Split Data. It is configured as shown in the below screenshot.
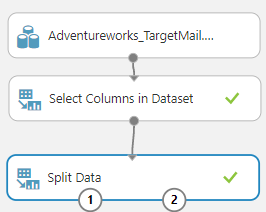
The following are the settings for the Split Data in Prediction in Azure Machine Learning.
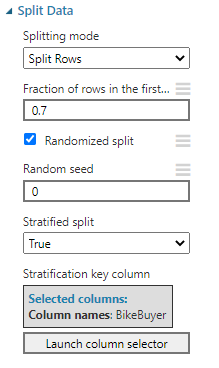
As shown in the above configuration, the train dataset is 0.7 from the dataset. Further, it is a random split and data will be split randomly to train and test dataset. When the Stratified split is set to true, data is split in such a way that both training and testing dataset has almost the same sample percentage of data for the selected column. In this configuration, training data will have 70% of the data with bike buyer yes and no values. When the stratified split is set to true, you need to choose the relevant attribute which is BikeBuyer.
It is should be noted that there are two outputs in the Data Split control where the first one is the training dataset and the second one is the testing data set.
The Training Model
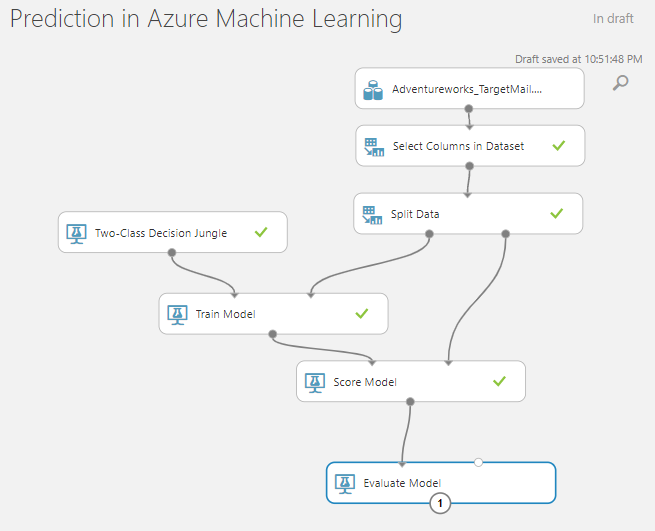
Training is an important aspect of prediction. You can find the Training Model control by navigating Machine Learning -> Train path. Similar to Data Split where you had two outputs, Training Model has two inputs. One input is the data set while the other input is for the training algorithm as shown below.
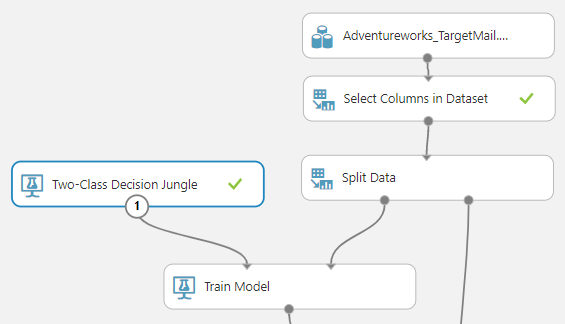
As observed in the above screenshot, the training dataset is connected to the second input of the Train Model while the algorithm is connected to the first input. In this example, we have chosen the Two-Class decision jungle algorithm whereas there are a lot of available algorithms to choose from.
The following list contains the list of available algorithms for Prediction in Azure Machine Learning:
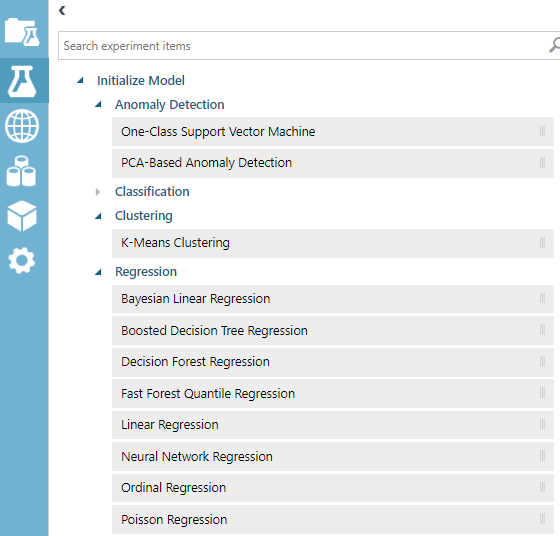
We will be discussing these techniques in future articles with details as every technique has different types of usages.
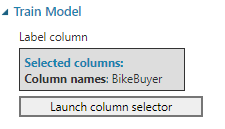
In the trained model, we need to choose the class variable since we have chosen a classification technique. For this data set, we are looking at predicting BikeBuyer, hence we will be choosing the BikeBuyer variable as shown in the below screenshot.
The Score Model
After the model is trained, let us see how the model is predicted using Machine Learning -> Score -> Score Model control. The Score model has two inputs, one from the train model and the other one is test data set from split data control as shown in the below screenshot.

We can view the output from the score model as shown in the below screenshot
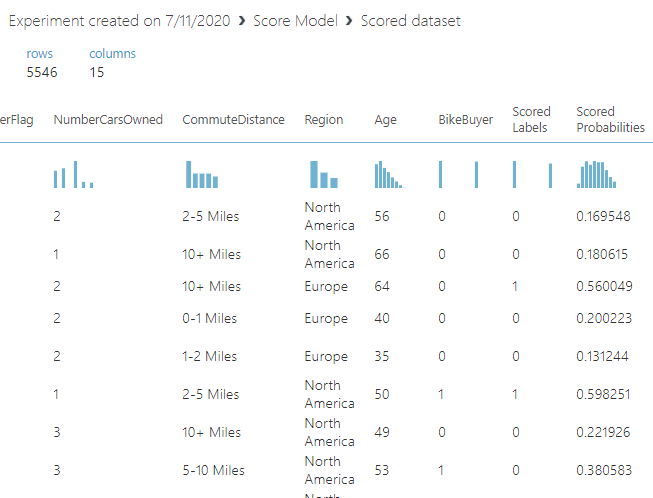
In the above screen, Bike Buyer is the actual value whereas scored labels are the predicted value with probability.
Evaluating the Model
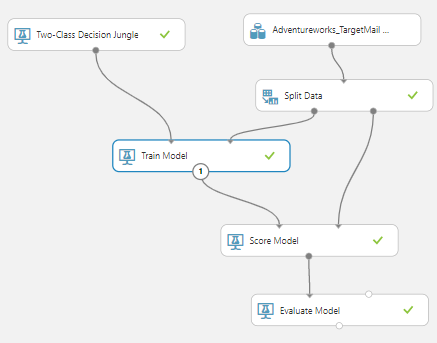
As you know, every algorithm has its own evaluation parameters. Model evaluation can be done from the control Machine Learning -> Evaluate -> Evaluate Model. With the inclusion of the Evaluation model, an experiment for Prediction in Azure Machine Learning is completed as shown in the below screenshot.
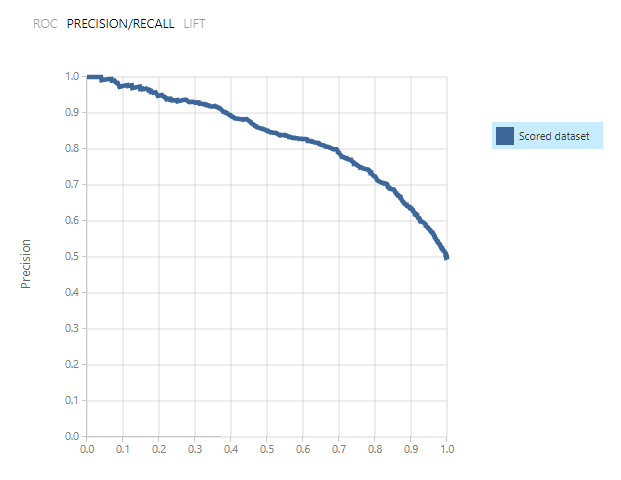
Let us see the Evaluate Model output and it is important to note that, evaluation parameters are different from the technique that you used. Since we have chosen classification techniques, we will see most of the output, relevant to classification techniques such as Precision/Recall.
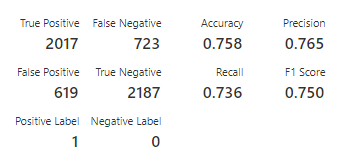
Following is the confusion matric and other accuracy parameters such as Accuracy, Precision, Recall and F1 score as shown in the below screenshot.
Publish to Gallery
You can publish the created experiment if you wish to share it with others. For this, you can use the Publish to Gallery option as shown below.

When the above option is clicked, the following screen will appear.
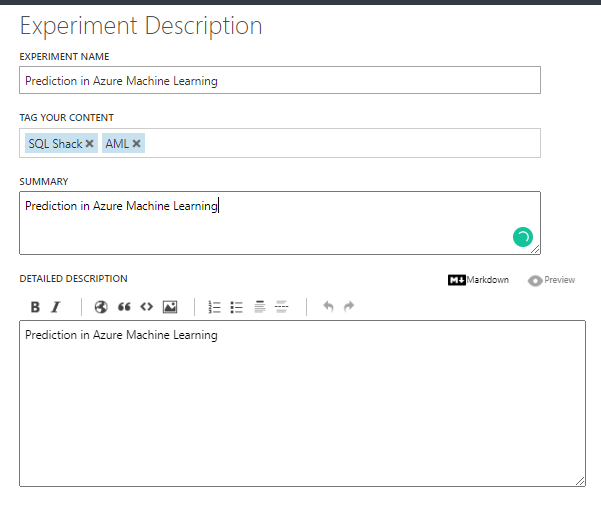
In this screen, you need to enter the Experiment Name, which is the Prediction in Azure Machine Learning. Tag names are entered so that this can be easily searched. Summary and description are entered so that the consumer knows what is the model that they are selecting.
From the following screen, a proper image can be selected so that a better interface can be viewed.
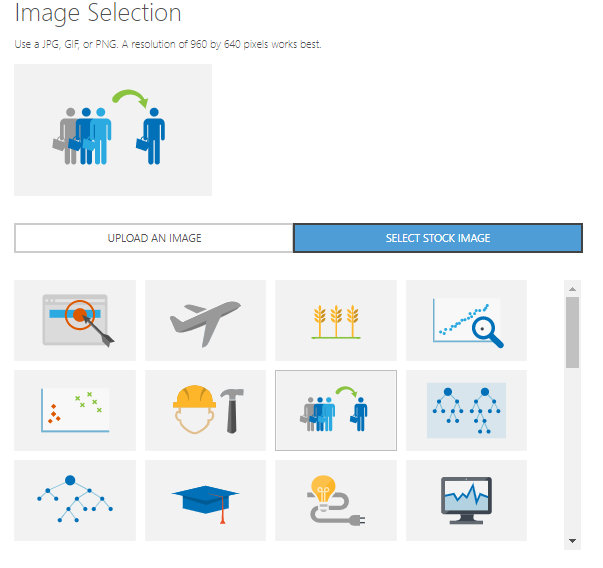
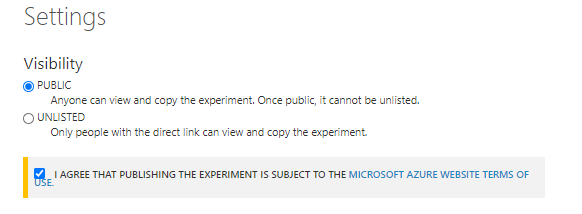
There are available images and also, you have an option to choose your own image to brand your model. After the image selection, next is to decide whether the model is available to the public or whether it is available to users who have the direct link which you have shared.
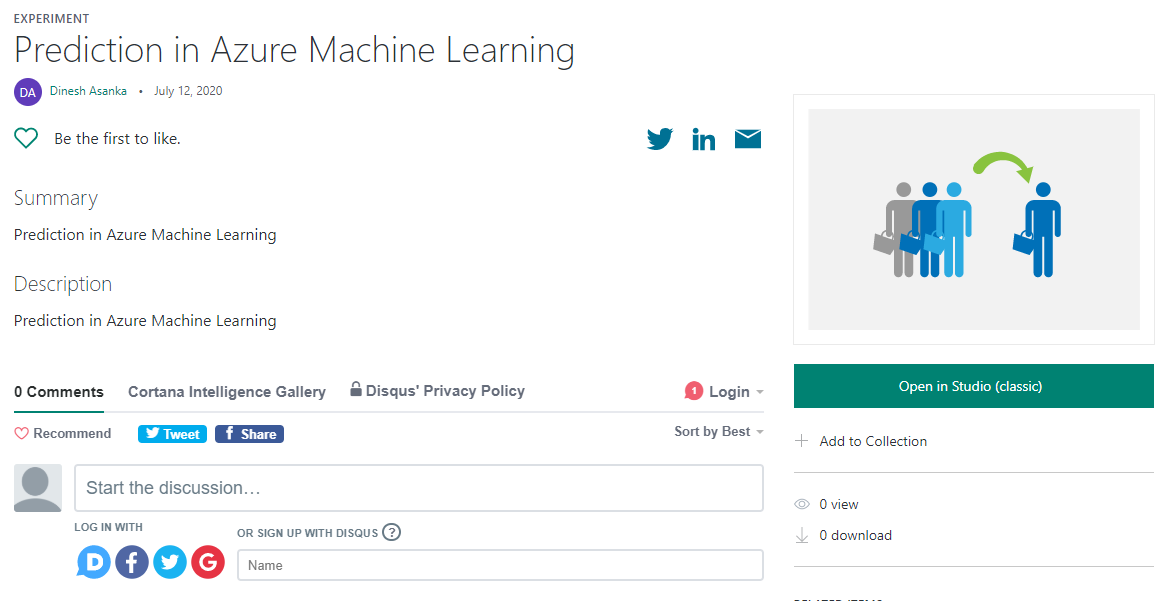
After publishing the built model, you will have the following screen.
Deployment of Azure Model
When the model is deployed, any user who does not have any understanding of the Machine Learning technique can use this model for their usages. For example, your marketing team can utilize this model to find out who are the most prospective customers from the existing list without knowing the technical details of Machine Learning.
There are a few changes needed for the previously created model. In the model, we need to eliminate unnecessary columns such as CustomerKey, etc. If not, those attributes will be shown as inputs. Let us remove these unnecessary columns and upload the file again to the Azure Machine Learning dataset. Then we do not need the filter columns and the final model will look like the following screenshot.
Then we need to set up this model as a web service so that it is usable. Make sure you have saved the model and run the model successfully in order to set up the web service.

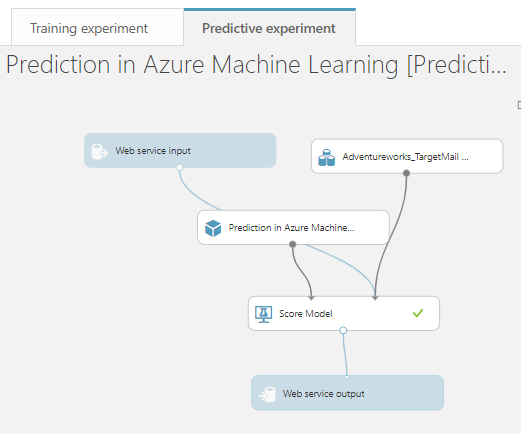
When the web service is created, a new tab named predictive experiment will appear as shown in the below screenshot.
When you go to the web service on the left-hand side, you will see the web service that was created for Prediction in Azure Machine Learning.
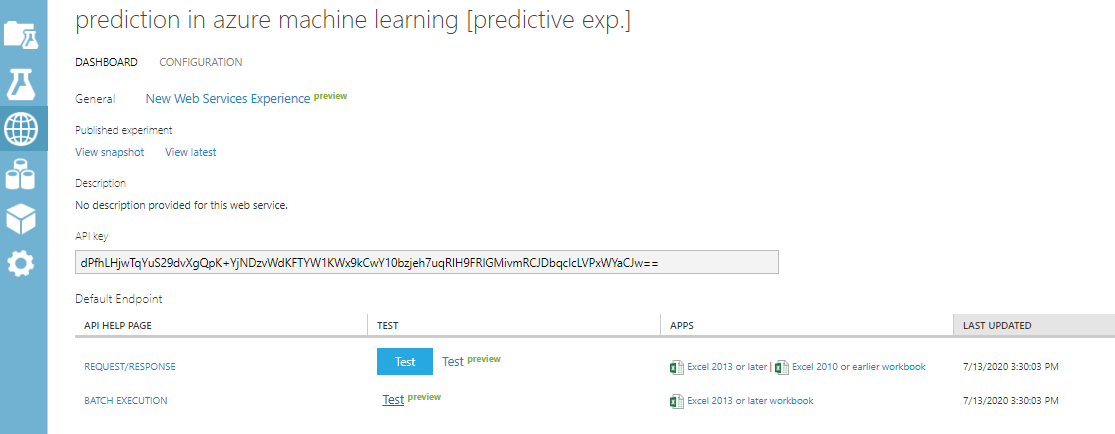
In this, you can perform the prediction in Azure Machine Learning.
You can either do a prediction for one entry or for a batch. The following screenshot shows how to perform Prediction in Azure Machine Learning for a single entry.

After you enter the values, click the Test Response option and you will see the result in the right-hand side as shown in the below screenshot.
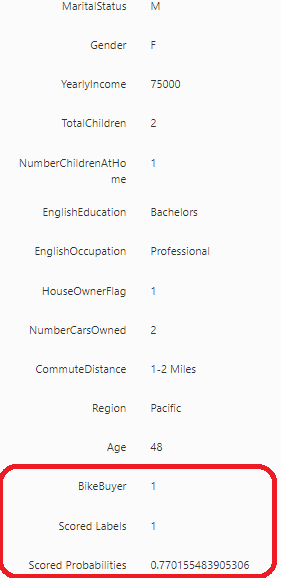
As shown in the above screenshot, it was predicted as a bike buyer with 77% of probability.
Applications
Prediction in Azure Machine Learning can be done using other tools such as Excel and other customize tools. You can find the relevant code for C#, Python, and R.
Conclusion
In this article, we discussed how prediction can be done in the Azure Machine learning by building the model and setting up as a web service. Further, we can publish the built model so that others can use the built model.
Table of contents

View all posts by Dinesh Asanka
- Testing Type 2 Slowly Changing Dimensions in a Data Warehouse - May 30, 2022
- Incremental Data Extraction for ETL using Database Snapshots - January 10, 2022
- Use Replication to improve the ETL process in SQL Server - November 4, 2021