
Linked servers allow submitting a T-SQL statement on a SQL Server instance, which returns data from other SQL Server instances. A linked server allows joining data from several SQL Server instances using a single T-SQL statement when data exists on multiple databases on different SQL instances. By using a linked server to retrieve data from several SQL instances, the only thing that should be done is to connect to one SQL instance.
There are two ways of configuring linked server in SSMS. One way is by using sp_addlinkedserver system stored procedure and another is by using SQL Server Management Studio (SSMS) GUI interface.
In this article will be explained how to configure a linked server using a SQL Server data source. More information about other data sources can be found on this link.
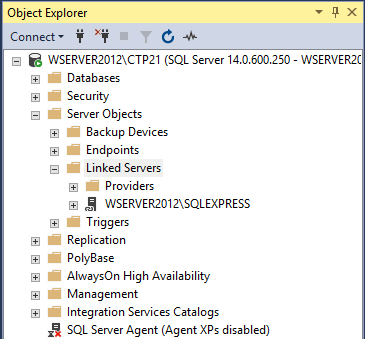
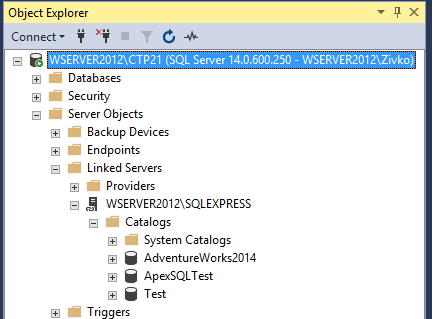
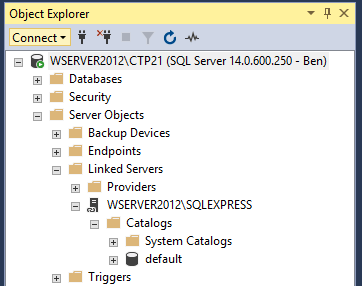
To see all created linked servers in SSMS, under Object Explorer, chose the Server Objects folder and expand the Linked Servers folder:
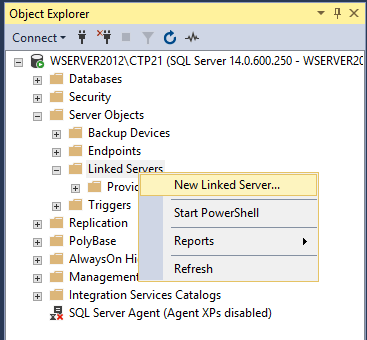
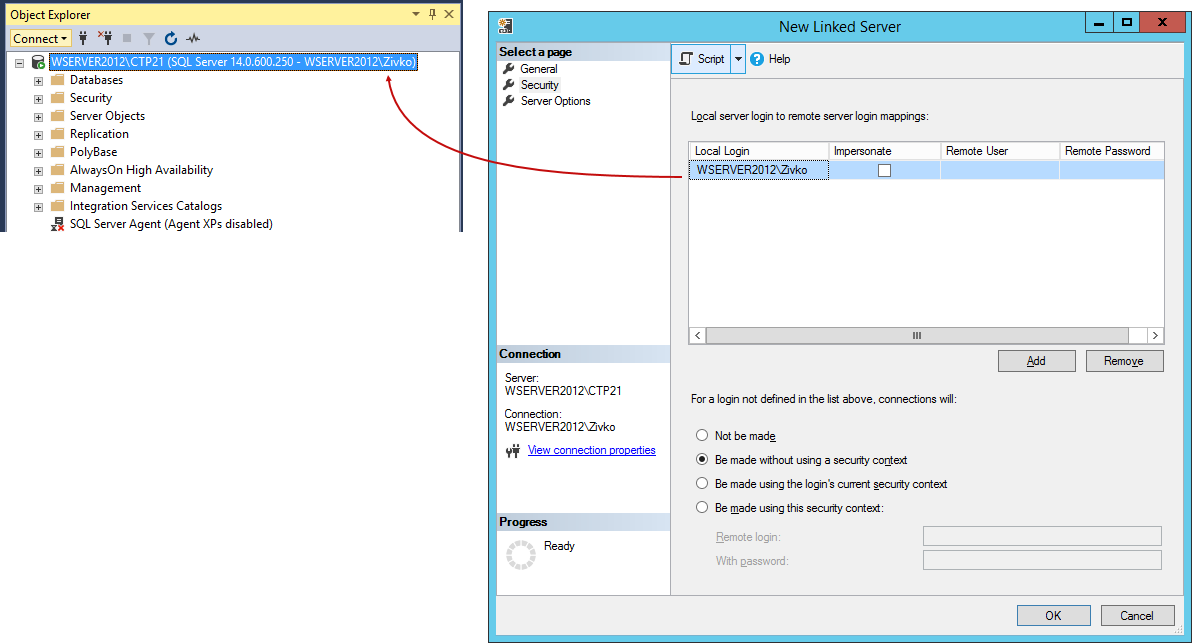
To create a linked server in SSMS, right click on the Linked Servers folder and from the context menu select the New Linked Server option:
The New Linked Server dialog appears:
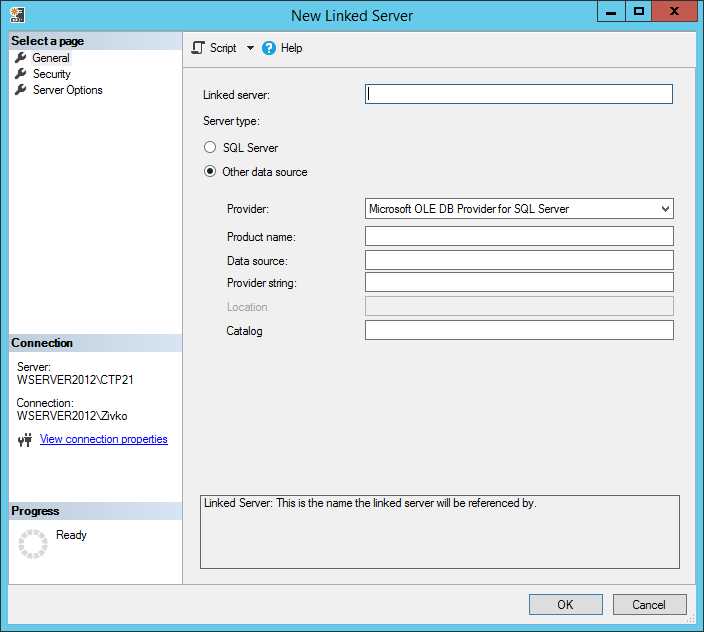
In this dialog, the name of a linked server and server type must be identified. The linked servers can be defined for different kind of data source if the Other data source radio button is chosen. For the purpose of this article, the SQL Server radio button under the Server type section will be chosen and in the Linked server text box, a name of the server will be entered:
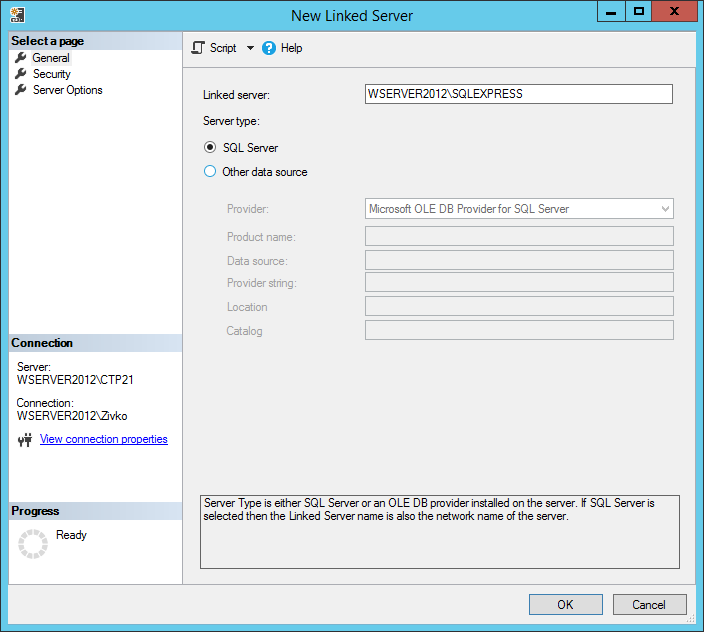
If the SQL Server type is chosen to configure a SQL Server linked server, the name specified in the Linked server text box must be the name of the remote SQL Server.
If a SQL Server instance is default instance, type the name of the computer that hosts the instance of SQL Server (e.g. WSERVER2012). If the SQL Server is a named instance, type the name of the computer and the name of the instance separated by slash (e.g. WSERVER2012\SQLEXPRESS).
Otherwise the following error may occur when the OK button is pressed:
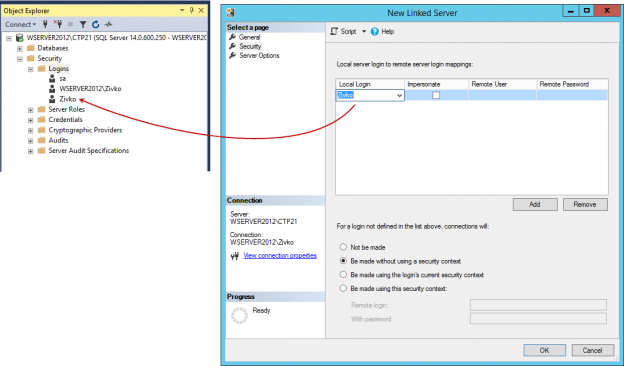
To set how a user would authenticate to the WSERVER2012\SQLEXPRESS instance, under the Select a page section on upper left corner of the New Linked Server dialog, select the Security item:
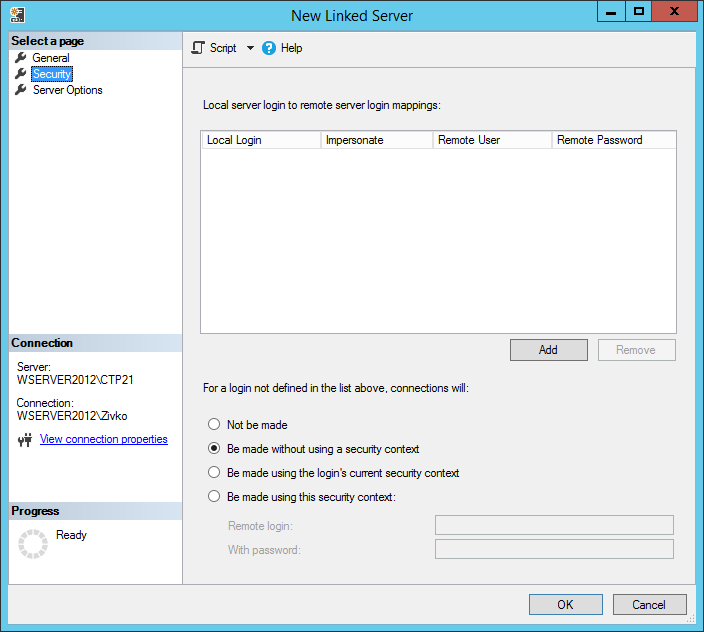
Here, different ways to authenticate the linked server can be set.
Under the Local server login to remote server login mappings, two ways of local logging to a remote login can be set. One way is to associate a local login with a remote login and other way is to impersonate.
Local Login
In the Local Login field, will be listed all the local logins. The local login can be an SQL Server Authentication local login:
Or a Windows Authentication login:
Now, when clicking the OK button on the New Linked Server dialog, the following error message will appear:
The login mappings should either be impersonate or have a remote login name.
See the image below:
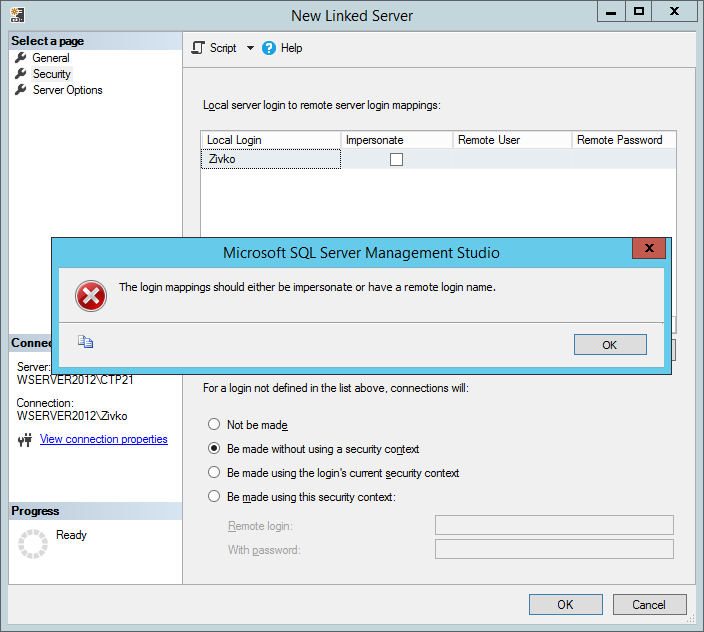
This happens because the Impersonate check box isn’t checked.
Impersonate
The Impersonate check box when is checked passes the local login credentials to the linked server. For SQL Server Authentication, the same login with the exact credentials must exist on the linked server, otherwise when connected to the server with the SQL Server Authentication, the list of the databases under the Catalogs folder may look like this:
For Windows logins, the login must be a valid login on the linked server. In order to use impersonation, the delegation between the local server and the linked server must be set.
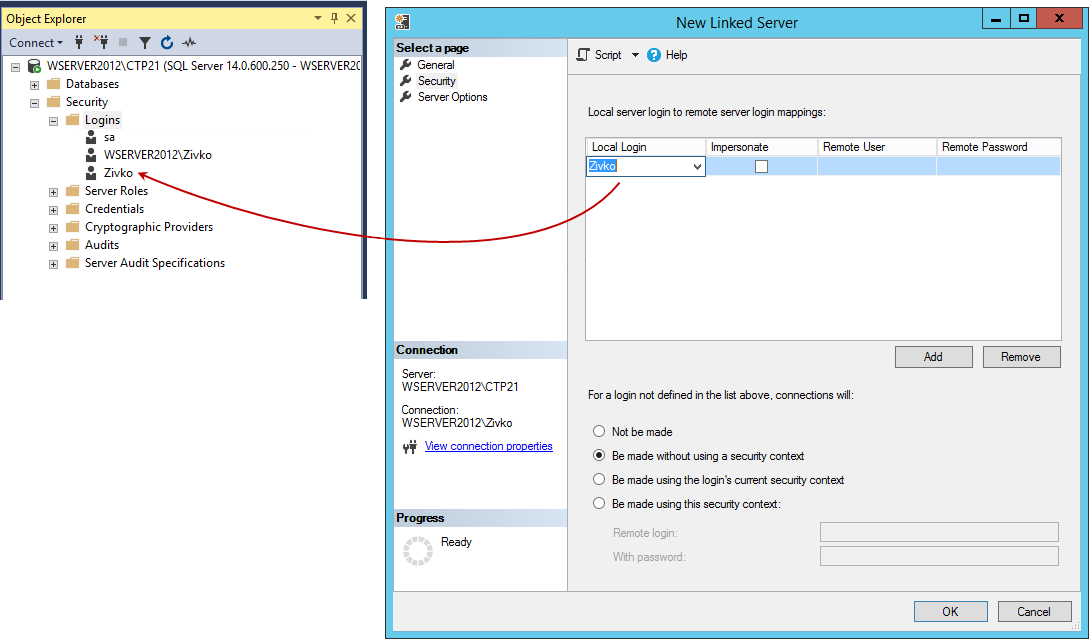
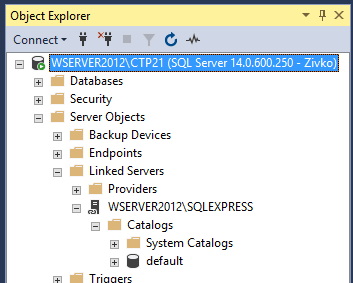
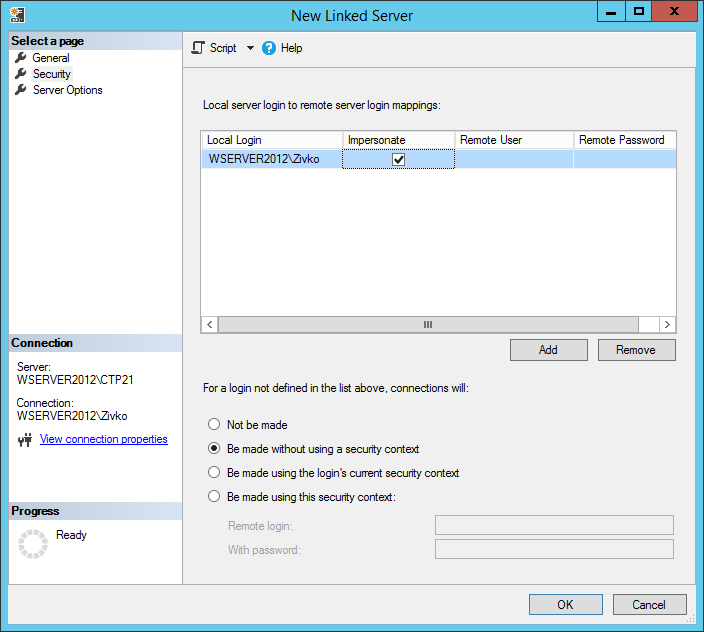
Let’s create a linked server using the local Windows login. From the Local Login combo box, choose the local Windows login and check the Impersonate checkbox and press the OK button:
Under the Catalogs folder, all databases that are located on the linked server will be listed:
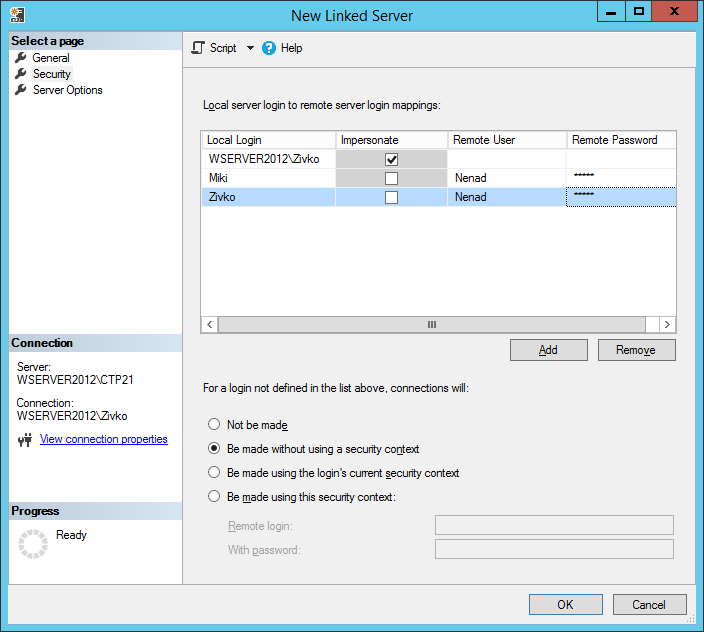
Remote User
The remote user option allows users from the local SQL server to connect to the linked SQL server even though their credentials aren’t present on the remote server by using the credentials from the user that exists on the remote server. Basically, it allows local logins to connect to a remote server as a different login that must exist on a remote server.
Remote Password
Specify the password of the remote user.
From the Local Login drop down list, choose a local login which should map to a remote login. On the Remote User field, enter the name of the remote user that exists on the remote server and in the Remote Password filed, enter a password of that remote user. Then, press the OK button:
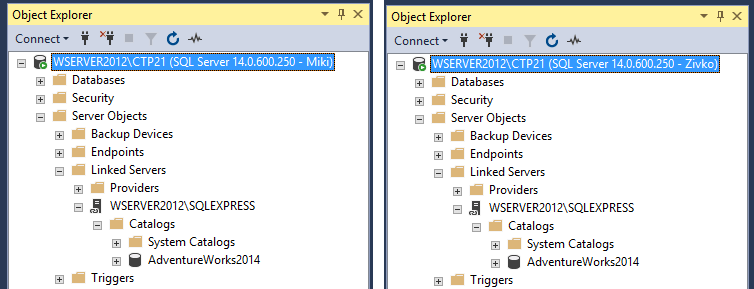
Now, when connected to the local server using SQL Server Authentication, with Miki or Zivko credentials, under the Catalogs folder, all databases that are available on a remote server for the Nenad remote login will be listed:
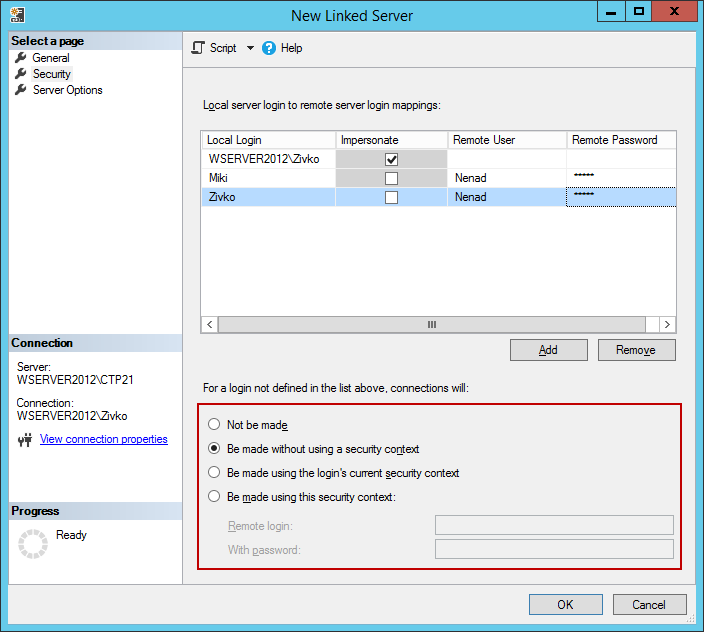
Additionally, on the Linked Server dialog, it can be identified how logins that are not set in the Local server login to remote server login mappings list will connect to the linked server, for that there are four options that can be used and they are located under the For a login not defined in the list above, connections will section:
Not be made
If this radio button is chosen, any users that aren’t identified in the Local server login to remote server login mappings list cannot establish connection to the linked server.
For example, if login with different account (e.g. Ben) that not set in the login mapping list the list of the databases under the Catalogs folder will look like this:
If you attempt to execute a linked server query:
|
1 2 3 |
SELECT * FROM [WSERVER2012\SQLEXPRESS].AdventureWorks2014.HumanResources.Employee e |
The following result will appear:
Msg 7416, Level 16, State 1, Line 1
Access to the remote server is denied because no login-mapping exists.
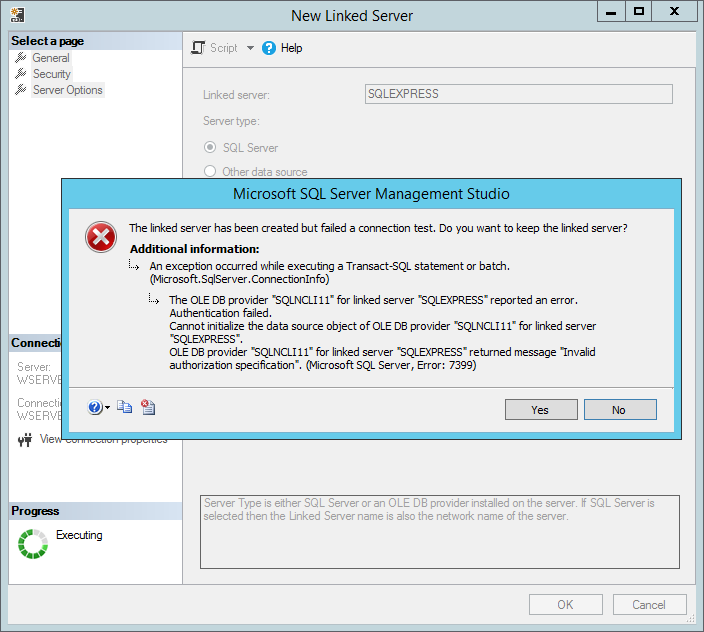
Be made without using a security context
The Be made without using a security context option is used for connecting to data sources that do not require any authentication, for example like a text file. When this option is selected for connect to a linked server, will have the same effect as selecting the “Not be made” option.
If you attempt to execute a linked server query:
|
1 2 3 |
SELECT * FROM [WSERVER2012\SQLEXPRESS].AdventureWorks2014.HumanResources.Employee e |
The following message e may appear:
OLE DB provider “SQLNCLI11” for linked server “WSERVER2012\SQLEXPRESS” returned message “Invalid authorization specification”.
Msg 7399, Level 16, State 1, Line 1
The OLE DB provider “SQLNCLI11” for linked server “WSERVER2012\SQLEXPRESS” reported an error. Authentication failed.
Msg 7303, Level 16, State 1, Line 1
Cannot initialize the data source object of OLE DB provider “SQLNCLI11” for linked server “WSERVER2012\SQLEXPRESS”.
Be made using the login’s current security context
If this option is chosen, it will pass the current security context of the local login to the remote login. If Windows Authentication is used, the windows credentials will be used to connect to a remote SQL server. If SQL Server Authentication is used, then the local login credentials will be passed to remote SQL Server. Note, to establish connection to remote server successfully, then the user with the exact same credentials must exist on the remote server otherwise when execute a linked server query:
|
1 2 3 |
SELECT * FROM [WSERVER2012\SQLEXPRESS].AdventureWorks2014.HumanResources.Employee e |
The following message will appear:
Msg 18456, Level 14, State 1, Line 1
Login failed for user ‘Ben’.
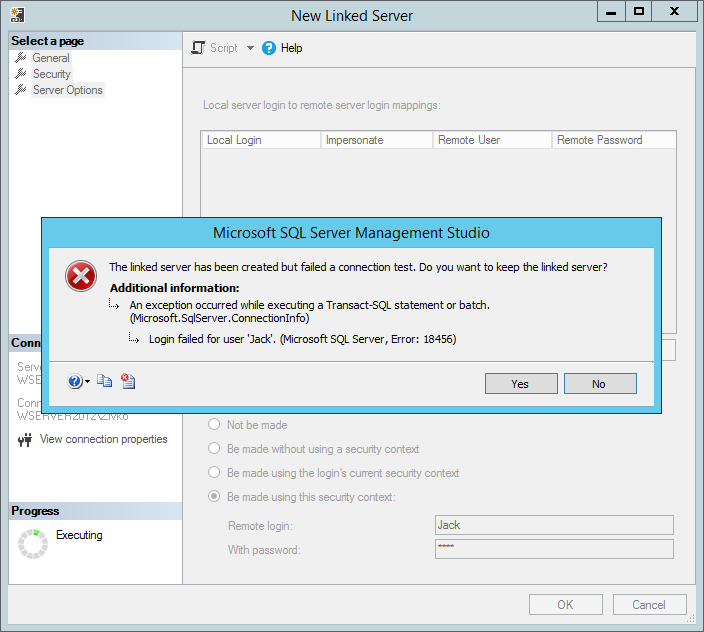
Be made using this security context
The fourth option under the For a login not defined in the list above, connections will section is Be made using this security context. In the Remote login and With password fields, enter the credentials of the SQL Server Authentication login that exist on a remote server, otherwise the following error may occur:
The last item under the Select a page menu is the Server Options item. When selecting this option, the following window will be shown:
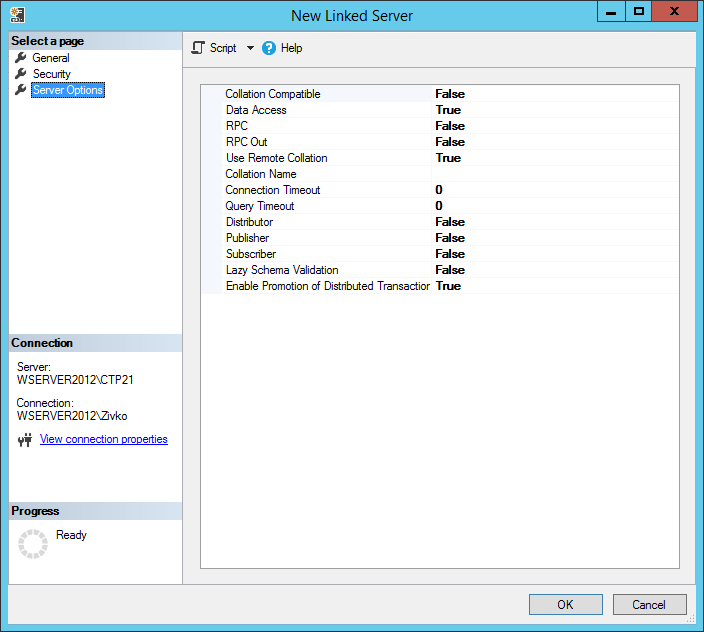
Here, additional options for linked server can be seen or set.
Collation Compatible
The first option is the Collation Compatible option. This option is used to identify if the linked server has the same collation as the local server. This option should set to True only if is known that the linked server has the same collation as the local, otherwise it should be set to False (default).
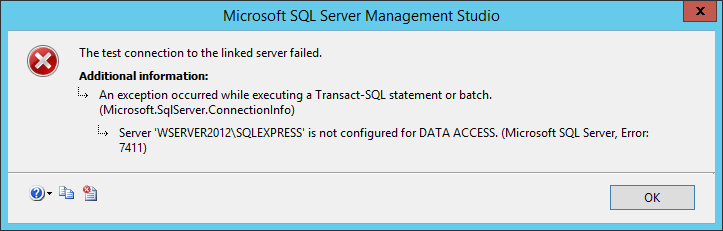
Data Access
This option is used to allow/deny access to the linked server data. If this option is set to False, the access to remote will be denied. This option is useful to disable access to a remote server temporally. The following message will appear when execute a linked server query and this option is set to False:
Msg 7411, Level 16, State 1, Line 1
Server ‘WSERVER2012\SQLEXPRESS’ is not configured for DATA ACCESS.
By default, the option is set to True
RPC and RCP Out
This RCP (Remote Procedure Call) is used to enable the access to remote procedures to be called from the linked server or to be called to the linked server.
If these options are set to False, the following error will appear when some procedures from the linked server are called:
Msg 7411, Level 16, State 1, Line 4
Server ‘WSERVER2012\SQLEXPRESS’ is not configured for RPC.
By default, the False value are set for the RPC and RCP Out options
Use Remote Collation
When this option is set to True, the collection of remote columns will be used and collection specified in the Collation Name filed will be used for data source that are not SQL Server data source, but if the option is set to False then the collation for the local server will be used. By default, is set to False.
Collation Name
If the Use Remote Collation filed set to True, this option is used to specify the collation name of the linked server for the data source that is not SQL Server data source. When chose a collation name, it must be a collation that SQL Server supports.
Connection Timeout
This option is used to set the maximum time the local server should wait for to get a connection to the linked server SQL Server instance. If 0 (zero) is set, then the server option remote login timeout is used. By default, 10 second is set for this option. Note, the default value for SQL Server 2008 is 20 seconds.
Query Timeout
This option is used to set how long, in seconds, a remote process can take before time is out. The default value is 600 second (10 minutes). To disable query timeout put 0 (zero) in this field and the query will wait until it is completed.
Distributor
In this option, it can be specified whether the linked server is participating in replication as a distribution Publisher.
The Distributor is a database instance, that acts as a store for replication specific data associated with one or more Publishers
Publisher
In this option, it can be set whether the linked server to be a replication publisher or not. If True, the linked server is a publisher. Otherwise, is not.
The Publisher is a database instance, that makes data available to other locations through replication.
Subscriber
In this option, it can be specified whether the linked server is a replication subscriber or not.
A Subscriber is a database instance, that receives replicated data.
More information about Distributor, Publisher, Subscriber can be found on the Replication Publishing Model Overview page.
Lazy schema validation
This option checks schema changes that have occurred since compilation in the remote tables. If this option is set to False (default state), SQL Server checks changes before the execution of a query and if there are some changes, it recompiles the query. If the Lazy schema validation is set to True, an SQL Server delay schema checks the remote tables until query execution.
Enable Promotion of Distributed Transactions
This option is used to protect the actions of a server-to-server procedure through a Microsoft Distributed Transaction Coordinator (MS DTC) transaction. If this option is set to True calling a remote stored procedure starts a distributed transaction and enlists the transaction with MS DTC.
Now, when everything is set, click the OK button on the New Linked Server dialog. A newly created linked server will appear under the Linked Server folder.
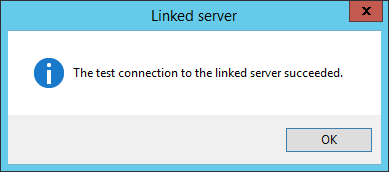
To test that linked server if it works properly, go right-clicking on that linked server and choose Test Connection:

If a connection with linked server is established successfully, the following info message box will appear:
Otherwise, an error message will be displayed that shows a problem that prevents connection to be successfully established:
Querying data using a linked server
Querying data using the linked server is a little bit different then querying data from the local SQL Server. In the normal queries, usually, two part notation is used [Schema].[ObjectName], for example HumanResources.Employee:
|
1 2 3 |
SELECT * FROM HumanResources.Employee e |
When querying a table from a linked server, the fourth part notation is used LinkedServer.Database.Schema.ObjectName. To get data from the Employee table which is located in a database on the linked server, querying code will look like this:
|
1 2 3 |
SELECT * FROM [ZIVKO\SQLEXPRESS2016].[AdventureWorks2014].[HumanResources].[ Employee] |
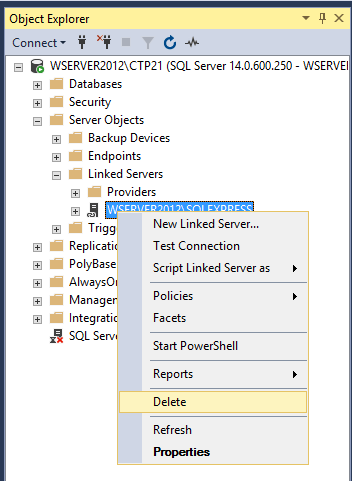
Deleting a linked server
To delete a linked server, under the Linked Servers folder, right click on the linked server and from the context menu choose the Delete command:
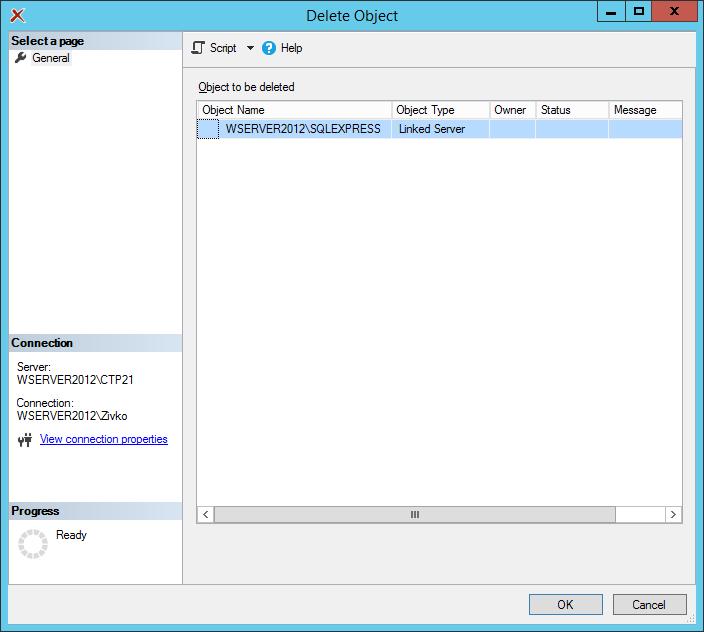
This will open the Delete Object dialog:
Click the OK button and from the message box, choose the Yes button:
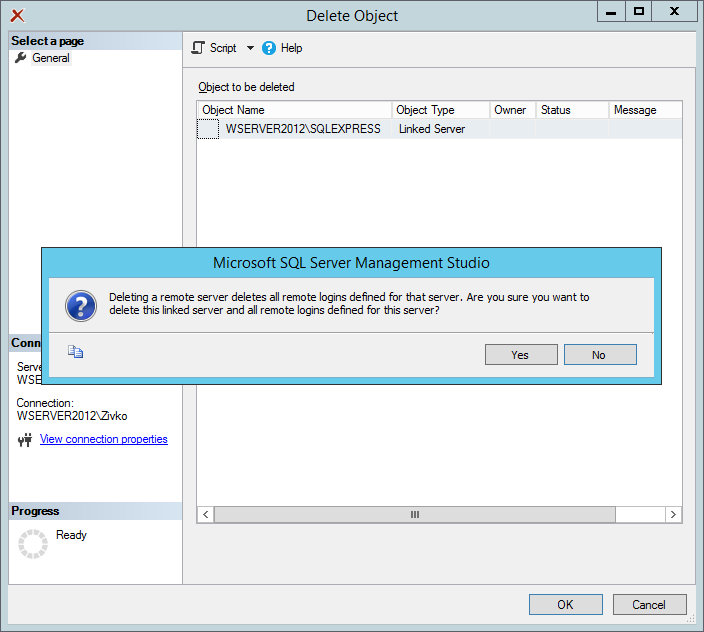
If everything goes well the linked server will be removed from the Linked Servers folder.
Next articles in this series:- How to create, configure and drop a SQL Server linked server using Transact-SQL
- How to query Excel data using SQL Server linked servers
- How to configure a Linked Server using the ODBC driver
- How to create a linked server to an Azure SQL database

He is a prolific author of authoritative content related to SQL Server including a number of “platinum” articles (top 1% in terms of popularity and engagement). His writing covers a range of topics on MySQL and SQL Server including remote/linked servers, import/export, LocalDB, SSMS, and more.
In his part-time, Zivko likes basketball, foosball (table-soccer), and rock music.
See more about Marko at LinkedIn
View all posts by Marko Zivkovic
- How to connect to a remote MySQL server using SSL on Ubuntu - April 28, 2020
- How to install MySQL on Ubuntu - March 10, 2020
- Using SSH keys to connect to a remote MySQL Server - November 28, 2019