This article is a 6th article in the series for SQL Server Always On Availability Groups. It covers the configuration of the group managed service account (gMSA) for SQL Services.
Introduction
DBA uses services accounts to run the various SQL Services. Usually, we should use a separate service account for an individual server SQL Services.
- You should run SQL services having the least permissions
- You should use a complex password and store it in a secure place
- Its password should never expire
- You should also change the password regularly, depending upon your organization’s security policy
If you maintain a large inventory of SQL Servers, you might think it is a cumbersome task to change and maintain the passwords for these servers. Once you change the service account password using SQL Server Configuration Manager, it also requires the restart of SQL Services. It might be a challenging task as well to get downtime for highly transactional applications.
We can leverage Group Managed Service Accounts (gMSA) in these cases. Let’s explore it in the subsequent section.
Prerequisites
-
You should follow the article series, Install SQL Server 2019 on Windows Server 2016 with SQL Server Always On Availability Groups and configure the following
- The virtual machine acts as a domain controller and active directory
- Three SQL nodes with SQL Server 2019 installed
- You should configure SQL Server Always On Availability Groups for these three nodes in synchronized mode
-
Windows PowerShell with active directory module installed. We installed it as a part of an active directory configuration
An Overview of Managed Service Accounts
We have two kinds of managed service accounts in an active directory configuration.
- Standalone Managed Service accounts(SMSA) provides the functionality of automatic password management. In simplified terms, users do not manage credentials for these users. It automatically changes the password and synchronizes with the services as per the active directory policy. We can use a standalone managed service account for a single server
- Group Managed Service accounts (gMSA) extend the functionality of SMSA. You can use gMSA for multiple servers. We define an AD group and provide permissions for all required servers that can use the credentials of the specified gMSA
To summarize, you get the following benefits using gMSA as the service account for SQL Services.
- Automatic password management
- Administrators do not require to store the passwords in a password vault
- It uses a very complex password(120 characters), and it is not known to administrators as well. It avoids the risk of circulating the password unknowingly as well
- Automatic SPN registration
- You can use them across multiple servers and services
- You can use gMSA on standalone servers or services that run on top of a failover cluster service such as Windows service, app pool, scheduled task
Let’s start configurations of the Group Managed Service accounts (GMSA) for SQL Server Always On availability groups.
Configuration of gMSA for SQL Services
We can configure and use the gMSA service accounts for Windows Server 2012 or later. In this article, we will work with Windows Server 2016.
Step 1: Create a Security Group for gMSA
Take an RDP of the active directory server and Launch active directory (AD) using DSA.MSC command.

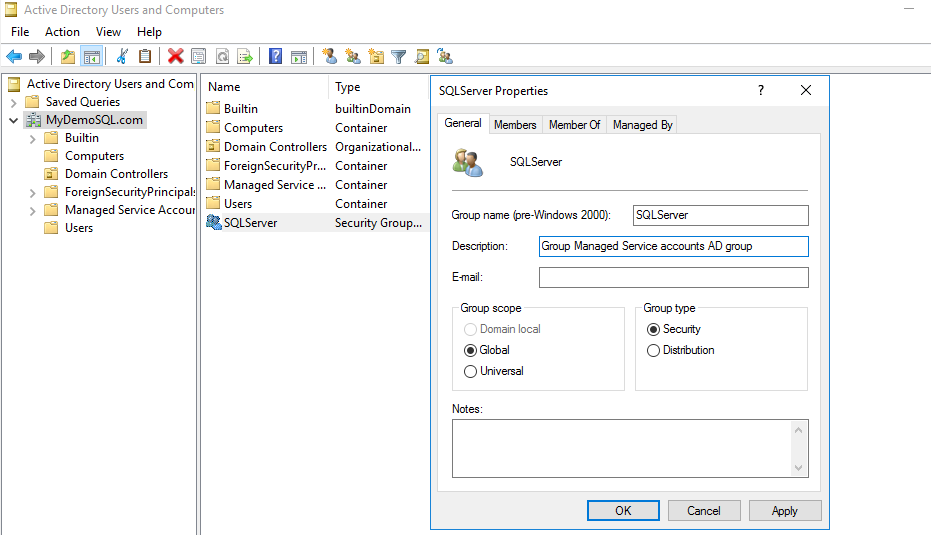
Right-click on the domain name and choose New -> Group. Specify a group name as per your requirement or naming convention.

Click Ok, and it creates the AD group. Open this group and enter a description. It helps you to identify the security group and its purpose efficiently.
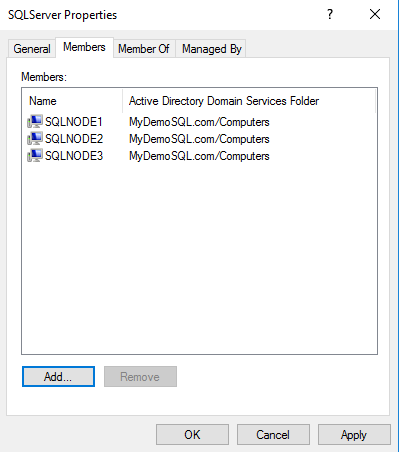
Click on Members. In the members, add the failover cluster nodes. I have SQLNode1, SQLNode2, and SQLNode3 virtual machines configured in a SQL Server Always On availability group.
Step 2: Configure key distribution service (KDS)
Group managed service accounts require a key distribution service (KDS) using the AD PowerShell module. It uses an Add-KdsRootkey PowerShell cmdlet. It takes 10 hours for full synchronization between all AD domain controllers.
For the demonstration purpose, you can use either -EffectiveImmediately parameter or specify a past timestamp.
Open the Windows PowerShell on the active directory VM (in this case vditest3.mydemosql.com) and run the following command.
|
1 |
Add-KdsRootKey -EffectiveTime ((Get-Date).AddHours(-10)) |
It returns a GUID, as shown below.

You can also validate the key using the Get-KdsRootKey to verify that the KDS key exists in the active directory.
|
1 |
Get-KdsRootKey |
You get the value, effective date, domain controller, and GUID.
Step 3: Create a new group managed service account
In this step, we create a new gMSA account using the New-ADServiceAccount PowerShell cmdlet.
It uses the following arguments.
- Name: Specify a gMSA service account name
- DNSHostName: Enter the FQDN of the service account. In my case, FQDN is gMSAsqlservice.mydemosql.com
- PrincipalsAllowedToRetrieveManagedPassword: Specify the AD group name we created in Step 1: Create a Security Group for gMSA
|
1 2 |
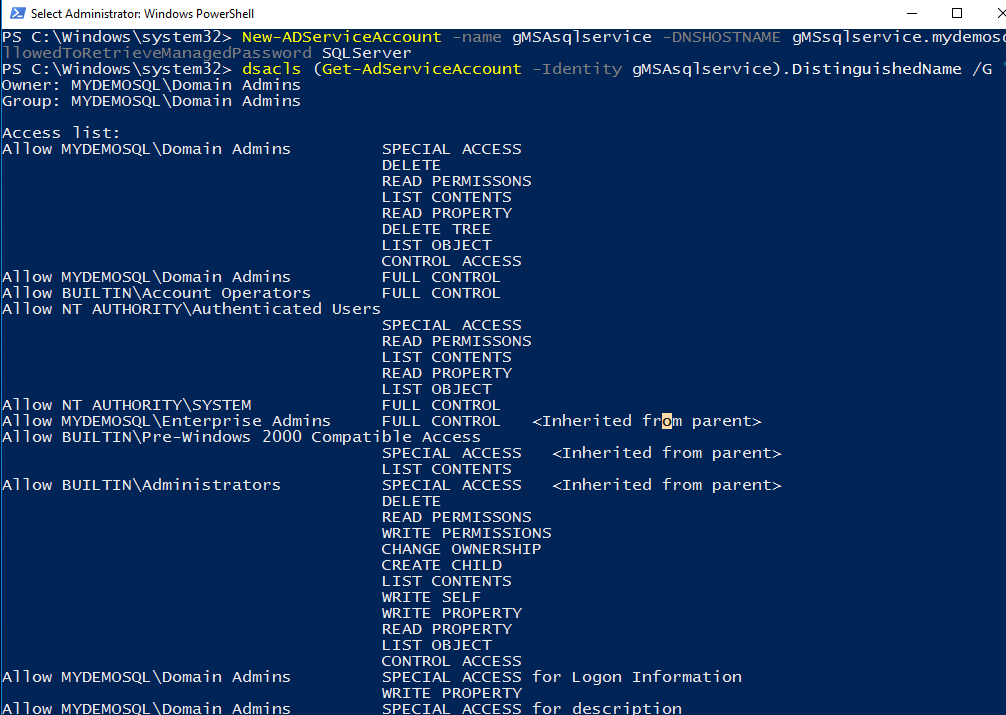
New-ADServiceAccount -name gMSAsqlservice -DNSHostName gMSAsqlservice.mydemosql.com -PrincipalsAllowedToRetrieveManagedPassword SQLServer |

You must also allow the gMSA account to register its service principal name ( SPN) for Kerberos authentication in SQL Server.
|
1 |
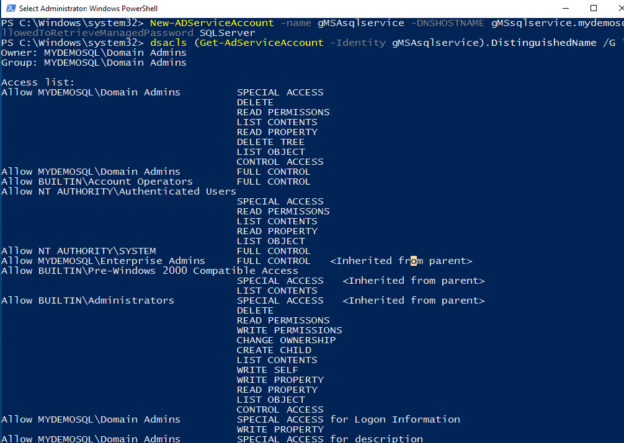
dsacls (Get-ADServiceAccount -Identity gMSAsqlservice).DistinguishedName /G "SELF:RPWP;servicePrincipalName" |
It gives you the following output.
You can check the account properties such as encryption type and SAM account name. By default, it uses RC4, AES128, and AES256 encryptions. You can note the account name uses the $ suffix in the account name.
|
1 |
Get-ADServiceAccount gmsasqlservice -Properties * | FL DNSHostName,KerberosEncryptionType,SamAccountName |
Step 4: Enable AD Windows feature for the target servers
We need to perform these steps in the target servers. Take RDP to the target server and enable the AD DS and AD LDS Tools in the Windows features.
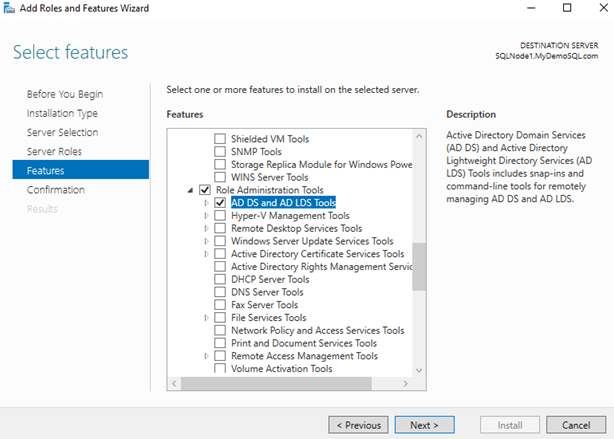
Click Next and confirm the feature installation. In the description box, you can note it installs the Active Directory module for Windows PowerShell on the target server as well.
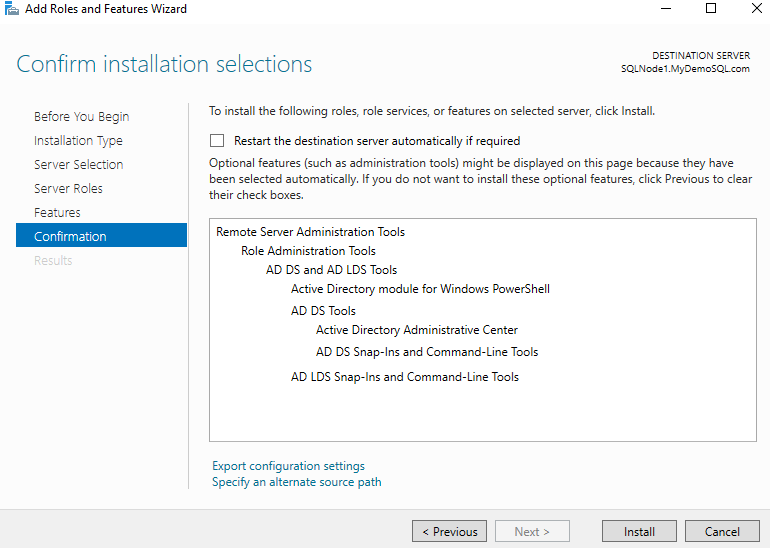
Click on Install to enable AD feature along with its dependencies on the target nodes.
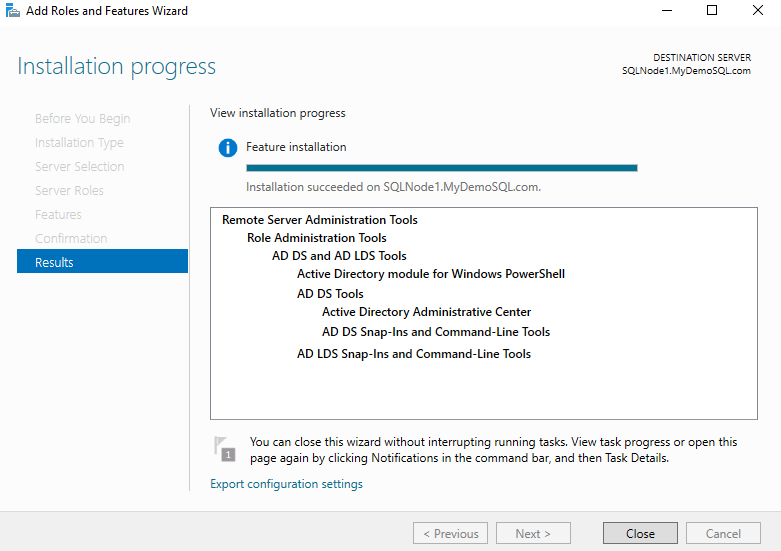
You can perform this step on the remaining servers in the Windows failover cluster as well.
Step 5: Install Group Managed Service account on the target node for SQL Server Always On Availability Group
Once the AD PowerShell cmdlets are available on the target node, we need to install the gMSA service account. It uses the Install-ADServiceAccount cmdlet.
|
1 |
Install-ADServiceAccount gMSAsqlservice |

It does not return any output. You can use another cmdlet Test-ADServiceAccount to verify the group managed service account status. It returns true if gMSA is valid and ready to use.
|
1 |
Test-ADServiceAccount gMSAsqlservice |

You can check the last password reset for the managed service account using the Get-ADServiceAccount cmdlet.
|
1 |
Get-ADServiceAccount gMSAsqlservice -Property PasswordLastSet |

Step 6: Configure gMSA to run the SQL Services
Now, we are ready to use the gMSA accounts in the SQL Services. Open the SQL Server Configuration Manager and go to Services.
Now, search the gMSA account in the active directory service account object. You can specify the account name as [mydemosql\gmsasqlservice$] as well. It does not give you a password prompt.
You might notice that we do not have a password for this user. It is not required to configure the services running under group managed service account as well.
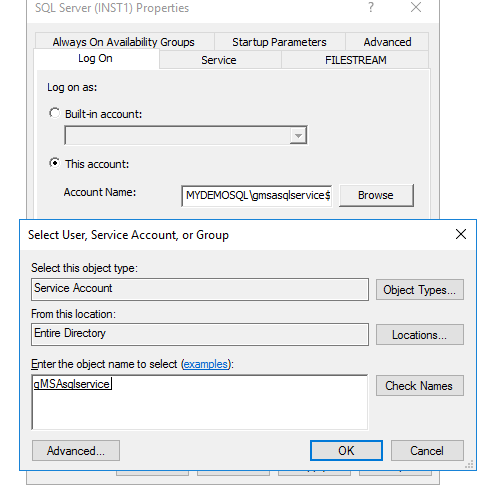
Click Ok and restart SQL Services. You can see SQL Service is running under the [mydemosql\gmsasqlservice$] security context.
 Connect to SQL Server using SSMS and view the error logs.
-
Verify the entry in SQL Server logs for the service account
- Verify Service Principal Name(SPN) registration for SQL Server
It successfully registers the service principal name ( SPN) for the Kerberos authentication and logs an entry in the error log, as shown below.
- [MSSQLSvc/SQLNode1.MyDemoSQL.Com:INST1]
- [MSSQLSvc/SQLNode1.MyDemoSQL.Com:I433]

Similarly, change the service accounts in the SQLNode2 and SQLNode3 for SQL Server Always On Availability Group and start SQL services.
|
1 2 3 4 5 |
SELECT @@Servername AS server, status_desc, service_account FROM sys.dm_server_services WHERE status_desc='Running' |

-
Add these accounts into all SQL instances and provides database mirroring endpoint to [MyDemoSQL\gMSsqlservices$] account. If the account does not have permissions for the endpoint, databases won’t see in the SQL Server Always on availability group, and you get disconnected status.
12ALTER AUTHORIZATIONON ENDPOINT::mirroring_endpoint TO [MyDemoSQL\gMSsqlservice$];
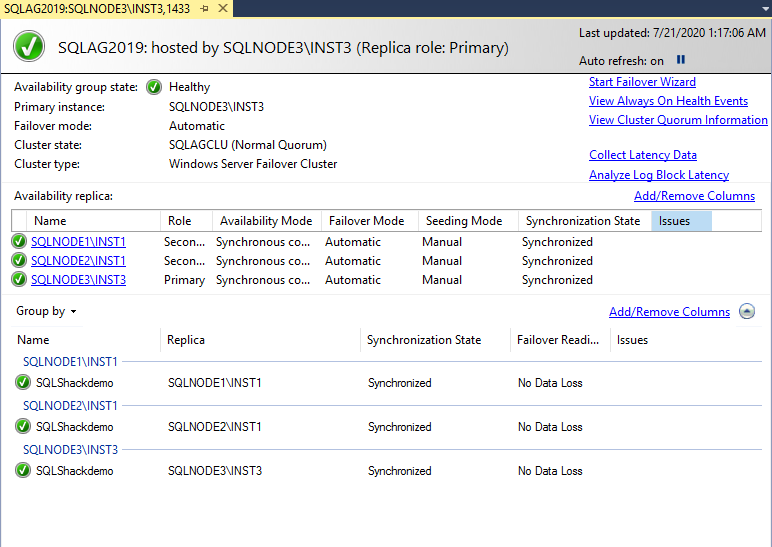
You can hold for some time, and you would see a healthy AG dashboard. In the below screenshot, we see that the [SQLShackDemo] database is in the synchronized state without any data loss.
Conclusion
In this article, we explored Group Managed Service Accounts (gMSA) for SQL Server Always On Availability Groups. It automatically manages SQL Service accounts and changes them without restarting SQL Services. It also eliminates the risk of password hacking or misuse for connecting to SQL. You can also configure the Windows task scheduler using this gMSA account.
Table of contents
- How to install PostgreSQL on Ubuntu - July 13, 2023
- How to use the CROSSTAB function in PostgreSQL - February 17, 2023
- Learn the PostgreSQL COALESCE command - January 19, 2023

