In this 32nd article on SQL Server Always On Availability Group series, we will discuss the process to apply a service pack or Cumulative packs for AG replica instances.
A brief overview of SQL Server Patches
It is a recommended practice to apply the regular update to the SQL Server with the service pack (SP) or the cumulative packs (CU). Here is a quick overview of the SQL Server updates.
- Service Pack: A service pack contains a single package of previously released hotfixes, updates
- Cumulative Packs (CU): Cumulative Packs (CU) are the hotfix, minor feature enhancements
- General distribution release (GDR): Microsoft releases the GDR release, and it is specially related to the SQL Server security
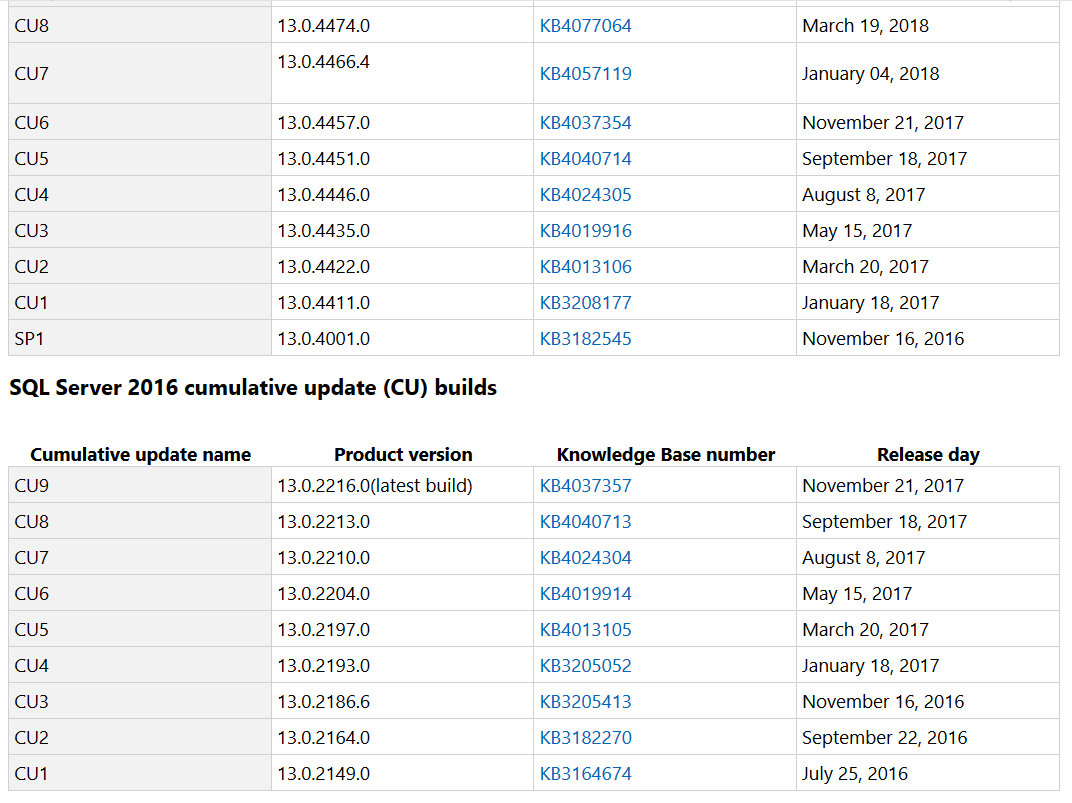
Until SQL Server 2016, Microsoft releases regular service packs and cumulative updates. For example, in the SQL Server 2016 versions, you see the following sequences.
- RTM release
- Cumulative Updates ( CU1 to CU9)
- Service Pack 1
- Cumulative Packs (CU1 to CU15)
- Service Pack 2
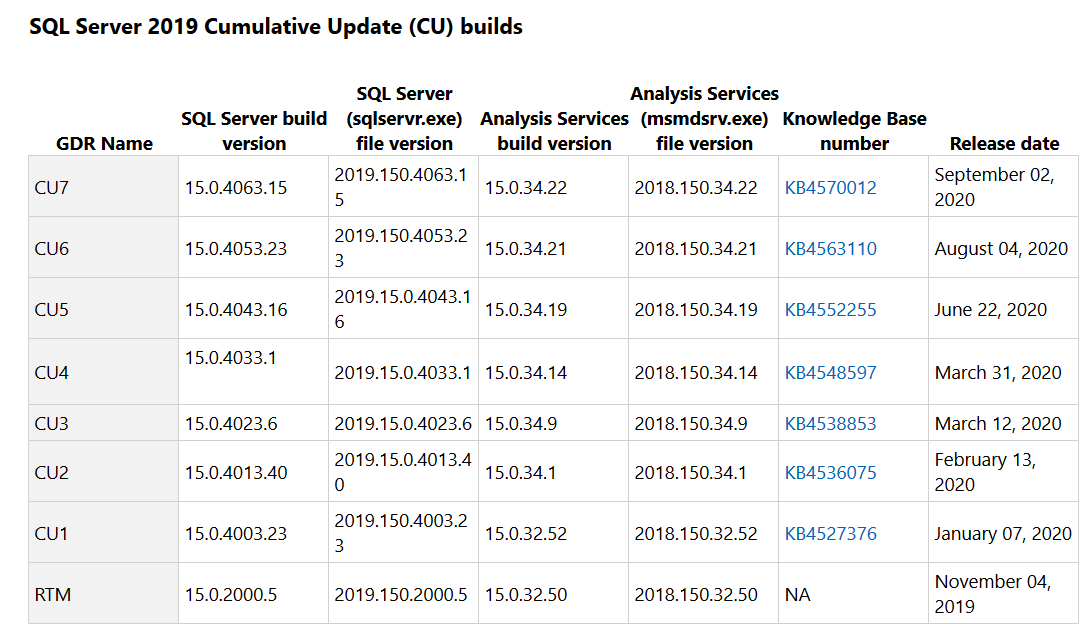
Starting from SQL Server 2017, Microsoft changes its servicing model. It no longer provides the service packs. Instead, it releases the Cumulative Packs in every 2 months. Every CU contains the previous cumulative pack as well. For example, in SQL Server 2019, Microsoft released the latest CU7 on 2nd September 2020. Therefore, if you are on the RTM version, you can directly apply the CU7 to be on the latest build version [15.0.4063.15].
Apply SQL Server Patches for the SQL Server Always On Availability Group replica
In the SQL Server Always On Availability Group, we use multiple SQL instances and call them a primary and secondary replica. You can have a single primary replica and multiple secondary replicas depending upon your SQL Server version.
There is a difference in the patching process between the SQL Server in a failover cluster environment and the Availability Group.
- In a failover cluster, SQL Services remains online on a node while another node services are in the stopped state
- The active node has the shared disk, and it moves to another node during the failover process
In the Availability group configuration, SQL Services runs on all replicas and acts as either a primary or secondary replica. In this article, we see how you can apply patches on a three-node availability group in a HADR environment.
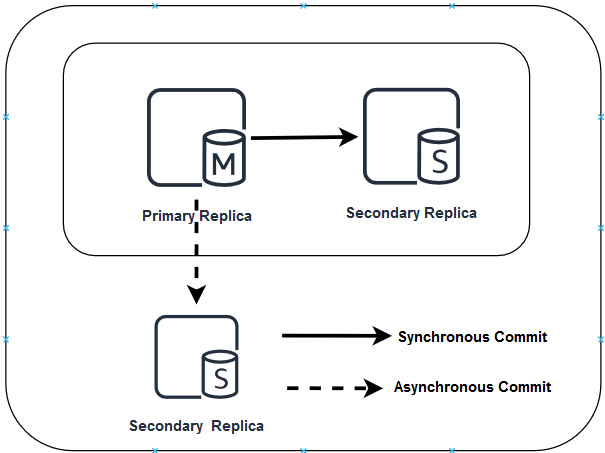
We can divide the overall SQL patching into three phases.
- Prework
- Apply Patches
- Post work
Let’s go through each phase and understand it in detail.
Preparatory Phase
In the preparatory phase, we need to the following tasks,
- Determine the current patch level and the target patch level. For the target patch level, you can either go with the N-1 (N= latest patch) patch level. In case you want to go with the latest patch, always look for SQL Server blogs for any known issues after applying the specific patch
- You must not apply the patch directly to the production environment. Test the targeted patch on the lower environment, wait for the application validations for at least 1 week and move to the production patching
- You should also go through the target patch release notes. It gives you the information about the bug fixes, enhancements
-
Before applying the patches for the production replicas, verify the following things
- Verify that you have the latest backups for the system databases as well as user databases in the primary replica. It is good to take full backups; however, if you have large databases, you can either take a differential backup or the transaction log backup before applying the patches
- On the secondary replica, take the system database backup
- Verify the availability group health using the AG dashboard. Your AG databases should be in the Synchronized state for the synchronous commit and Synchronizing state for the asynchronous commit mode
Apply SQL Server patches in SQL Server Always On Availability Group Replicas
As shown in the above image, we have three SQL instances in which we need to apply the SQL Server patches.
- We have two nodes in the primary data center. In the primary data center, the availability group is in the synchronous mode
- We have a node in the secondary data center. In the secondary data center, the availability group is in the asynchronous mode
First, we apply the patch on the secondary replica of the primary data center.
-
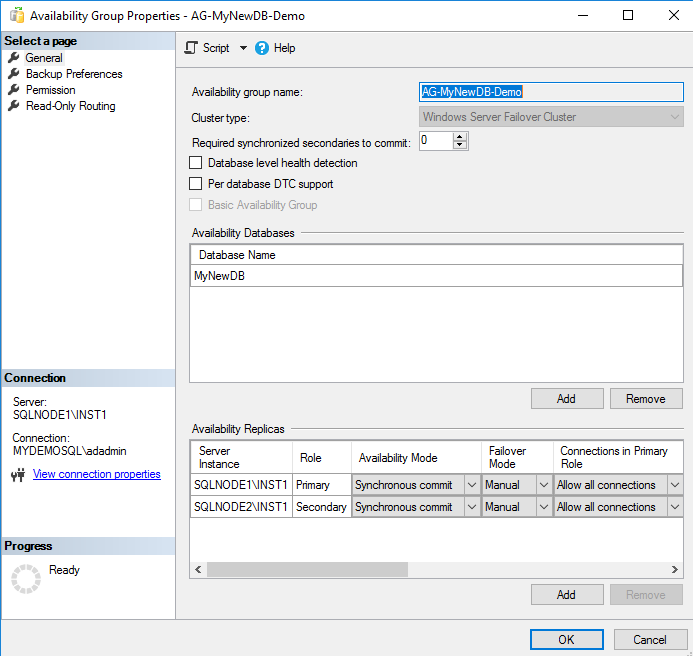
Open the availability group properties in SSMS and change the failover mode from Automatic to Manual like the below screenshot. It ensures that no automatic failover happens to the secondary replica in case of any issue on the primary replica while we apply the patches

-
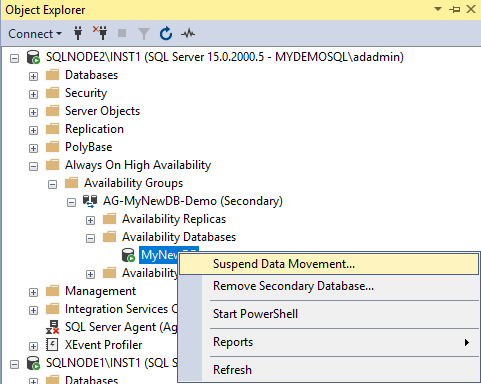
Connect to the secondary replica in SSMS and Expand Always On High Availability-> Availability Databases. Suspend data movement for the secondary replica databases so that the primary replica does not send any transaction block to the specific secondary replica. If you suspend the data movement from the primary replica, it suspends data movement for all secondary replicas. Therefore, you should do it from the secondary replica in which you are applying the SQL Server Patches

- Take the RDP of the secondary replica and apply the service pack\cumulative pack as required. The installation service pack or cumulative pack is straightforward. You can follow the installation wizard and apply the latest patch
- Restart the secondary replica. You must restart the server after applying the latest patches
-
Once the secondary replica comes online, connect to it using SSMS and perform validation
- Verify SQL Services are online
- SQL Server version validation
- Verify SQL Server error logs for any errors, warnings
- Databases validations
- It is also recommended to perform a database consistency checker (DBCC CHECKDB) after applying the patches
- Now, resume data movement from the secondary replica database. The secondary replica might take time to come in the synchronized state because it applies all pending transaction blocks on the secondary database before changing status to synchronize
- Wait for the AG dashboard to become healthy. Once it is green, perform a manual failover from the current primary replica to the secondary replica in the primary site
- After the failover, the current primary replica changes its state to a secondary replica. We can similarly apply the SQL Server patches by following the above steps
- Once the new secondary replica is also patched, and validations are done, perform an AG failback. After the failover, our availability group primary replica is the same before and after failover as well
- Change the failover mode to automatic for the primary and secondary replica in the synchronous data commit mode
- To this point, we have done the SQL Server pathing for the replicas in the primary site in SQL Server Always on Availability Group. You can ask application teams to start the validation and report for any issues
-
The DR replica node is in asynchronous mode for SQL Server Always On Availability Group; therefore, it is
already set to manual failover. Do the following steps
- Pause the data movement from the DR replica node
- Apply patch on the DR replica
- Perform the database and SQL validation
- Resume data movement
Post Patching work
Once you have applied SQL Server patches the SQL instances in an availability group, validate the following:
- Verify that you have the updated SQL Instance version on all replicas participating in SQL Server Always On Availability Group
- Perform AG failover and validate that the dashboard is healthy after failover and failback
- Review the error logs on all replicas
- Ask your application team to validate the functionality
Conclusion
SQL Server patching is an essential task for database professionals. In this article, we explored applying the SQL Server patches on SQL Server Always On Availability Groups in HADR configuration. You must remember that each environment might be different depending upon the configurations, SQL Server features. Therefore, you must plan before applying any patches to avoid any last-minute rush. Always apply patches on the development and test environments.
Table of contents
- How to install PostgreSQL on Ubuntu - July 13, 2023
- How to use the CROSSTAB function in PostgreSQL - February 17, 2023
- Learn the PostgreSQL COALESCE command - January 19, 2023


