

This article covers the different methods to install Postgres on Ubuntu.
Introduction
PostgreSQL, a popular relational database management system, emphasizes compliance and extensibility. It is also known as Postgres. The PostgreSQL valuable features are as below:
-
- Data Types: It supports various data types such as Integer, Numeric, String, Boolean, Date/Time, Array, JSON, XML, Point, Line, Circle, Polygon, and Composite types.
-
Performance: PostgreSQL supports the following features optimized performance.
- B-tree, Composite (Multi-column), Gist, GIN, BRIN, Covering indexes
- ACID property (Atomicity, Consistency, Isolation, Durability)
- Table partitioning
- Multi-version Concurrency control (MVCC)
- Isolation levels, Parallelism
-
Security:
- Multi-factor authentication
- Certificates
- Symmetrical and Asymmetrical Encryption
- Column and data-level security
- Role-Based Access Control
- Transparent Data Encryption
- TLS
-
High Availability and Disaster recovery:
- Backups and Restore
- Failover clusters
- Write-ahead logging
- Replication
- Log shipping
- Point-In-Time-Recovery (PITR)
- Active standbys
-
Extensibility
- Support for PL/pgSQL, Perl, Python, Tcl, Java, JavaScript (V8), R, Lua, JSON, and Rust
- International Collations
- Full-text search
- Native support for horizontal scaling with sharding and read replicas.
PostgreSQL installation on Ubuntu
In this tutorial, I will walk you through installing Postgres on Ubuntu 20.04.5 LTS. We will also cover basic setup tasks, such as setting the default password and creating a new user. Let us get started.
Prerequisites:
- An Ubuntu Linux system
- User account having sudo privileges
Install PostgreSQL from PostgreSQL Apt Repository
The PostgreSQL Apt Repository lets users install the latest Postgres version on Ubuntu. The Apt Repository supports the following Ubuntu versions.
- kinetic (22.10, non-LTS)
- jammy (22.04, LTS)
- focal (20.04, LTS)
- bionic (18.04, LTS)
You can use the following steps to install Postgres’s latest version on Ubuntu 20.04 LTS.
Step 1: Create a file repository configuration for the PostgreSQL
This step fetches the latest Postgres repository information using the following script. The pgdg.list stores the Postgres official repository as per your Ubuntu version.
$ sudo sh -c ‘echo “deb http://apt.postgresql.org/pub/repos/apt $(lsb_release -cs)-pgdg main” > /etc/apt/sources.list.d/pgdg.list’

Step 2: Import the repository signing key
The step2 adds the Postgres GPG (GNU Private Guard) key to the APT package manager. APT uses this GPG key to verify the repository package authenticity. You get an OK response for the successful GPG key import.
$ wget –quiet -O – https://www.postgresql.org/media/keys/ACCC4CF8.asc | sudo apt-key add –

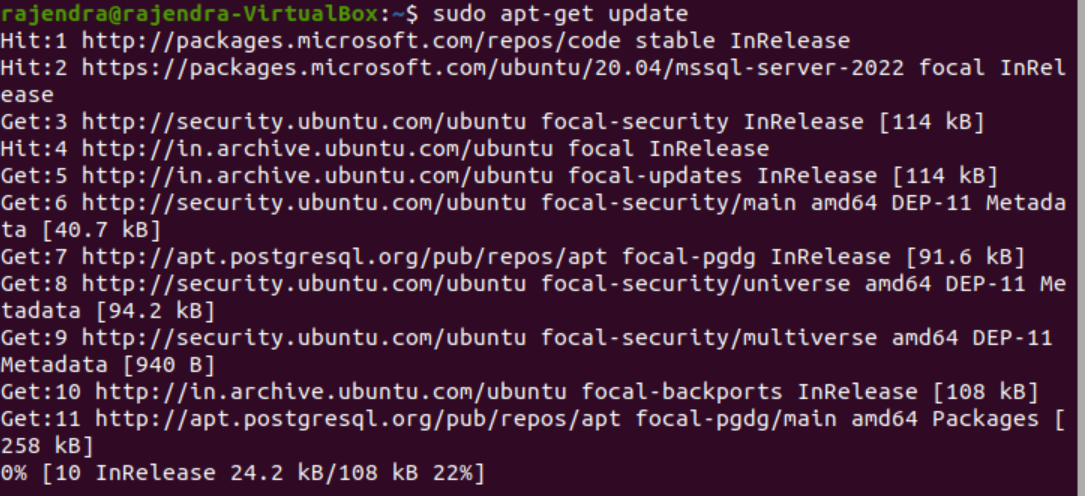
Step 3: Update the package list
We need to update the package list in Ubuntu so that apt gets the official Postgres package location. As shown below, it lists the following line for the Postgres official repository address –
https://apt.postgresql.org/pub/repos/apt focal-pgdg InRelease (114 kB)
$ sudo apt-get update
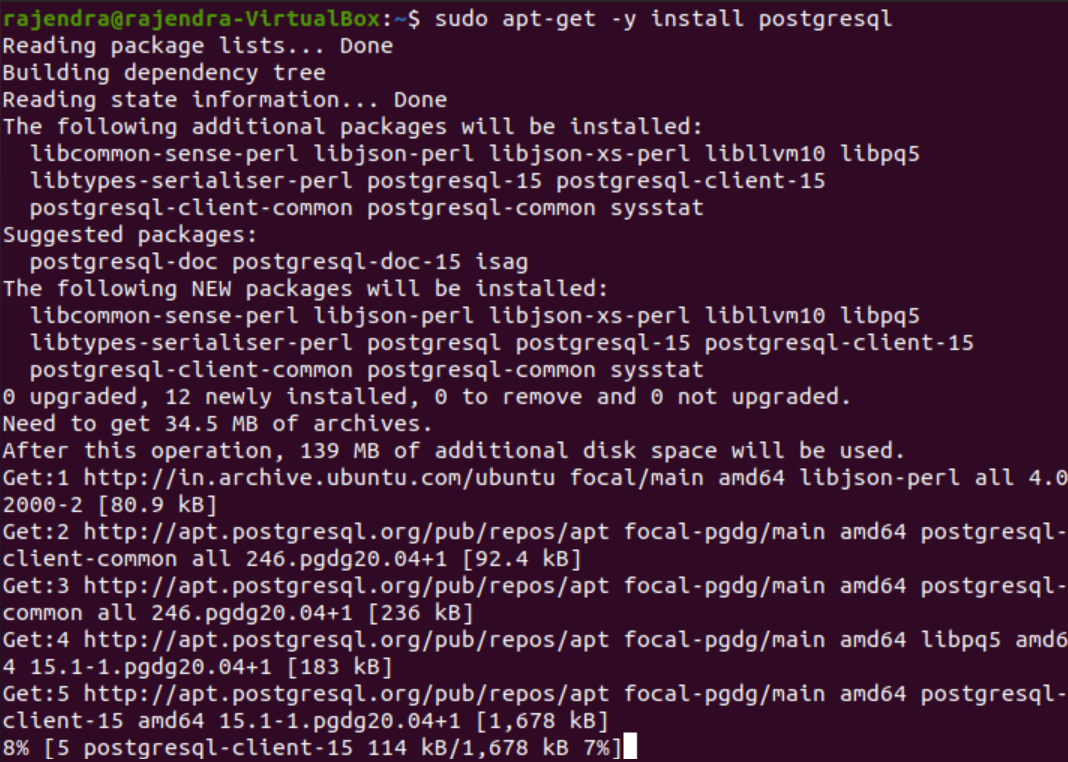
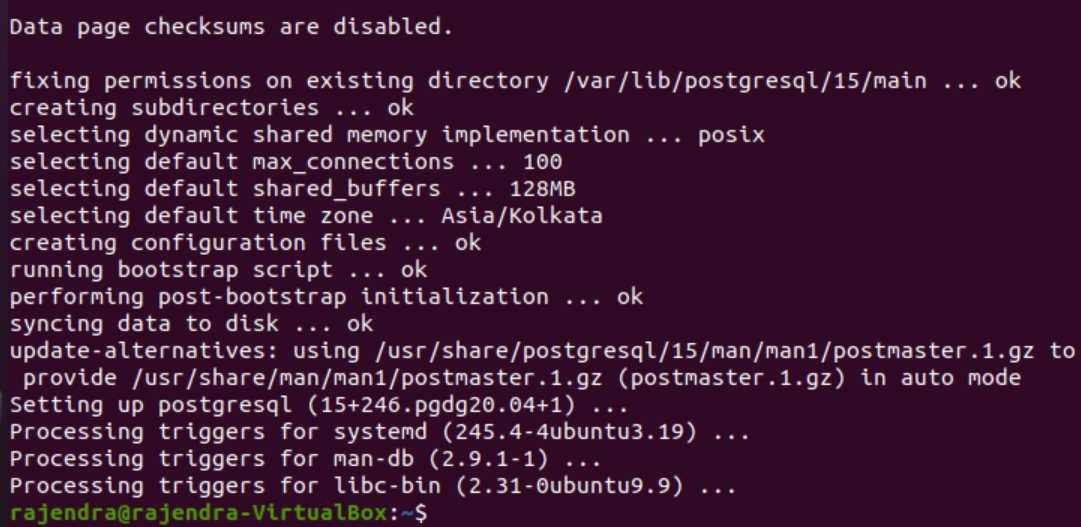
Step 4: Install Postgres on Ubuntu
Run the apt-get install command to start the Postgres installation. The script contains -y to avoid user input as Y or Yes during installation. You can view the installation progress in the terminal messages.
$ sudo apt-get -y install postgresql
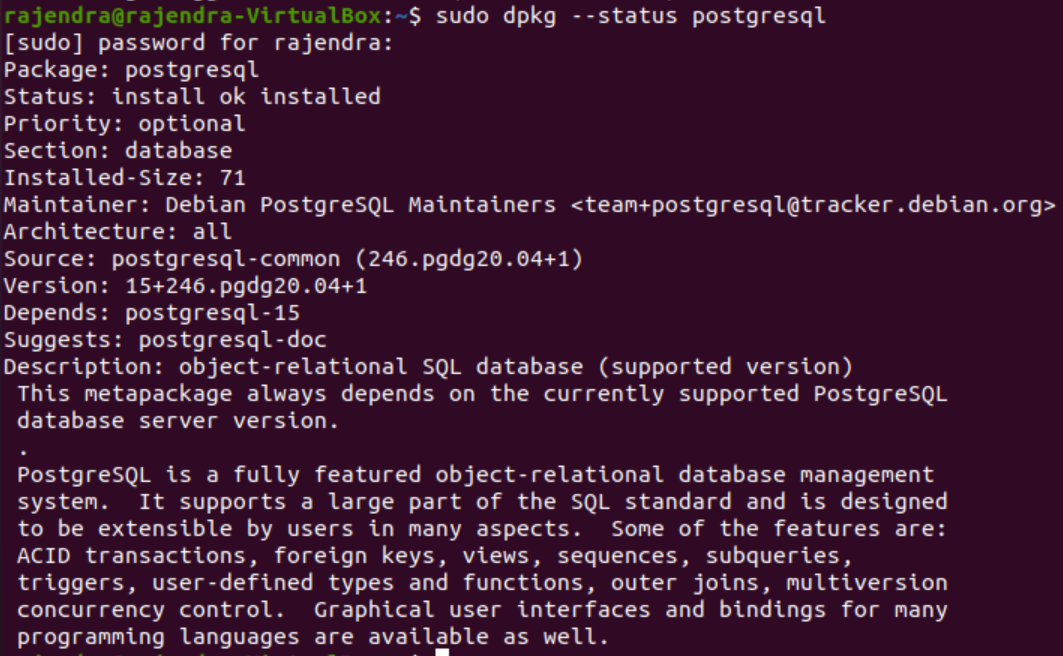
You can confirm the Postgres official repository points to version 15 as of writing this article.
$sudo dpkg –status postgresql
Step 6: Verify the Postgres service status
Postgres services should be in an active state after the installation finishes. You can verify the Postgres service status using the following command.
$ sudo systemctl status postgresql.service

Change the default PostgreSQL User password by enabling Password Encryption
By default, Postgres installation configures a default user account, Postgres, without any password. This user has administrative access to Postgres. Without the password, any user who connects to the Ubuntu machine can access the Postgres databases. Therefore, you must configure the password for the default user Postgres.
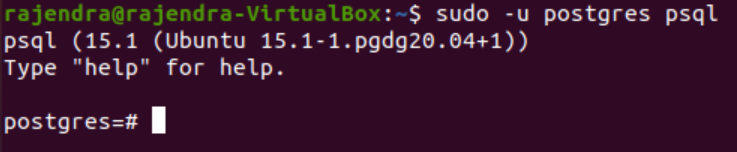
Firstly, let’s open the terminal and enter the following command.
$ Sudo -u postgres psql
This command did not specify any password for the Postgres user. Still, we can access the Postgres instance.
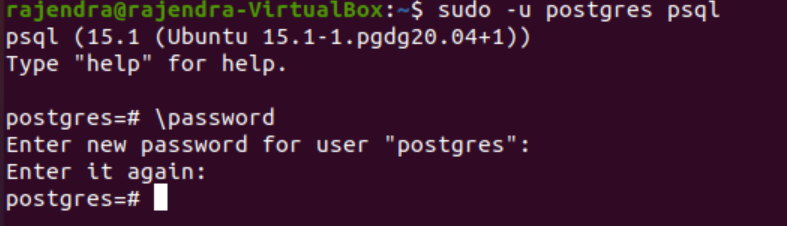
Run the \password command in the terminal to specify a password of your choice for the Postgres user. It gives instructions to set a new password for the user “Postgres”. You can exit the psql shell by typing \q.
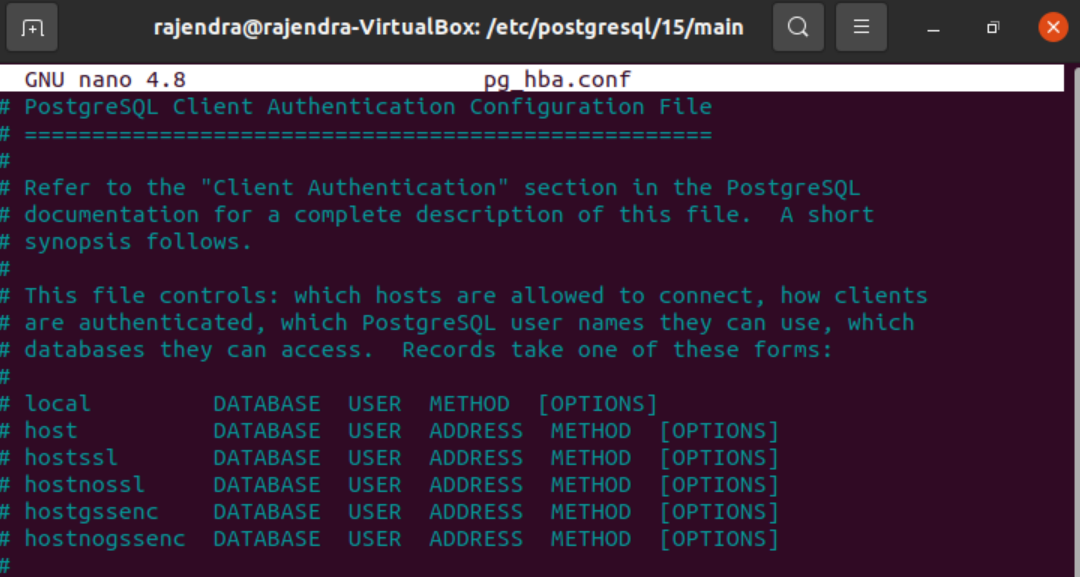
Specify the md5 authentication method for the authentication
Postgres transmits the credentials in plain text as per its default mechanism. It is a security risk as anyone can capture the plain text and get database access. Therefore, you must specify the secure authentication method, such as md5, for communication.
In the terminal, navigate to the directory /etc/postgresql/15/main, and you can see a configuration file named pg_hba.conf.

Edit the pg_hba.conf file in nano editor.
$ sudo nano /etc/postgresql/15/main/pg_hba.conf
Scroll down and find the line that specifies database administrative login by Unix domain socket. Here, replace the keyword peer with the md5. The md5 authentication method encrypts the password before sending it to the Postgres server.
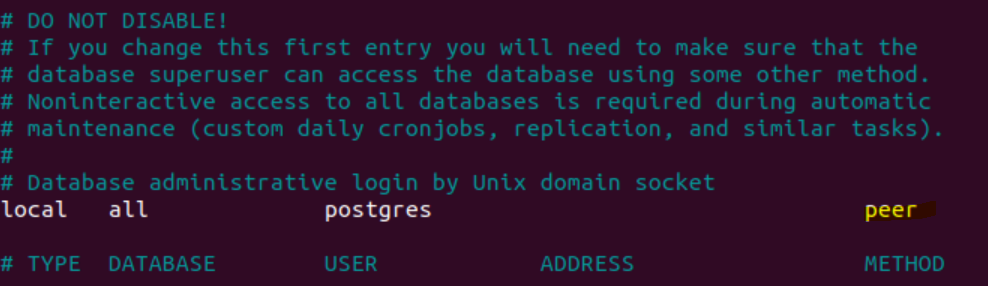

Save the pg_hba.conf and restart the Postgres service.

You can connect to Postgres with the password you specified earlier. As shown below, it prompts the user to set the Postgres password.

Creating a Postgres database
Create a user database in Postgres, you can run the following command:
postgres=# Create database sqlshack;
The create database command creates a database called “sqlshack”.

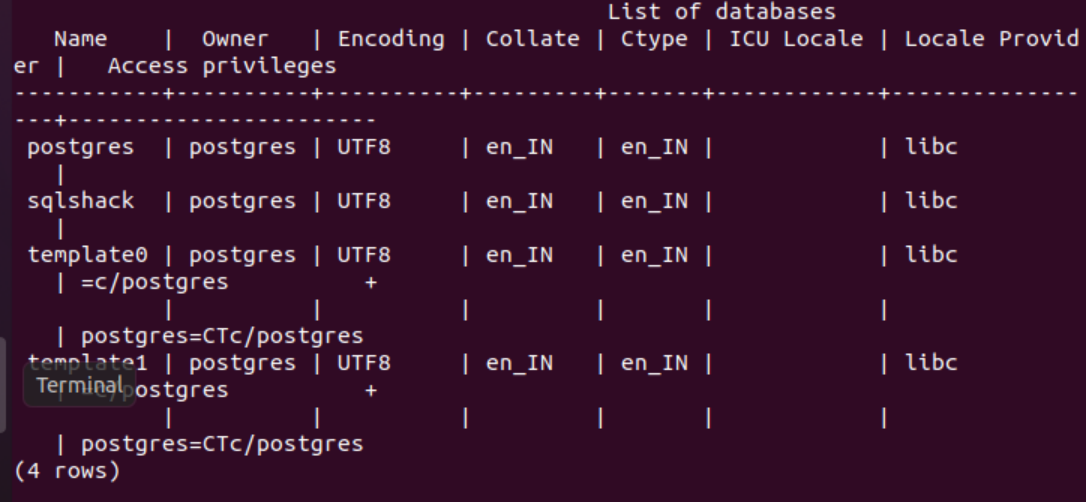
Use the command \l to get a list of all databases in Postgres. As shown below, we have a few system databases and a user database named sqlshack.
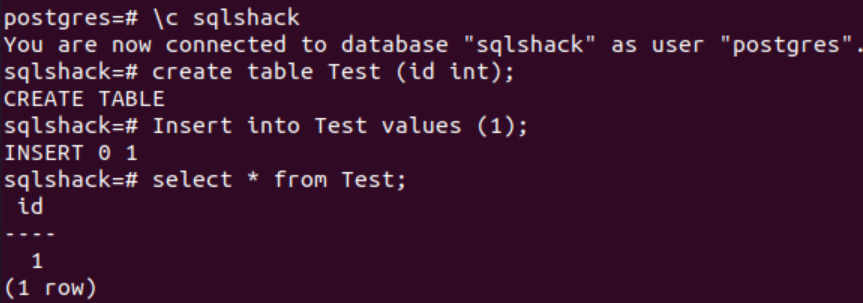
Switch to the specific database with the following command.
postgres=# \c sqlshack
It prompts a message: “You are connected to database “sqlshack” as user “postgres”.

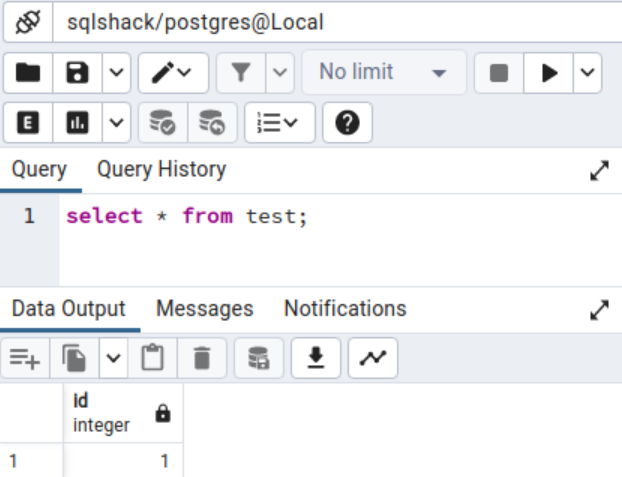
You can now create database objects such as tables and stored procedures in the sqlshack database. We created a test table and inserted a sample row, as shown below.
Install PgAdmin GUI client for Postgres
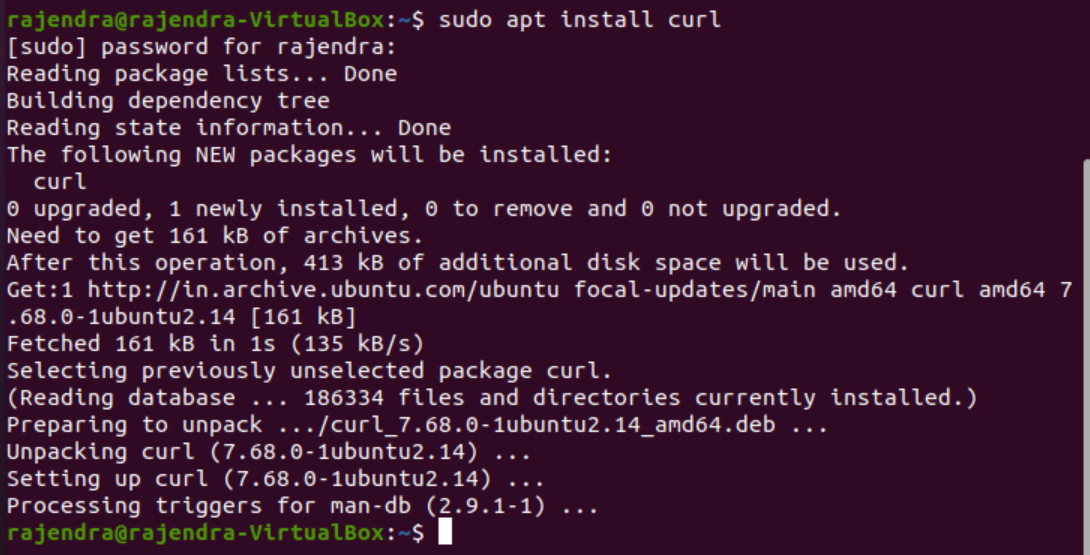
The Pgadmin4 tool is an open-source, graphical tool to connect and work with Postgres. It supports most of the Postgres features. We can install the pgadmin4 utility using the curl utility. The command to install the curl utility is as below.
$ sudo apt install curl
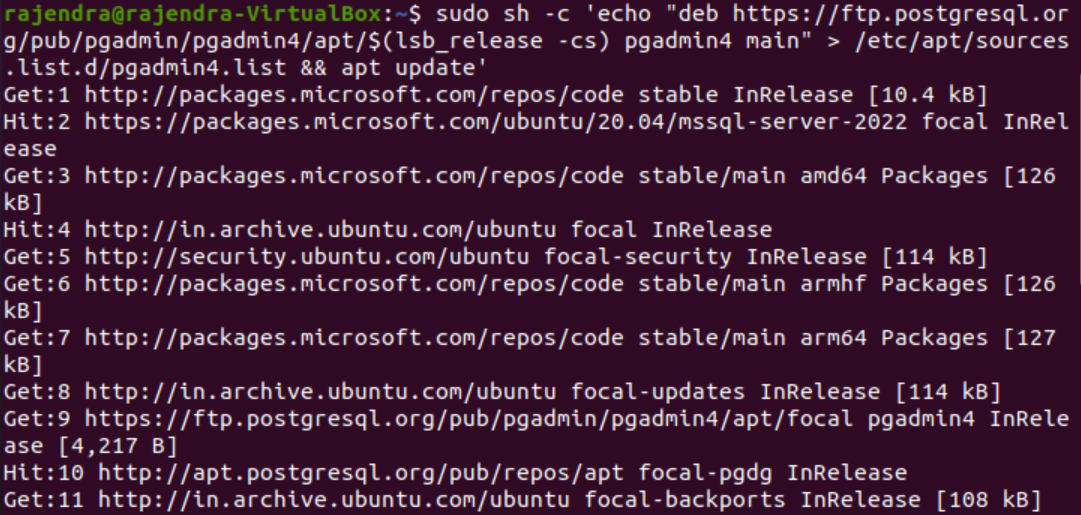
We need to import the repository signing GPG key and add the pgAdmin4 package to your system with the following commands.
$curl https://www.pgadmin.org/static/packages_pgadmin_org.pub | sudo apt-key add –

$ sudo sh -c ‘echo “deb https://ftp.postgresql.org/pub/pgadmin/pgadmin4/apt/focal pgadmin4 main” > /etc/apt/sources.list.d/pgadmin4.list’
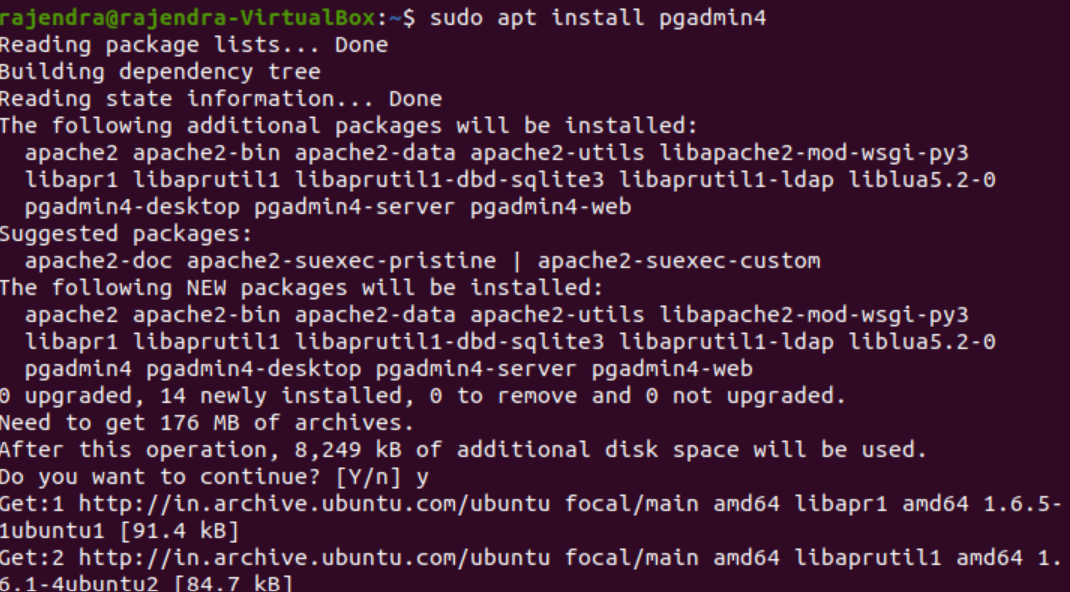
Install the pgadmin4 GUI utility with the following command.
$ sudo apt install pgadmin4
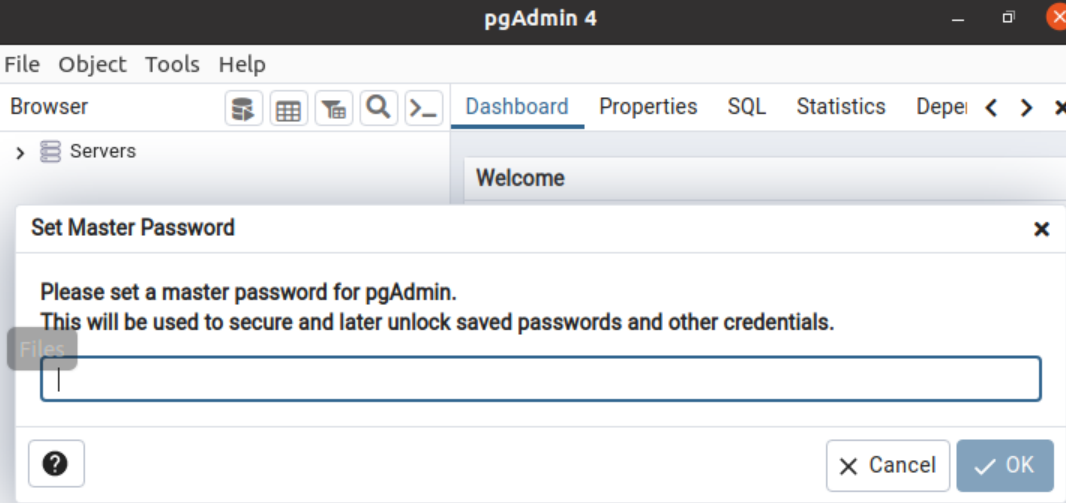
Once pgadmin4 is installed in your ubuntu system, launch it from the applications.

The initial launch of pgadmin4 asks you to set a master password. This password is used to secure and later unlock credentials in pgadmin4. Specify the password and click OK.
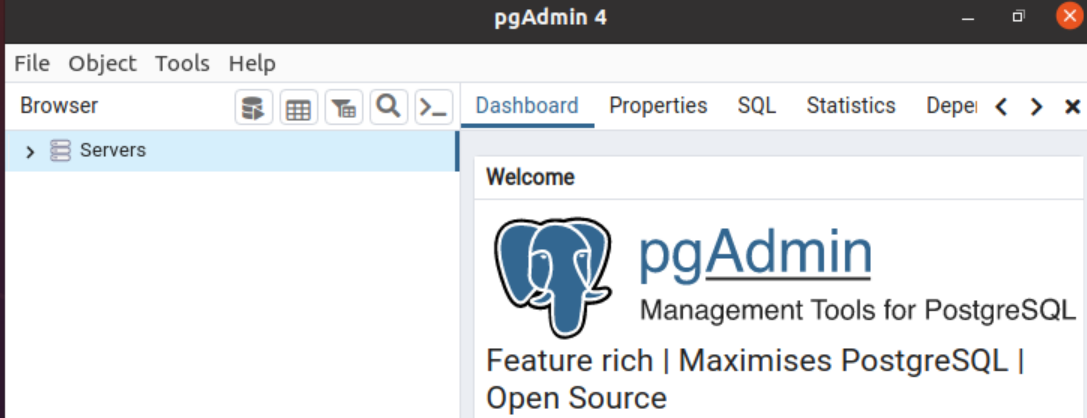
The launch screen or dashboard looks like the one below.
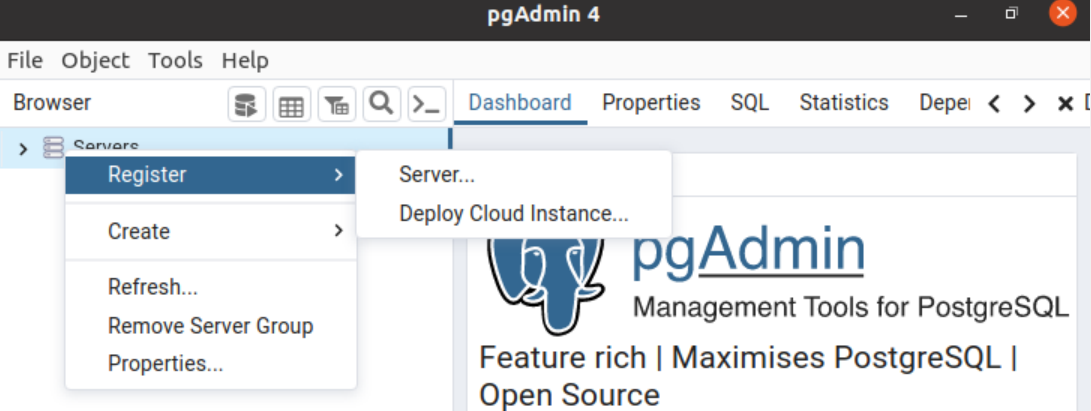
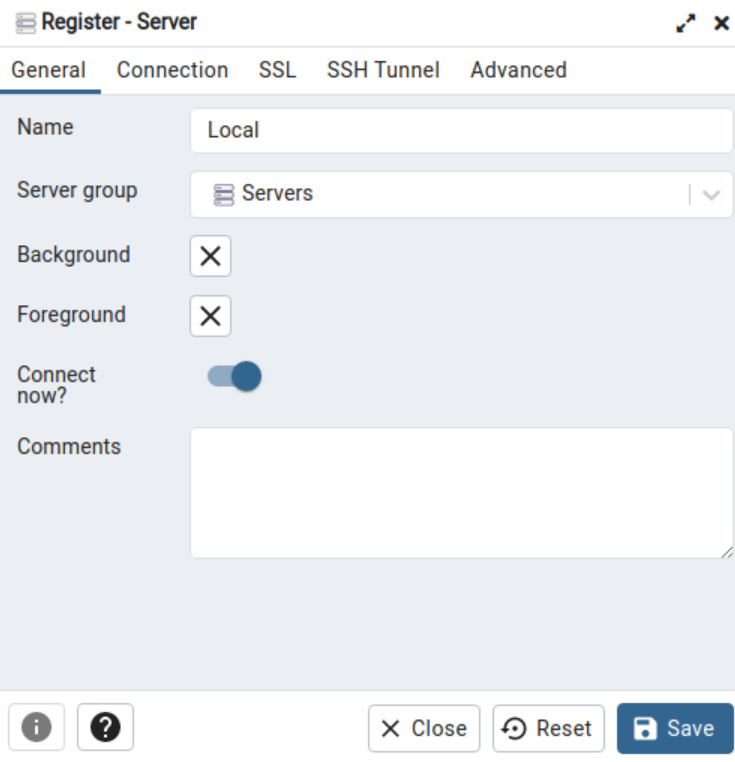
Right-Click on the servers tab and Register a new server.
Specify a name for the Postgres connection on the general page. If you have multiple servers, you can also create server groups. The default server group is Servers.
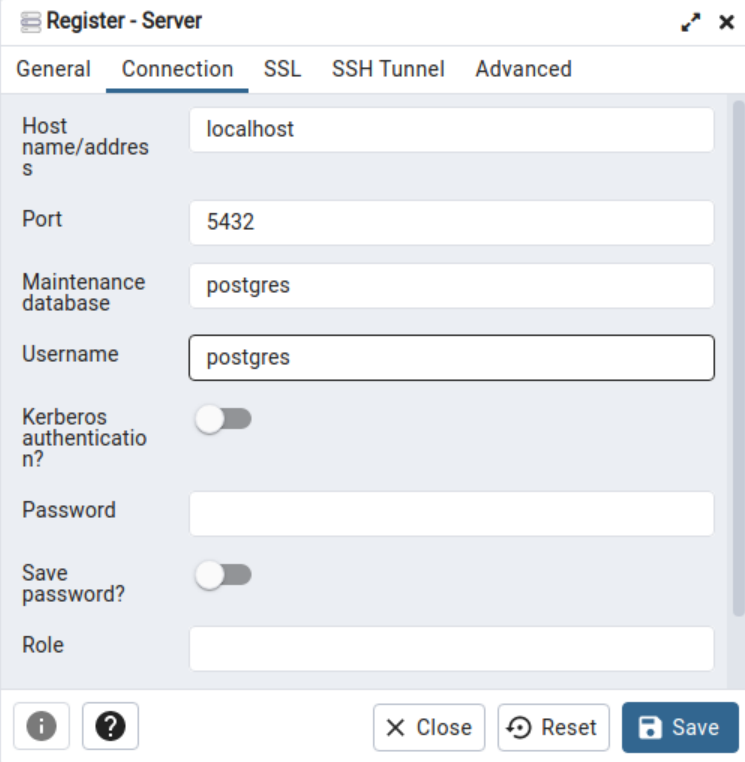
Click on the Connection tab and enter the hostname as localhost for the local server. If you want to connect to the remote server, specify the hostname or IP address of the remote Postgres instance.
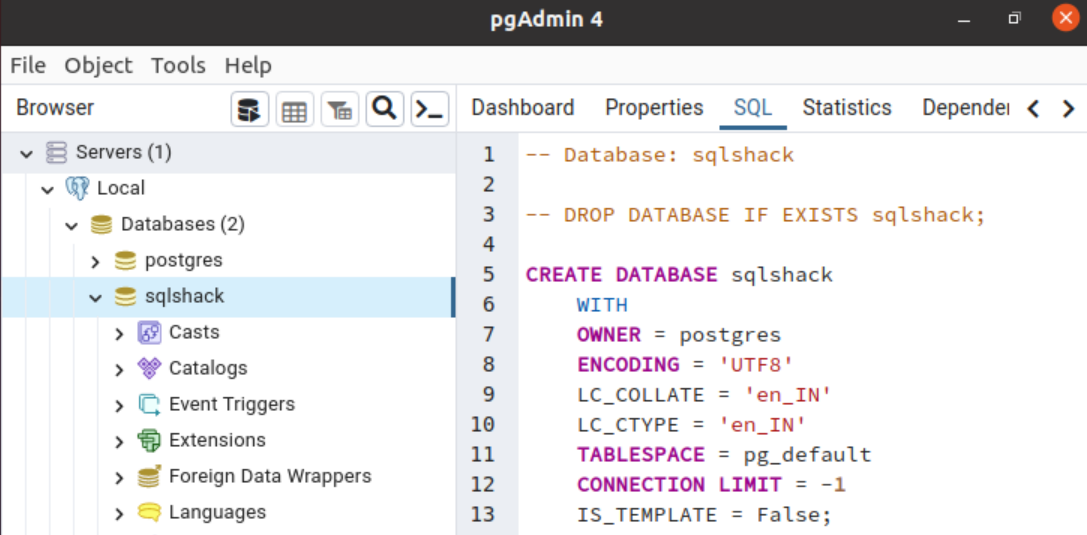
It connects to specified Postgres instances and shows all databases and their objects. The SQL tab displays the corresponding code, such as creating a database and table.
You can launch the query tool in the pgadmin4 tool and query the database or deploy the objects.
Conclusion
This article covered the steps to install PostgreSQL on Ubuntu. We also learned to create a new database and objects using the terminal and Pgadmin4 GUI interface.

I am the author of the book "DP-300 Administering Relational Database on Microsoft Azure". I published more than 650 technical articles on MSSQLTips, SQLShack, Quest, CodingSight, and SeveralNines.
I am the creator of one of the biggest free online collections of articles on a single topic, with his 50-part series on SQL Server Always On Availability Groups.
Based on my contribution to the SQL Server community, I have been recognized as the prestigious Best Author of the Year continuously in 2019, 2020, and 2021 (2nd Rank) at SQLShack and the MSSQLTIPS champions award in 2020.
Personal Blog: https://www.dbblogger.com
I am always interested in new challenges so if you need consulting help, reach me at rajendra.gupta16@gmail.com
View all posts by Rajendra Gupta
- Understanding PostgreSQL SUBSTRING function - September 21, 2024
- How to install PostgreSQL on Ubuntu - July 13, 2023
- How to use the CROSSTAB function in PostgreSQL - February 17, 2023