This article continues from the series on SQL Server Always On Availability Group. This is the 11th article in this series.
Introduction
In the previous article, Deploy a domain-independent Windows Failover Cluster for SQL Server Always On Availability Groups, we learned the new capability in Windows Server 2016 to configure a domain-independent Windows failover cluster. We did the following steps in the previous article.
- Configure the primary DNS suffix on both SQLAG1 and SQLAG2
- Configured a domain-independent Windows failover cluster
In this article, we will configure an Availability Group on the domain-independent cluster.
Configure a domain-independent SQL Server Always On Availability Group
Step 1: Install SQL Server 2019 on SQLAG1 and SQLAG2 using the built-in service account
First, you should install the SQL Server database engine on all nodes participating in the failover cluster. I do not cover all steps in SQL Server 2019 installation in this article, and you can explore the previous article in the series for detailed instructions.
As you know, we do not have an active directory configured for both nodes in my failover cluster. You should use the built-in service accounts(NT Service). As per best practice, you should grant volume maintenance task privilege for the SQL Server Database engine service, as shown below.
Step 2: Enable Always On Availability Group feature on SQLAG1 and SQLAG2
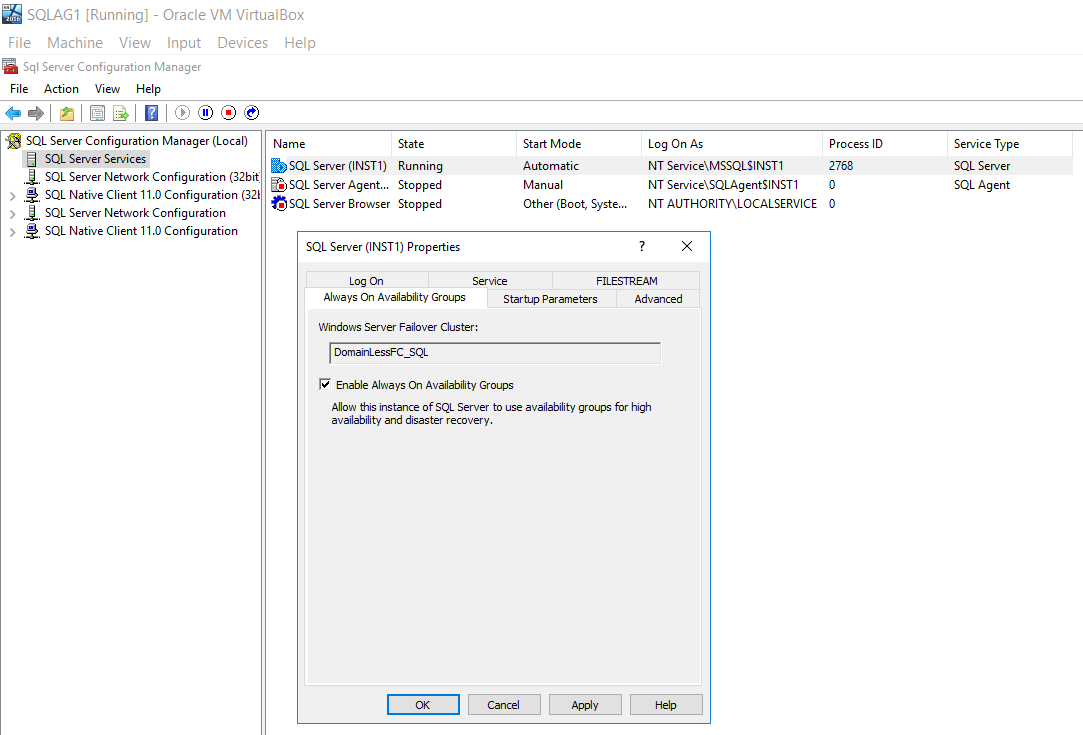
Open the SQL Server Configuration Manager and put a tick on the Enable Always On Availability Group. You can see the name of the domain-independent failover cluster on this page. You must restart SQL Services to make the changes effective.
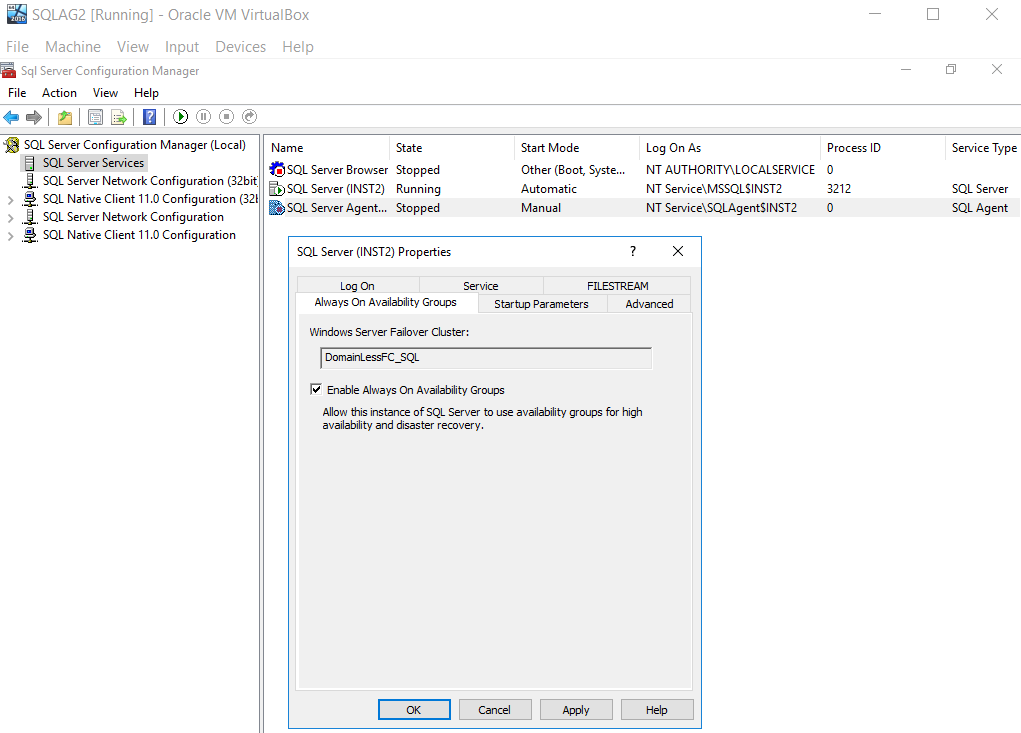
Similarly, enable the Always-on availability groups on the SQLAG2 node and restart SQL Services.
Step 3: Create a database master key on the primary replica SQLAG1
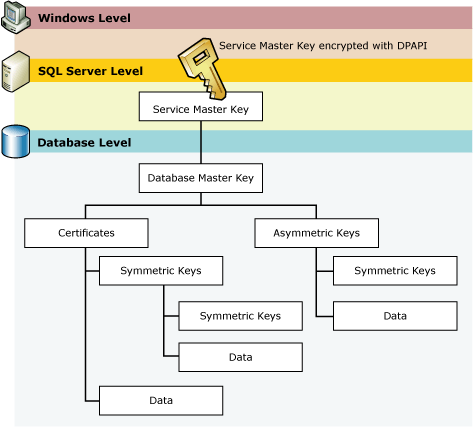
A domain-independent uses the database master key for SQL Server Always On Availability Group. You require a password to encrypt the database master key.
Image Reference: Microsoft docs
We configure the SQLAG1 as the primary replica for this article.

Step 4: Create a certificate to encrypt the endpoints in Always On
In this step, we create a certificate to secure the availability group endpoint in SQL Server Always On. This certificate is also useful to secure the inbound traffic on the secondary AG. SQL Server uses these certificates for authentication purposes as well in a domain-independent cluster.
Execute this script on the primary replica SQLAG1.

Step 5: Backup the Certificate
We need to take a backup of the certificate created in step 4. This certificate is required later in the secondary replica user authentication.

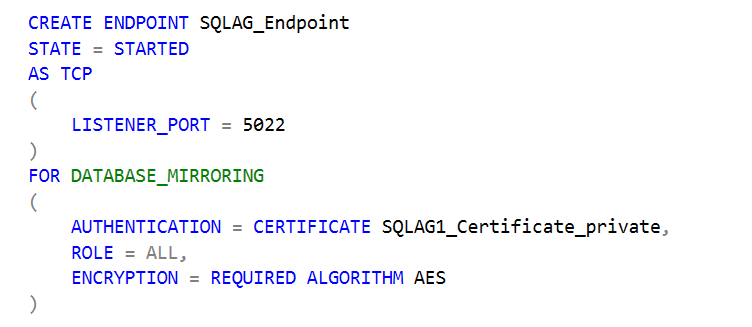
Step 6: Create an endpoint for the AG communication
In this step, we create an endpoint on the primary replica SQLAG1 with the following information.
- It uses the default port 5022 for the AG communications
- In the authentication mechanism, it uses the certificate that we created in step4
- It uses the AES encryption algorithm mechanism
Step 7: Perform step 3 to step 6 on the second node of the domain-independent failover cluster
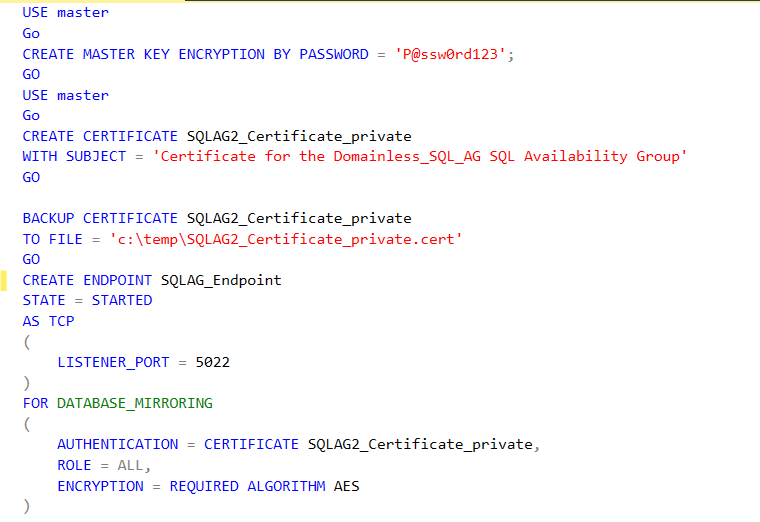
You need to perform steps 3 to 6 in the secondary replica SQLAG2 using the t-SQL. You can copy the script from the attachment in this article.
Step 8: Create a SQL Login on the SQLNode1
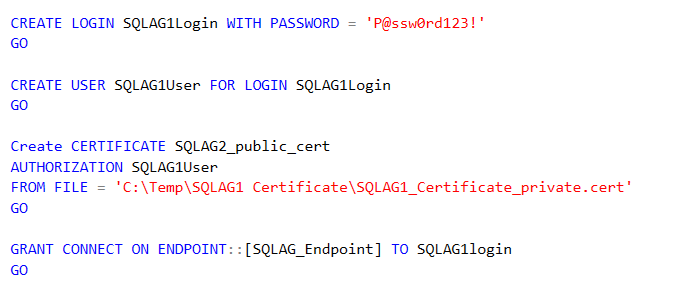
In this step, we create a SQL Login and user in the master database. This user will be used to authorizing the user on the public key portion of the certificate from the SQLAG2 node.

Step 9: Import the public key portion of the certificate from the SQAG2 node
You should copy the certificate from the SQLAG2 node into the SQLAG1 node. Now, create another certificate in the SQLAG1 node from the SQLAG2 node and authorized SQLAG2User to access it. If you have multiple secondary replicas in your environment, you need to perform for all secondary replicas certificate.

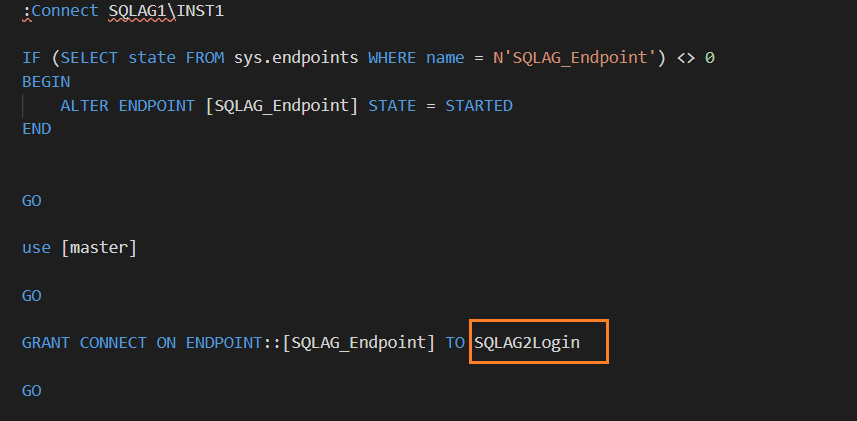
Step 10: Grant permissions to connect to the endpoint for the SQLAG2Login
The login should have permission to connect to the HADR endpoint for communication between primary and secondary replicas.
In this step, we assign permissions to connect to the endpoint.

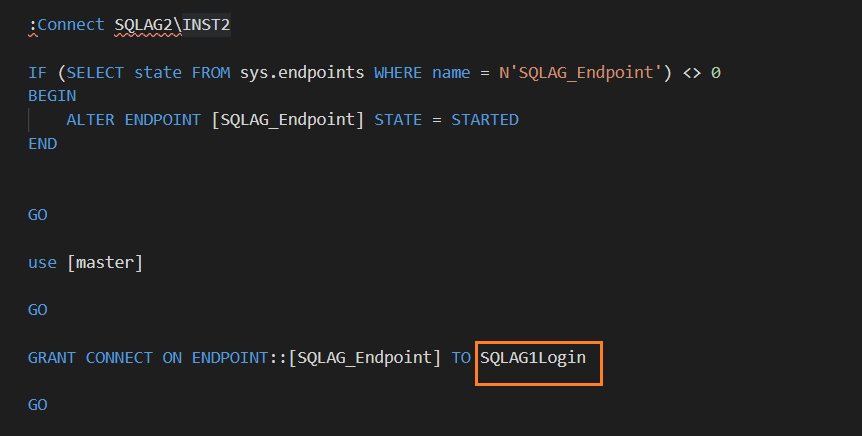
Step 11: Repeat steps 8 to 10 on the SQLAG2 node
You need to repeat steps 8 to 10 on the secondary AG node SQLAG2 with the scripts attached to this article.
At this point, your security configurations for the domain-independent SQL Server Always On Availability Group are complete. Now, we can deploy the AG group in the next section.
Configure a domain-independent SQL Server Always On Availability Group
Before you want to deploy an AG group, make sure you have met the following prerequisites.
- You should create a database into the primary AG replica
- You should use a similar data file and log file directories in both AG nodes
- Perform a full and transaction log backup on the primary replica
- Copy the full and transaction log backup files to the secondary replica nodes
- Restore the full and log backup on the secondary replica in NORECOVERY mode
Once you start creating a new availability group in SSMS, you see that it uses the built-in service account for the endpoint owners. Usually, in a traditional AG, we use an AD service account for endpoint authorization, but we cannot use these built-in service accounts in a domain-independent AG. We use the SQL logins created earlier in this article. We cannot change these endpoint owners in this SSMS wizard.
If you try to configure domain-independent AG using SSMS wizard, it fails with the below error message.
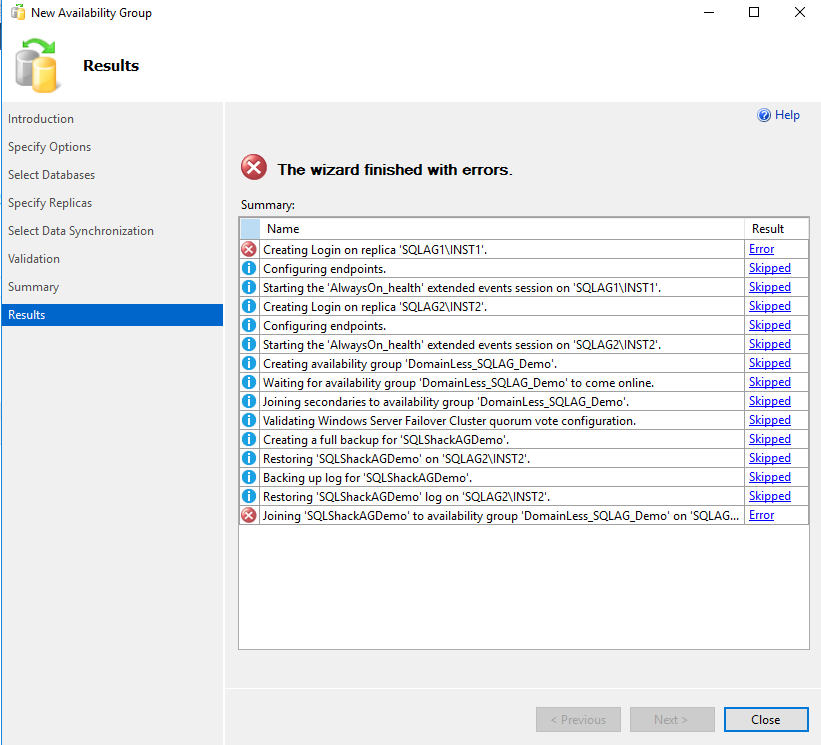
Click on Error hyperlink to get the detailed error. As per the error message, it says it can’t find the built-in service account ‘NT Service\MSSQL$INST2’

You can script out the AG configuration from the summary page.
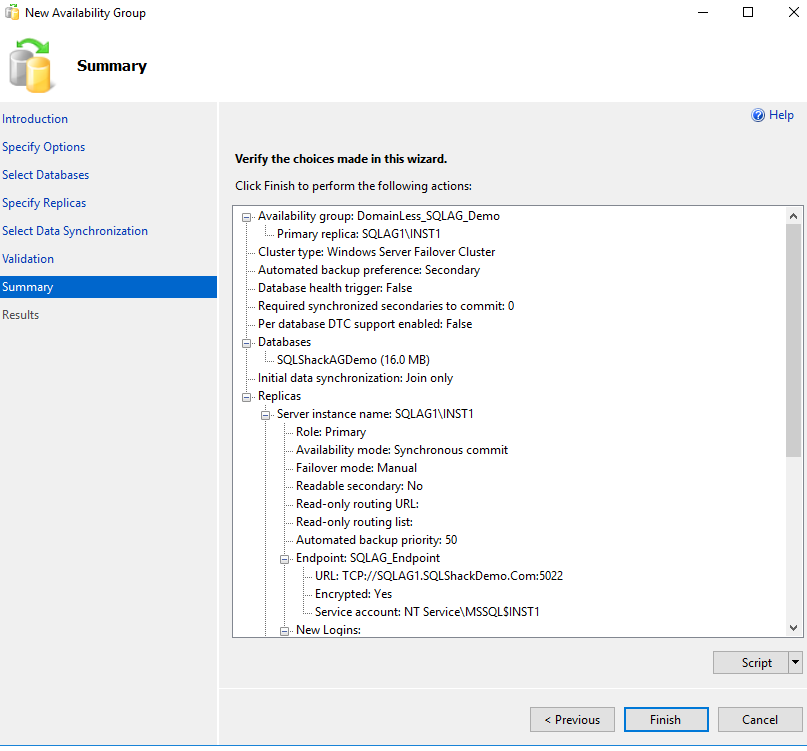
Now, change the endpoint owners as the SQL users in the generated AG script.
-
Modify endpoint owner for the primary replica

Modify endpoint owner for the secondary replica

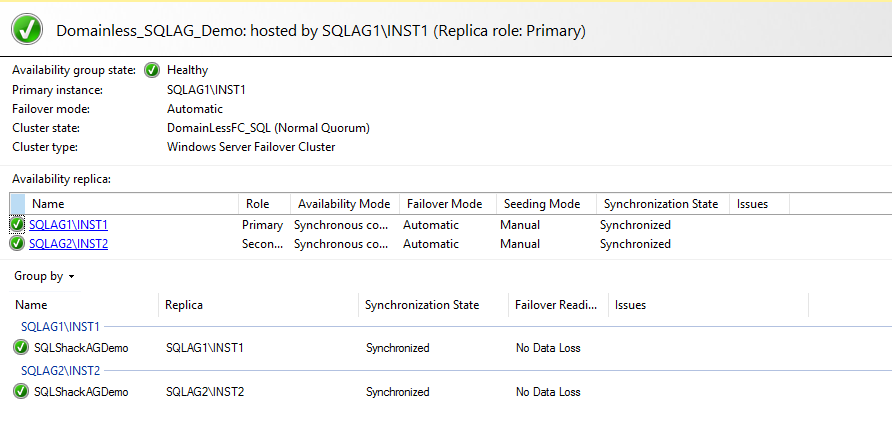
Now, execute the generated AG script in SQLCMD mode and your domain-independent AG Availability Group is available now as shown below in the AG dashboard.
Create a SQL listener for the domain-independent SQL Server Always On Availability Group
Expand the availability group in SSMS on the primary replica and create a new availability group listener.
Here, we specify a listener DNS name, port and the static IP address.
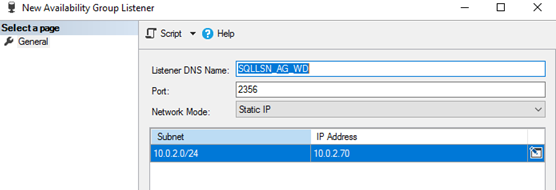
Once your listener configuration is complete and you try to connect to it in SSMS, you might get the network-related error.
Once we configure a listener in a traditional AG, it creates a computer object in the active directory. In the domain-independent failover cluster, it cannot create the listener computer object in the AD.
To overcome this issue, connect to the DNS manager and create a new forward lookup zone( SQLShackdemo.com) and the new host record for the SQL listener, as shown below.
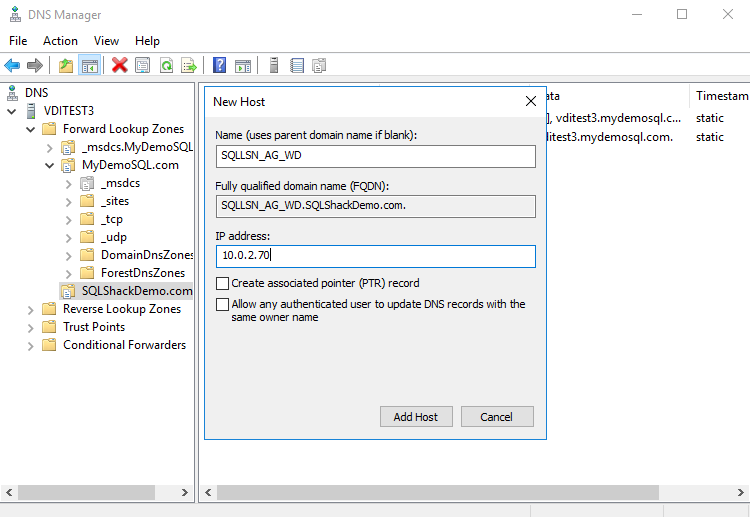
Once the host record is created, you should get the ping response for the listener. It should return the IP address if you ping with the listener’s name.
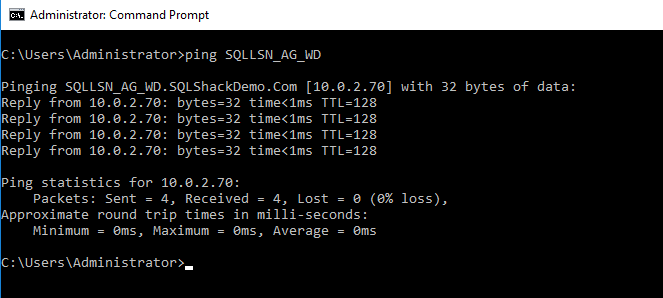
You can now connect to the domain-independent Availability Group with a listener as well.
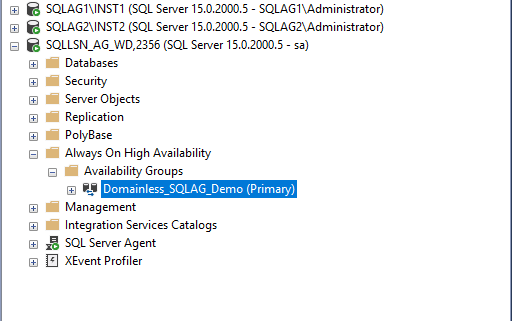
Failover in a domain-independent Availability Group
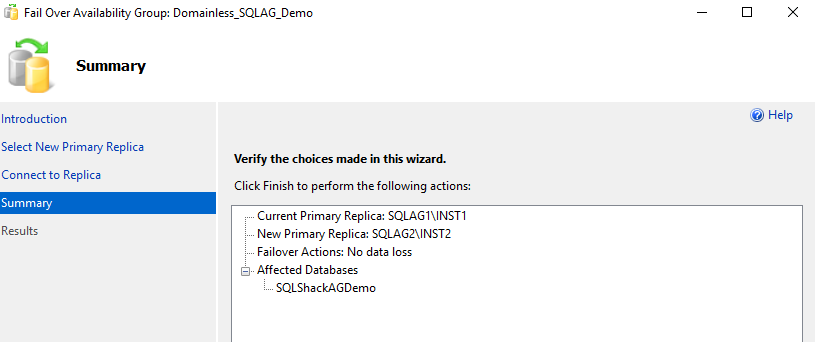
It is always advisable to check the AG failover once you configure it for the first time. In the failover wizard, verify the current and new replica.
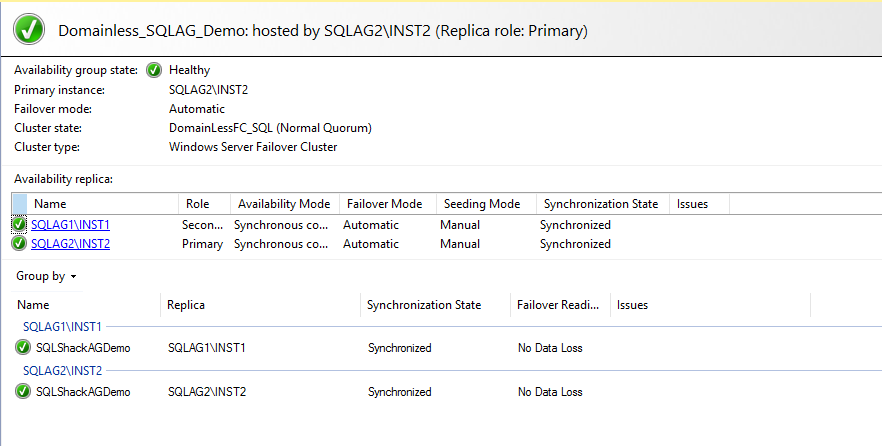
Once the failover is completed, connect to the new primary replica SQLAG2\INST2 and verify the dashboard health and new AG owner.
Conclusion
In this article, we configure a domain-independent SQL Server Always On Availability Group. This feature is available on Windows Server 2016 and SQL Server 2016 onwards. You should consider your requirements before implementing an AG group.
Table of contents
- How to install PostgreSQL on Ubuntu - July 13, 2023
- How to use the CROSSTAB function in PostgreSQL - February 17, 2023
- Learn the PostgreSQL COALESCE command - January 19, 2023


