

This article explains how to develop ETL (Extract Transform Load) jobs using AWS Glue to load data from AWS S3 into AWS RDS SQL Server database objects.
Introduction
ETL is one of the widely-used methods for data integration in any enterprise IT landscape. Data is transported from source to destination data repositories using ETL jobs. Enterprises host production workloads on AWS RDS SQL Server instances on the cloud. Data is often load in and out of these instances using different types of ETL tools. One of the AWS services that provide ETL functionality is AWS Glue. AWS S3 is the primary storage layer for AWS Data Lake. Often semi-structured data in the form of CSV, JSON, AVRO, Parquet and other file-formats hosted on S3 is loaded into Amazon RDS SQL Server database instances. In this article, we will explore the process of creating ETL jobs using AWS Glue to load data from Amazon S3 to an Amazon RDS SQL Server database instance.
AWS RDS SQL Server Instance
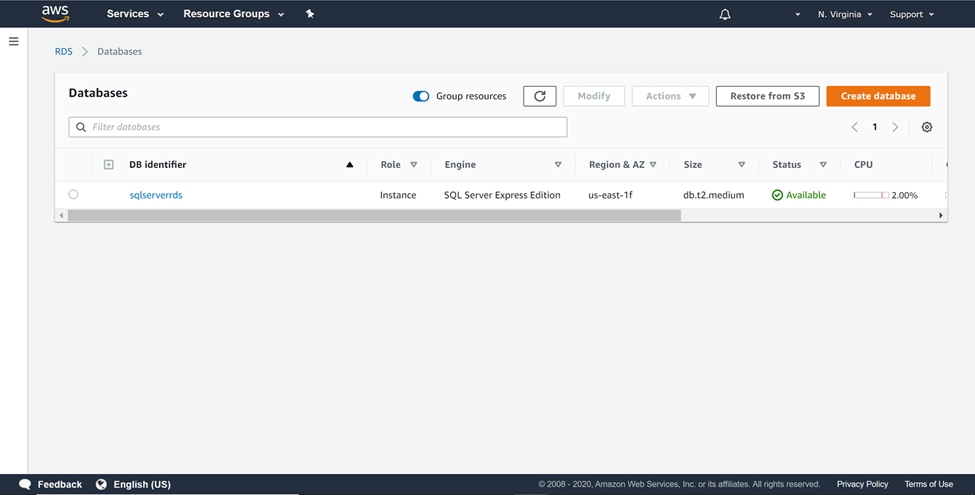
It’s assumed that an operational instance of AWS RDS SQL Server is already in place. Once the instance is available, it would look as shown below. For the ETL job that we would be developing in this article, we need a source and a target data repository. Amazon S3 would act as the source and the SQL Server database instance would act as the destination. Even a SQL Server Express edition hosted on SQL Server instance will work. Do ensure, that you have the required permissions to manage an AWS S3 bucket as well as the SQL Server database instance.
Setting up an AWS S3 Bucket with sample data
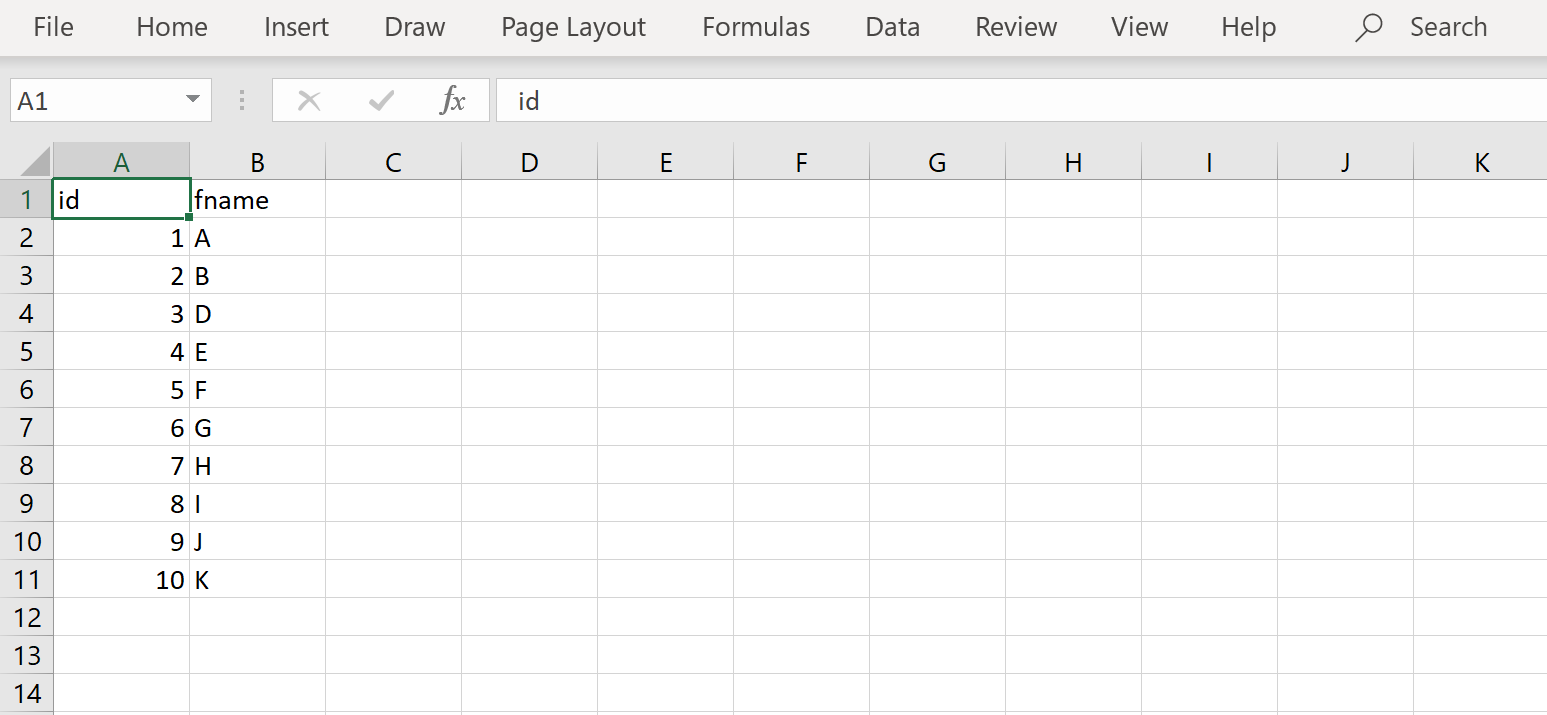
Navigate to the AWS S3 home page, by typing S3 on the AWS Console home page and then open the selected service. From the Amazon S3 home page, click on the Create Bucket button to create a new AWS S3 bucket. Provide a relevant name and create the bucket in the same region where you have hosted your AWS RDS SQL Server instance. Create a sample CSV file as shown below and add some sample data to it. In our case, we have a sample file named employees that has two fields and a few records as shown below.
Once the file has been created, upload it to the newly created S3 bucket by clicking on the Upload button in the AWS S3 Bucket interface. Once you have uploaded the file successfully, it would look as shown below. This completes the creation of our source data setup.

AWS RDS SQL Server database objects setup
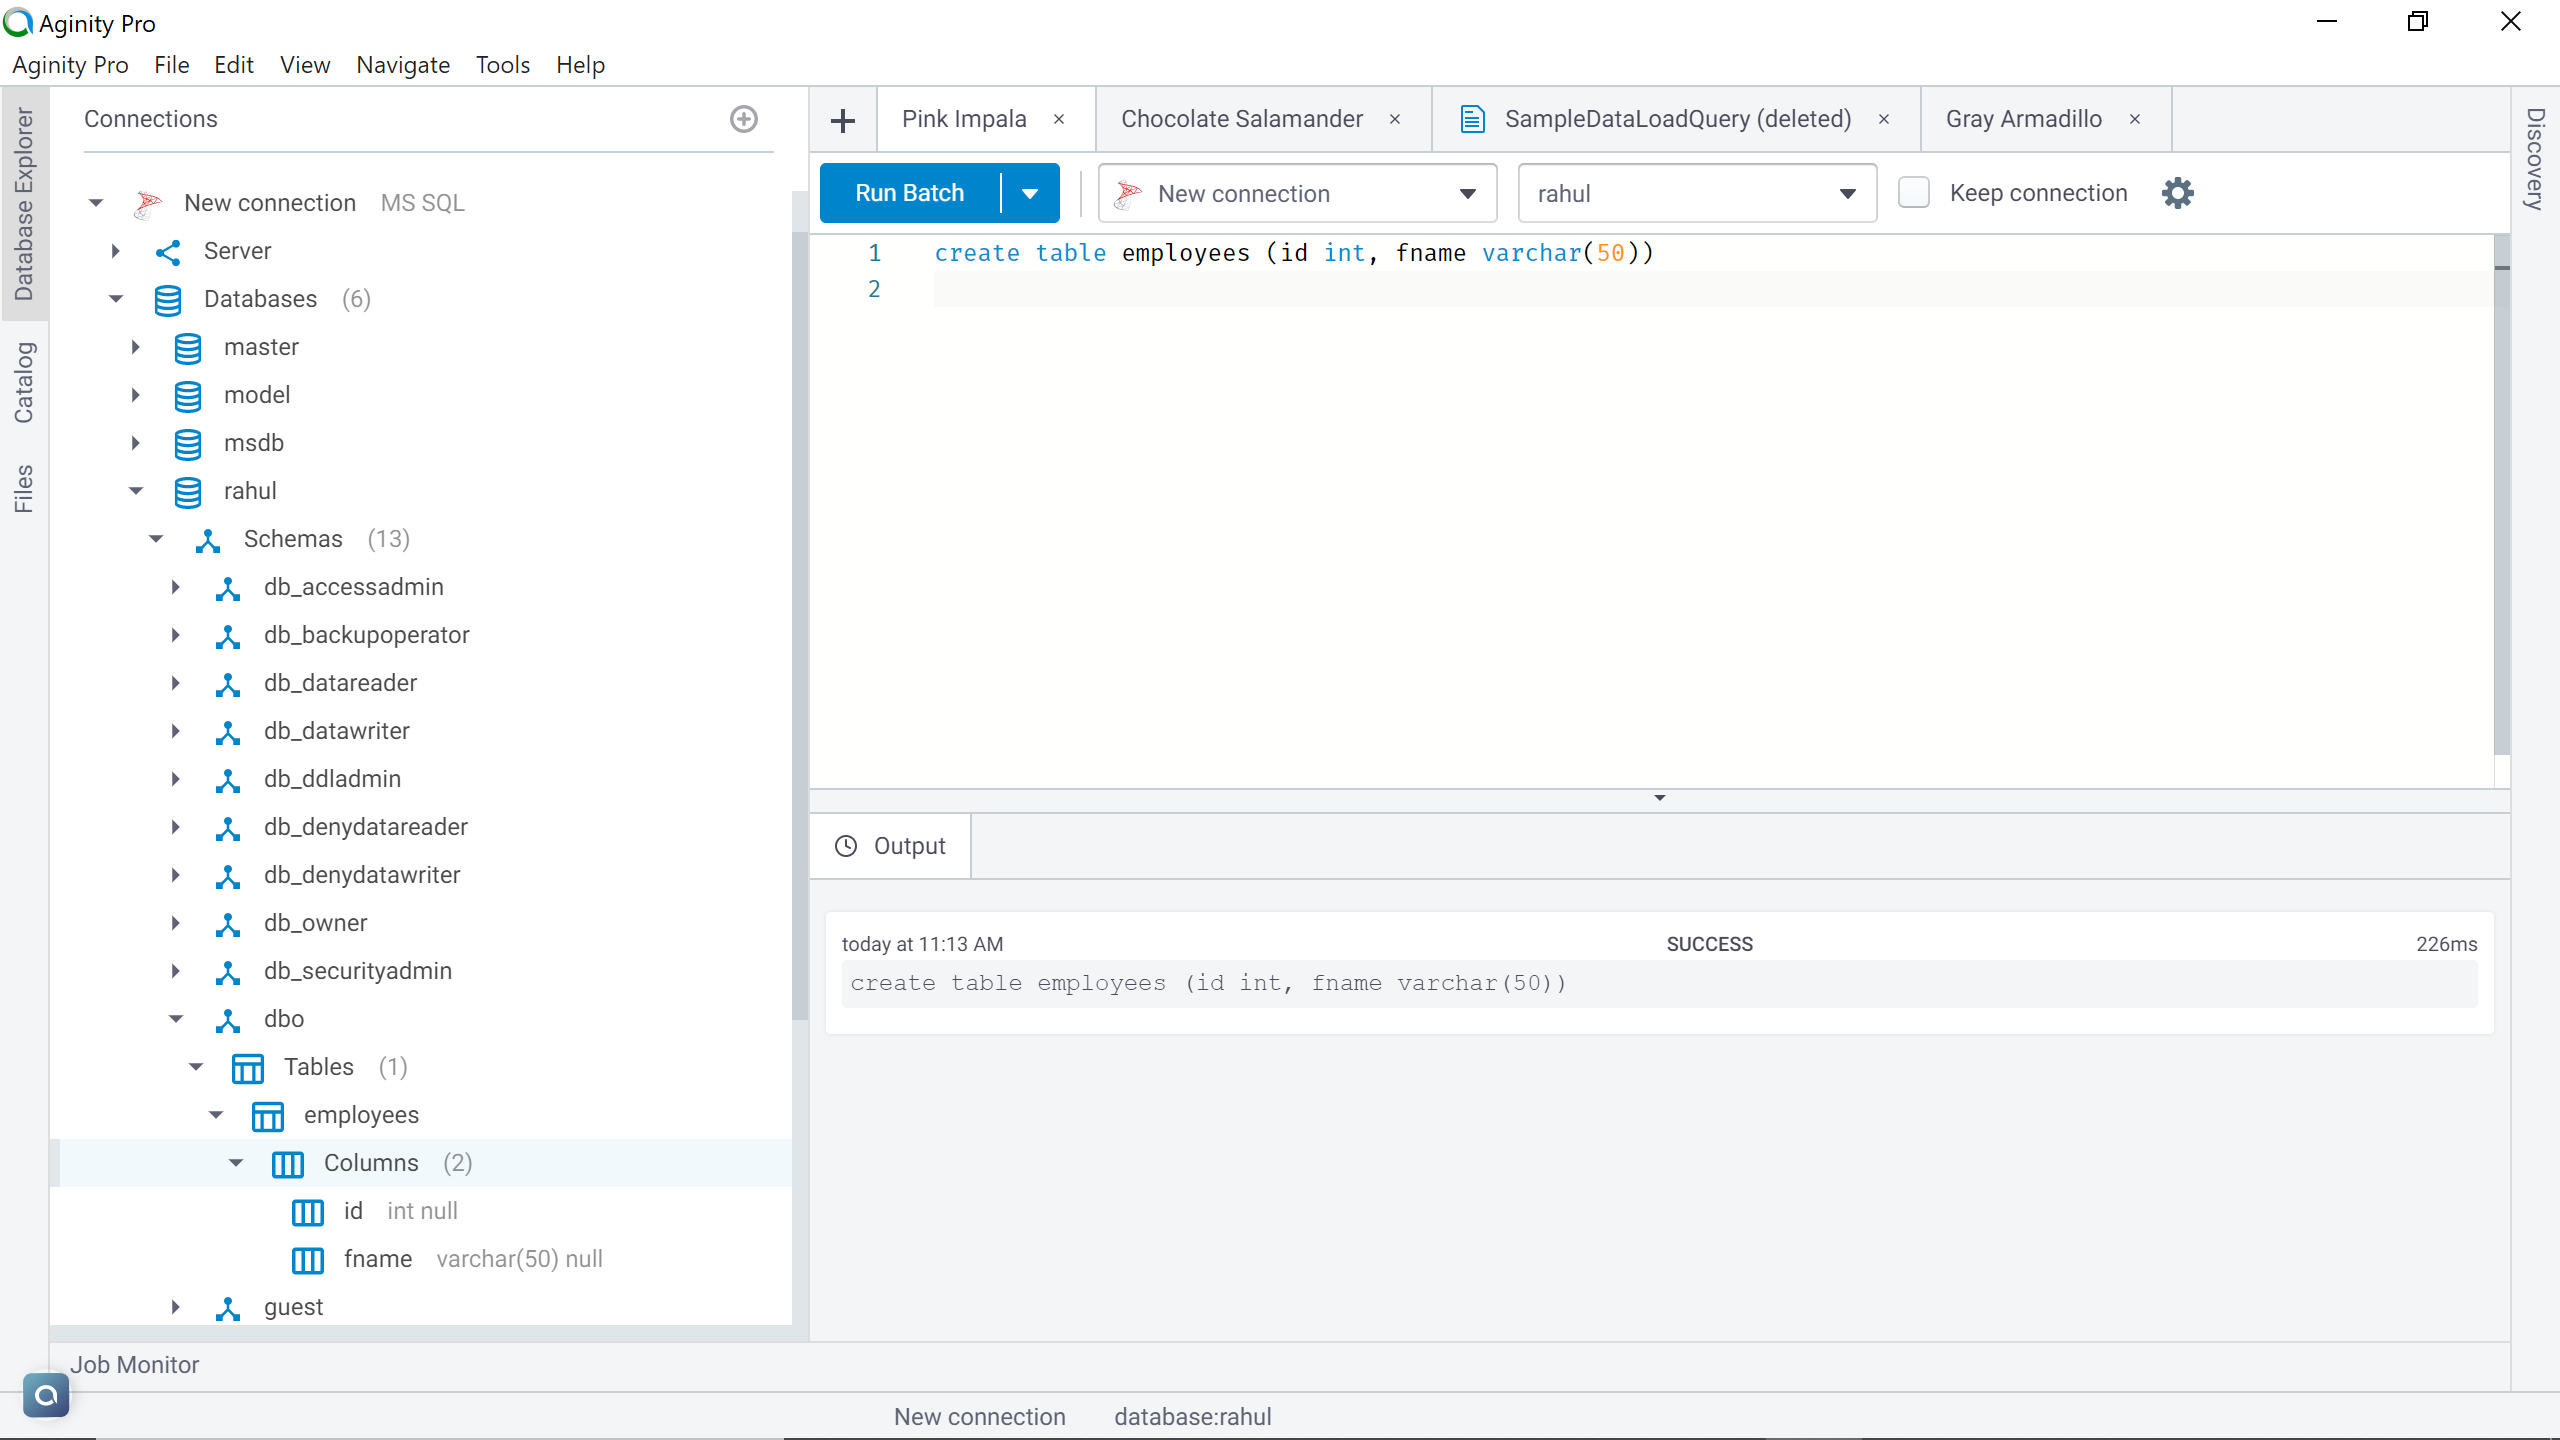
Log on to the AWS RDS SQL Server database instance using the editor of your choice. Once you have connected to the instance, create a table that matches the schema of the CSV file that we just created. The schema can be different as well, in that case, we will have to perform a transformation for the source data to load into the target table. To keep the transformation complexity minimum so that we focus on the configuration of the ETL job, here a table is created that has identical schema to the CSV file as shown below.
Crawling AWS S3 files and AWS RDS SQL Server tables
We learned how to crawl SQL Server tables using AWS Glue in my last article. In the same way, we need to catalog our employee table as well as the CSV file in the AWS S3 bucket. The only difference in crawling files hosted in Amazon S3 is the data store type is S3 and the include path is the path to the Amazon S3 bucket which hosts all the files. After all the Amazon S3 hosted file and the table hosted in SQL Server is a crawler and cataloged using AWS Glue, it would look as shown below.
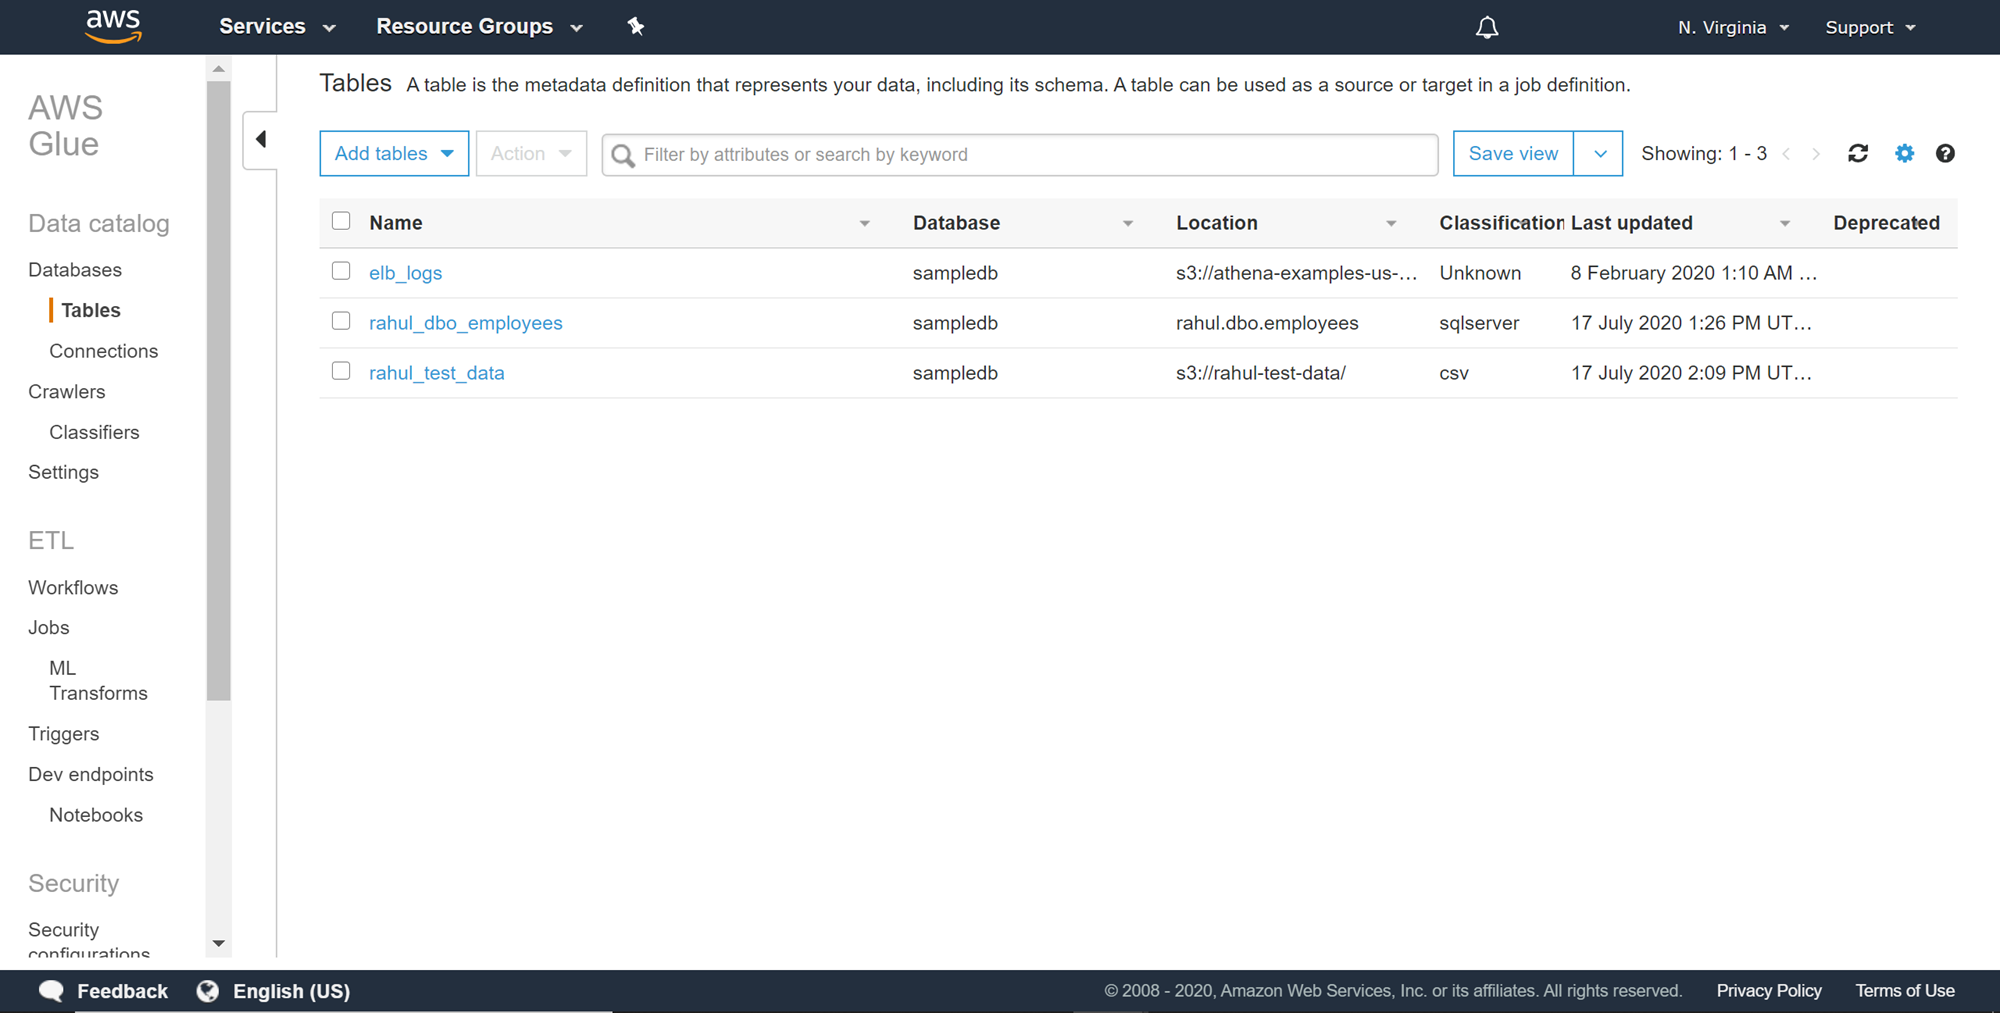
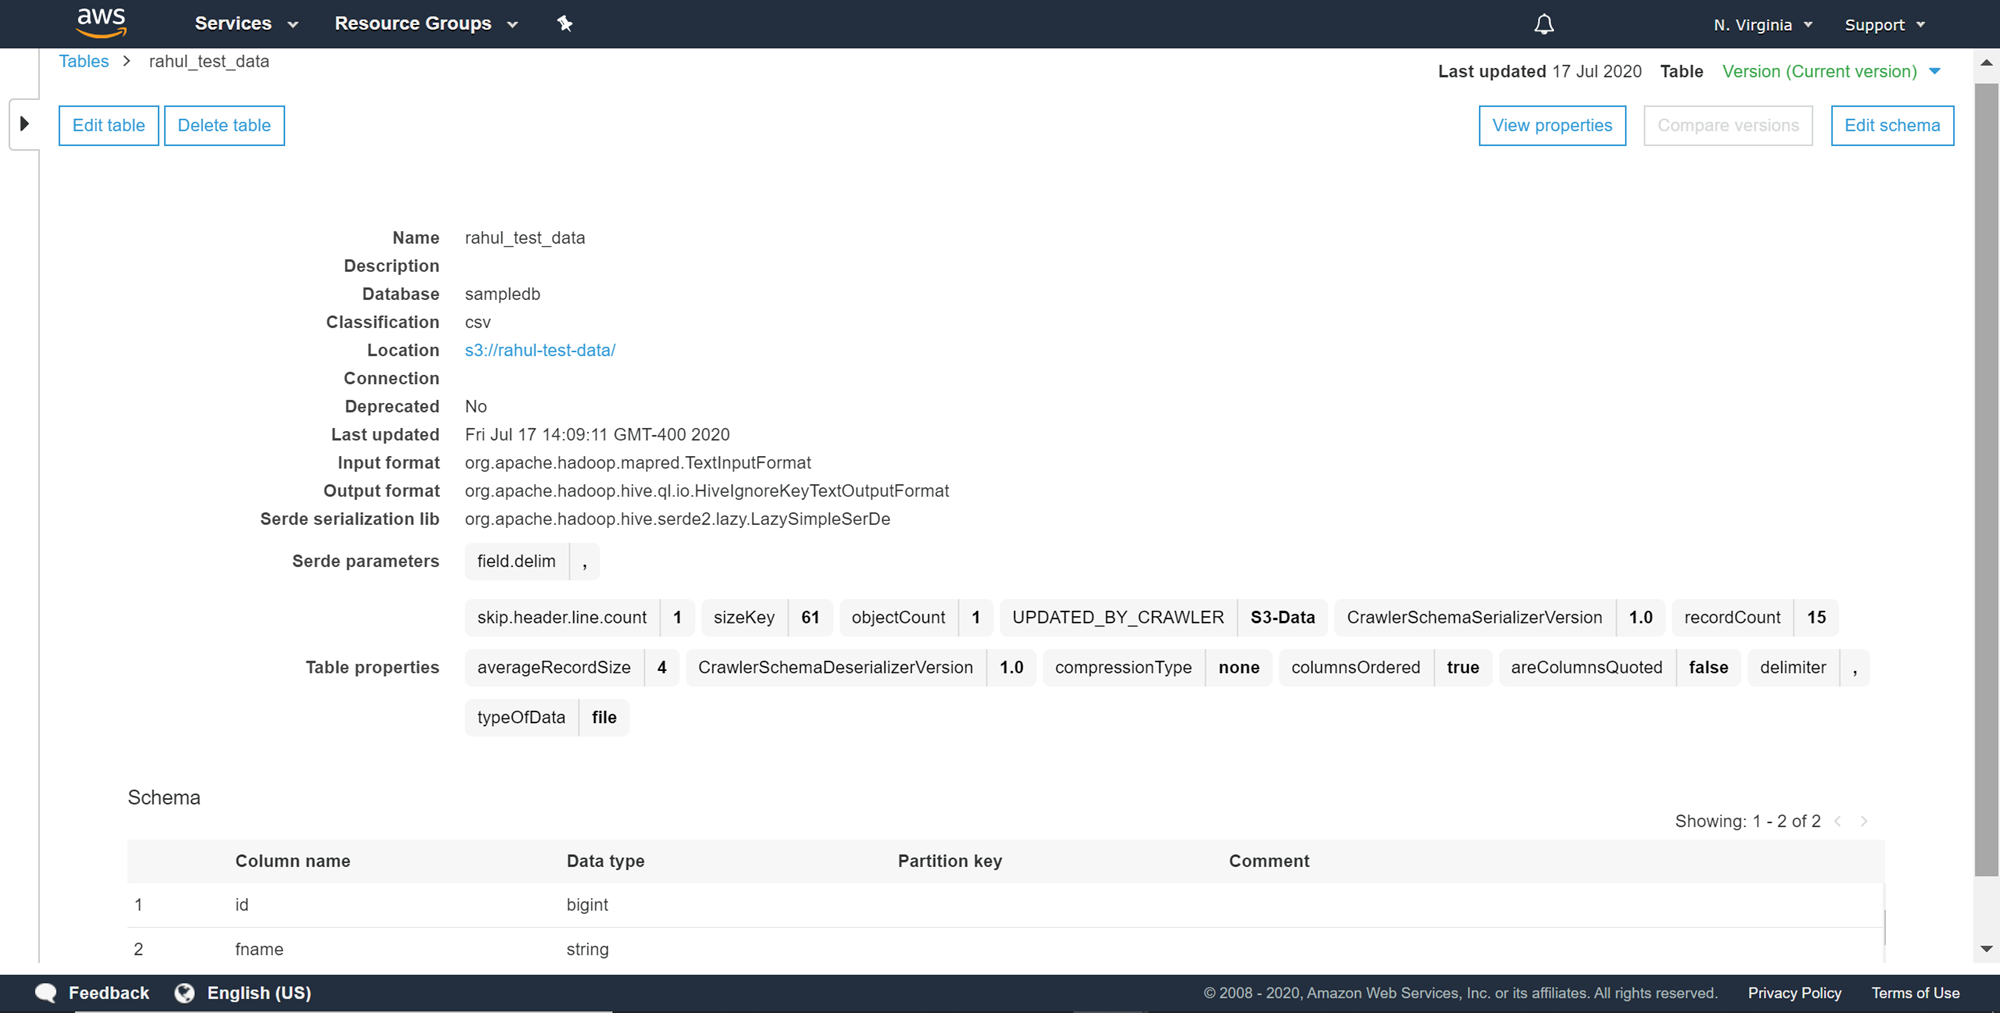
We learned how a cataloged AWS RDS SQL Server table would look in my last article, How to catalog AWS RDS SQL Server database. For reference, a cataloged AWS S3 bucket-based table, for a file having a schema like the CSV that we created earlier, would look as shown below.
Developing an AWS Glue ETL Job
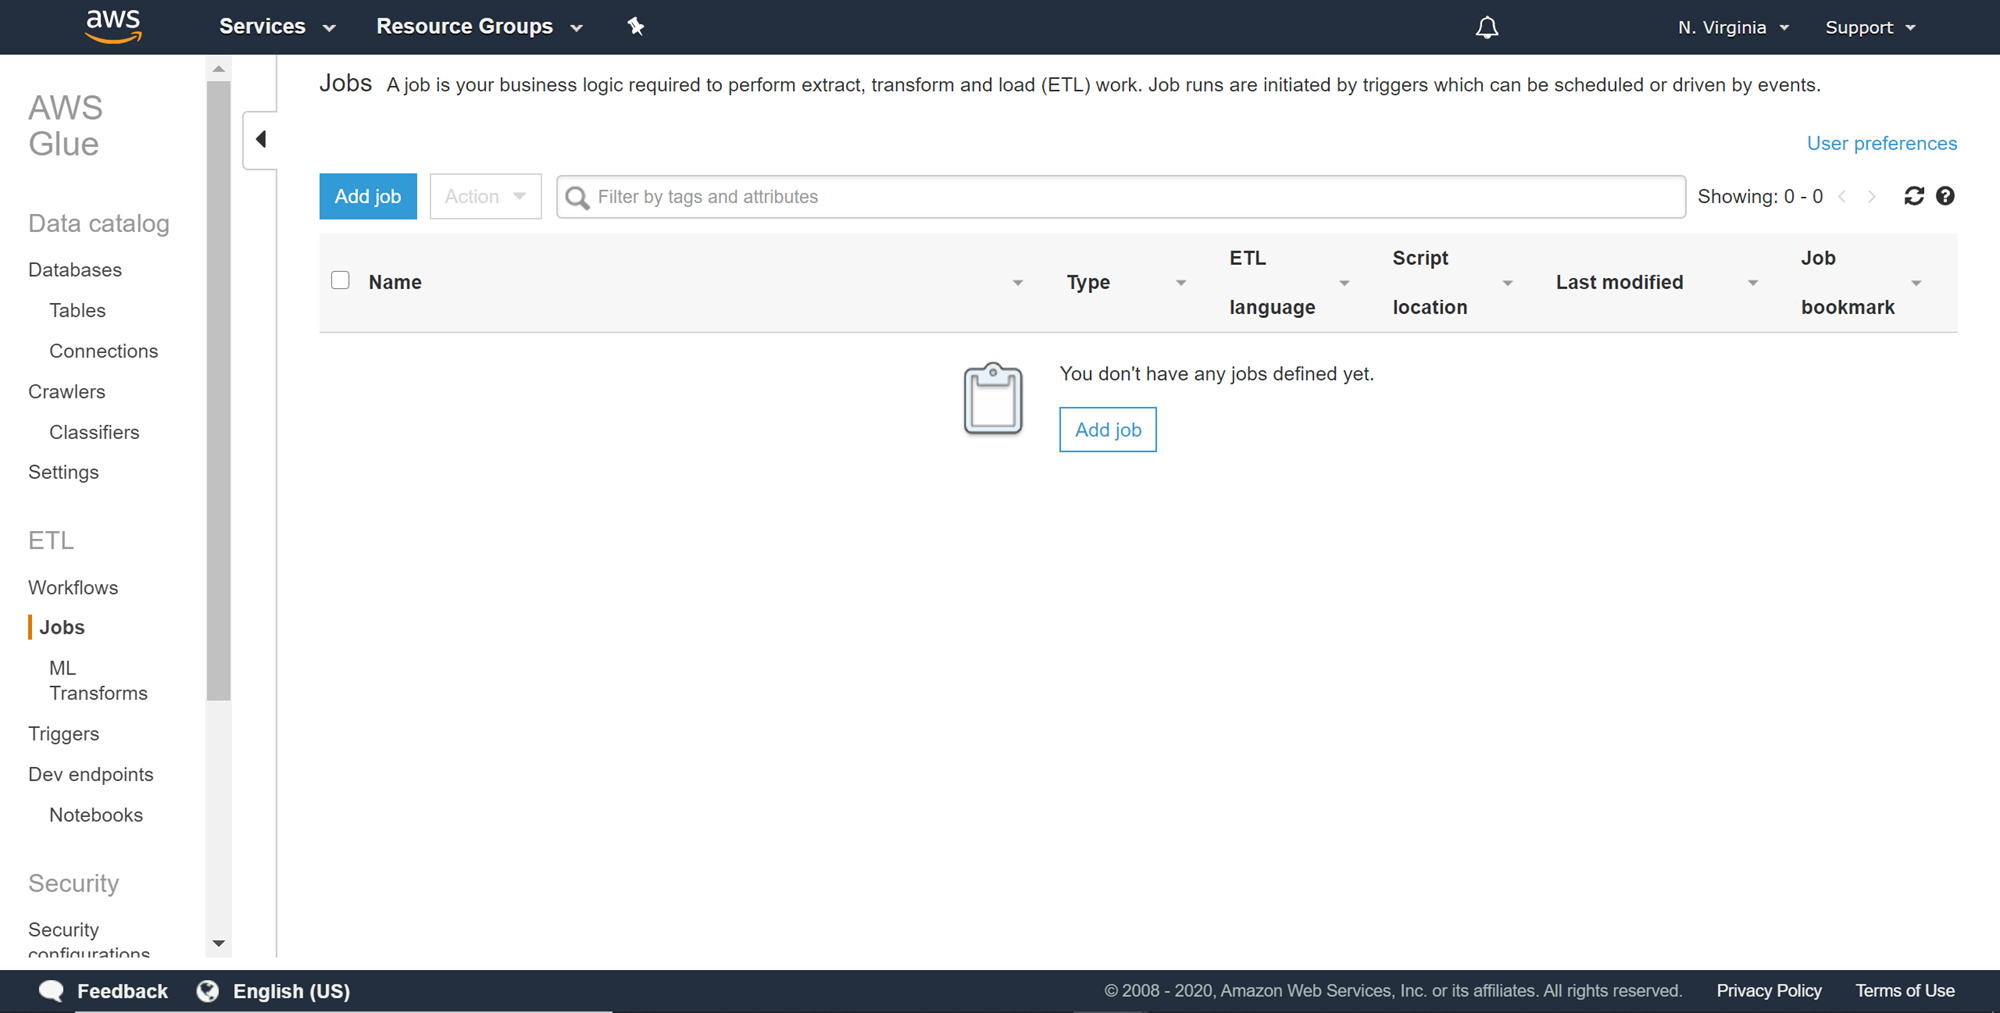
Now that the AWS Glue catalog is updated with source and destination metadata tables, now we can create the ETL job. Navigate to the ETL Jobs section from the left pane, and it would look as shown below.
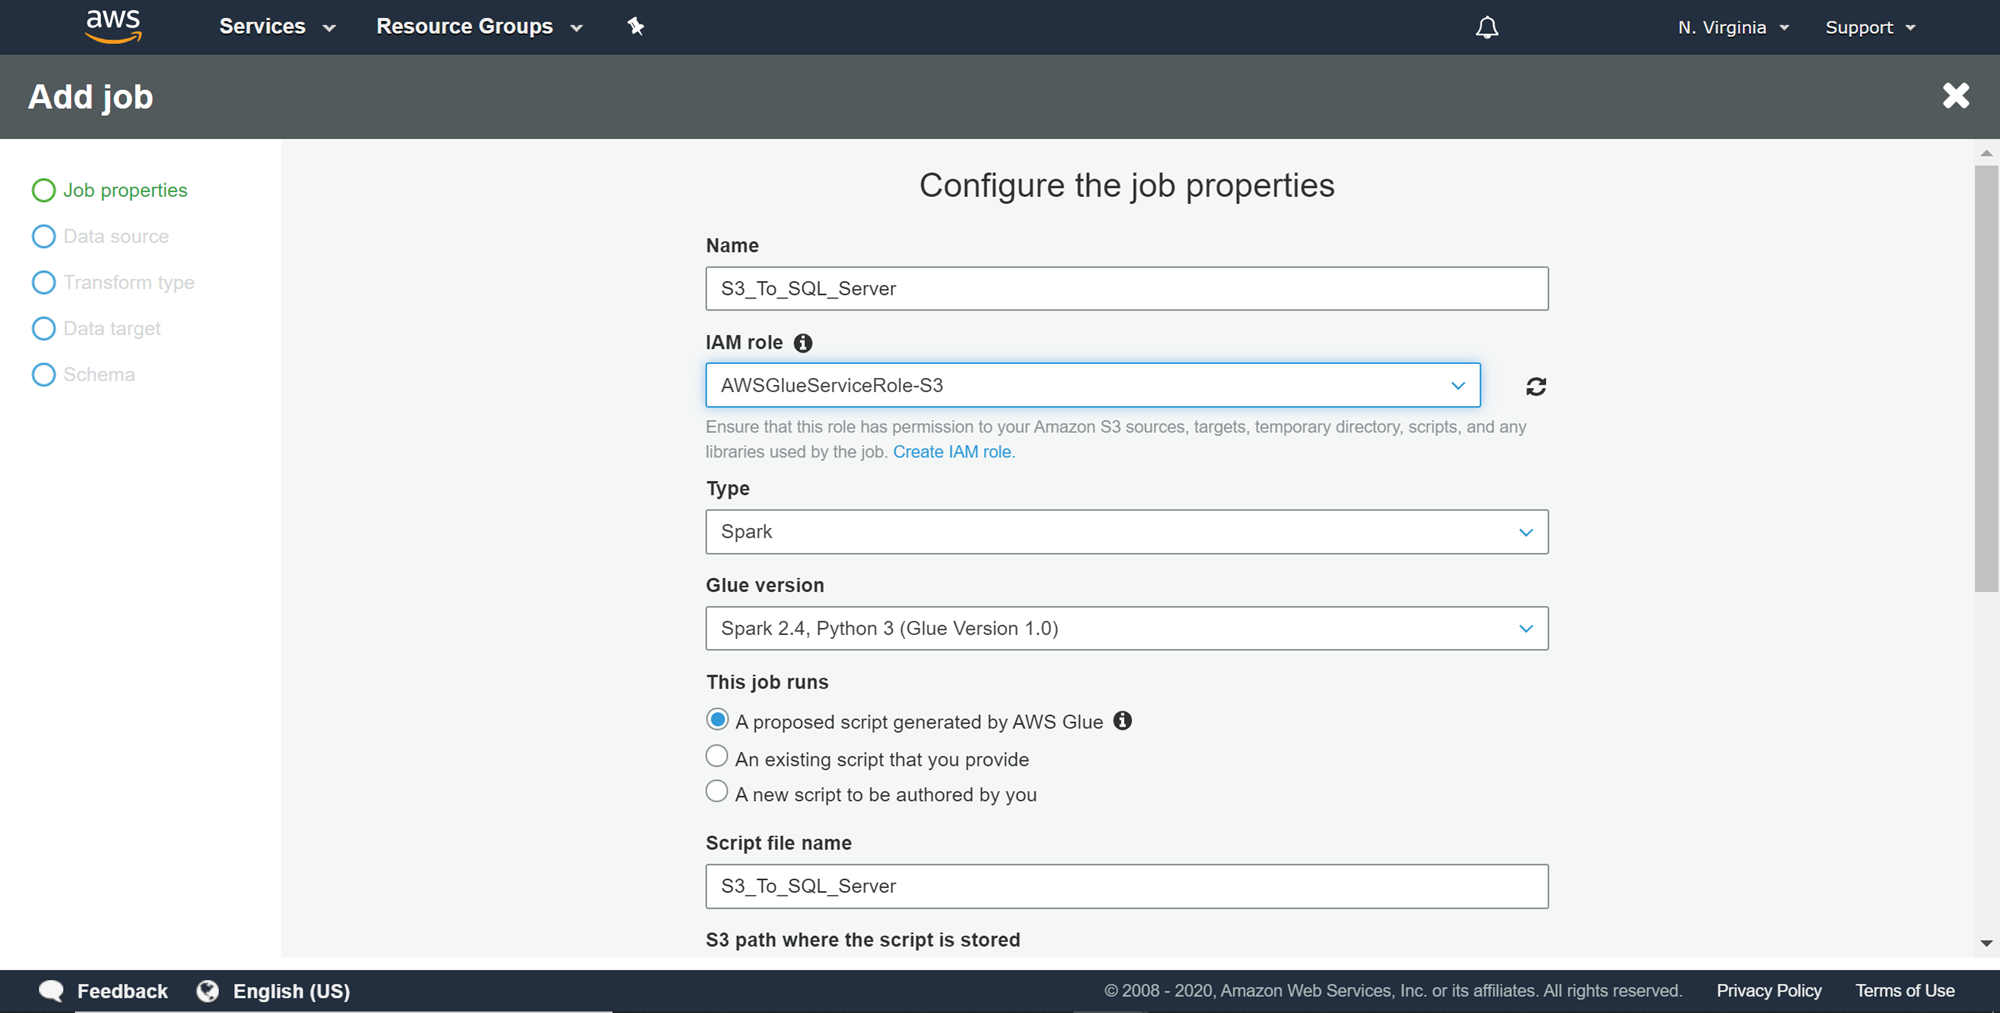
Click on the Add job button to start creating a new ETL job. A new wizard would start, and the first step would look as shown below. Provide a relevant name and an IAM role (with privileges to read and write on the metadata catalog as well as AWS S3) for the job. The type of job provides options to either create a Spark-based job or a Python shell job. Spark-based jobs are more feature-rich and provide more options to perform sophisticated ETL programming compared to Python shell jobs, and also support all the AWS Glue features with Python-based jobs do not. After we are done specifying all the options, the output of this job would be a script that is generated by AWS Glue. Alternatively, you can configure this job to execute a script that you already have in place or you wish to author. We are going to leave the job type and script related settings to default.
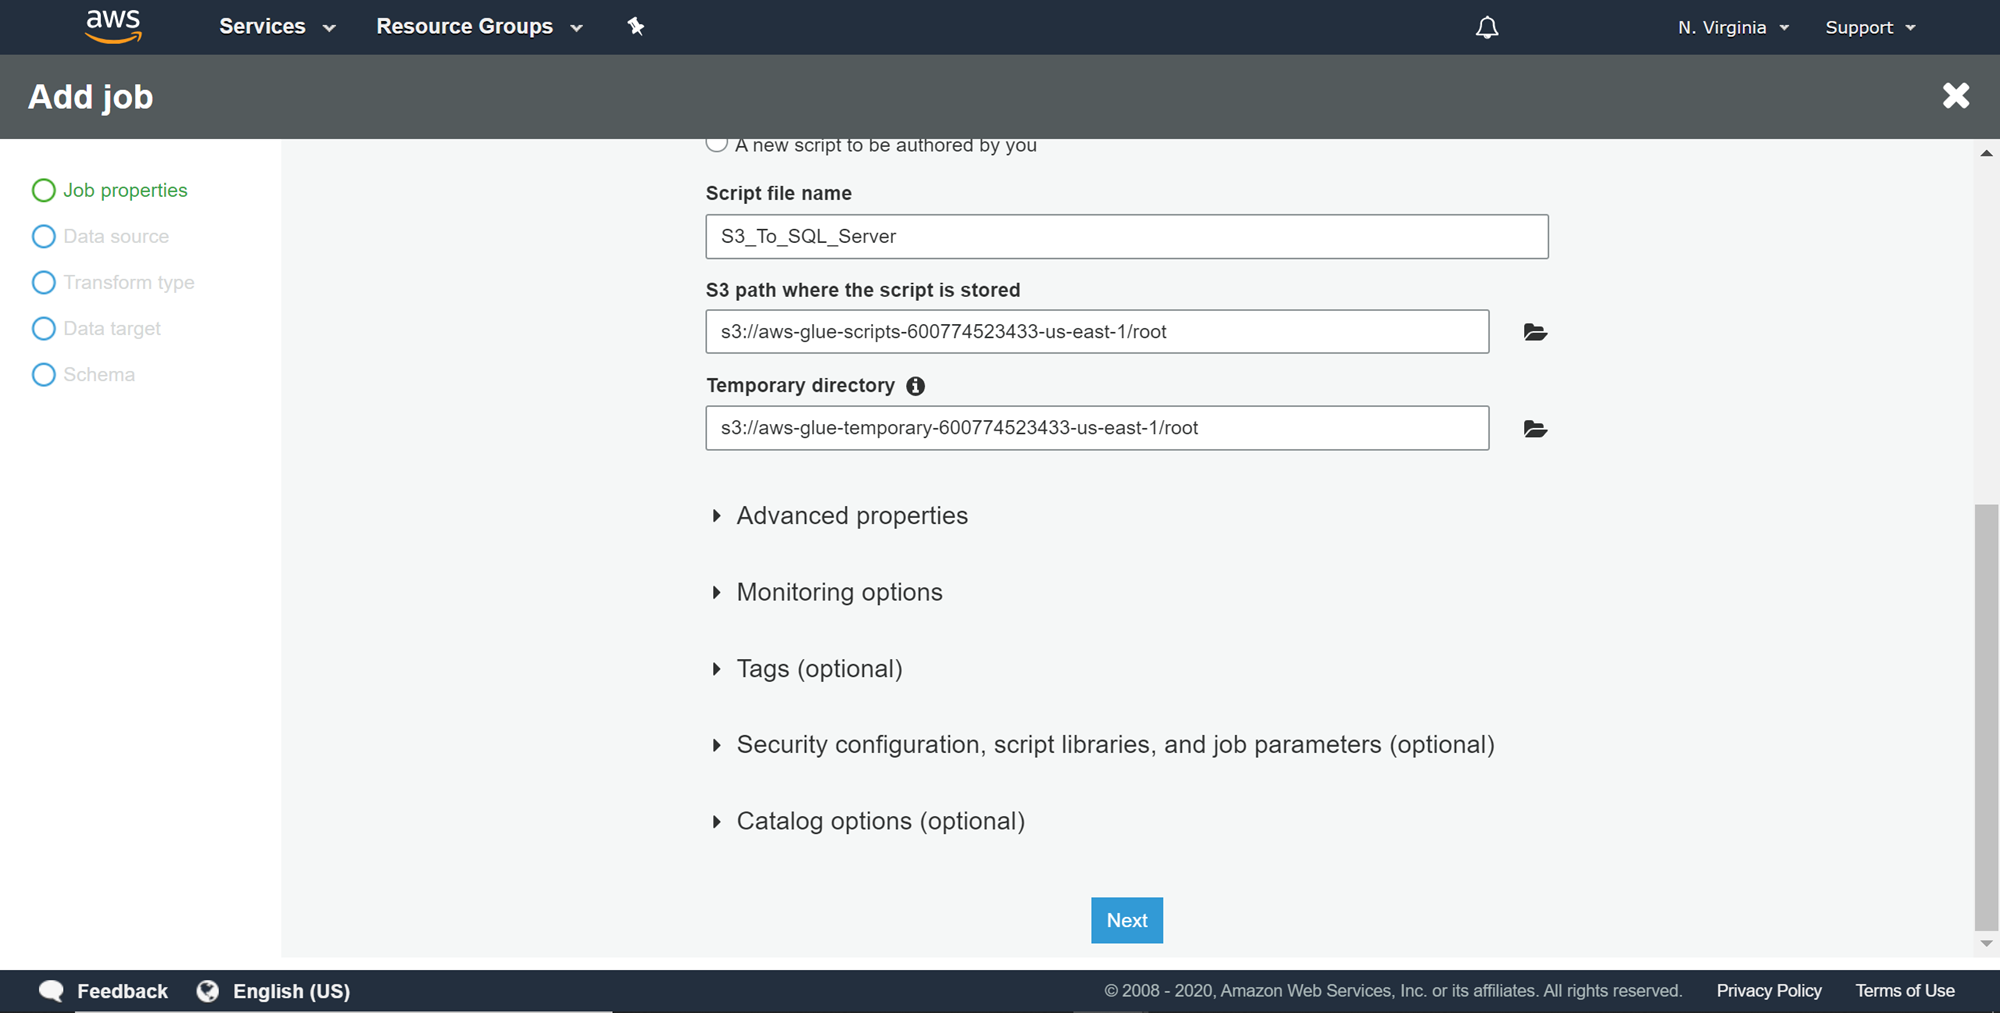
Other options on this page will look as shown below. These options can be used to mainly configure any custom scripts or libraries, security, monitoring and logging, which is not required in our case for the purpose of demonstration. We can proceed with the next step.
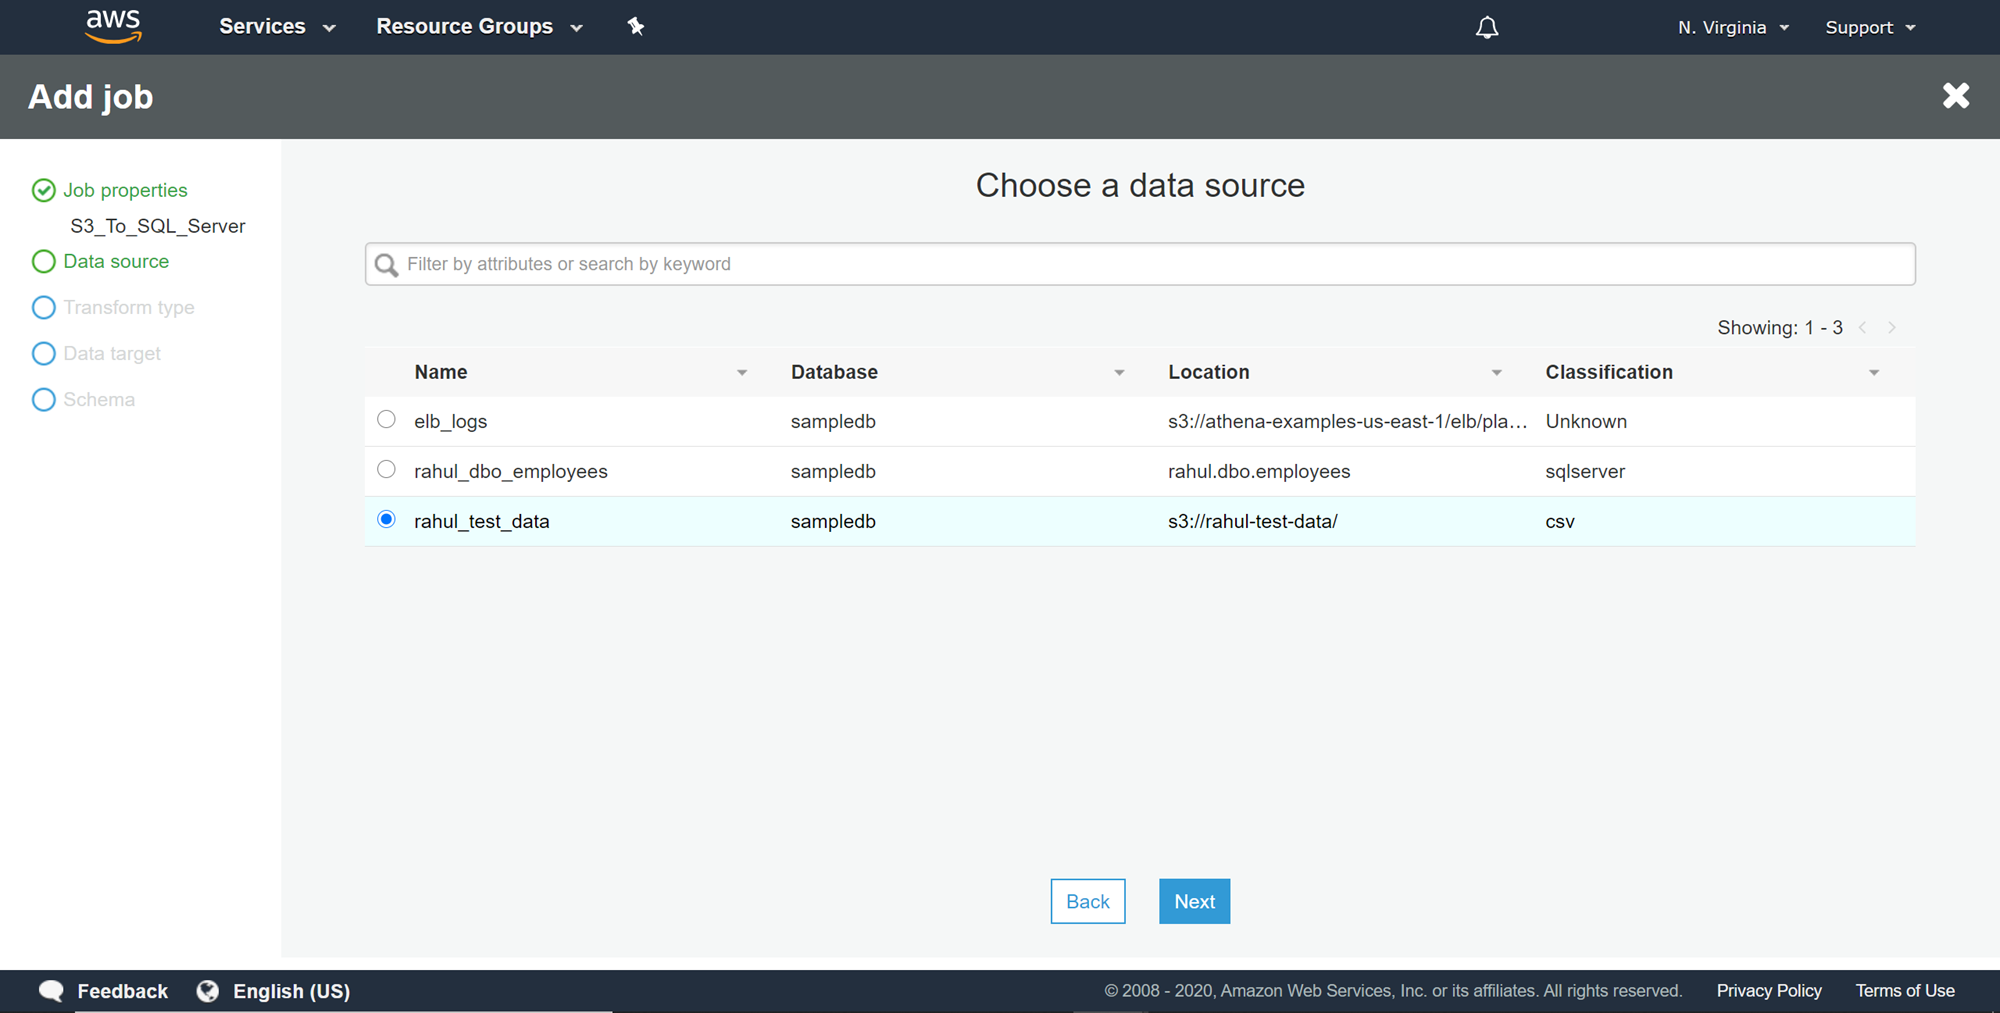
In this step, we need to select the data source, which is the table from the metadata catalog that points to the S3 bucket. Select the relevant table as shown below and click Next.
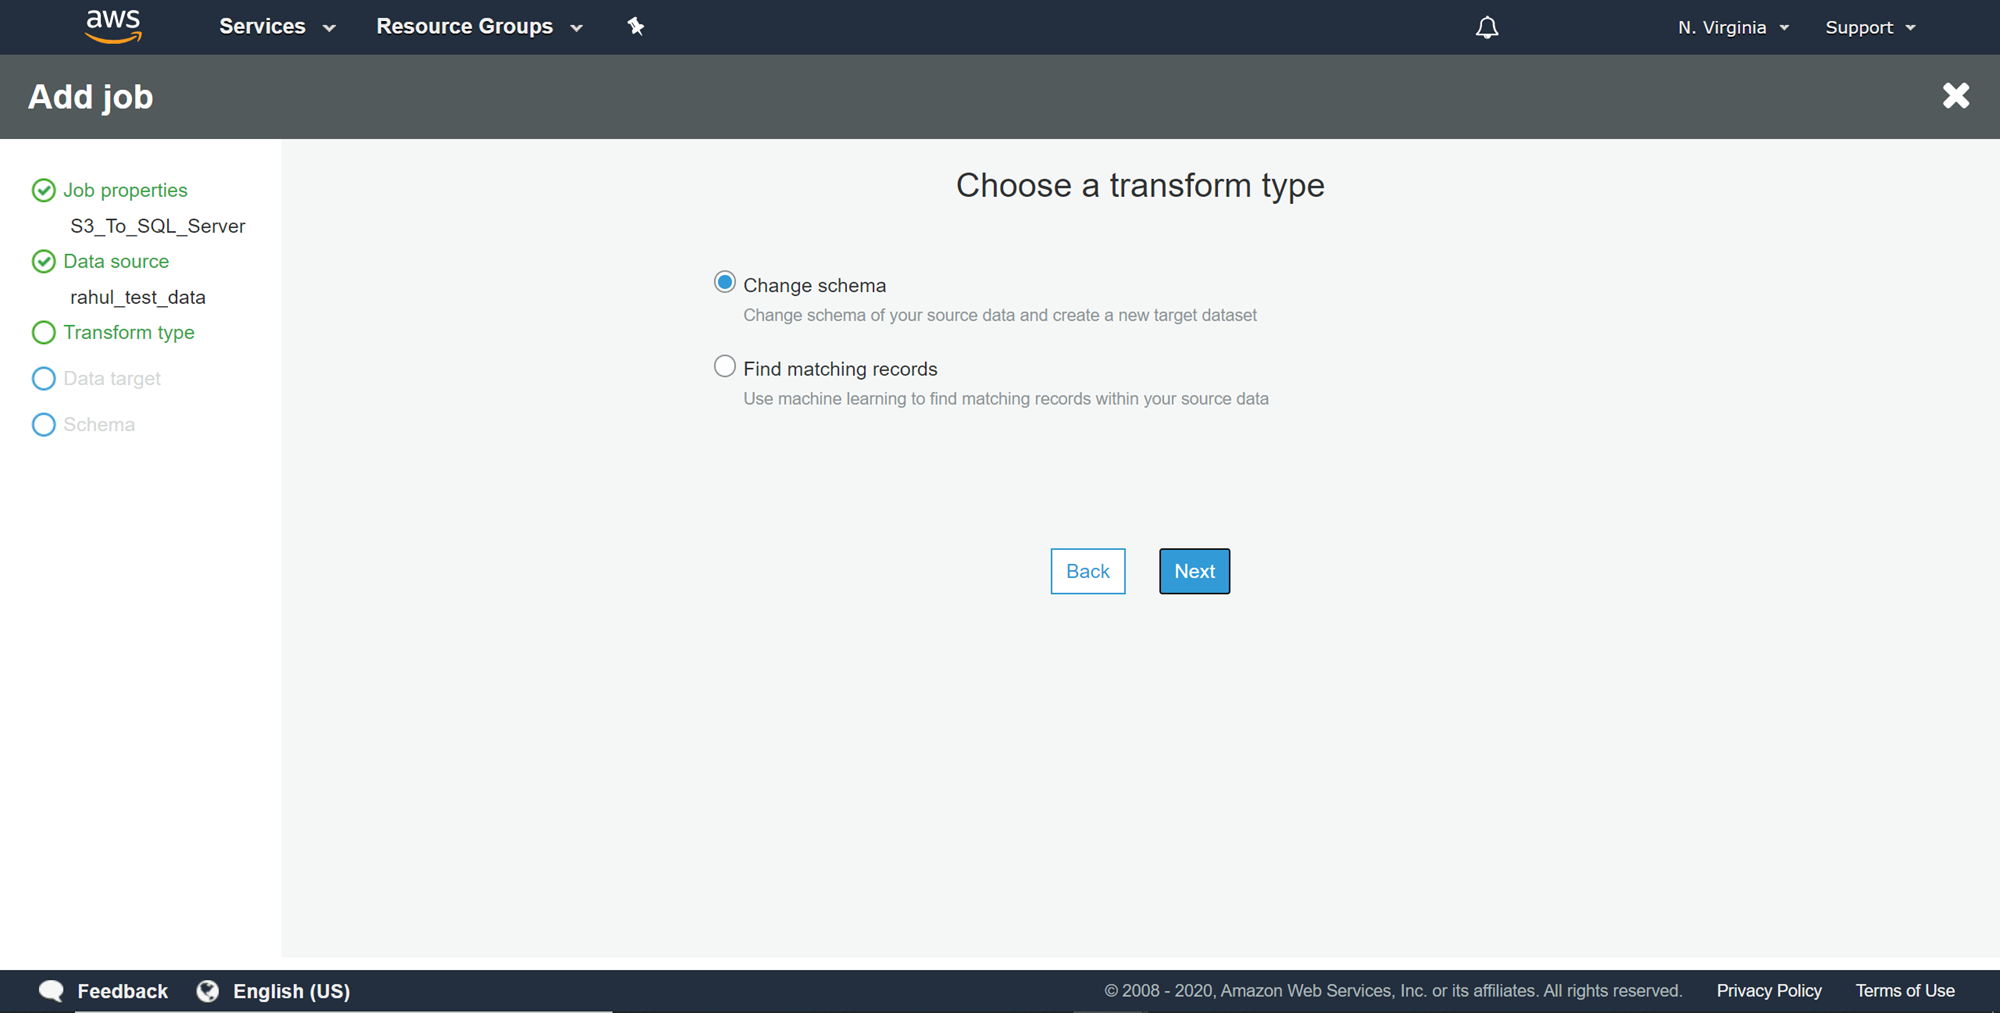
We need to select a transformation type in this step. Even can select not to make any transformation in the next step, but at this step, we need to either changing of schema or find matching records (for deduplication) as one of the transform types. Select Change schema and click Next.
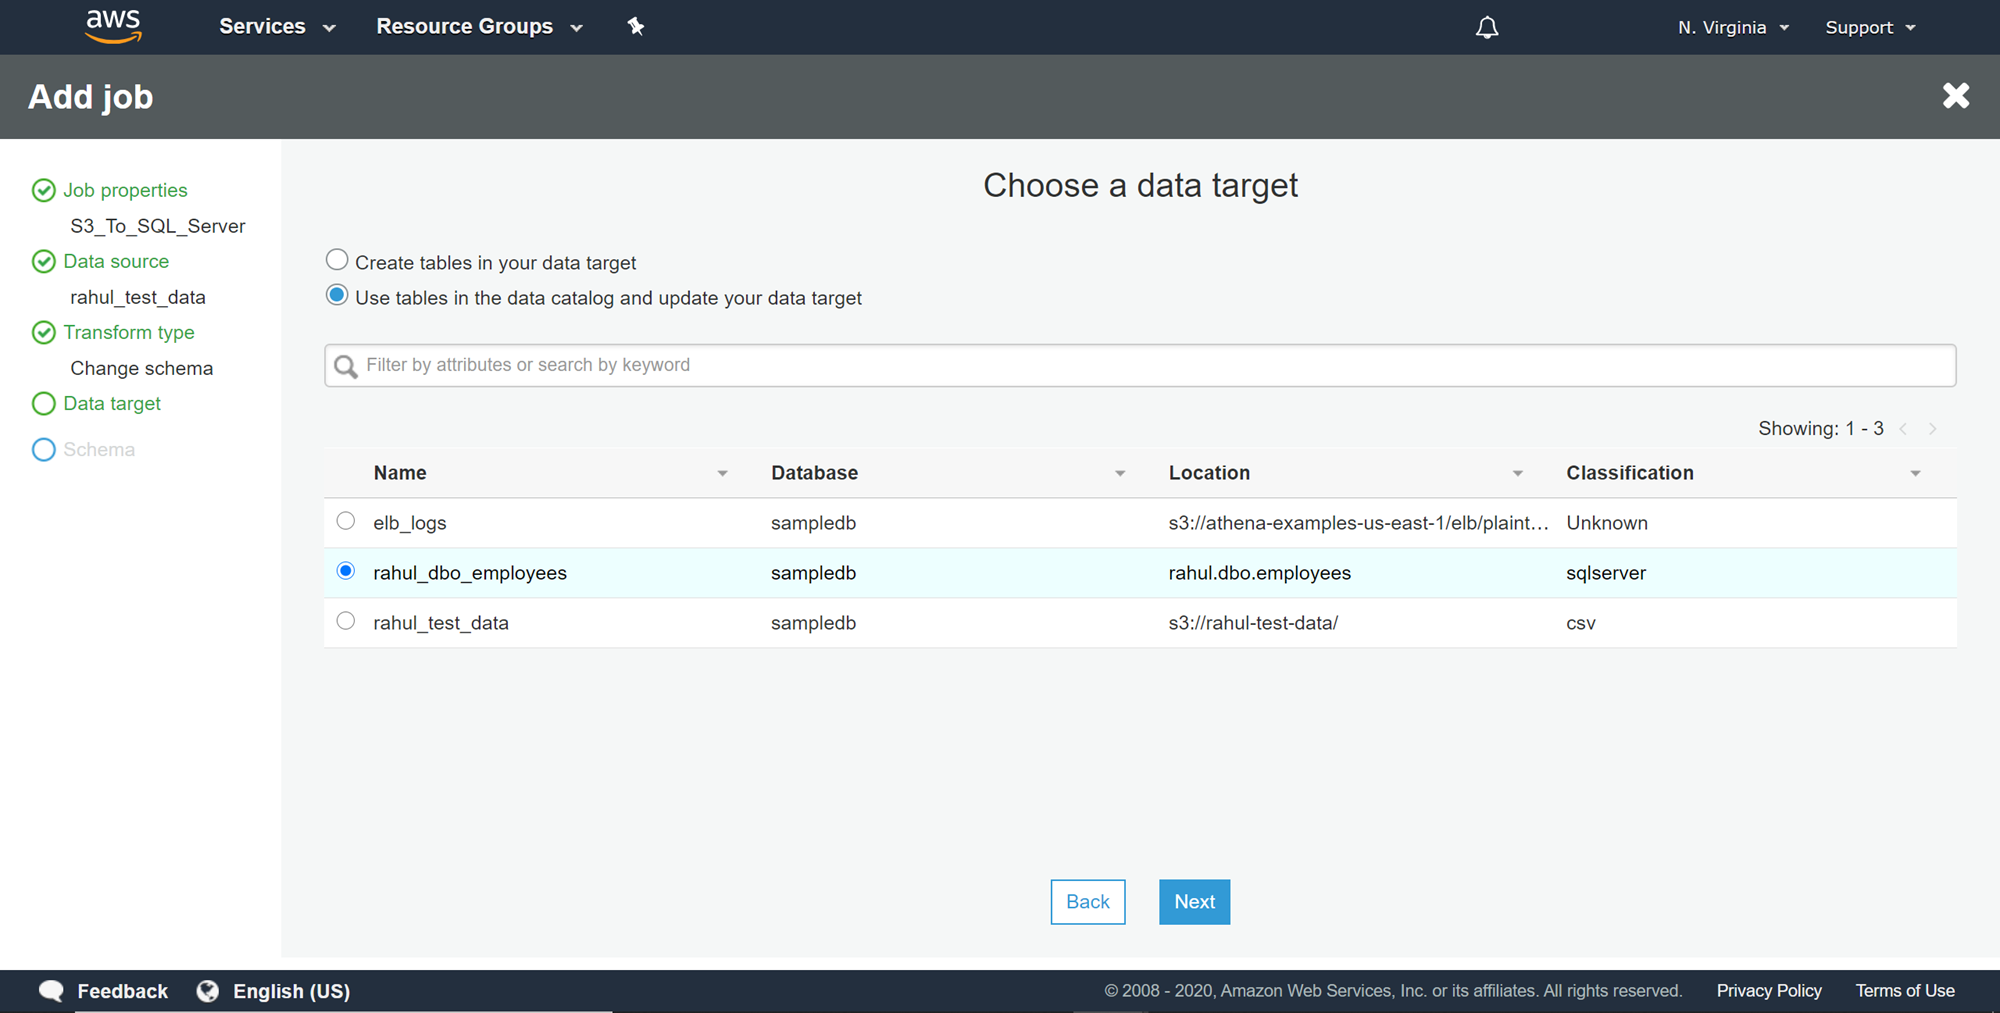
Now we need to select the destination metadata table that points to our AWS RDS SQL Server table. Select the relevant table as shown below and click Next.
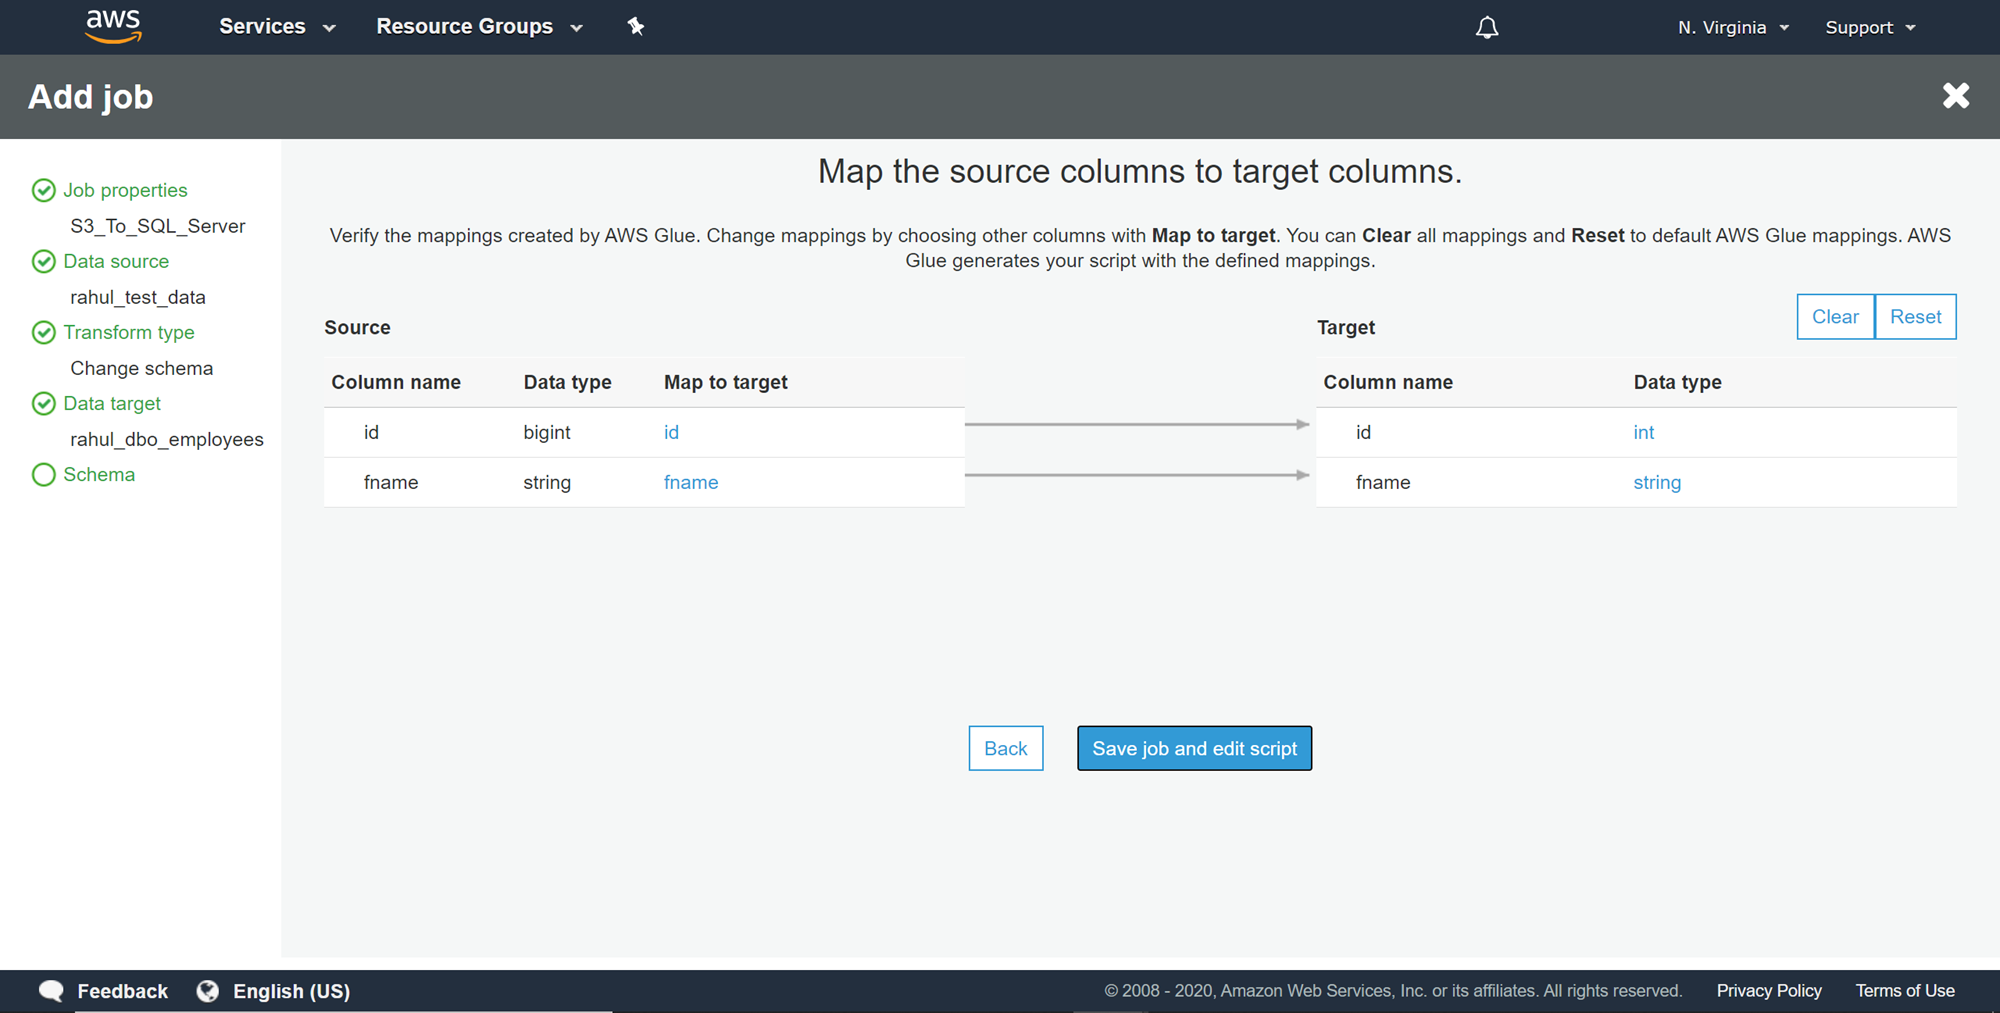
In this step, we can make the required changes to the mapping and schema if required. As we do not need to make any changes to the mapping, we can click on the Save job and edit script button.
This would take us to the python script generated by this job for the ETL as per the specifications that we provided for the job. Now that our job is ready, we can click on the Run Job button to execute the ETL job.

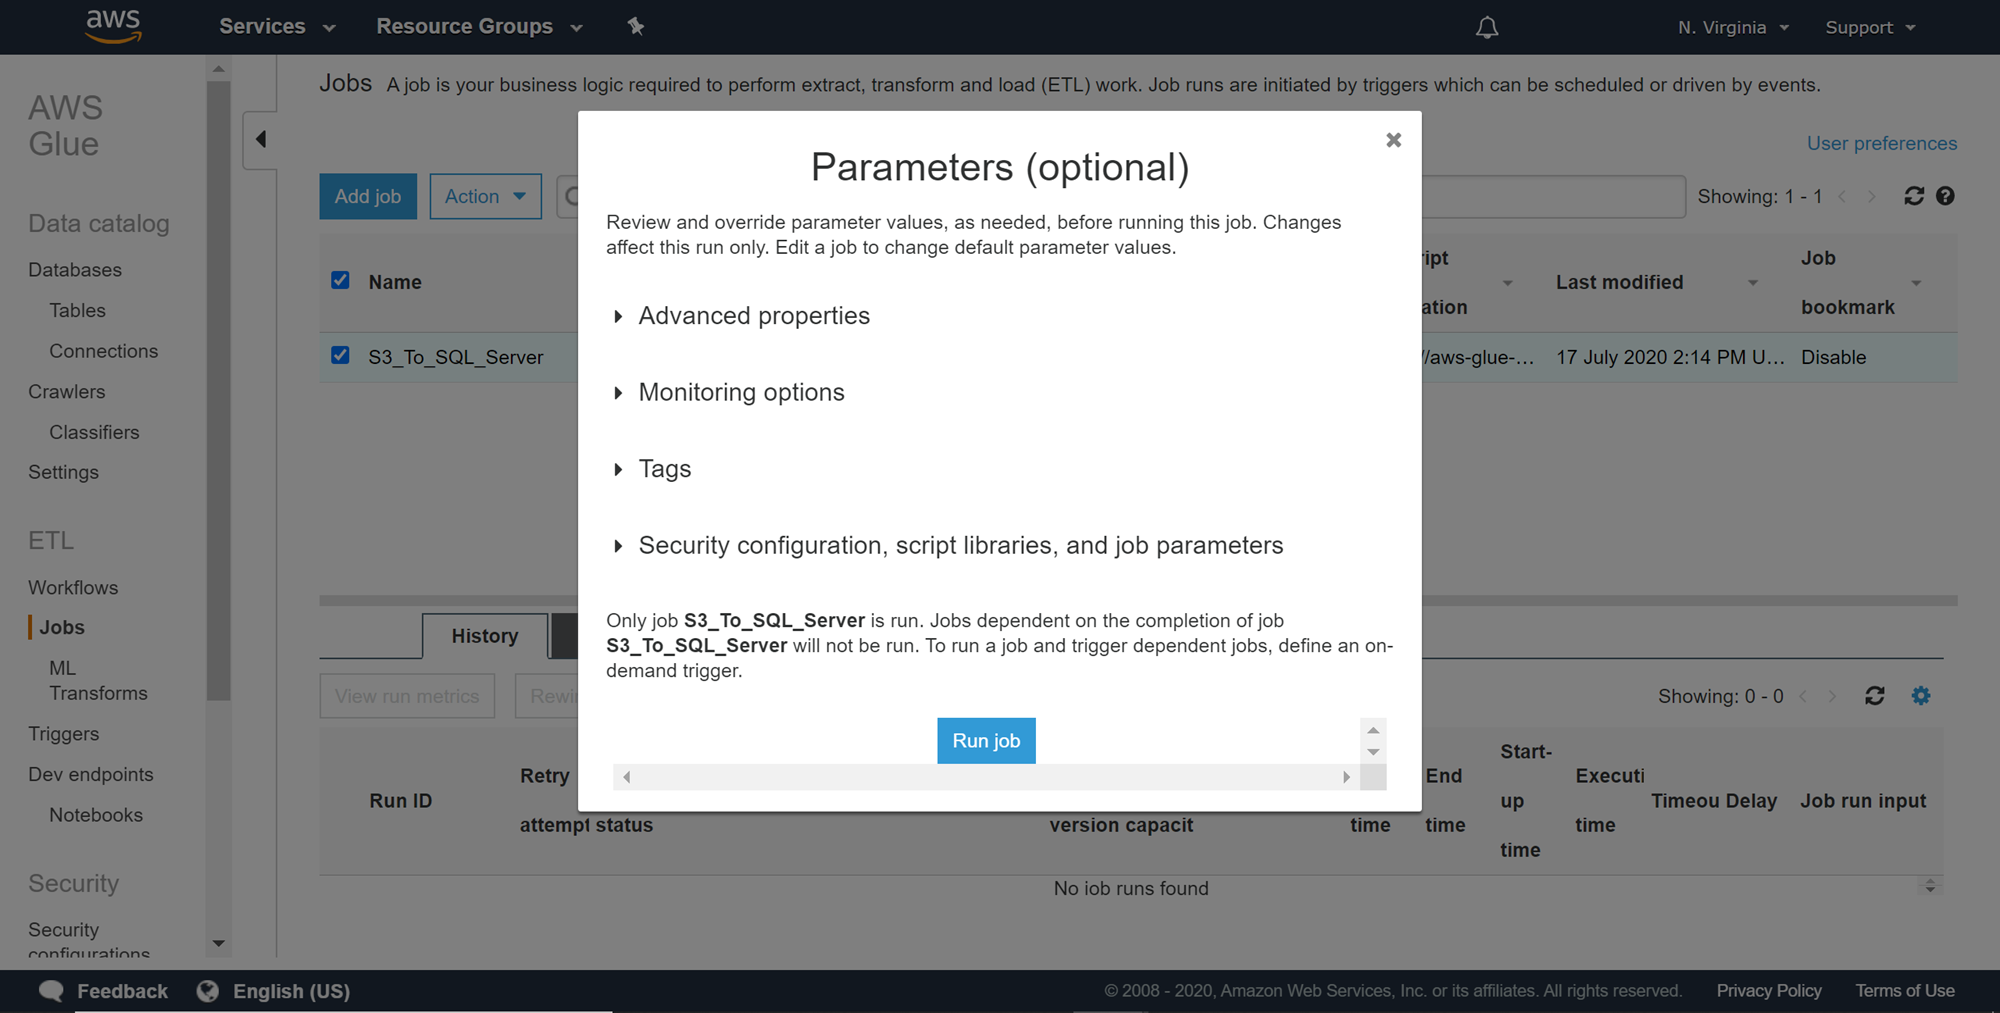
A prompt is shown before executing the job, where we can change runtime parameters if required. We do not need to change any parameters in our case, so click on the Run job button. This would start the execution of our ETL job.
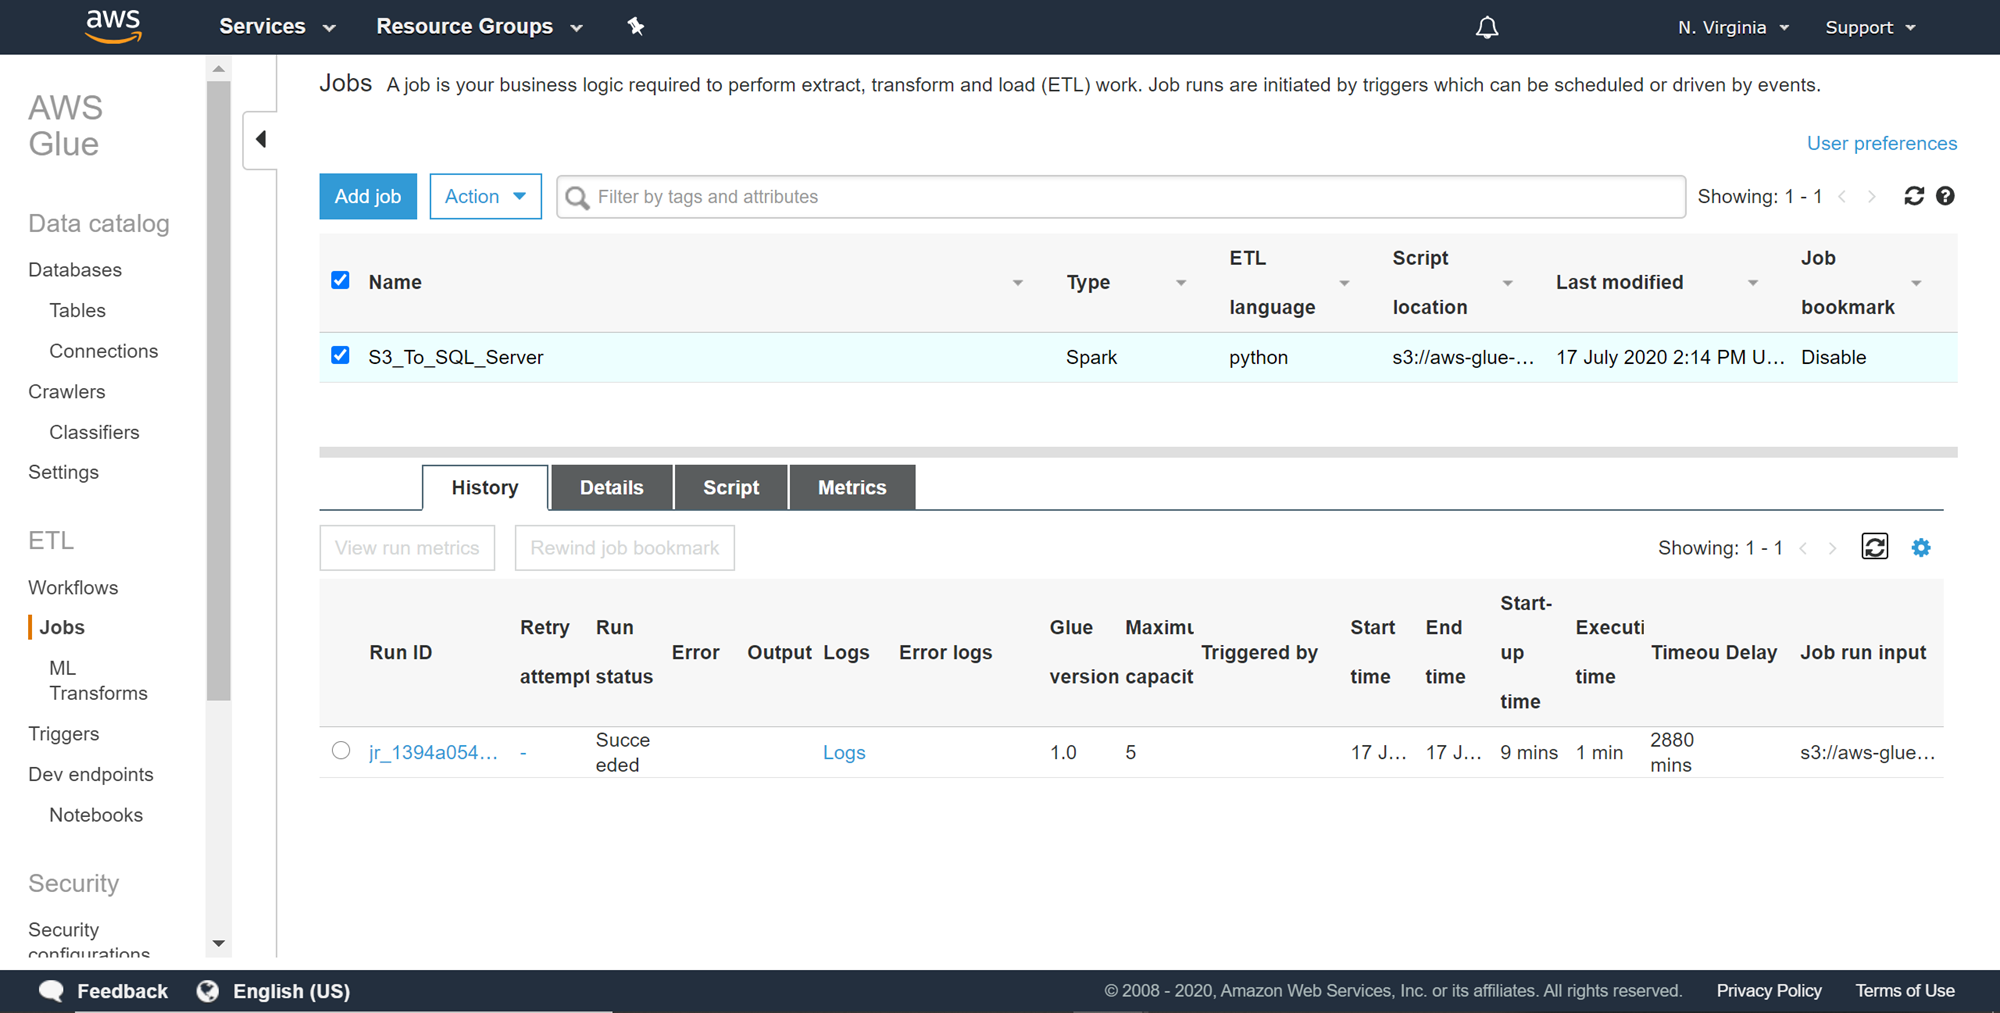
Once the job execution starts, you can select the job and it would show us the status of the job in the bottom pane as shown below. It can take a few minutes to start the job, as it warms up the spark environment in the background to execute the job. Once the job execution is complete, it would provide the details of the job execution in the bottom pane as shown below.
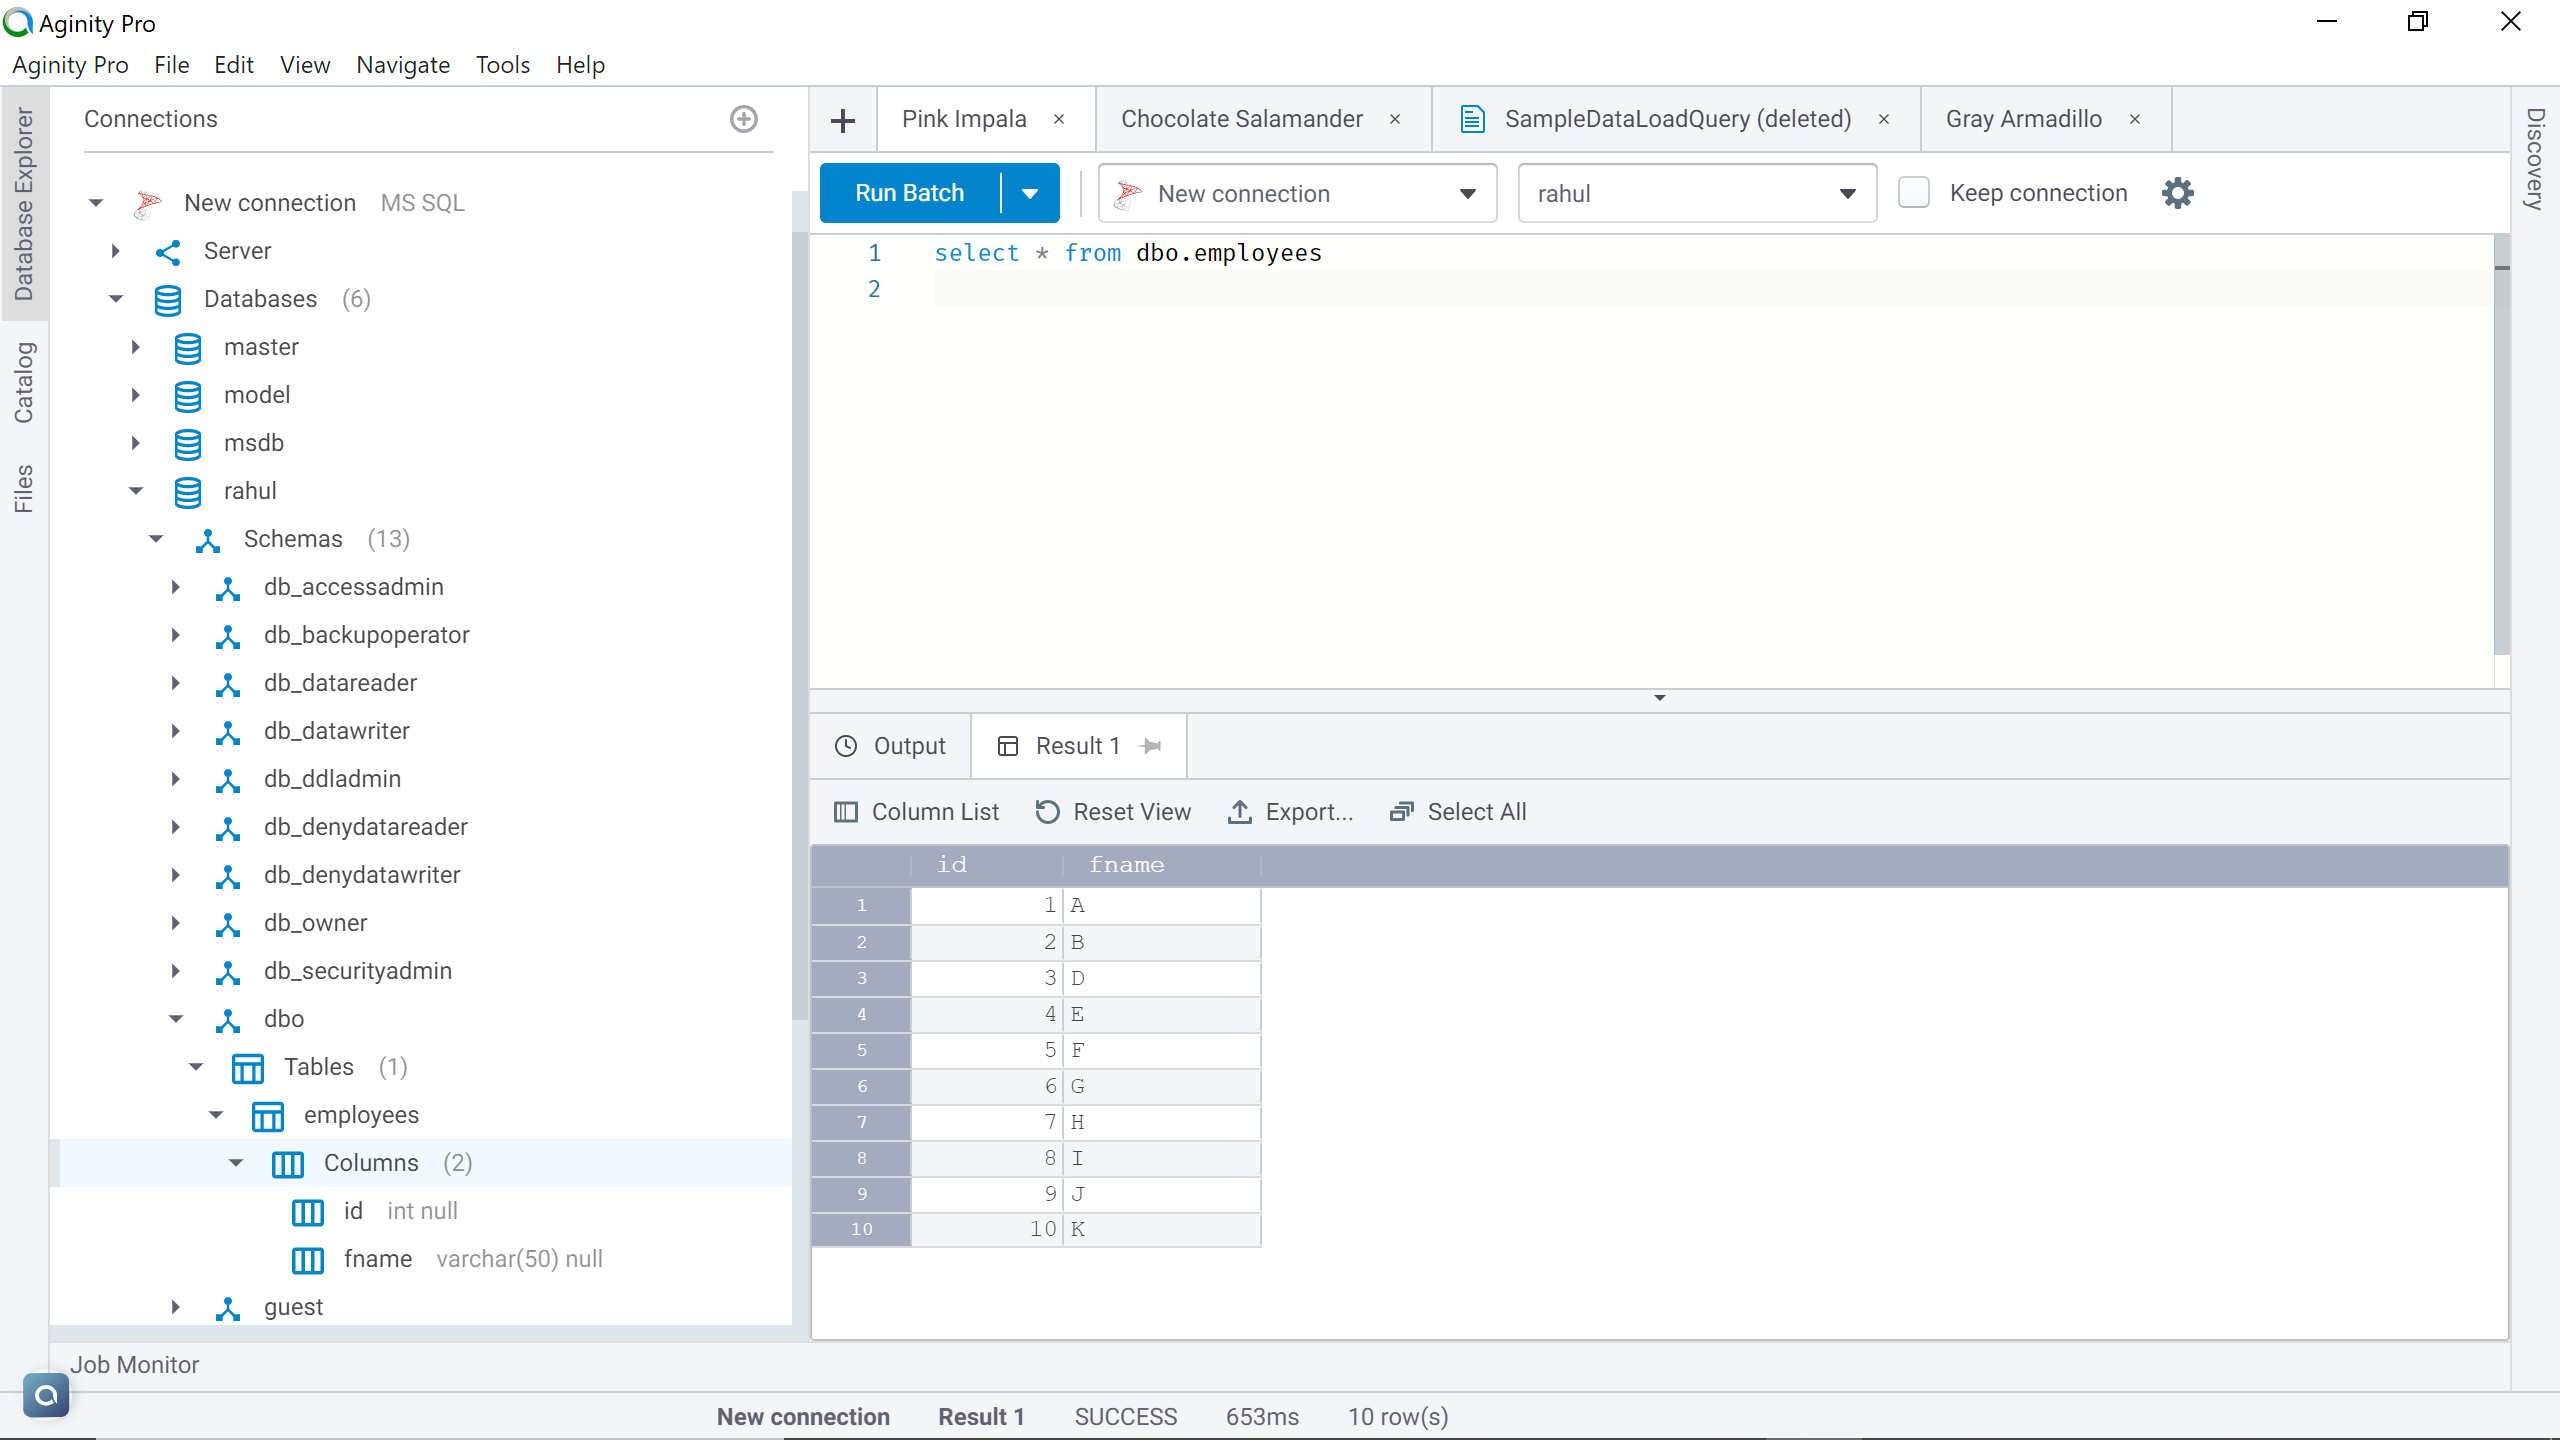
Now that the job has completed execution, if the job worked as expected, all the ten records that we have in our CSV file that is hosted on AWS S3, the same records should have got loaded into AWS RDS SQL Server table that we created earlier. Navigate to a query editor and query the SQL Server table. You should be able to see all those records in the table as shown below.
In this way, we can use AWS Glue ETL jobs to load data into Amazon RDS SQL Server database tables.
Conclusion
In this article, we learned how to use AWS Glue ETL jobs to extract data from file-based data sources hosted in AWS S3, and transform as well as load the same data using AWS Glue ETL jobs into the AWS RDS SQL Server database. We also learned the details of configuring the ETL job as well as pre-requisites for the job like metadata tables in the AWS Glue metadata catalog.
Table of contents

He has worked internationally with Fortune 500 clients in various sectors and is a passionate author.
View all posts by Rahul Mehta
- Finding Duplicates in SQL - February 7, 2024
- MySQL substring uses with examples - October 14, 2023
- MySQL group_concat() function overview - March 28, 2023