
This article provides a step by step explanation of how to get started with AWS Sagemaker by creating an AWS SageMaker instance for using machine learning related features on AWS Cloud.
Introduction
Before the advent of cloud, machine learning (ML) and artificial intelligence (AI) was limited to organizations and professionals who had the financial power to afford the required hardware and software, as well as expertise to operate machine learning algorithms and applications. Cloud has democratized access to machine learning and artificial intelligence by packaging AI/ML hardware and software in an affordable pricing model, as well as abstracting the huge complexity of setting up the environment itself for kick-starting AI/ML applications. AWS SageMaker is the primary and key service on the AWS cloud that provides a platform to build ML applications at scale. It comes packed with several machine learning frameworks like Tensorflow, MXNet, etc., AWS SDKs, and programming languages like Python.
It’s a completely managed service, so one does not need to manage setting up infra, installing the software stack, configuring the network topology, and other such administrative tasks. AWS SageMaker clubs several services like SageMaker GroundTruth, SageMaker AugemendAI, SageMaker Marketplace, and other such services and features. All of these can be accessed by using the AWS SageMaker API or by using AWS SDK / CLI from the AWS SageMaker instance. In this article, we are going to create a SageMaker instance and access ready-to-use SageMaker examples using Jupyter Notebooks.
AWS SageMaker setup
In this exercise, we are going to create a new instance of SageMaker on AWS. It’s assumed that you already have an AWS account with required access privileges on SageMaker. Log on to the AWS Console, type SageMaker in the search bar, which will provide an item link, and click on the same to navigate to the AWS SageMaker home page. Once you land on the home page, it should look as shown below.
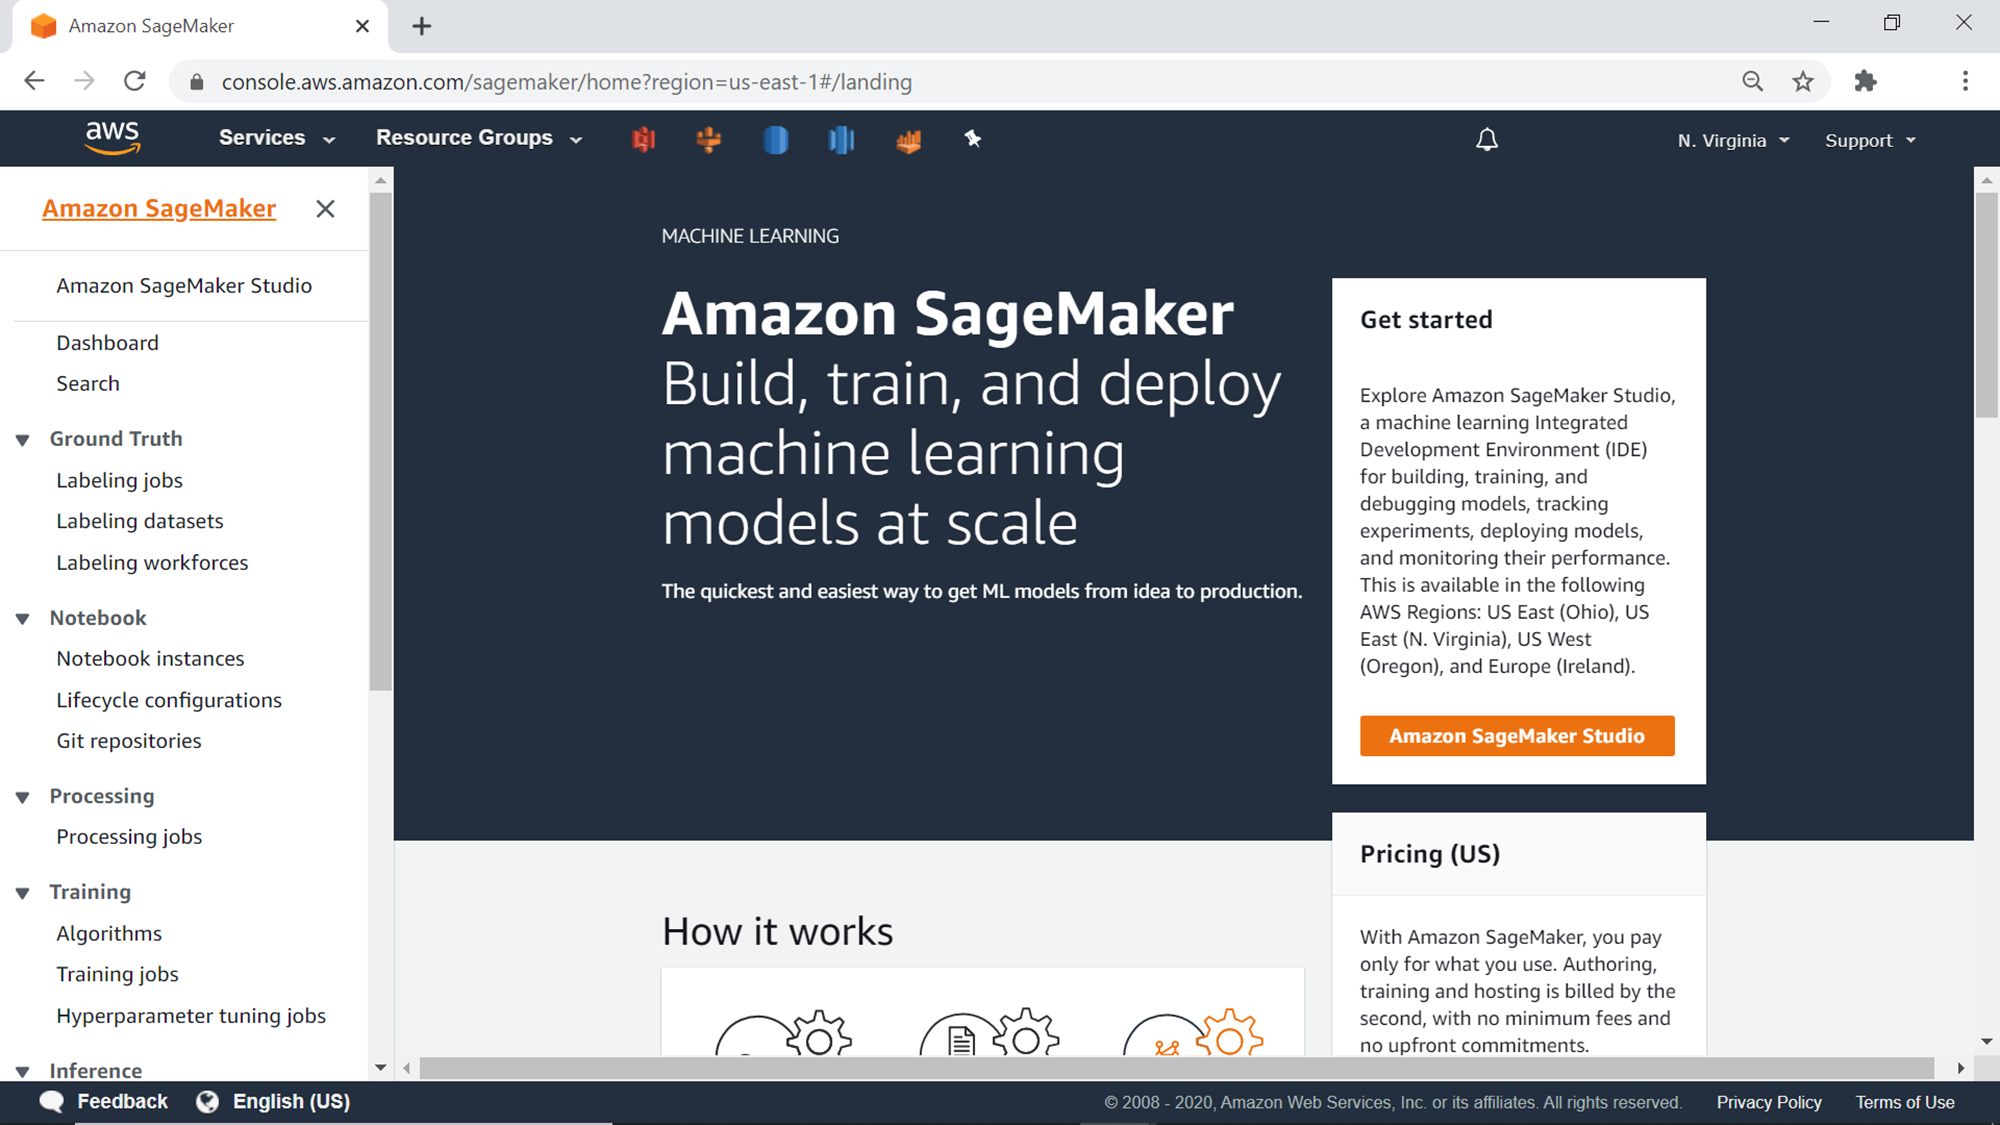
There are two ways to access Amazon SageMaker. One is by creating SageMaker Studio, which is an IDE for building, debugging, operating, and deploying machine learning models. Another way is to create a SageMaker notebook instance, which we are going to cover in this exercise as Jupyter notebook instances are one of the standard ways to access many different types of AWS services.
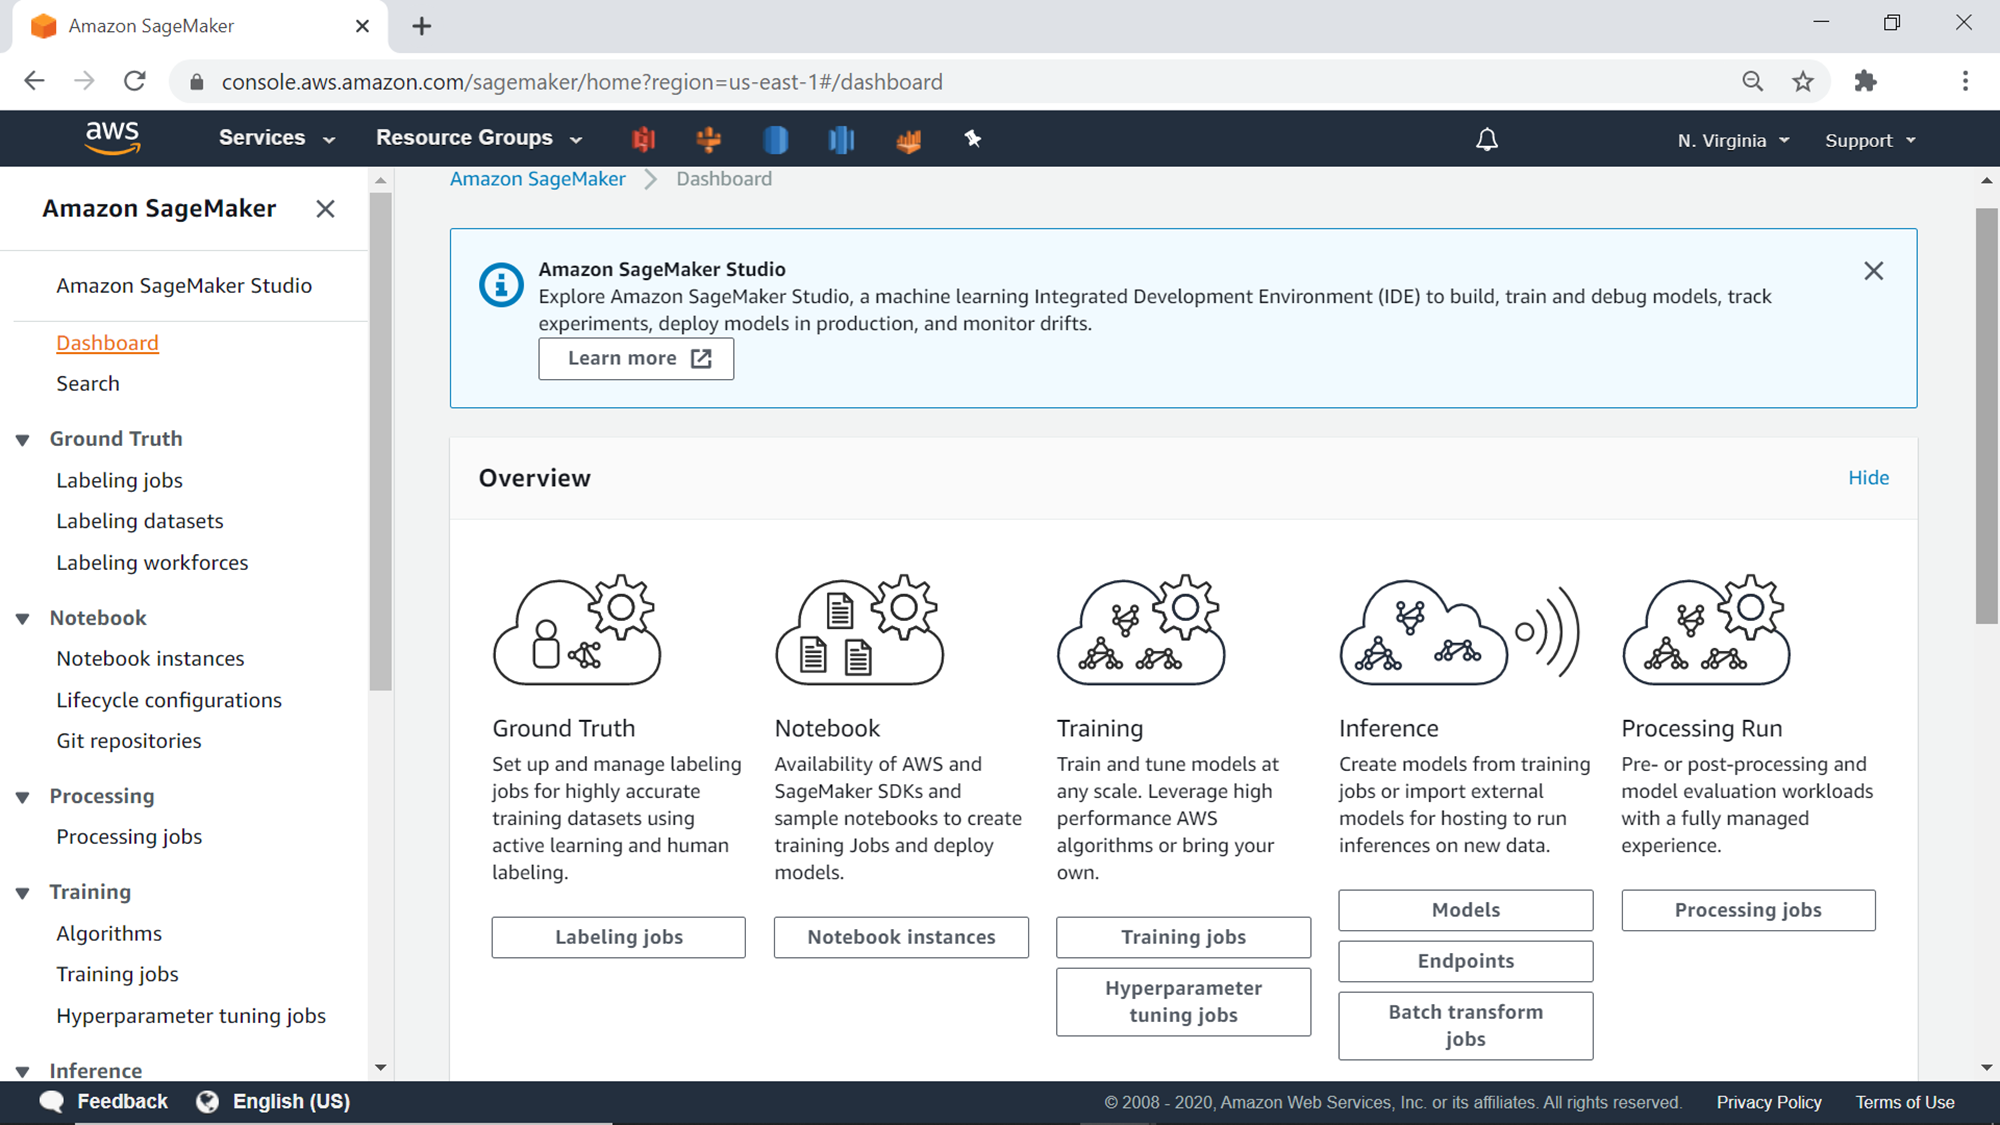
Before starting with the creation of an AWS SageMaker notebook instance, let’s look at the Dashboard, as shown below. Click on the Dashboard menu item on the left pane. This view shows the status of all the ongoing activities and status of tasks in the selected AWS Region, which can be seen on the top-left side on the screen. By default, the selected region would be N. Virginia. You can click on this and change it to the region of your choice, where you may intend to create the SageMaker instance.
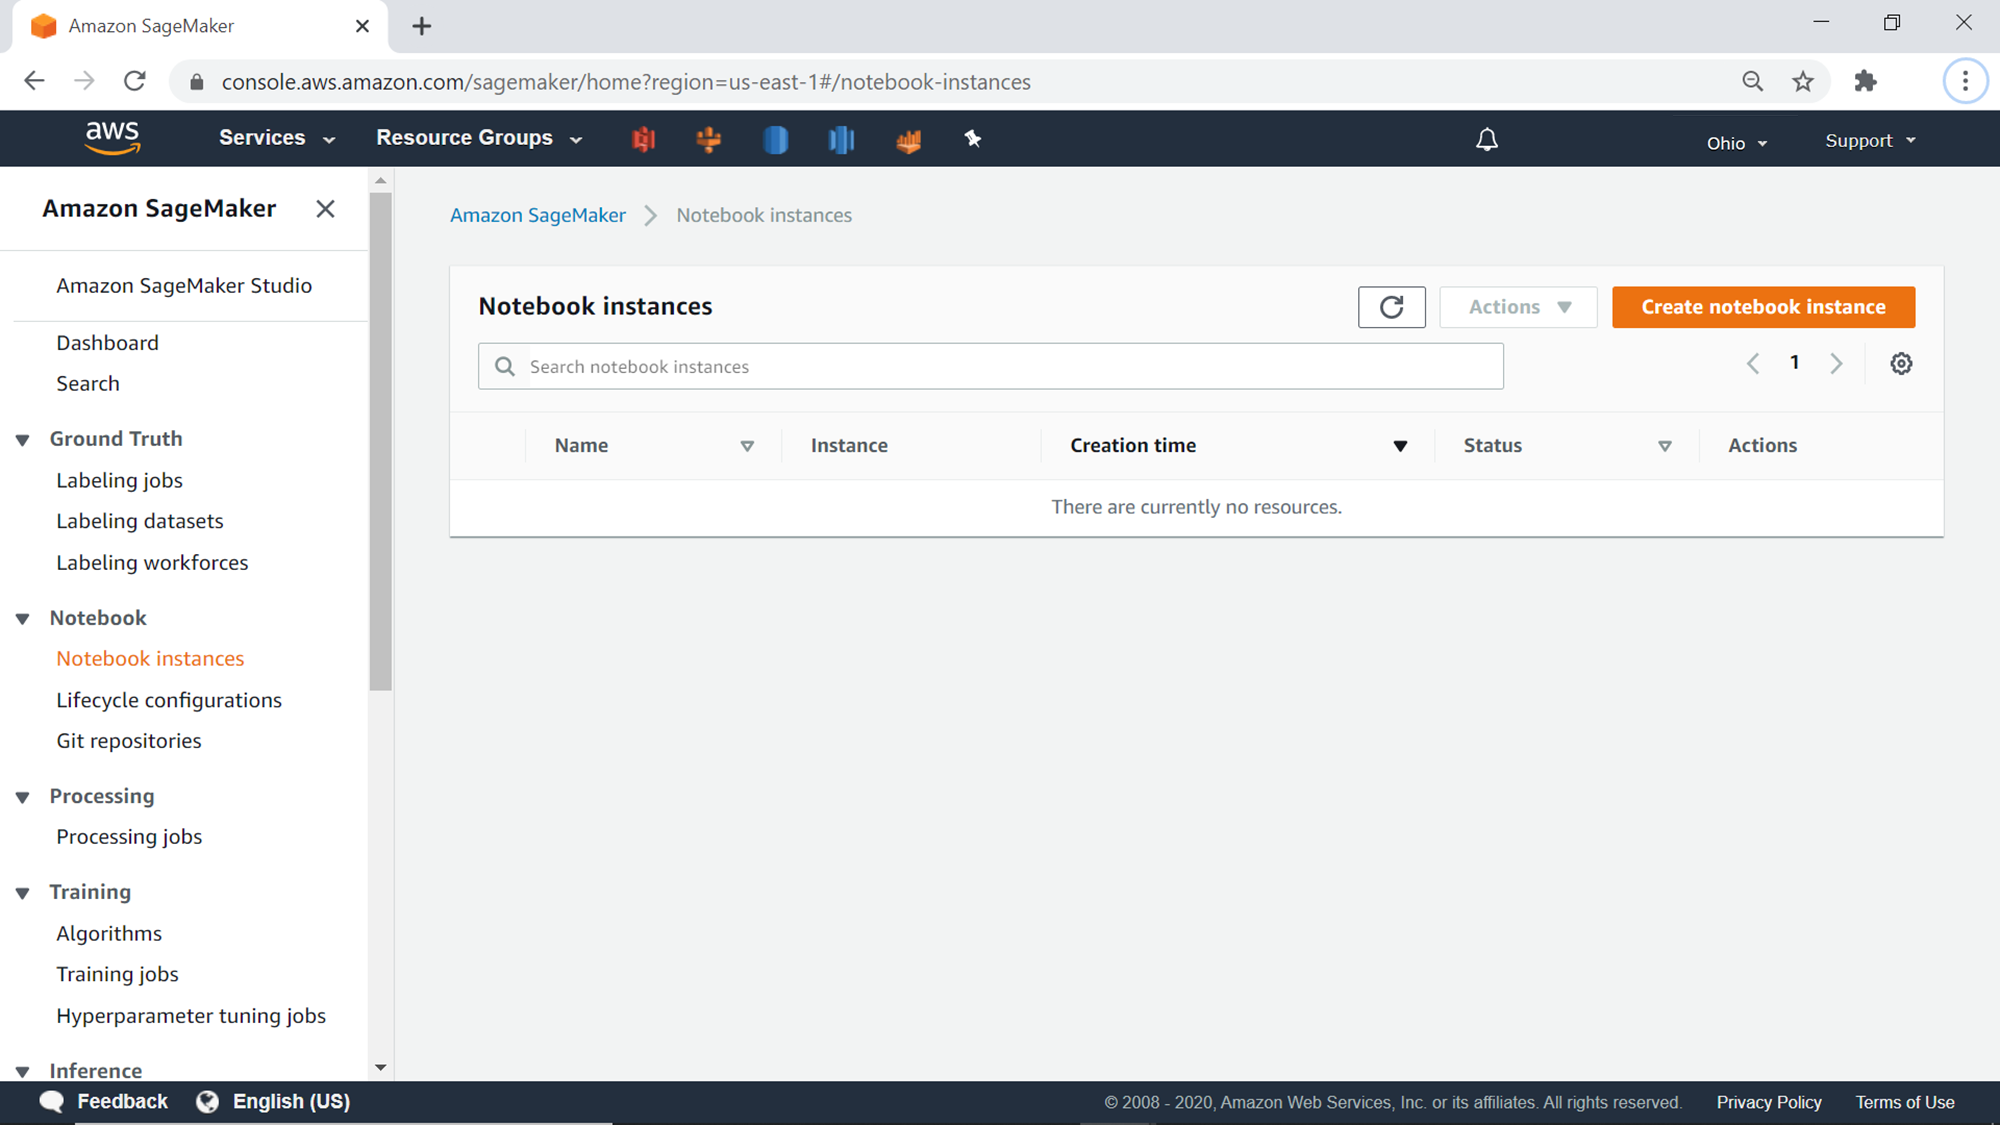
Click on Notebook instances under the Notebook section, and you would find a screen a show below. If you are using SageMaker for the first time, you would not have any instances. Let’s go ahead and create our first instance by clicking on Create notebook instance.
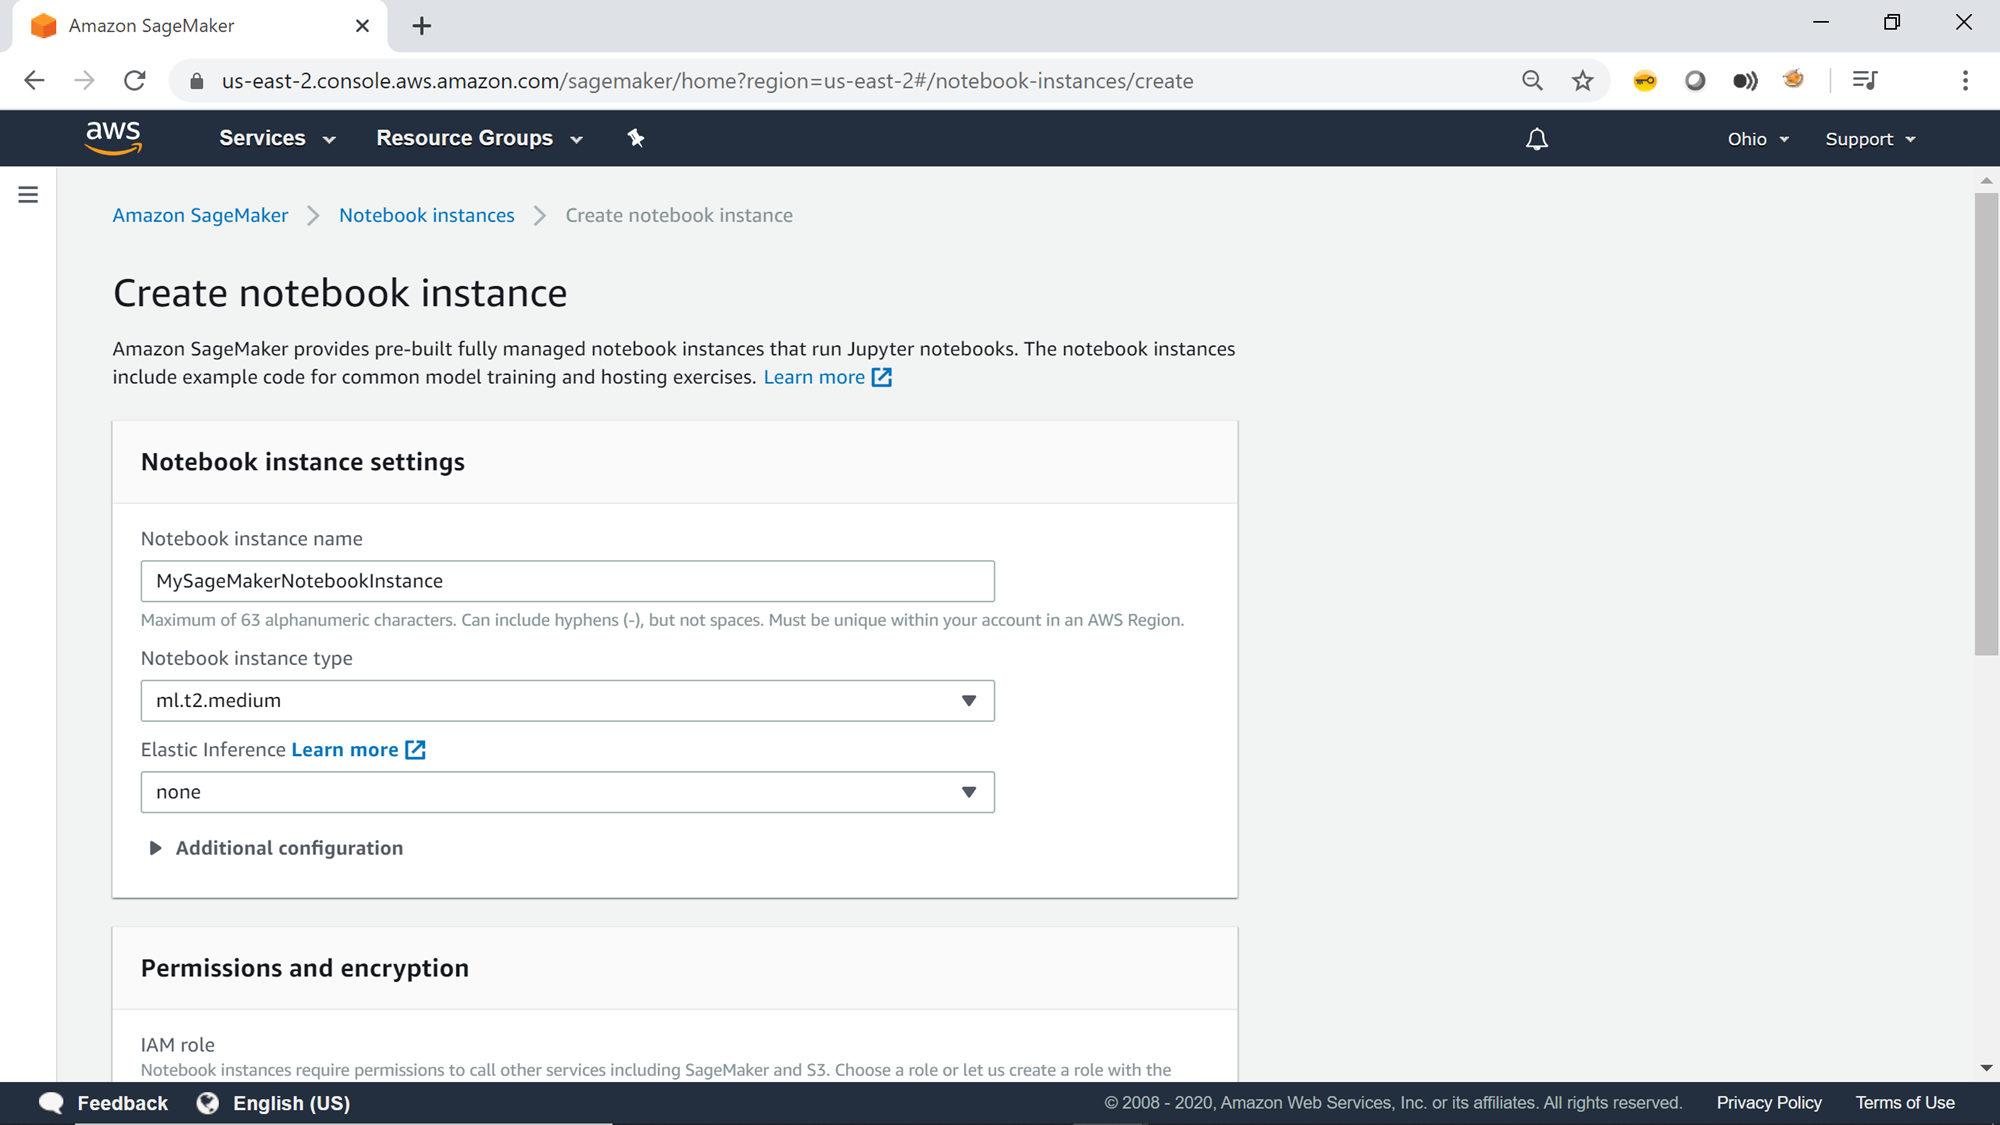
Once you click on the button, it will open up an instance creation wizard, as shown below. As it’s a managed service, we do not need to manage creating on any virtual machine or similar infrastructure. The only input required from our side is the configuration of the Jupyter server instance. The first detail is the name of the notebook instance. Provide a relevant name, as shown below. The default notebook instance type is ml.t2.medium. One can opt for a larger capacity instance if you anticipate a lot of data download on the instance itself and execute large scale jobs on the instance. In that case, change the instance type to a larger instance size.
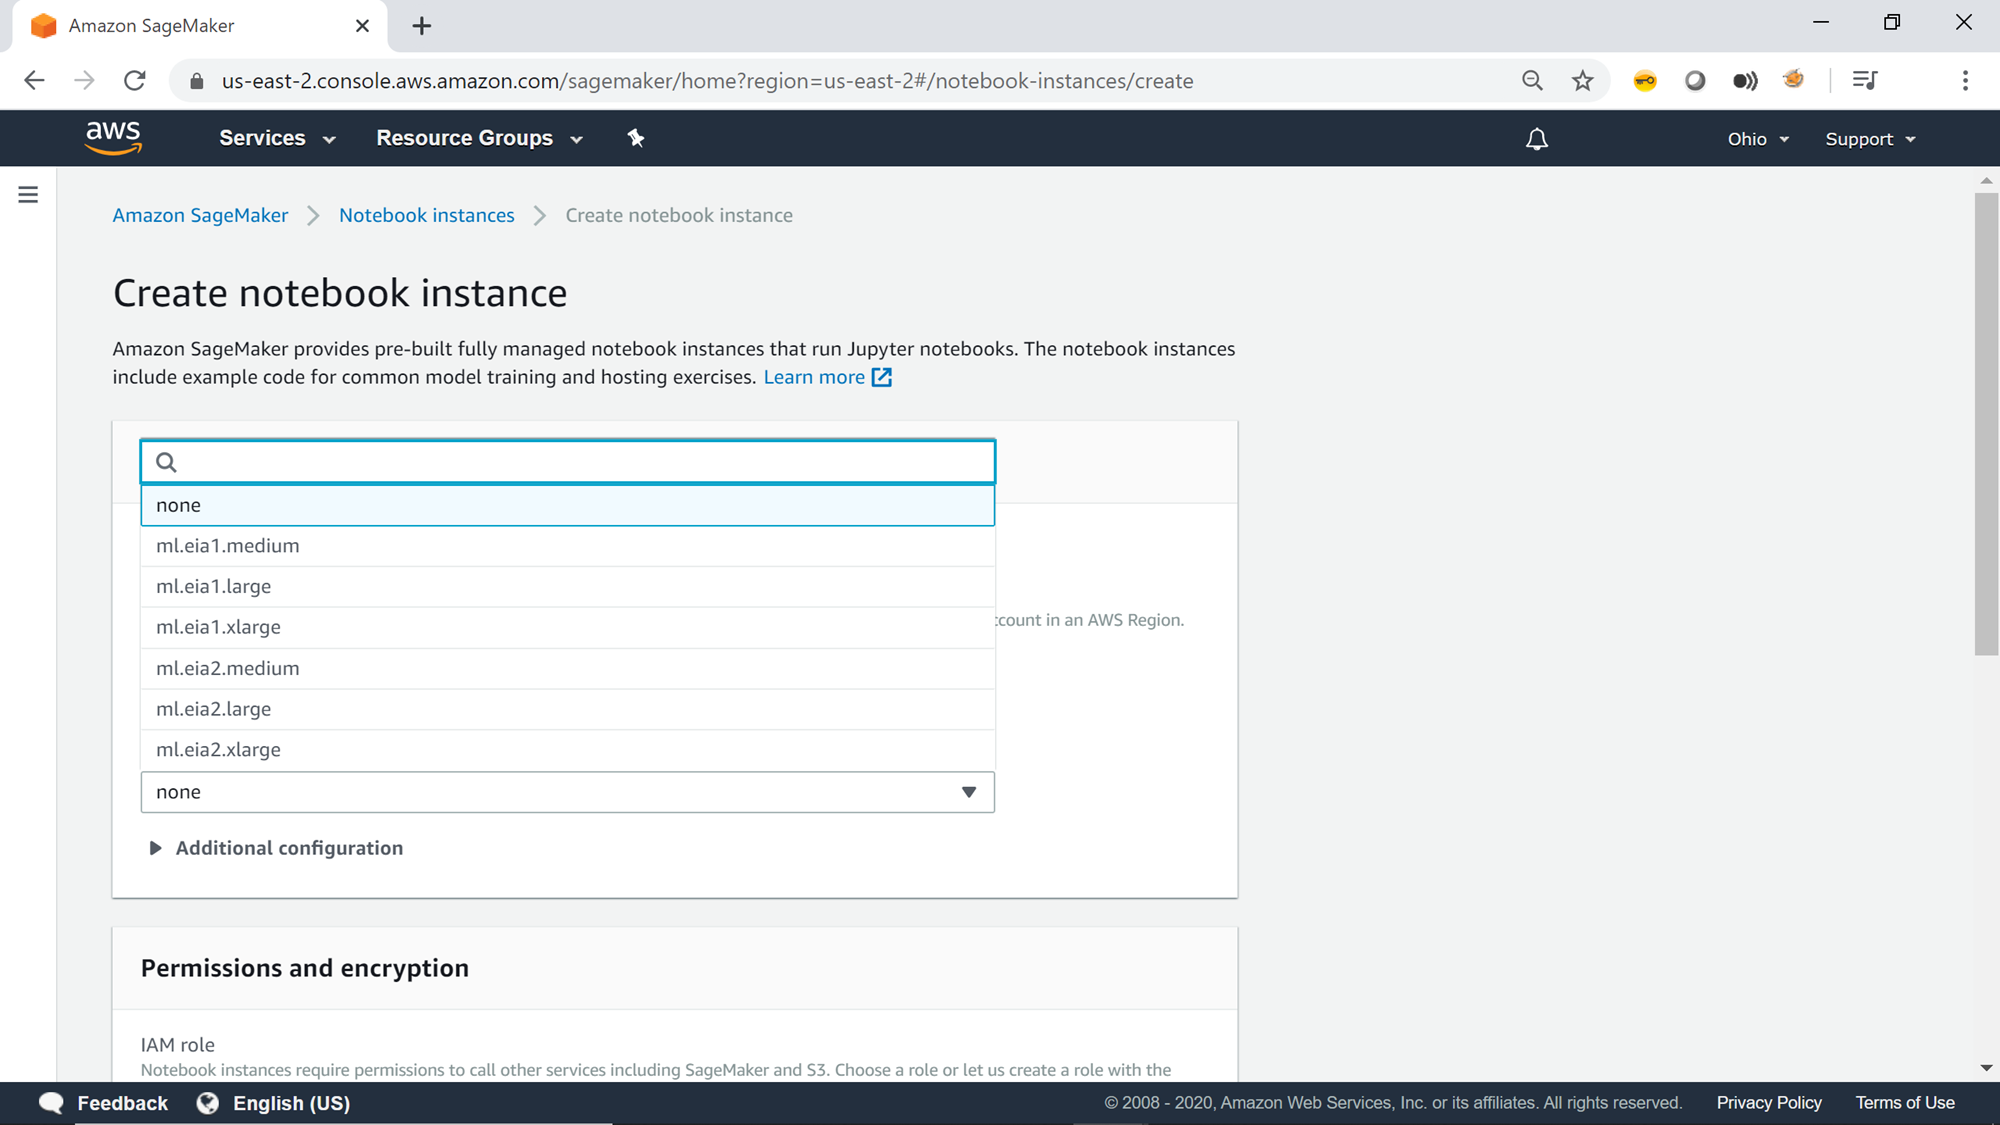
By default, the Elastic Inference value is set to none. The inference is the process of applying the model derived from the training of a deep neural network to infer or deduce the output from the input dataset. The inference process gets speed up by using Graphical Processing Units (also known as GPUs). The cost of using GPUs can be quite high, and your deep learning ML algorithms may not need GPU processing all the time. Elastic Inference enables us to use fractional GPU capacity as per the needs and help to balance the cost. There are various sizes of Elastic Inference available in SageMaker, as shown below.
Click on the additional configuration section and expand it, as shown below. It provides options to manage the lifecycle configuration as well as the size of the disk attached to the instance. Lifecycle configuration provides a mechanism to specify scripts that would execute when the instance starts. One can use it to set up and install required packages, scripts, or other operations that one would like to perform when the instance boots up. This is an optional setting, and for our exercise, we can use the default value of none. The default setting for the t2.ml.medium instance is 5 GB. One can increase this size if high data storage on this instance is anticipated.
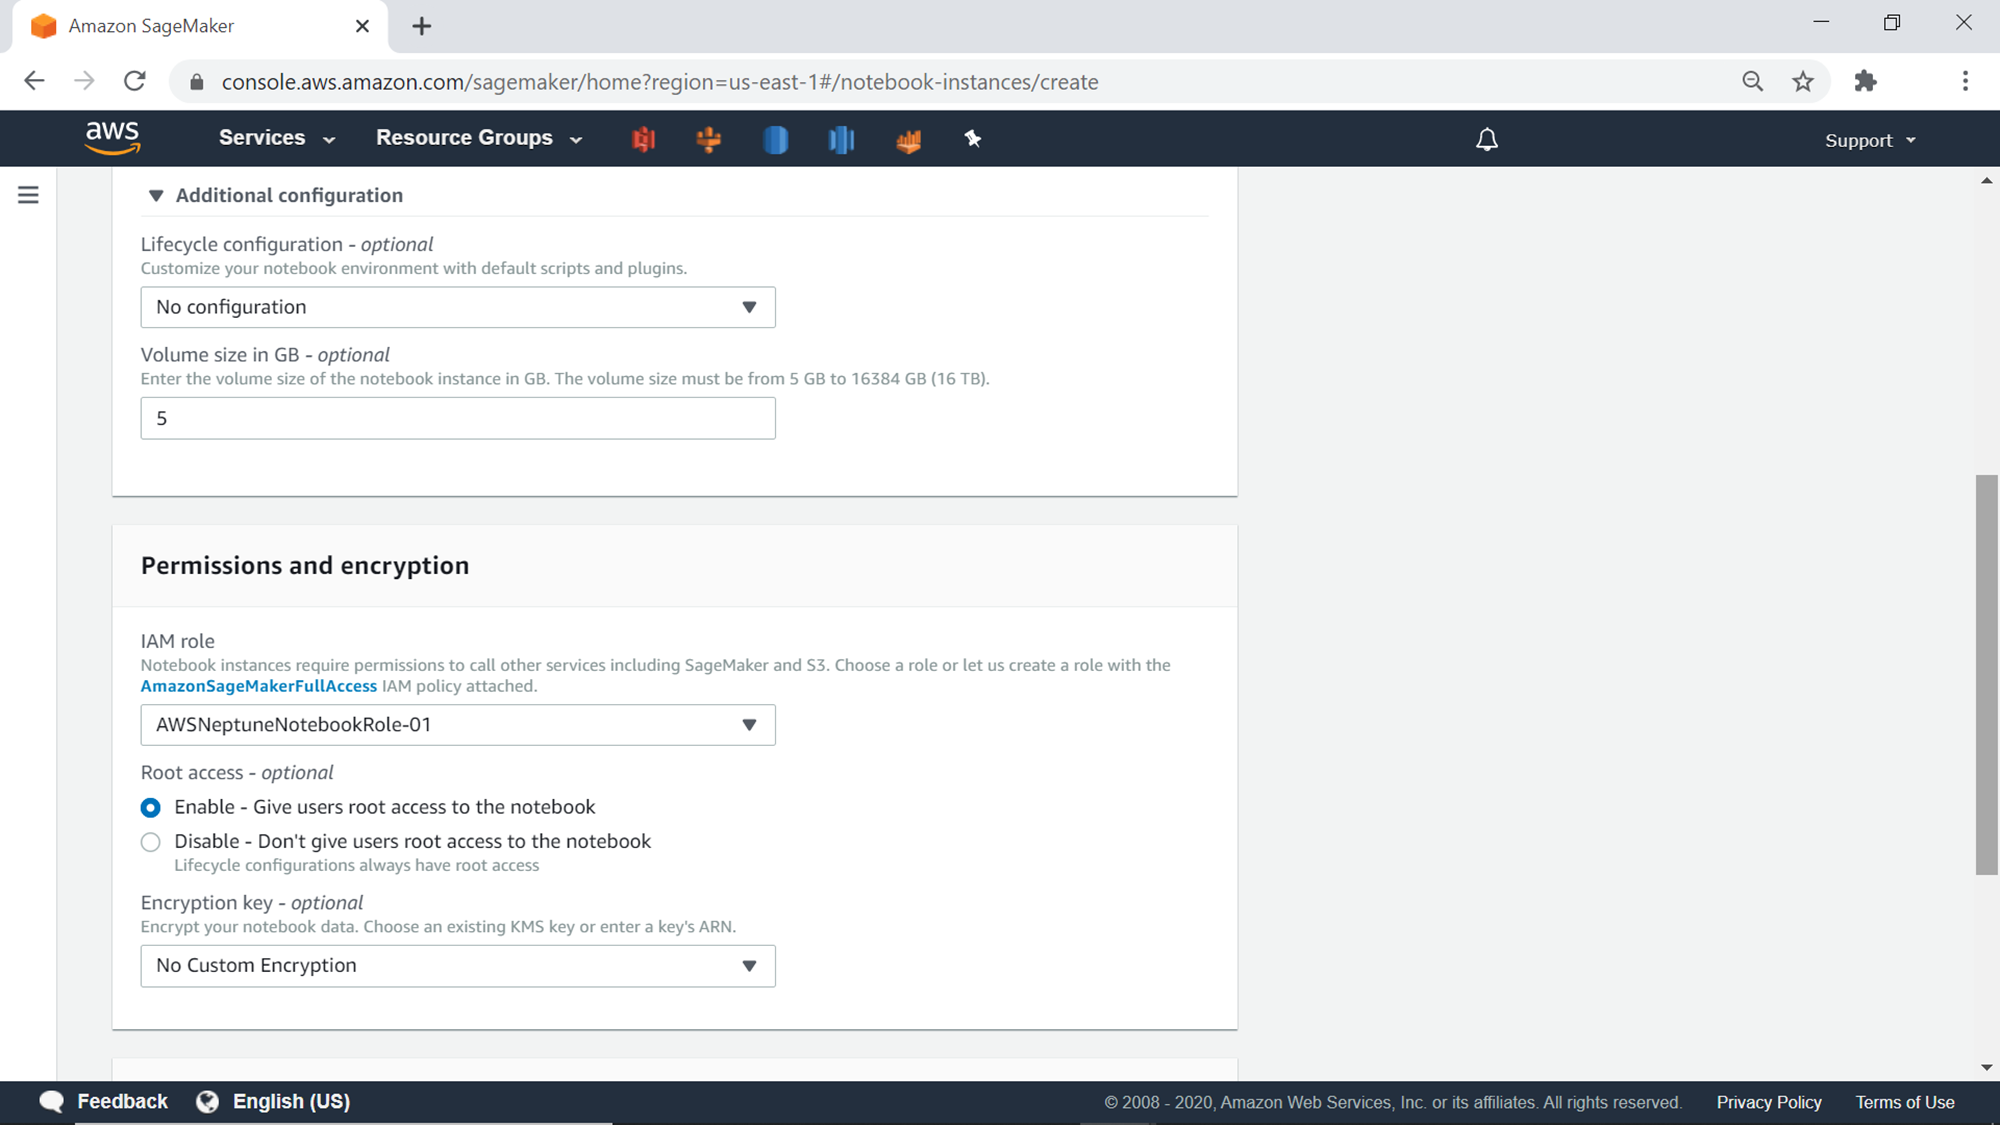
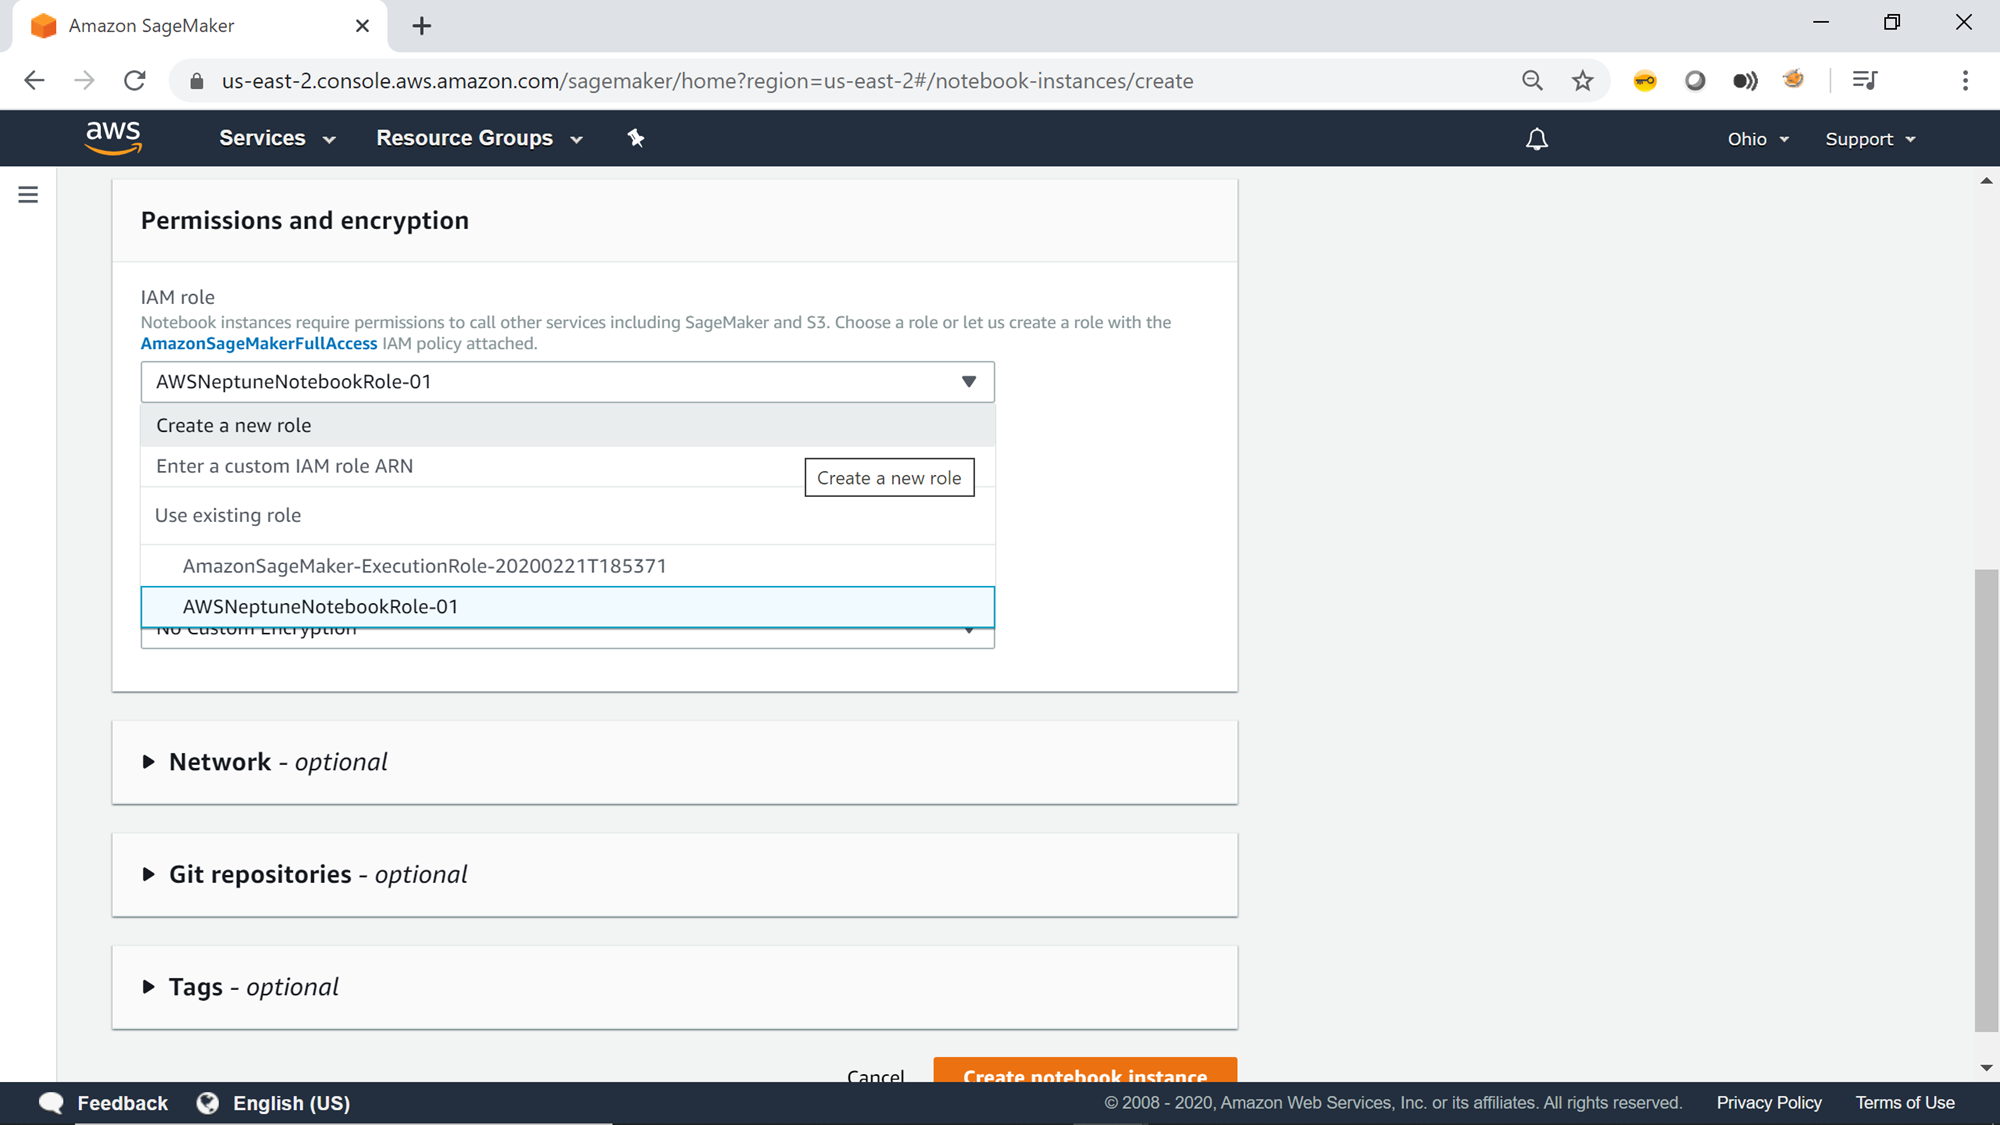
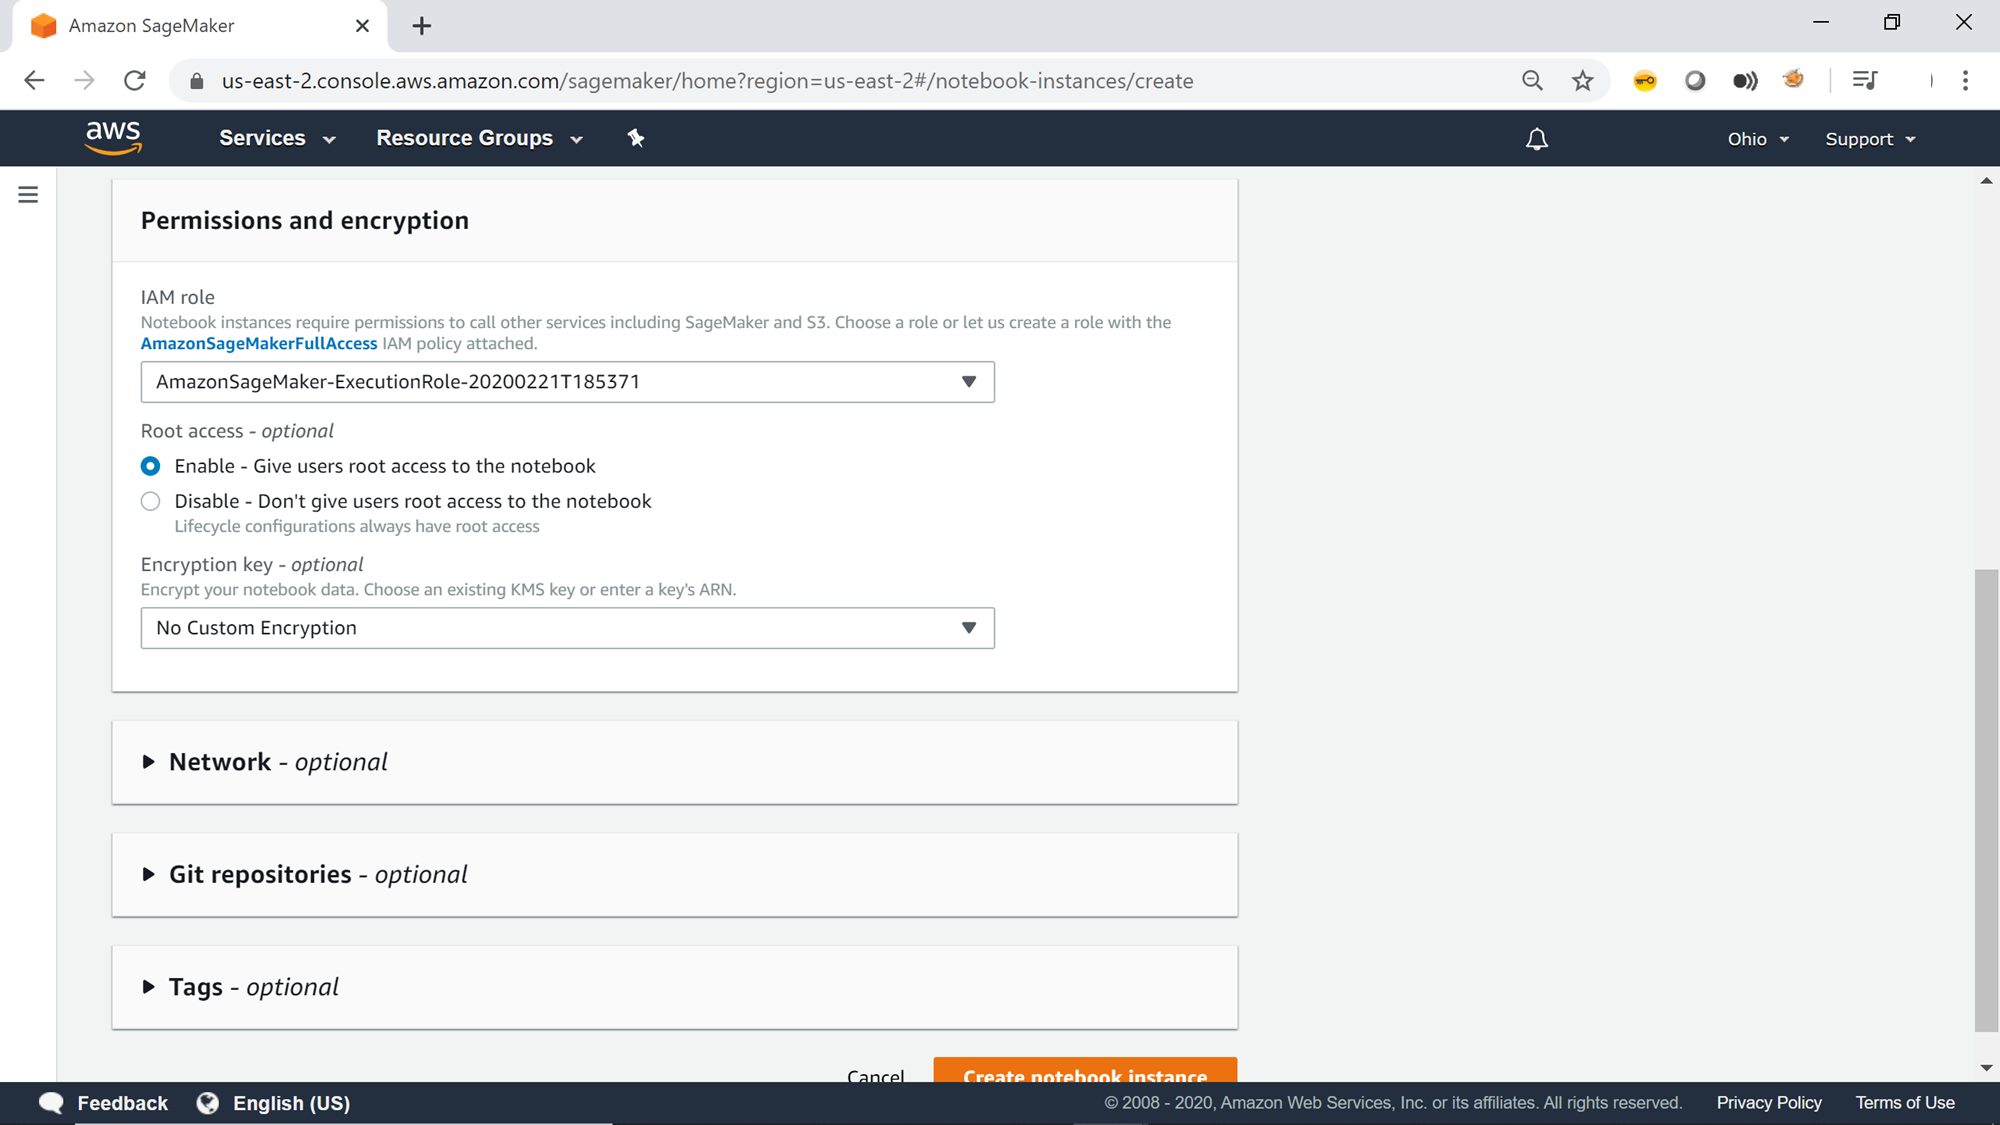
The next section is Permissions and Encryption. One can use built-in IAM roles or create a new IAM role as well, which will be used by the Jupyter notebook instance to make calls to AWS SageMaker service.
By default, one gets root-level access on the instance once they log on to the notebook. To restrict general users from having root access on the notebook, admins can disable this setting by selecting the Disable option. Select the Key Management Services encryption key if you desire to encrypt the data on the notebook instance.
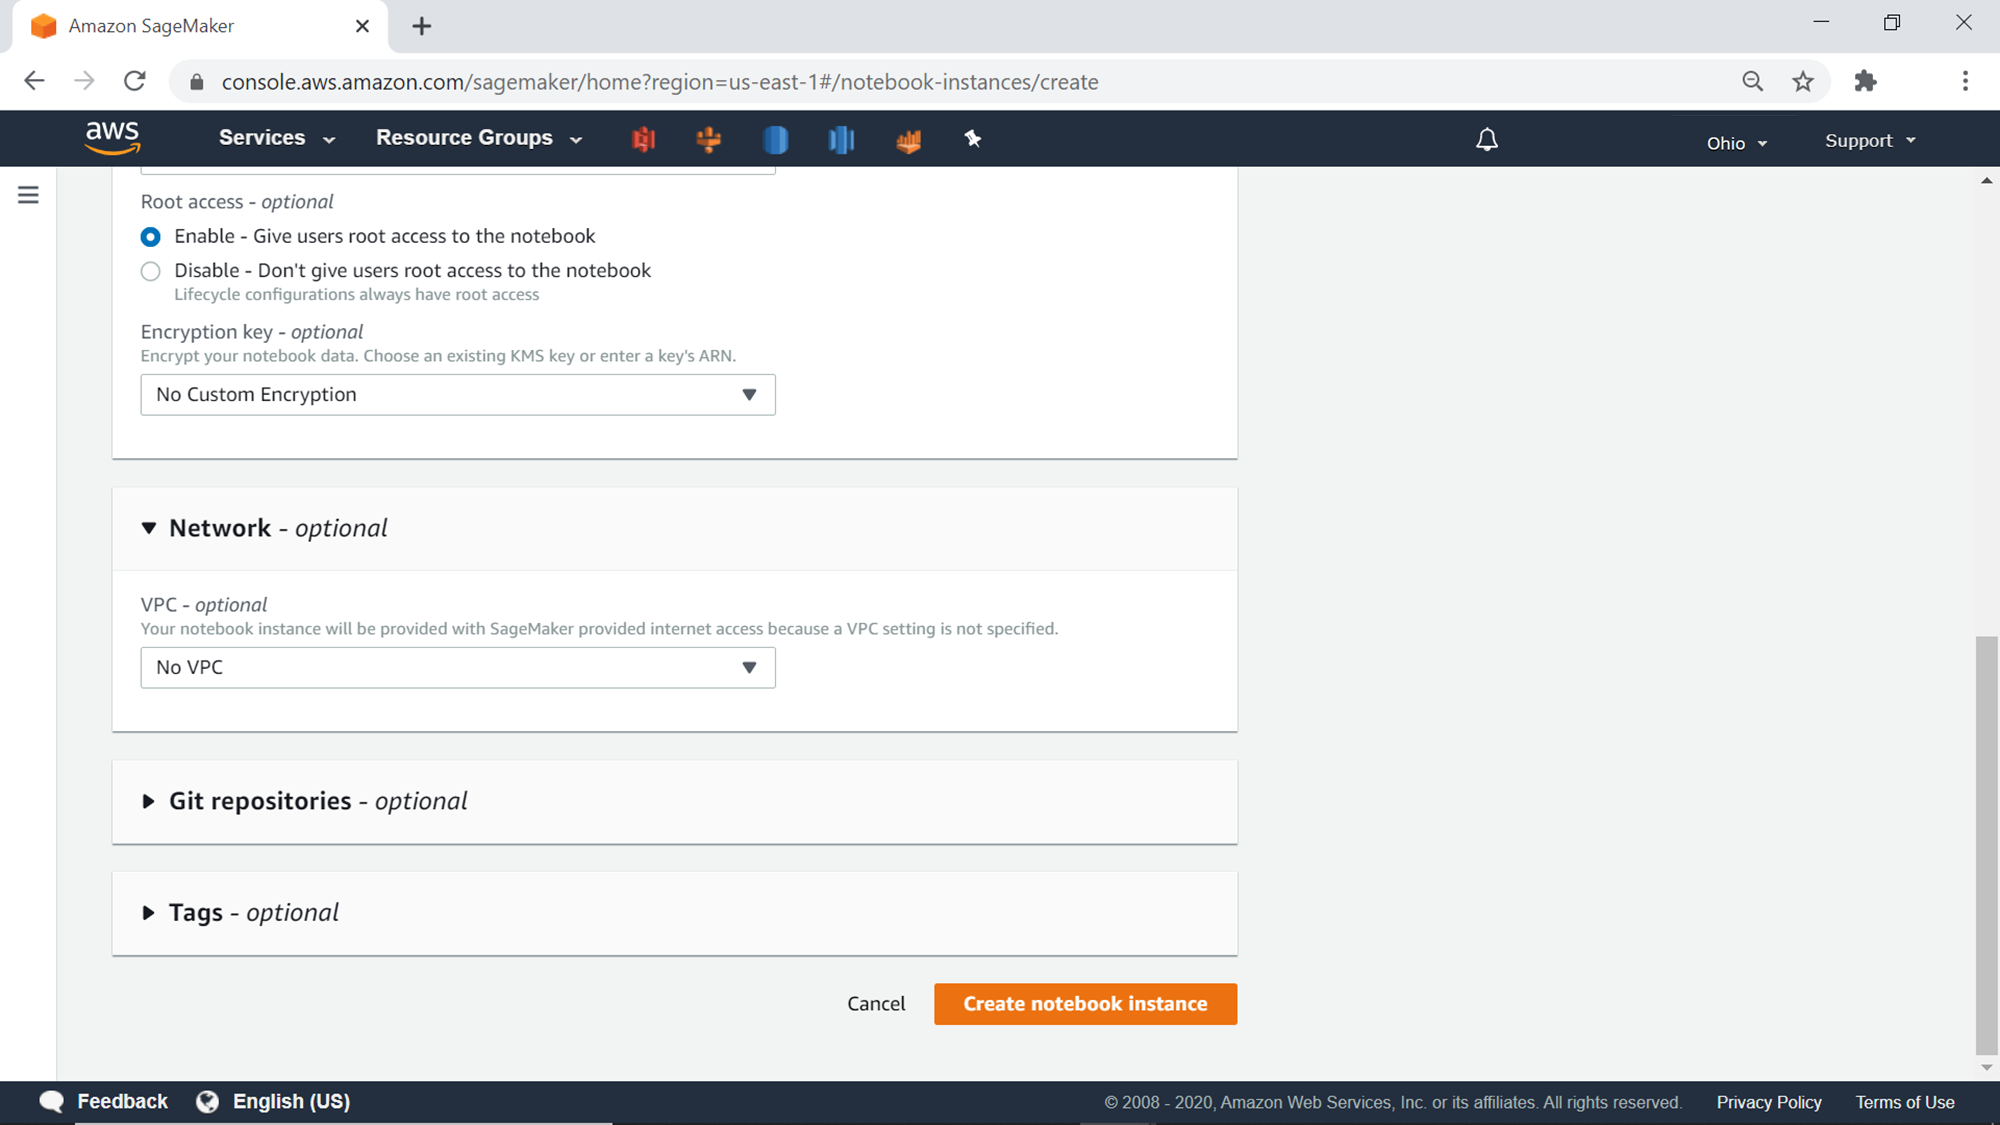
The next section is Network which is an optional section. One can choose to restrict access to a certain VPC or let the notebook be accessible over the internet too. By default, there is no restriction on accessing the notebook over the Internet. For this exercise, we will proceed with the default value.
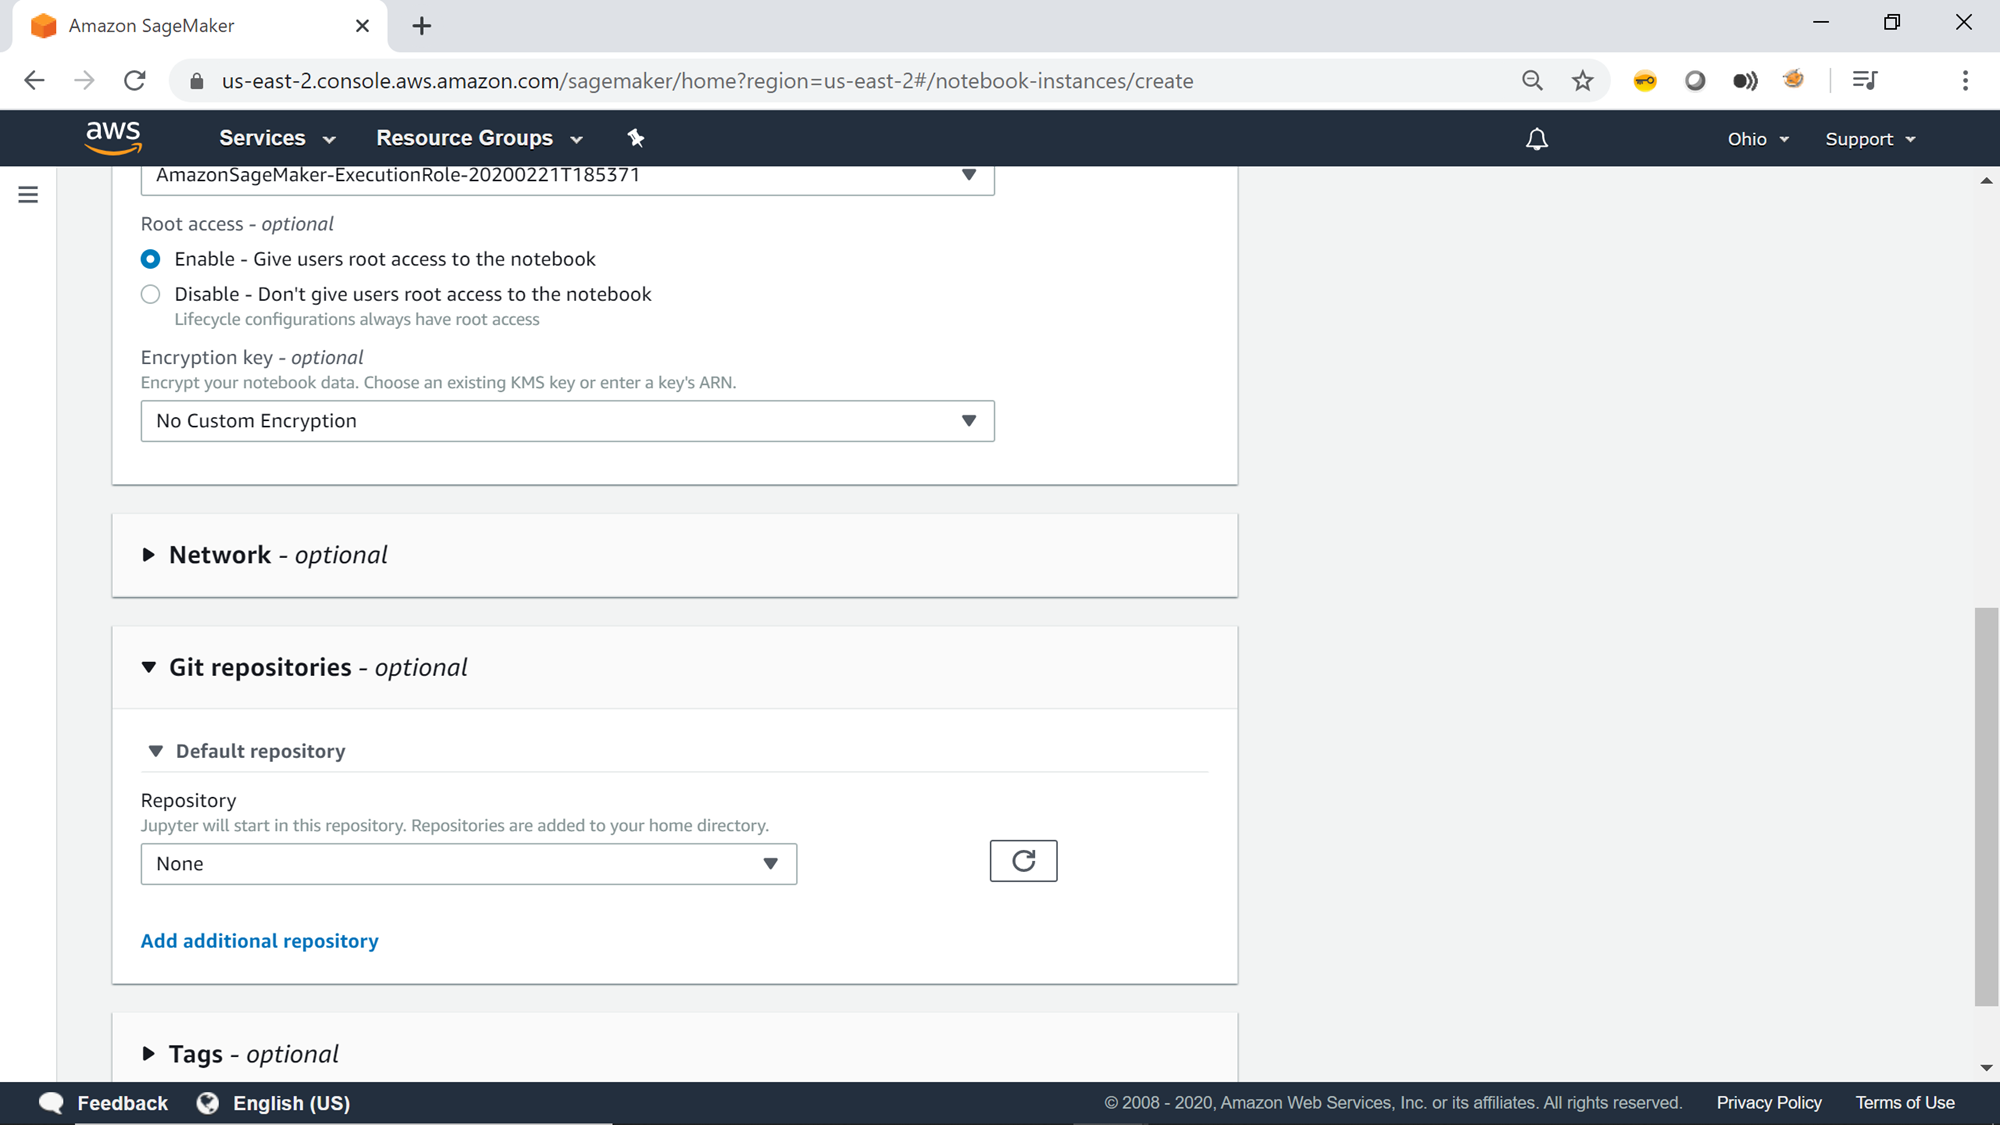
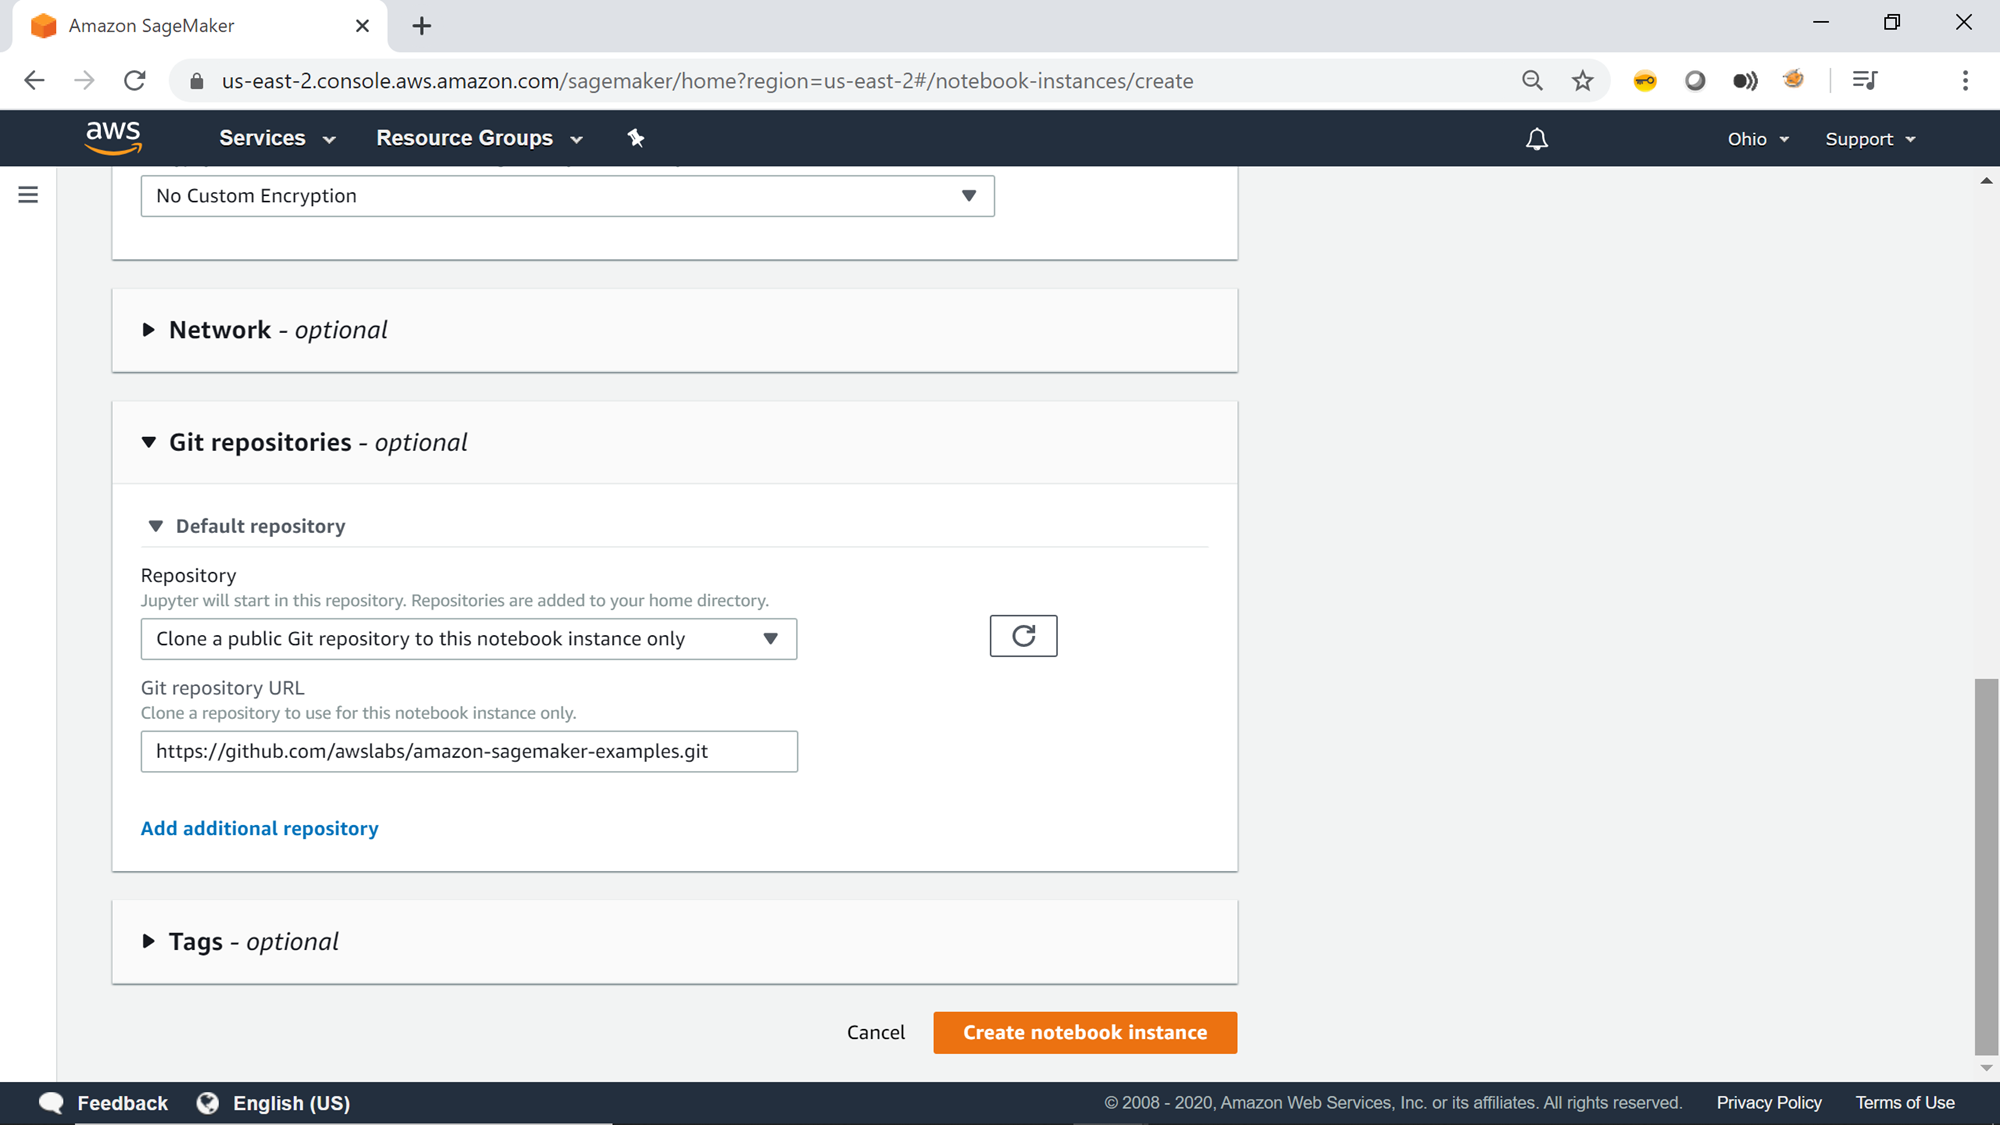
The next option is to configure a Git repository optionally. Generally, source control repositories are used in every project. One can create a repository using AWS Tools and Services, or you can also choose to clone a Git repository on the notebook, so that all the objects (like notebooks) are already available on the instance, which can be readily executed on the notebook instance.
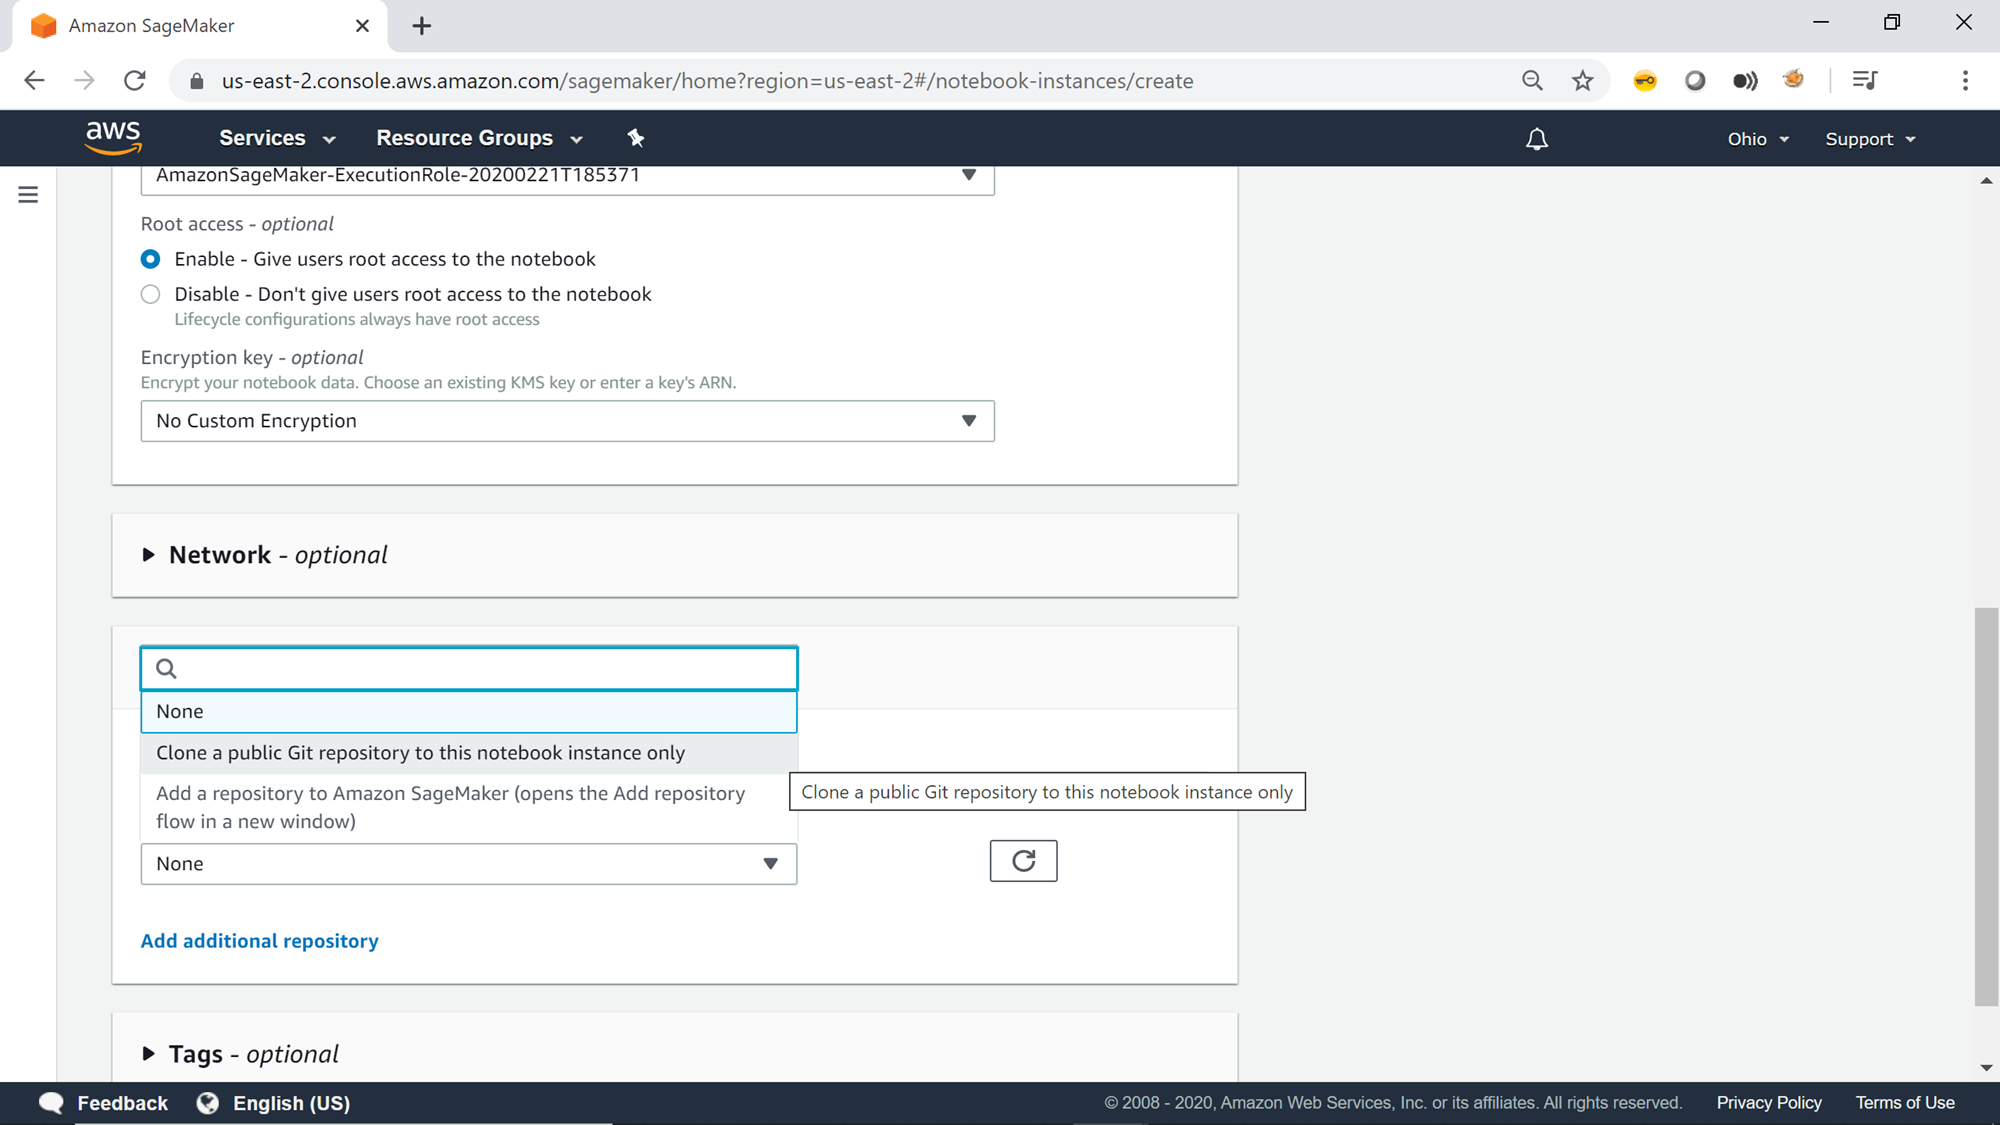
As shown below, select “Clone a public Git Repository to the notebook instance only” option. AWS SageMaker provides several sample notebooks for testing various features of SageMaker. We will be cloning this repository on this notebook instance.
Mention the URL of the git repository as shown below. One can choose any public git repository here, the below repository is used only for demonstration purposes. You can click on Add additional repository, to clone multiple repositories on the instance.
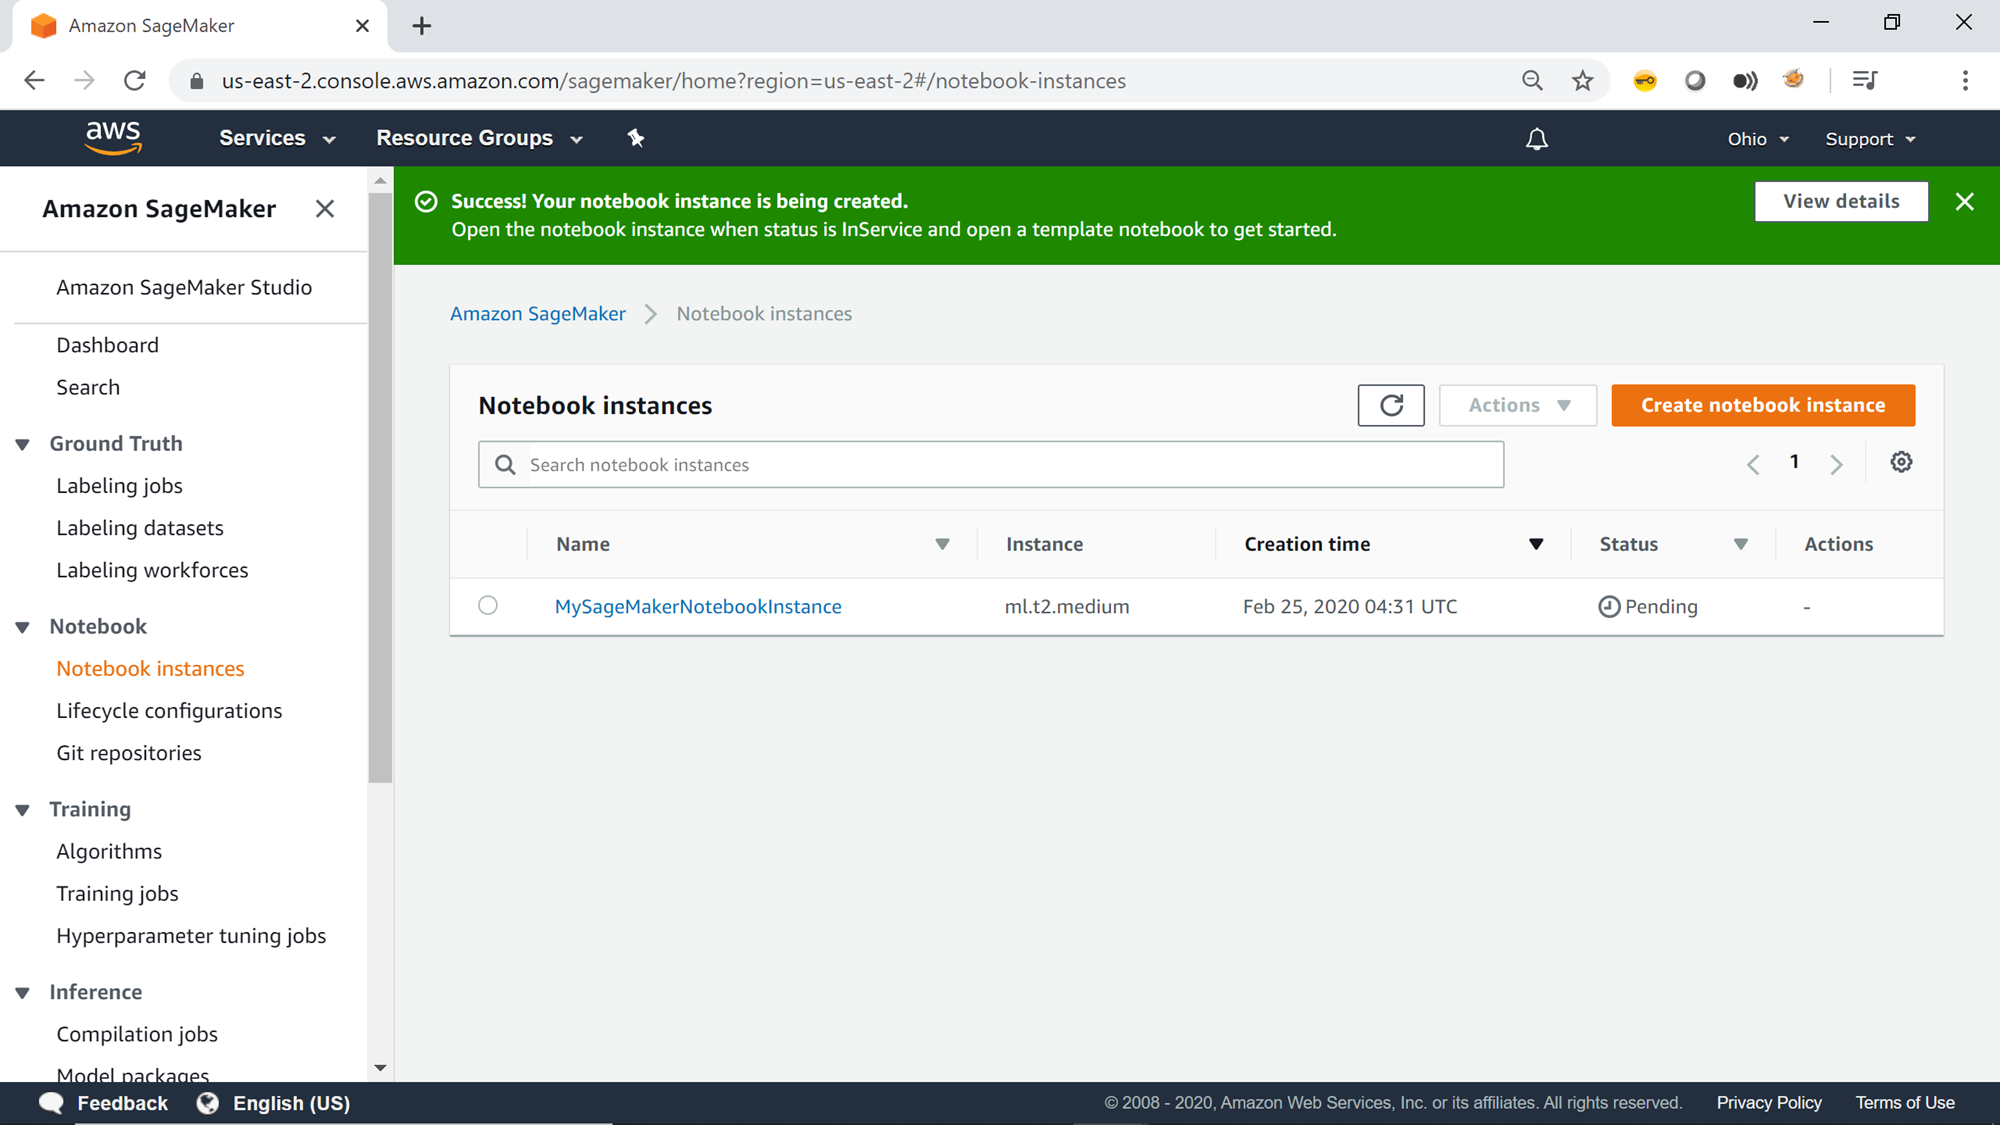
Add tags optionally to this instance and click on Create notebook instance button. This will start the creation of the Jupyter notebook instance, and the status will be Pending as shown below.
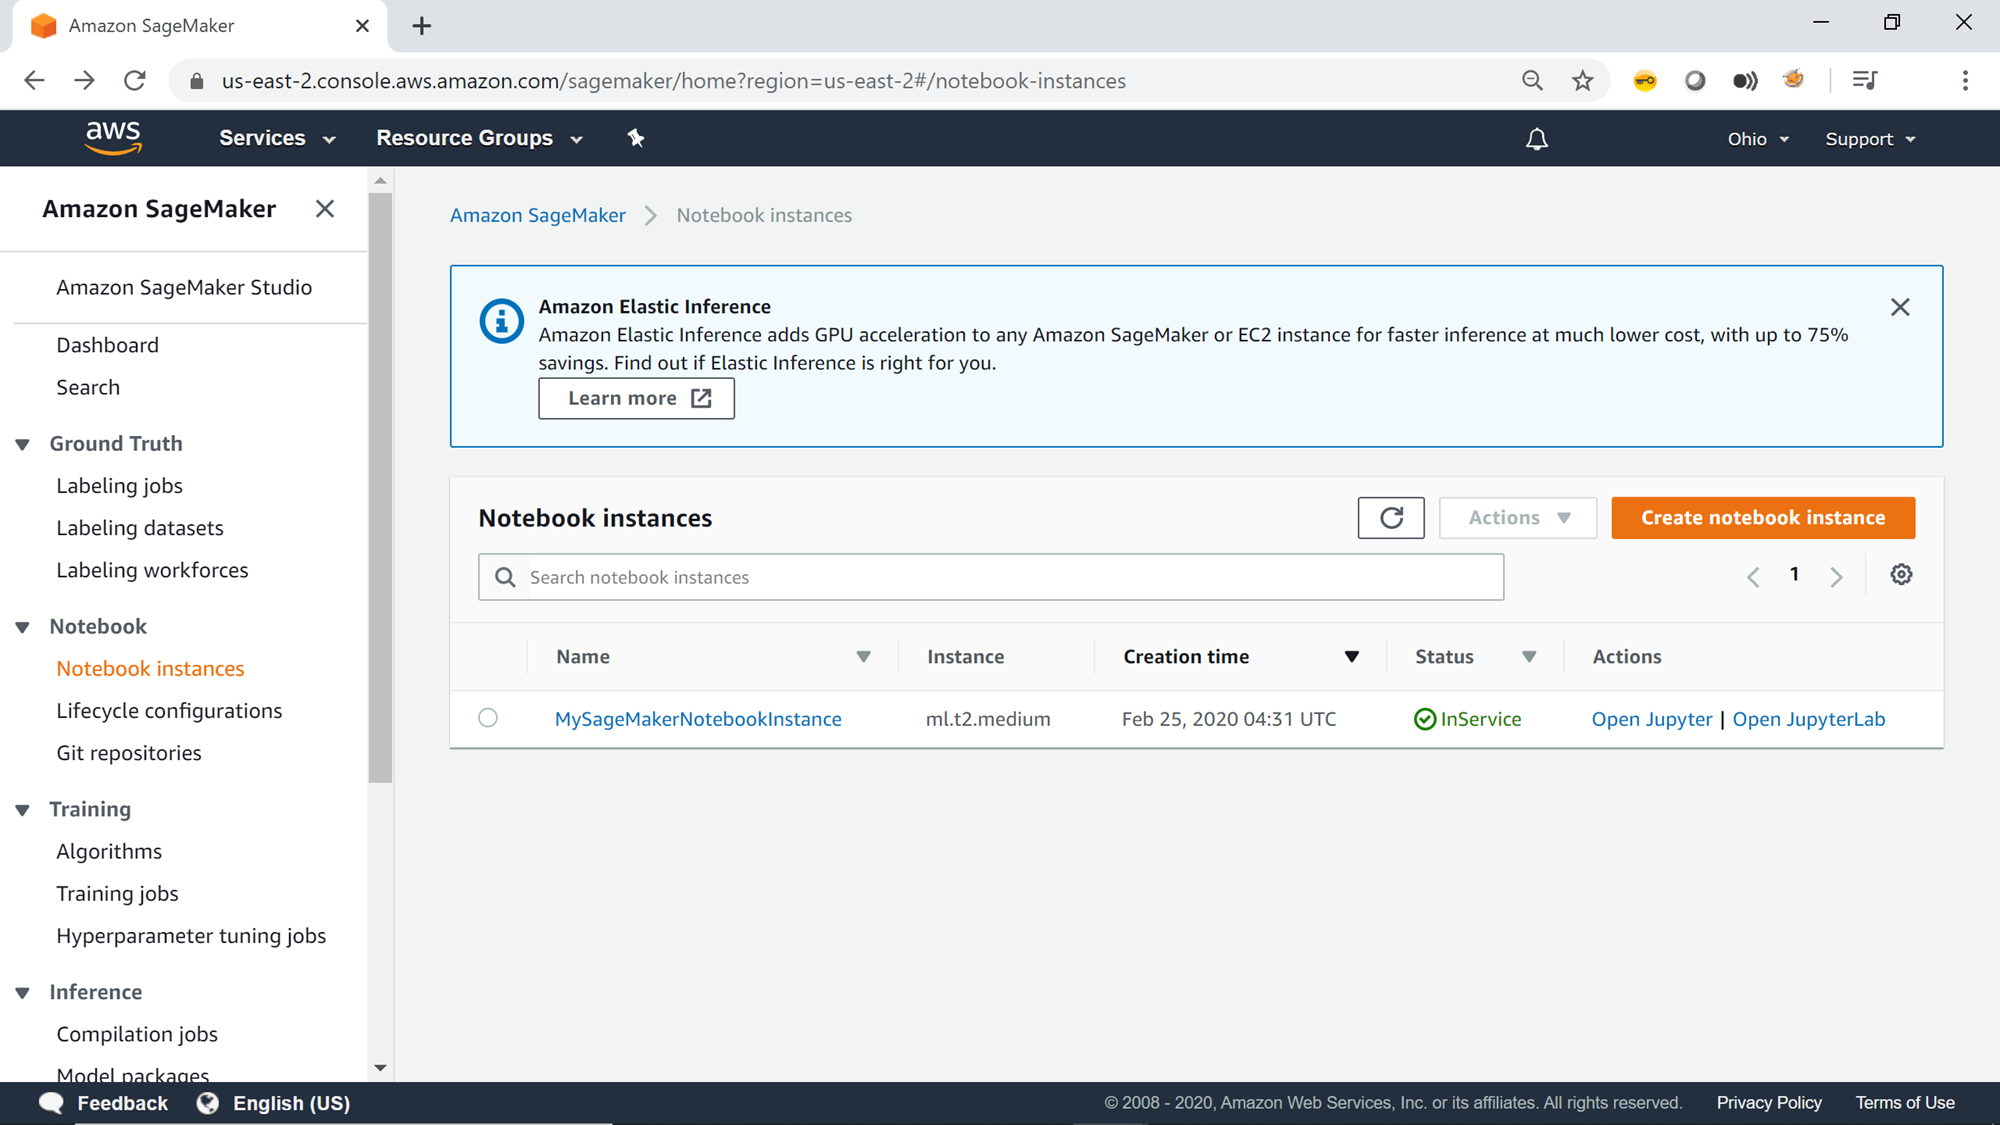
Once the instance is in the ready state, the status of the instance will change to InService as shown below, which means that the instance is ready for use and the git repository has already been cloned.
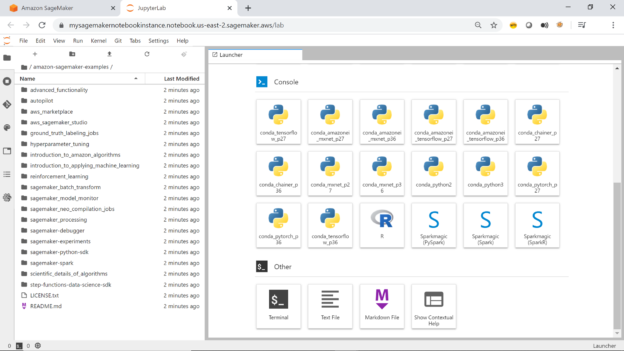
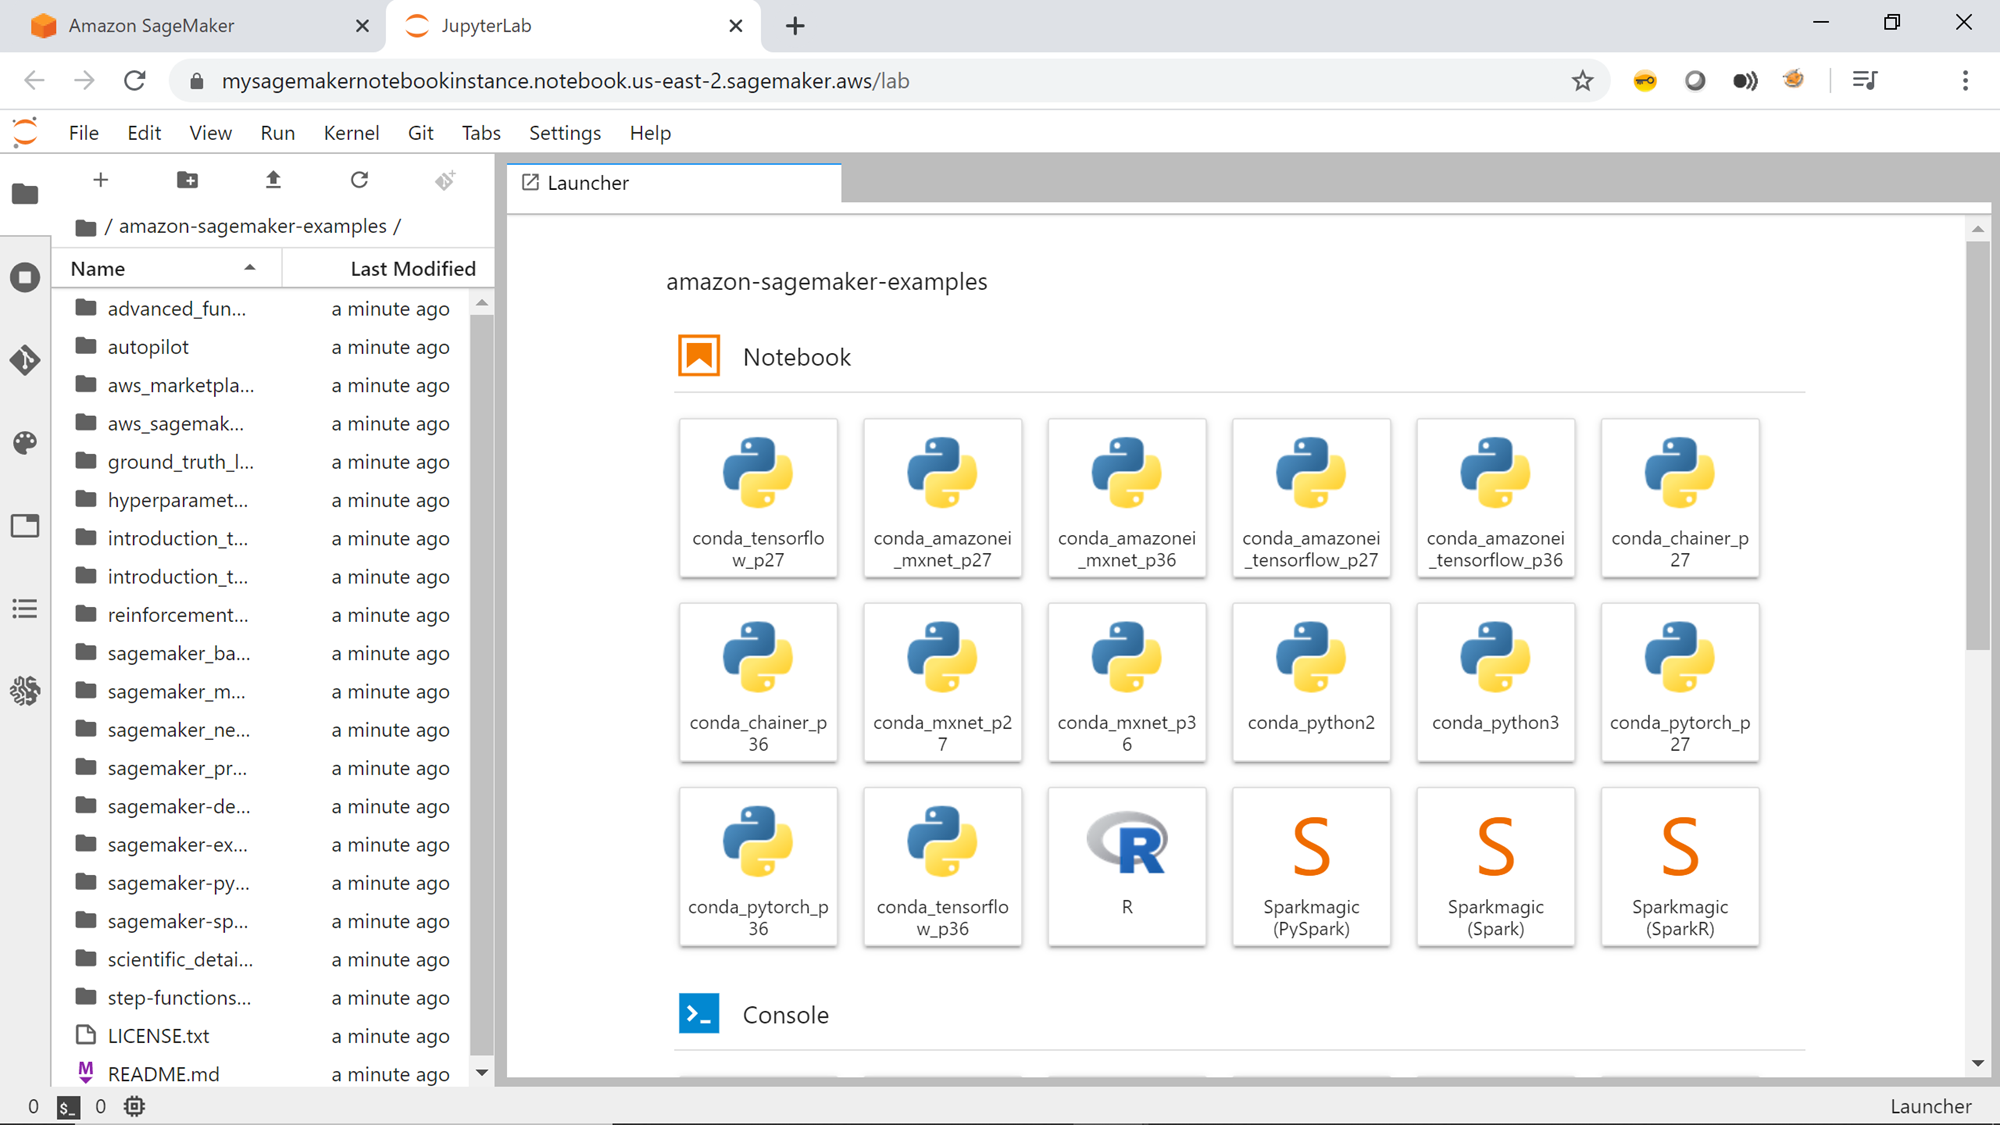
Click on the Open JupyterLab button and the below interface would open in a new tab. On the left-pane, you would be able to see all the directories, which have been cloned from the git repository. By default, SageMaker ships with a few examples too as shown below on the right pane.
Scroll down and you would be able to see the option to open the terminal window to fire Linux commands, create a new script file and many other options as shown below.

This completes the creation of the AWS SageMaker instance, pre-configured with all the SageMaker examples too. You can click on any notebook and start executing the commands in the notebook to learn different machine learning related examples and features using the notebook. Once the instance is not in use, one can stop as well as delete the instance as required.
Conclusion
In this article, we learned how to create an AWS SageMaker instance using Jupyter notebooks. We covered the configuration to change the configuration like instance size and inference related settings. We also learned how to clone git repositories and setup start-up scripts to prepare the instance, so it’s ready to use one it’s available.
Table of contents

He has worked internationally with Fortune 500 clients in various sectors and is a passionate author.
View all posts by Rahul Mehta
- Finding Duplicates in SQL - February 7, 2024
- MySQL substring uses with examples - October 14, 2023
- MySQL group_concat() function overview - March 28, 2023