

In this article, we will learn an approach to source data from AWS Redshift and populate it in the Azure SQL database, where this data can be used with other data on the SQL Server for desired purposes.
Introduction
Azure SQL database is one of the de-facto transactional repositories on Azure. In the era of cloud, most organizations have a multi-cloud footprint, and often there is a need to correlate data from different clouds for various purposes, for example, reporting. AWS Redshift is a very popular and one of the pioneering columnar data warehouses on the cloud, which has been used by clients for many years. So, it’s very probable that clients would have data on the Redshift, as well as Azure SQL databases in a multi-cloud scenario. Let’s see how we can import data into the database on Azure from AWS Redshift in this article.
Initial Setup
In this exercise, our aim is to import data from Amazon Redshift to Azure SQL Database. As a pre-requisite to start this exercise, we need the source and destination systems in place. As Redshift is the data source, let’s start with creating a Redshift cluster. It’s assumed that you have an AWS account with the required privileges to create the Redshift cluster.
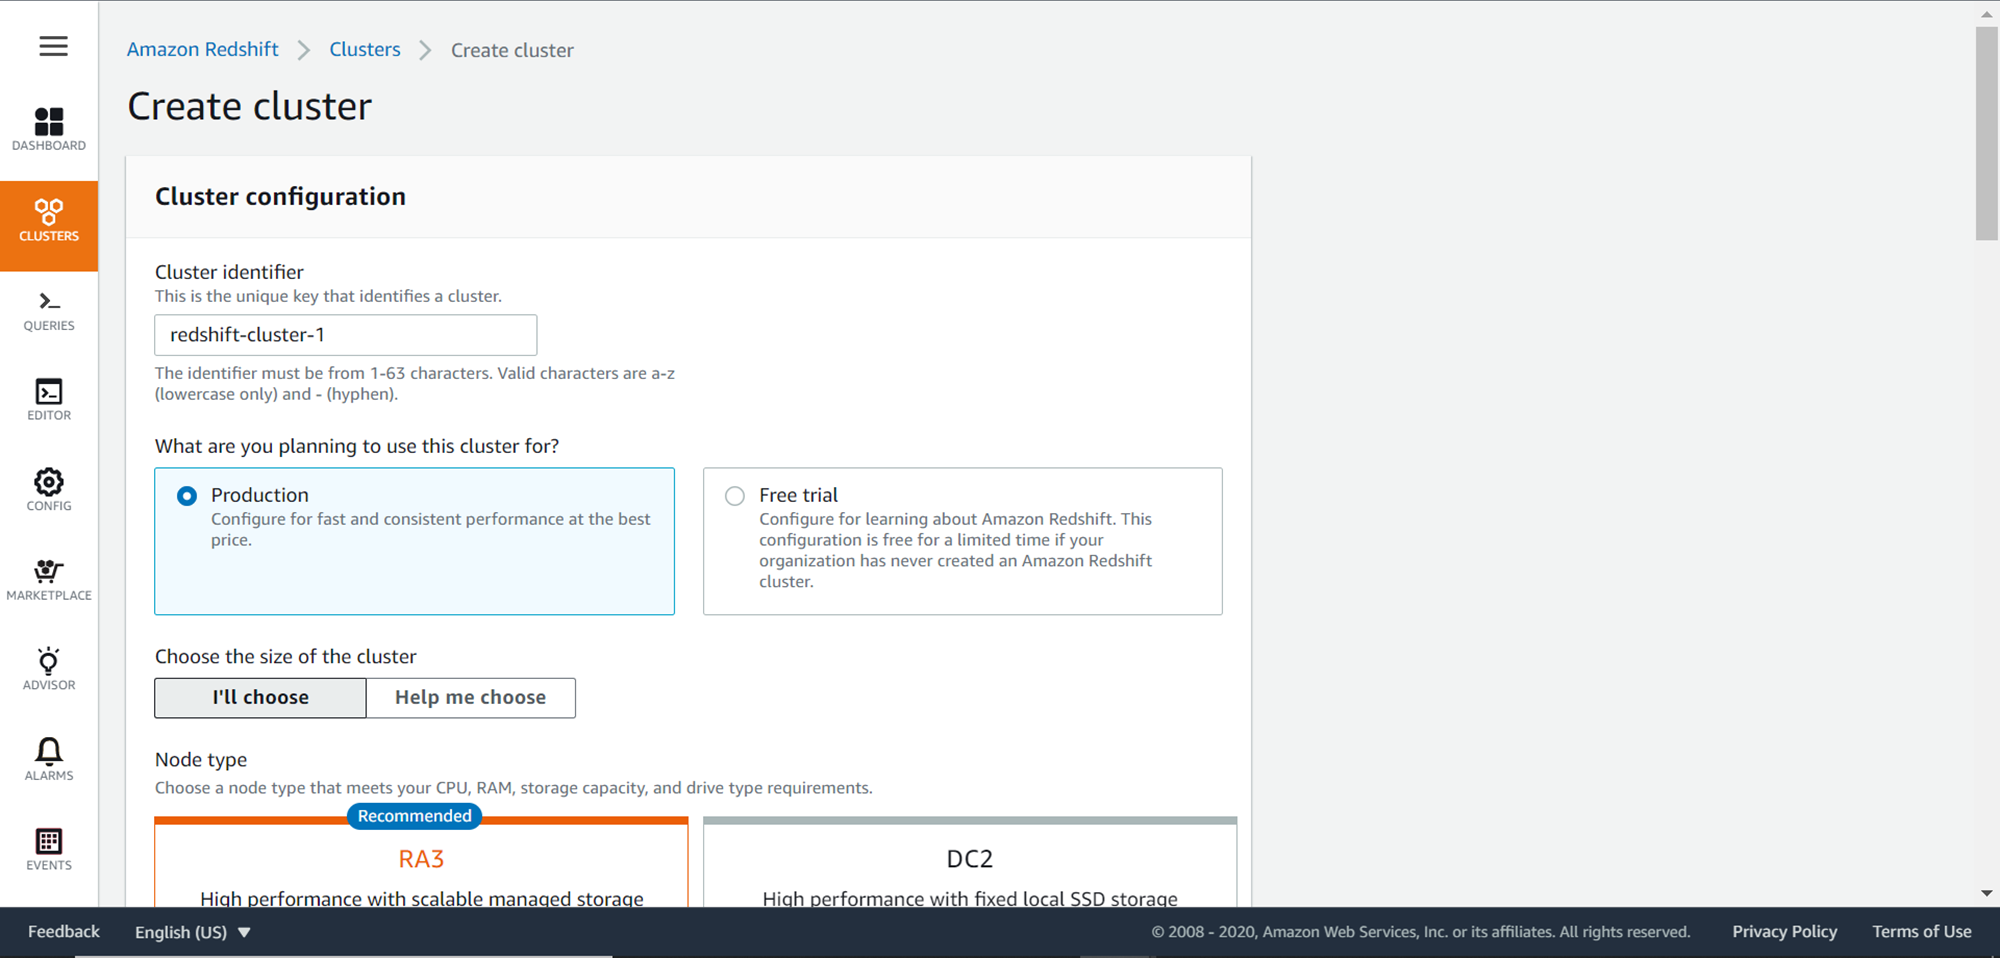
Log on to the AWS Account and search for AWS Redshift and click on the search results link. This would open the Redshift dashboard page. Click on the Create Cluster button to open the cluster creation wizard as shown below. Provide the name of the cluster, node type, number of nodes, as well as master credentials to create the cluster. If you intend to access the cluster over open internet temporarily, you change the Publicly Accessible setting value to True. After changing this setting, you also need to add the IP of your client machine to the security group in which the Redshift cluster is placed. This will allow traffic from your client machine over the open internet to the AWS Redshift cluster.
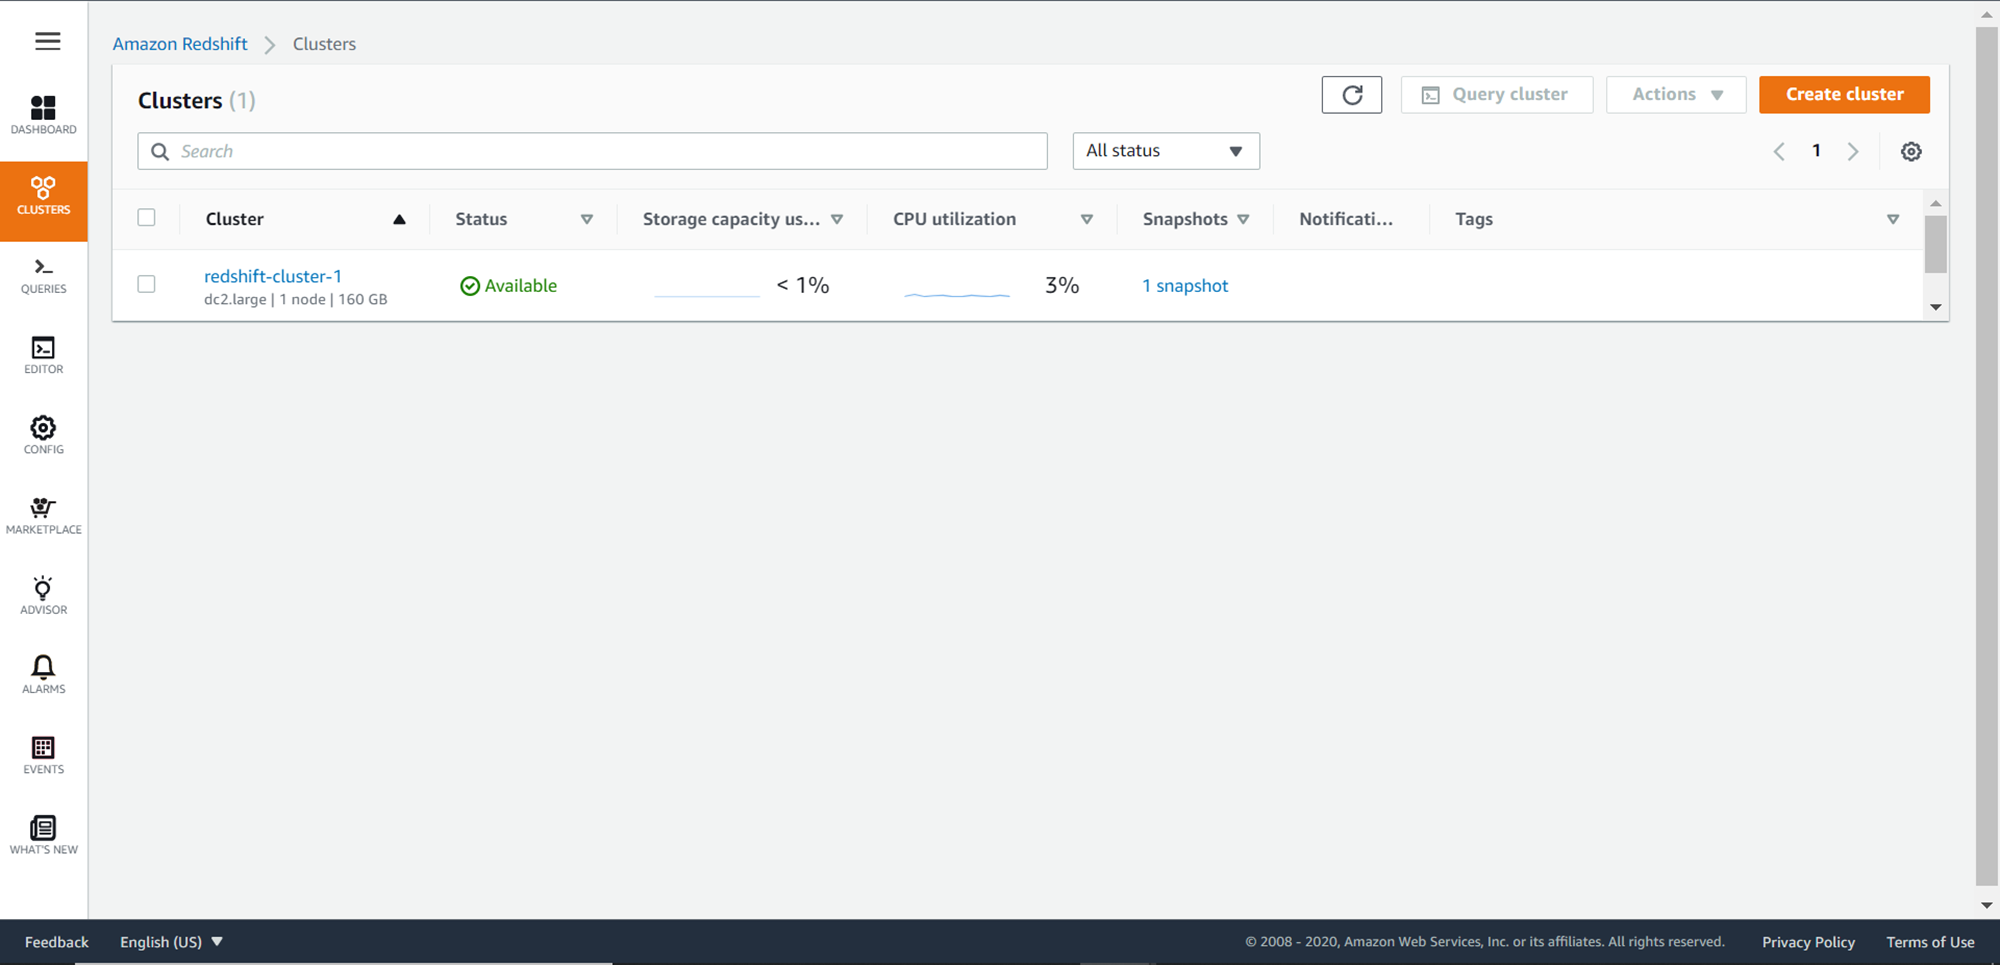
After creating the cluster, you should be able to see an entry as shown below on the Clusters dashboard page. Click on the name of the cluster, to view the properties page of the cluster. Take a note of the cluster endpoint from the properties page as we would need it while creating the pipeline in Azure Data Factory.
Once the cluster is created, we need to add some sample data to it. One of the simplest ways to add data is by logging on to the cluster using the query editor window. it would mean that the source system with data is in place. The volume of data or schema of the database object is not important. We just need at least one database object and a few records in it.
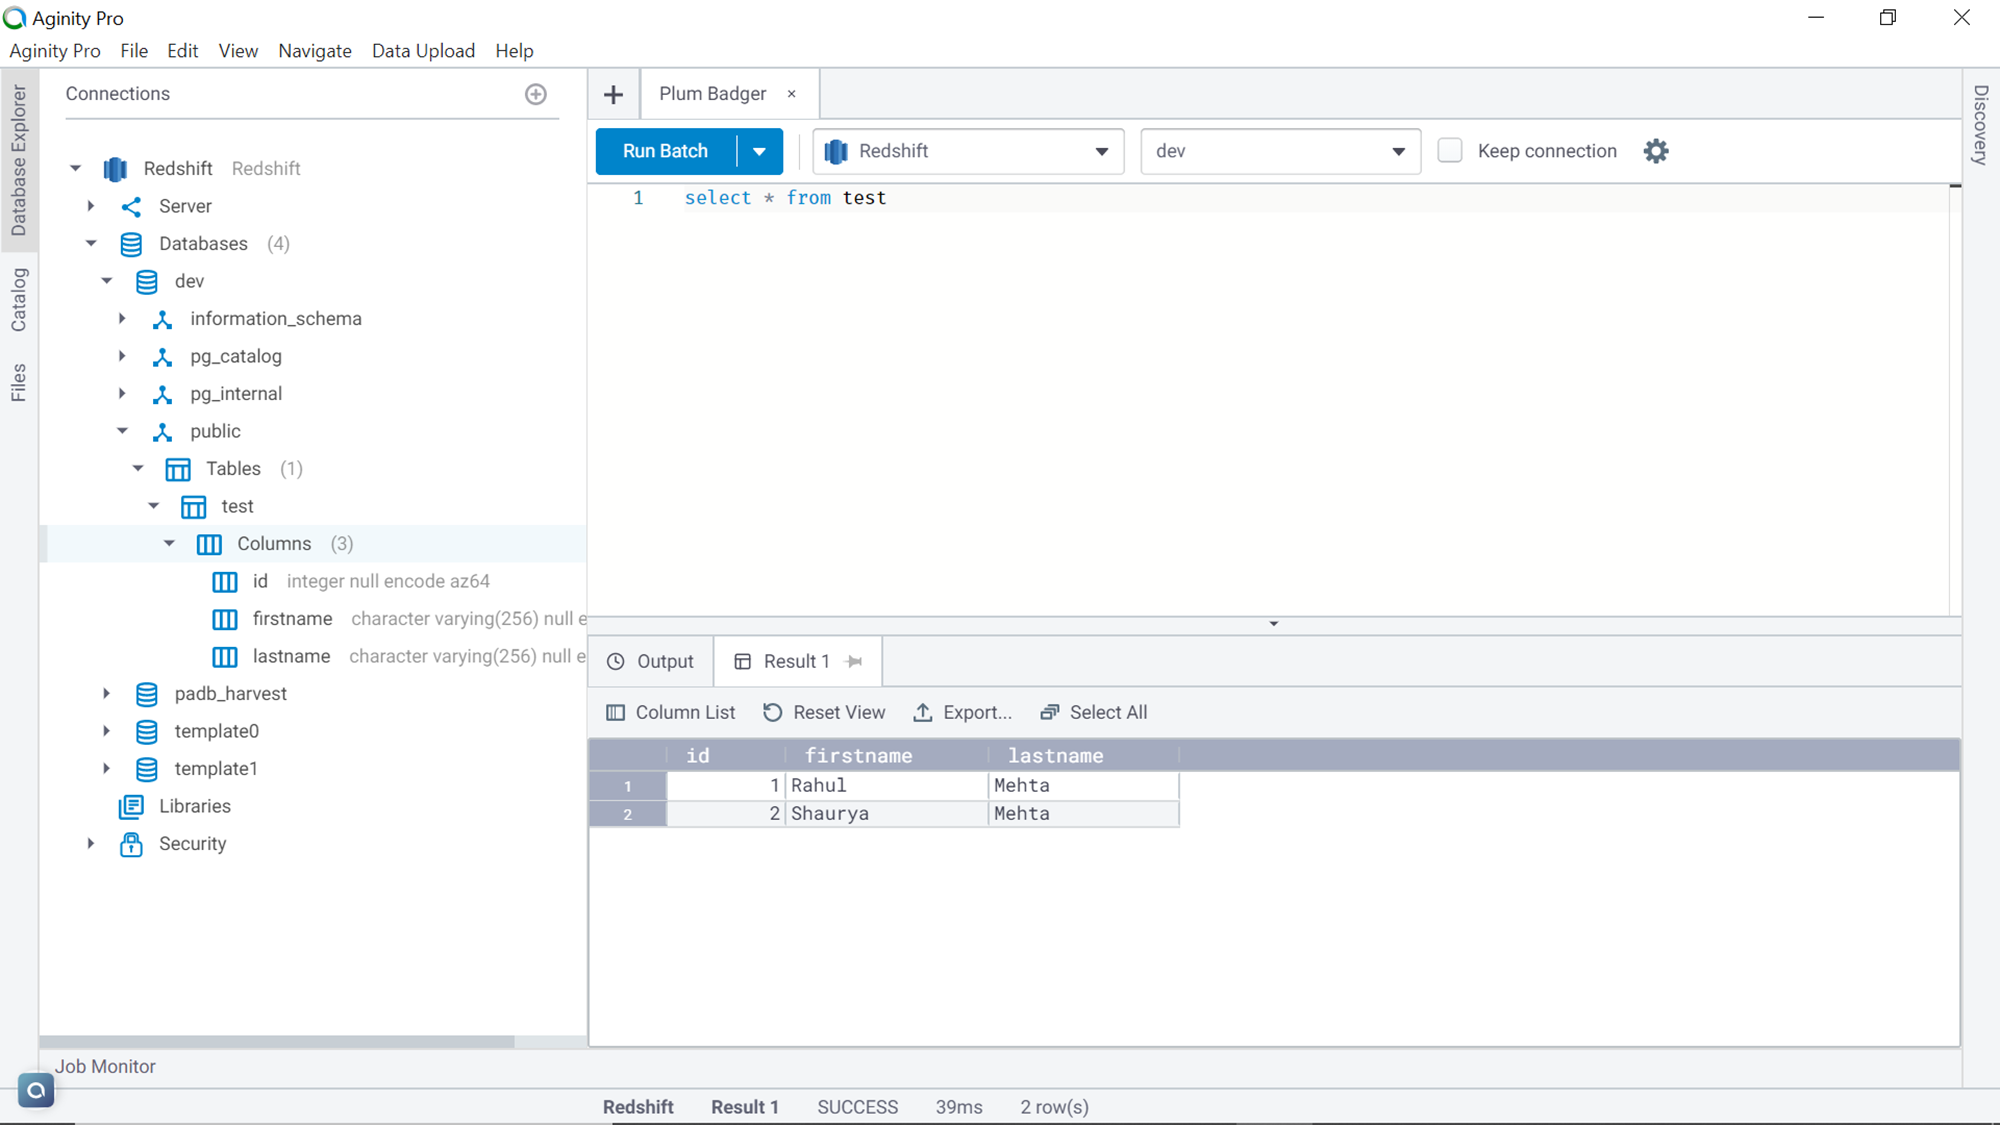
For demonstration purposes, I have created a simple table named test with just a few records in it as shown below. This is the dataset that we aim to load into the SQL database on Azure.
The destination for our scenario is going to be the Azure SQL database. We need to have an Azure SQL Server instance and a database hosted on it. Once these pre-requisites are in place, we are ready to focus on the method of populating data into the database from AWS Redshift.
Populating data with Azure Data Factory
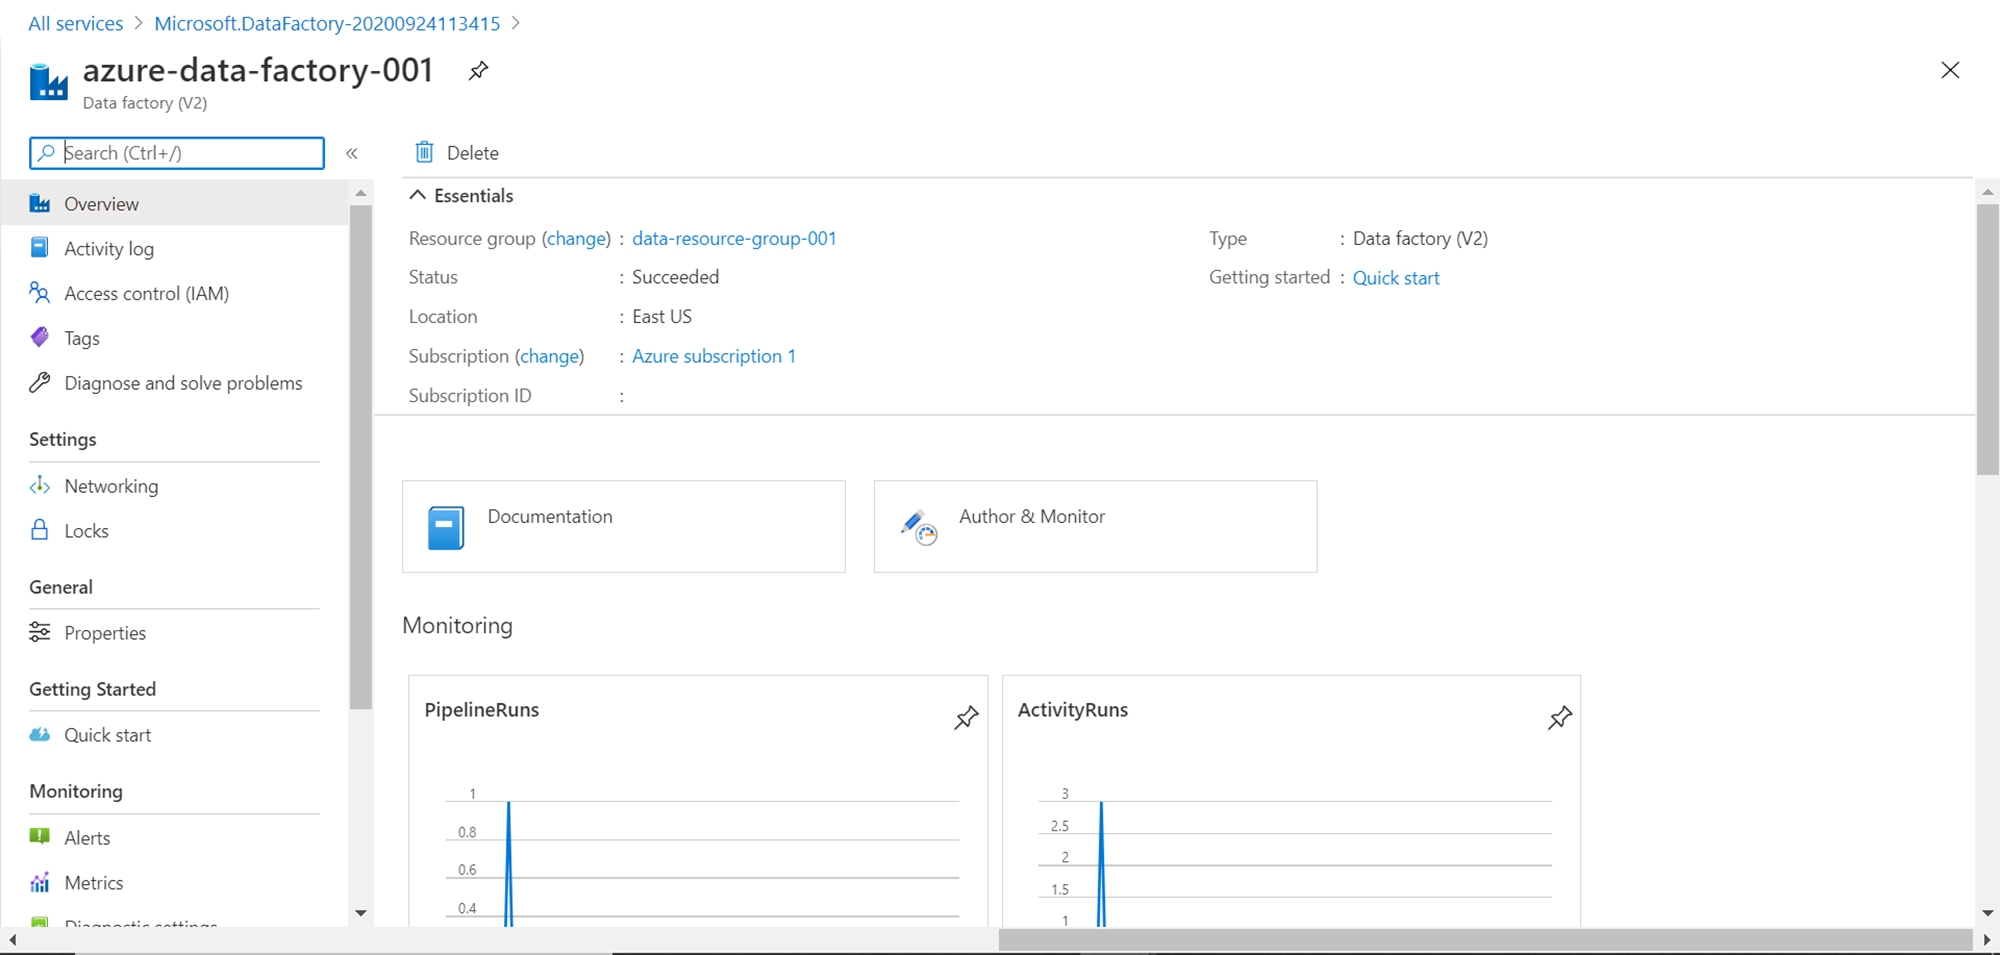
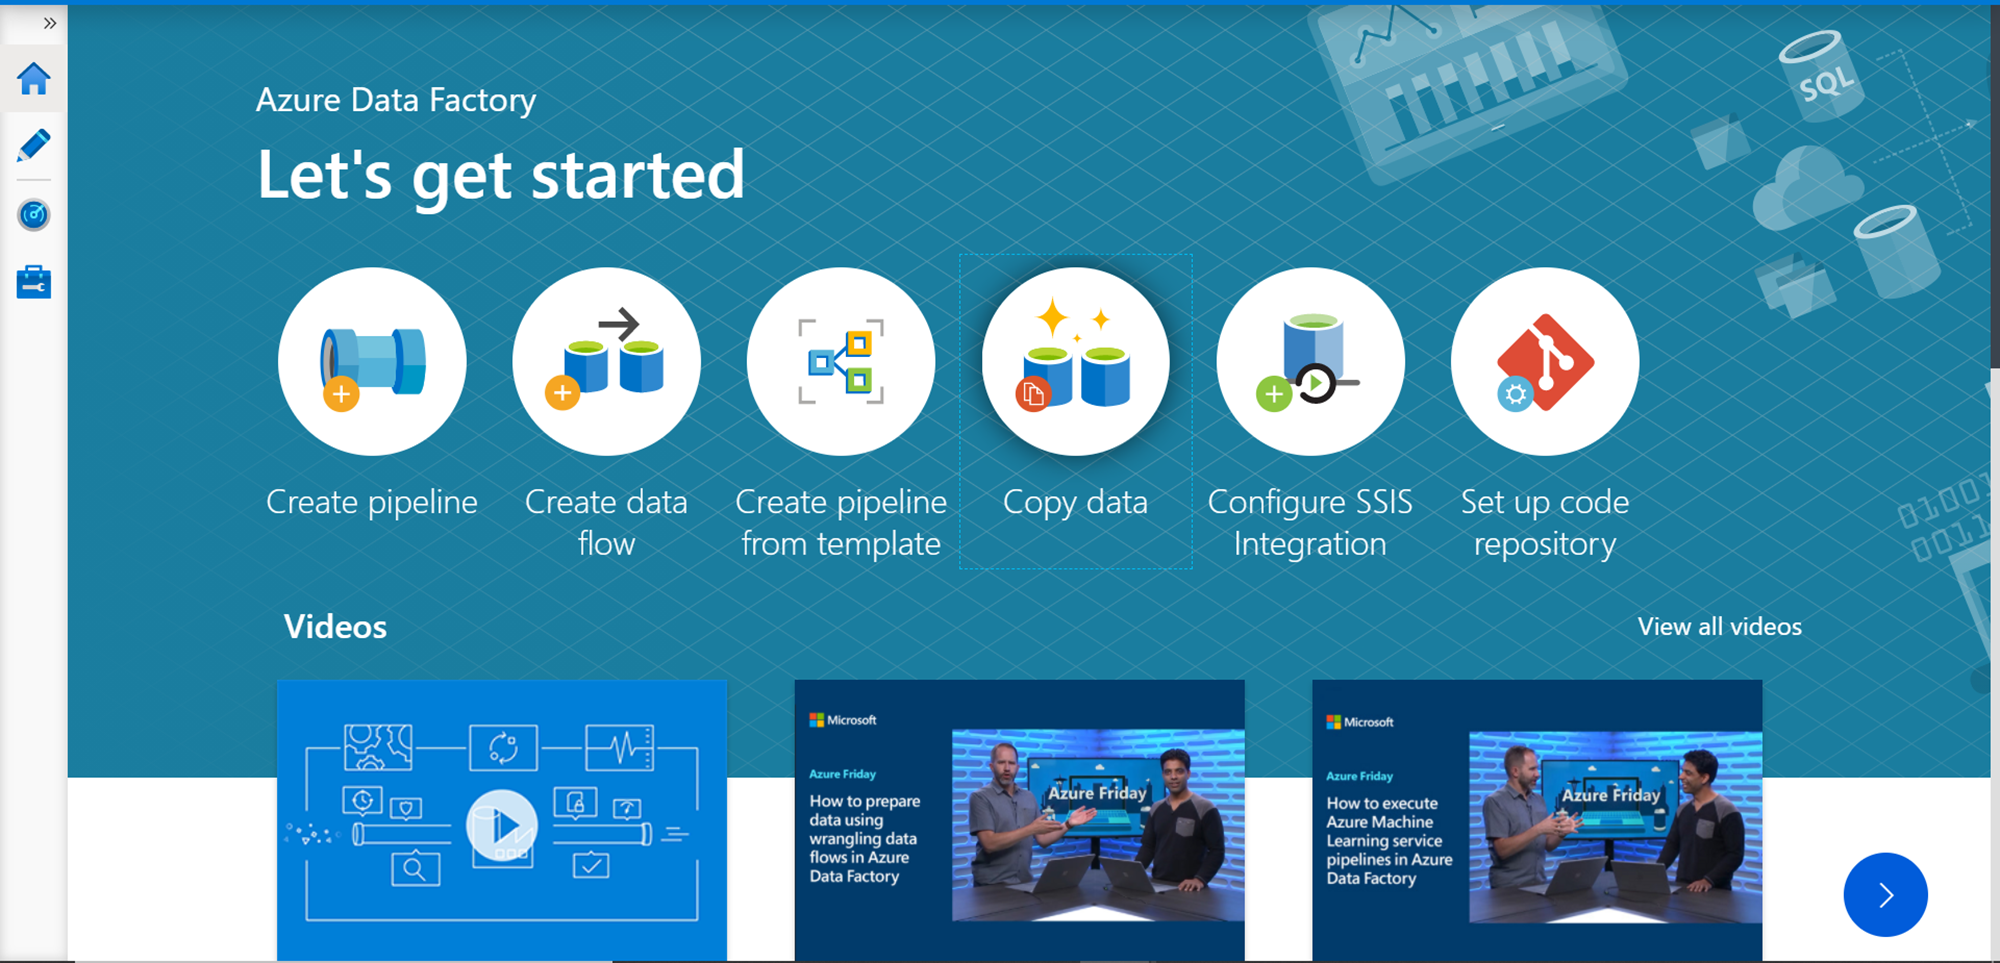
The first step is to set up an Azure Data Factory instance, which is going to be the data movement vehicle for the data population. Navigate to All Services, from the Databases menu, you would find the Azure Data Factory item. Click on it and it would navigate you to the Azure Data Factory dashboard page. Click on Create New button and create a new instance. Once created, it would look as shown below.
Click on the Author & Monitor link which would open the portal as shown below. From the portal, click on the Copy data icon to start the data wizard which would help us to build the desired data pipeline.
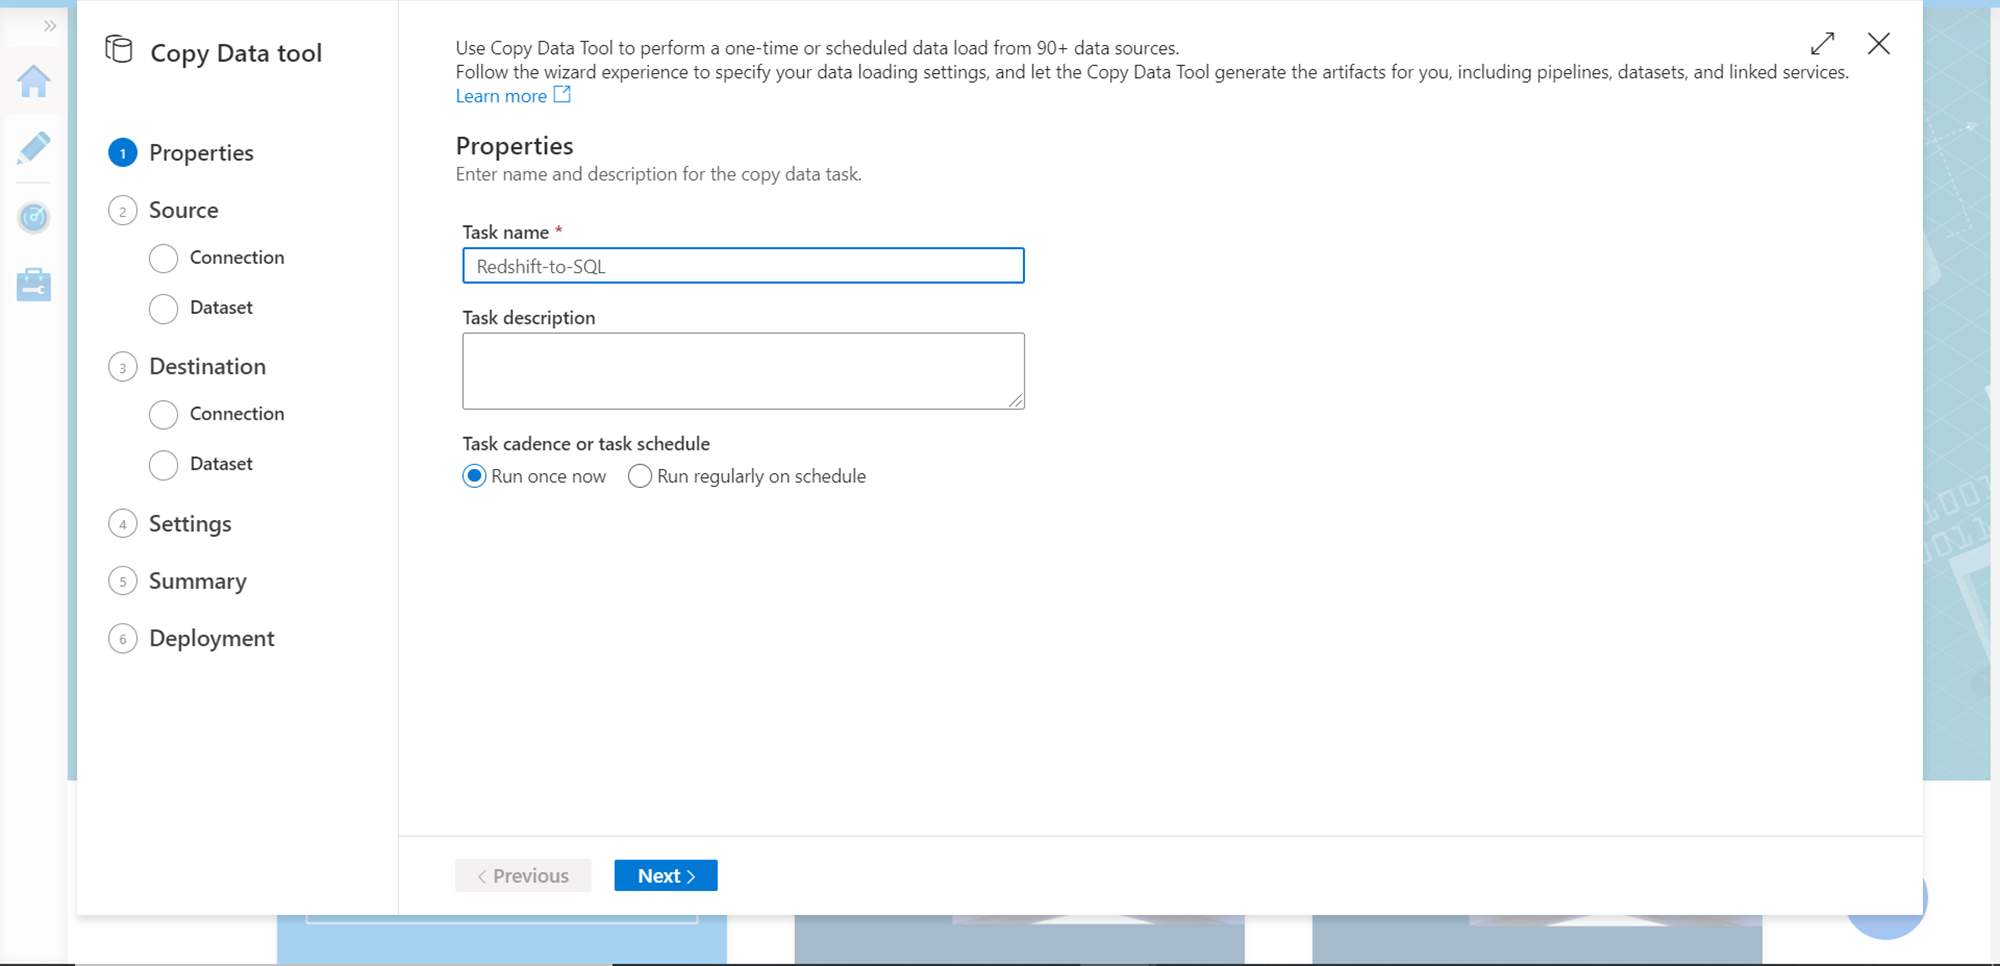
In the first step of the wizard, we need to provide basic details like the name of the pipeline, description as well as the execution frequency. Provide appropriate details and click on Next.
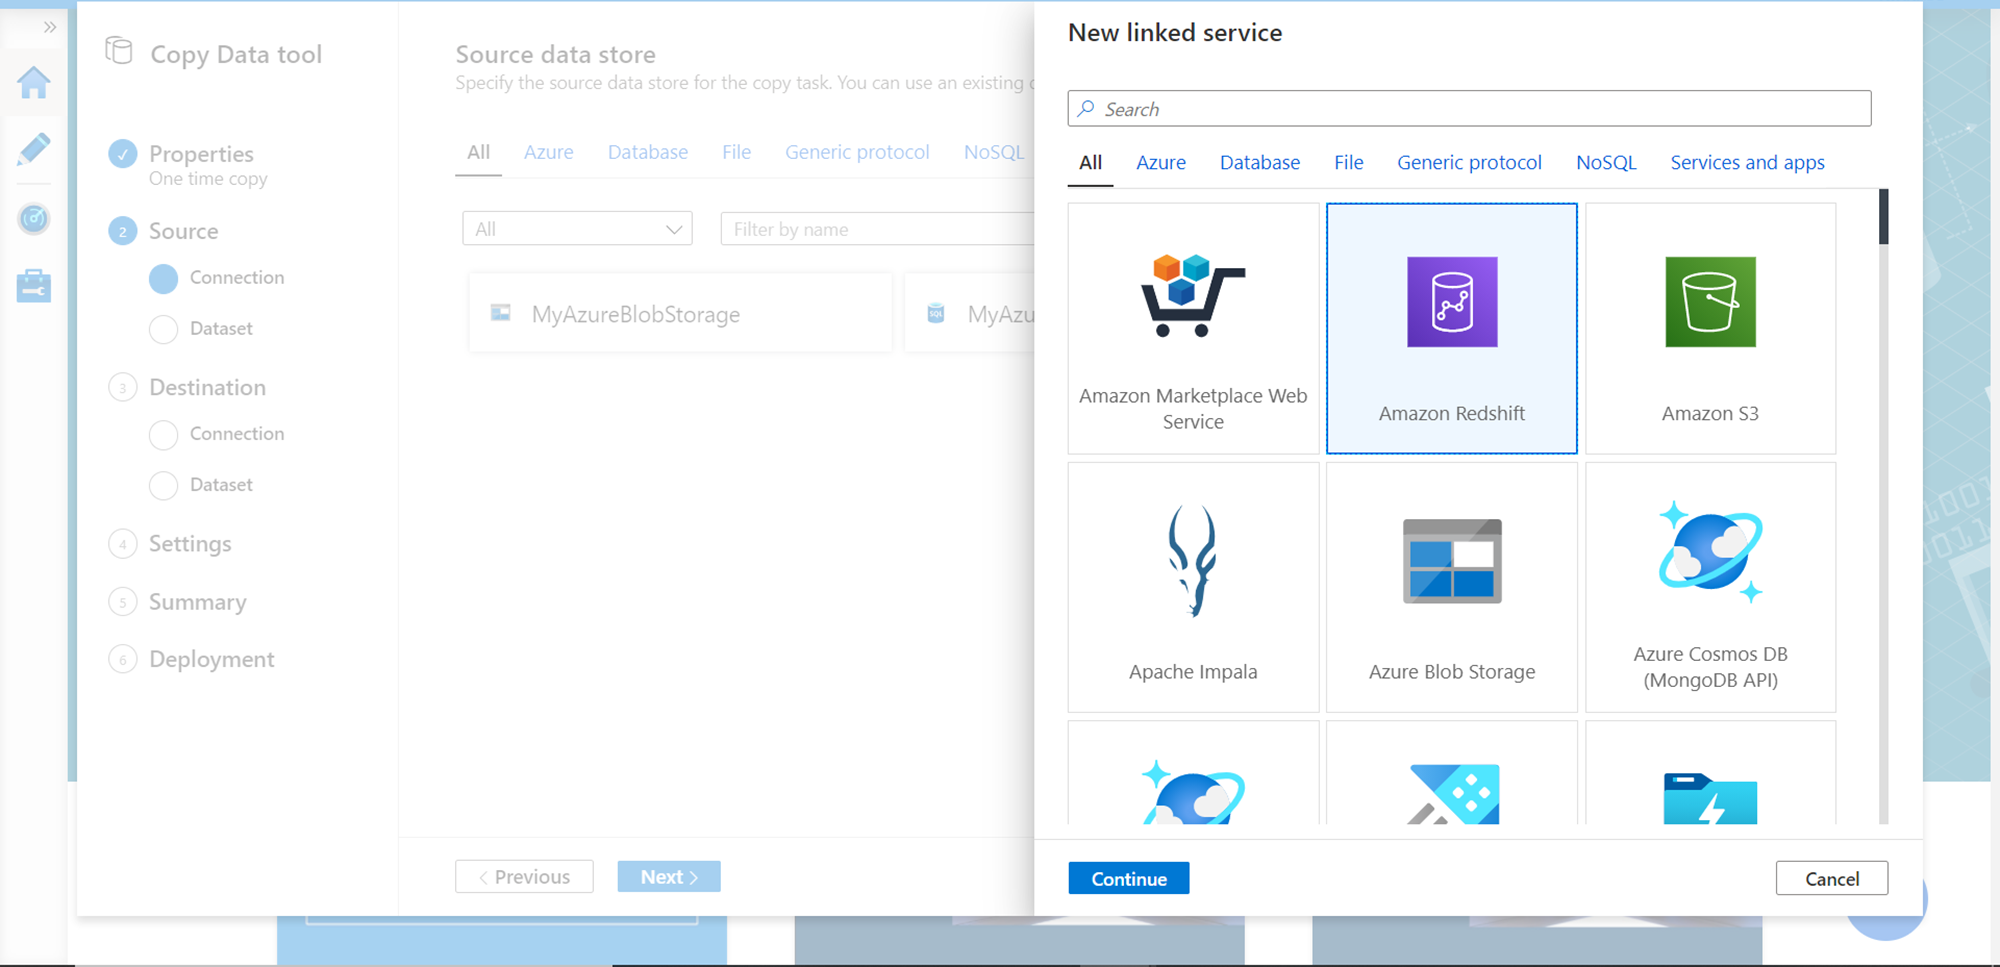
Now it’s time to register Redshift as a linked service, which in our case is the data source. Select Redshift as shown below and click on the Continue button.
In this step, we need to provide a name for the data source. The integration runtime instance will help us to test the connectivity during design time. The hostname should be the AWS Redshift endpoint which is the server address. You would find this detail on the properties page of the Redshift Cluster. The rest of the details should be provided as per the configuration of Redshift. Shown below are the default details of a typical Redshift configuration.
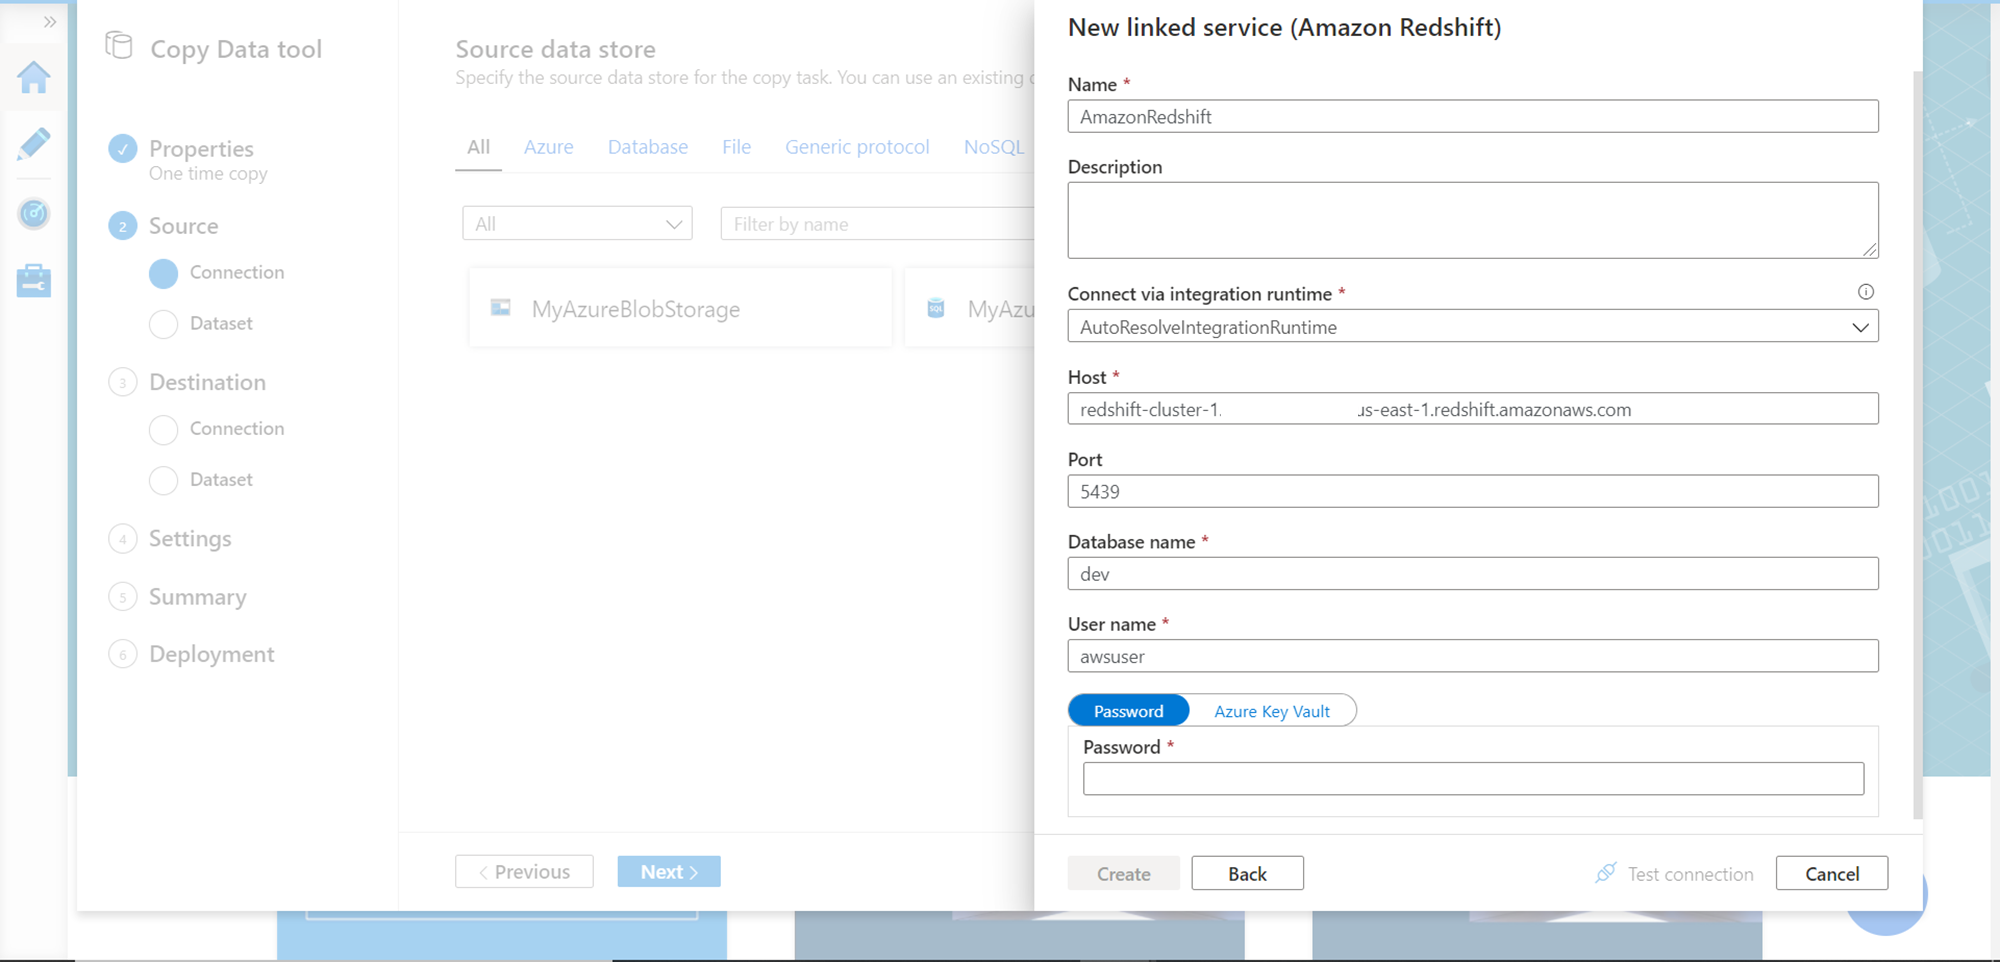
Test the connectivity, and once successfully tested, click on the Create button to register AWS Redshift as the data source. Once registered it would look as shown below.

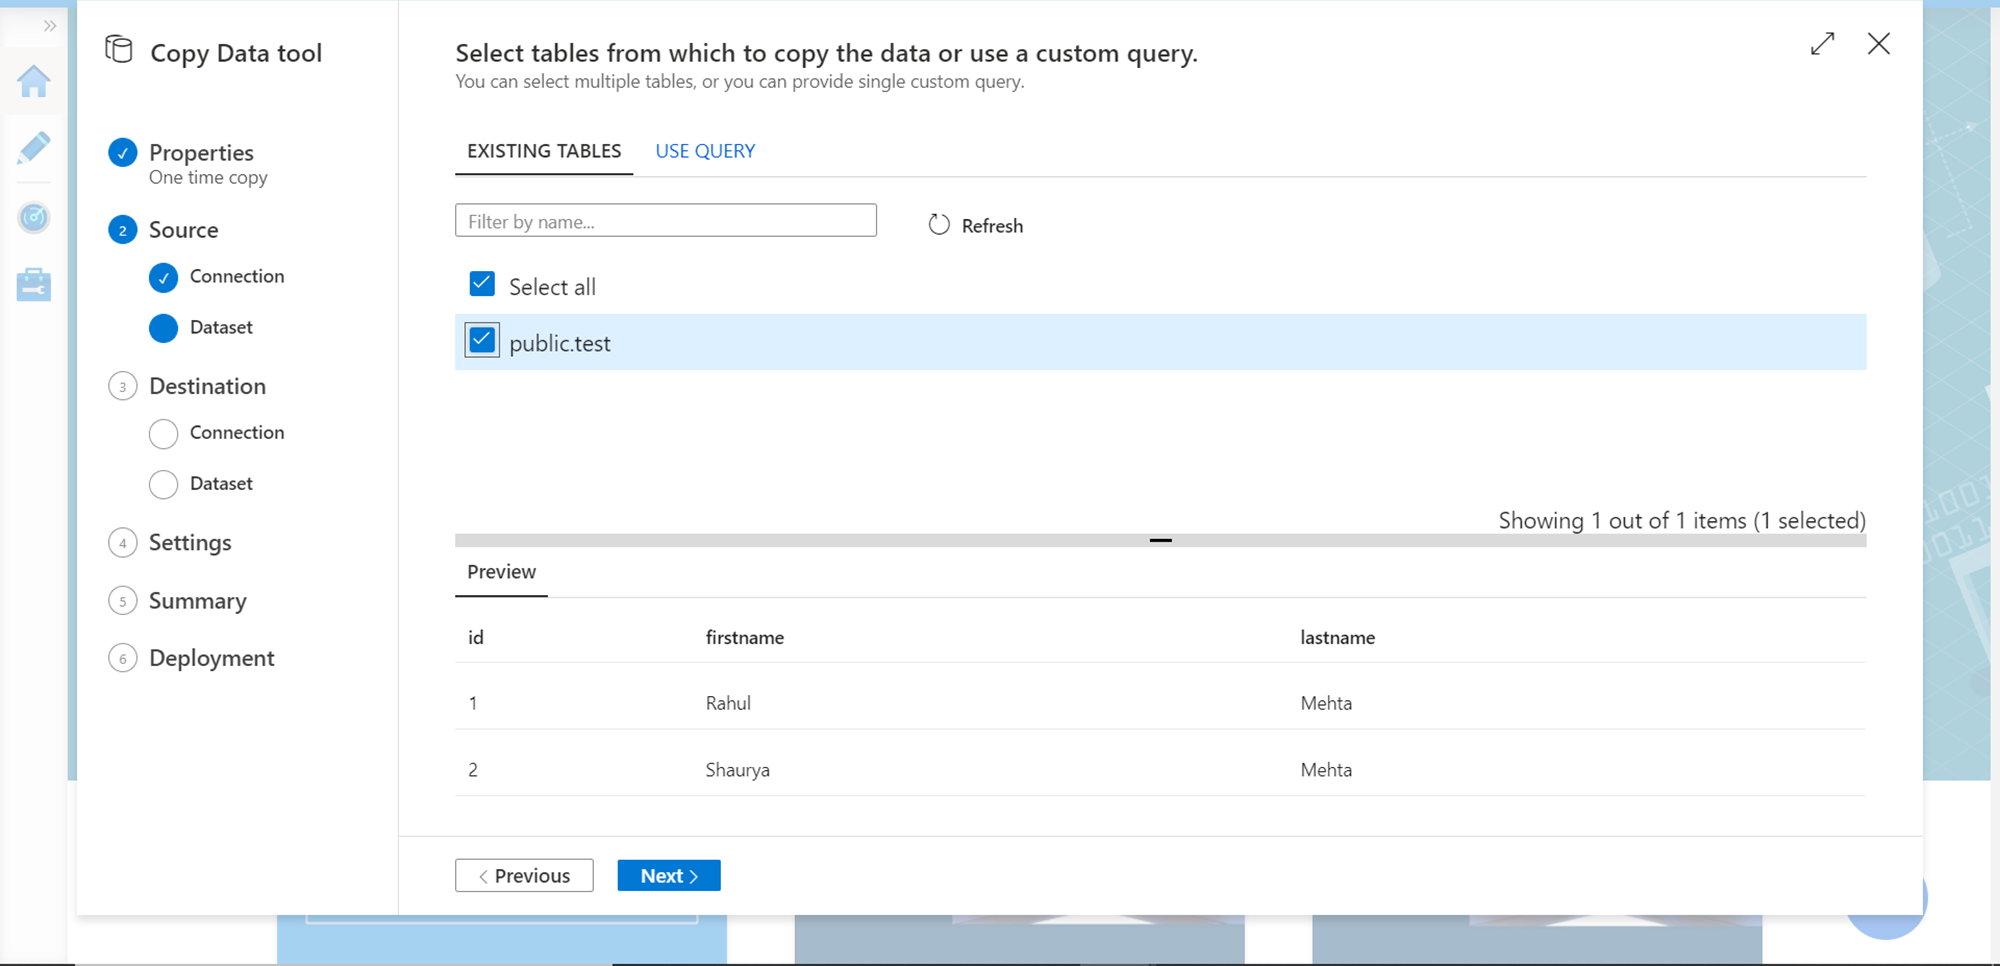
In the next step, select the tables that we intend to populate in the destination. In our case, we just have one table in the Redshift cluster which is shown below. Select this table and click on Next.
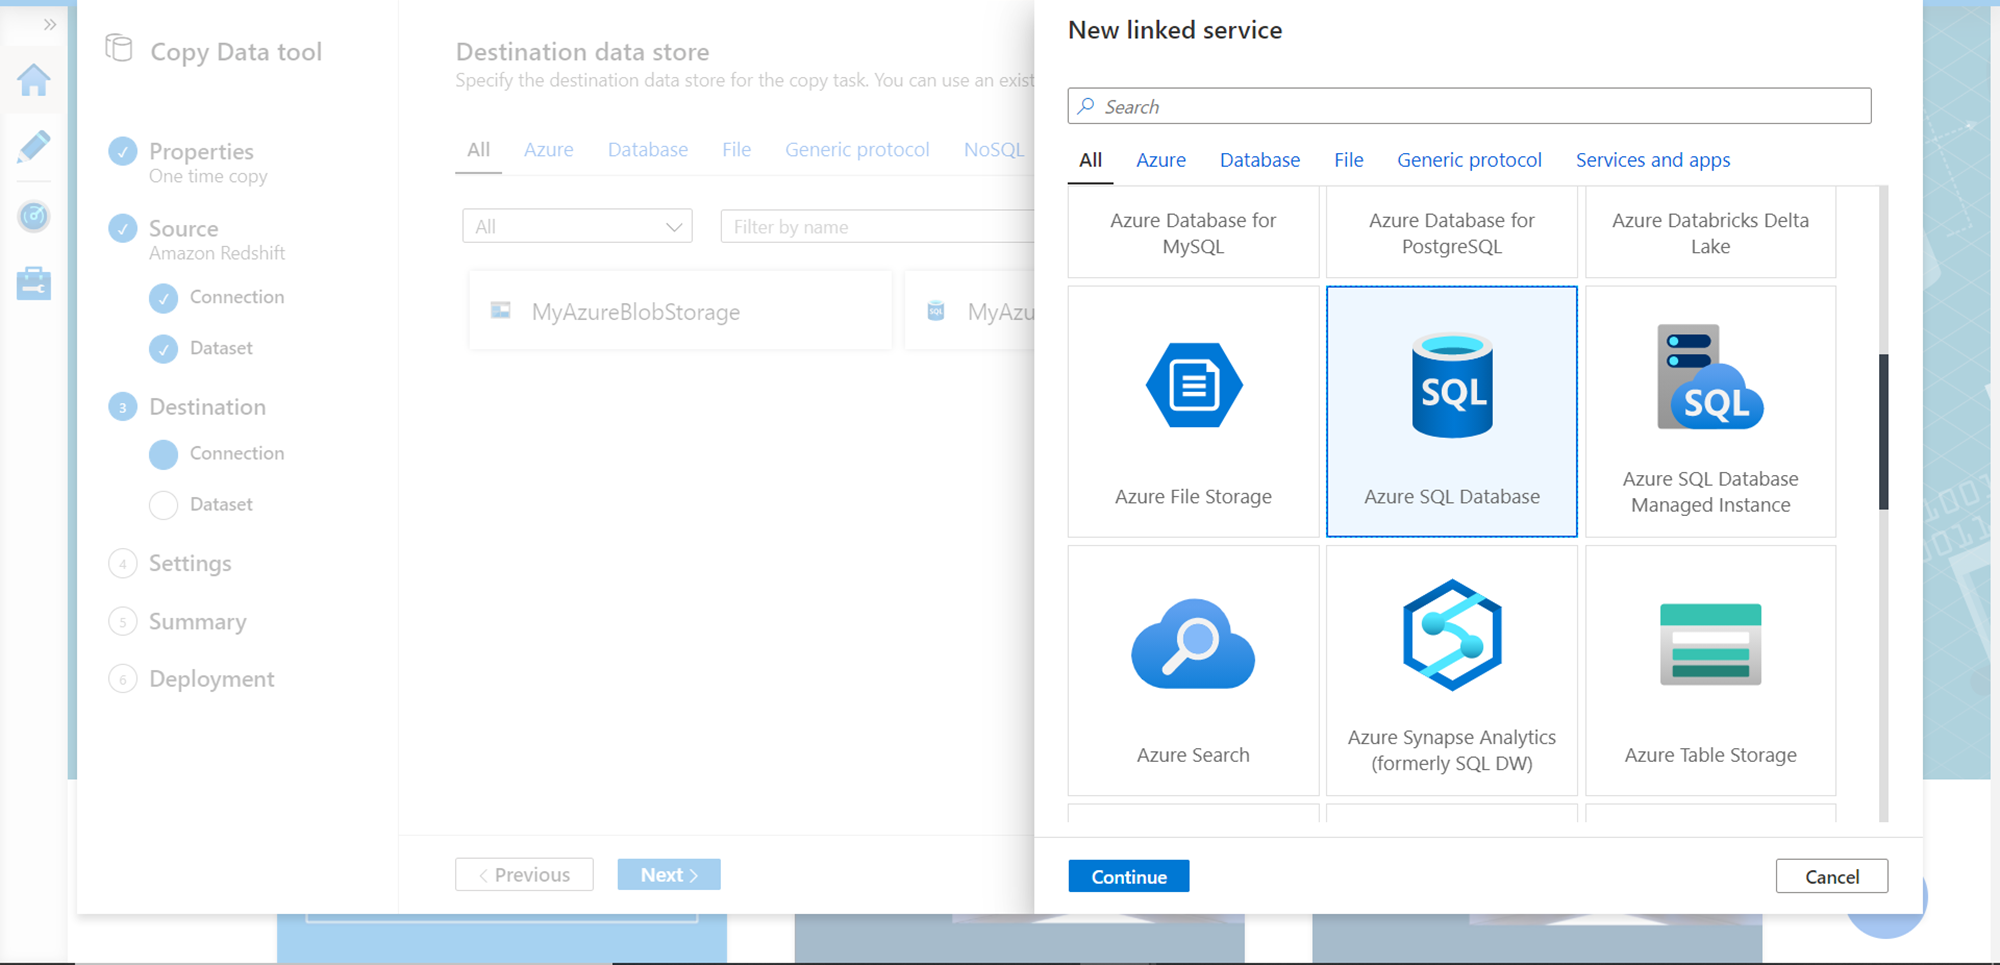
In the next step, repeat the previous steps that we followed to register the source database, this time for the destination database which is the SQL Server database as shown below.
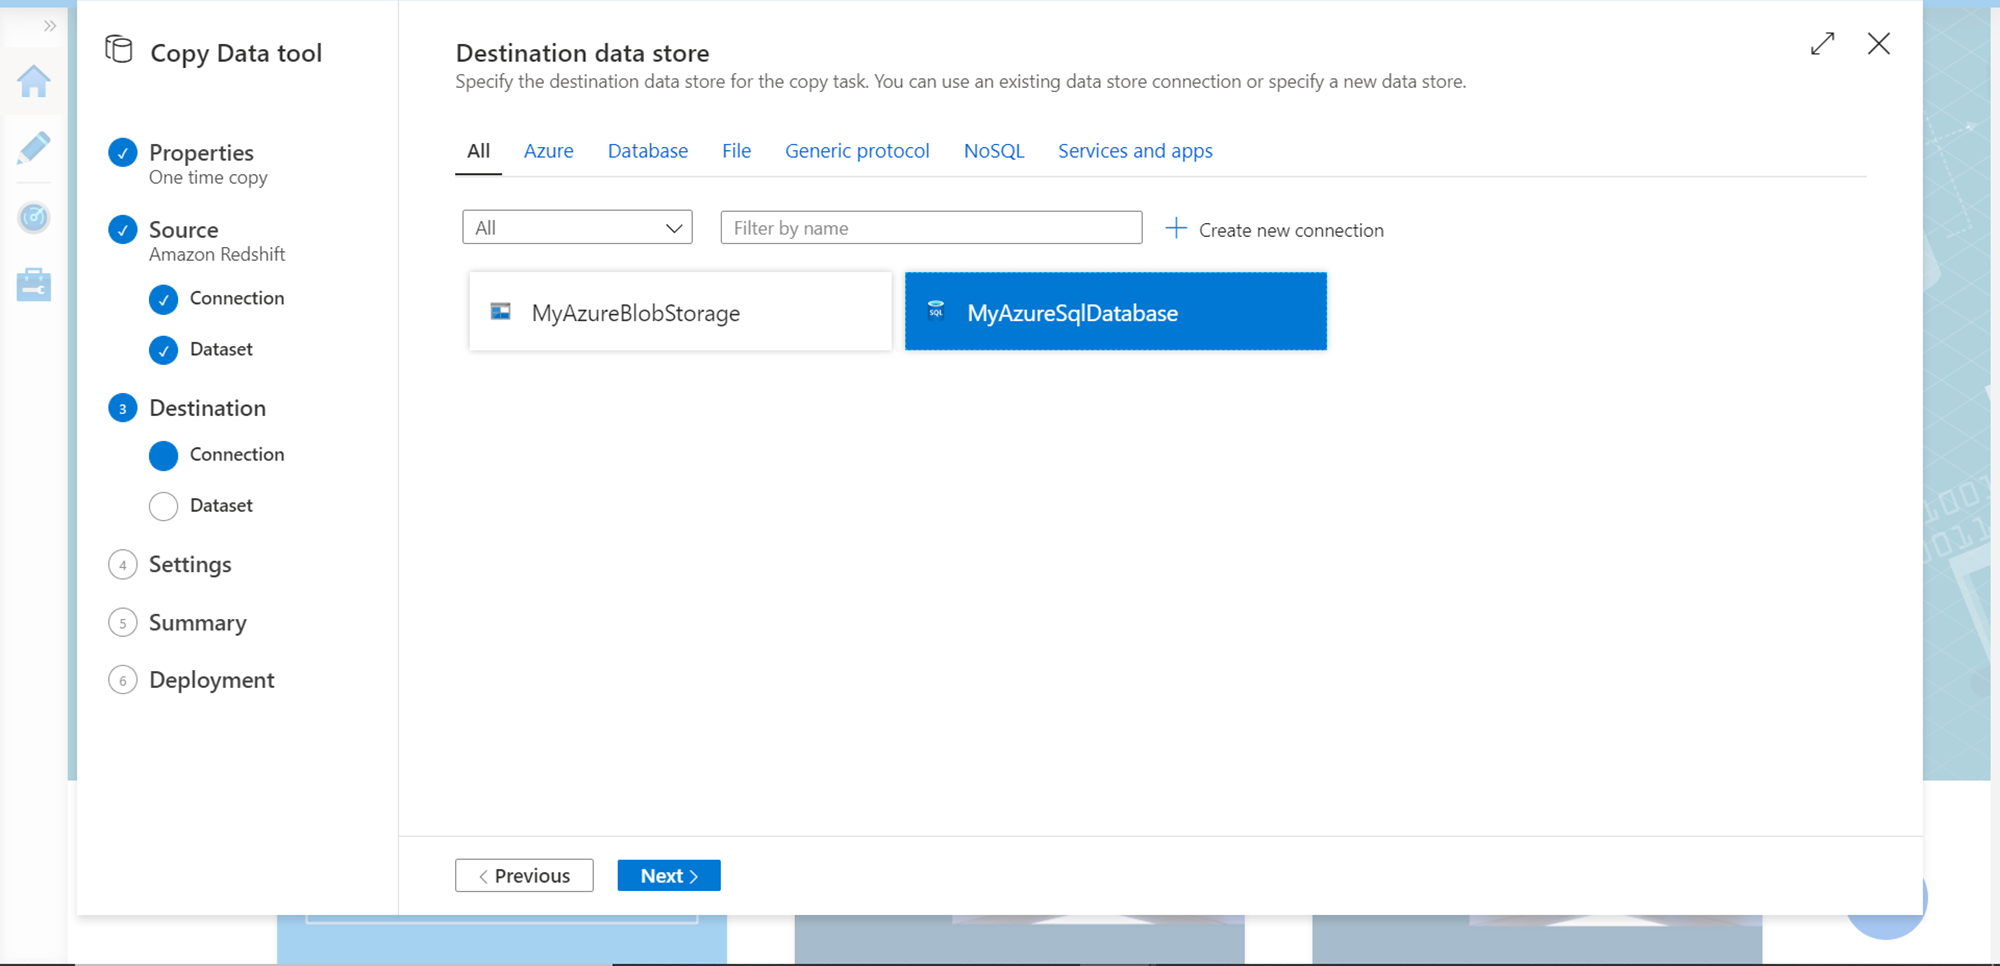
After the Azure SQL Server database is registered as a linked service, it would look as shown below.
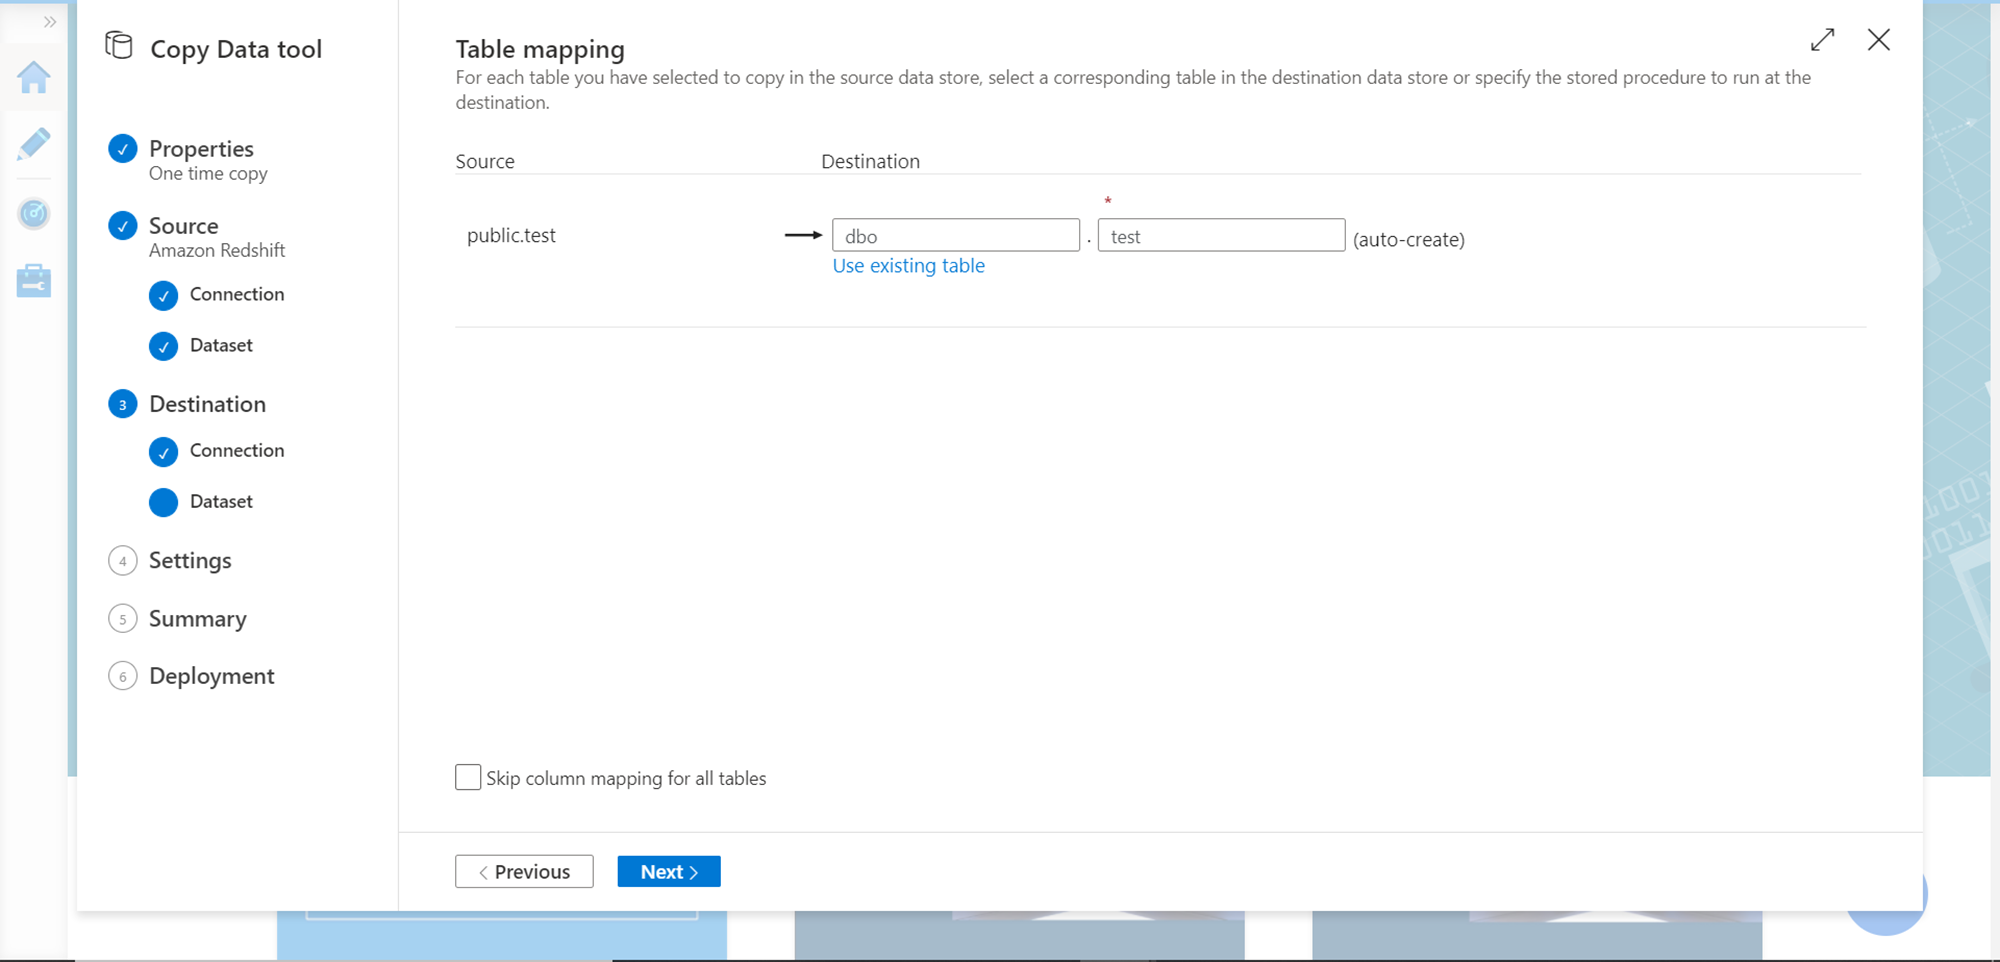
After registering the destination, now it’s time to map the source tables to the objects in the destination database. In our case, the database is empty as we intend to create new tables directly by the pipeline. In case if the need is to use existing tables, click on the existing table and map the objects accordingly.
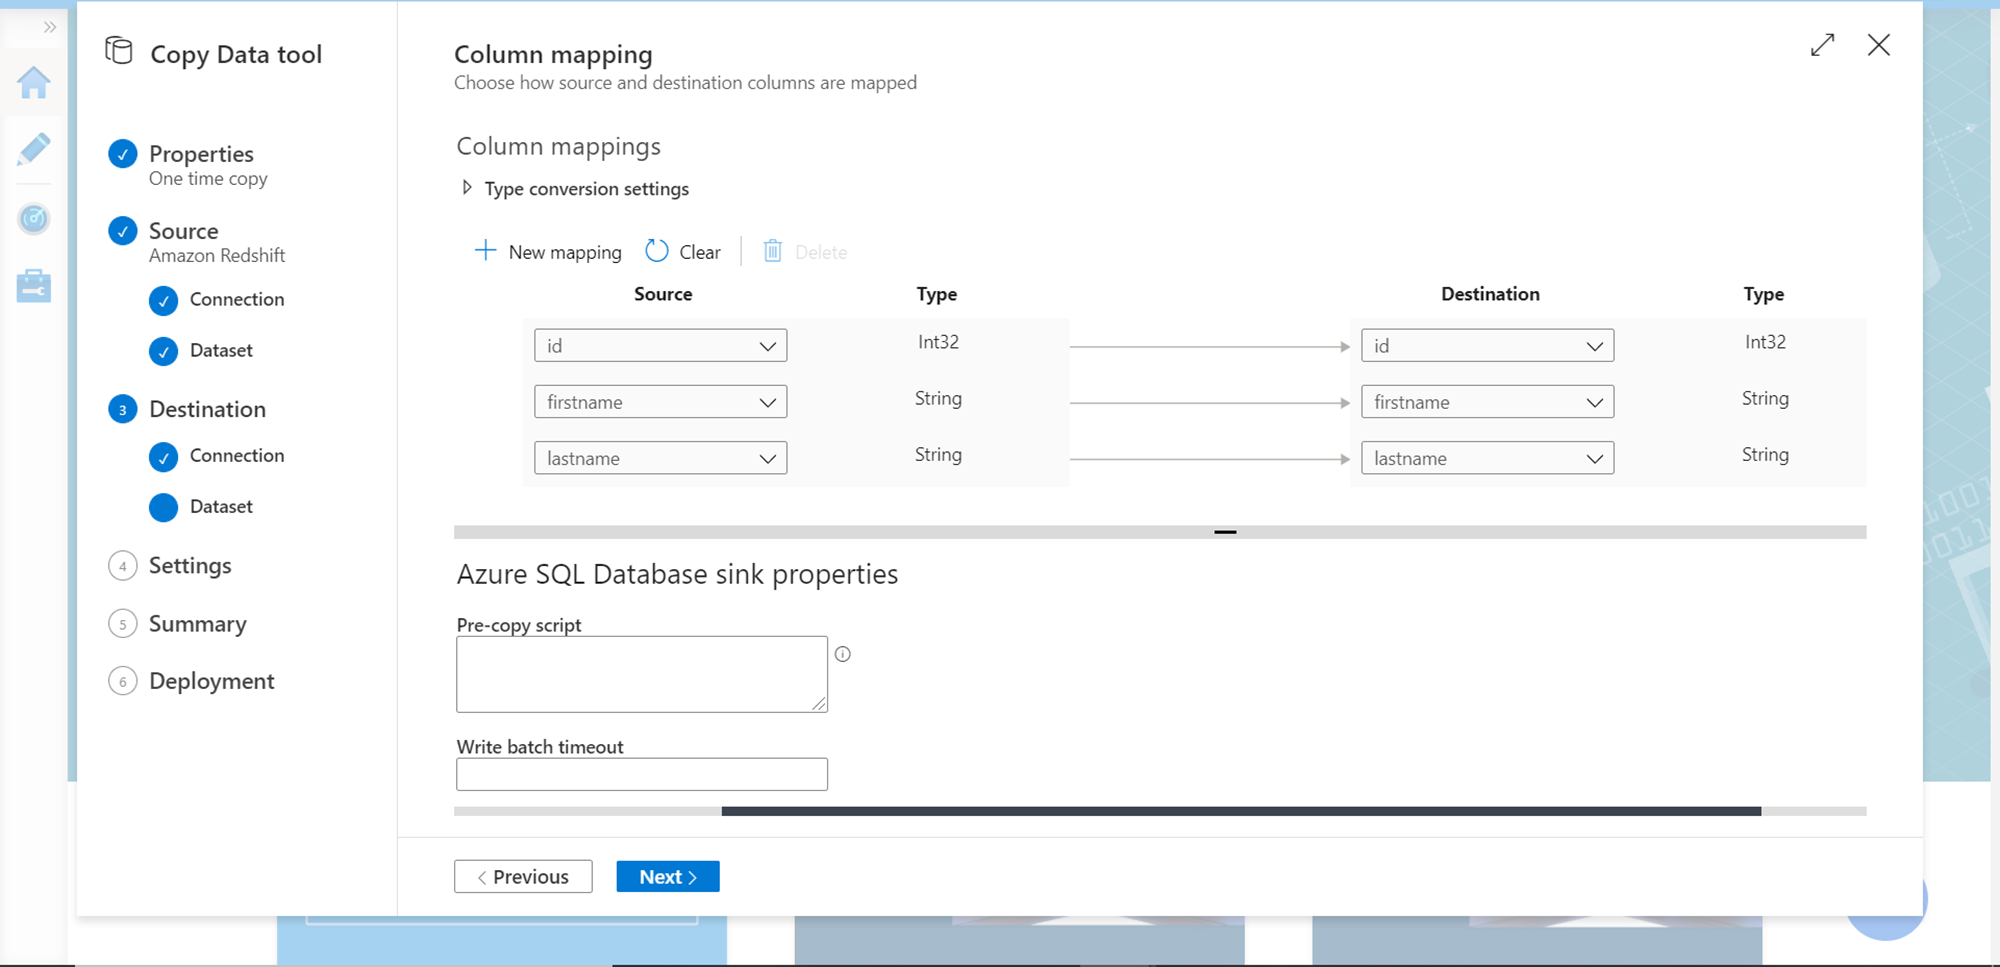
In the next step, verify the column mappings and modify the properties as required. In our case, we can proceed using the default values.
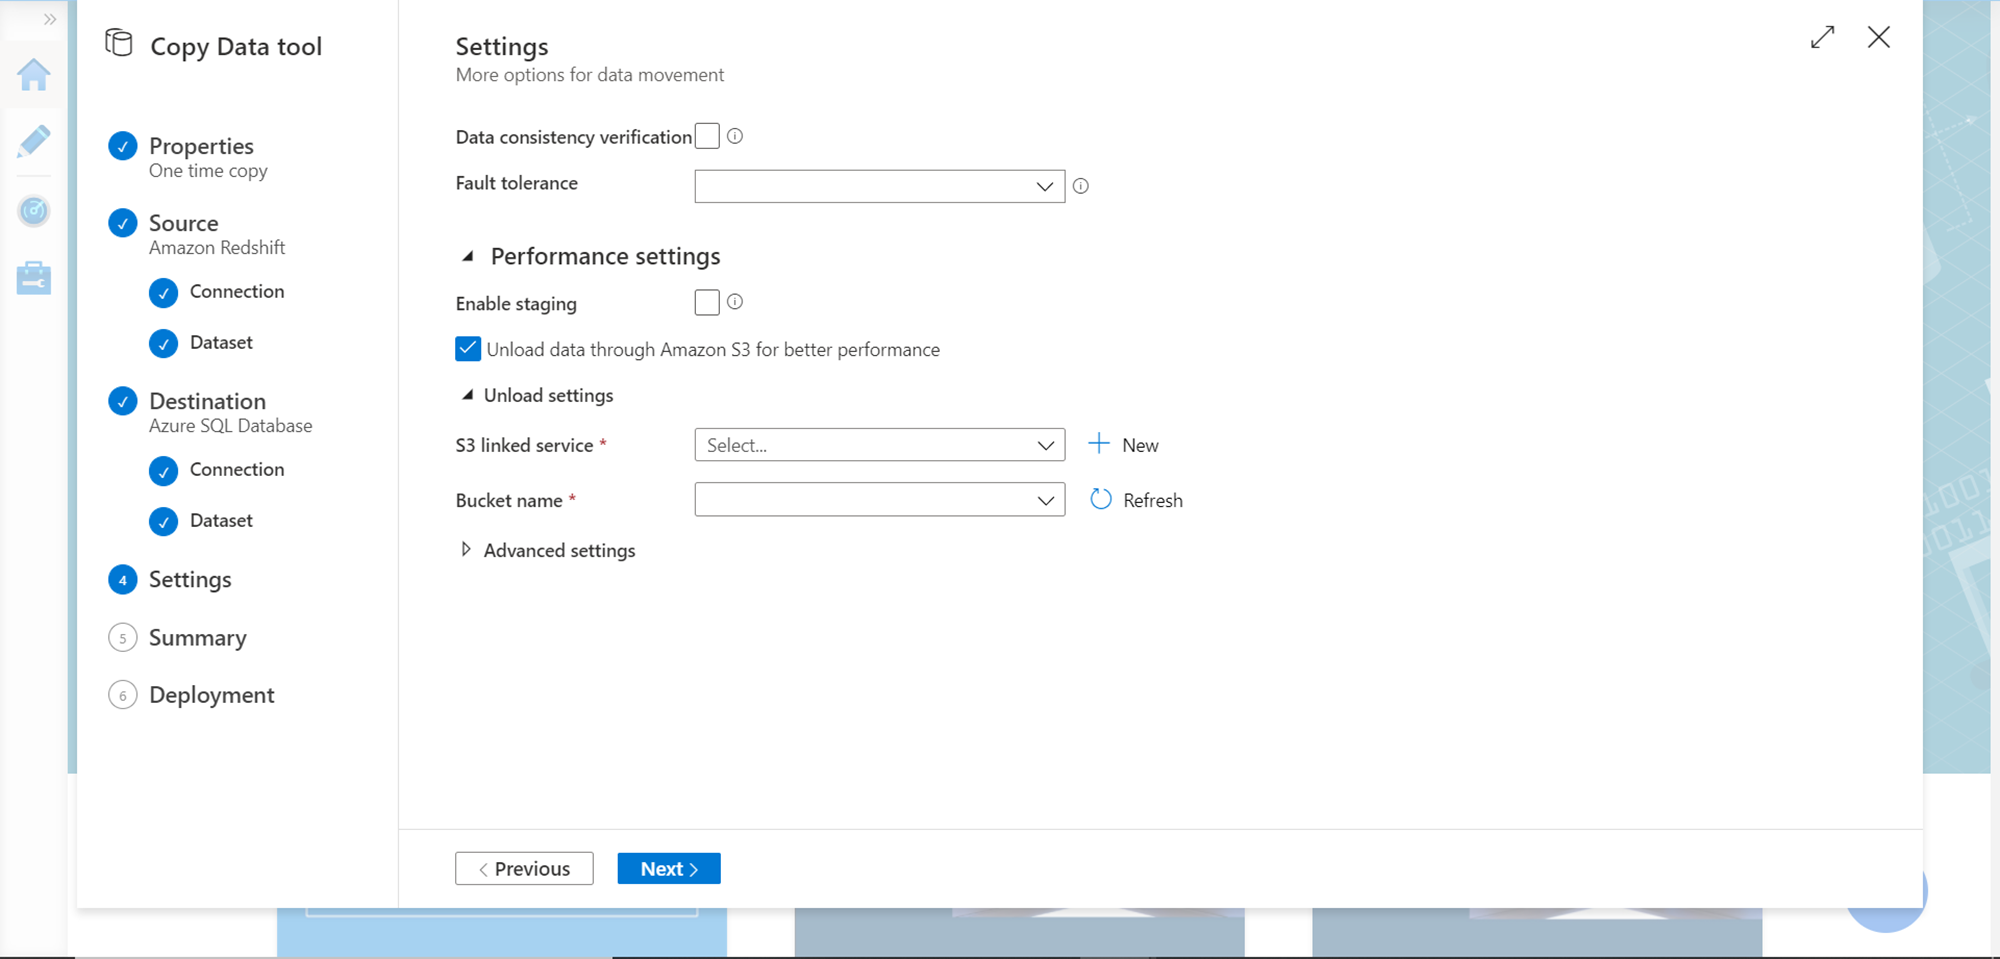
In this step, we can configure settings to optimize the data extraction from AWS Redshift. Often all the tools on the AWS ecosystem extract data from Redshift and stage it on AWS S3 before moving it ahead. Though it is completely possible to perform the extraction and population of the data completely in-flight and in-memory. For now, to keep the process simple, uncheck the “Unload data through Amazon S3 for better performance”, so that we do not have to register S3 as a linked service. Once done, click on the Next button.
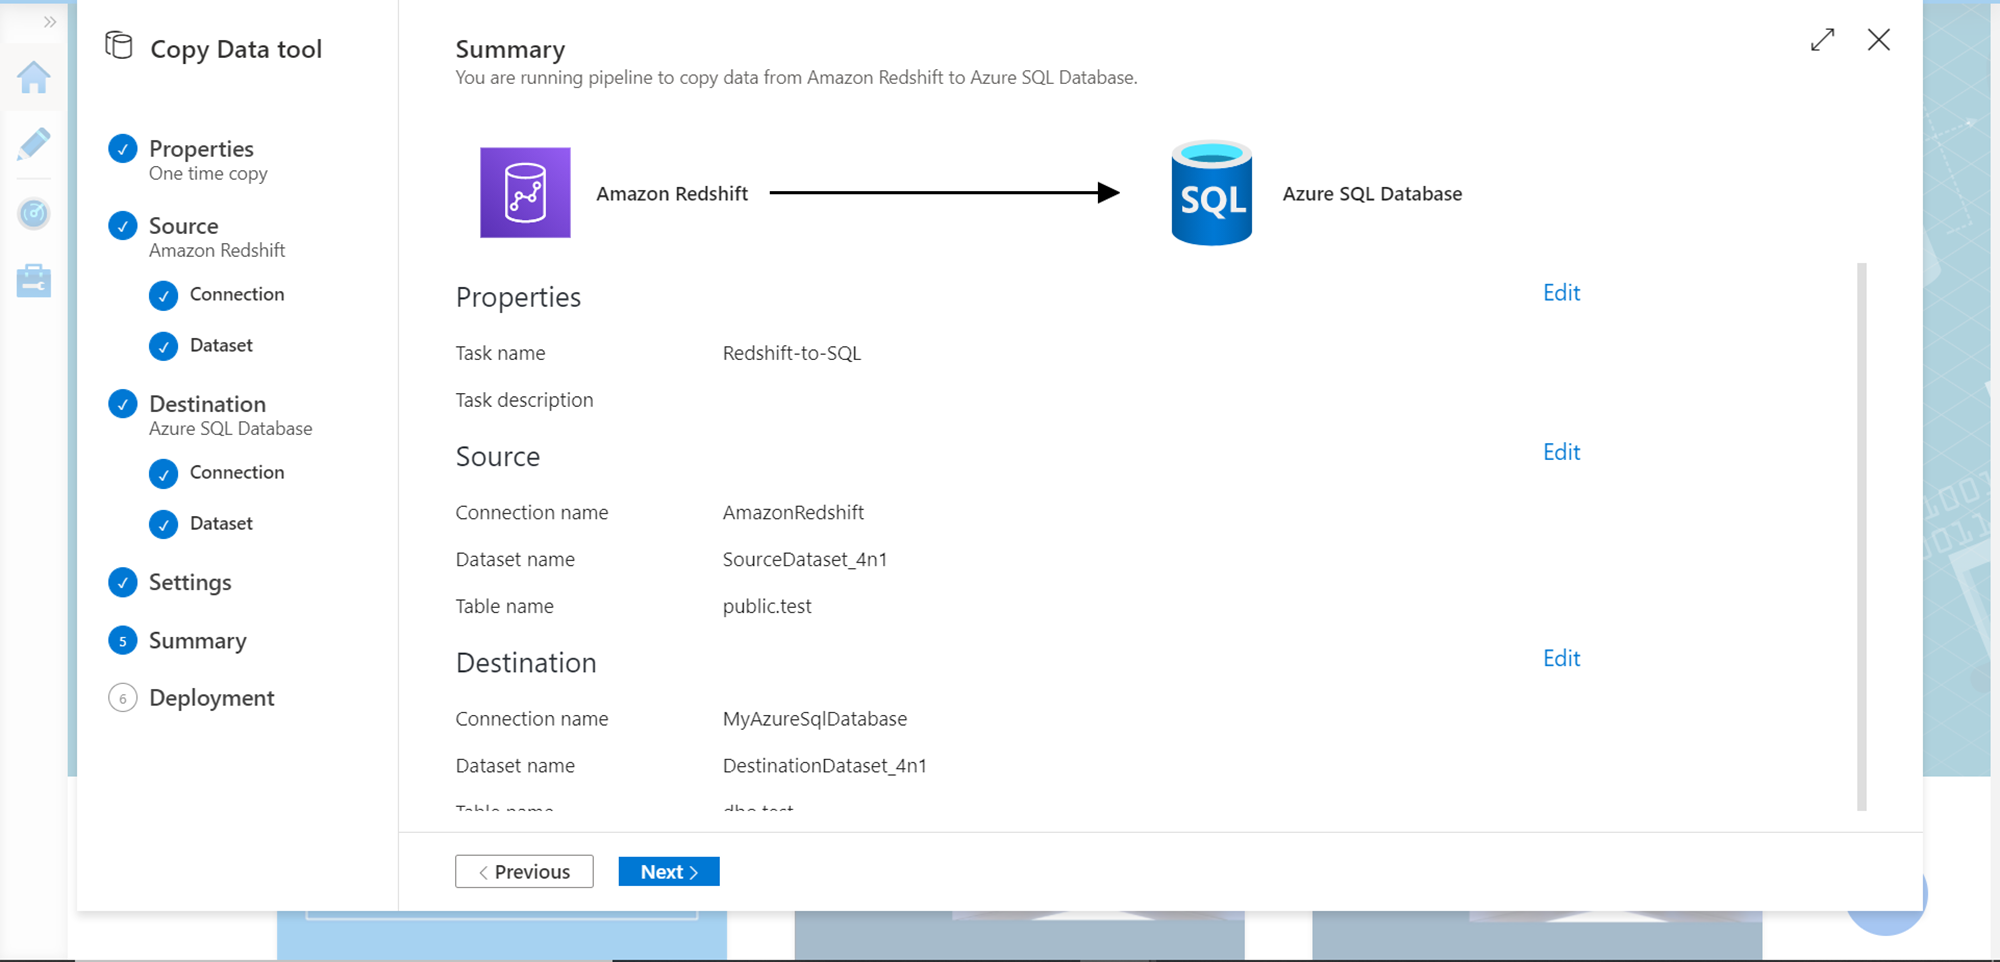
Finally, we should be on the Summary page, where we just need to verify the details and start deploying the pipeline. Verify the details and click on the Next button.
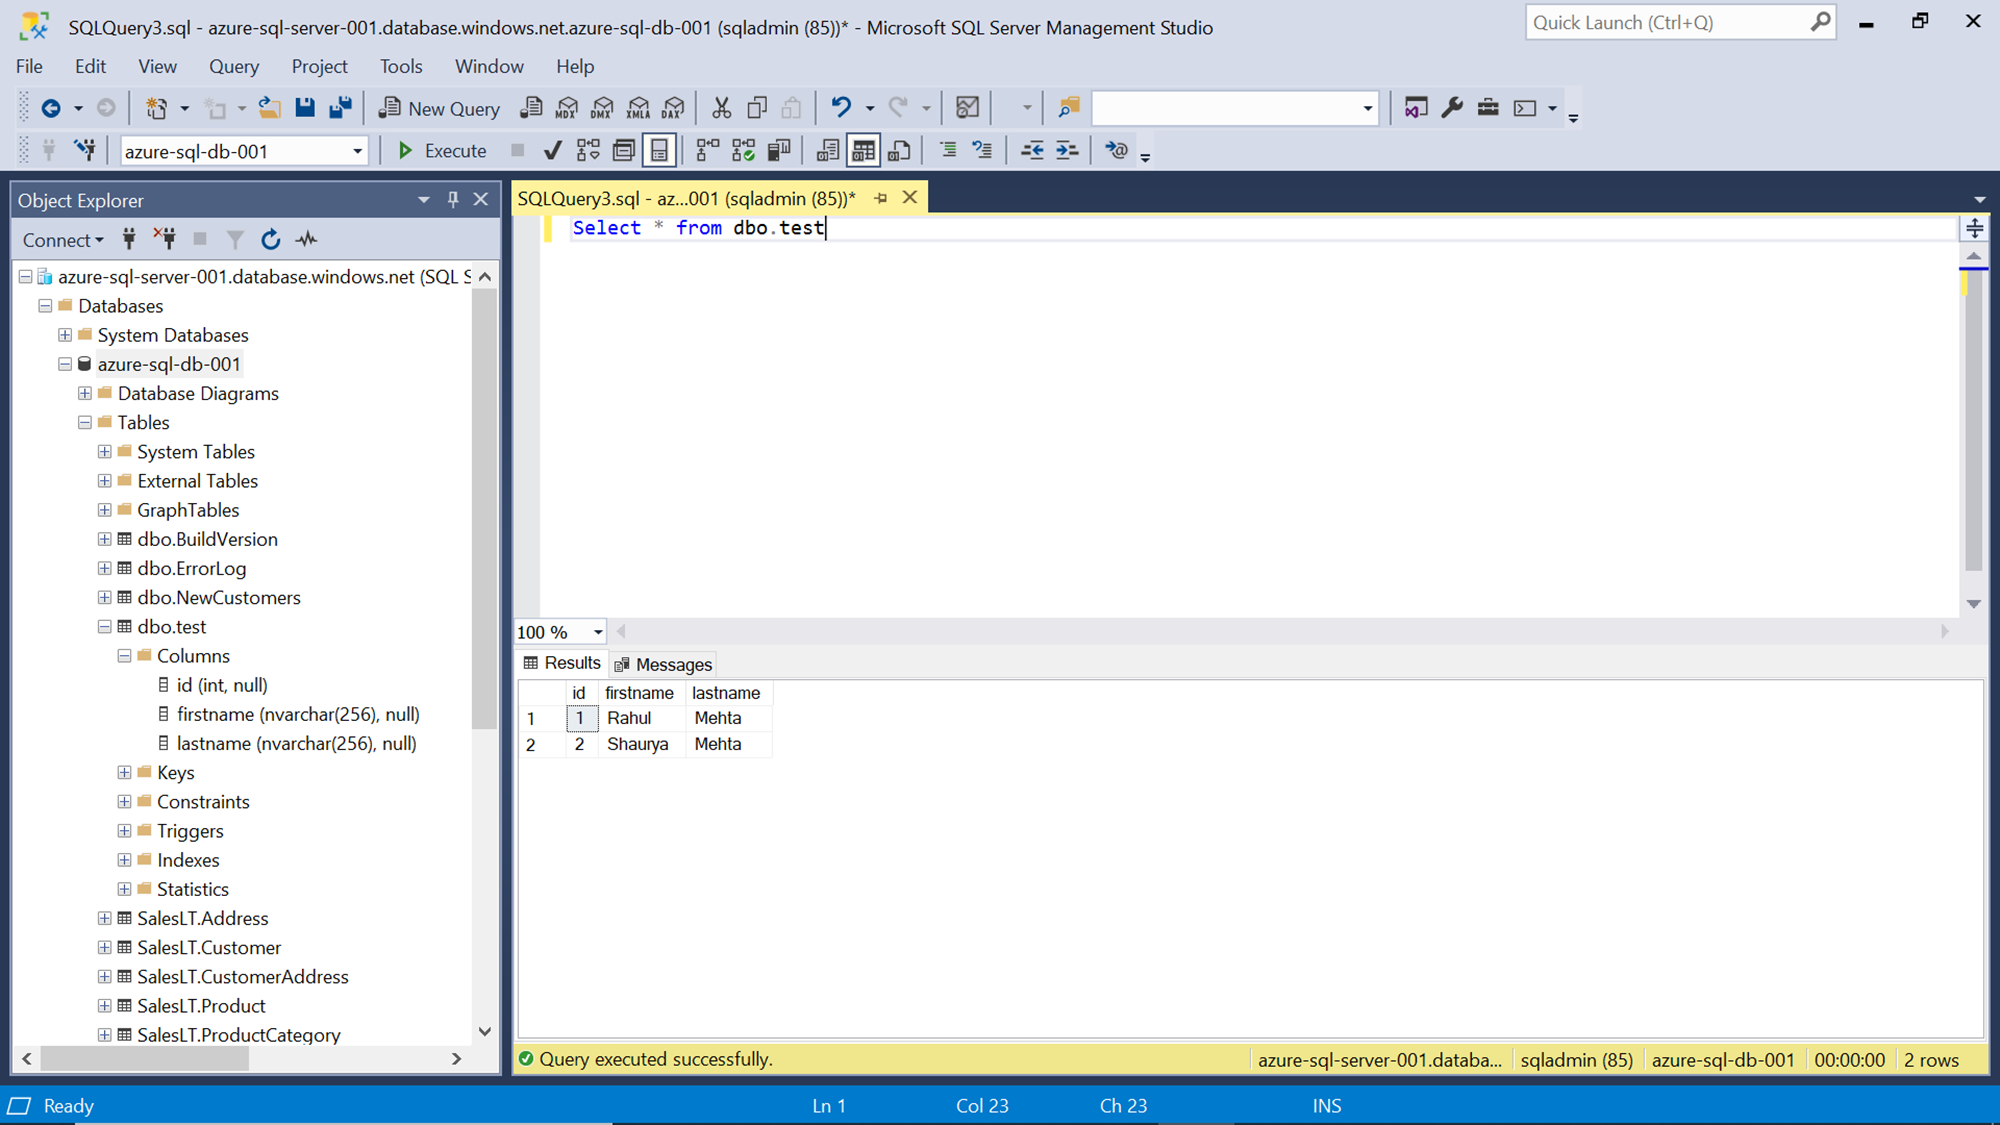
This would deploy and execute the pipeline, which would extract the data from the Redshift table, and populate the same data in a new table in Azure SQL Database as shown below.
In this way, we can use the Azure Data Factory to populate data from AWS Redshift to the Azure SQL Server database.
Conclusion
In this article, as a pre-requisite, we started with the Redshift cluster as the source and Azure SQL Database as a destination. We created an Azure Data Factory instance to create a pipeline that sourced data from the AWS Redshift table and populated the same in a new Azure SQL Database table. We also learned different settings the can be configured to optimize the performance of the pipeline.
Table of contents

He has worked internationally with Fortune 500 clients in various sectors and is a passionate author.
View all posts by Rahul Mehta
- Finding Duplicates in SQL - February 7, 2024
- MySQL substring uses with examples - October 14, 2023
- MySQL group_concat() function overview - March 28, 2023