
This article provides a step by step explanation of how to create an Aurora DB cluster that is compliant with MySQL or PostgreSQL.
Introduction
AWS RDS Aurora is an AWS native relational database that is compliant with MySQL as well as PostgreSQL, and a fully managed database service. It is available in an instance sized model as well as a serverless model. It is available for deployment as a single region as well as a multi-region database. Considering the various features and compliance it offers with above mentioned open source databases, it is a very promising migration candidate for those who intend to migrate from open source databases to cloud-native databases without losing compatibility or having to re-work the entire database and connected systems. In this article, we will learn how to get started with the AWS RDS Aurora DB cluster and create a new Aurora database instance.
AWS RDS Aurora Setup
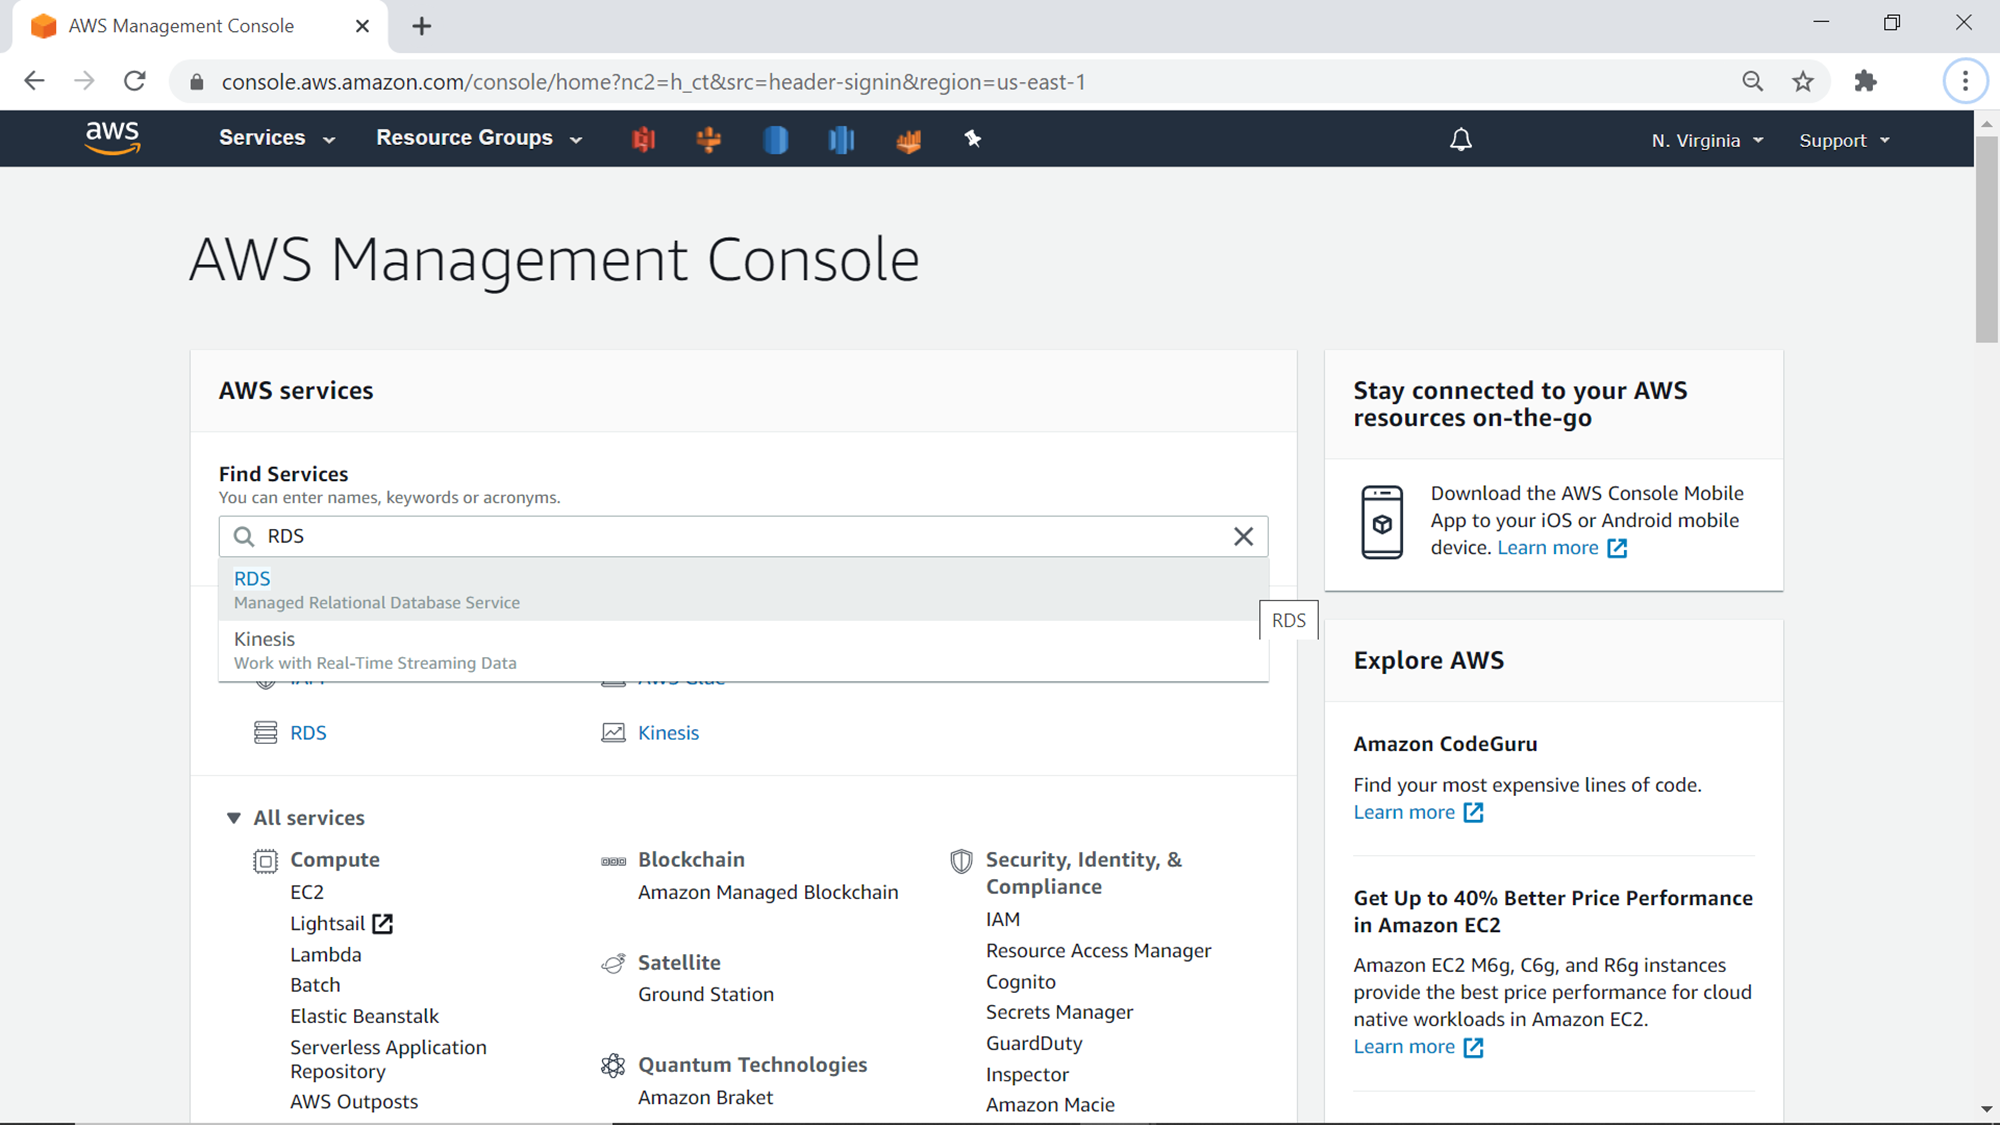
Aurora is one of the six databases offered as part of the AWS RDS database offerings. So, we need to first navigate to the AWS RDS homepage. Open the AWS Management Console, and type AWS in the search console. It would show the AWS RDS Service link as shown below. Click on that to navigate to the AWS RDS Dashboard page.
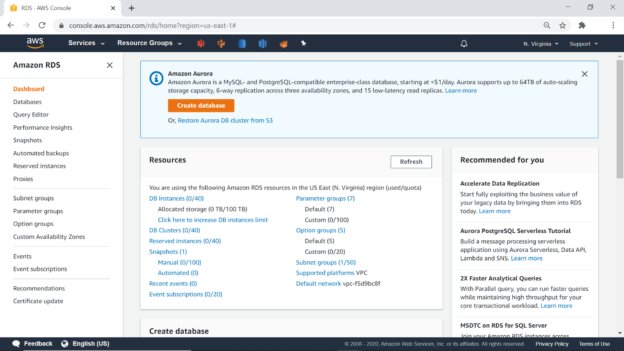
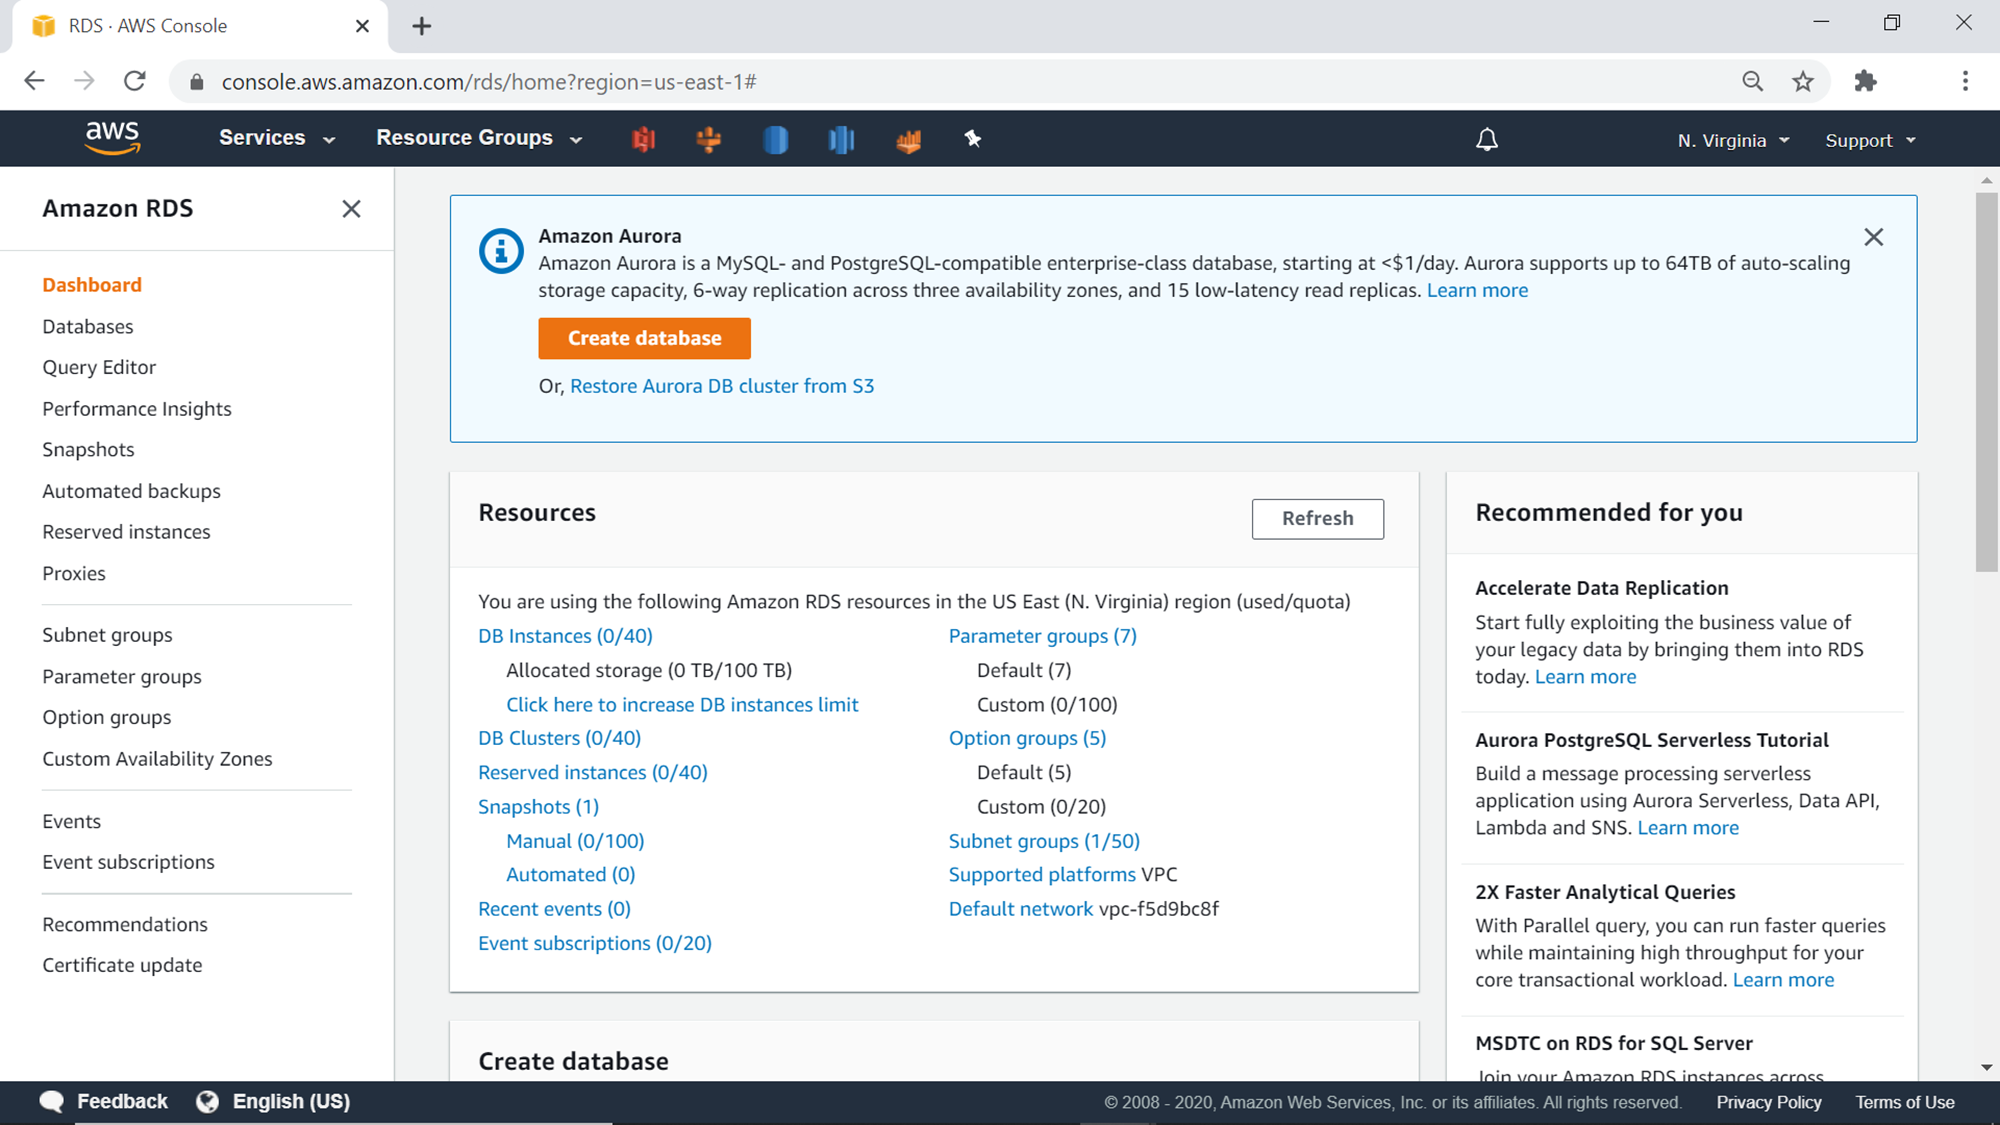
Once you land on the dashboard page, it would look as shown below. Generally, there would be an informational message showing that Aurora is a MySQL and PostgreSQL compatible database, with a Create database button to start creating the database from the dashboard page itself. You can click this button or you can click on the Database Instances link in the Resources section.
Clicking on any of the options would land you on the create database wizard. The first option to select on this wizard is whether one would like to use the Standard Create option or the Easy Create option. The Standard Create option provides options to configure and customize all the details to configure the AWS RDS Aurora cluster, while the Easy Create option uses recommended settings for most of the options. Advance users generally go with the Standard Create option, which is the default option as well. We will select this option as we intend to explore all the settings to create the cluster.
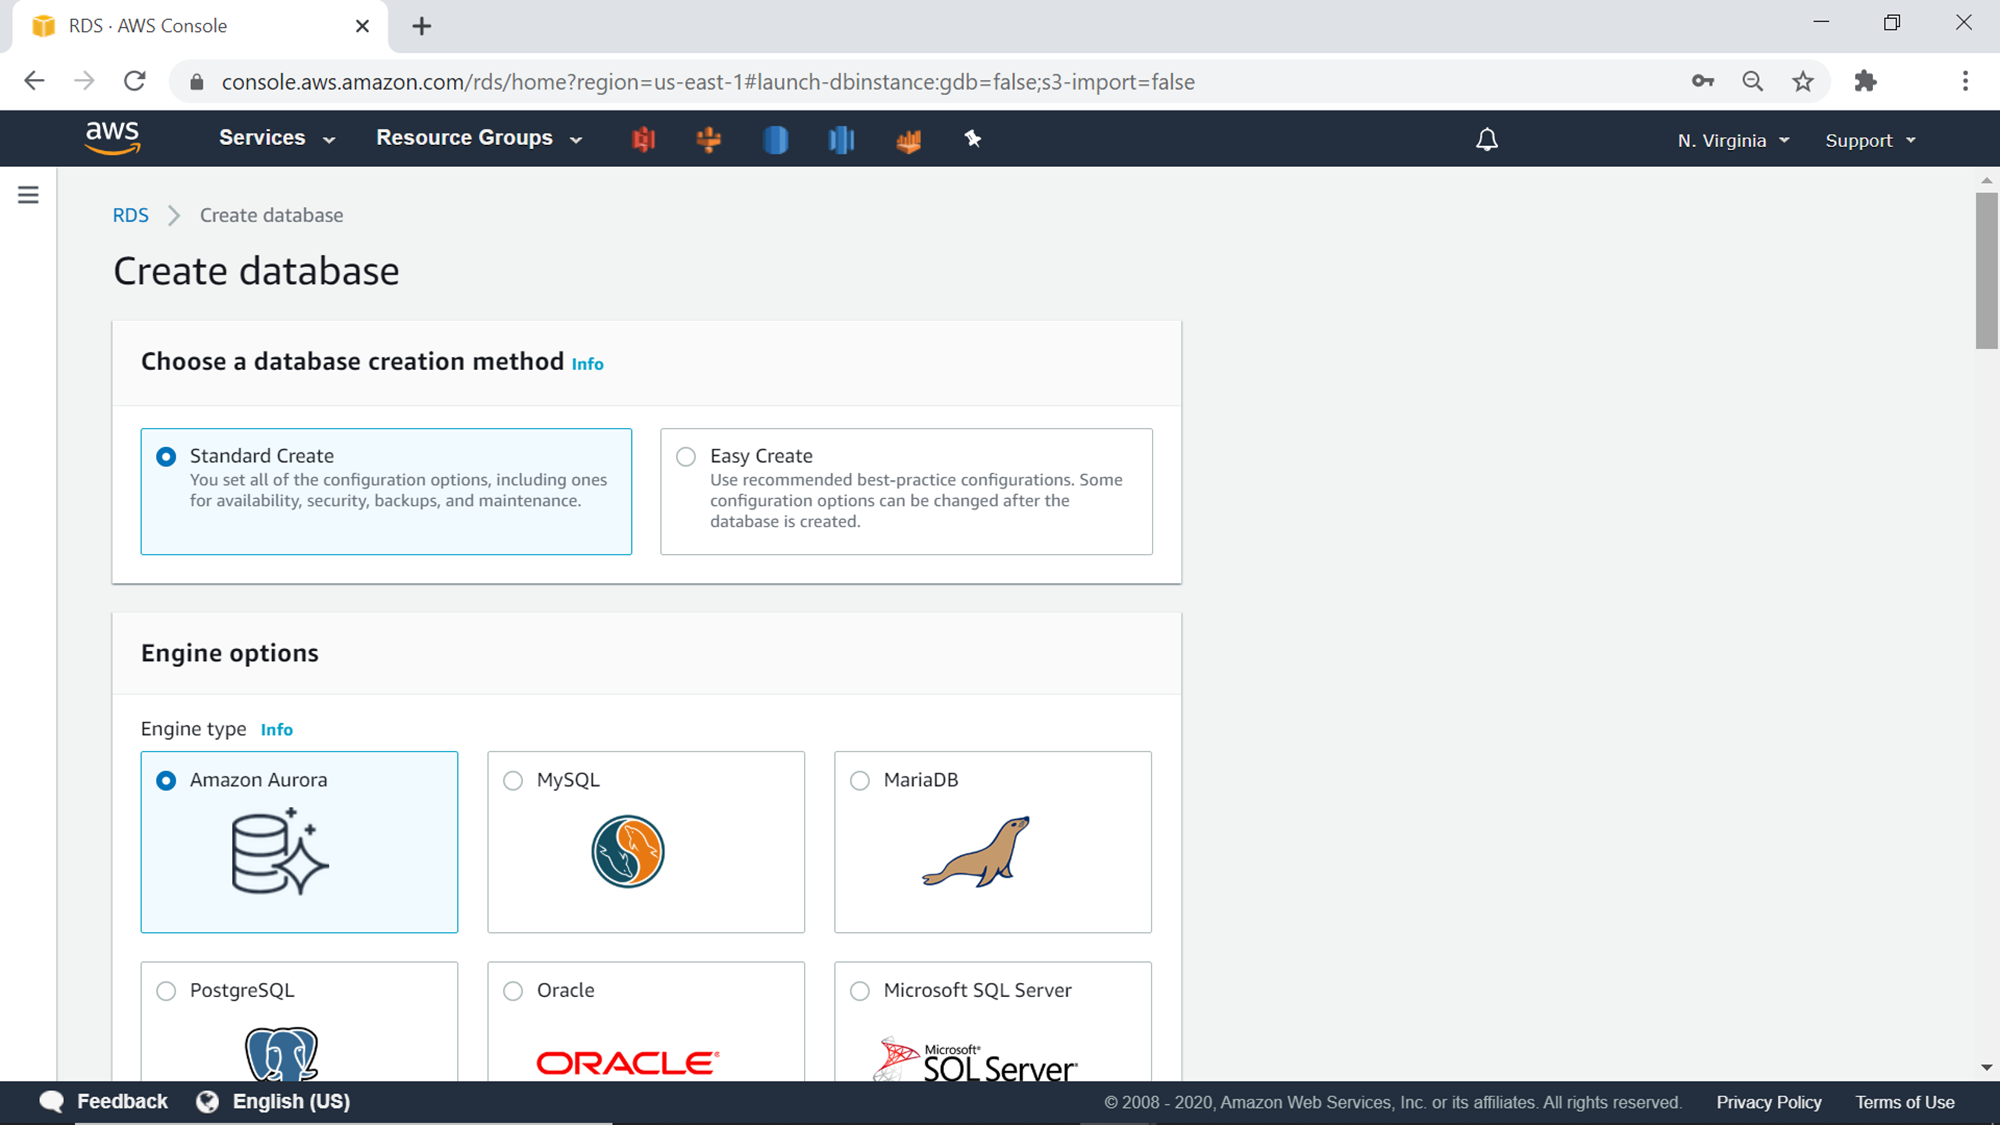
The next step is the Engine options. As we intend to create an AWS RDS Aurora cluster, we would select Amazon Aurora as the Engine. Aurora engine comes in two editions – MySQL compatible and PostgreSQL compatible. The topology and architecture of Aurora remain native of Aurora, but the database engine remains compliant with the selected edition. This enables users to use their existing MySQL or PostgreSQL tools with the Amazon Aurora engine and still benefit from the additional features that Aurora provides on the top of these database engines. Select the edition of your choice.
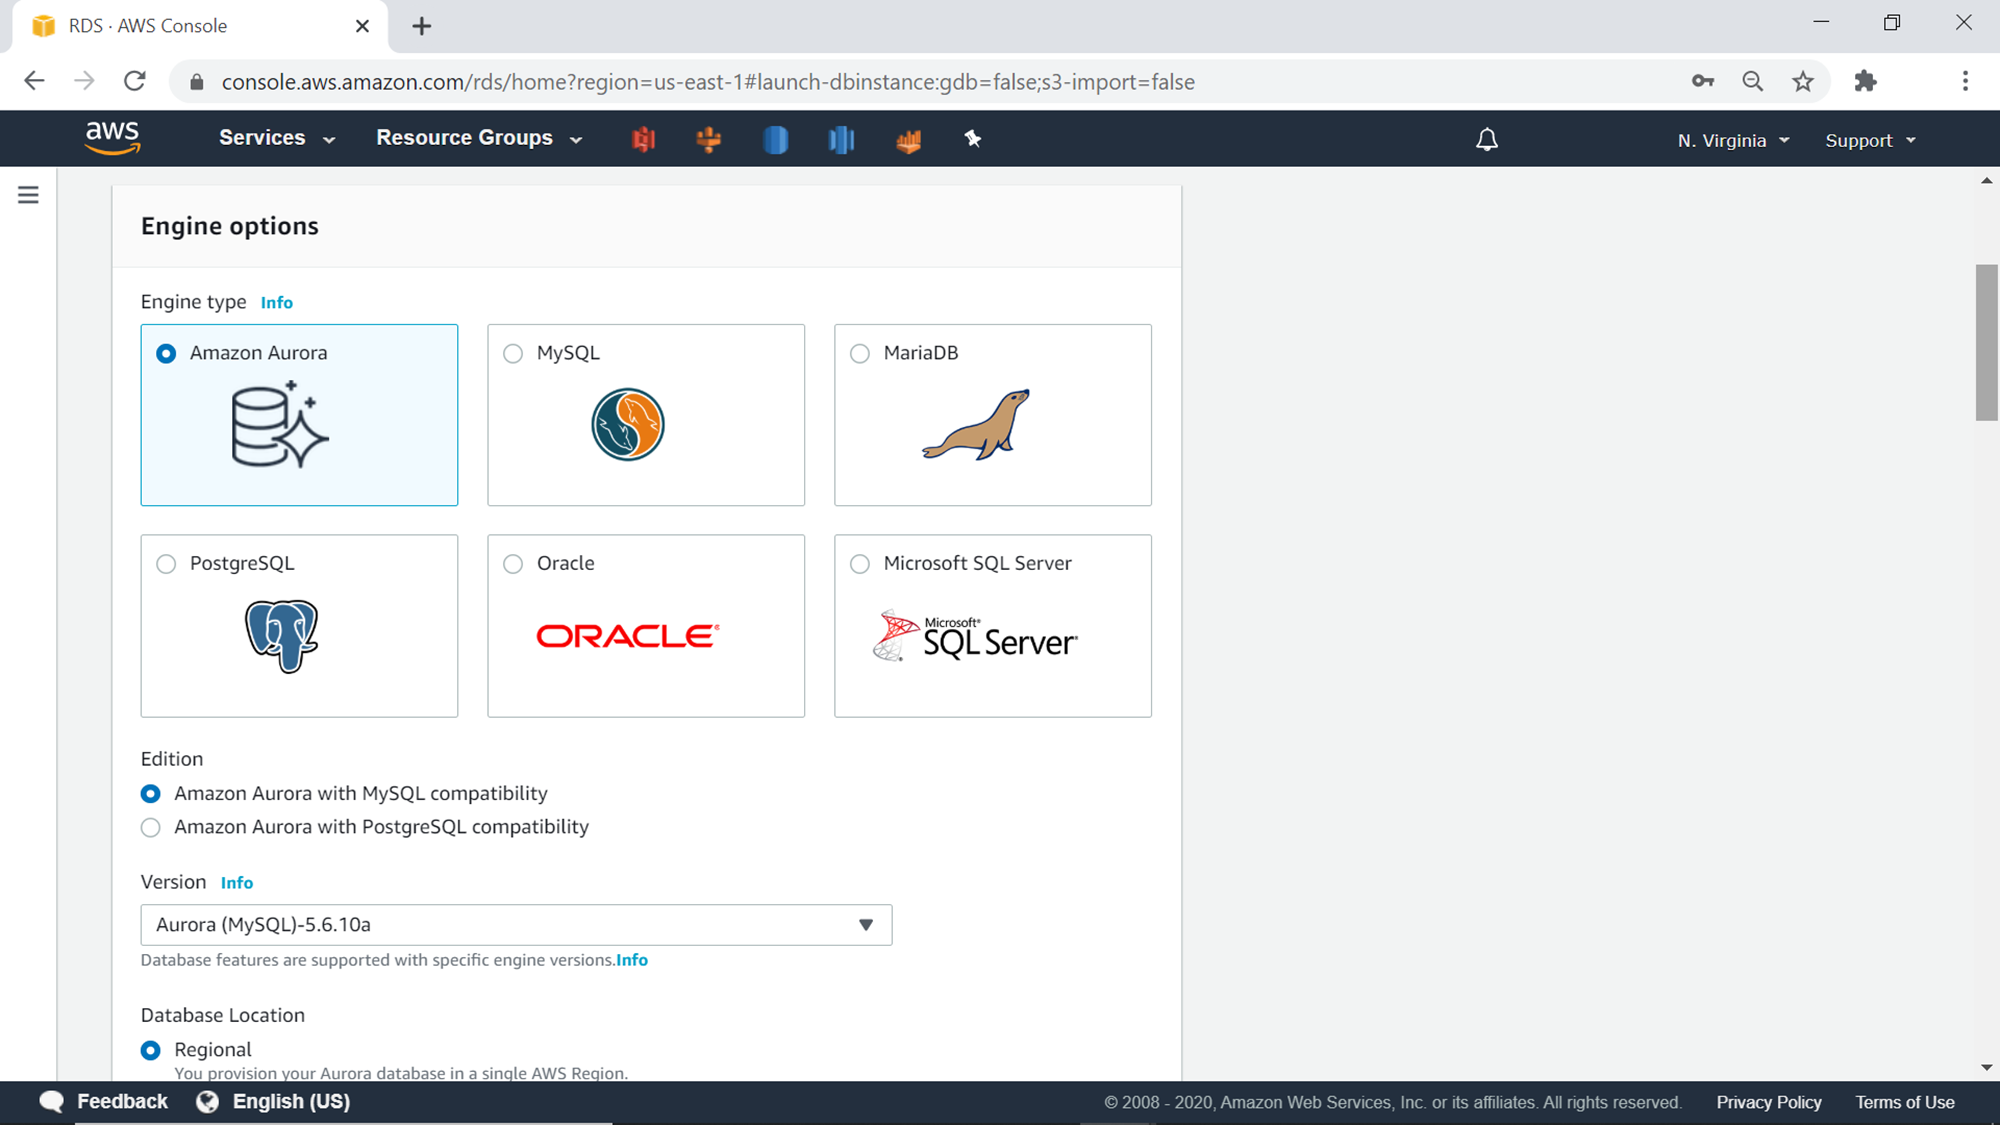
The next step is the Database Location. Aurora allows the creation of a Regional database Or a Global database. As the name suggests, one can create an Aurora database in any single AWS region, whereas the Global database can span multiple regions. One does not need a global database unless they need their database existence in multiple geographies or regions. For the demonstration, we would be continuing with the Regional database.

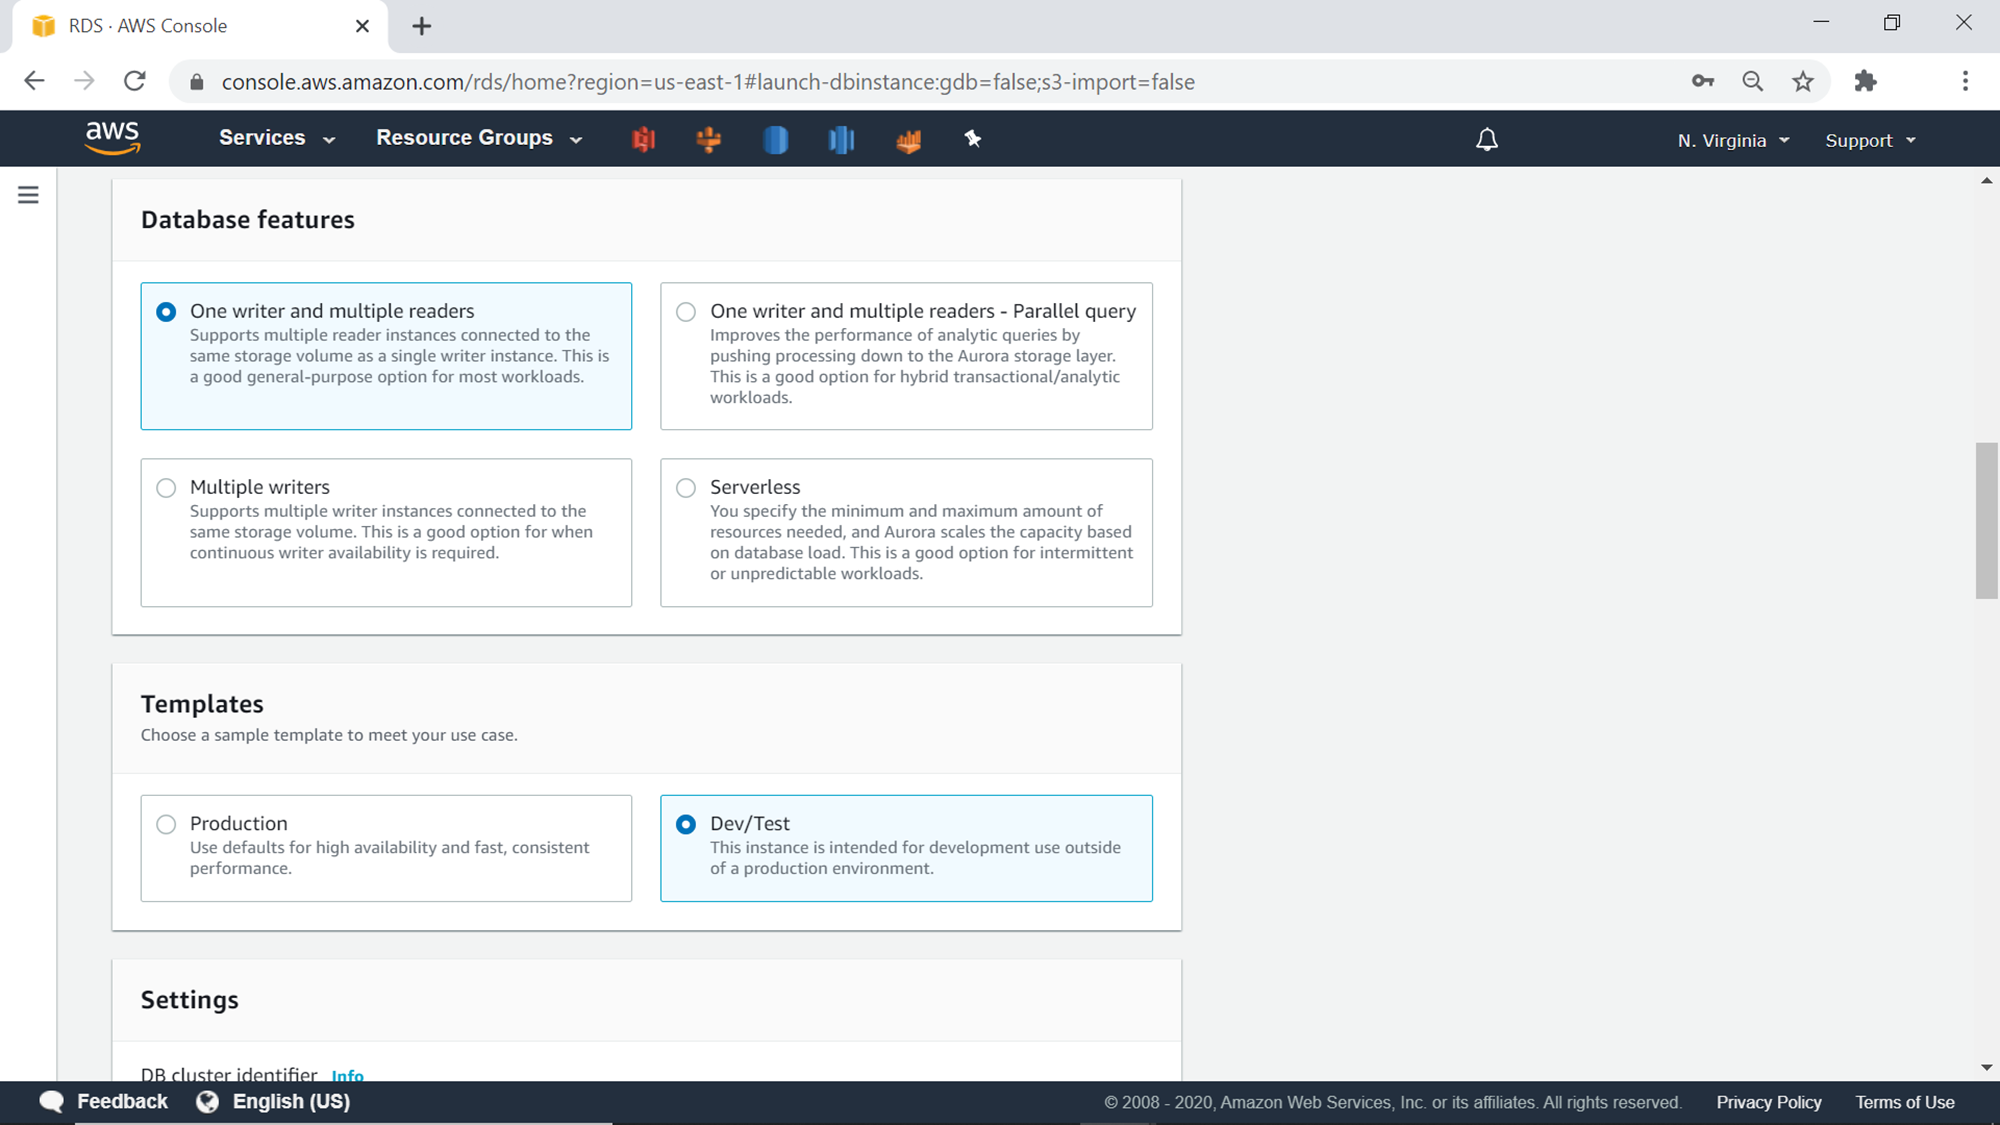
The next step is to select the database features. There are four options as shown below.
- One writer multiple readers – This is the default option, and can be used in general when you have more reads than writes on your database instance
- One writer and multiple readers – Parallel Query – This option is suitable when you have analytical workloads that may involve large scale data aggregation, complex calculations, and typical operations of analytical workloads on a massive volume of transactional data
- Multiple writers – This option is suitable for use-cases where the database writes are extremely high in volume compared to reads, and parallel write capacity is required by multiple applications
- Serverless – This option is suitable when the database usage is very volatile or unpredictable, and you need the database capacity to elastically scale with the workloads
After selecting the database feature, the next step is to select the template – whether the database is being created for production workloads or lower environments. This option sets the default settings of the rest of the database configuration accordingly. For demo purposes, we can go ahead with Dev/Test template.
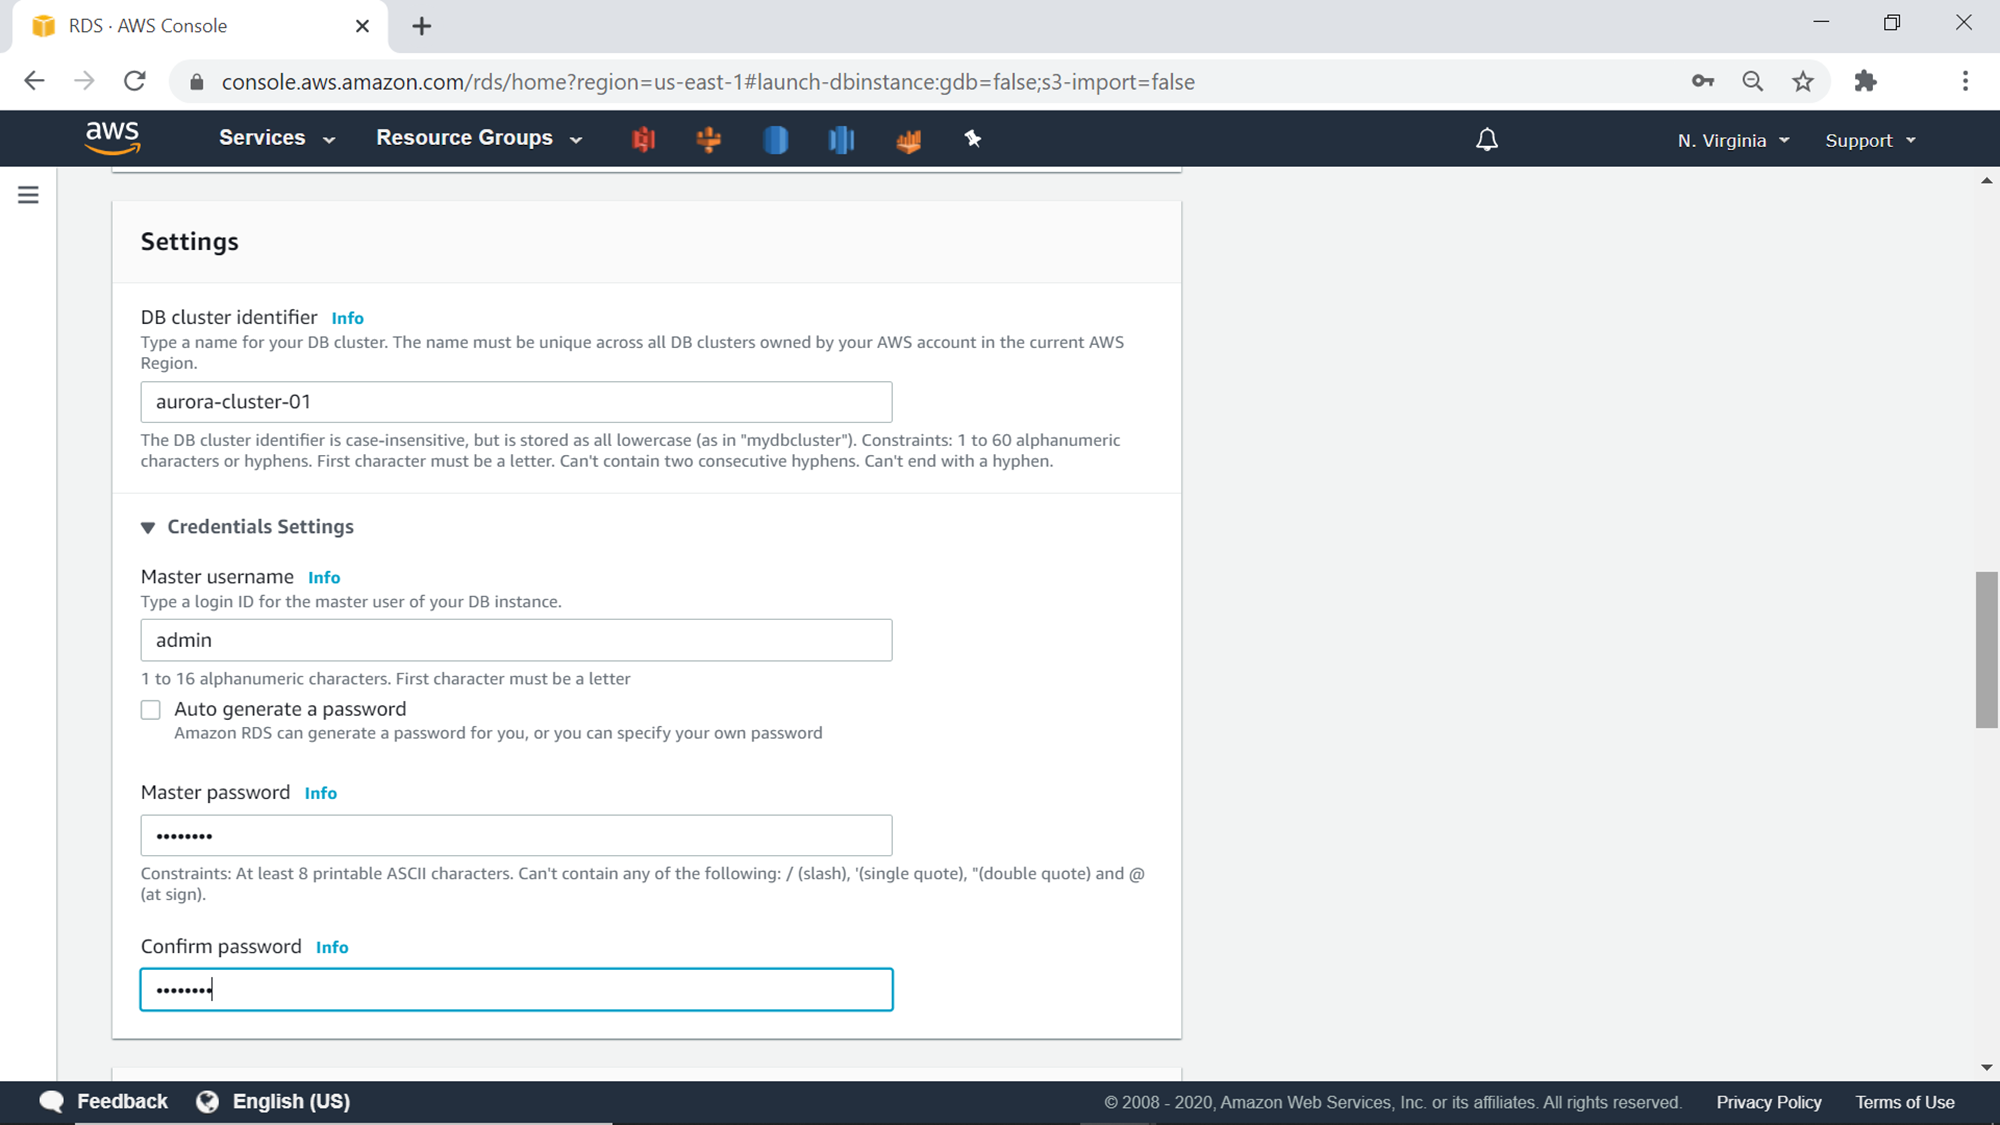
In the next step, we need to configure the settings of the database in the Aurora cluster. Provide a name for the cluster identifier as well as a username and password that would be used to connect to the cluster.
Now we need to select the database instance size. This will determine the compute capacity available to the database. The Memory-optimized instance class is the default selection. In case if you anticipate workloads that will have occasional spikes when you need more capacity and for the rest, you need lower capacities, one can consider burstable classes.
If one needs a high-availability deployment of the cluster, one can create database replicas in multiple availability zones, which may have an impact on the overall database instance cost as well. In lower environments like development or test, one can opt to not create a database replica. As we selected the templates as Dev/Test, the default option for Availability and durability is to not create Aurora Replica.
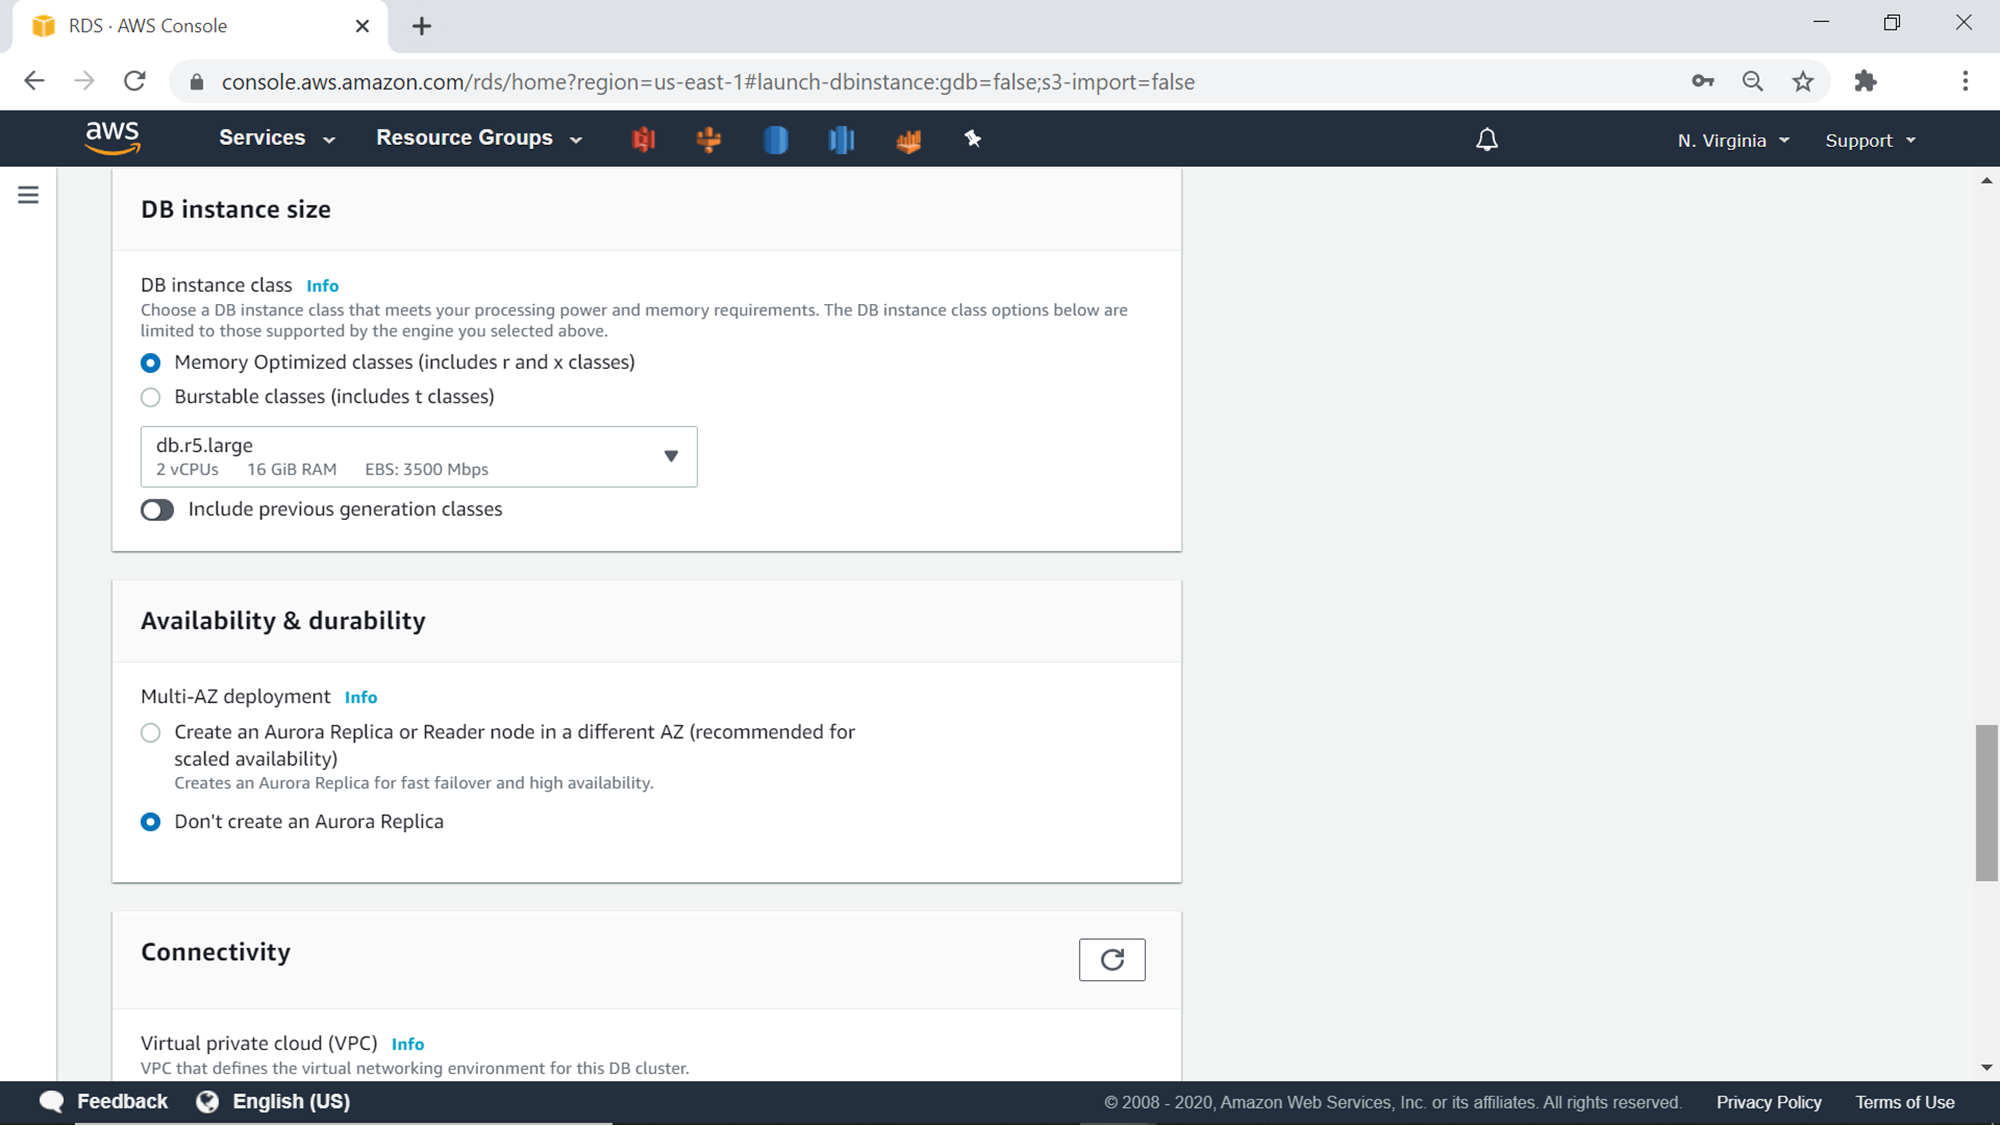
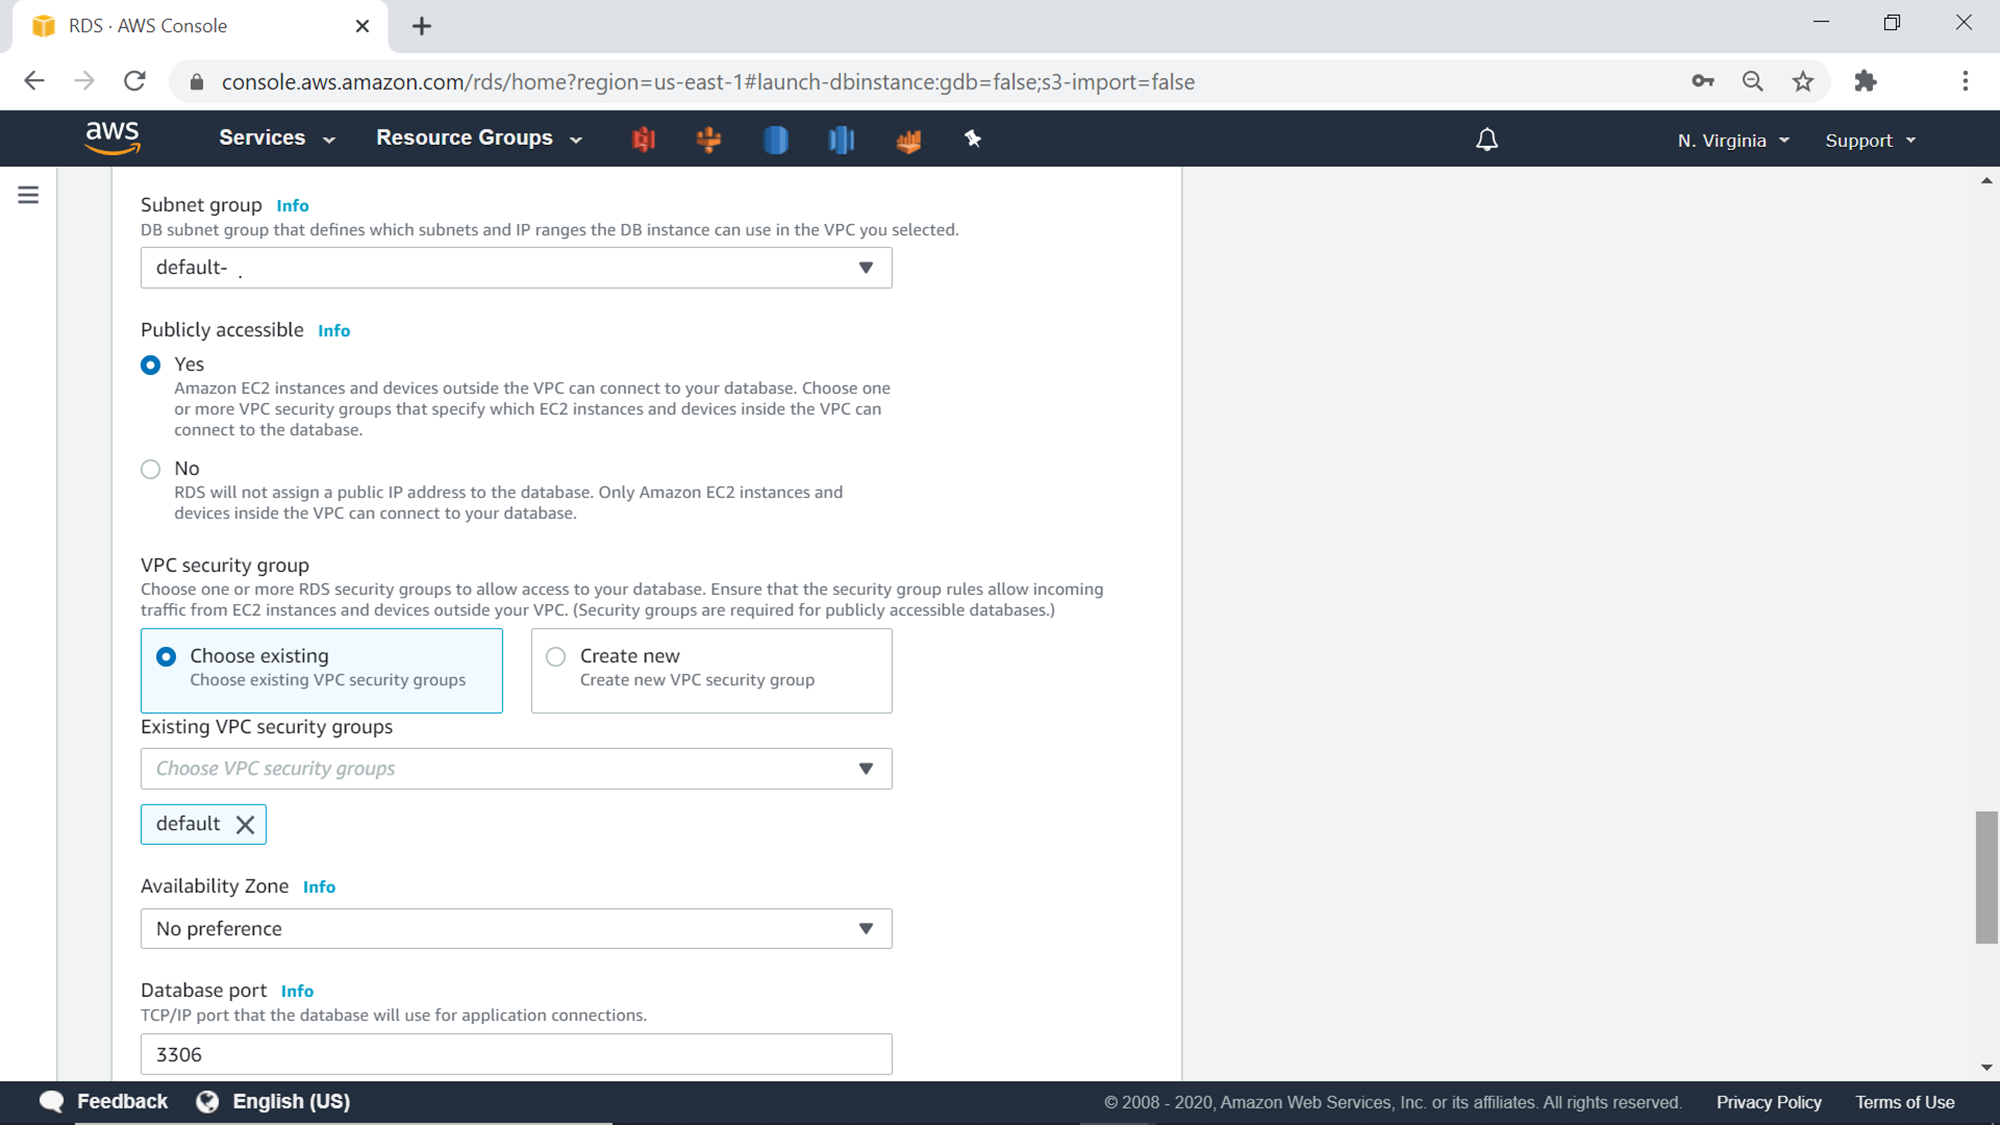
The next step is to configure network connectivity. One can change the VPC and the subnets, if one does not want to go with the default option. To access this cluster over the internet, one needs to select the Yes option for the publicly accessible setting. Alternatively, you can also place this cluster in a private subnet, and configure the network connectivity over a VPN over other suitable options, to avoid exposing the AWS RDS aurora cluster on the private subnet.

Security groups control the inbound and outbound traffic over specific ports. While it is possible to choose an existing security group, there’s also an option to create a new security group just for the AWS RDS Aurora cluster right through the wizard. We are going to keep all the default values for the network configuration of this AWS RDS Aurora Cluster. The default database port for Aurora is 3306. One can change this default port to any desired port number. For this exercise, we are going to keep the default port number as well.
AWS RDS Aurora cluster supports password-based authentication, as well as password and IAM based authentication. If one’s entire cloud security is not IAM driven, one can just continue with password-based authentication which is password authentication.
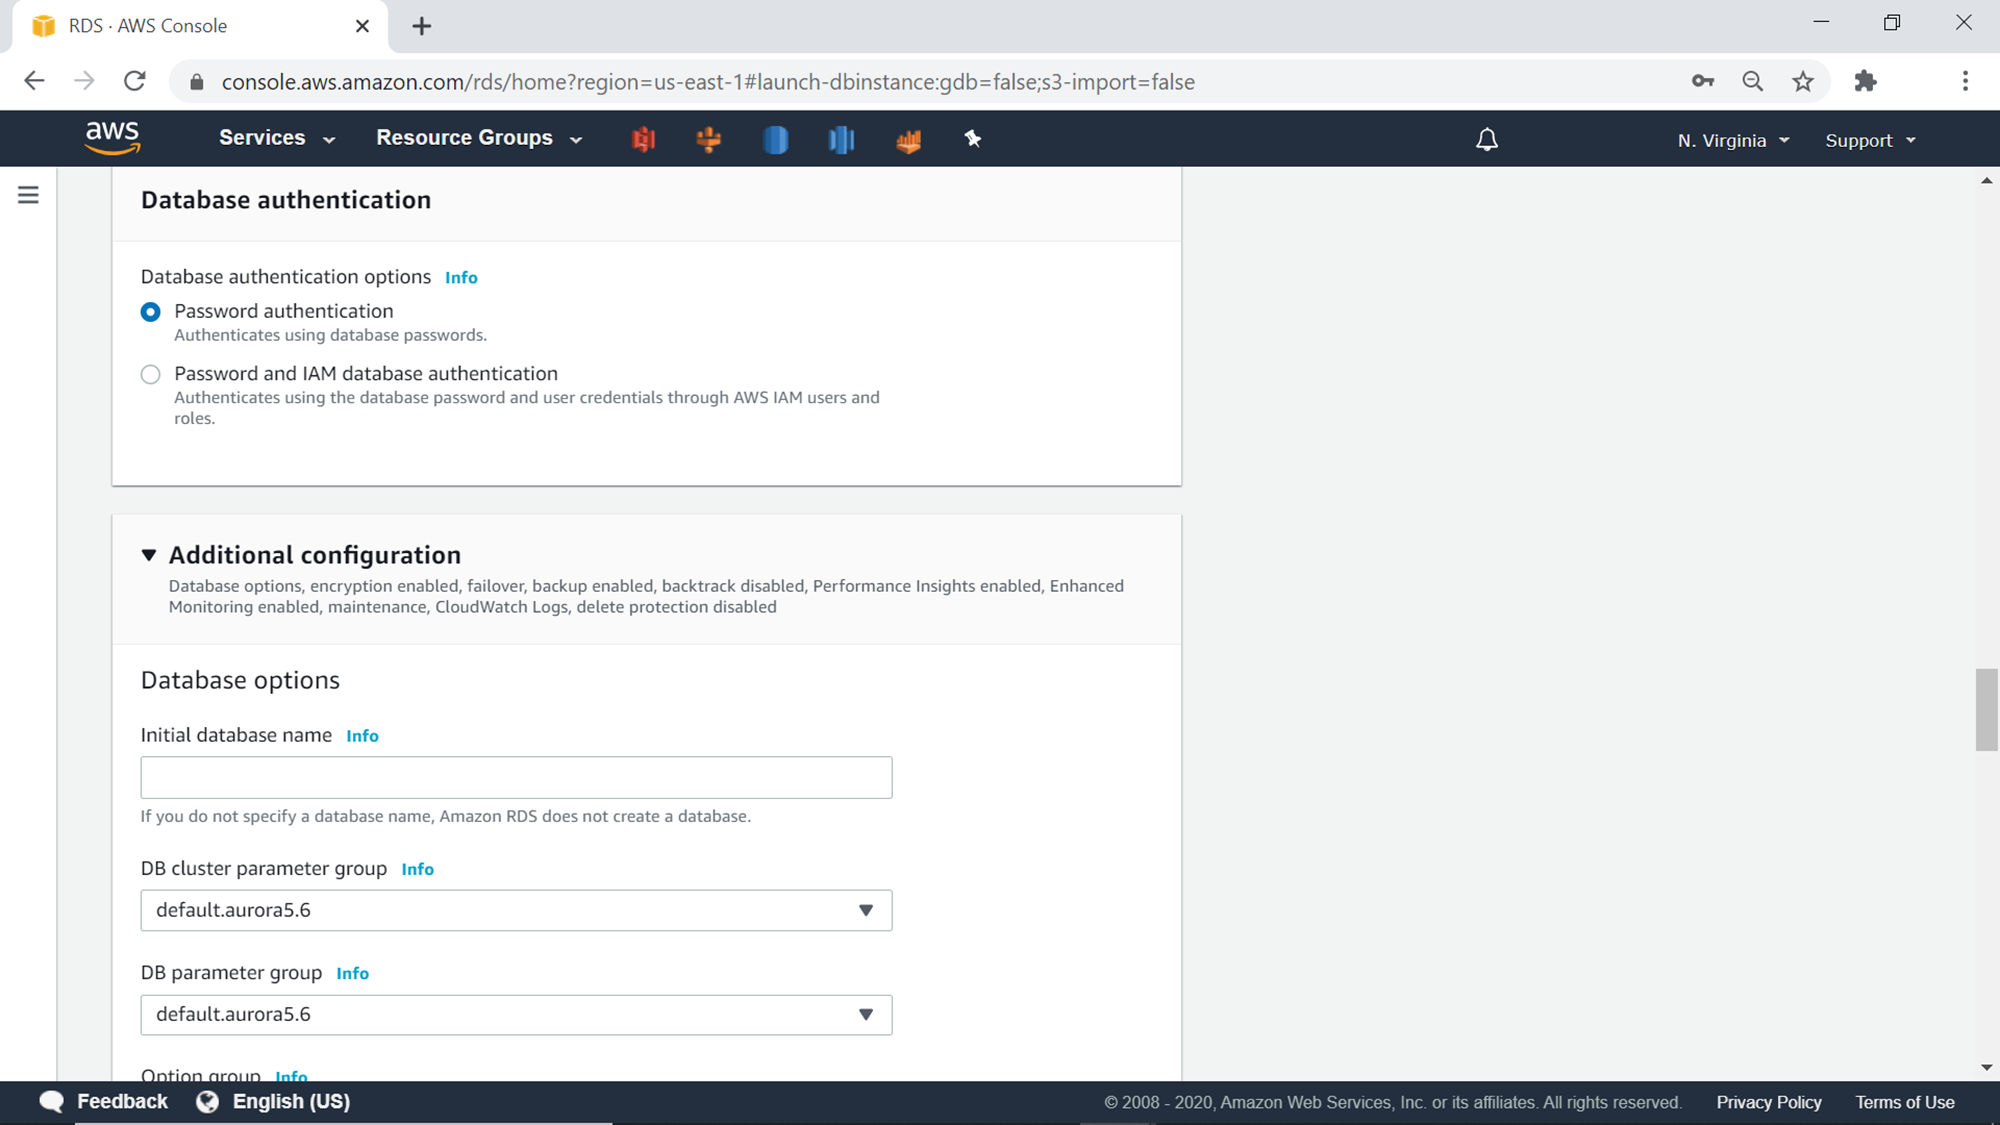
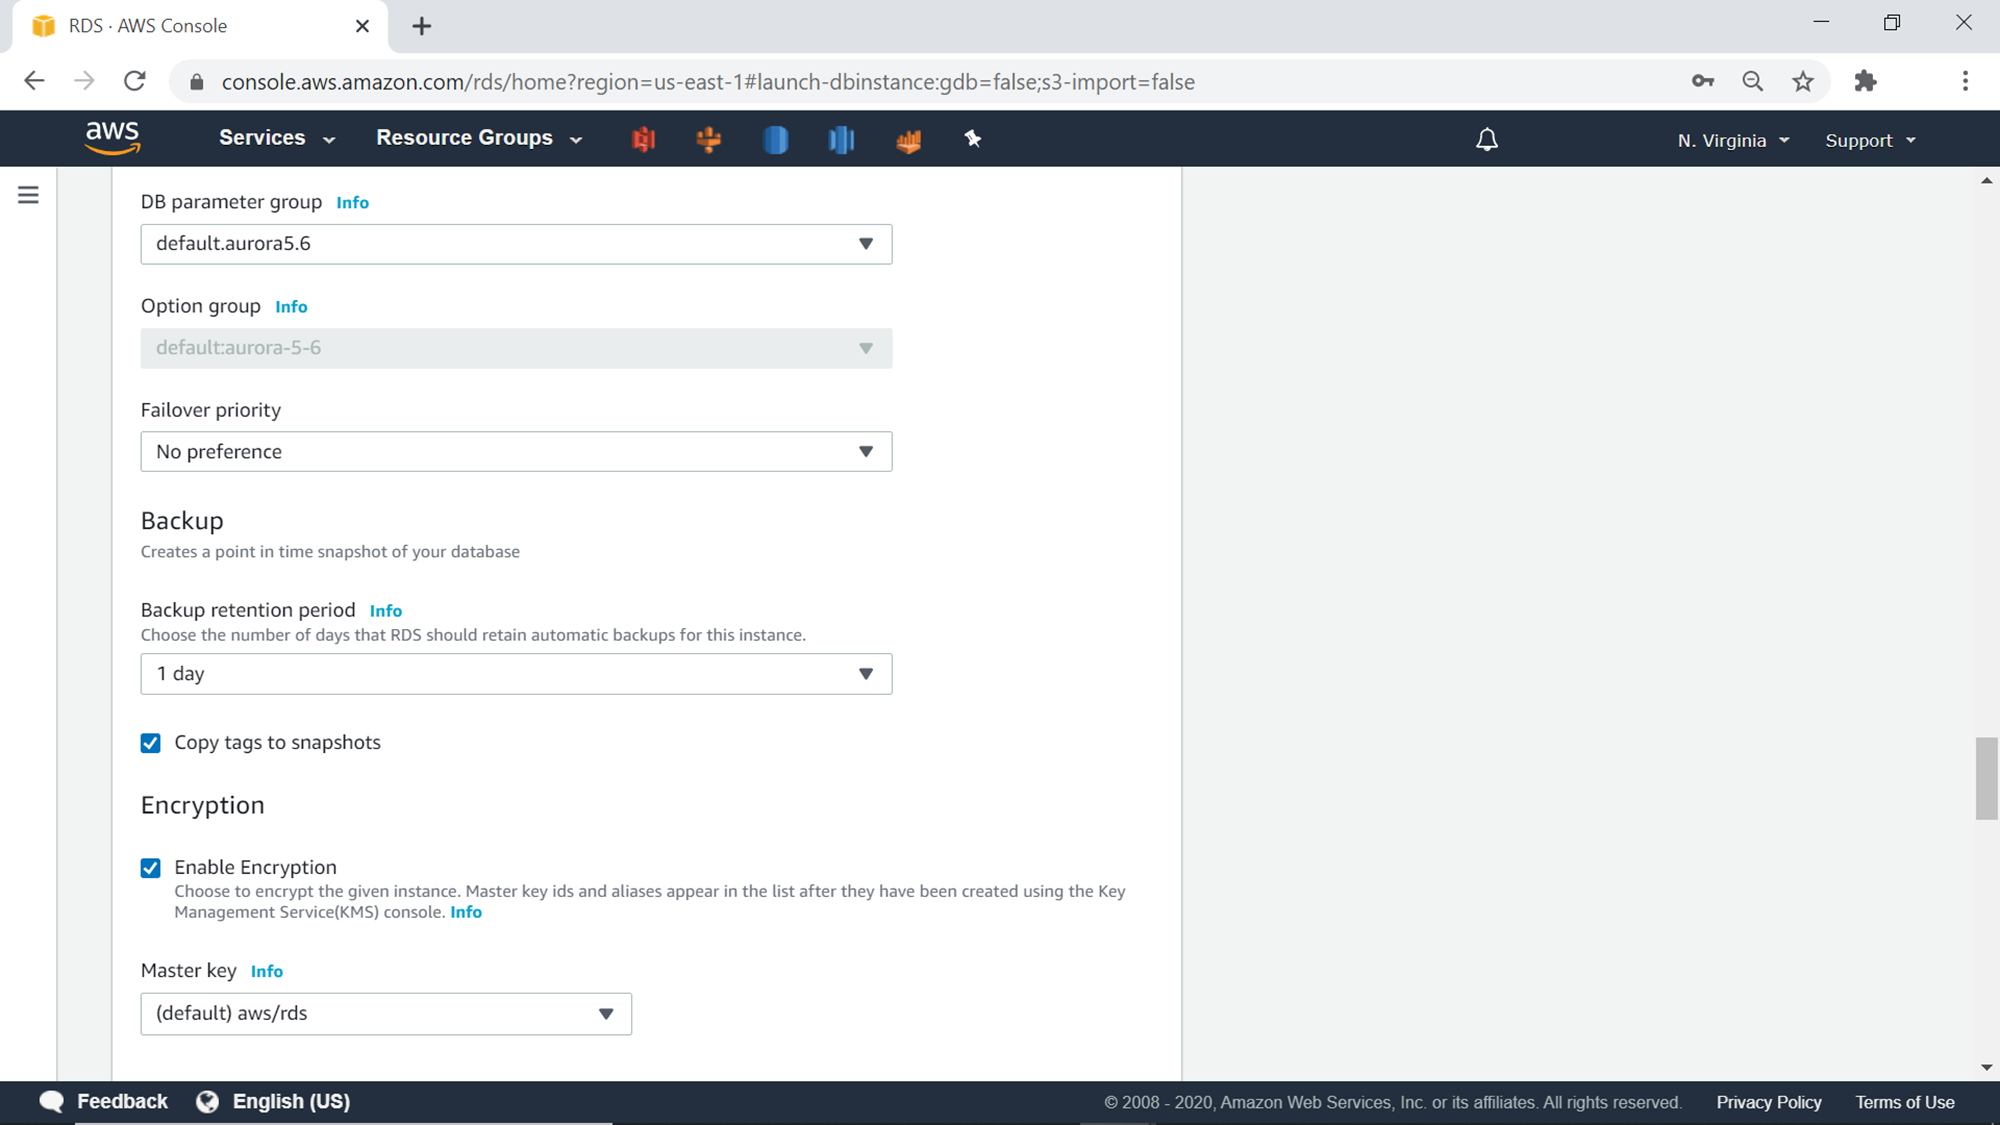
In the additional configuration section, one can configure the initial database name. This is the database that would be created in the aurora database and would be treated as the default database. This setting is optional, and one can leave it blank as well. One has the choice to select different parameter groups for the cluster as well as the database, in case one has created a custom group. Generally, a standard group is created by admin, which gets used by all the database or cluster instances that get created, and the same can be used. In this exercise, we are going to continue with the default options. The next setting is fail-over priority. Aurora provider 15 levels of failover priority as one can have that many read replicas, which will be used as failover instances in case the primary instance crashes. Setting a preference of failover priority is optional, we here we will continue with the default option. The backup section provides the option to configure the backup retention duration. Encryption section provides an option to enable or disable the encryption and use the default or any custom KMS keys for encrypting the data.
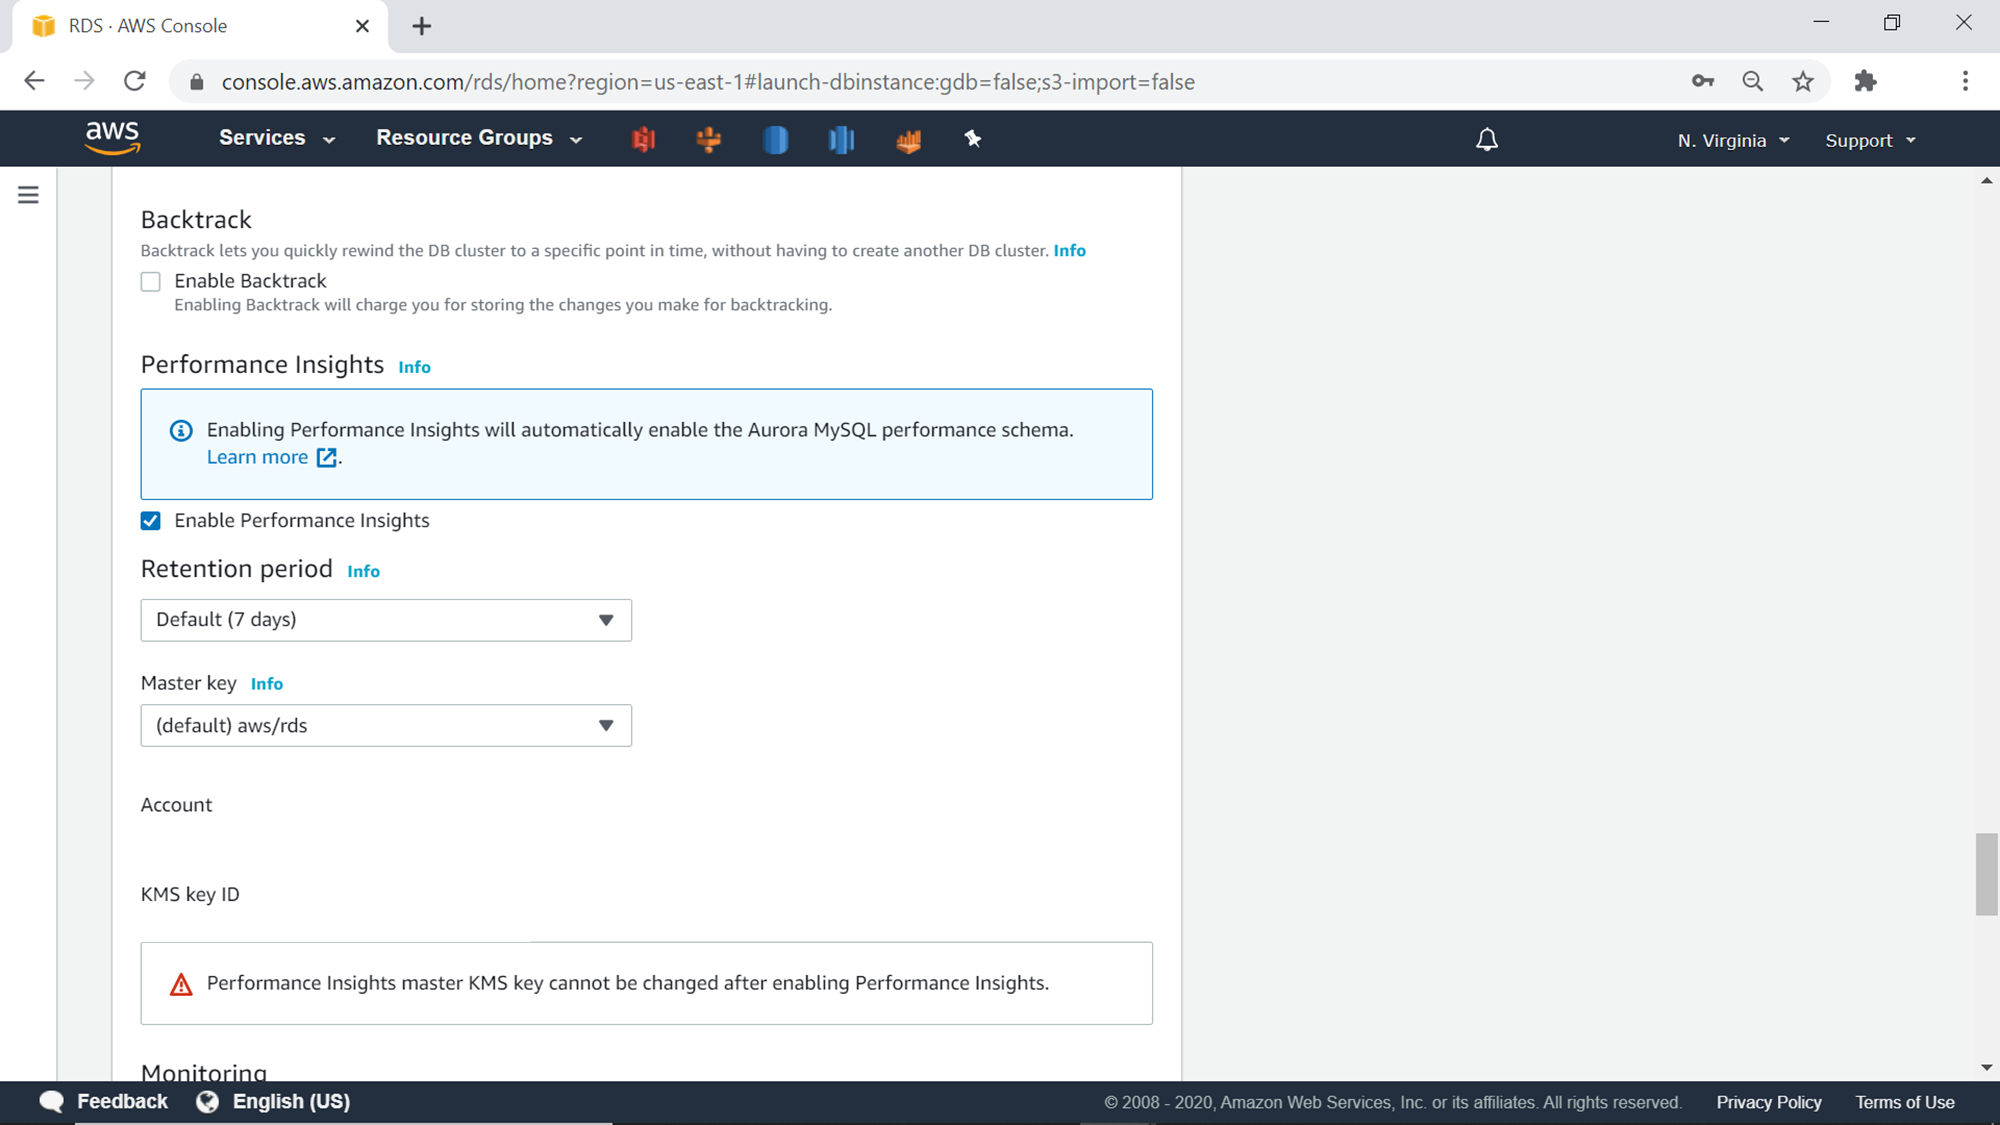
The next setting is the Backtrack feature. It’s a unique feature that allows us to rewind the data to a historical point-in-time, without the need to restore a snapshot as a new cluster, and then deleting the existing cluster. As backtracking would create more checkpoints and tracking, this feature would create extra charges on the usage of aurora clusters like multi availability zone configuration. Performance Insights is another feature that provides performance-related reports and analytic dashboards to analyze performance data. This feature would also cost extra and is an optional feature. The retention period setting configures the retention period of data held for showing performance insights.
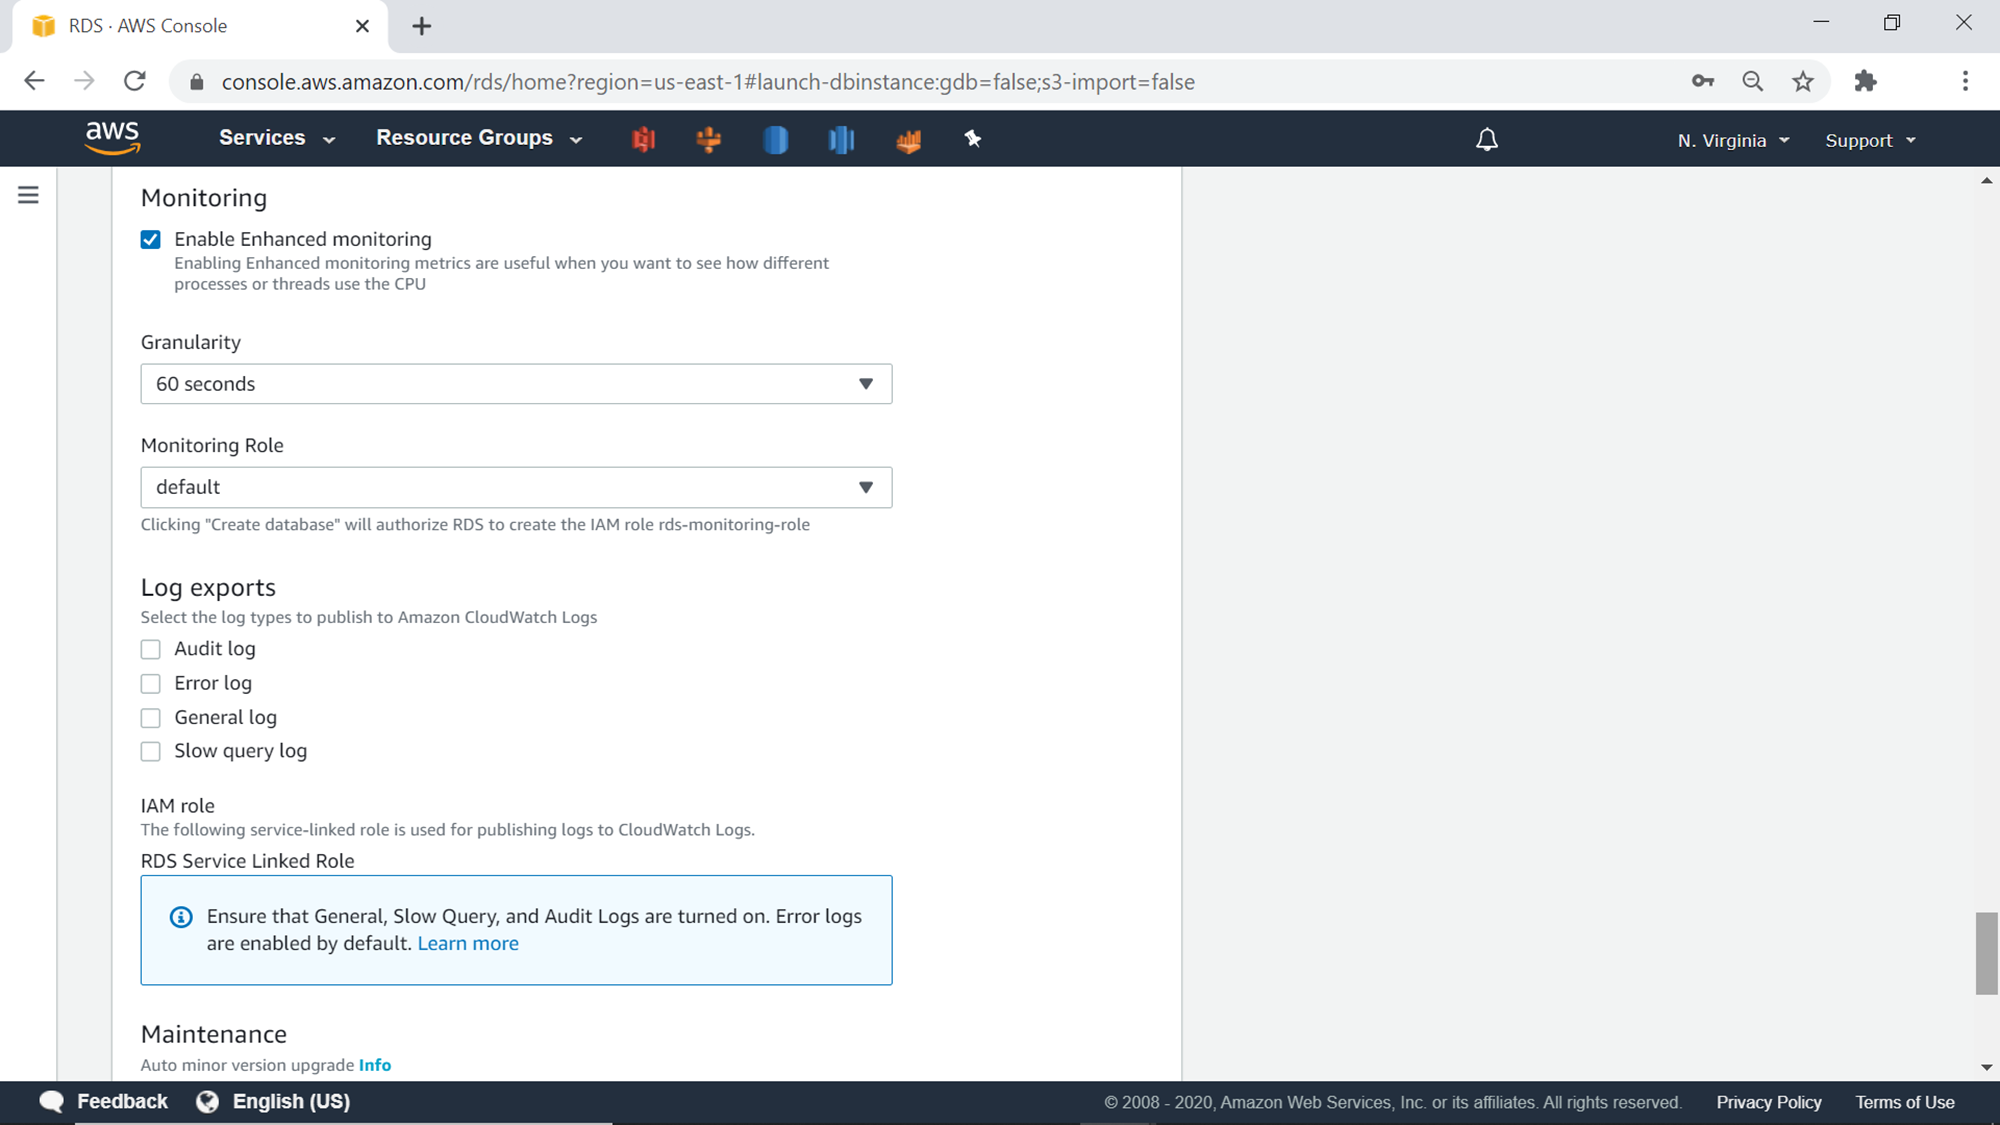
The next setting is related to monitoring. One can enable enhanced monitoring as well as configure the time period granularity at which the metrics should be collected. The Log exports section provides an option to enable different kinds of logs generated in CloudWatch Logs. Depending upon the nature of data and compliance requirements, one can enable different logs.
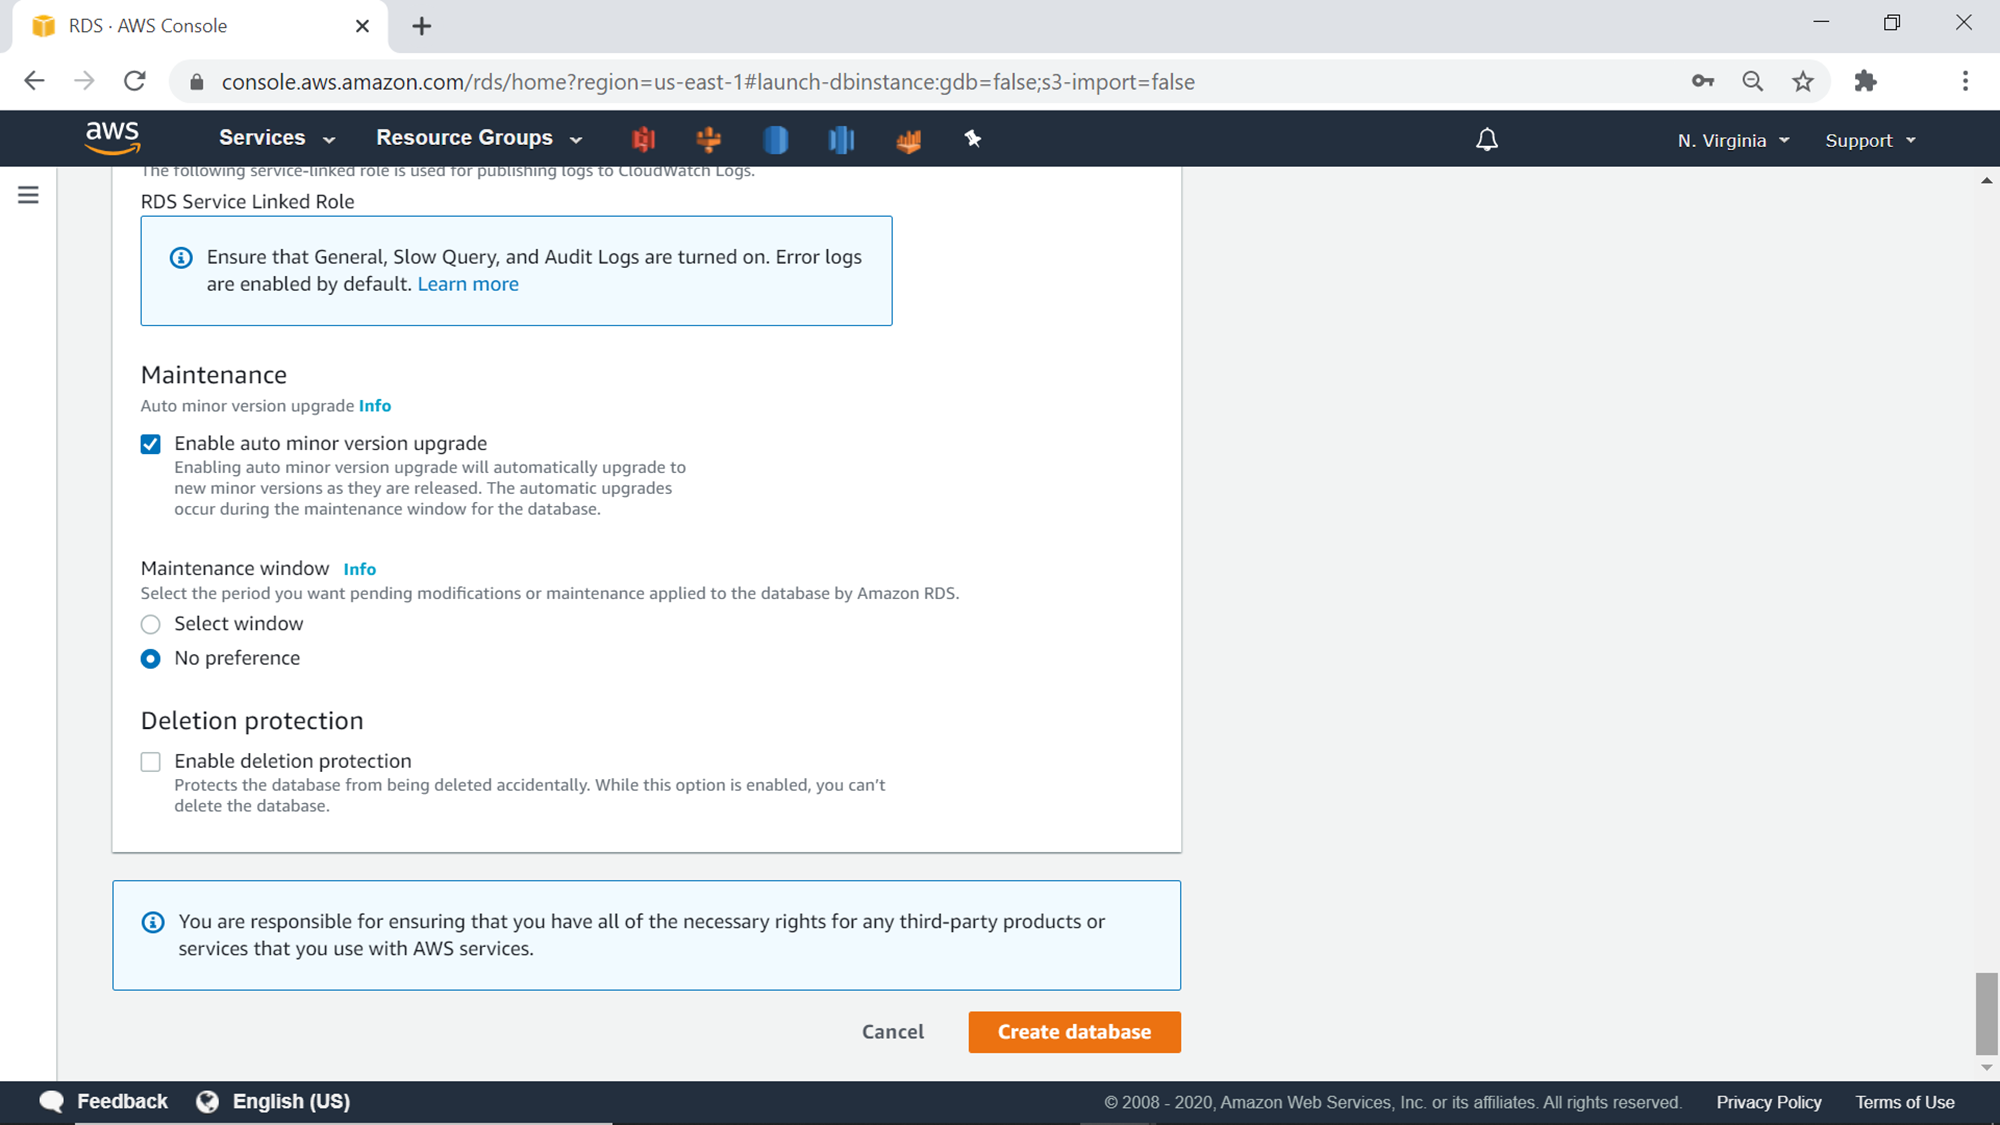
The last setting is the maintenance setting, which can be configured to schedule the maintenance window as well as version upgrades. With this, we have covered all the settings that can be configured to create the AWS RDS Aurora cluster. Finally, click on the Create database button to create the Aurora cluster.
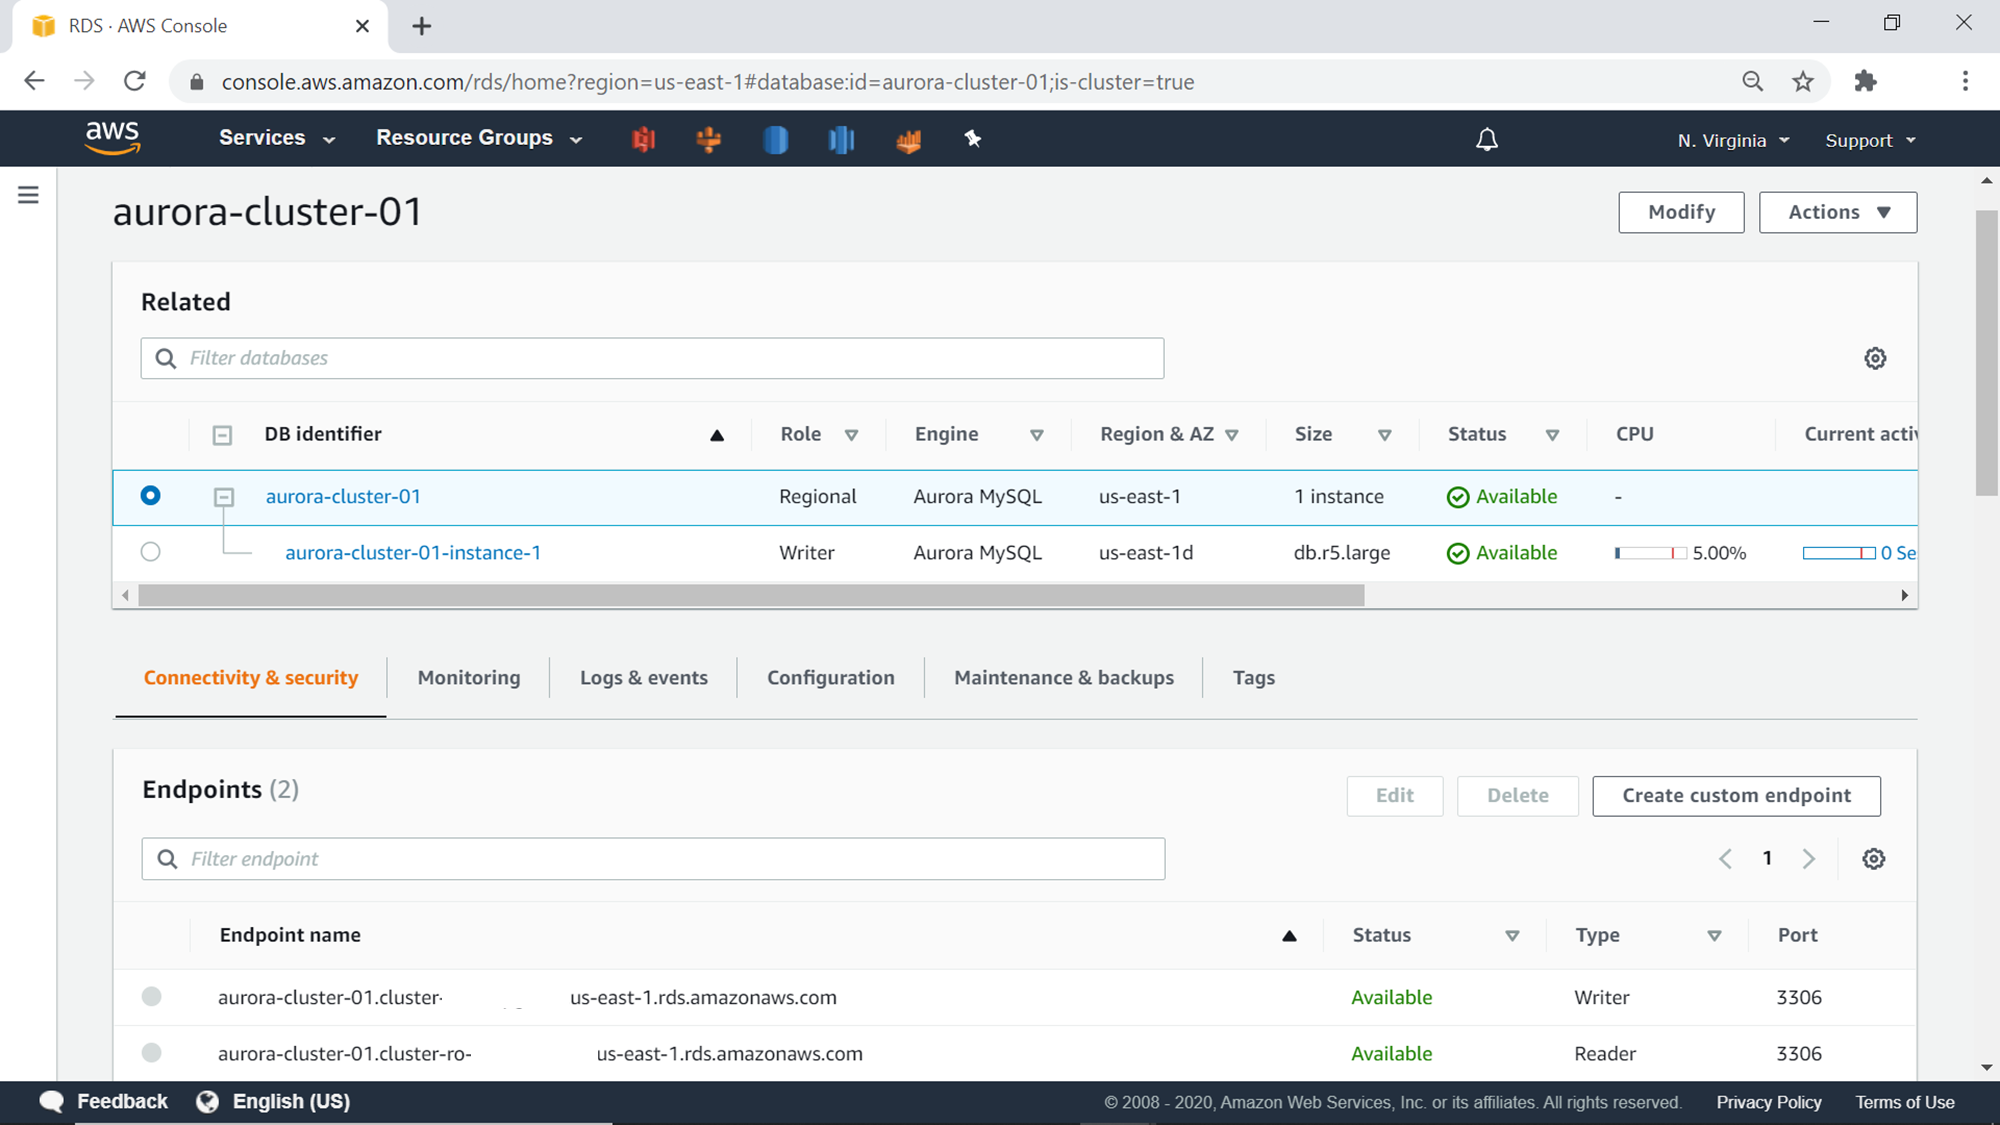
This will start the creation of the cluster as well as the database, and it would be in an available state in few minutes generally, as shown below. On the connectivity and security tab, you would find the read-only and read-write endpoints, which can be used with your existing IDEs that you may be using for MySQL, to connect to the AWS RDS Aurora cluster.
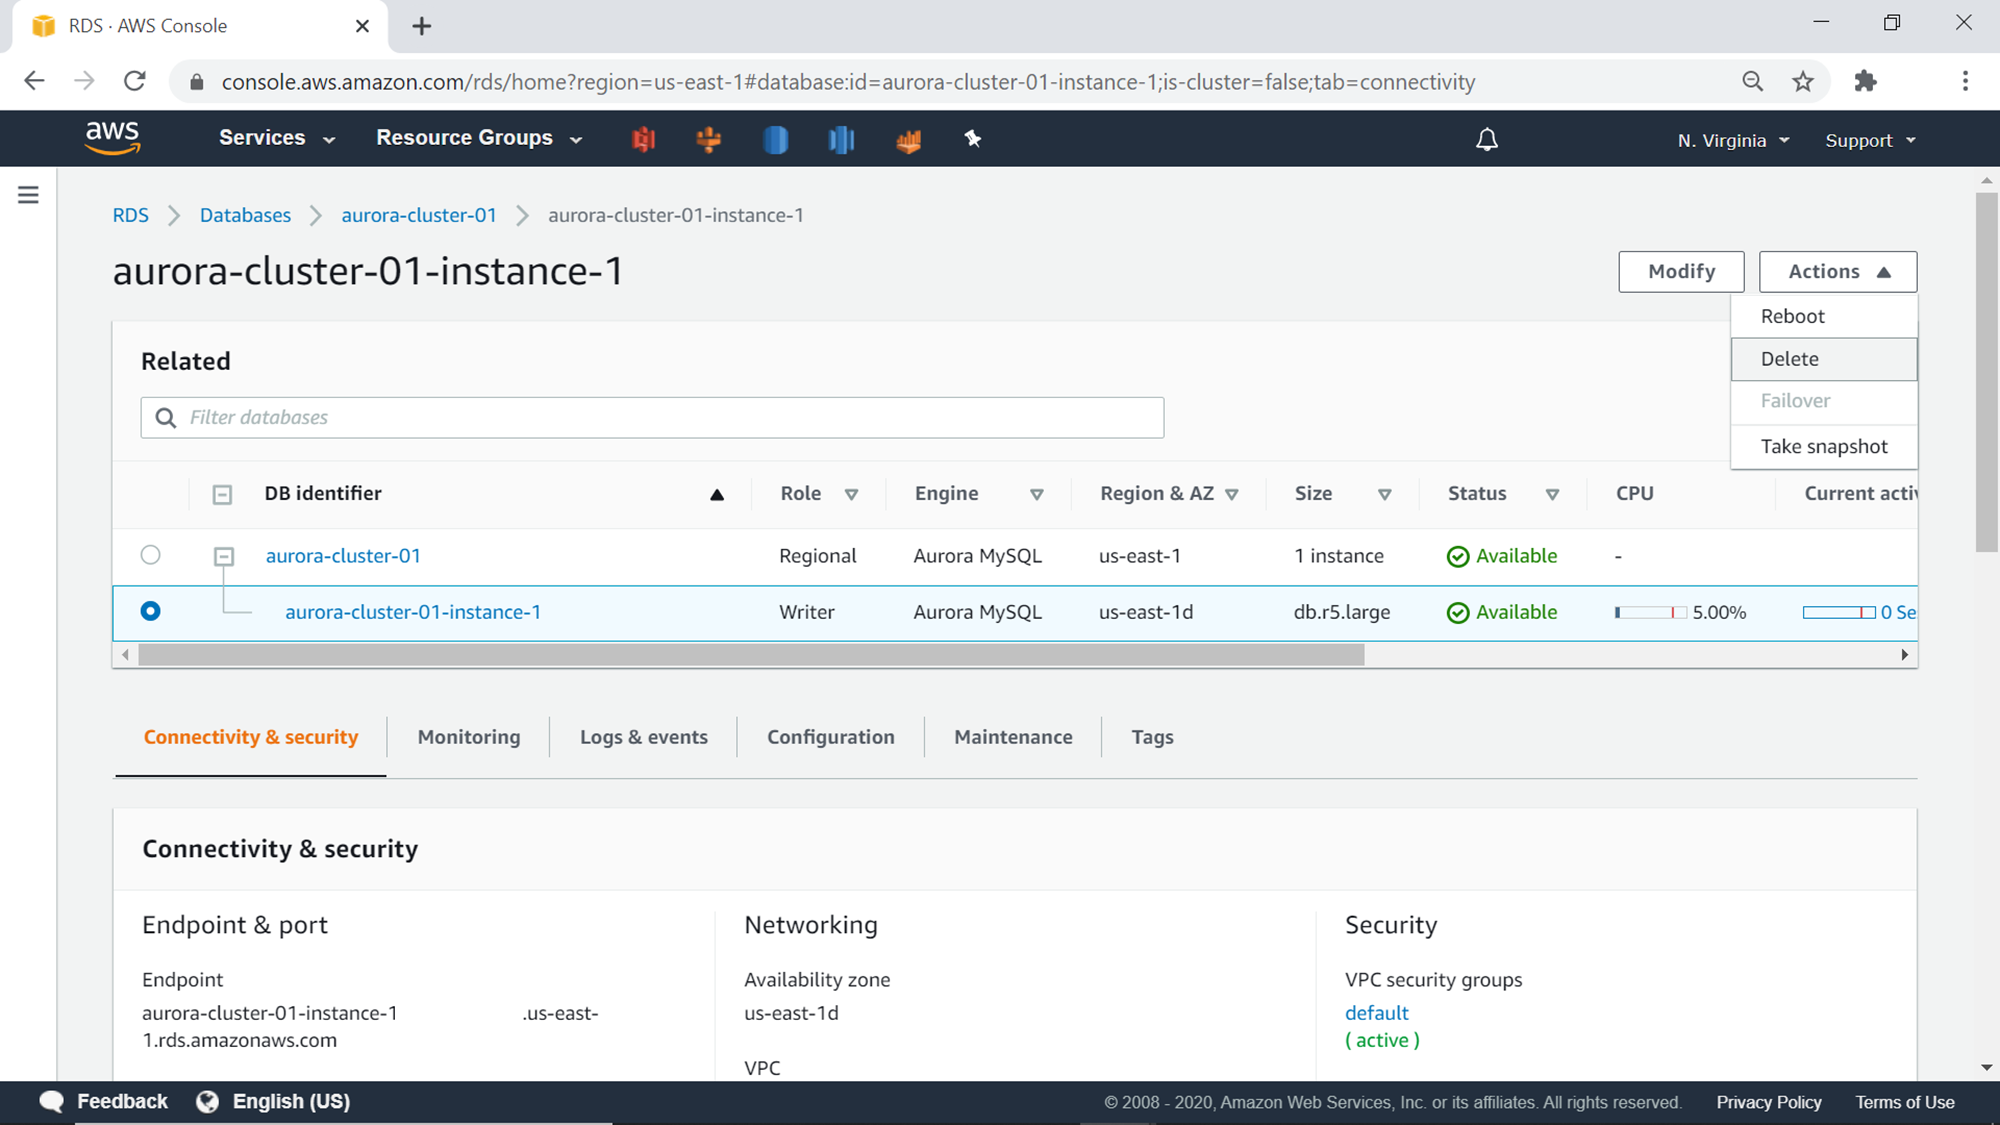
One can delete this cluster from the Delete menu item from the Actions drop-down as shown below. This cluster can prove to be costly if kept on for a long duration without any use. Consider deleting this cluster one the exercise is completed.
In this way, one can create an AWS RDS Aurora Cluster compliant with MySQL or PostgreSQL.
Conclusion
In this article, we learned how to create a brand-new AWS RDS Aurora cluster. We learned almost every setting that can be configured while creating the cluster from the AWS Console.
Table of contents

He has worked internationally with Fortune 500 clients in various sectors and is a passionate author.
View all posts by Rahul Mehta
- Finding Duplicates in SQL - February 7, 2024
- MySQL substring uses with examples - October 14, 2023
- MySQL group_concat() function overview - March 28, 2023