
This article provides a step by step explanation of how to restore selective datasets from AWS Redshift snapshots to a working Redshift cluster, instead of restoring the entire backup.
Introduction
Database snapshots and restore is a regular administrative process. These actions are generally carried out as a one-time process as part of disaster recovery or initializing a new database environment to an individual or a team. In cases, where one has needs to restore only certain database objects, like some selected set of tables, it’s not desirable to restore an entire database and then use different means to re-import the specific dataset from the restored database to the original database. There needs to be a way to restore selective datasets in cases like rolling back a table to a previous state or recovering few tables which may have data discrepancies or corrupted data as some load failed half-way. AWS Redshift provides a mechanism to support this requirement, which we will learn in this article.
AWS Redshift Setup
Amazon Redshift supports the restoring of snapshots as new clusters with the desired cluster specifications. This approach is desirable when one needs to instantiate a brand-new redshift cluster. But this approach won’t be efficient for selective datasets as the cluster itself would be different altogether.
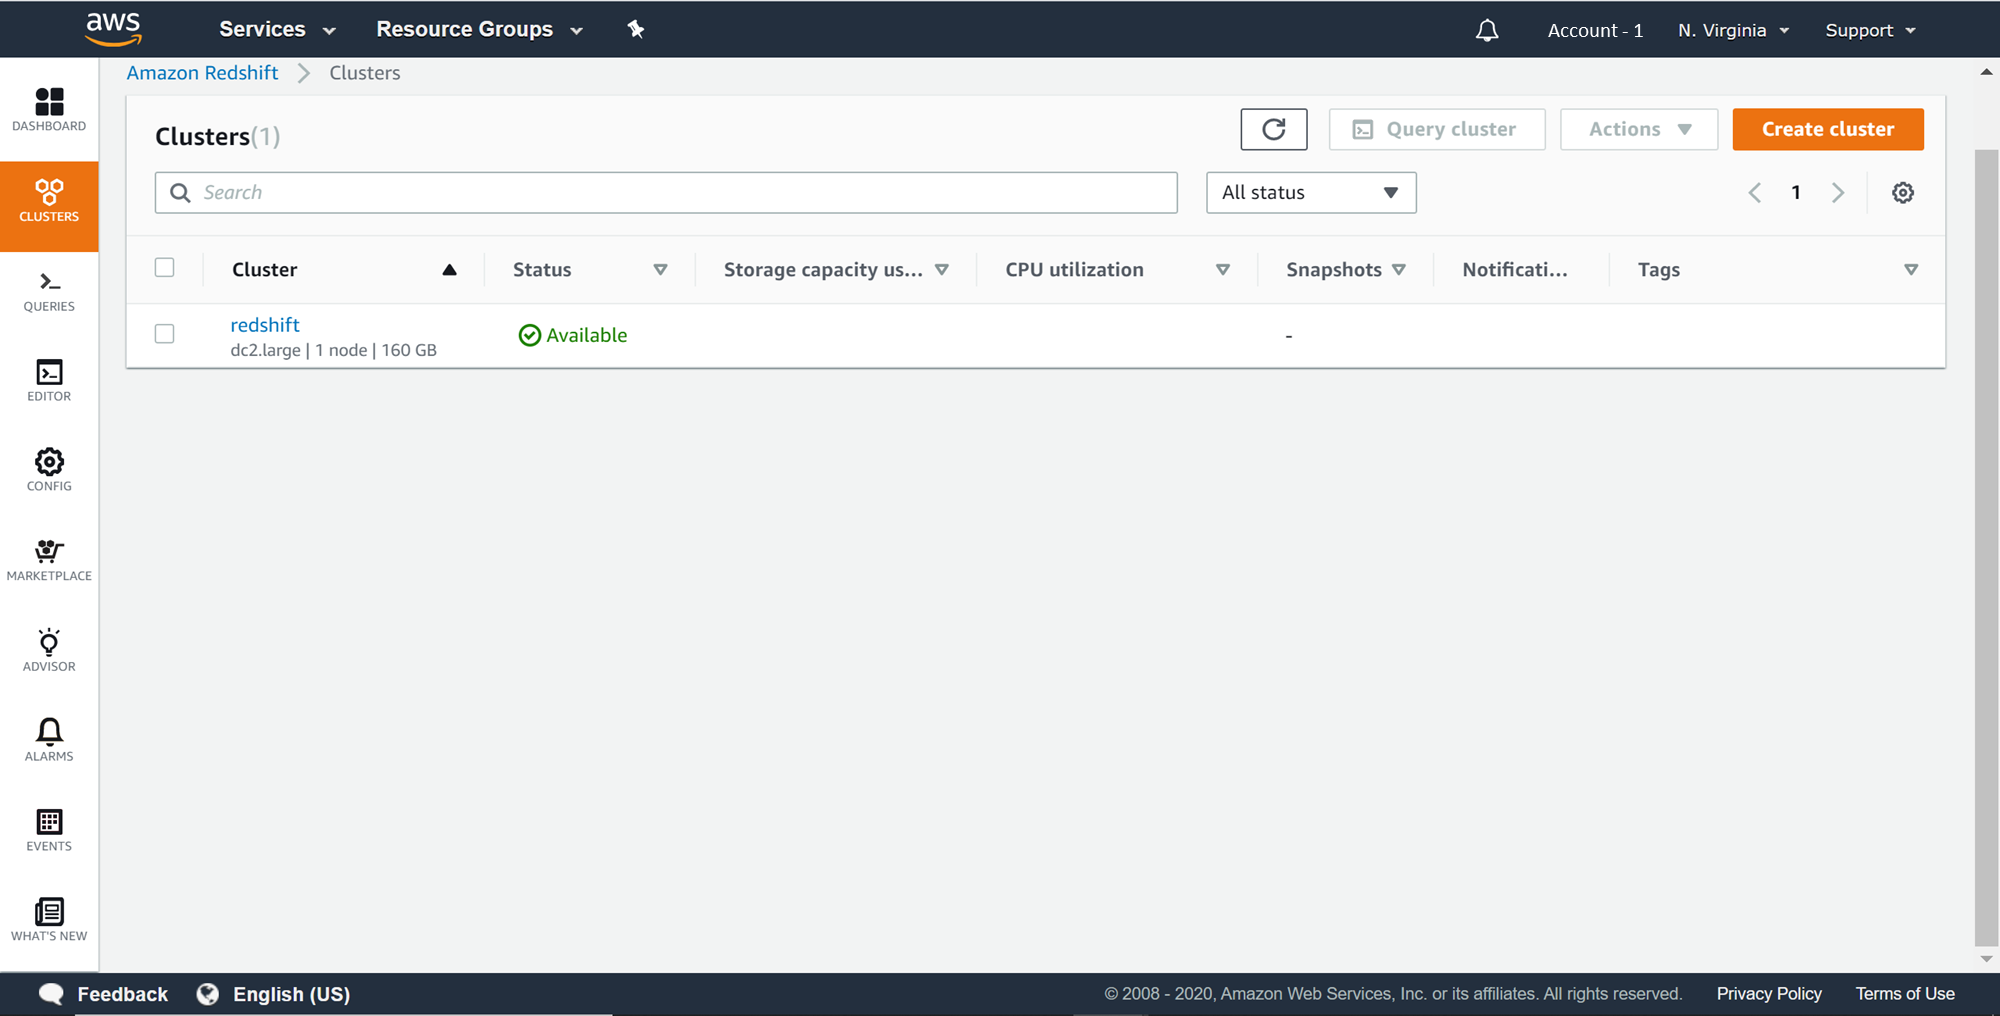
In this article, we would simulate a scenario where we intend to restore a table in a working Redshift cluster. In case, you are not familiar with Redshift clusters, you can refer to this article, Getting started with AWS Redshift, and create a new Redshift cluster. After the cluster is created, it can be seen as shown below on the Redshift page.
Let’s consider a scenario of data corruption due to a failed ETL load in a sample table. In this scenario, one option is to reverse the logic that manipulated the data using some logs. But in scenarios where the load would have deleted data and committed the transaction, there would be no option to reverse the action. Typically, remediation measure is to restore the full database, and then either replace the database or sync specific objects in the database that got corrupted. While this workaround still works but requires additional time and resources. Also, most of the time it involves a lot of manual intervention which is prone to errors as well. The most desirable action is the ability to restore the exact table(s) in question that was impacted, without any additional steps. To simulate this situation, we do not need to create an ETL load and deliberately fail it to cause any data discrepancy. We just need to have a table with some sample data in the AWS Redshift cluster, and we can assume the data in this cluster is going to have discrepancies. This simulates the situation in question and effectively creating a need to restore this data. For demonstration purposes, here we have created a sample users table containing data.
AWS provides sample scripts and data to load directly in the Redshift cluster. These scripts can be found here. The sample is available in the form of a downloadable zip file. After downloading the zip file, one can extract all the text files and host them on an AWS S3 bucket. Thereafter, the next step is to create tables in the cluster. The DDL script for these tables in question is also available on the AWS documentation shared in the above link. In one of my previous articles, Load data into AWS Redshift from AWS S3, I have explained how to load data from AWS S3 to AWS Redshift. Using the same mechanism, one can load this sample data in the redshift cluster. The Users table shown below is created using the same mechanism, and is one of the sample tables provided by AWS for use with Amazon Redshift.

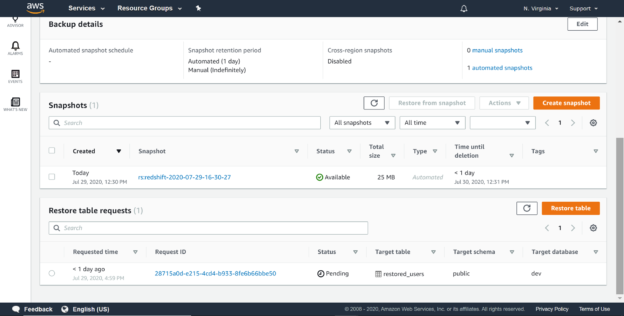
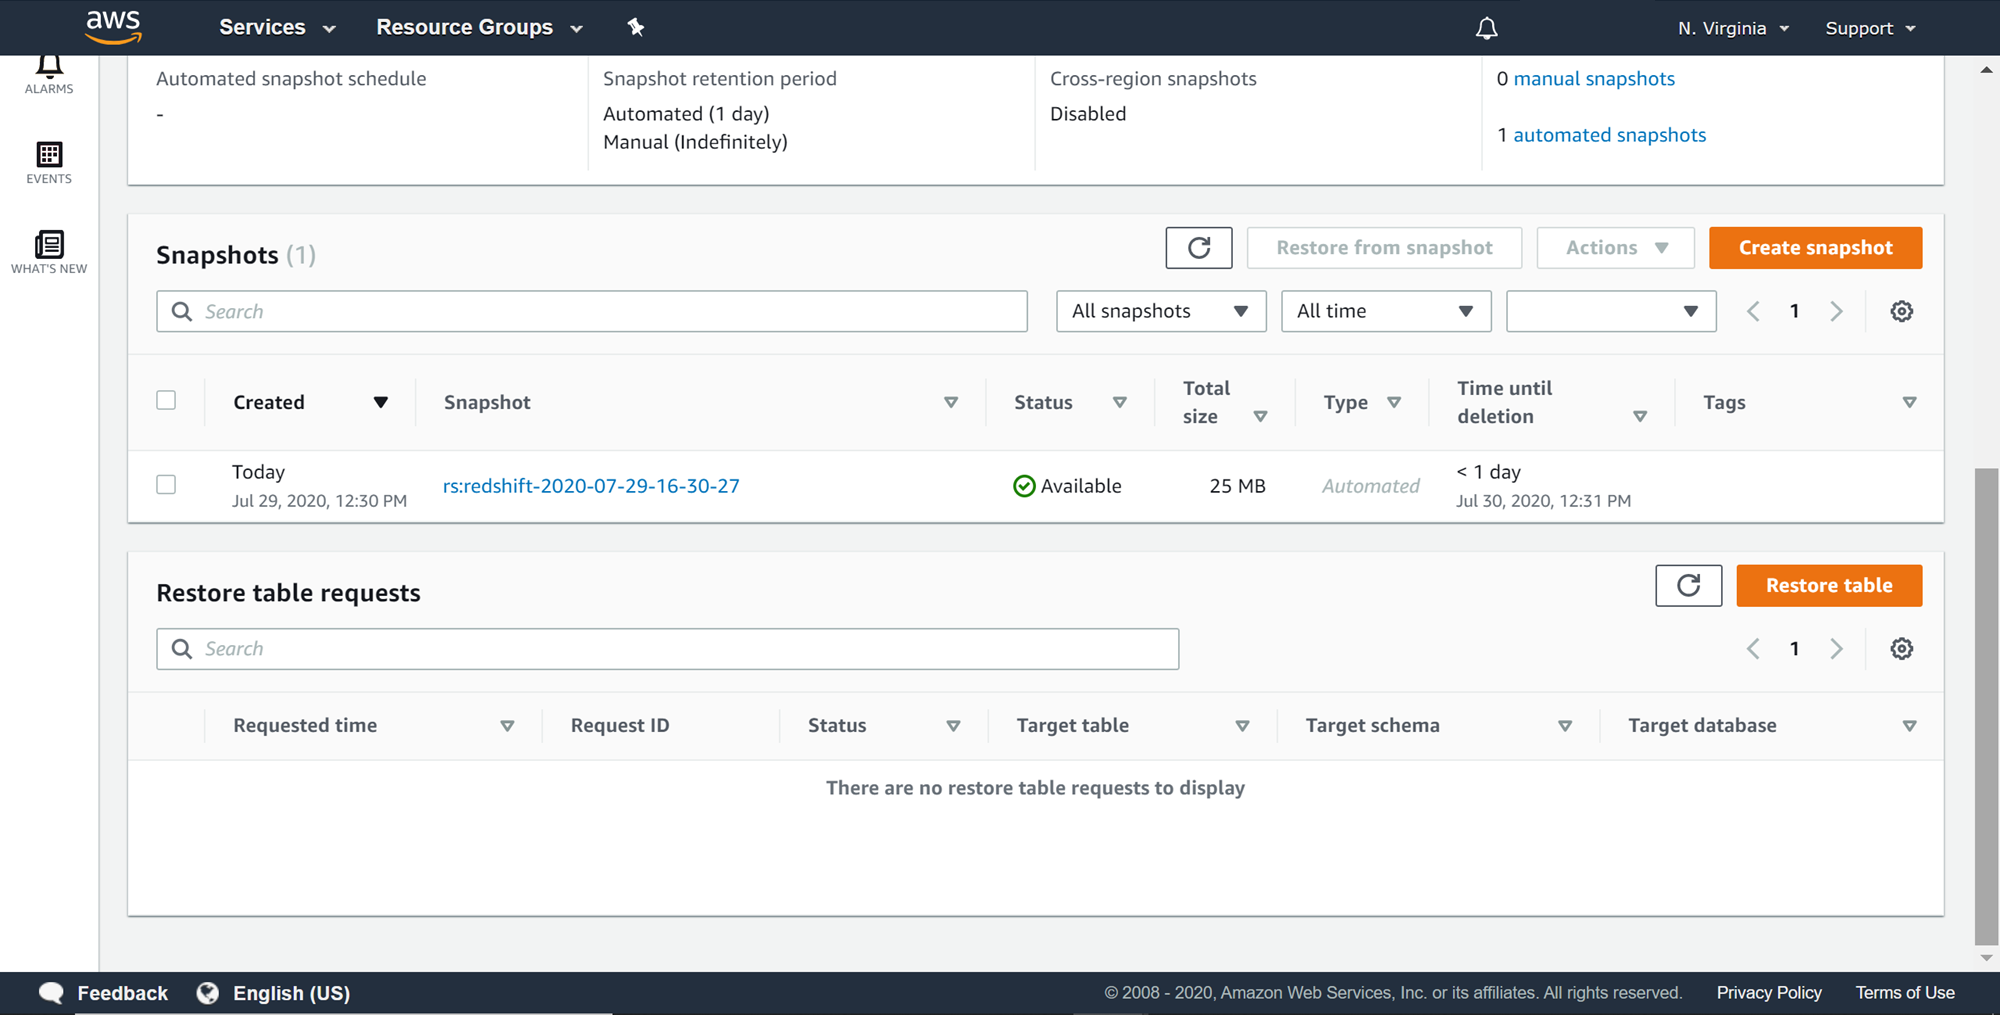
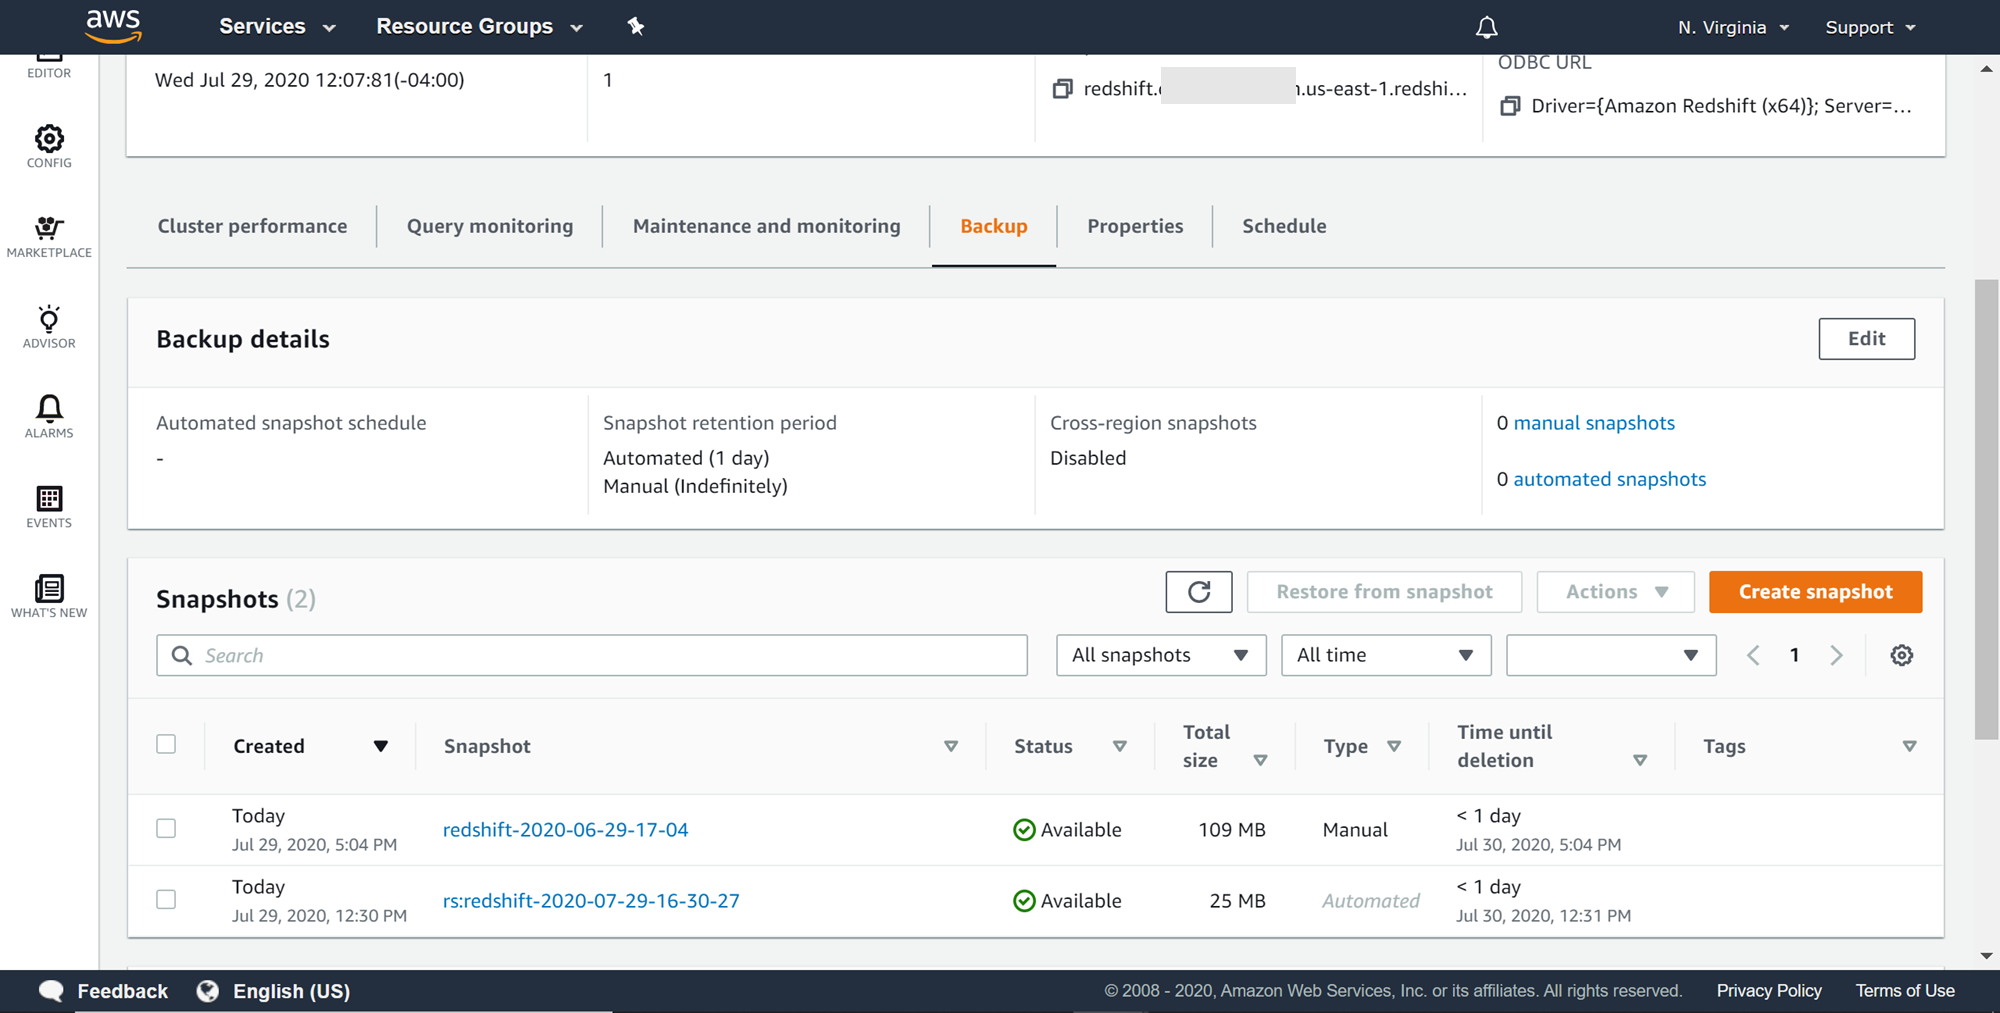
When the cluster gets created, an automatic snapshot gets created. This snapshot takes a snapshot of the as-is state of the cluster. One may have created the data after creating a blank cluster, in which case the automated snapshot would not have any data. Navigate to the backup section in the cluster properties and you would find at least one automated snapshot created as shown below.
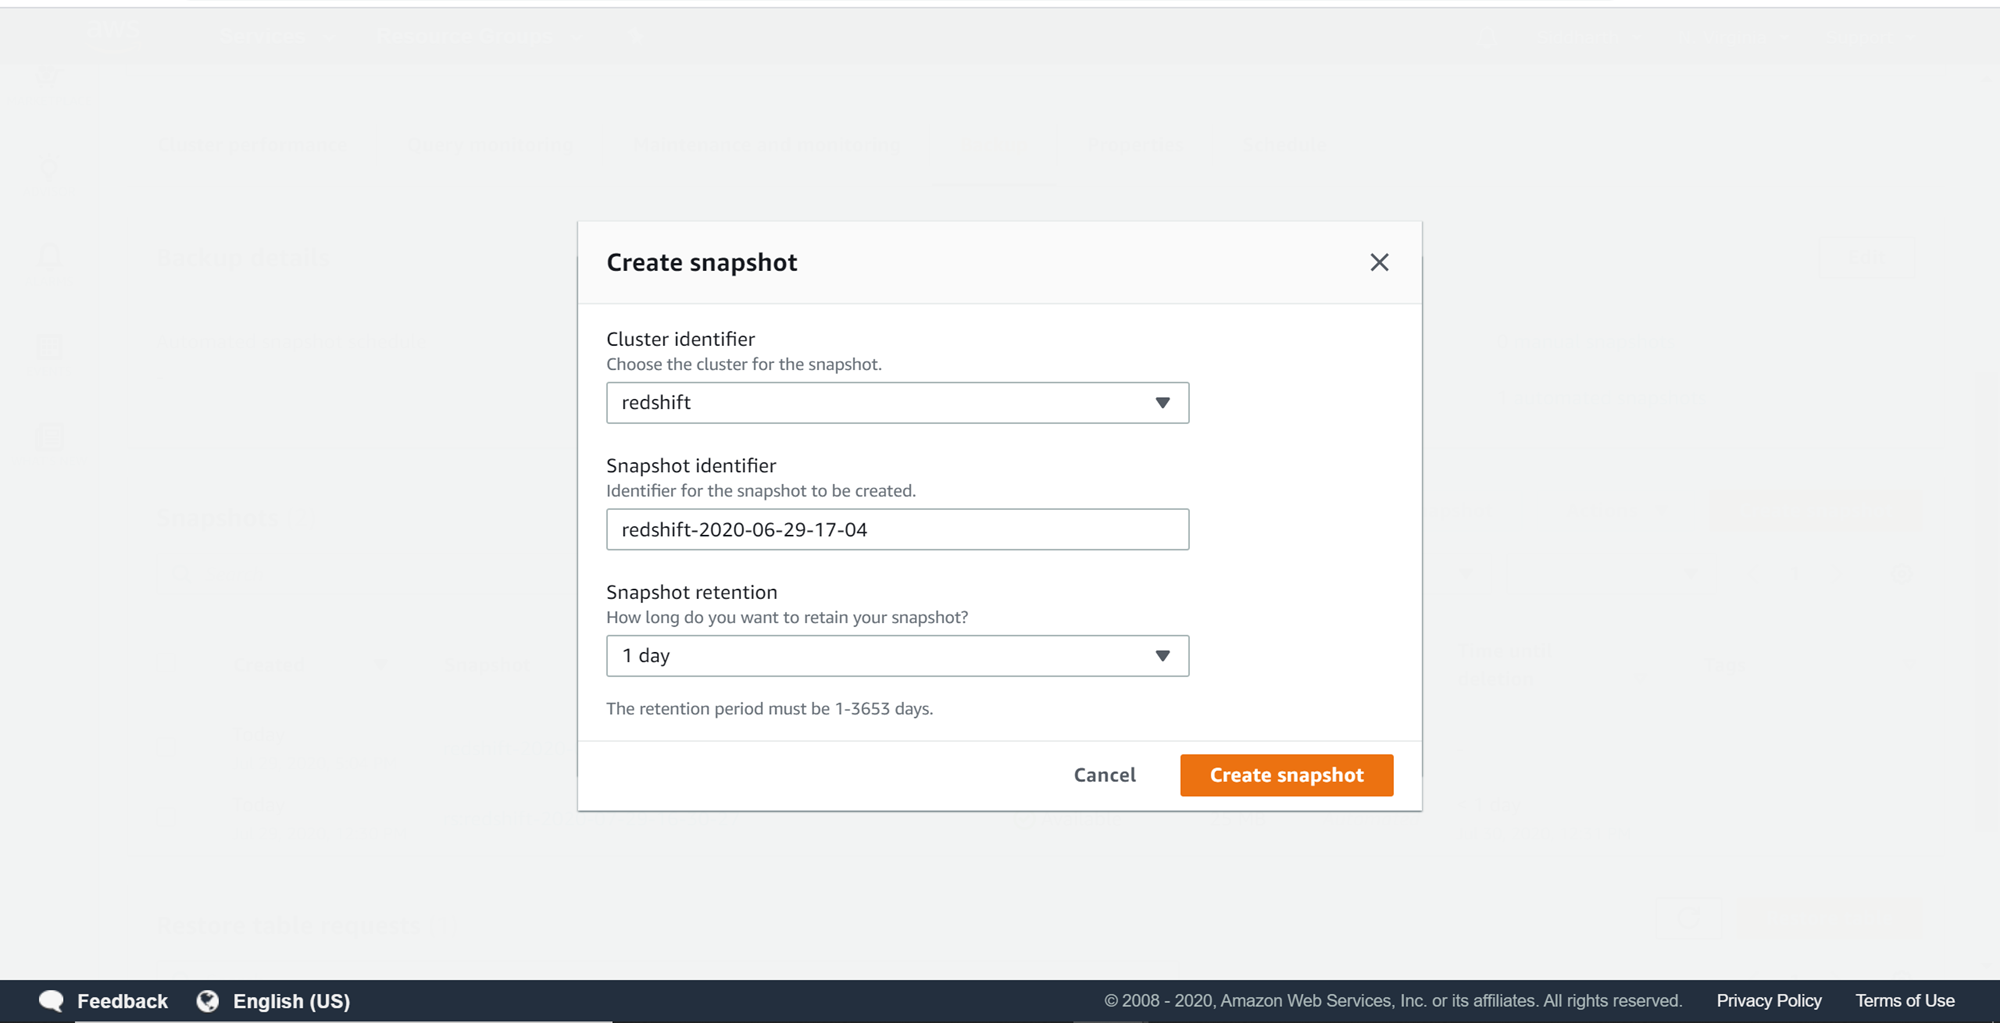
If your data is not contained in the snapshot, you may want to consider creating a manual snapshot. Click on the Create snapshot button, and this would bring up a dialog as shown below. Provide the required details.
Once you click on the Create snapshot button, it will create a manual snapshot as shown below. This manual snapshot would have the table in question, assuming the snapshot is created after having the table in place.
Now that we have the snapshot is in place, we can start creating a Restore Table job. This job will restore the selected tables to the existing cluster. Assume that the users table that we created earlier, we intend to restore the same table from the snapshot in the AWS Redshift cluster, where the user table already exists. We would start by creating a new table restore job. Scroll down and click on Create Restore Job button. Upon clicking, a new wizard would appear as shown below.
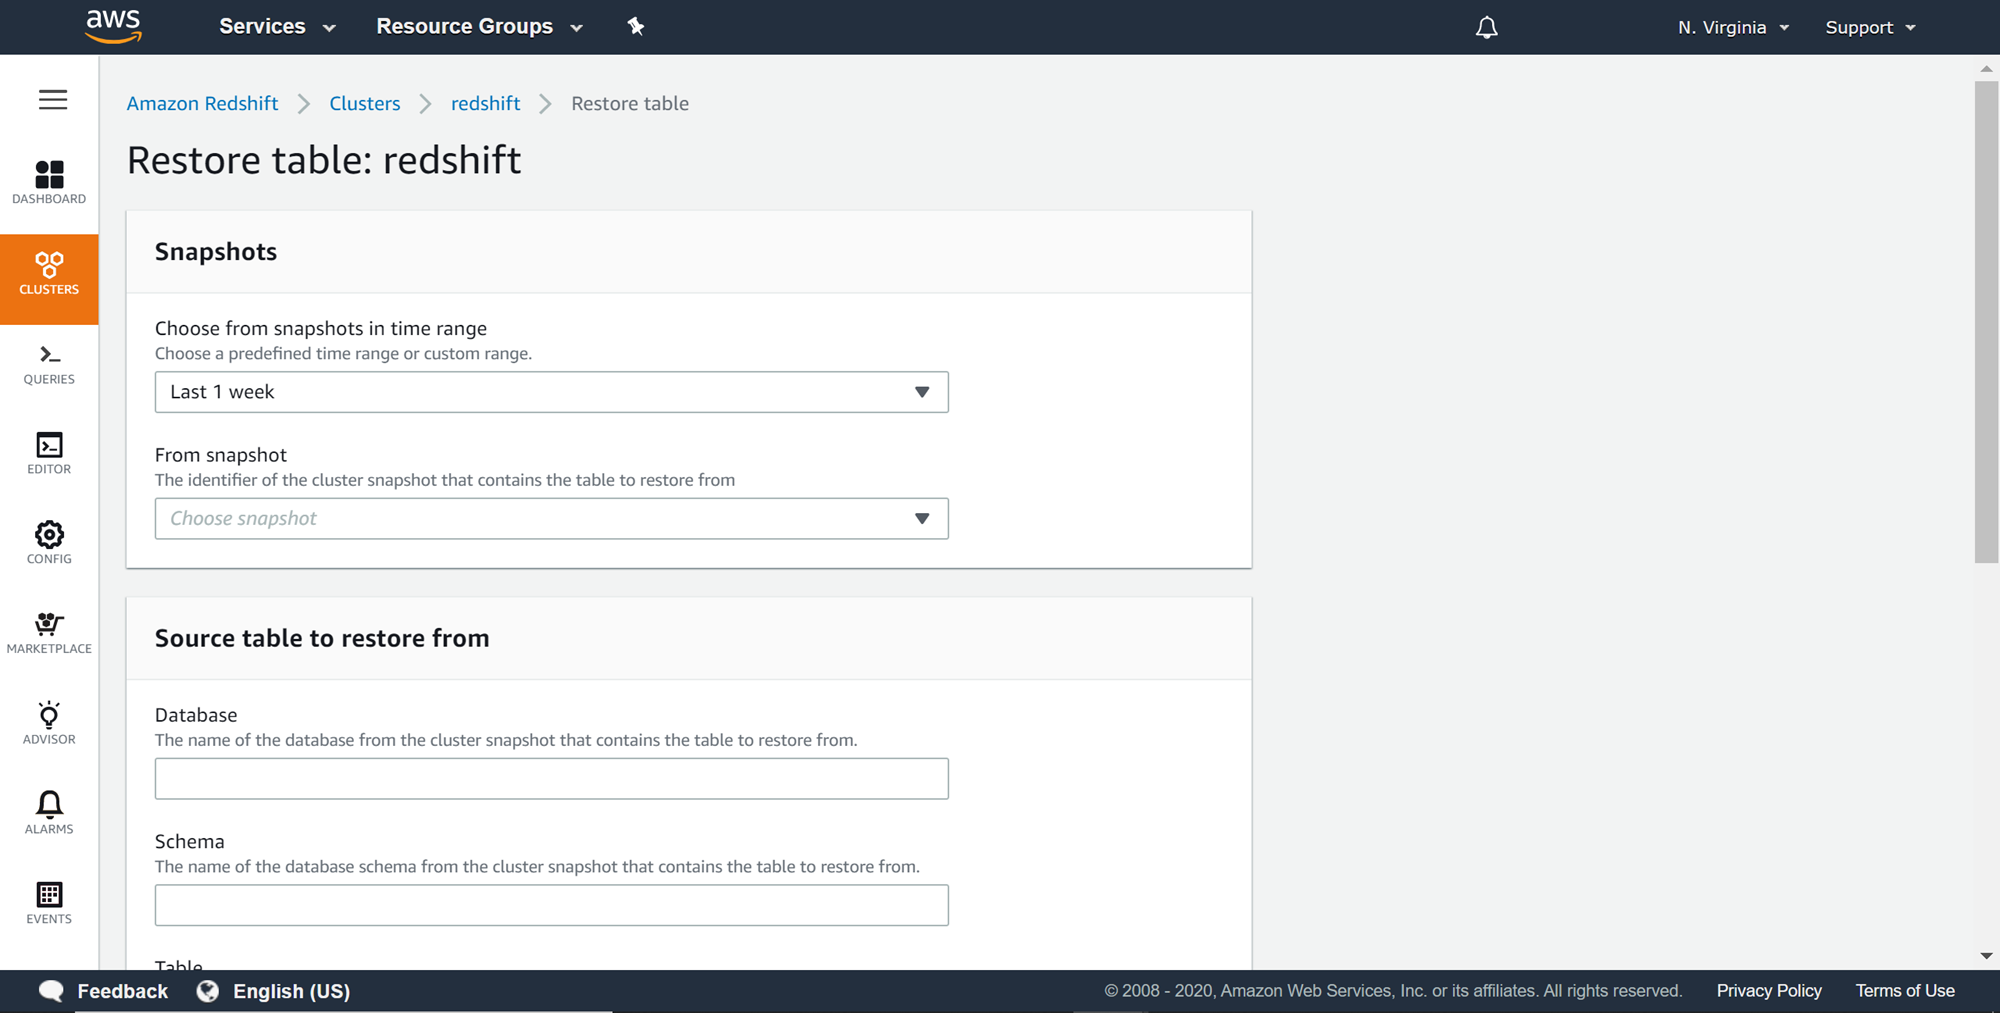
From the snapshots section, select the right snapshot which contains the last desired version of the table, which was backed up in the snapshot as shown below. In the Source table to restore from section, select the database and the schema in which the table existed, as well as the name of the table when the snapshot was created.
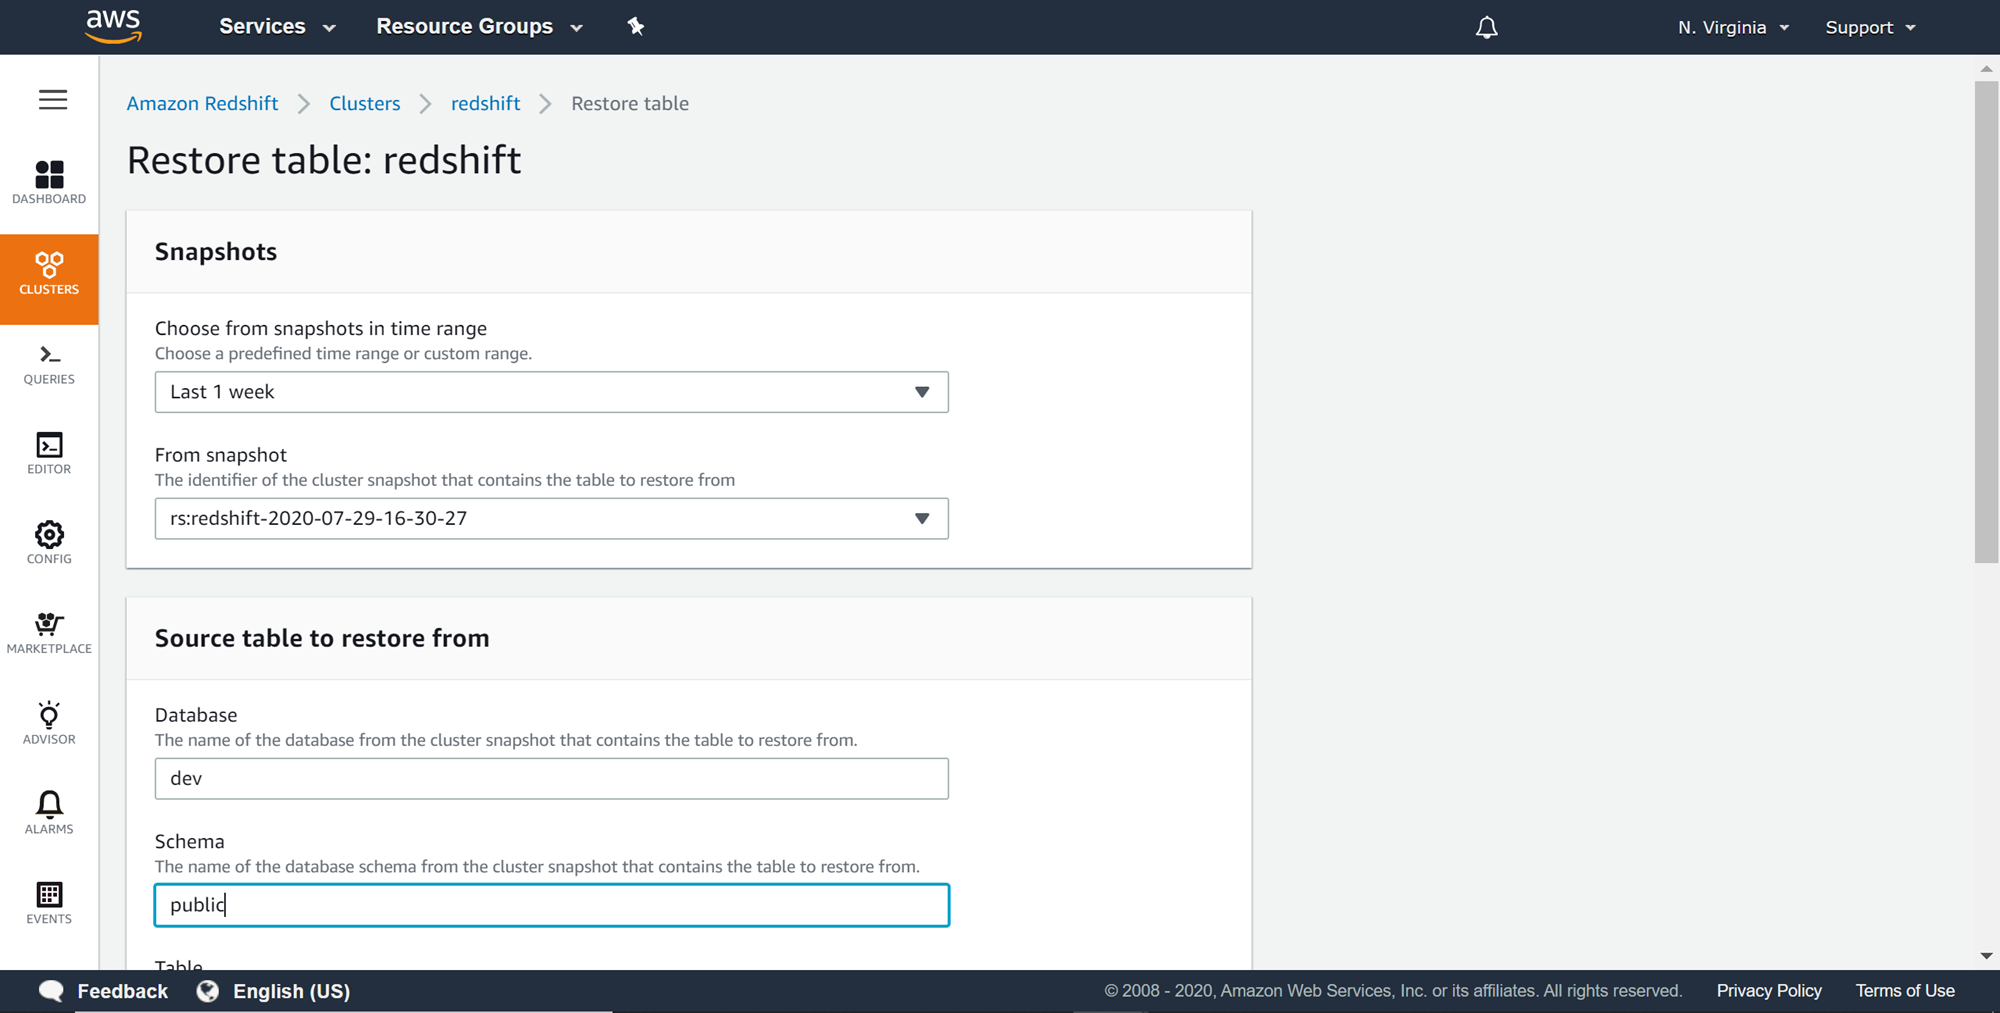
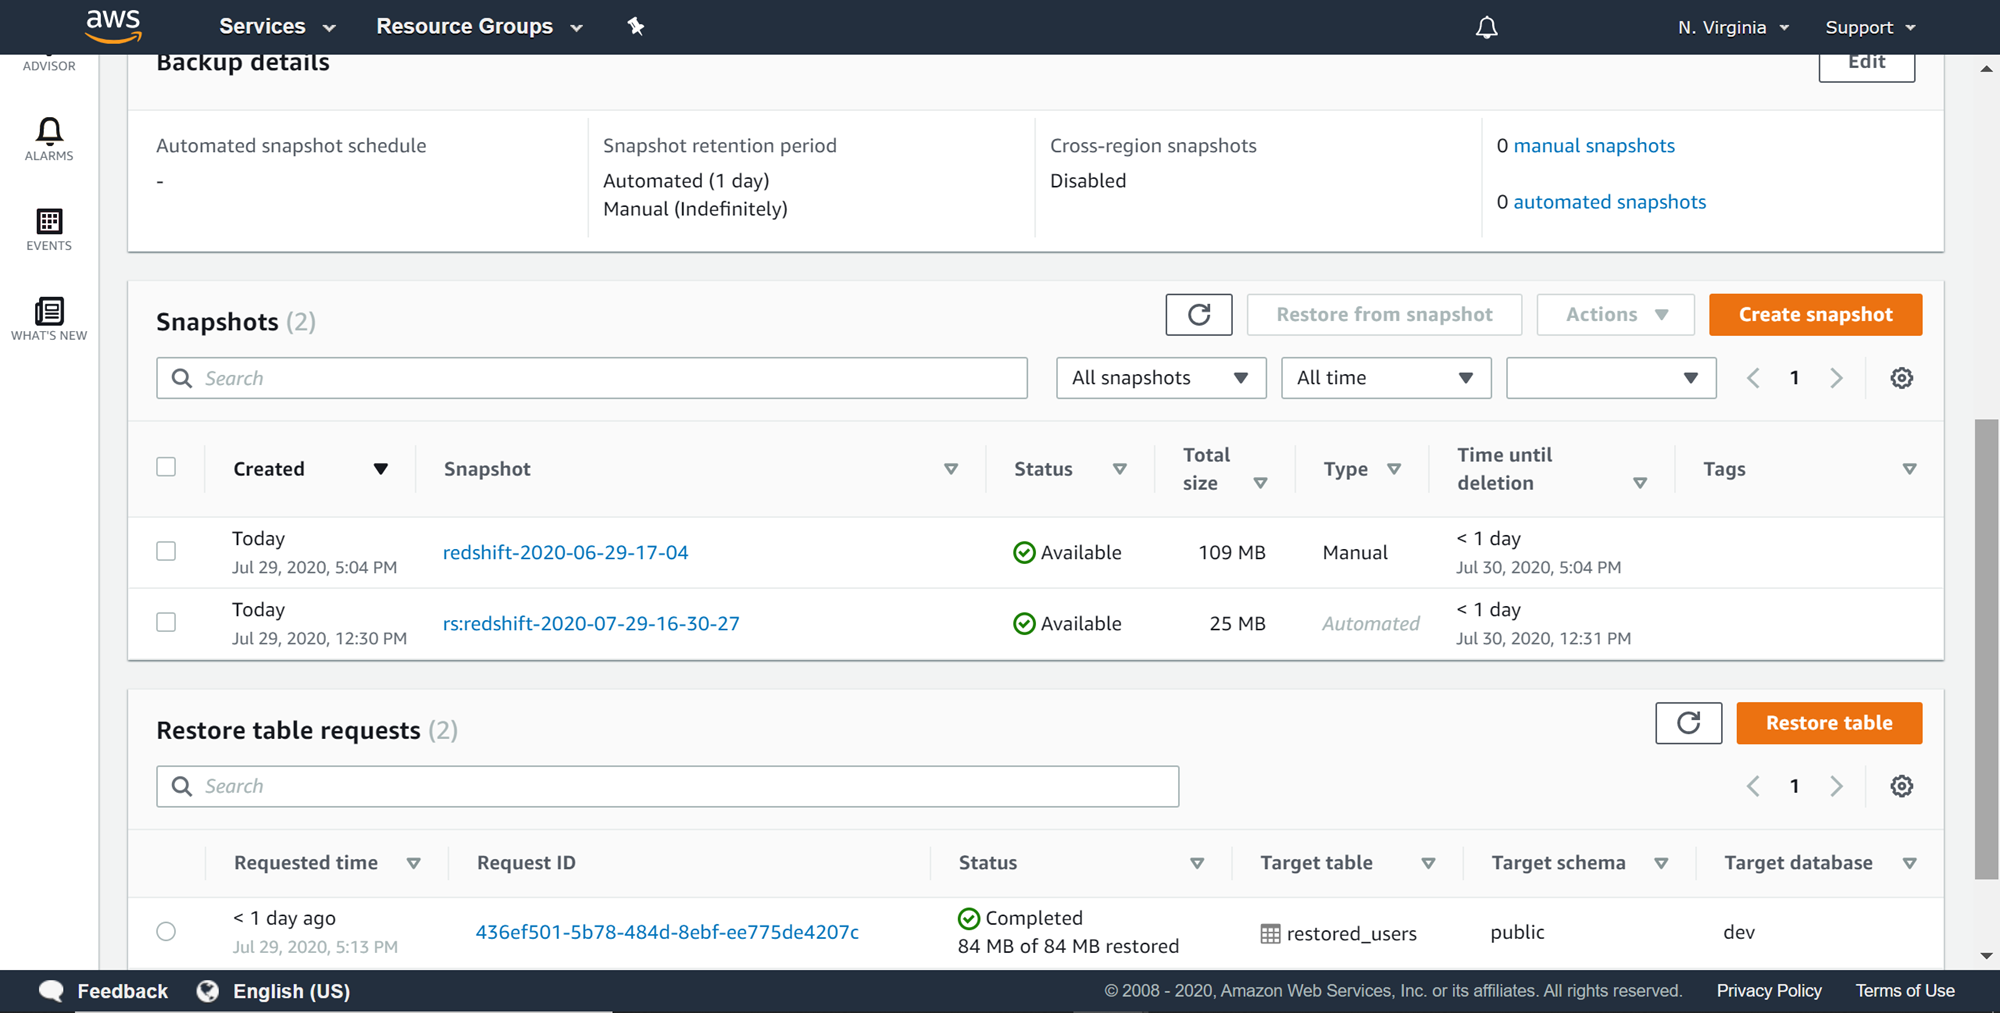
After providing the source details, provide the target table details. The name of the database, name of the schema and the new name of the table that would be used to restore the table in the existing cluster has to be provided as shown below. In this case, we are naming the restored version of the table as restored_users. Once all the details are filled up, one can click on the Restore table button.

A new restore table request would get created with a new request id as shown below. The restore process may not start immediately and depending upon the volume of the table it may take time to restore the table. Till then, the status of the table would be in the pending state. One can monitor the cloudwatch metrics of the AWS Redshift cluster to monitor the activity in the cluster, and that may offer clues of the restore activity going on in the cluster as well as the impact of the restore activity on the cluster storage and processing capacities.

Once the restore process is complete, the cloud watch metrics should return to normal, and you would also find the job in the completed state as shown below.
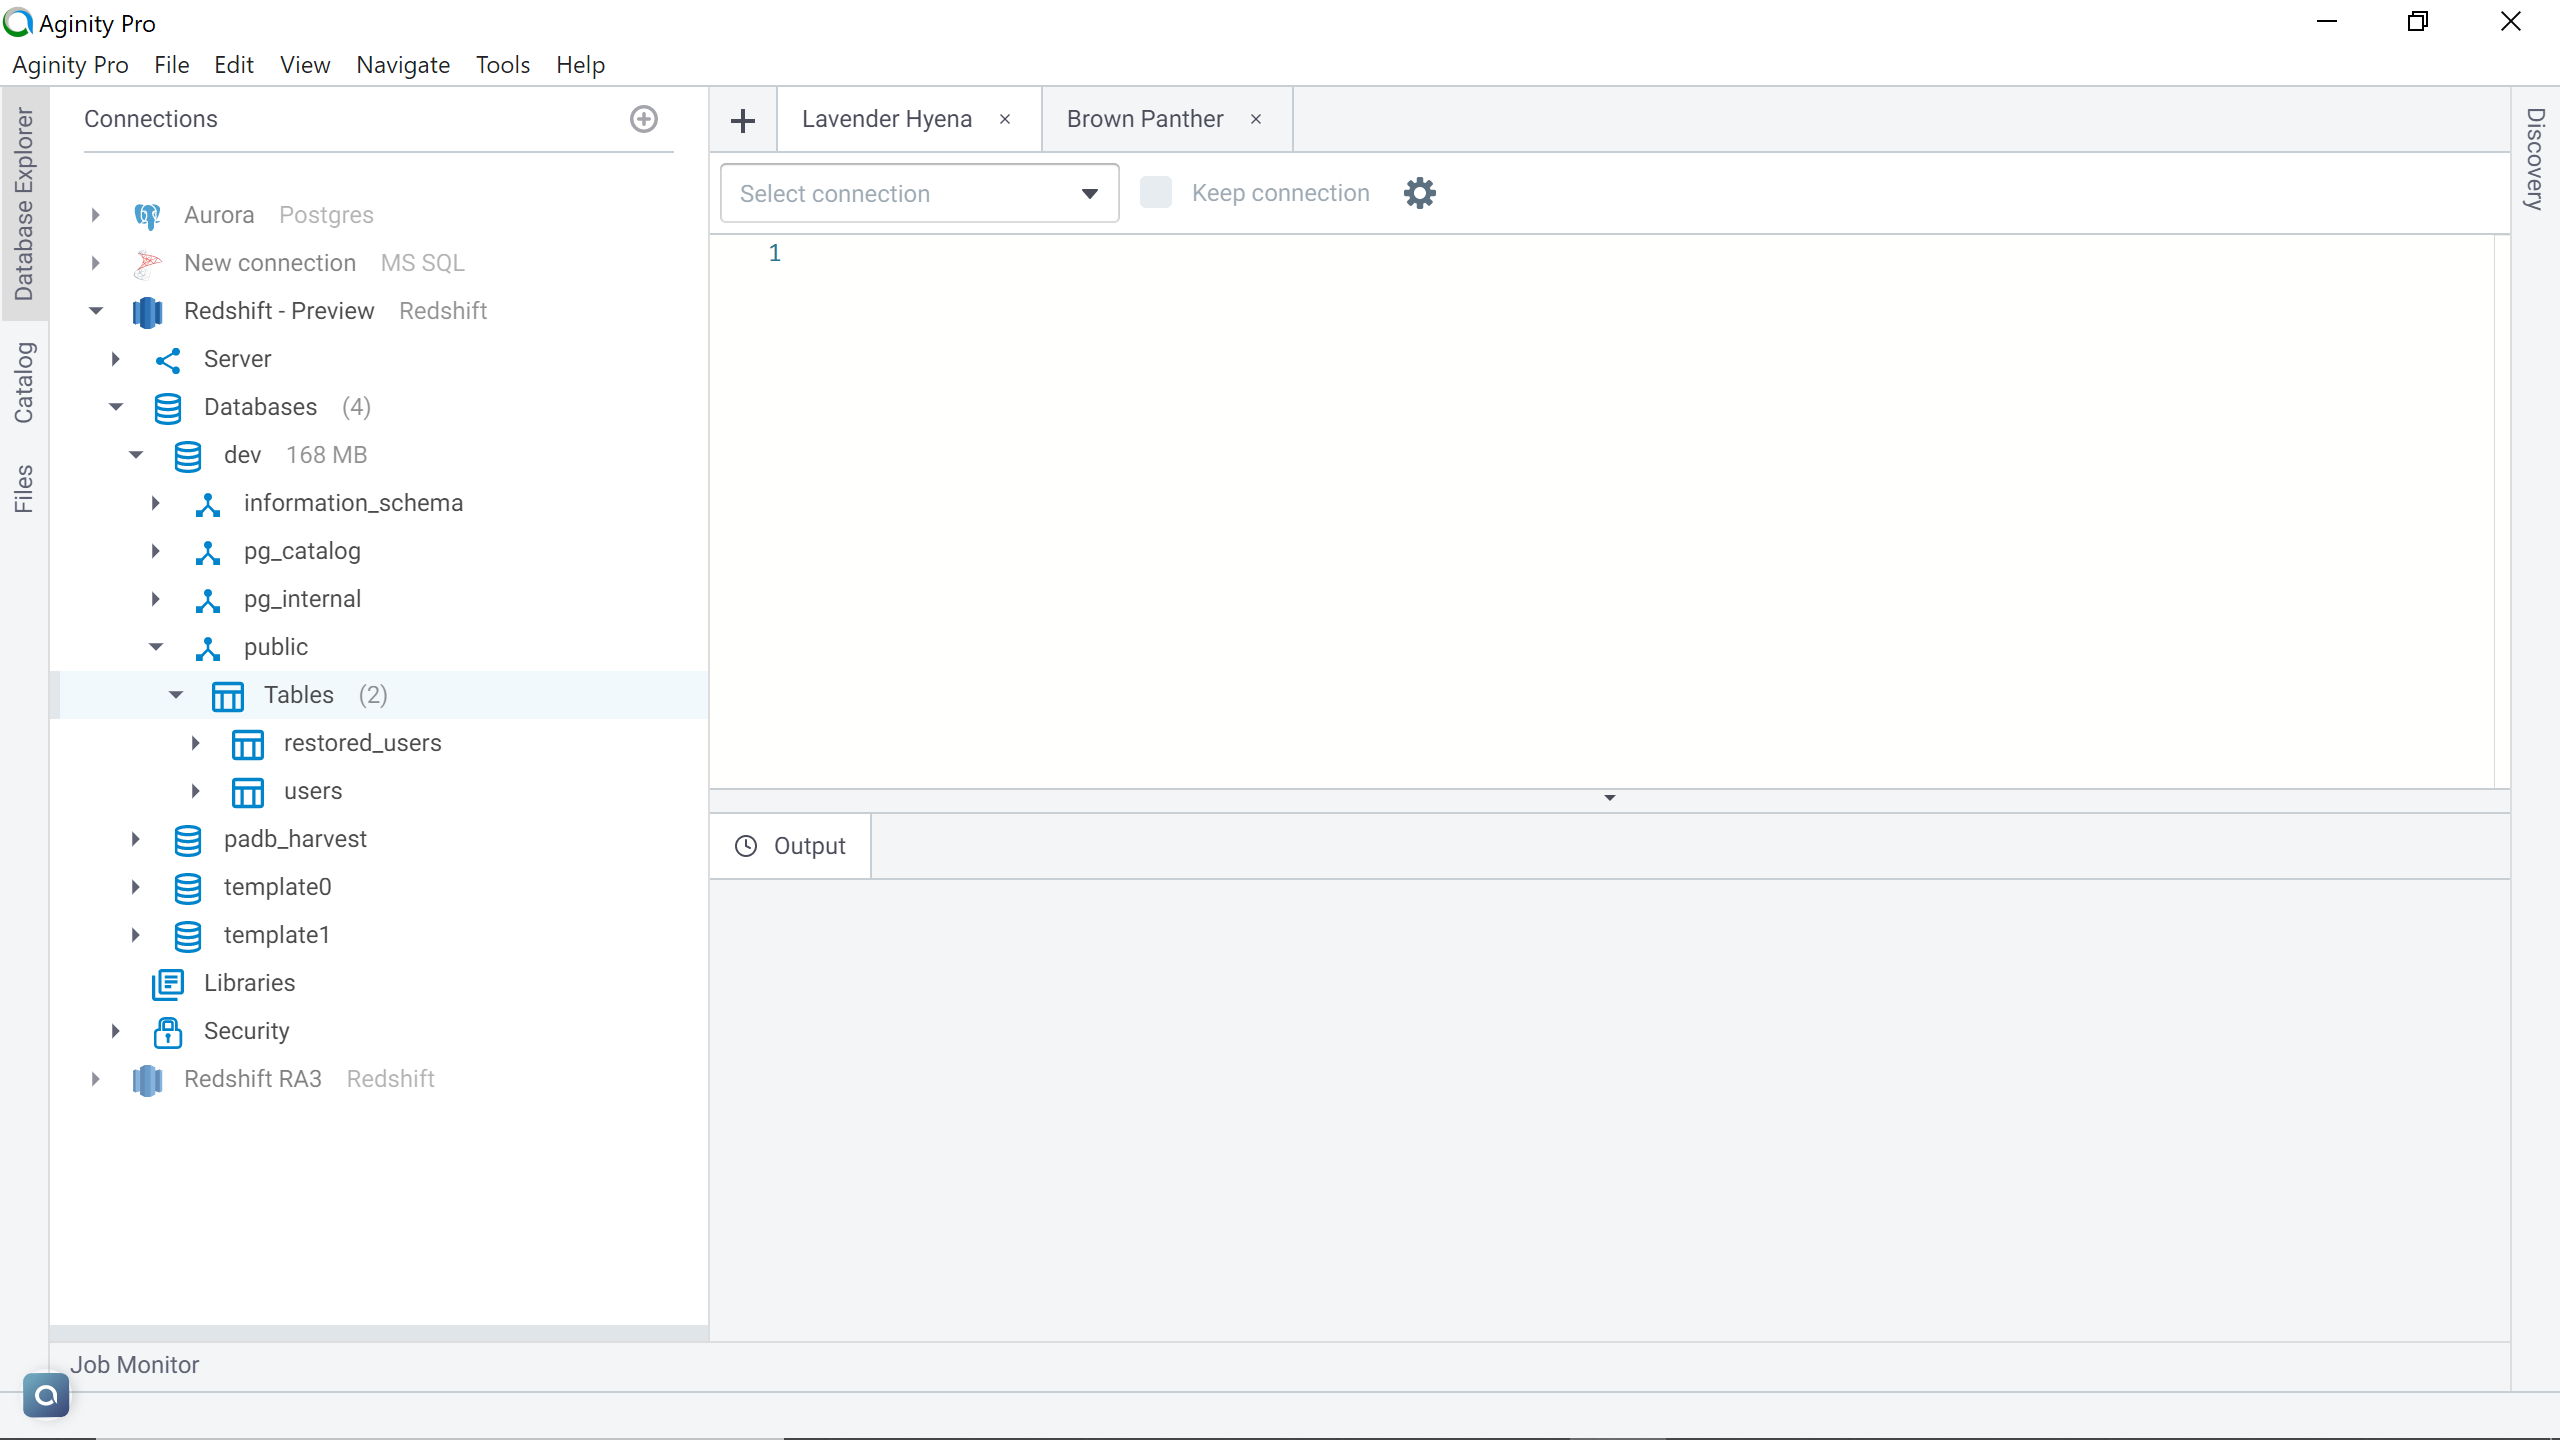
Now that the table is restored, one can navigate back to the cluster and you would find that the restored table with all the data in it as shown below.
In this way, one can restore the tables from Amazon Redshift snapshots to an existing Redshift cluster without the need to restore an entire database. If you have created the manual snapshot just to test out the feature, it is advisable to delete the manual snapshot so that it won’t create any additional costs.
Conclusion
In this article, we learned how to use the AWS Redshift table restore feature to restore specific tables into an existing AWS Redshift cluster. We also learned how to create manual snapshots and ensure that the data we would need to restore in the future is contained in an automated or manual snapshot as required.
Table of contents

He has worked internationally with Fortune 500 clients in various sectors and is a passionate author.
View all posts by Rahul Mehta
- Finding Duplicates in SQL - February 7, 2024
- MySQL substring uses with examples - October 14, 2023
- MySQL group_concat() function overview - March 28, 2023