
This article gives you an overview of AWS Redshift and describes the method of creating a Redshift Cluster step-by-step.
Introduction
AWS Redshift is a columnar data warehouse service on AWS cloud that can scale to petabytes of storage, and the infrastructure for hosting this warehouse is fully managed by AWS cloud. Redshift operates in a clustered model with a leader node, and multiple worked nodes, like any other clustered or distributed database models in general. It is based on Postgres, so it shares a lot of similarities with Postgres, including the query language, which is near identical to Structured Query Language (SQL). This Redshift supports creating almost all the major database objects like Databases, Tables, Views, and even Stored Procedures. In this article, we will explore how to create your first Redshift cluster on AWS and start operating it.
Pre-requisites
An AWS account with the required privileges is required to use the AWS Redshift service. To create an AWS account, you would need to have a credit card or a payment method supported by AWS. First-time users who intend to open a new AWS account can read this article, which explains the process of opening and activating a new AWS account.
Once you have a new AWS account, AWS offers many services under free-tier where you receive a certain usage limit of specific services for free. New account users get 2-months of Redshift free trial, so if you are a new user, you would not get charged for Redshift usage for 2 months for a specific type of Redshift cluster.
Creating your first AWS Redshift Cluster
It is assumed that the reader has an AWS account and required administrative privileges to operate on Redshift. If you are a new user, it is highly probable that you would be the root/admin user and you would have all the required permissions to operate anything on AWS. Once you log on to AWS using your user credentials (user id and password), you would be shown the landing screen which is also called the AWS Console Home Page.
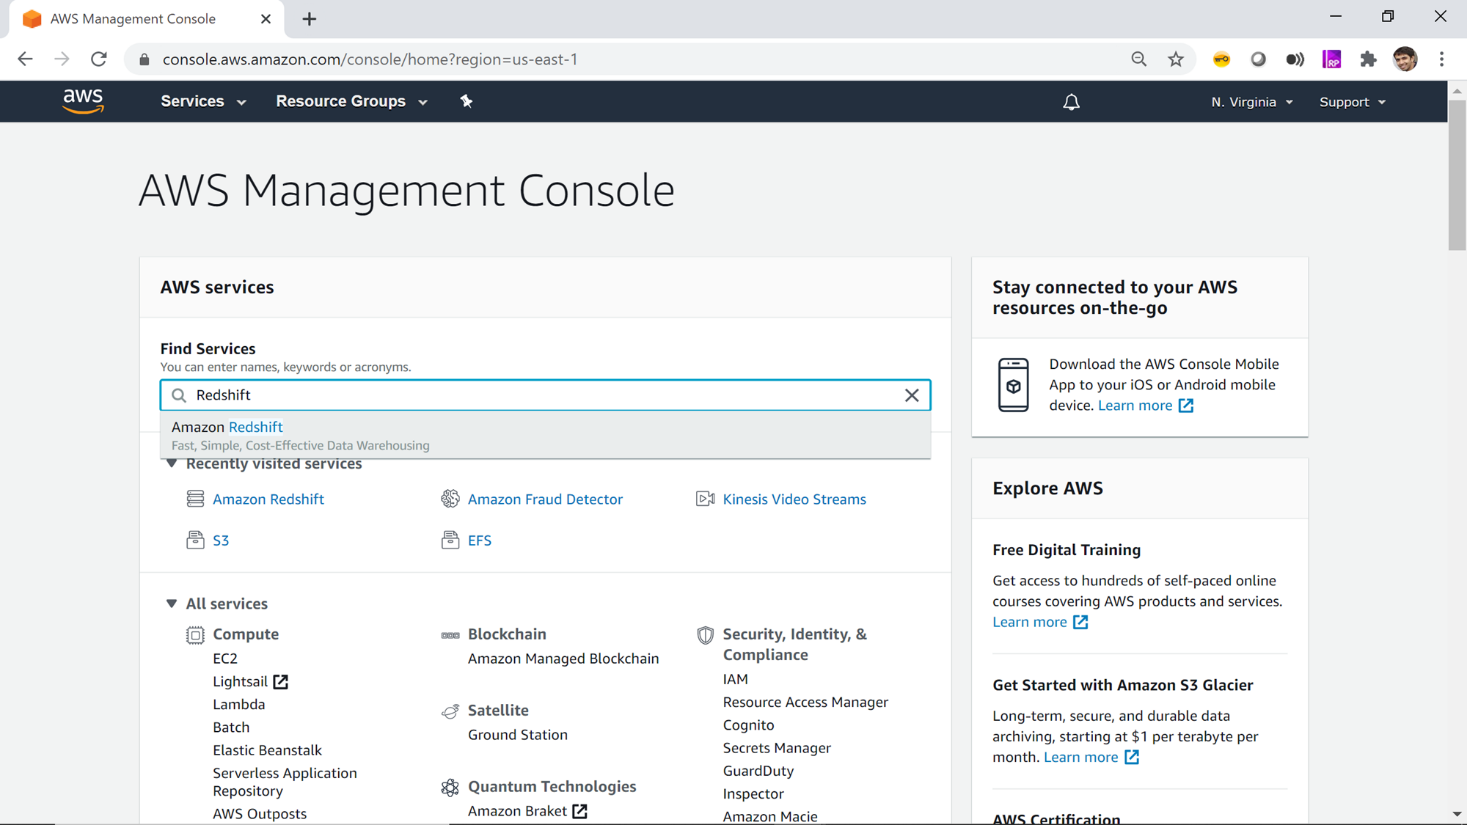
In AWS cloud, almost every service except a few is regional services, which means that whatever you create in the AWS cloud is created in the region selected by you. The default region in AWS in N. Virginia which you can see in the top-right corner. If you wish to create your Redshift cluster in a different region, you can select the region of your choice. You can learn more about AWS regions from this article. After selecting the region of your choice, the next step is to navigate to the AWS Redshift home page. Type Redshift on the search console as shown below, and you would find the service name listed.
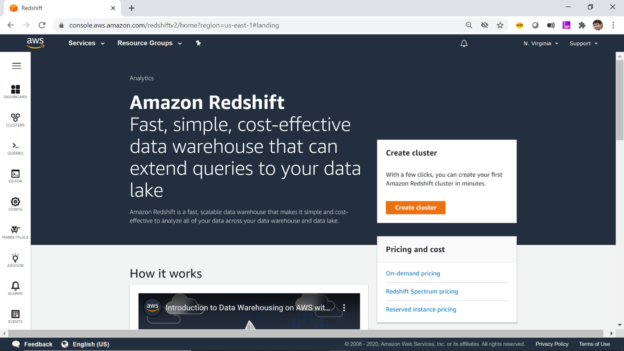
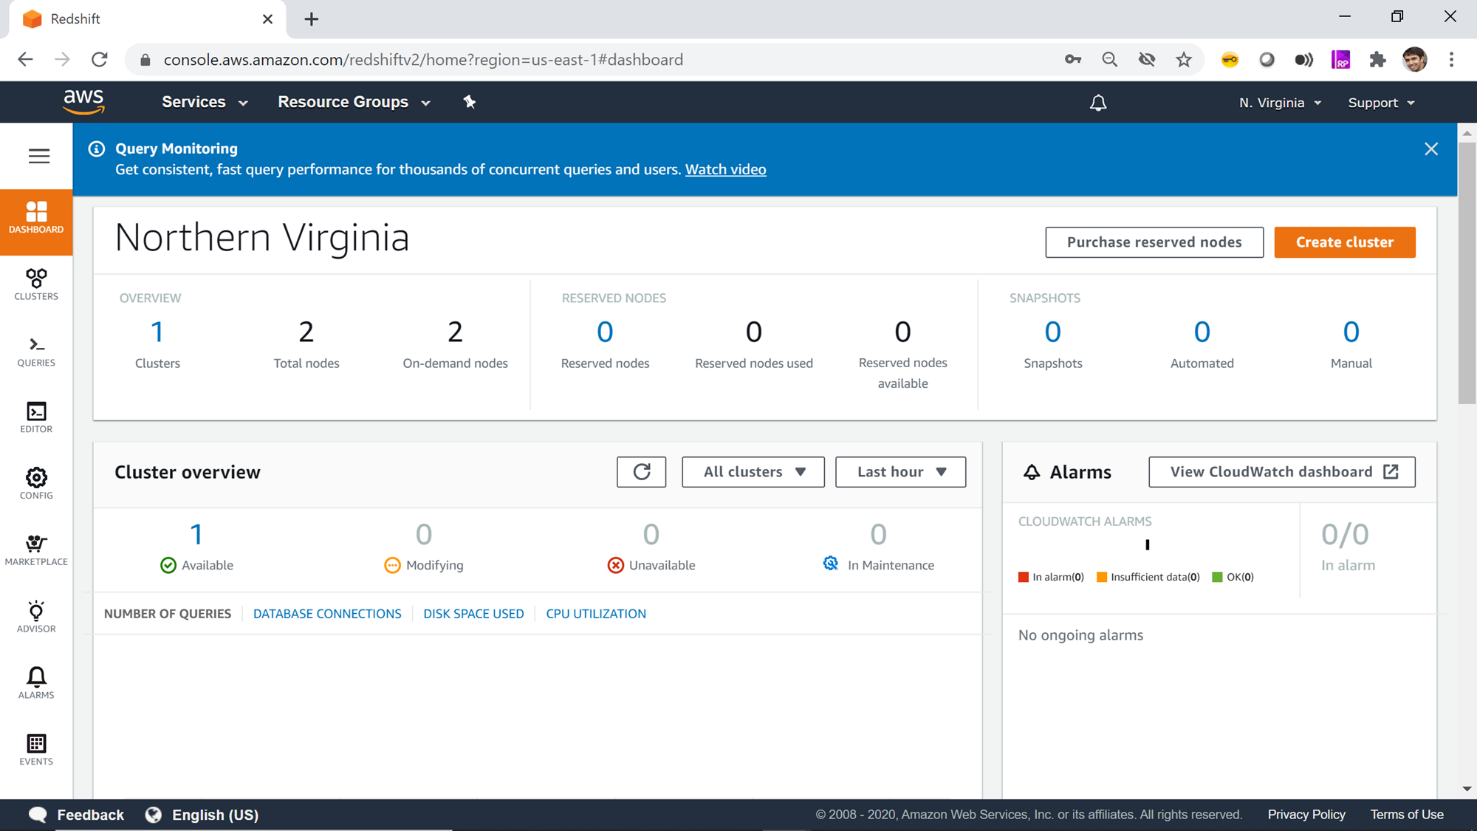
Click on the service name and you would be navigated to the home page or the dashboard page of Redshift as shown below.

Once you are on the home page of AWS Redshift, you would find several icons on the left page which offers options to operate on various features of Redshift. To get started, we need to create a cluster first, then log on to the cluster to create database objects in it. On the right-hand side of the screen, you would find a button named Create Cluster as shown above. Click this button to start specifying the configuration using which the cluster would be built.
Cluster Configuration

Once you are on the cluster creating wizard, you would need to provide different details to determine the configuration of your AWS Redshift cluster. Firstly, provide a cluster name of your choice. The next detail is Node Type – which determines the capacity of nodes in your cluster. DC2 stands for Dense Compute Nodes, DS2 stands for Dense Storage and RA3 is the most advanced and latest offering from Redshift which offers the most powerful nodes having a very large compute and storage capacity. By default, it would be shown as the recommended option. But for first-time users who are just getting started with Redshift, they often do not need such high capacity nodes, as this can incur a lot of cost due to the capacity associated with it. DC2 usage is covered in the free-tier and it offers a very reasonable configuration at an affordable cost for modest data volumes. So, select dc2.large node type which offers 160 GB of storage per node. You can read more about Redshift node types from here.
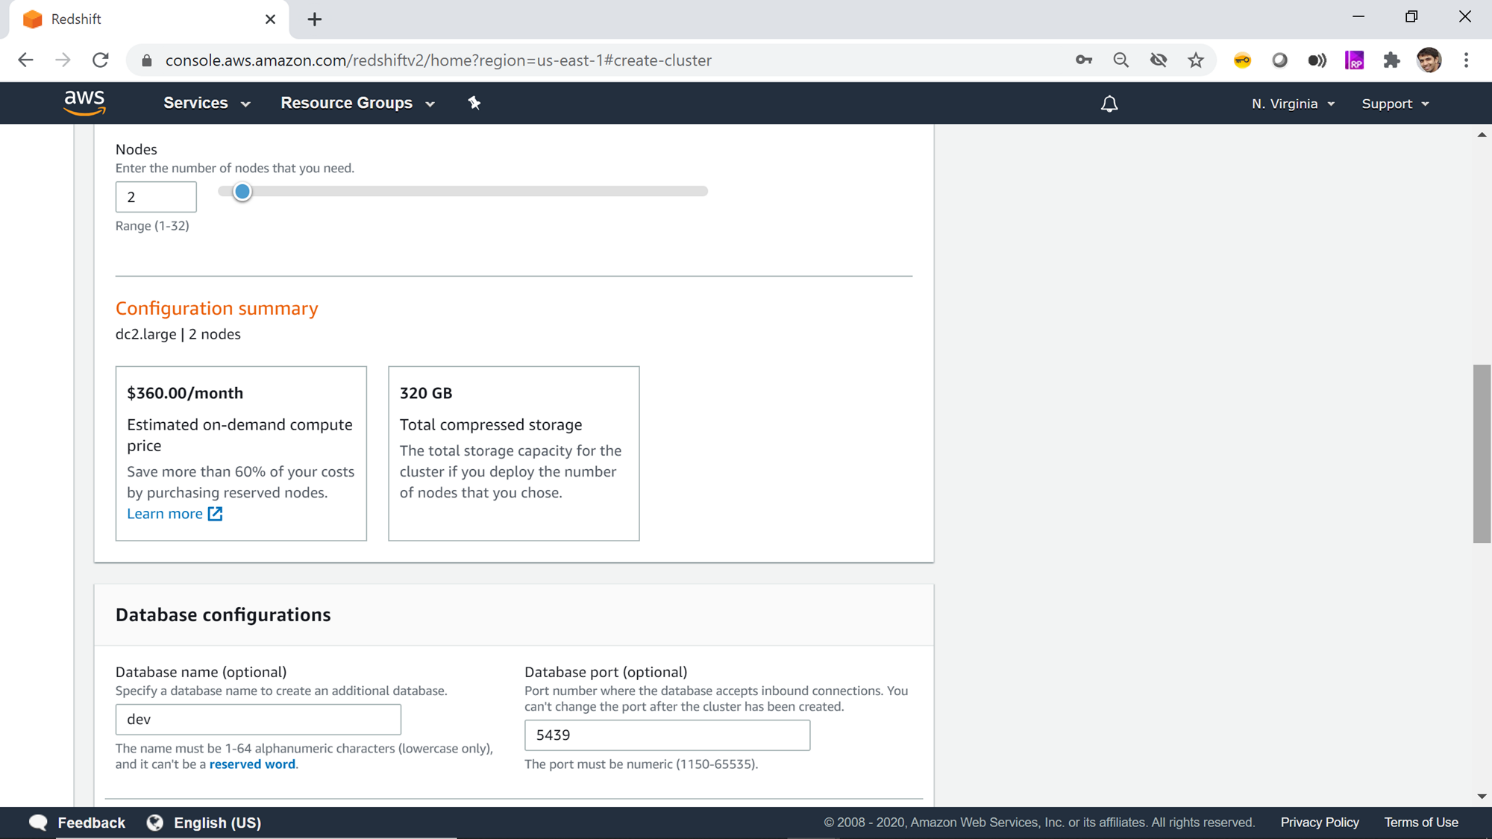
The next step is to select the number of nodes in a cluster. We can create a single node cluster, but that would technically not count as a cluster, so we would consider a 2-node cluster. The default value for the number of nodes is 2, which you can change as required. Below are the number of nodes, it shows that the cost of running this cluster for the entire month is $320. It’s recommended to terminate the cluster once the cluster is not in use. The cluster creating process is very concise and it hardly takes minutes to create or terminate a cluster. You can either pause/terminate a cluster when not required depending upon your use-case. First-time users are covered under free tier, so they would not get charged anything for Redshift usage of DC2 2-node cluster for a couple of hours.
Database Configuration
The next step is to specify the database configuration. The default database name is dev and default port on which AWS Redshift listens to is 5439. You can change this configuration as needed or use the default values. In this case, we would be using the default values.
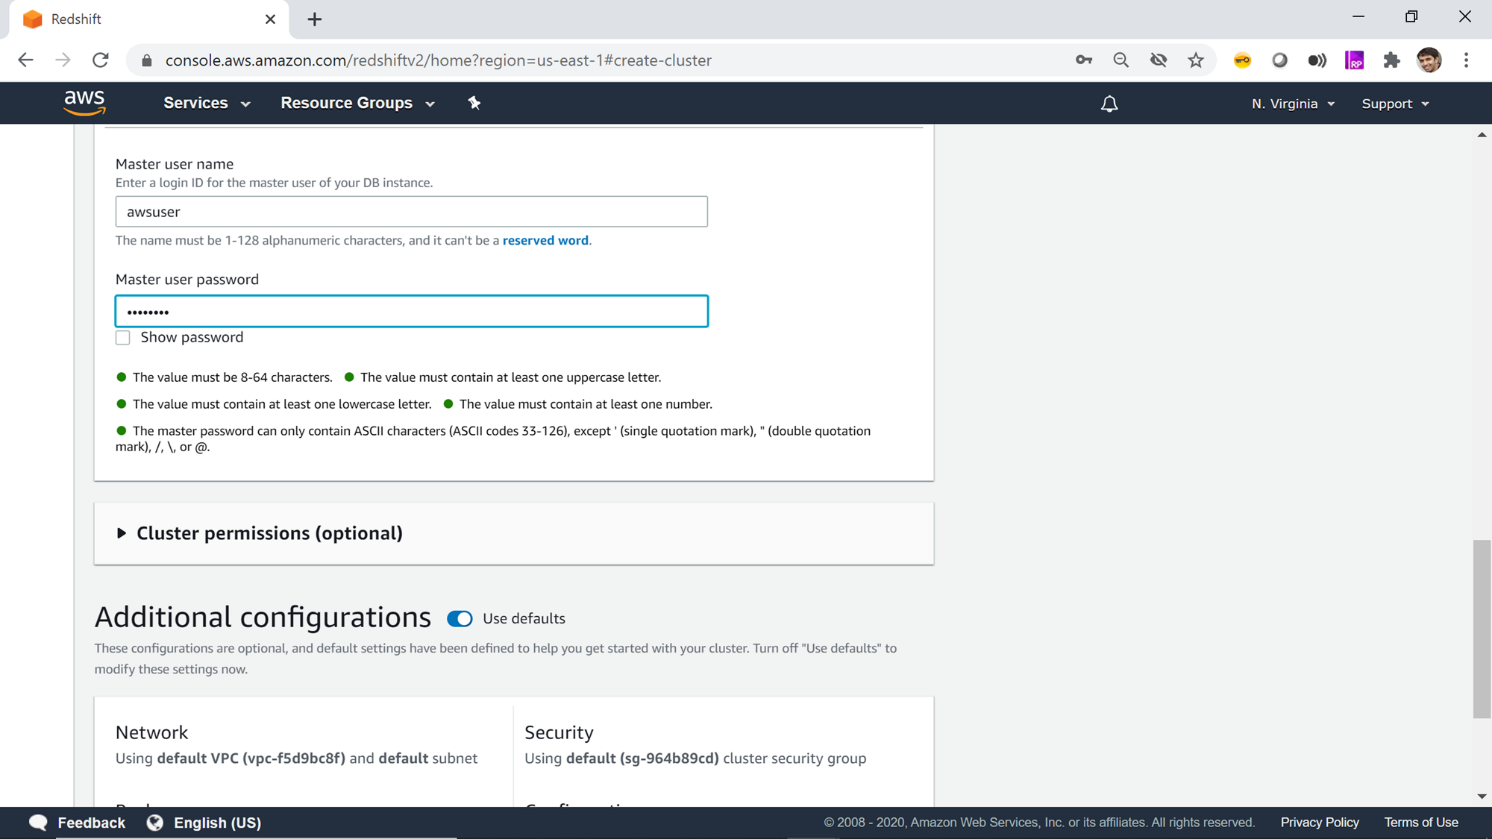
After specifying the database name and port, the next required detail is the master username and password, which is the administrative credential that provides full access to the AWS Redshift cluster. The default username is an awsuser. Provide a password of your choice as per the rules mentioned below the password box. This completes the database level configuration of Redshift.
Additional Configurations
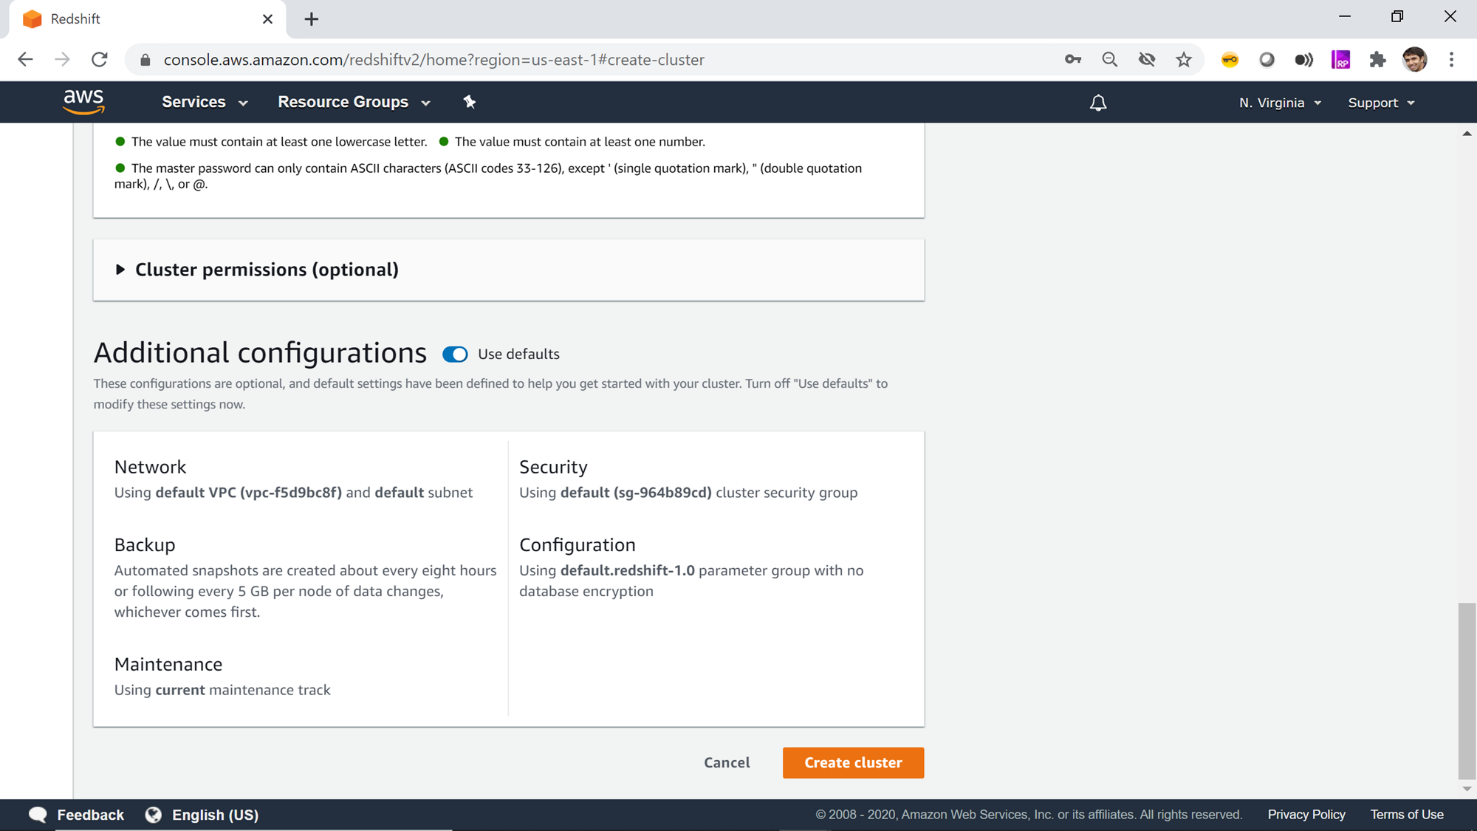
Cluster permissions is an optional configuration that allows specifying Identity and Access Management (IAM) roles that allow the AWS Redshift clusters to communicate/integrate with other AWS services. It can be modified even after the cluster is created, so we would not configure it for now.
In the additional configurations section, switch off the Use Defaults switch, as we intend to change the accessibility of the cluster. We intend to use the cluster from our personal machine over an open internet connection. This is generally not the recommended configuration for production scenarios, but for first-time users who are just getting started with Redshift and do not have any sensitive data in the cluster, it’s okay to use the Redshift cluster with non-sensitive data over open internet for a very short duration. The additional configuration allows specifying details like network configuration, security, backup management, parameter and option groups that allow to control the behavior of the Redshift cluster and well as maintenance windows.
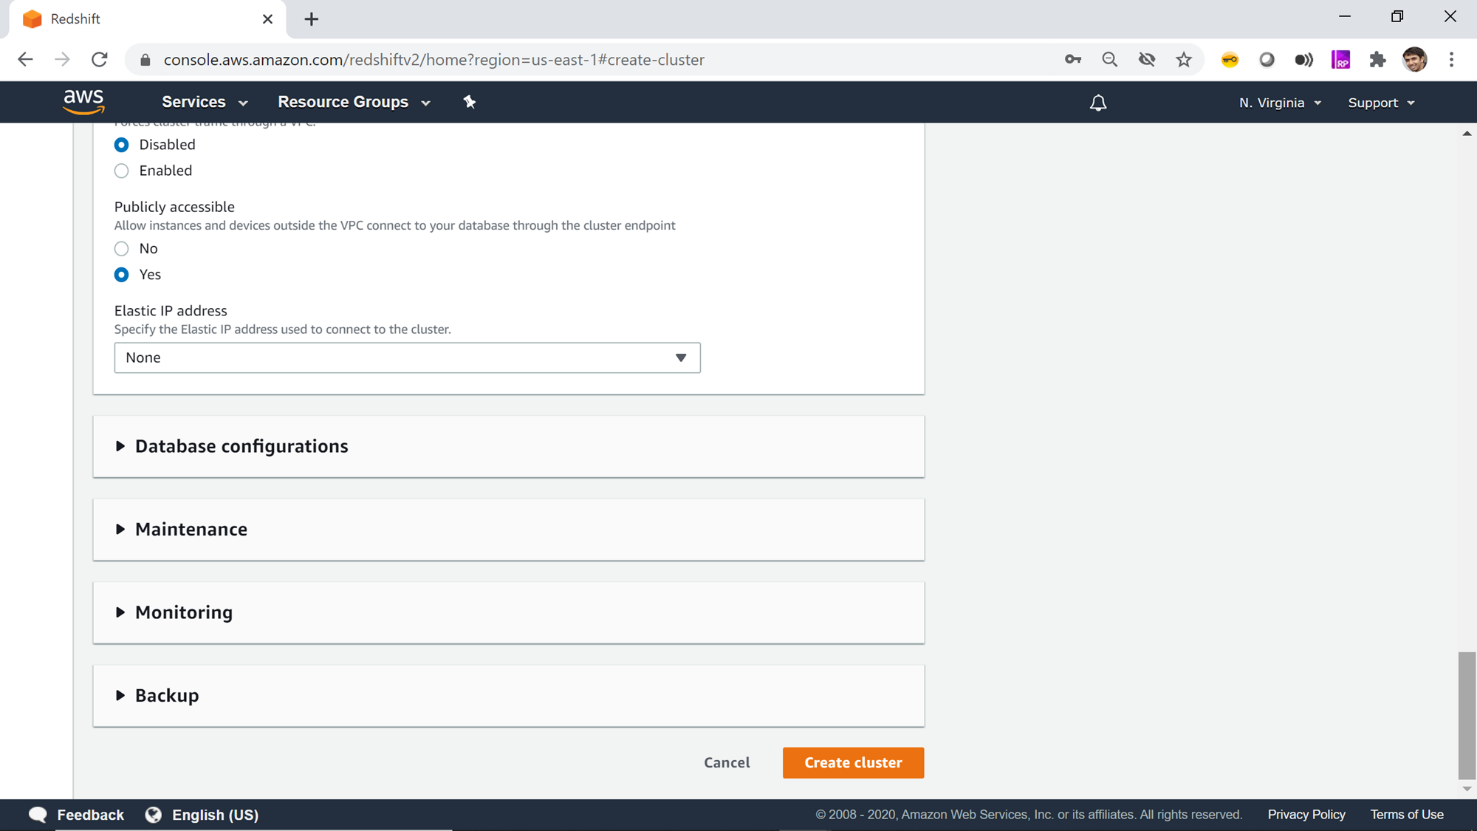
The only option which we need to change here is the Publicly Accessible setting as shown below. The default value for this setting will be No. Change it to the value of Yes, so that it would make the necessary network changes to allow the use of AWS Redshift cluster over open internet using the cluster endpoint that would be created.
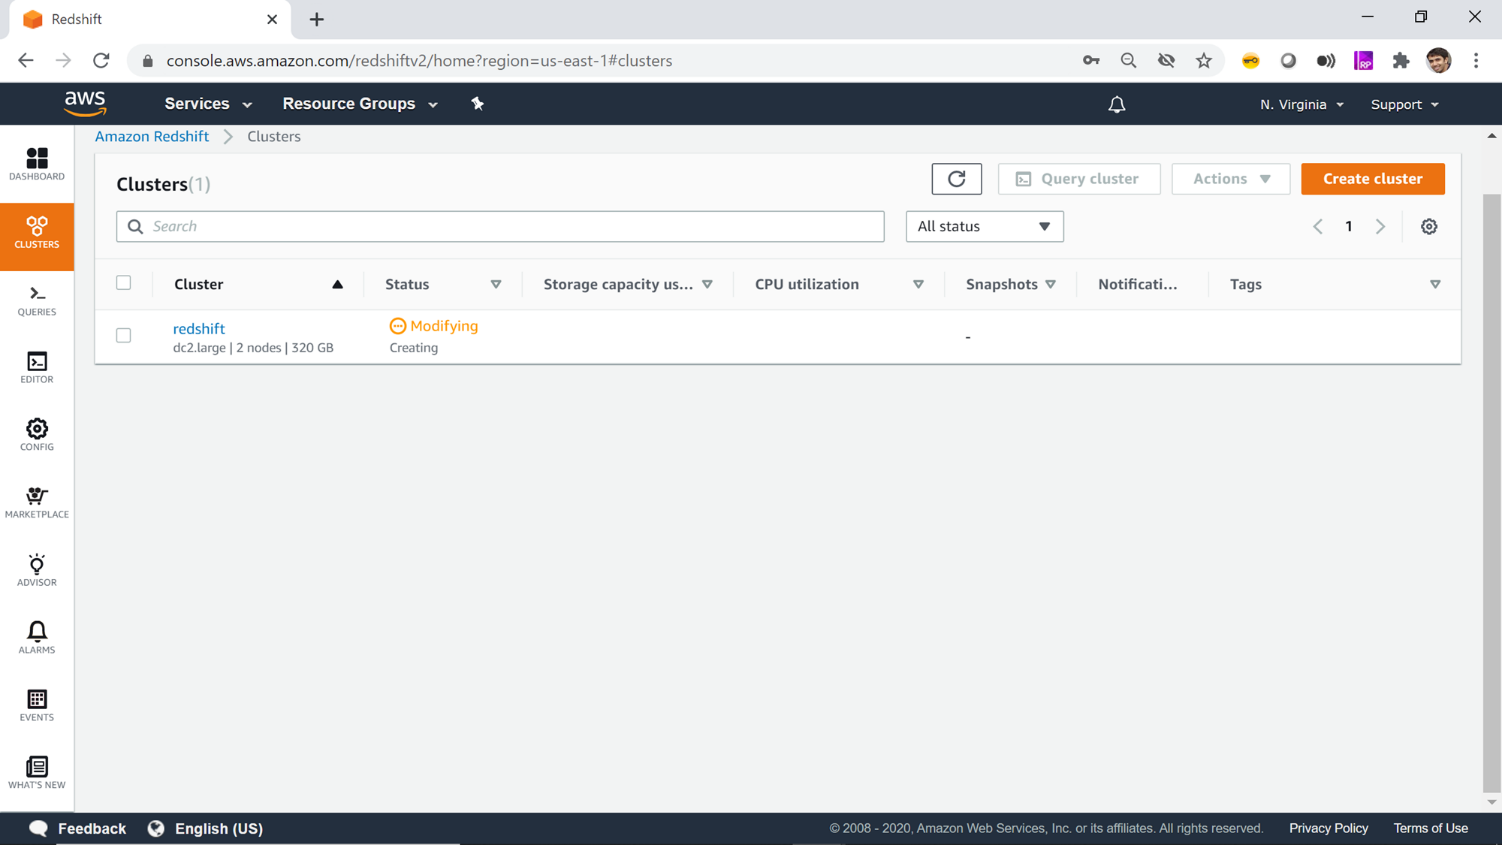
Once this configuration is complete, click on the Create Cluster button. This will start creating your cluster and you would be navigated to the clusters window, where you would find the status of your cluster in Modifying status. Do not get alarmed by the status, as you may wonder that you are just creating your cluster and instead of showing a creating/pending/in-progress status, it’s showing modifying. This is the terminology that AWS uses for creating or modifying any type of cluster.
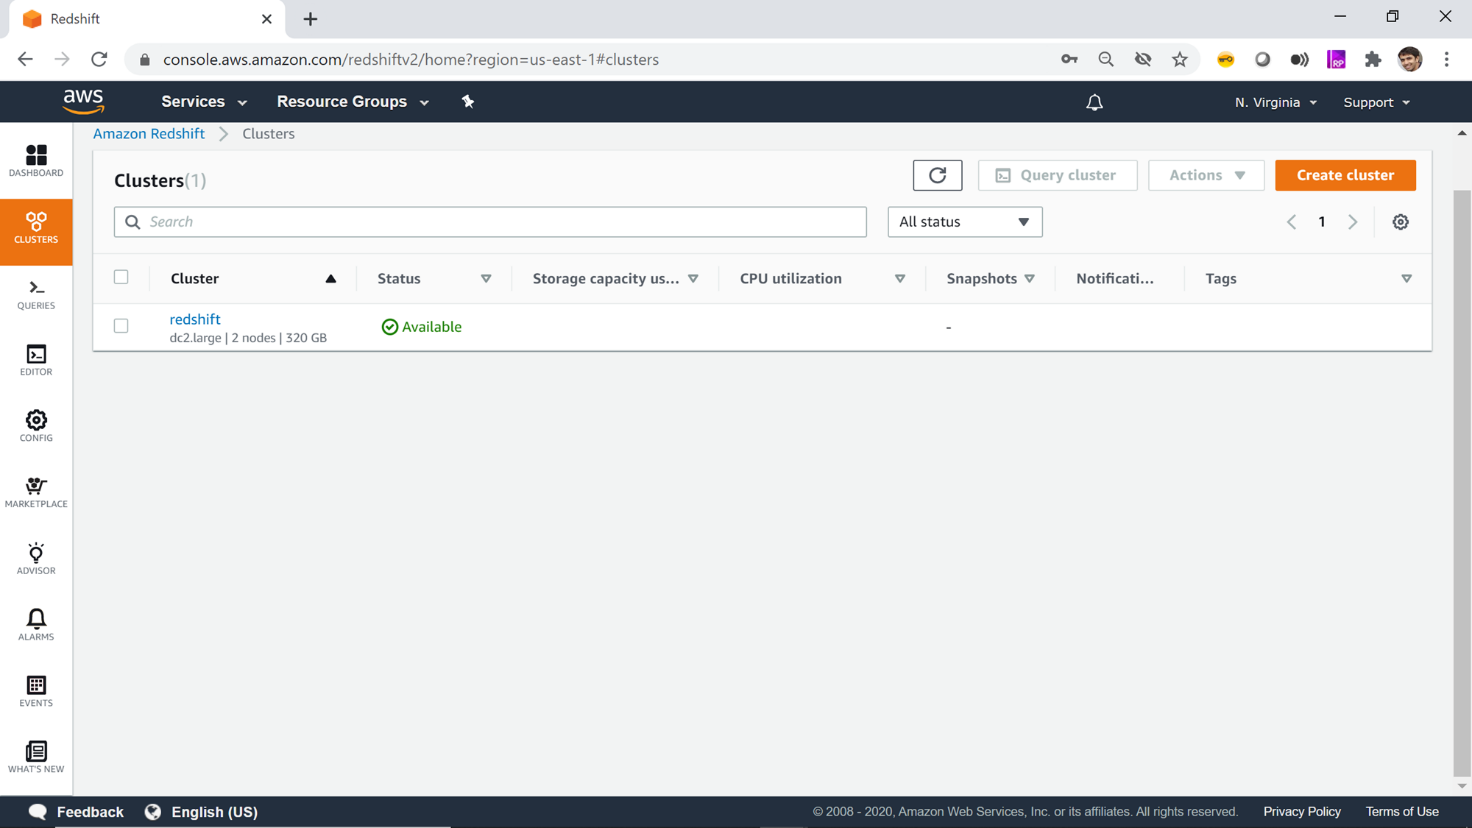
Once the cluster is created you would find it in Available status as shown below.
Once you click on the Dashboard, you would find you would be able to see the statistics of the cluster, for example, 1 Cluster(s), 2 Total nodes etc. Consider exploring this page to check out more details regarding your cluster.
Querying AWS Redshift Cluster
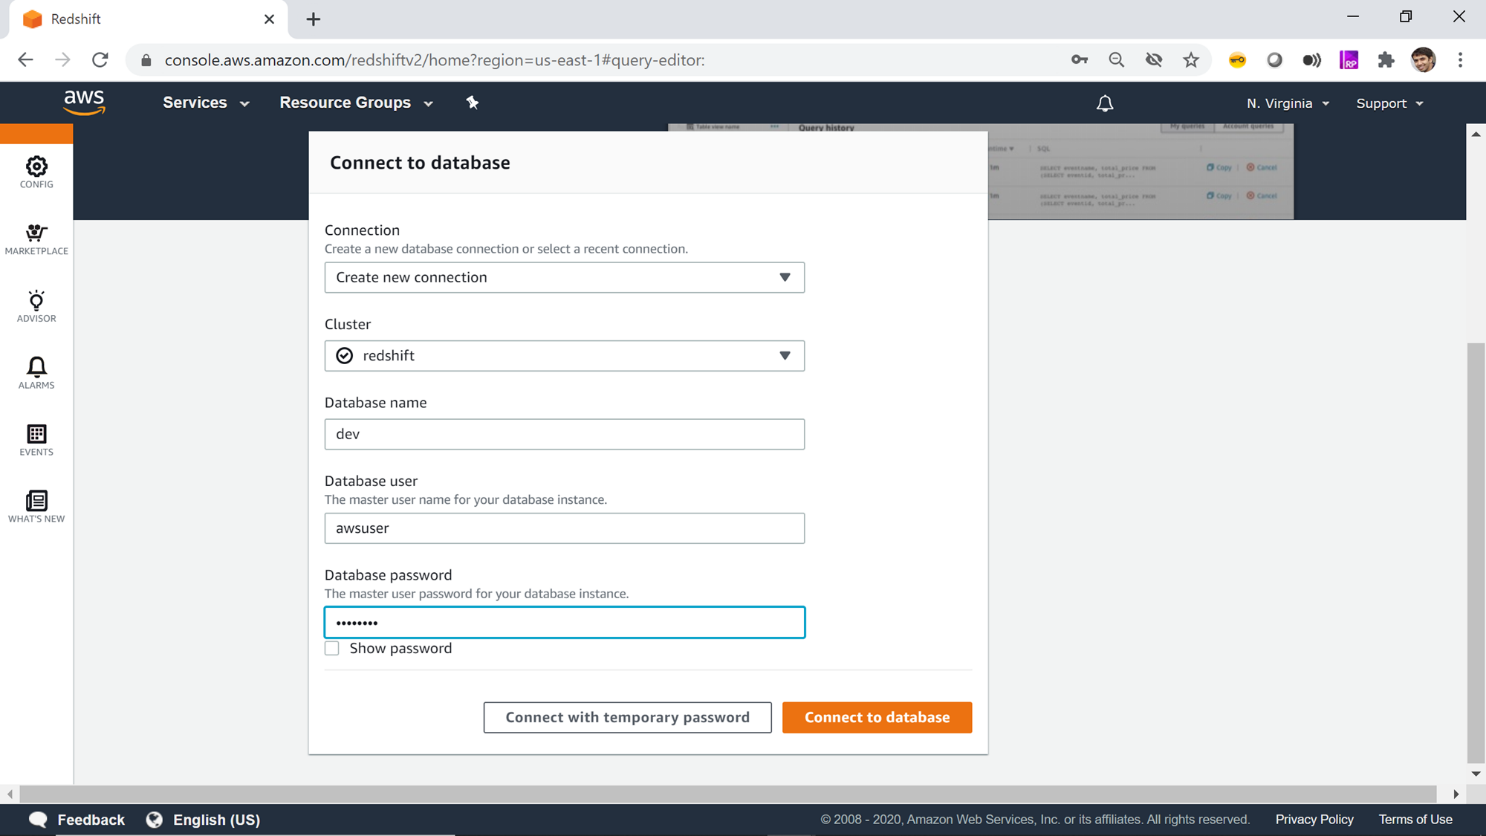
Click on the Editor icon on the left pane to connect to Redshift and fire queries to interrogate the database or create database objects. This page will require you to provide your master username and password to log on and start using the database from the browser itself, without the need to use an external IDE to operate on Redshift. Provide the details as shown below and click on Connect to database button.
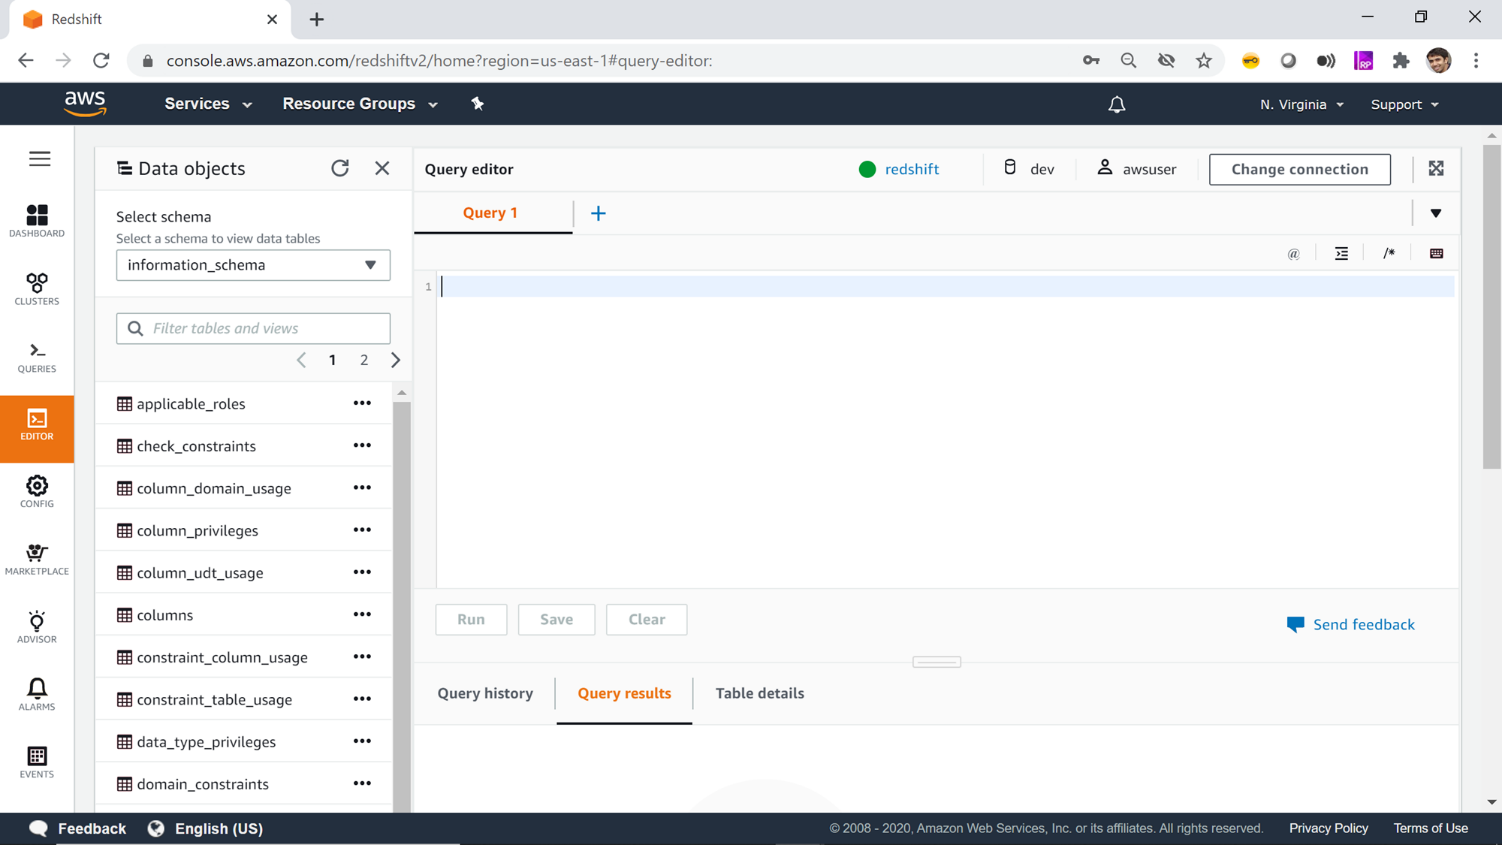
Once you successfully log on, you would be navigated to a window as shown below. The data objects list the system objects and schemas. The Query editor window facilitates firing queries against the selected schema.
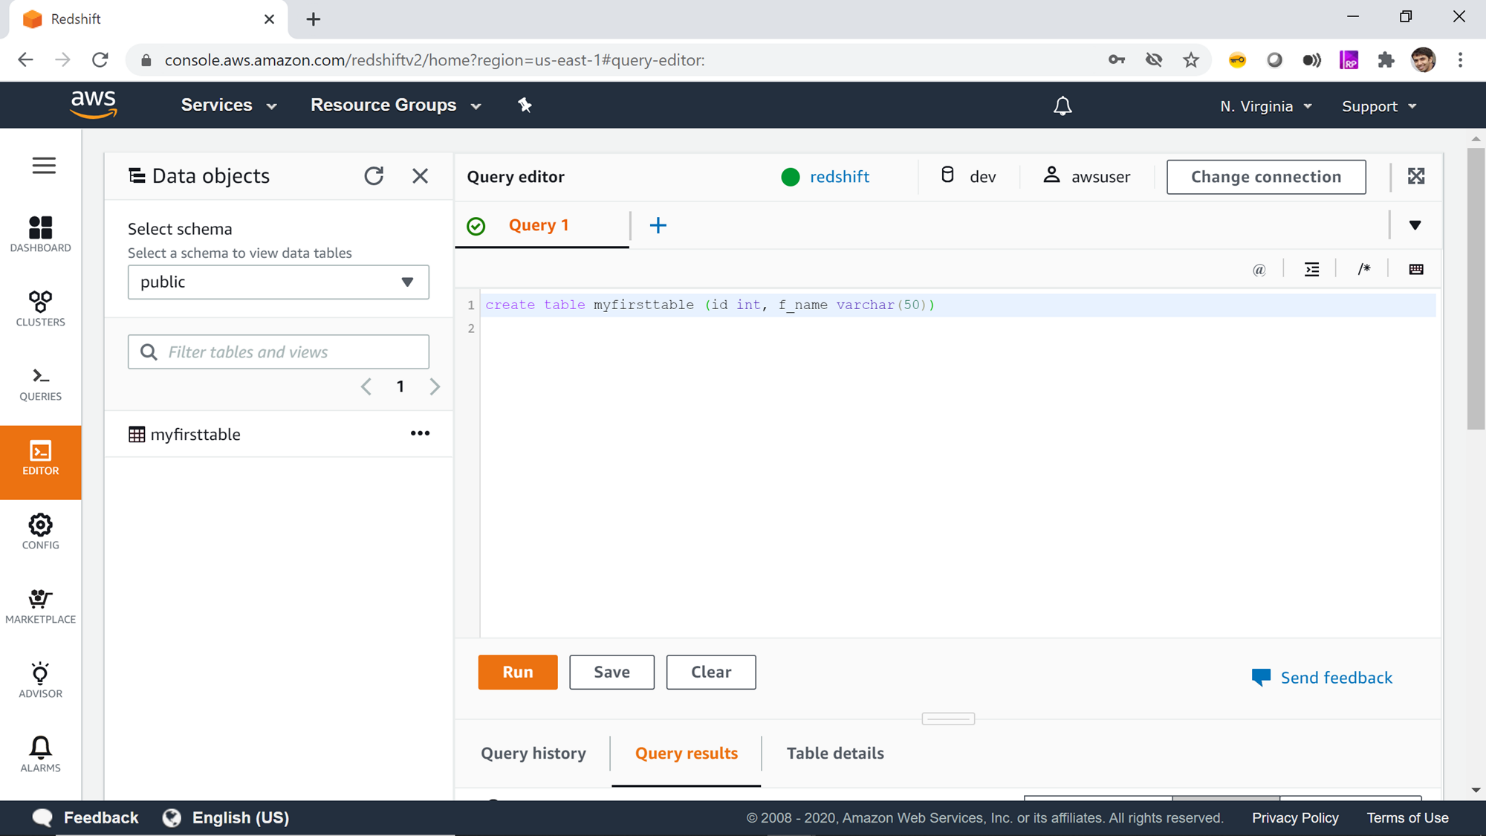
You can start firing DDL (Data Definition Language) and DML (Data Manipulation Language) queries from the Query Editor window as shown below. You can read more about the AWS Redshift query language from here.
Deleting AWS Redshift Cluster
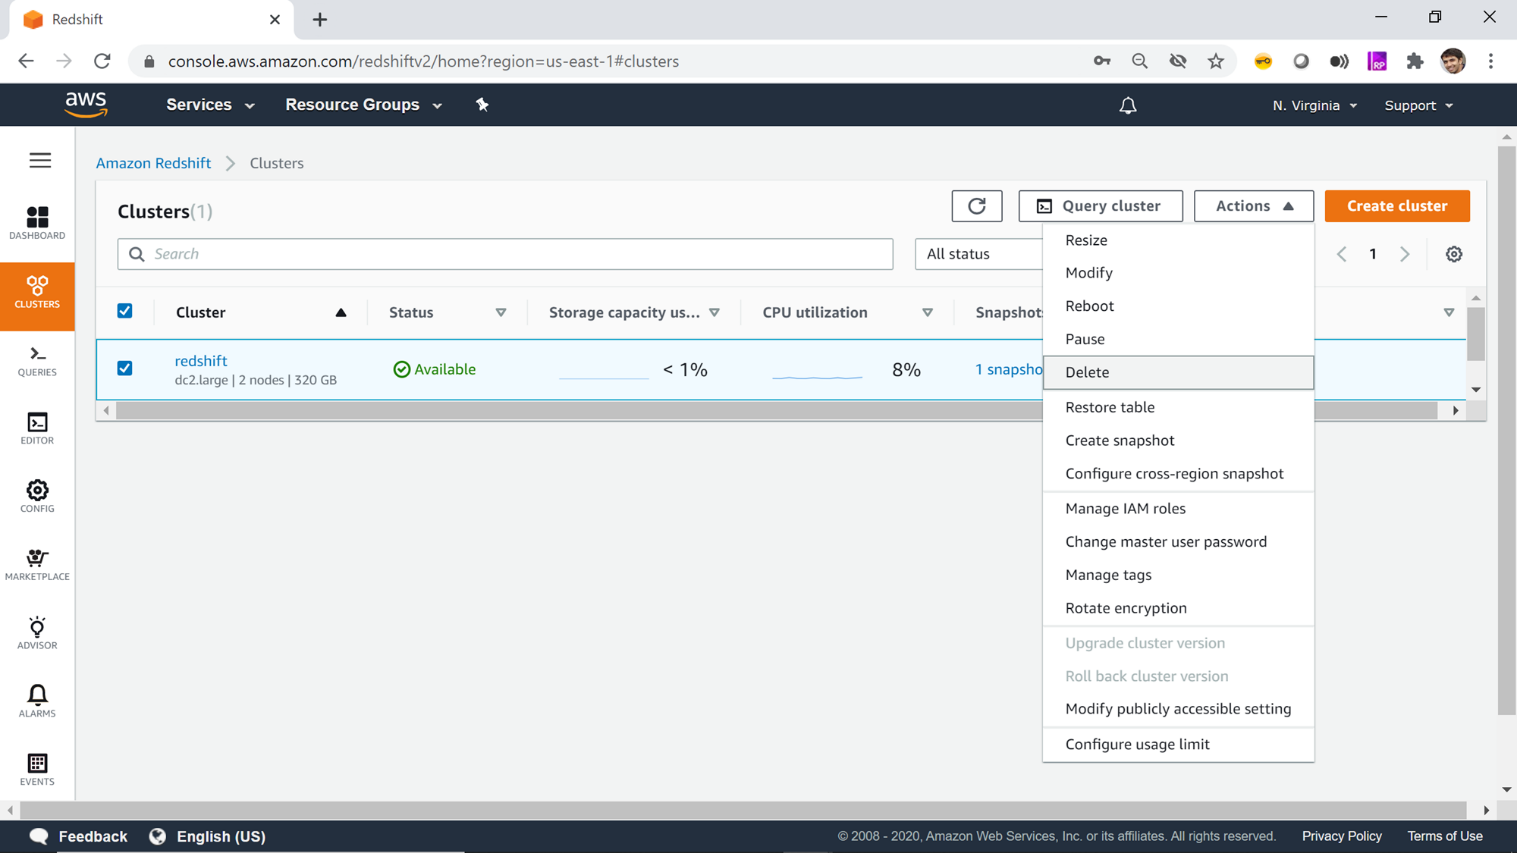
Once you are done using your cluster, it is recommended to terminate the cluster to avoid incurring any cost or wastage of the free-tier usage. Navigate to the dashboard page by clicking on the dashboard icon on the left pane. Select your cluster and click on the Delete button from the Actions menu.
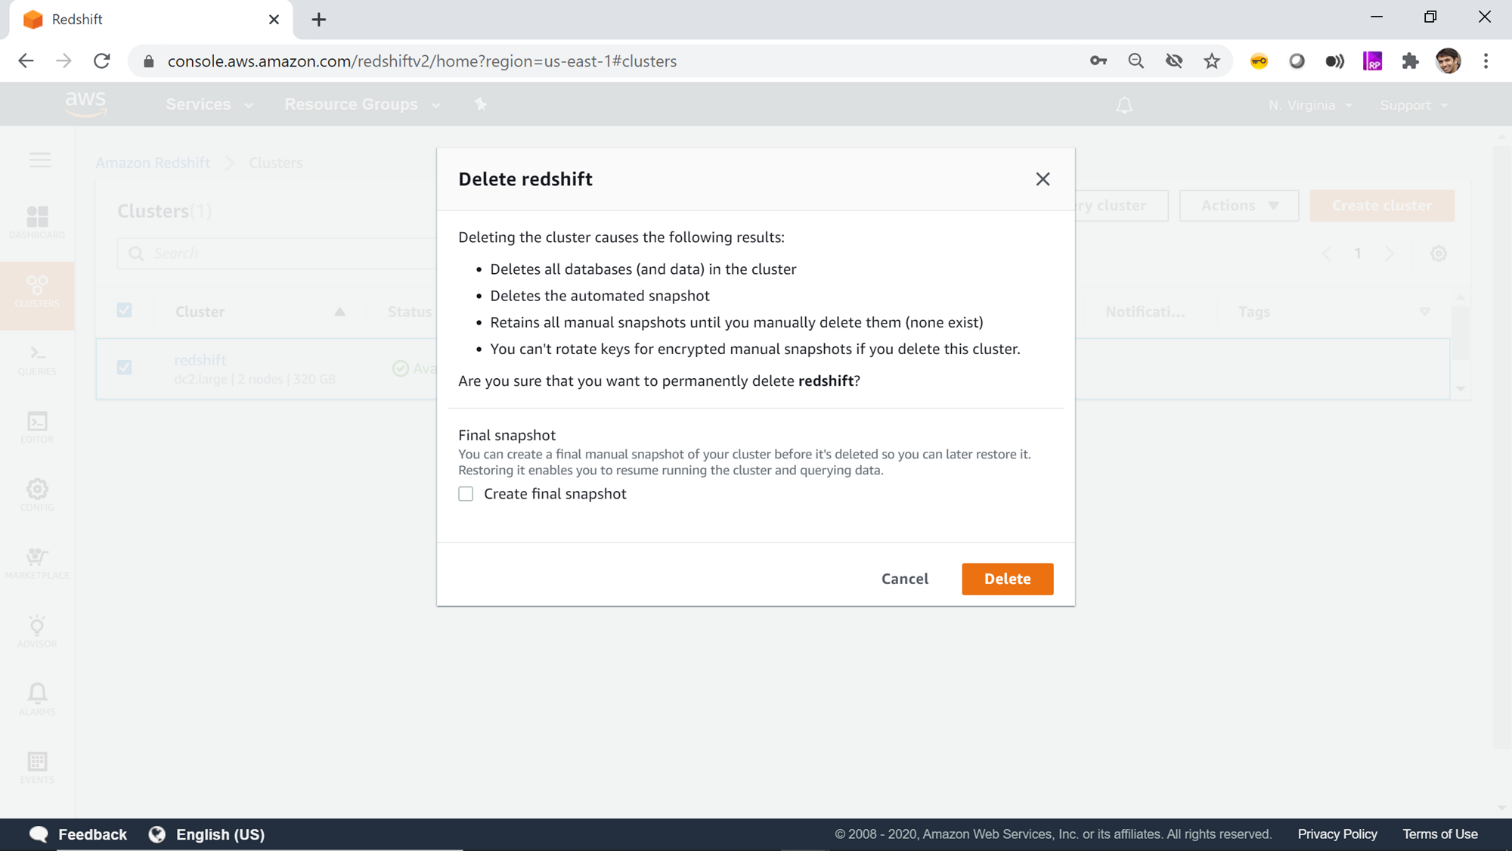
You would be prompted with a pop-up dialog that will ask you to create a final snapshot. If you do not have any data that you want to retain in a snapshot will have an additional cost, then you can uncheck this option as shown below. Click on the Delete button and this will start the deletion process and within a minute or two the AWS Redshift cluster would get deleted.
Conclusion
In this article, we covered the process of creating an AWS Redshift cluster and the various details that are required for creating a cluster. We briefly understood the way to access the cluster from the browser and fire SQL queries against the cluster. And finally, once the cluster is no longer required, we learned how to delete the cluster to stop incurring any cluster usage cost.
Table of contents

He has worked internationally with Fortune 500 clients in various sectors and is a passionate author.
View all posts by Rahul Mehta
- Finding Duplicates in SQL - February 7, 2024
- MySQL substring uses with examples - October 14, 2023
- MySQL group_concat() function overview - March 28, 2023