
This article provides a step by step explanation of how to export data from the AWS Redshift database to AWS S3 using different export-related options.
Introduction
Data import and export from data repositories is a standard data administration process. From developers to administrators, almost everyone has a need to extract the data from database management systems. In the AWS Data Lake concept, AWS S3 is the data storage layer and Redshift is the compute layer that can join, process and aggregate large volumes of data. To serve the data hosted in Redshift, there can often need to export the data out of it and host it in other repositories that are suited to the nature of consumption. AWS S3 is one of those central storage repositories in AWS that is integrated with almost all the data and analytics services supported by AWS. By that virtue, one of the fundamental needs of Redshift professionals is to export data from Redshift to AWS S3. In this article, we will learn step-by-step how to export data from Amazon Redshift to Amazon S3 and different options related to it.
AWS Redshift Setup
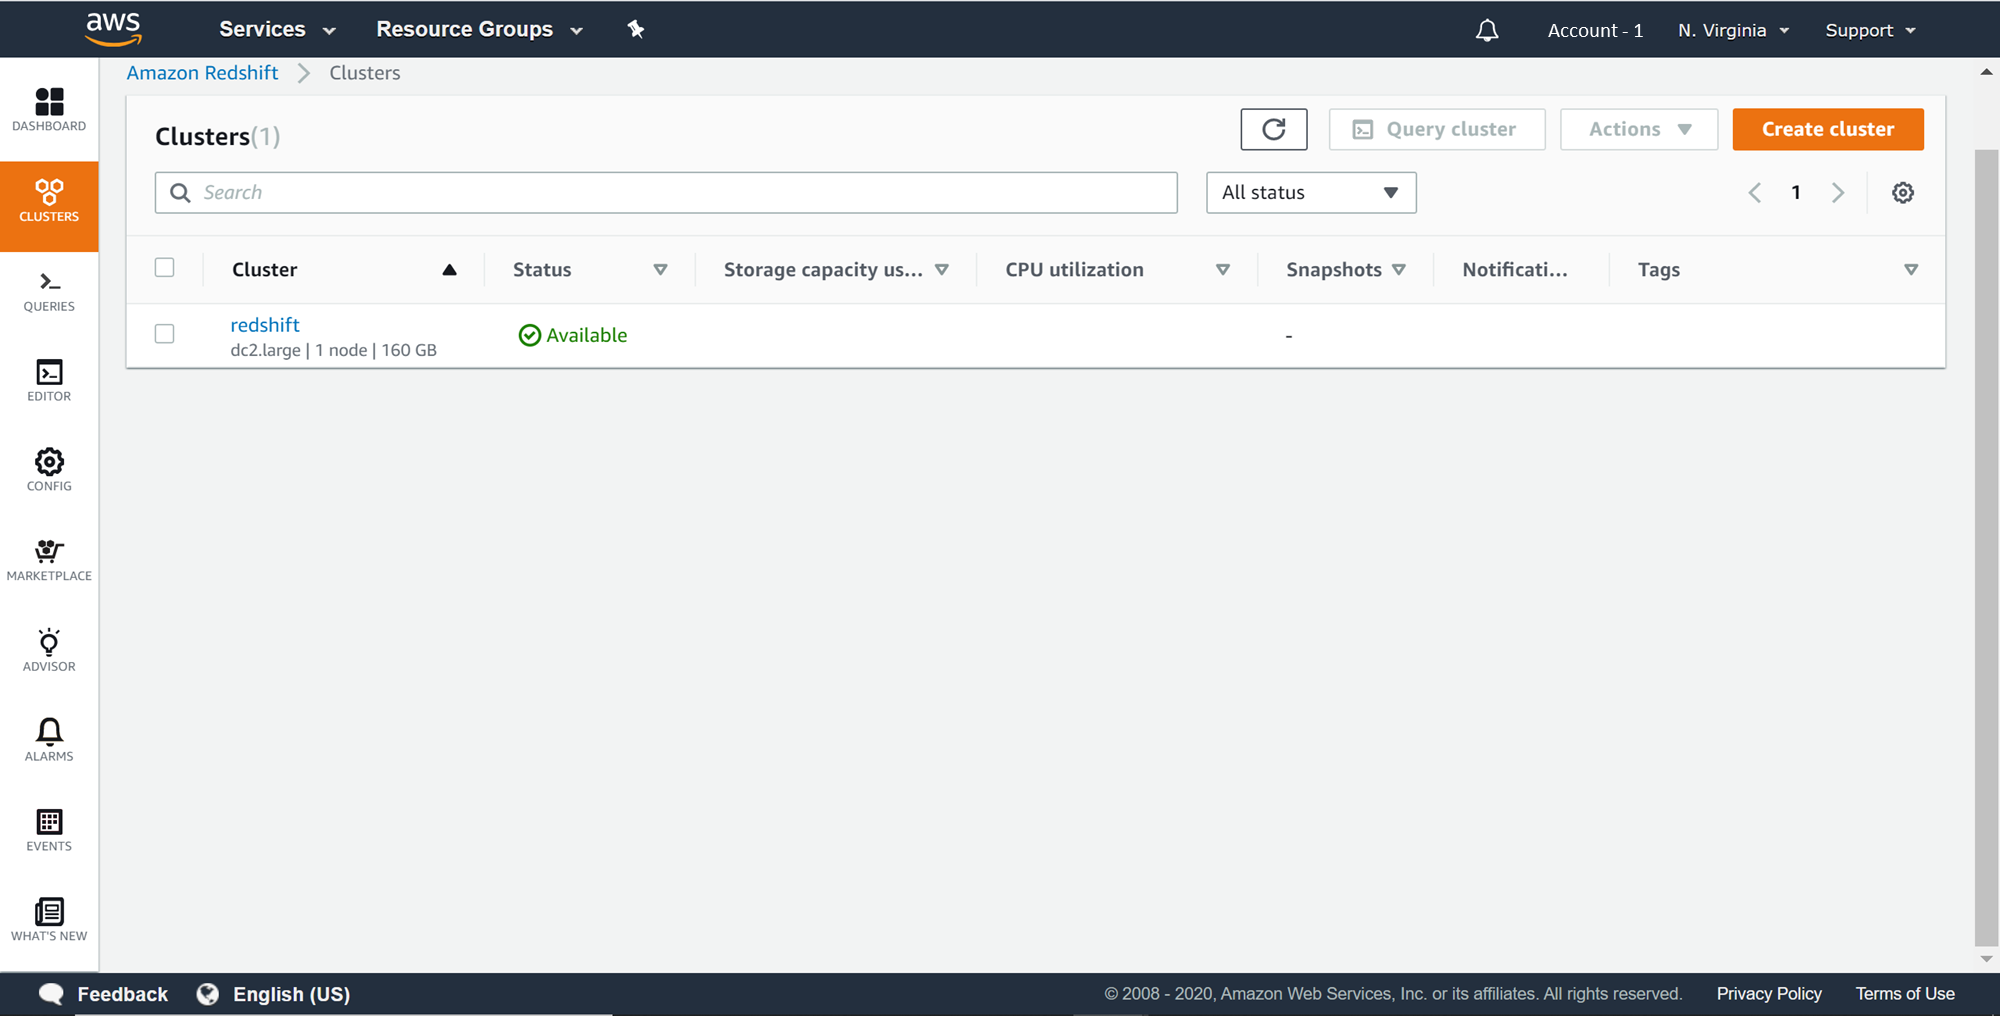
In this article, it’s assumed that a working AWS Redshift cluster is in place. Redshift beginners can refer to this article, Getting started with AWS Redshift, to create a new AWS Redshift cluster. Once the cluster is in place, it would look as shown below on the Redshift Clusters page.
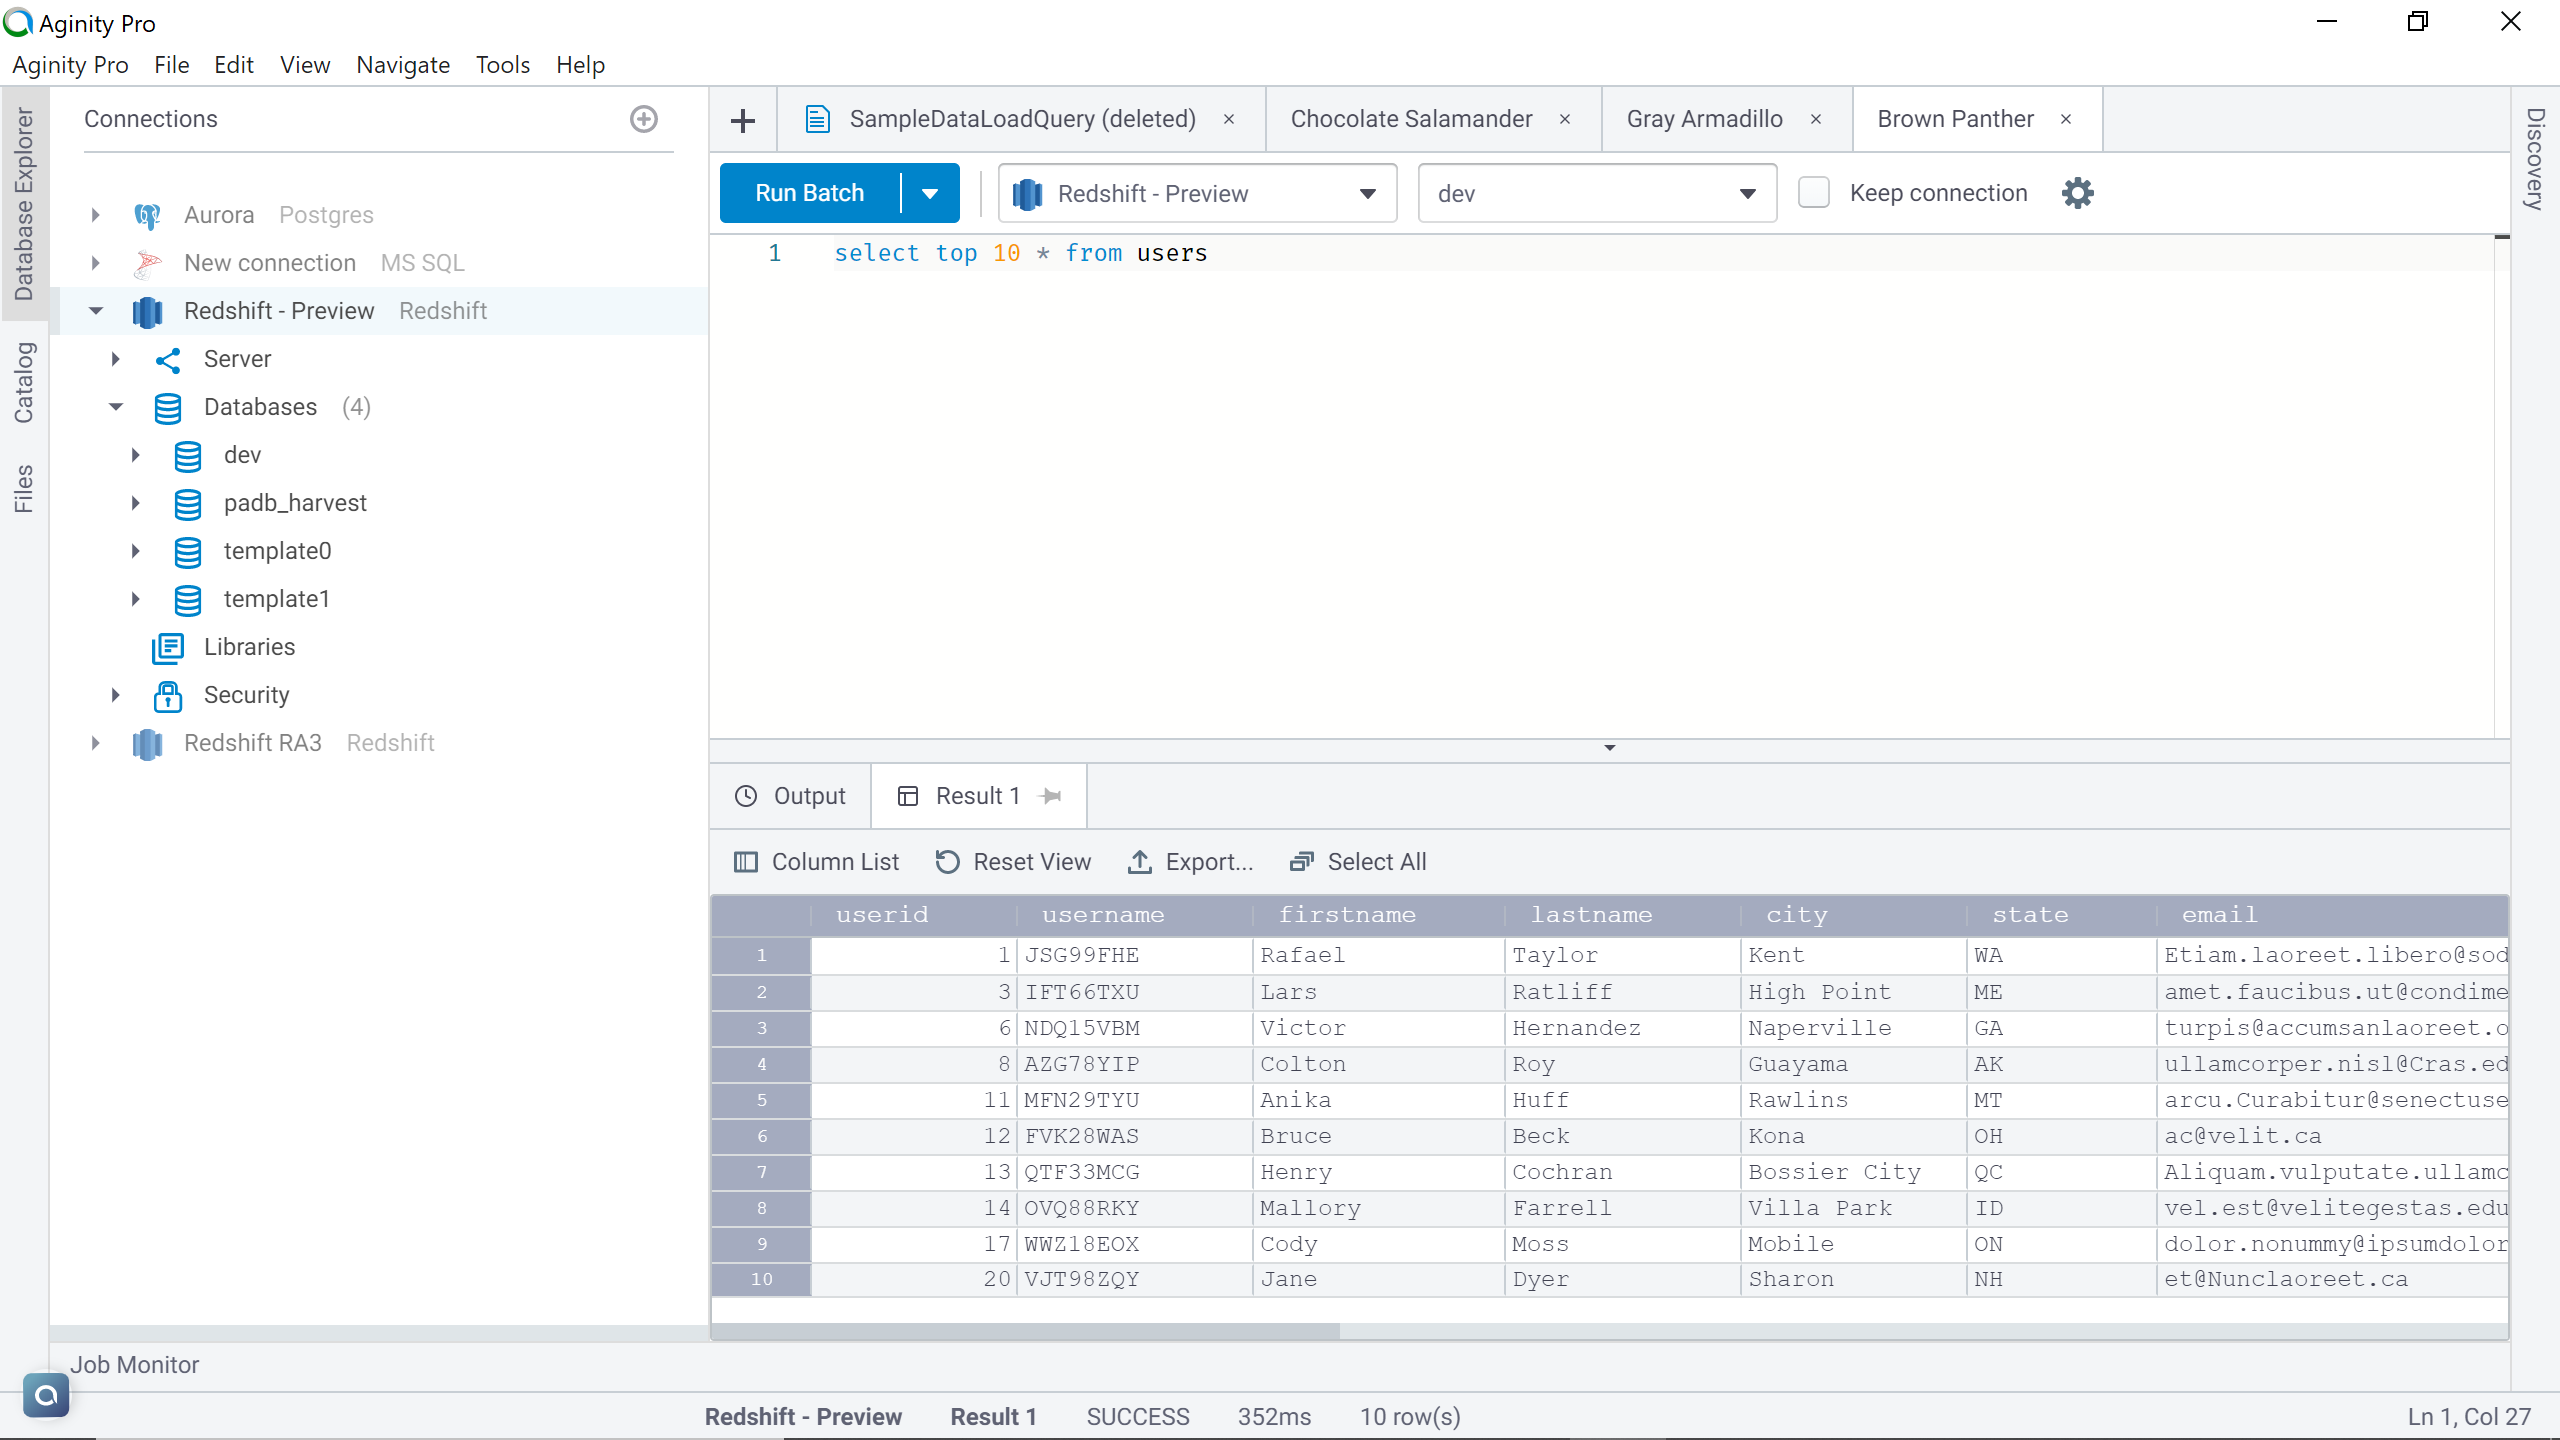
As we need to export the data out of the AWS Redshift cluster, we need to have some sample data in place. It’s assumed to you have at least some sample data in place. If not, in one of my previous articles, I explained how to load data in Redshift, which can be referred to create some sample data. Once the cluster is ready with sample data, connect to the cluster. I have a users table in the Redshift cluster which looks as shown below. Connect to the Redshift cluster using IDE of choice.
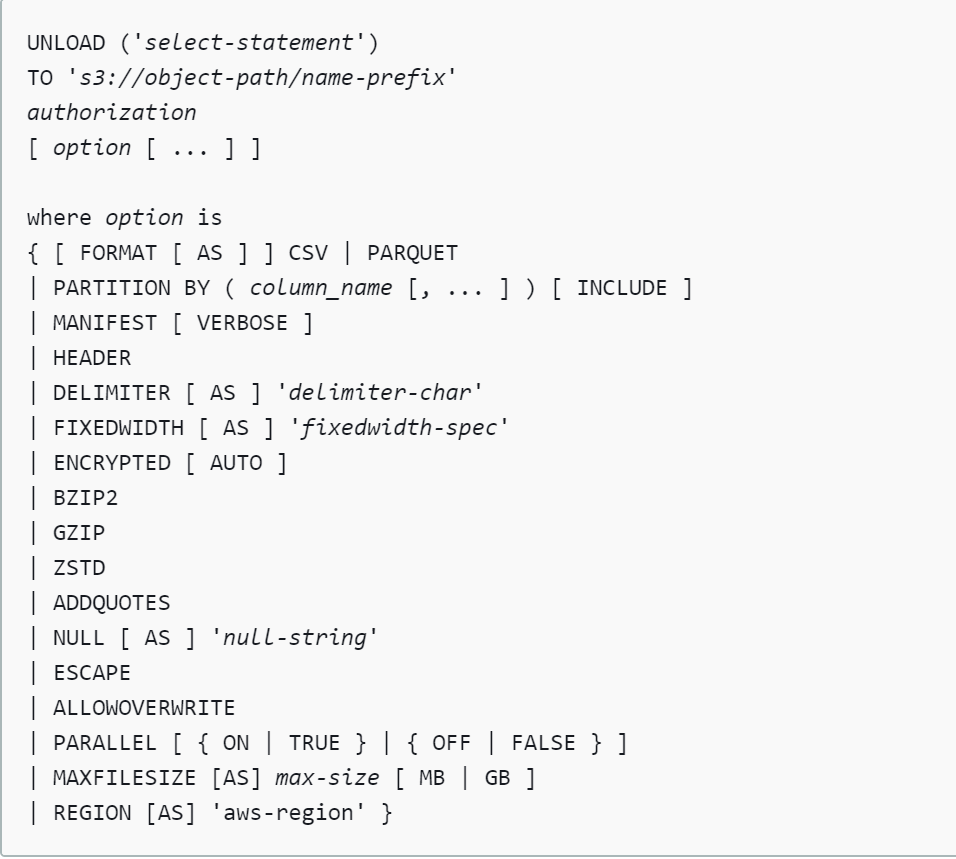
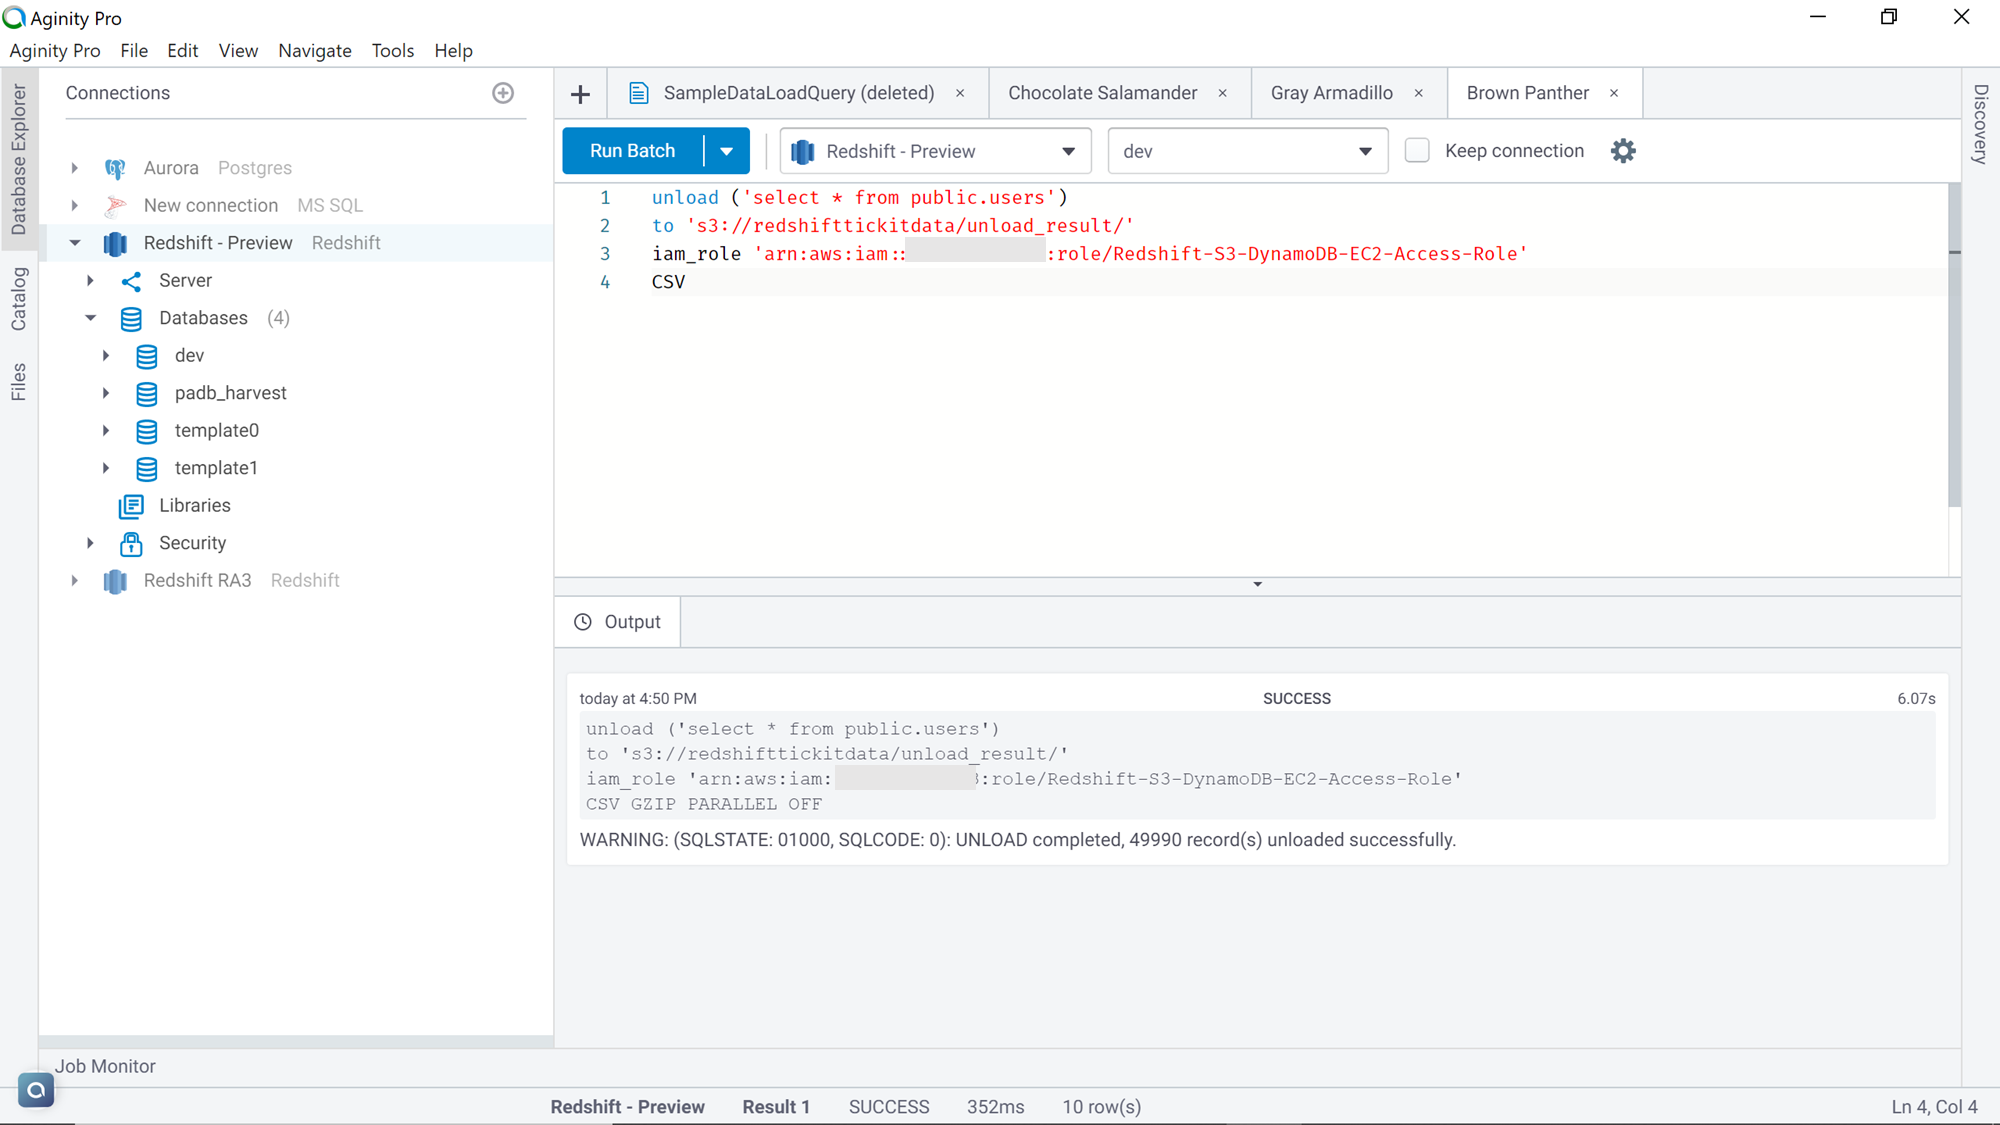
Let’s say that we intend to export this data into an AWS S3 bucket. The primary method natively supports by AWS Redshift is the “Unload” command to export data. The syntax of the Unload command is as shown below. This command provides many options to format the exported data as well as specifying the schema of the data being exported. We will look at some of the frequently used options in this article.
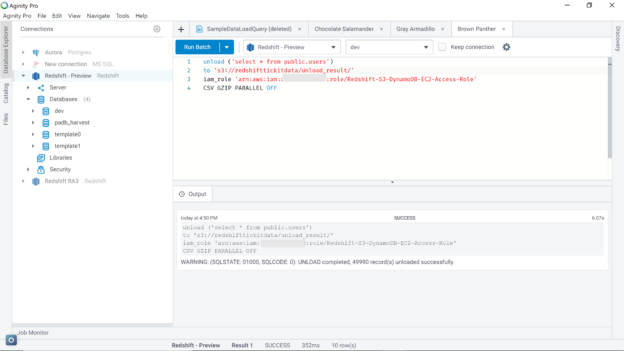
We would need a couple of things in place before we can execute the unload command. An AWS S3 bucket is required where the exported data would be loaded. Also, an IAM role that has write-access to Amazon S3 and attached to the AWS Redshift cluster needs to be in place. Assuming that these configurations are in place, execute the command as shown below. Let’s try to understand this command line-by-line.
- The first line of the command specifies the query that extracts the desired dataset. In this case, we want all the fields with all the rows from the table
- The second line of the command specifies the Amazon S3 bucket location where we intend to extract the data
- The third line specifies the IAM role that the Redshift cluster will use to write the data to the Amazon S3 bucket
- The last line specifies the format of the data in which we intend to export the data. In this case, we intend to export the data in CSV format, so we have specified the keyword CSV
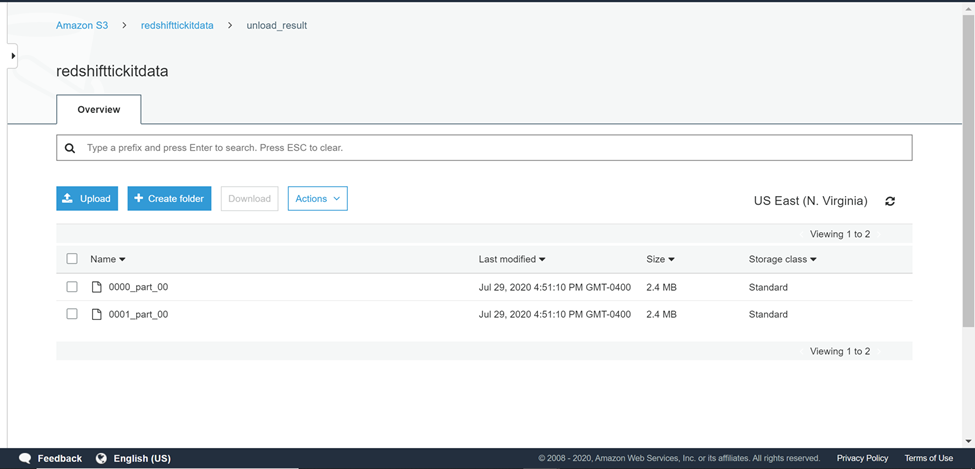
Navigate back to the AWS S3 bucket and the output would look as shown below. AWS Redshift architecture is composed of multiple nodes and each node has a fixed number of node slides. By default, unload command exports data in parallel to multiple files depending on the number of node slices in the cluster. In this case, that data is exported from one node cluster, and the data got exported in two separate files.
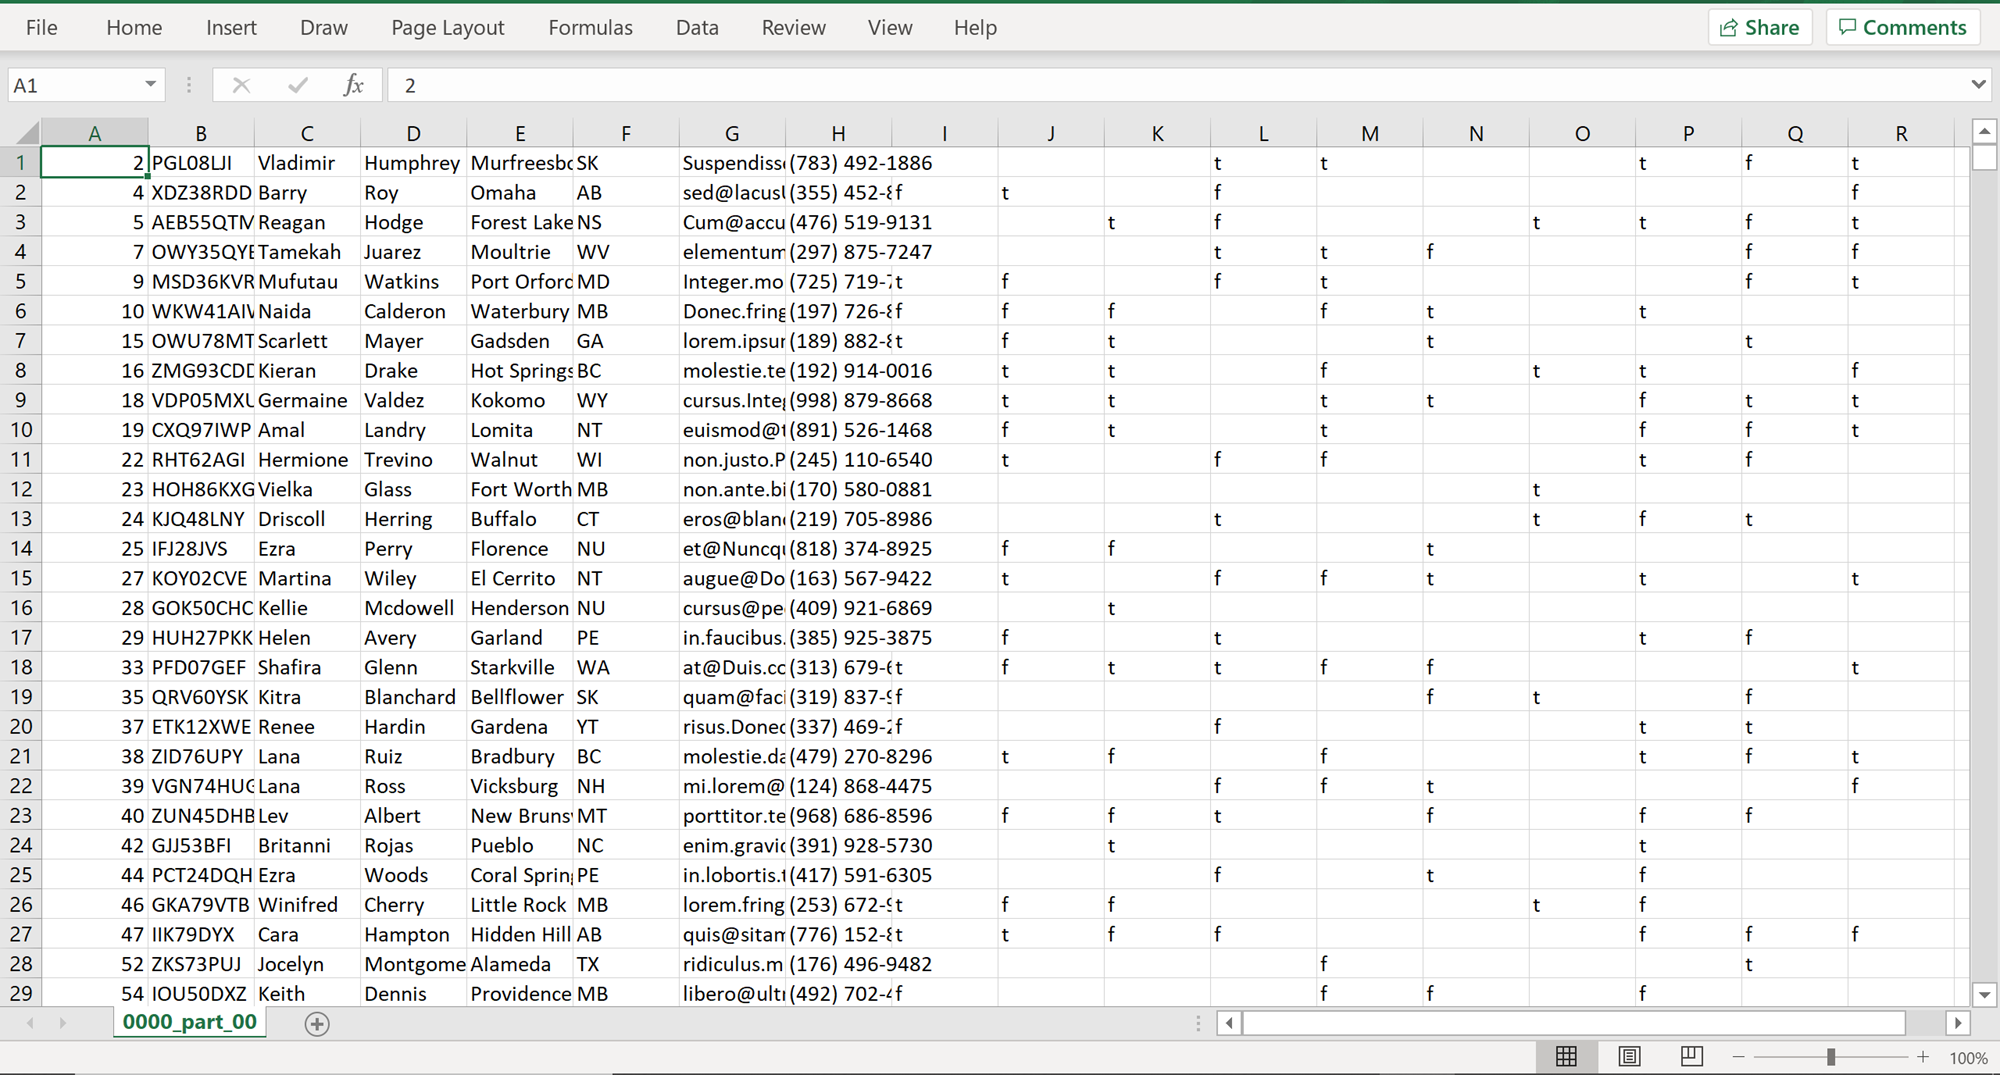
If you open any of these files, it would look as shown below. The file would have all the fields and parts of the data exported using the unload command.
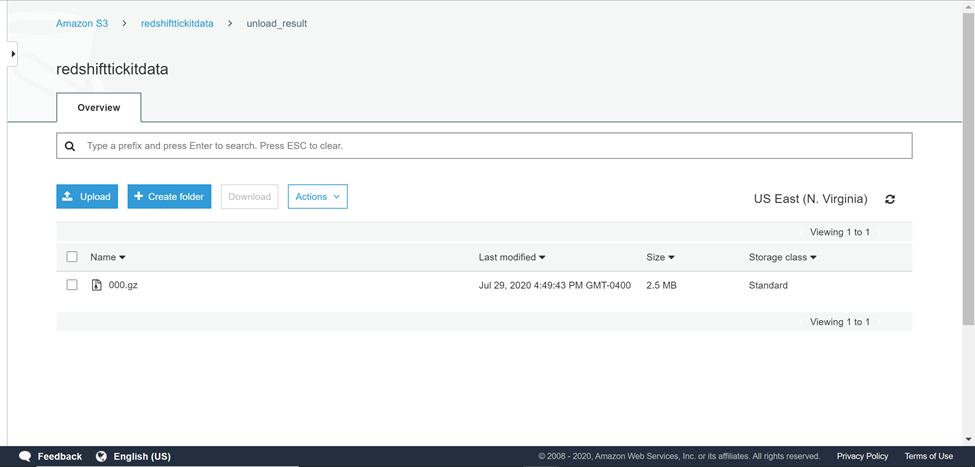
Generally, in the case of large-scale data exports, one would want to compress the data as it reduces the storage footprint as well as save the costs as well. Exporting the data in an uncompressed format and then compressing it is an additional step that takes extra time and effort. Unload command provides options to export data in a compressed format. Also, at times the data is required to be in a single file, so that it can be readily read by the consumption tools, instead of being joined first in a single file and then being read. Modify the previous command as shown below, by adding the keywords GZIP and PARALLEL OFF, which compresses the exported data in gzip format and stops AWS Redshift in exporting data in a parallel mode which results in a single file output.

Once the data is exported, navigate back to the AWS S3 bucket and the output would look as shown below. The output would be a single file in gzip format.
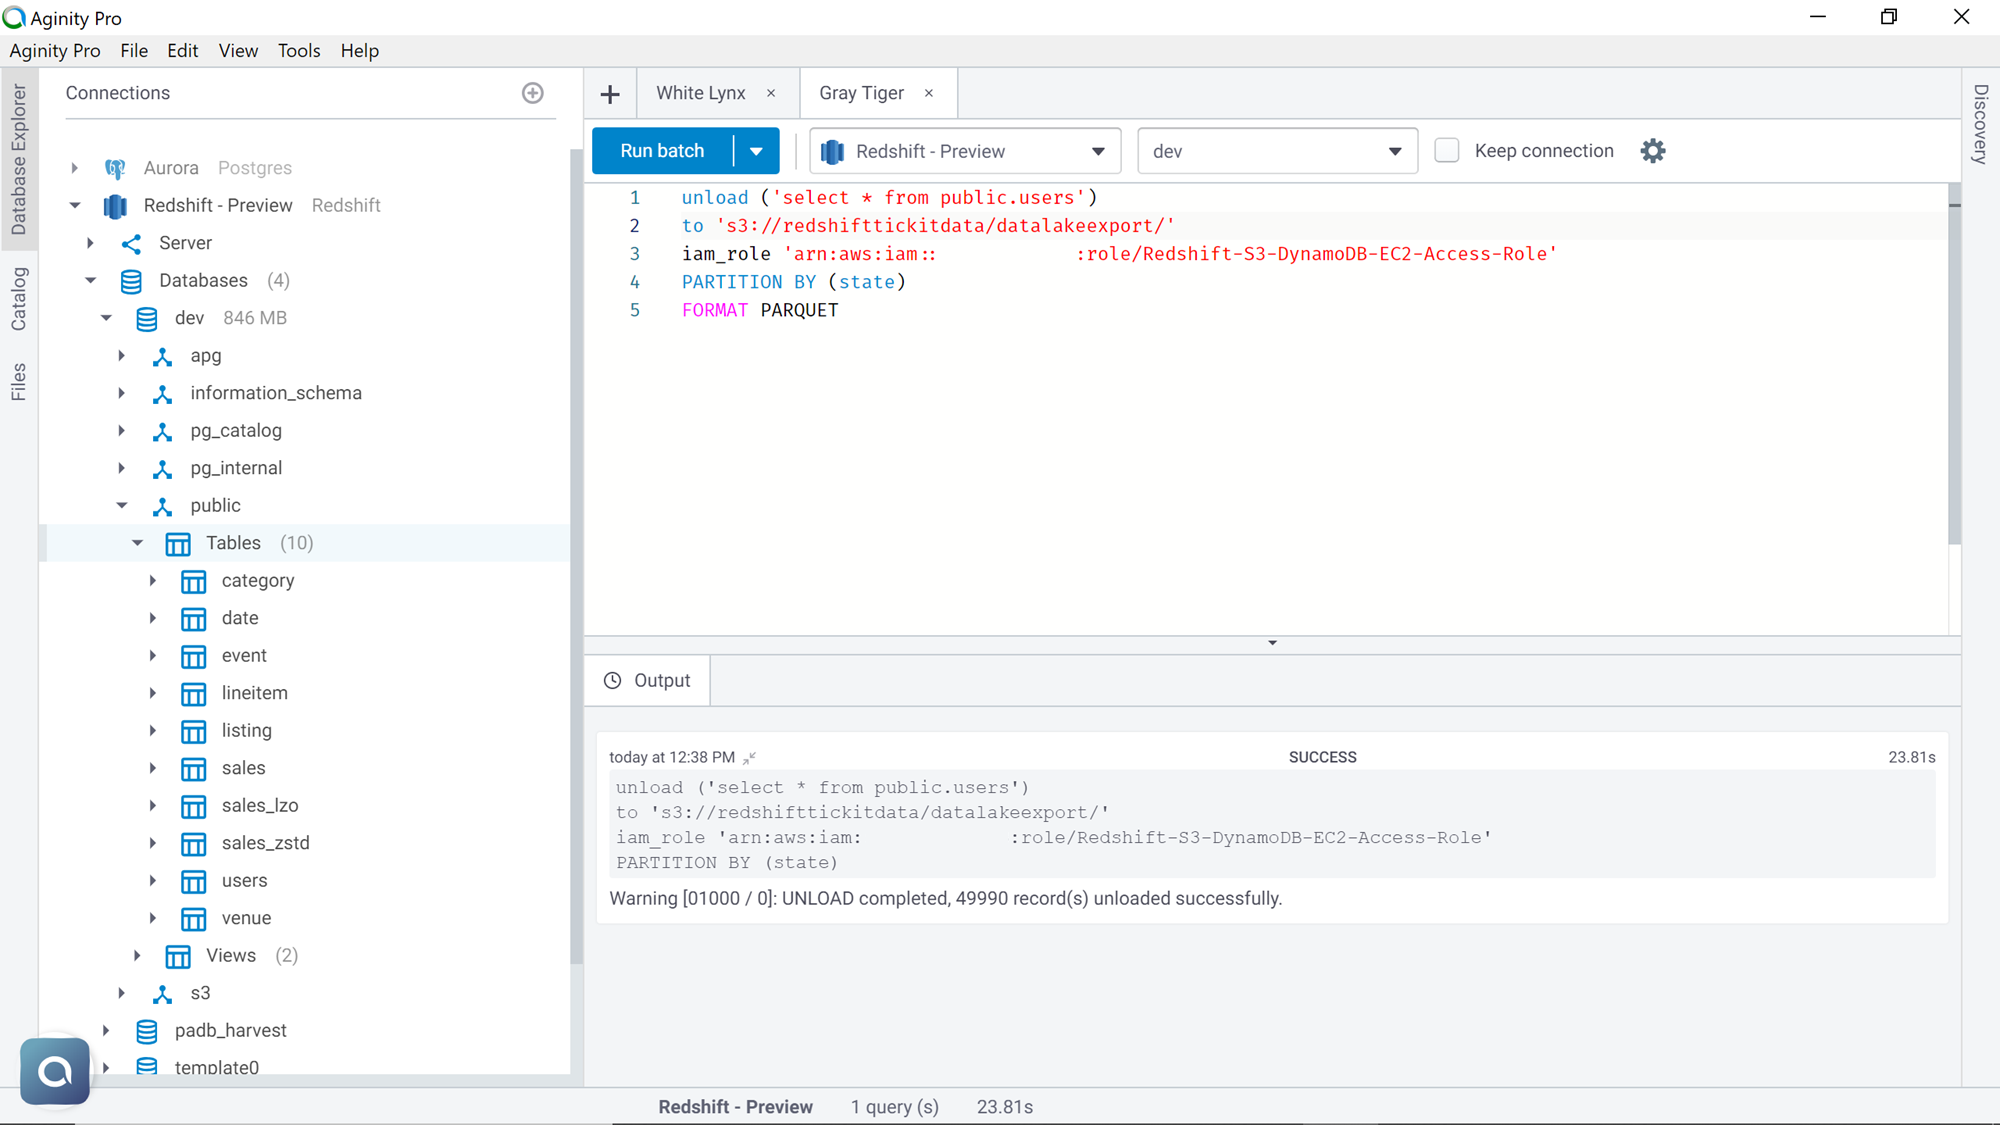
The above commands are suitable for simple export scenarios where the requirement is to just export data in a single place. Consider a scenario where the data is fairly large and accumulating all the data in single or multiple files would not serve the purpose and either it would be too much data in a single file or the data of interest is spread out in too many files. The requirement is to organize the data by a certain criterion into different buckets, so there is no additional effort to organize data in AWS S3 after the export process. This means that we need to partition the data as part of the export process. In the dataset that we are using, we have “state” as one of the fields. Let’s say that we need the data to be partitioned by state so that all the rows that belong to a common state are placed in a single file in its own bucket. Unload command provides the partition keyword, which allows us to achieve this exact purpose. Execute the command as shown below and mention the attribute as “state” with the partitioned keyword.
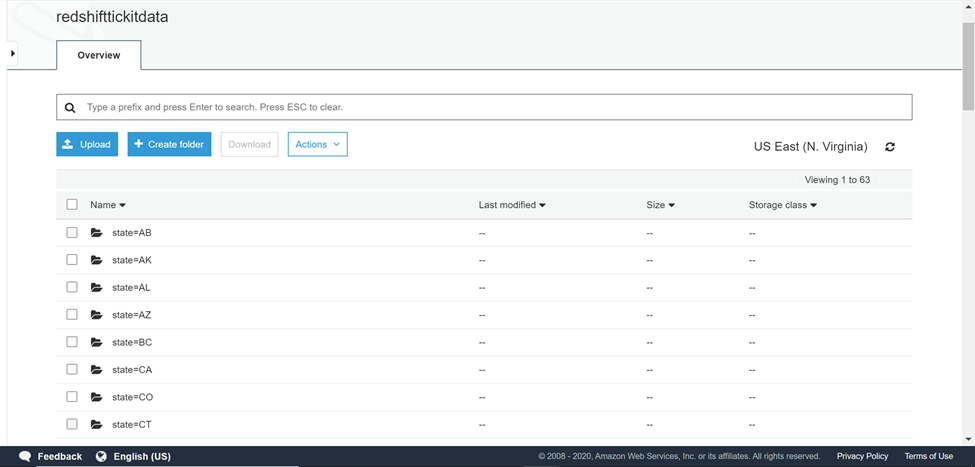
To check the output, navigate back to the AWS S3 bucket, and you would find the output as shown below. Several folders would be created in the destination bucket where data is exported. One folder is created for each distinct state, and the name of the state as well as the value of the state would the name of the folder.
Open any folder and you would find the exported data in multiple files. The reason is that if you analyze the above unload command, you would find that we did not mention the PARALLEL OFF option, so it resulted in multiple files. Add this option to the command if the requirement is of a single file. Open any of the files in any given folder, and you should be able to find all the records with the same state.
The unload command has several other options. Consider exploring more and trying out these options from the AWS Redshift documentation.
Conclusion
In this article, we learned how to use the AWS Redshift Unload command to export the data to AWS S3. We also learned the different options that can be used with this command to export the data, compress data, export the data with or without parallelism, as well as organize the exported data using the same command.
Table of contents

He has worked internationally with Fortune 500 clients in various sectors and is a passionate author.
View all posts by Rahul Mehta
- Finding Duplicates in SQL - February 7, 2024
- MySQL substring uses with examples - October 14, 2023
- MySQL group_concat() function overview - March 28, 2023