
In this article, we are going to build a small python application and deploy it to Azure Functions. The development and the deployment will be done using the Visual Studio (VS) Code. As you might be aware, VS Code is one of the most widely used and preferred code editors for programmers. It is a cross-platform tool, which means you can install this tool on any operating system of your choice, starting from Windows, Linux, or Mac OS.
What makes the VS Code so unique and popular is that there are tons of custom extensions that are developed by the community. These extensions are leveraged and can be extended the default behavior of the code editor as you want.
Pre-requisites for app development
Assuming that this article is for a beginner, I will start by listing out all the possible pre-requisites that you need to have in order to deploy your code to Azure Functions from Visual Studio Code.
- Python executable – First things first, since in this article, we are going to learn how to deploy python apps, we need to have the python executable installed in our system. You can head over to https://www.python.org/ and download Python for your operating system
- Visual Studio Code – Yes, as we are going to use Visual Studio Code as the code editor and build our app using the same, you need to get this installed and running on your machine as well. Visual Studio Code is a cross-platform tool, and you can get it installed on any operating system. Download Visual Studio Code by visiting http://code.visualstudio.com/
- Python Extension for Visual Studio Code – By default, when you install Visual Studio Code, you do not have the option to execute python files directly. You need to install an additional extension provided by Microsoft to support working with python files. Download this extension from the marketplace by visiting https://marketplace.visualstudio.com/items?itemName=ms-python.python
- Azure Functions Extension for Visual Studio Code – In order to be able to deploy your code to Azure Functions, you need to install the extension as well. You can install the same by visiting https://marketplace.visualstudio.com/items?itemName=ms-azuretools.vscode-azurefunctions
- Azure Functions Core Tools – In order to debug and run your functions locally, you need to set up Azure Functions Core Tools as well. You can follow how to install this tool from the official documentation
- A valid Azure Account – You also need to have an Azure account up and running for this. Visit https://portal.azure.com to create your account
Once you are done with installing all the pre-requisites as mentioned above, you should be good to start with it. Now, the Visual Studio Code looks something like this.
![]()
Figure 1 – Azure Icon Added in VS Code
As you can see, an icon for using the Azure Services appears on the left-hand pane. Use this panel to sign-in to your Azure account to proceed forward.
Creating the project locally
Now that we are able to set up our environment for development let us go ahead and create a new project. Start by clicking on the New Project icon under Azure Functions in the panel and browse a directory to start with.
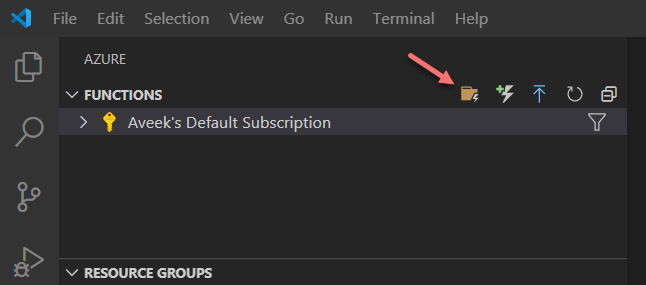
Figure 2 – Create a new project
Once you have specified the folder for the project, the next step is to choose the programming language that you want to start with. For the sake of this tutorial, I am going to go ahead and choose Python.
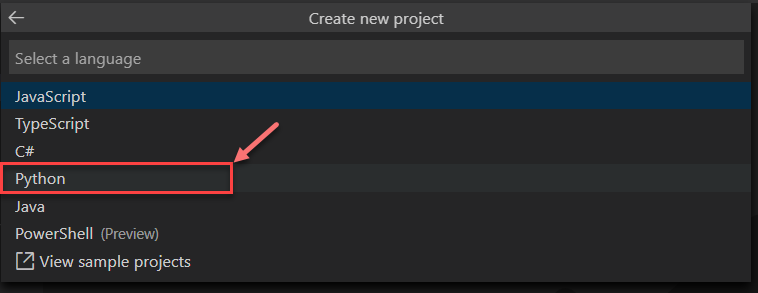
Figure 3 – Choosing the Language
In the next step, you need to tell the Visual Studio Code, wherein the binary file for the Python. In this step, the VS Code will create a virtual environment for the project and run the python file inside it.
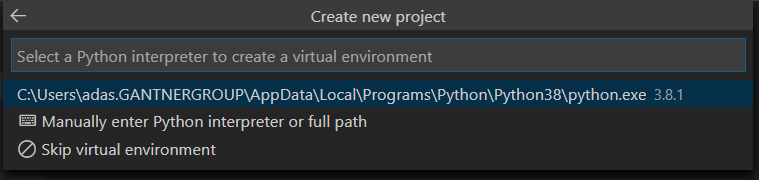
Figure 4 – Selecting Python Interpreter
In the next step, you will be prompted with a choice to select a template to begin with. Templates help you to do the heavy lifting in your application, and you just need to focus on your code. It is absolutely fine if you want to write your own code from scratch, but to keep things simpler and sweet, I am going to select the HTTP Trigger template.
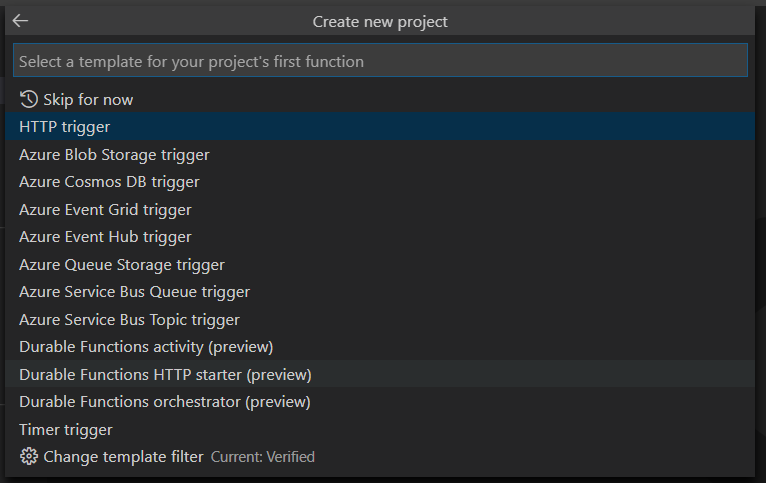
Figure 5 – Selecting the template
Now, we have selected our environment and also defined a template that we would like to use. The next step is to add a name to our function. Please note that your Azure Function on the Azure portal will also be created using this name.

Figure 6 – Function Name
The penultimate step here is to select the authorization level for your Azure function. Although in a production application, there will be securities and authentication involved, for our tutorial, we will go with the Anonymous authentication.
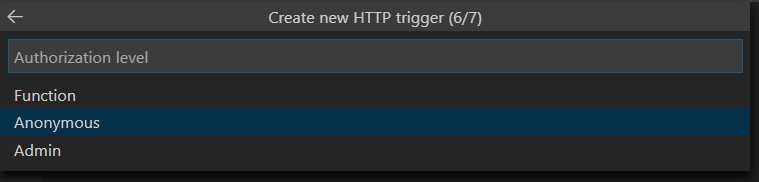
Figure 7 – Selecting Authentication Level
Once the app is created, you can see something like this on your screen.
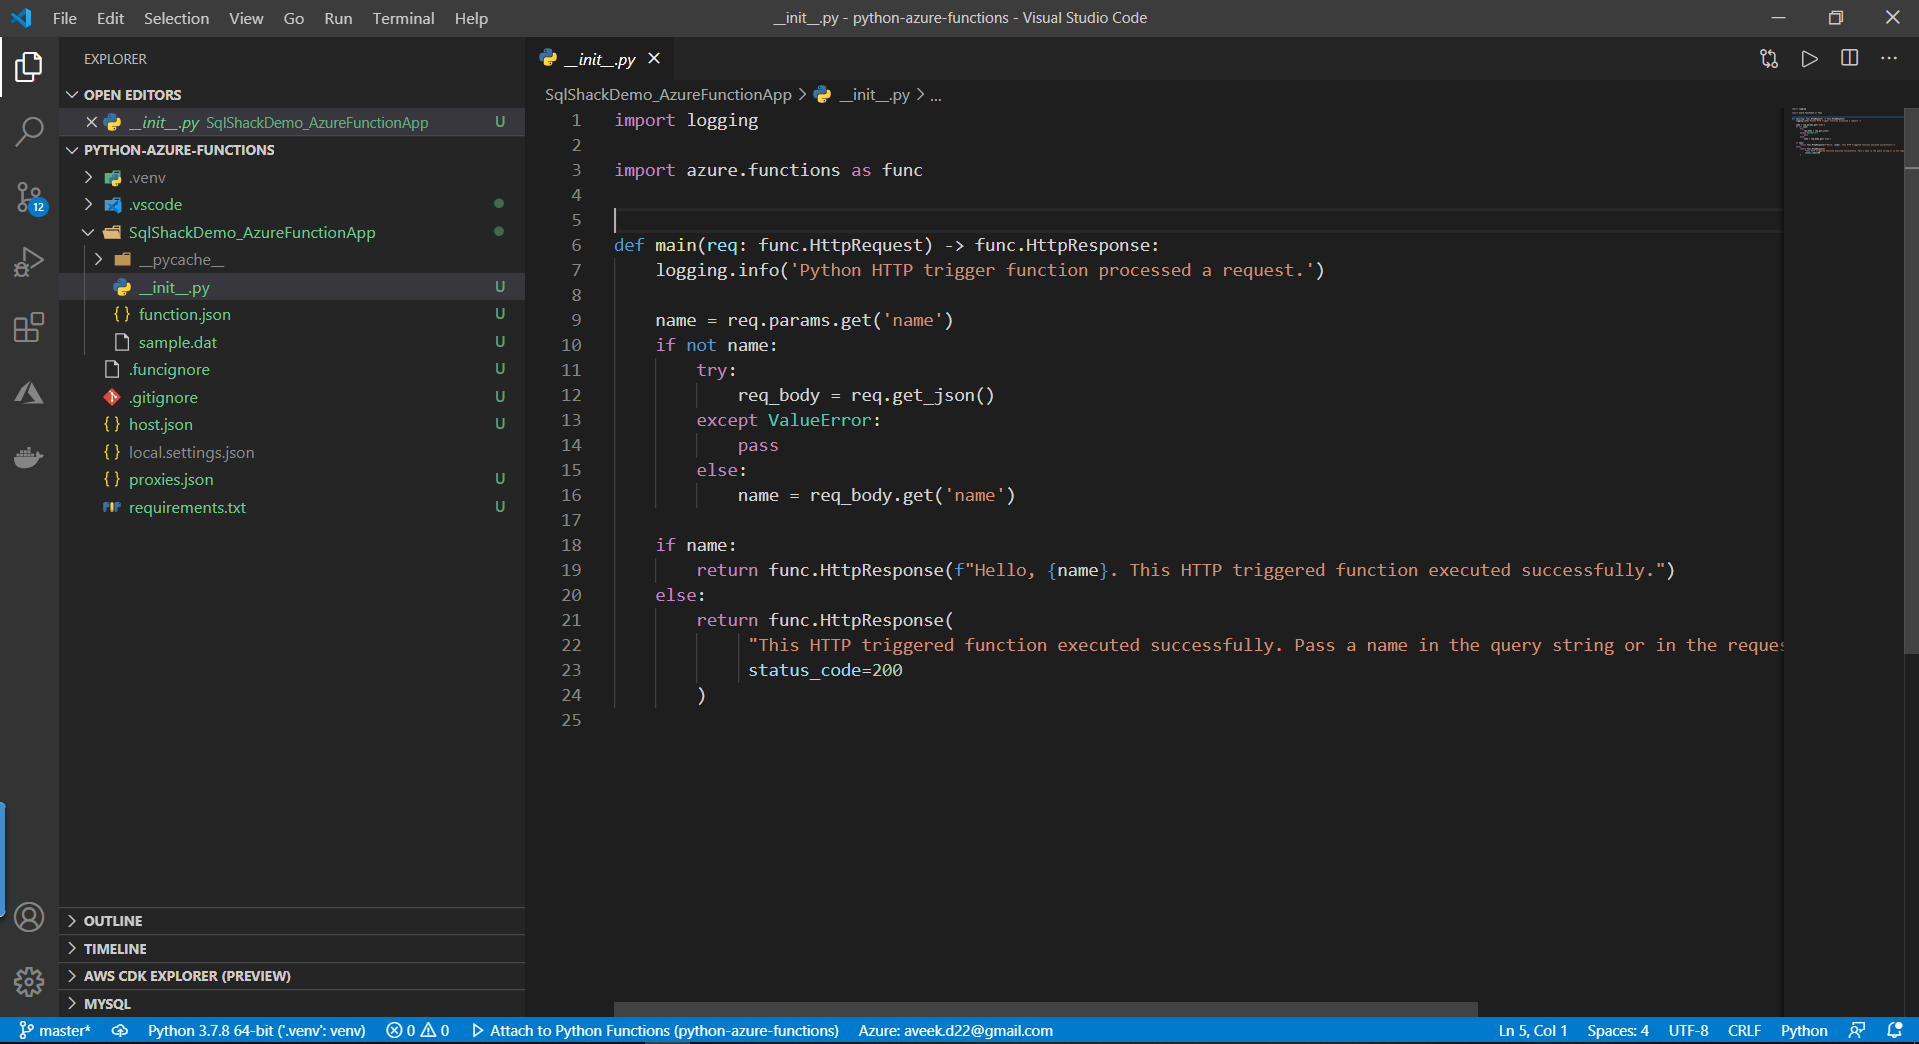
Figure 8 – Function created
Debugging the function locally
Now that our function is ready, we can debug it locally to test if it is working as expected. To debug, click on the debug icon, and select Debug (Attach to Python Functions) or press F5 on your keyboard.
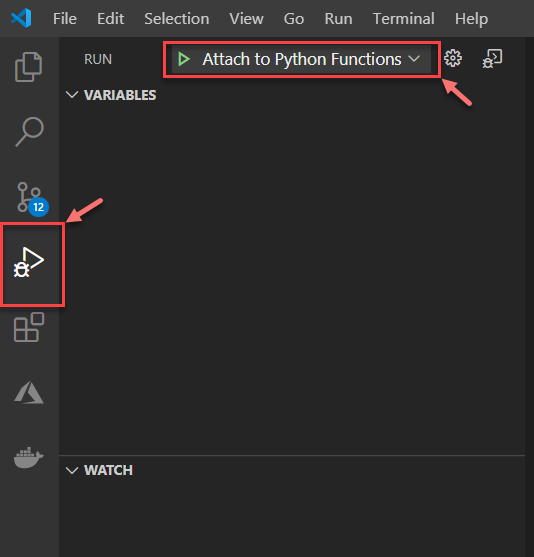
Figure 9 – Debug the function locally
As soon as you start debugging, you can see the terminal window is displayed, and the function is hosted locally on a URL. You can open this URL on a browser window. Click to open this URL on the browser.
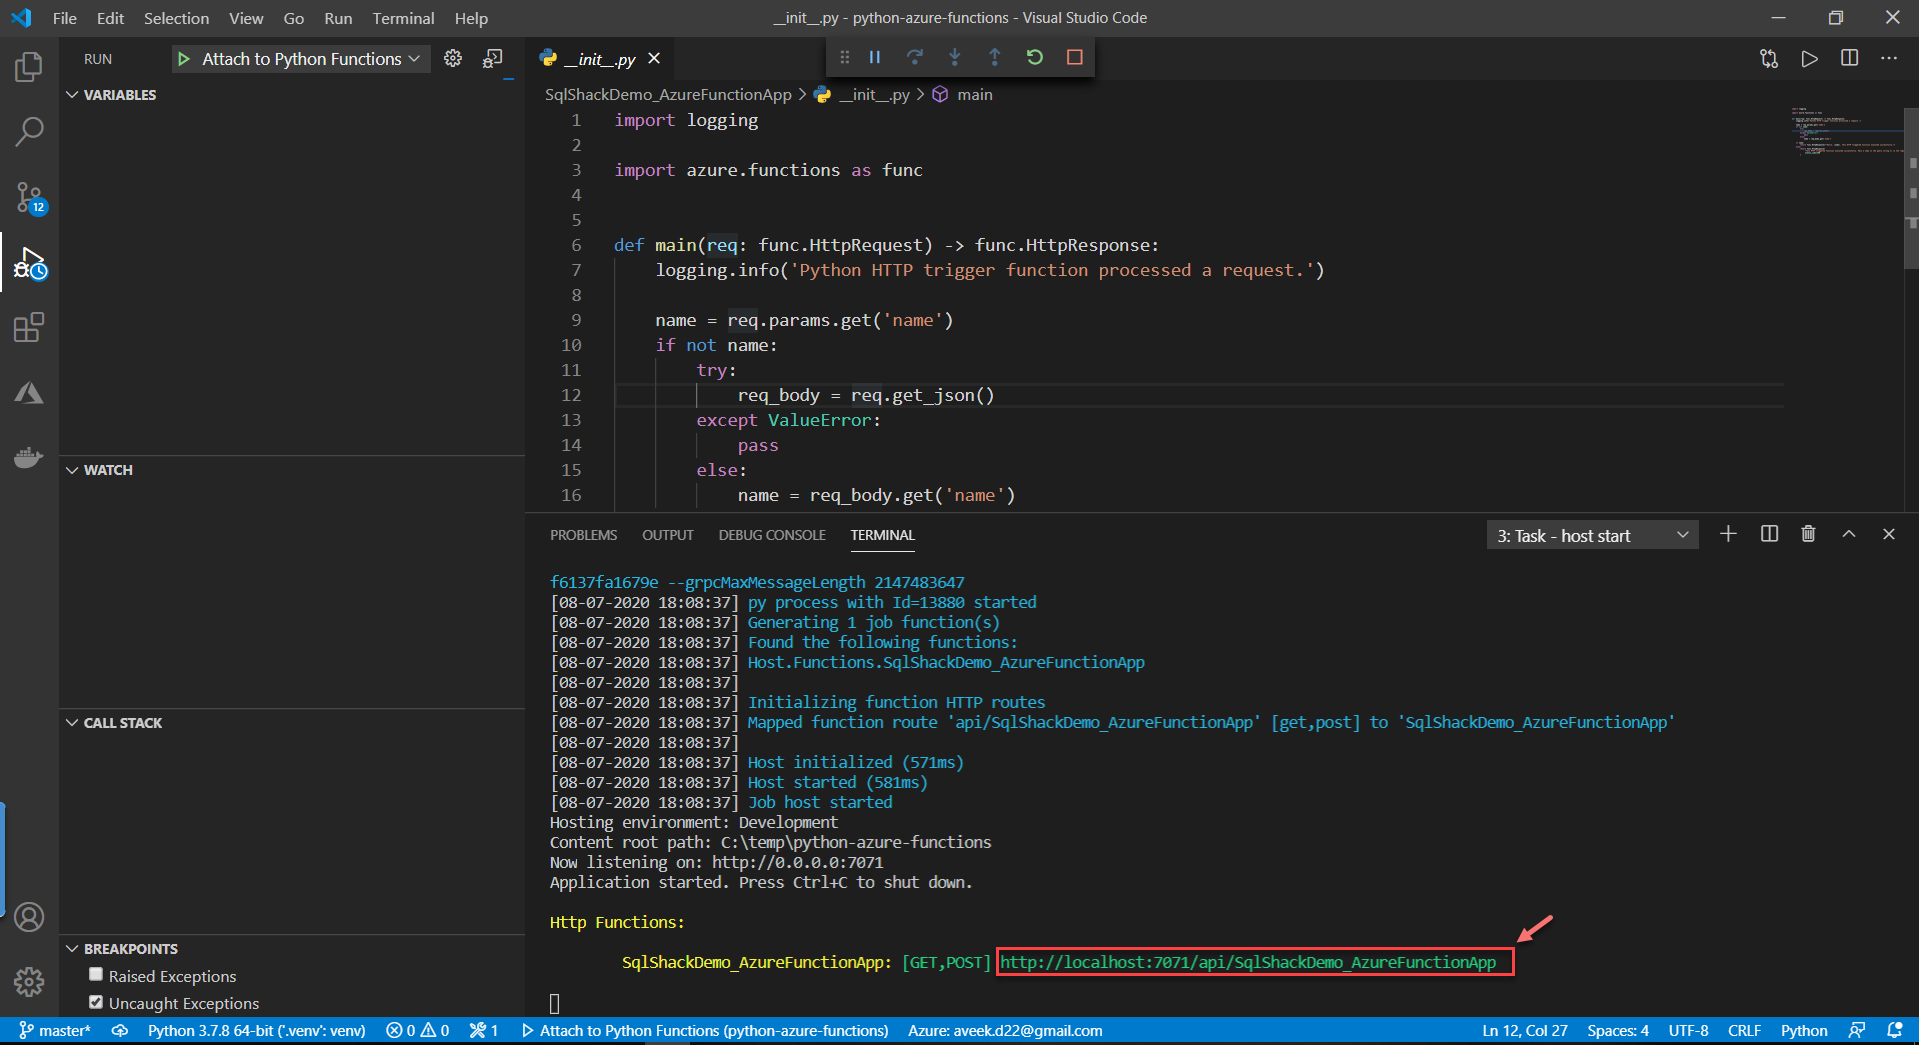
Figure 10 – URL for localhost
In the browser, you can see something like this.

Figure 11 – Function response
You can modify the URL and append “?name=aveek” at the end of the query to test if it is working fine.

Figure 12 – Function response
Now that the function is running as expected on our local, we can go ahead and deploy it on Azure Functions.
Deploying the function to Azure
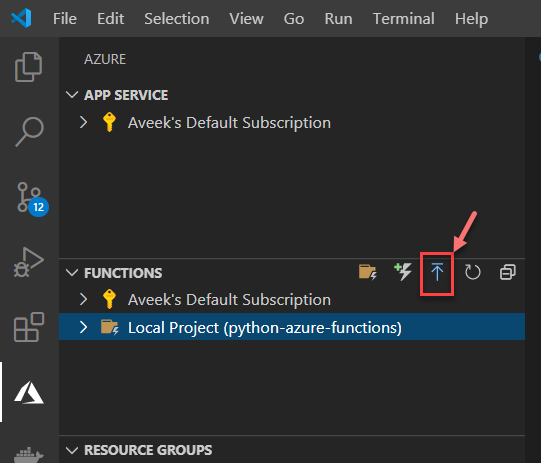
To deploy your code to the Function App, click on the Deploy icon, as shown in the figure below.

Figure 13 – Deploy to Azure
You will be prompted with the following two options. I am going to choose the first option with basic settings.

Figure 14 – Creating the Function App
In the following steps, provide a unique name of the Function App that you want and specify the version of Python. You might also need to provide the name of the region under which you would like the resources to be created in Azure. It might take some time to build up the resources on the cloud, and you can grab some coffee while the function is being deployed.

Figure 15 – Function App Name
You can see that the function has been deployed successfully and up for our use. Head over and click the URL that you can see and open it on the browser.
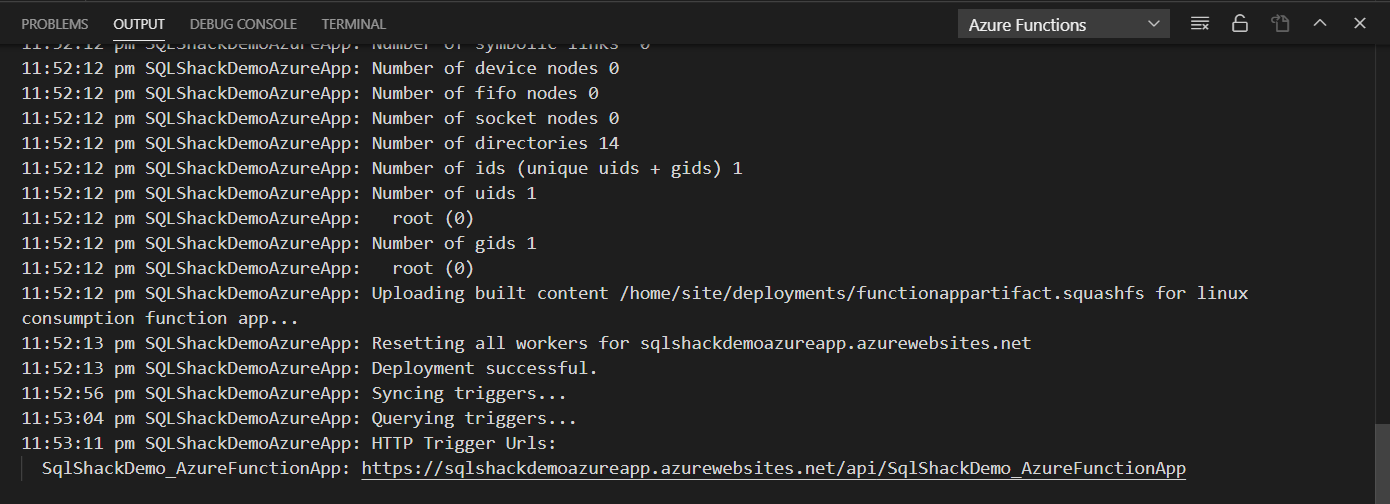
Figure 16 – Function App Deployed
As you might have guessed, the function is now deployed to Azure and works as expected.

Figure 17 – Azure Functions Work well
Conclusion
In this article, we have seen how to develop python applications using Visual Studio Code locally. I have also explained how we can deploy the same applications to Azure Functions directly from VS Code editor. This is a great way to quickly deploy your app to the cloud without having to leave the code editor. You can easily build your apps locally and verify them. Once these apps are verified in local, you can quickly publish it to the cloud with the help of just a few clicks. This really helps to save a lot of time for the developers and help them focus on the code rather than deploying the changes.
Table of contents

He is a prolific author, with over 100 articles published on various technical blogs, including his own blog, and a frequent contributor to different technical forums.
In his leisure time, he enjoys amateur photography mostly street imagery and still life. Some glimpses of his work can be found on Instagram. You can also find him on LinkedIn
View all posts by Aveek Das
- Getting started with PostgreSQL on Docker - August 12, 2022
- Getting started with Spatial Data in PostgreSQL - January 13, 2022
- An overview of Power BI Incremental Refresh - December 6, 2021