
In this article, I am going to explain in detail the Pandas Dataframe objects in python. In the previous article in this series Learn Pandas in Python, I have explained what pandas are and how can we install the same in our development machines. I have also explained the use of pandas along with other important libraries for the purpose of analyzing data with more ease. Pandas provides a dataframe object which makes it relatively easier to consider working with the data as it provides a tabular interface for the data in it. People who are already familiar in working with relational databases, they can really find similarities between a table in the database and the dataframe object in pandas.
Setting up the virtual development environment
Although, I have discussed installing pandas before, let me provide a quick recap on how to install the same. Also, we will use a virtual environment for the purpose of this tutorial. So, let us go ahead and create a virtual environment first. Create a directory where you want to place your code and open the VS Code. You can use the following command to create and activate the virtual environment.
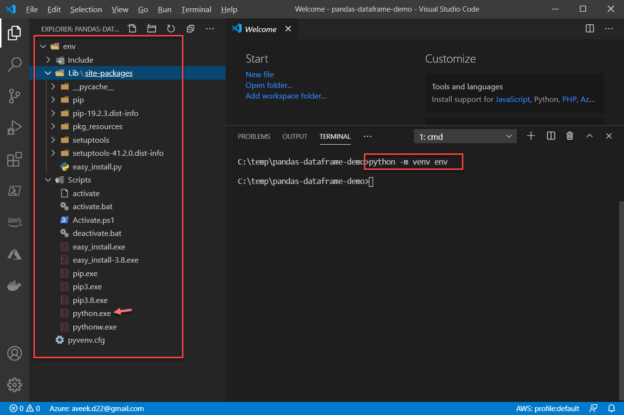
python -m venv env
Once you run the above command, you can see that a new folder has been created with the name “env“. This is the virtual environment directory where all the binaries and libraries related to your code will be stored. As you can see, we have the python.exe file available under the “Scripts” directory which can now be used while running the application.

Figure 1 – Virtual Environment created
Once the virtual environment is set up, the next step is to activate this environment for execution. In order to activate the virtual environment, you can run the following command.
.\env\Scripts\activate
This will activate the environment and you can now see an “env” keyword appear before every line on the terminal. This means your virtual environment has been set up and activated.
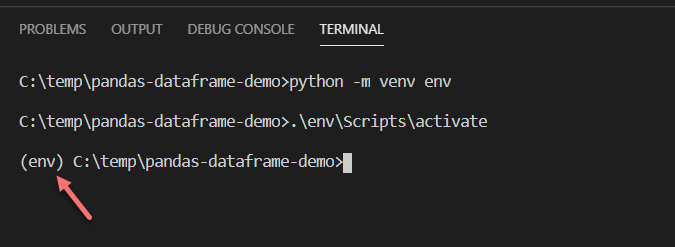
Figure 2 – Activating virtual environment
Installing pandas in the virtual environment
Now that the virtual environment has been activated, let us go ahead and install pandas in this environment. Use the following command to install pandas.
pip install pandas
This might take some time depending on the speed of your network as it will download the WHL file from the server and get it installed.
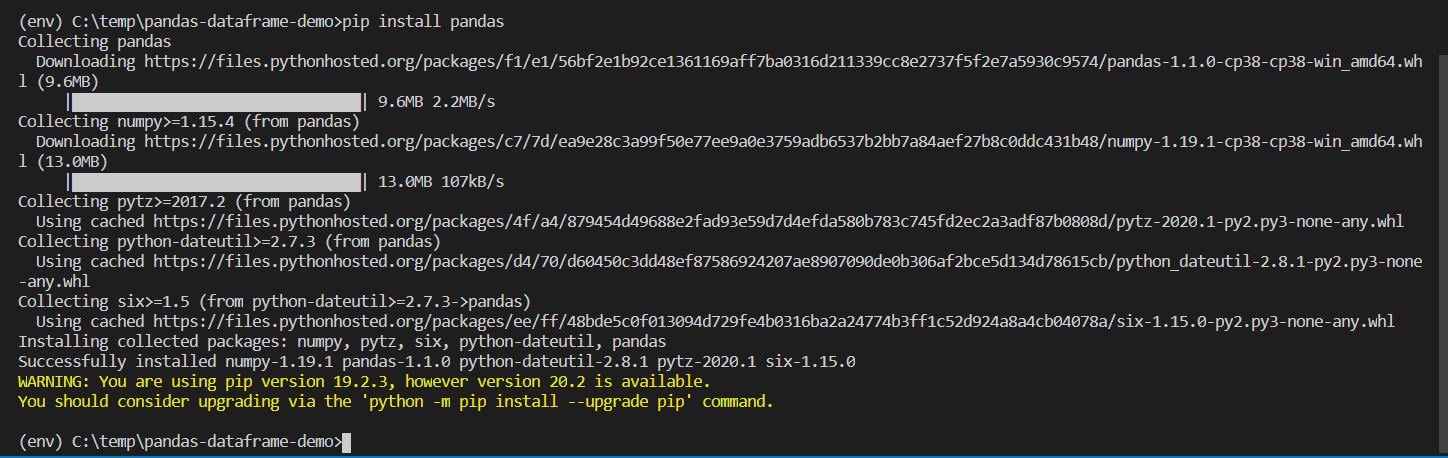
Figure 3 – Install pandas in the virtual environment
Setting up Jupyter Notebooks in Visual Studio Code
We are now all set to start writing our code for pandas and analyze our data. However, like the conventional way of using python files, we will instead write our code using a Jupyter Notebook, a feature within the VS Code. This will help us to read and execute our code in a more managed way. Create a new file with the extension as “.ipynb“. This is the extension for an IPython Notebook which is supported by Visual Studio Code.
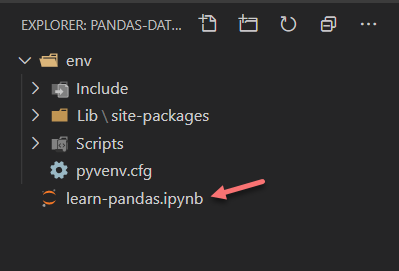
Figure 4 – Creating the notebook file
As soon as you open this file, you can see that a new interactive window opens up in the editor pane. Click on the Python version on the right and select the interpreter from the virtual environment.
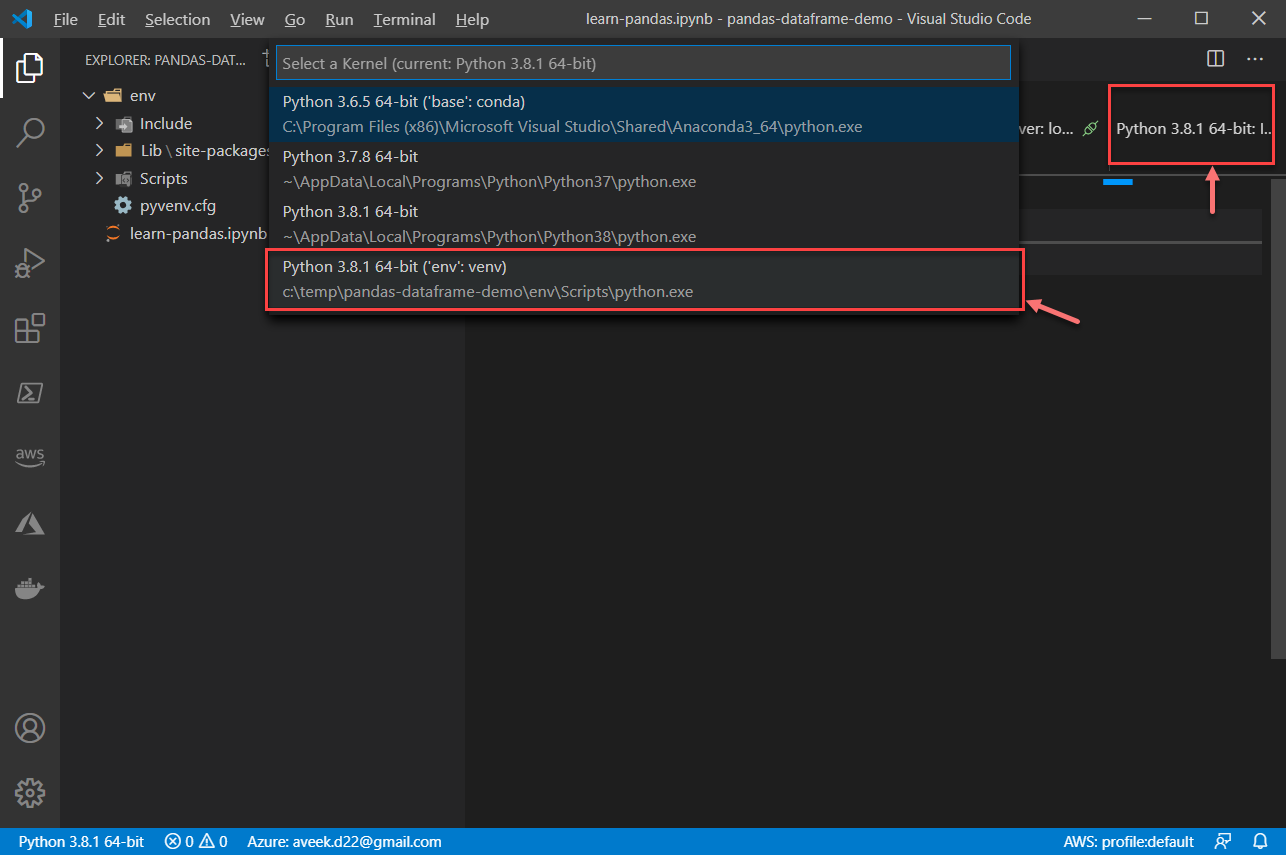
Figure 5 -Selecting the interpreter from the virtual environment
Read data using pandas dataframes
Now that our python notebook is ready, we can start importing the pandas library into it and read a CSV file and load the data into a pandas dataframe. Once you write your code in the cell, click the Run button to execute the cell.
|
1 2 |
import pandas as pd df = pd.read_csv('sample-superstore.csv') |
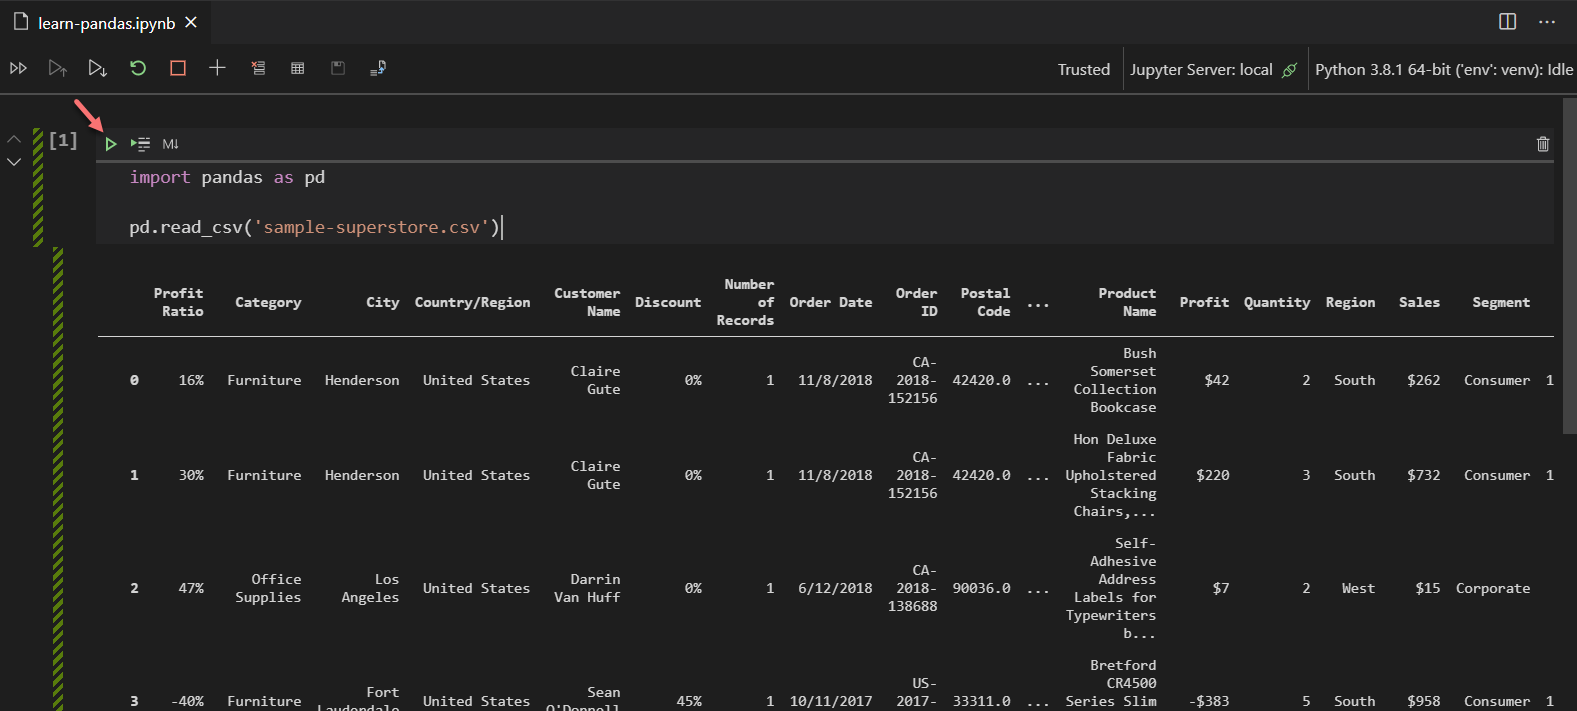
Figure 6 – Reading the CSV file
As you can see in the figure above, the cell has been executed and the data from the CSV file has been loaded into the dataframe.
Let us now run some of the basic data analysis commands that will help us understand some more detail about the data that we have imported. We are going to run the following commands to understand more about the dataframe.
|
1 2 3 4 5 6 |
# 1. Returns the top 5 records from the dataframe df.head() # 2. Some statistical information about your data df.describe() # 3. List of columns headers df.columns.values |
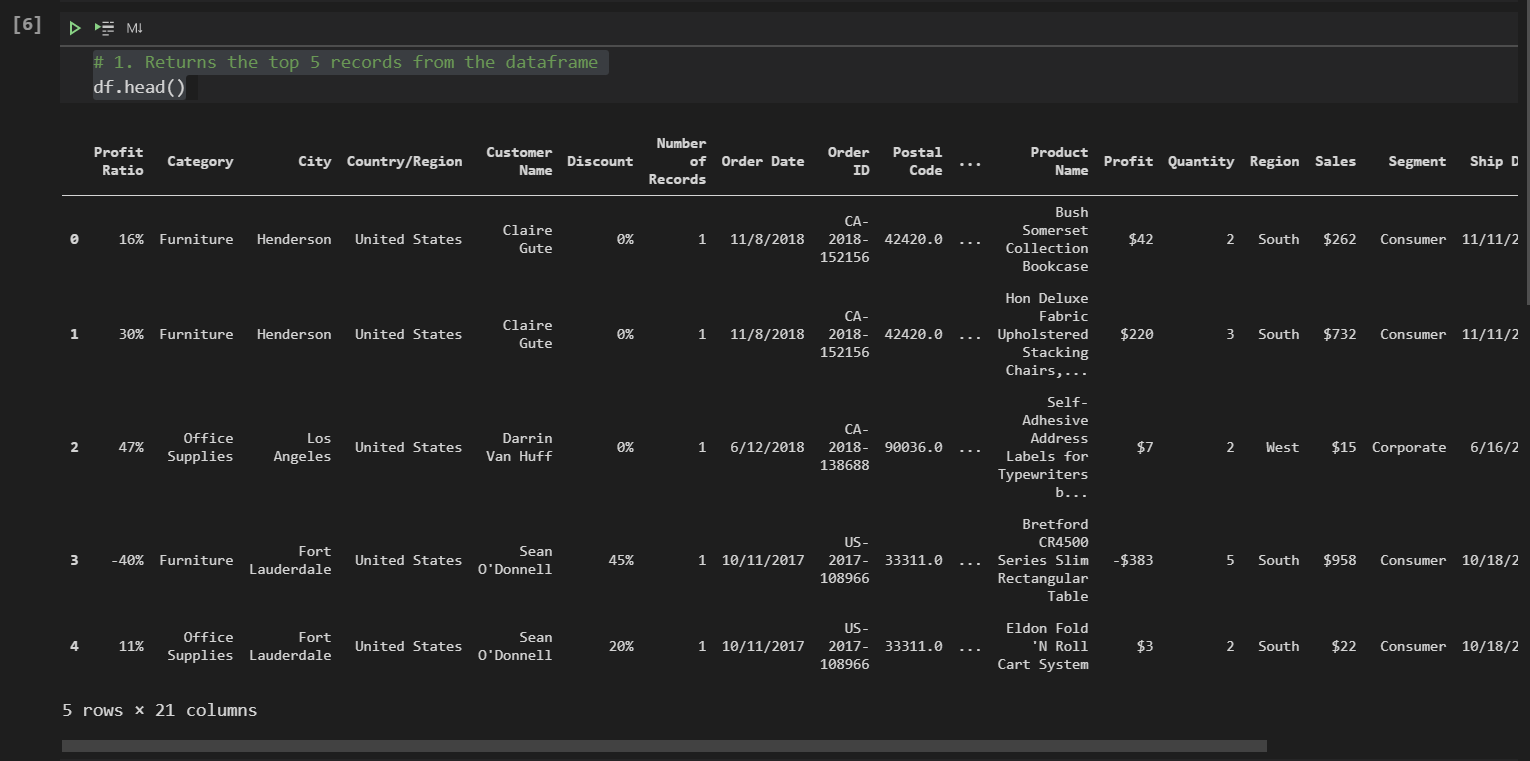
Figure 7 – Running the df.head() method
As you can see, the head() method returns the top 5 records from the dataframe. This command is essential when your dataframe is quite large and you want to view all the columns and understand the data in those columns. However, loading and displaying the entire dataframe in a notebook is not advisable as it will not be displayed properly or will cost a lot of memory.
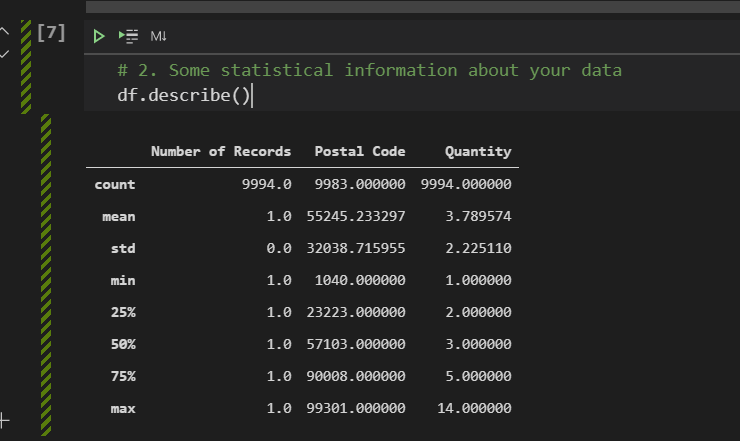
Figure 8 – Running the describe() method on the dataframe
The describe() method, provides a high-level statistical inference about the data available in your dataframe. It is useful when your dataset contains a lot of numerical fields.
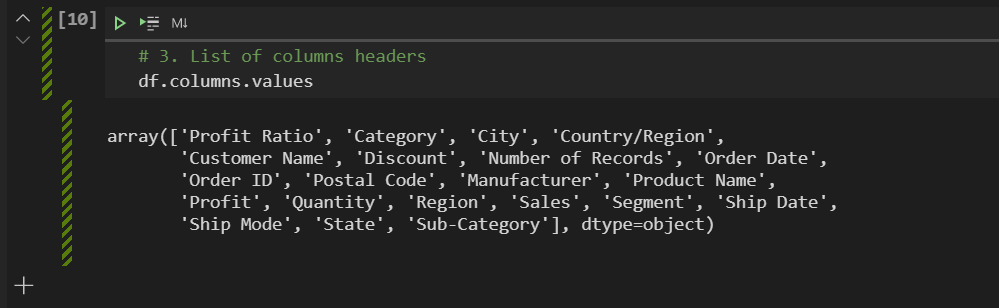
Figure 9 – Viewing the list of columns in the Pandas Dataframe
It is also useful to see a list of all the columns available in your dataframe if you have a very wide dataset and all the columns cannot be fit into the screen at once.
Working with the Pandas Dataframe
Now that we have some idea about the dataframe, let us go ahead and apply some operations on this dataframe. The first thing you might want to do in an initial dataframe is to select only a list of few columns from the entire dataframe that suits your interest. This can be done by using indexes or by specifying conditions to select the selected columns. Let us explore in detail.
|
1 2 3 4 5 |
# 1. Create a list of columns to be selected columns_to_be_selected = ["Country/Region", "Quantity", "Sales"] # 2. Use it as an index to the DataFrame df[columns_to_be_selected] |

Figure 10 – Selecting a list of columns
As you can see in the figure above, we have first created a list that stores the names of the columns that we need to be displayed. Then, we pass this list as an argument while calling the dataframe.
Now that we know how to select a subset of the dataframe by specifying column names, let us explore how to filter the pandas dataframe using conditions. Filtering is almost similar to how we do for relational tables. We can filter records by specifying the conditions as mentioned below.
|
1 2 |
# Quantity more than 10 df[df["Quantity"] > 10] |
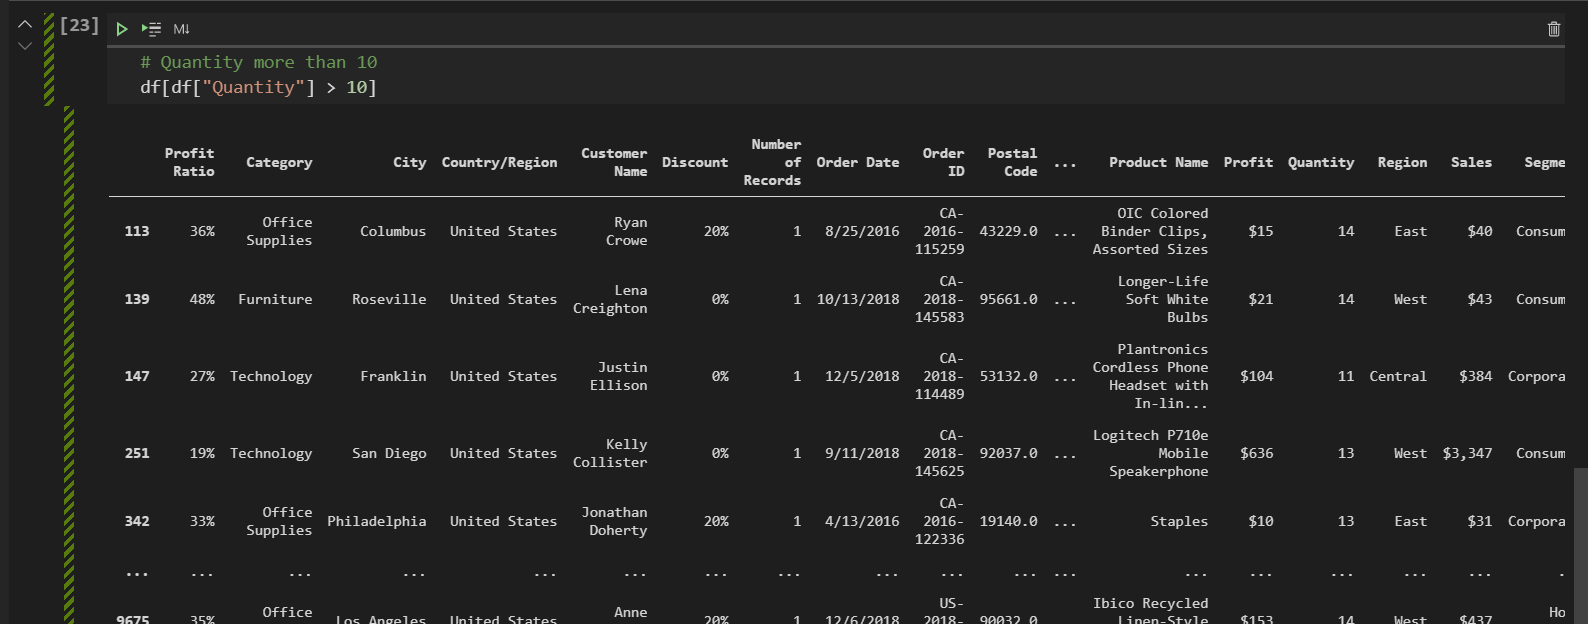
Figure 11 – Filter integer values
You can also filter string values in the same way. Additionally, you can specify multiple conditions while filtering the records from the dataframe and it can be done as follows.
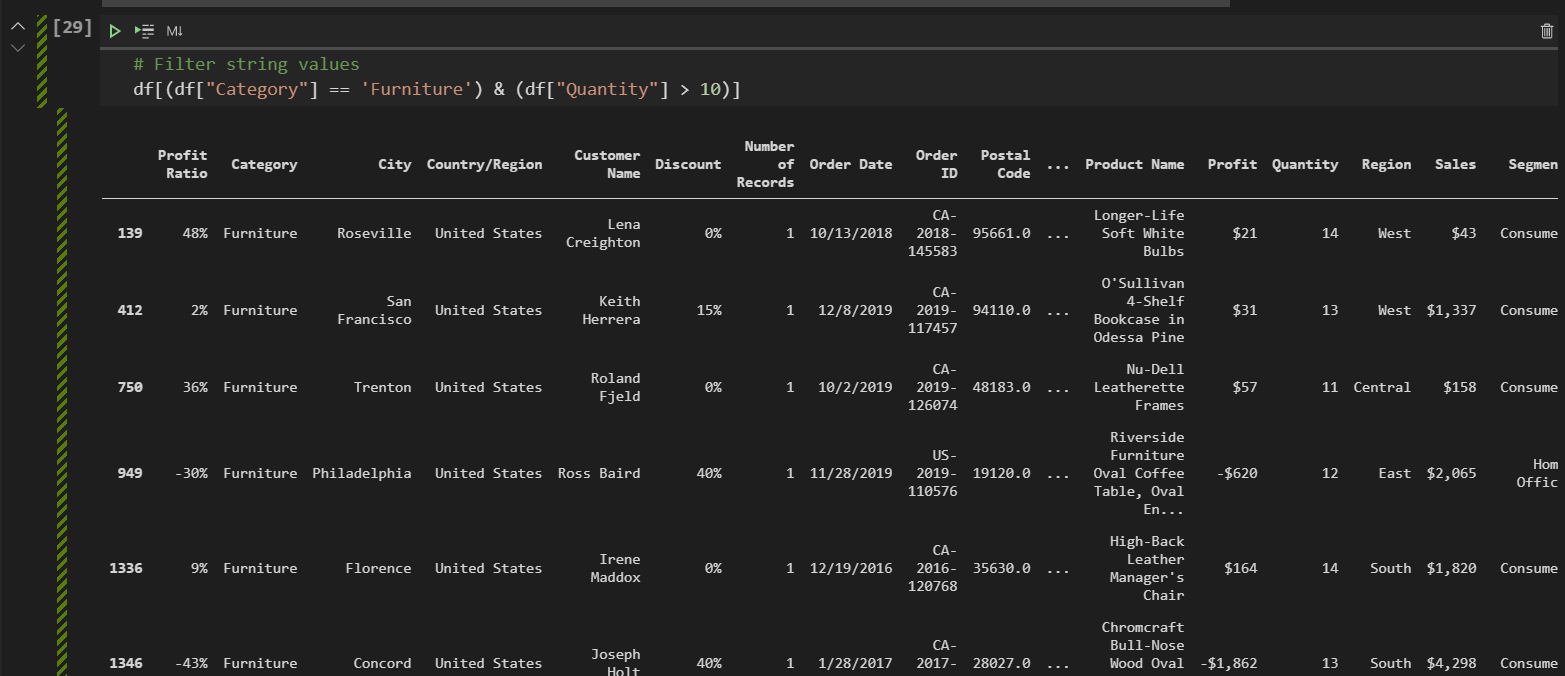
Figure 12 – Filter string and integer together
Additionally, you can also perform arithmetic operations like summation, finding the maximum and minimum, and perform other statistical calculations on your numerical fields. Let us now try to find the total number of items sold since the beginning. This can be done by running the following command.
|
1 2 |
# Return total quantity of items sold df["Quantity"].sum() |
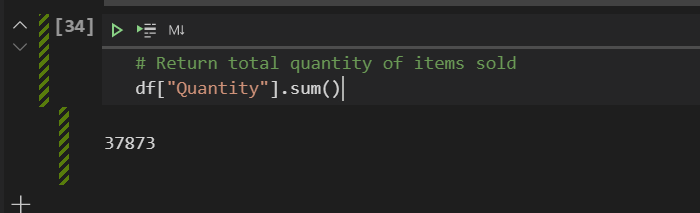
Figure 13 – Summation in Pandas Dataframe
You can also find the maximum and minimum items that were sold as follows.
|
1 2 3 4 |
# Return maximum quantity of items sold df["Quantity"].max() # Return minimum quantity of items sold df["Quantity"].min() |
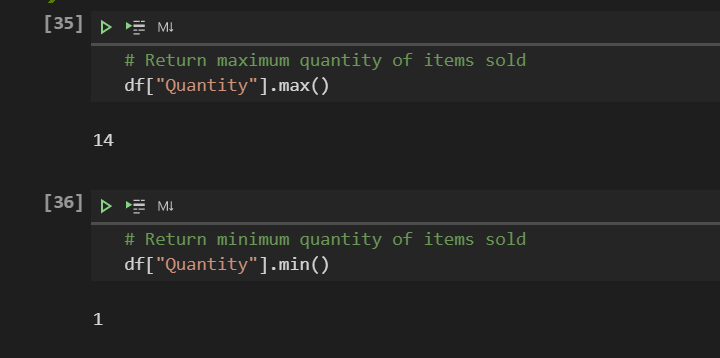
Figure 14 – Returning the maximum and the minimum values
Conclusion
In this article, we have explored in detail regarding the pandas dataframe object. The pandas dataframe object converts the python objects such as lists and arrays into suitable tabular objects which makes the life of a data analyst quite simple. Using the pandas dataframe object, you can easily transform your data, filter records, add new columns to the dataframe, remove blanks and nulls and do a lot more. You can also use pandas to read data from files and databases and process them in memory. Once the processing is completed, you can write the dataframe back to a file or a database on your server or the cloud. In the next article in the series, I will talk about how to work with databases using pandas dataframe.
Table of contents

He is a prolific author, with over 100 articles published on various technical blogs, including his own blog, and a frequent contributor to different technical forums.
In his leisure time, he enjoys amateur photography mostly street imagery and still life. Some glimpses of his work can be found on Instagram. You can also find him on LinkedIn
View all posts by Aveek Das
- Getting started with PostgreSQL on Docker - August 12, 2022
- Getting started with Spatial Data in PostgreSQL - January 13, 2022
- An overview of Power BI Incremental Refresh - December 6, 2021