

In this article, I am going to explain how to create a serverless application using Azure Functions and use Azure SQL Database to log messages generated by the function. In this world of cloud-based applications, it is very important that you are aware of how to create and design serverless applications. An important aspect while designing any application is to generate log messages at every key step or operation that is being performed. This helps us to understand the workflow whenever there are some issues and need debugging at some later point in time.
In general programming, logging is a very wide concept and needs to be discussed in detail. However, it is assumed that we should categorize our log messages and log each of those. For example, log messages can be classified into information, warning, or error etc. You can also introduce further categorization based on your needs. These logged messages can be stored in simple text files, log files, log streams in a cloud like AWS CloudWatch or Azure Monitor. Alternatively, you can also choose to build your own custom logger and log messages in a database or a datastore of your choice. This article focuses on storing log messages from a Function App to an Azure SQL database. It is assumed that you have fair knowledge in writing simple SQL scripts to insert and view data from a database.
Creating an Azure SQL Database
Since we are going to use Azure SQL Database to store our log messages from the Function App in Azure, let us create one. Navigate to https://portal.azure.com and search for “SQL Database”. Select SQL databases from the dropdown.
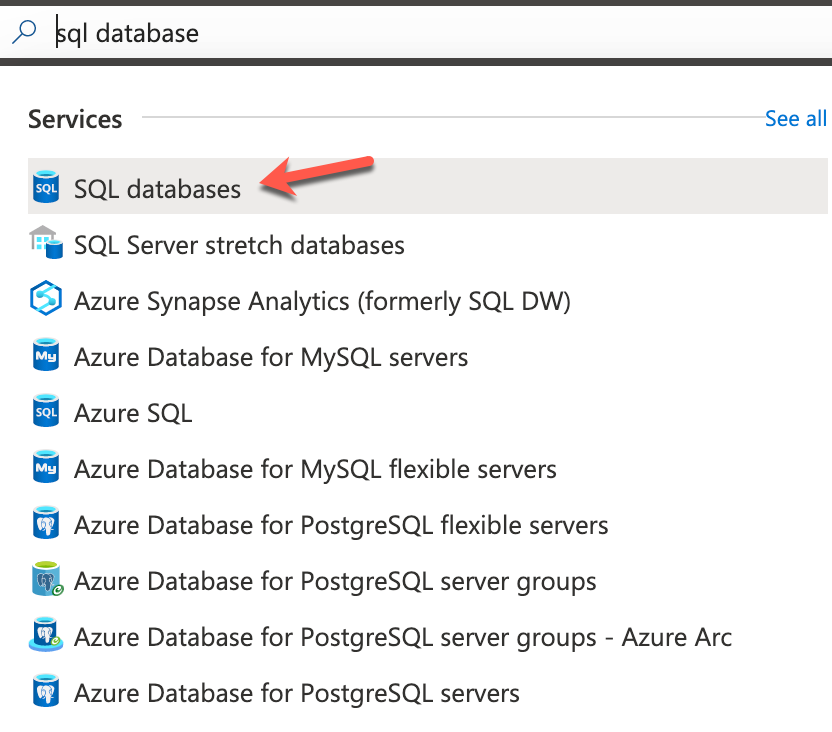
Figure 1 – Azure SQL Database
In the Create SQL Database pane, provide the relevant details to create an SQL database.
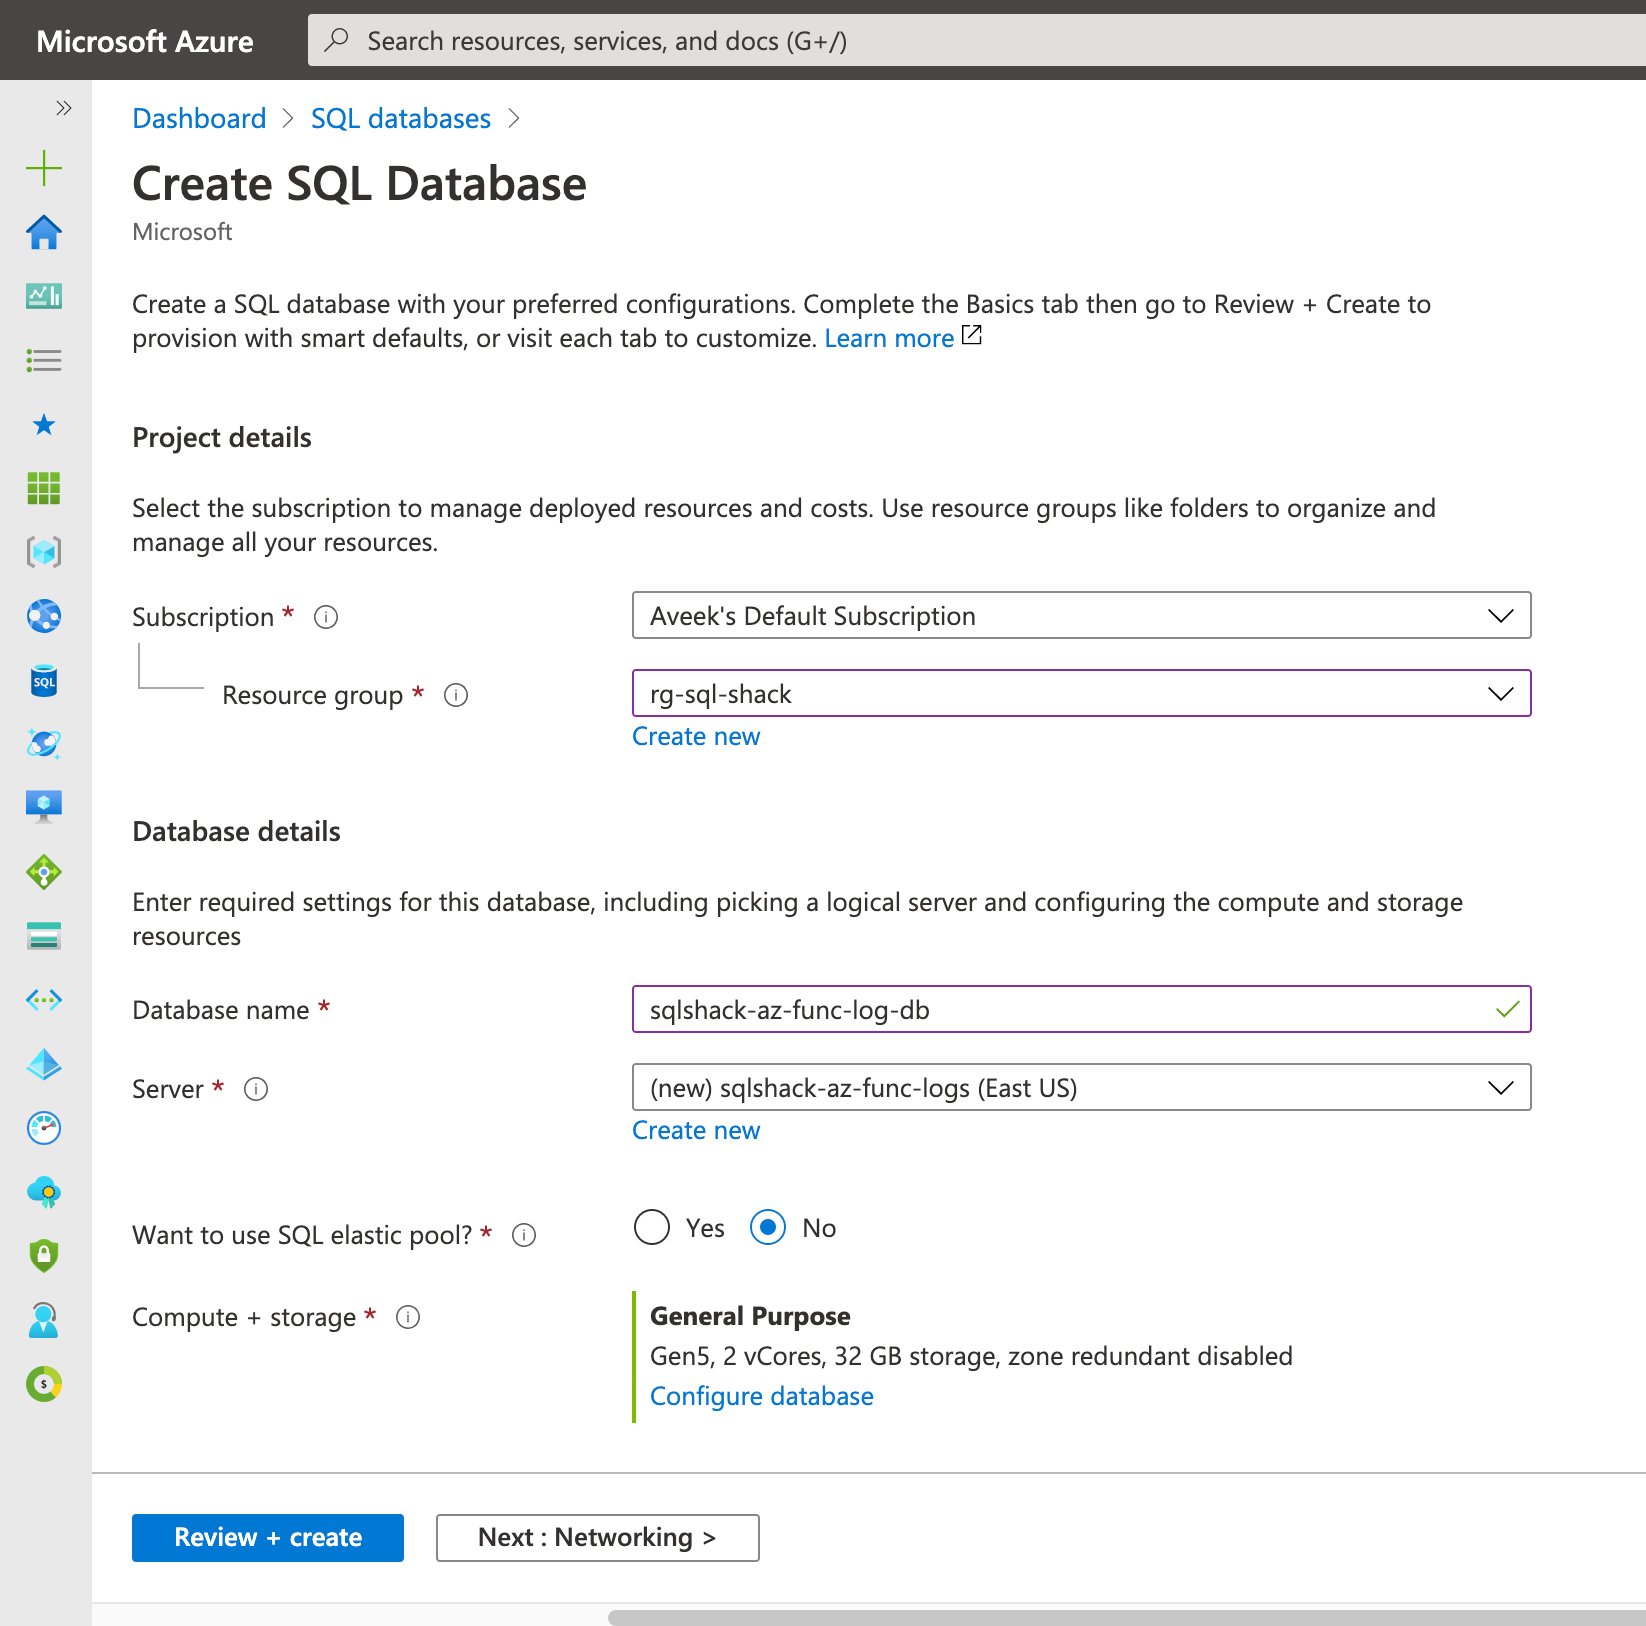
Figure 2 – Create SQL Database
If required, you can also create a new SQL Server Database if you do not have an existing server.
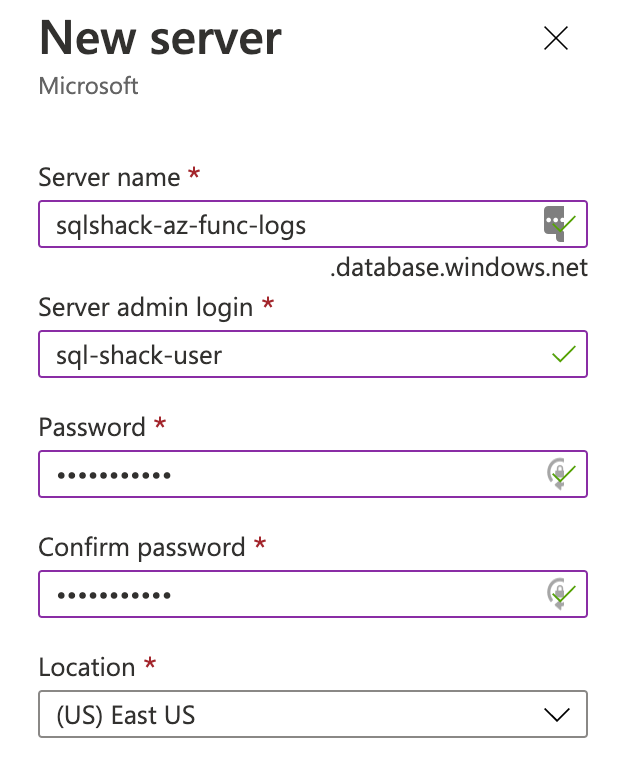
Figure 3 – Creating new Azure SQL Database
Once you have provided all the necessary details, click on Create. It might take some time to create all the resources. Once done, you can see a deployment success screen as follows. Click Go to resource on this page.
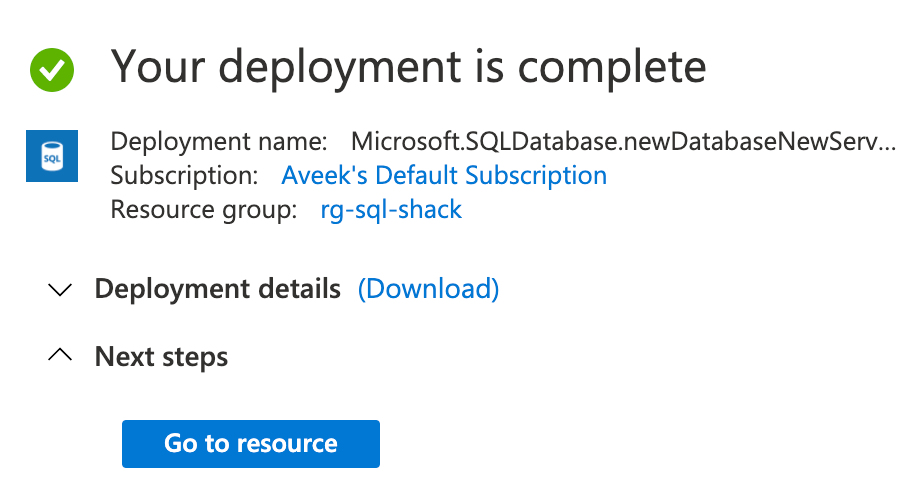
Figure 4 – SQL Database Deployed Successfully
Connecting to the Azure SQL Database
Once the database has been deployed successfully, now we can connect to the database. Since I am using MacOS, I will be using Azure Data Studio to connect to the server. You can also use SQL Server Management Studio to connect. Copy the Server Name from the resources page and use it to connect to the SQL Server using your client application.
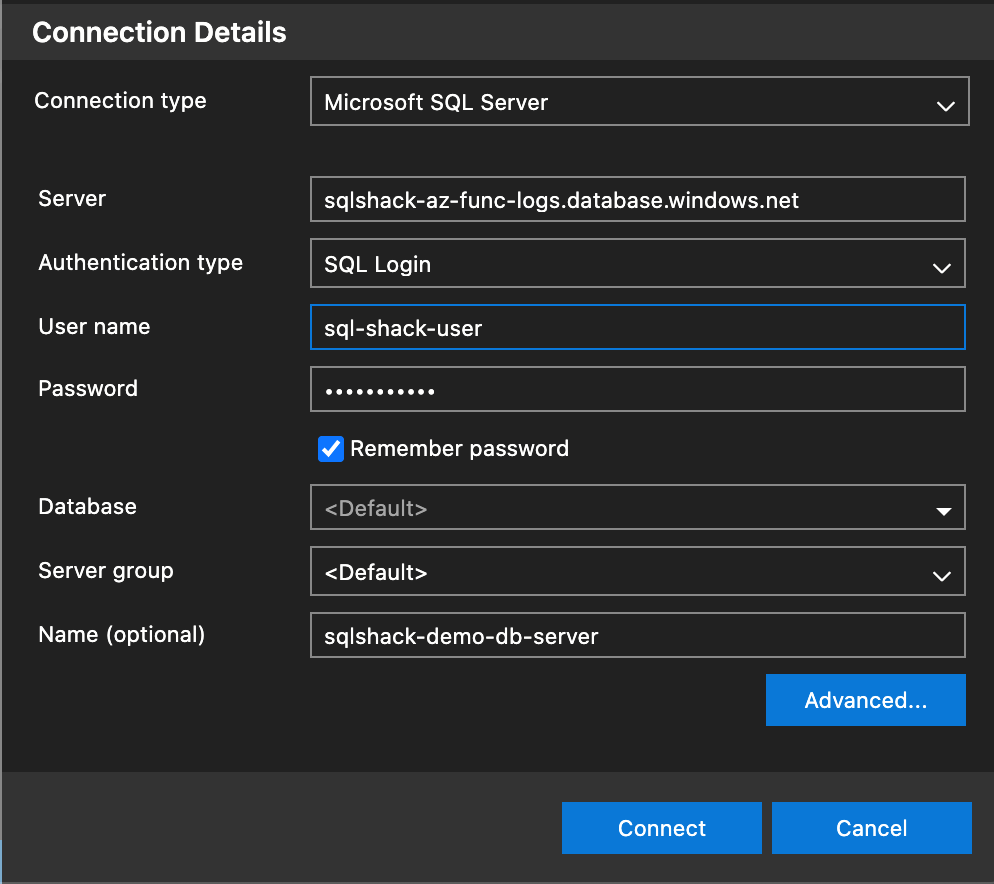
Figure 5 – Connecting to the SQL Database
Once logged in, you can navigate through the databases.
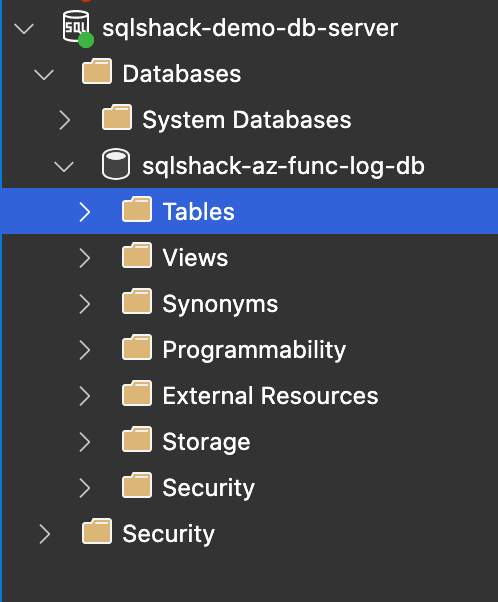
Figure 6 – Browsing the SQL Server
Let us now create a simple table that can be used to store the log messages. You can use the script below to create the table. We will also insert a dummy record to test if the script works well.
|
1 2 3 4 5 6 7 8 9 10 11 |
CREATE TABLE [dbo].[ApplicationLogs]( [Id] [INT] IDENTITY(1,1) NOT NULL, [LogMessage] [NVARCHAR](MAX) NULL, [CreateDate] [DATETIME] NULL, CONSTRAINT [PK_Logs] PRIMARY KEY CLUSTERED ([Id] ASC) ) INSERT INTO [ApplicationLogs] ([LogMessage],[CreateDate]) VALUES('This is a test log message.', GETDATE()) SELECT * FROM [ApplicationLogs] |
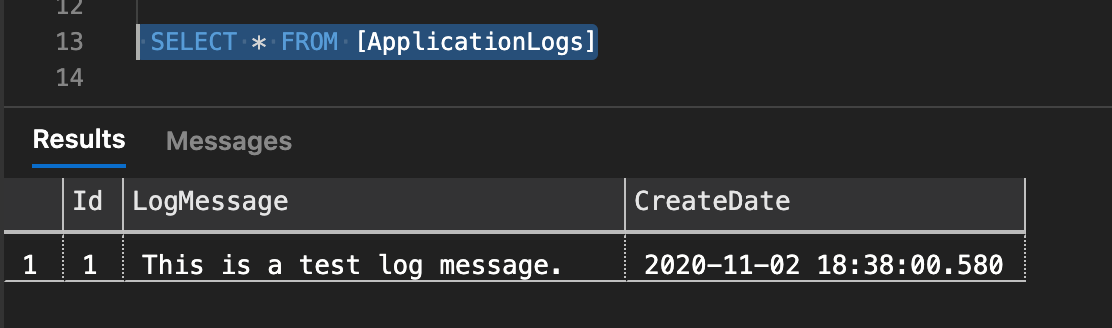
Figure 7 – Dummy Record Inserted
Now, we will store the Connection String for the database that will be used by the Function App later while connecting to the database. Click on Show database connection strings under the database Overview pane.
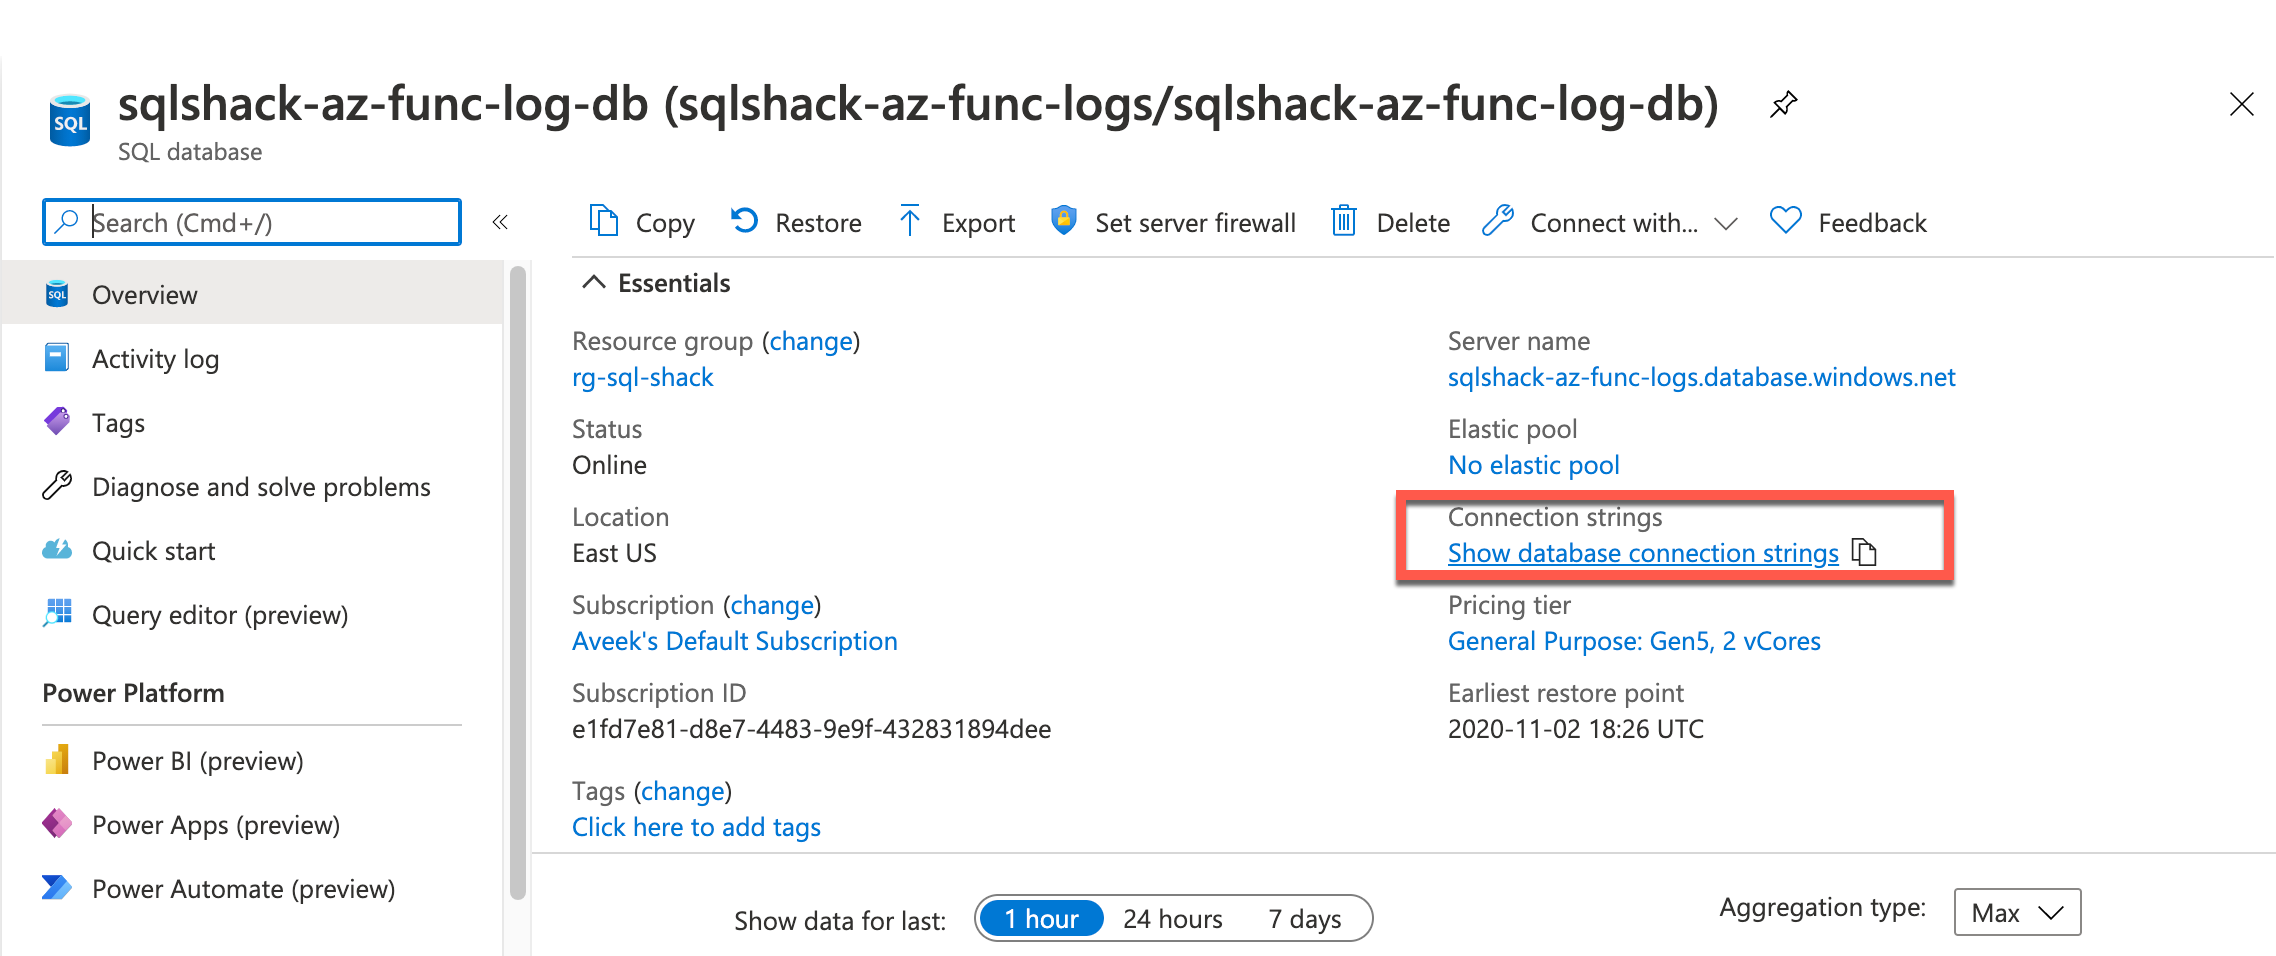
Figure 8 – Show Database Connection Strings
Your connection string will appear in the tab below. You need to replace the password with the one that you have set.
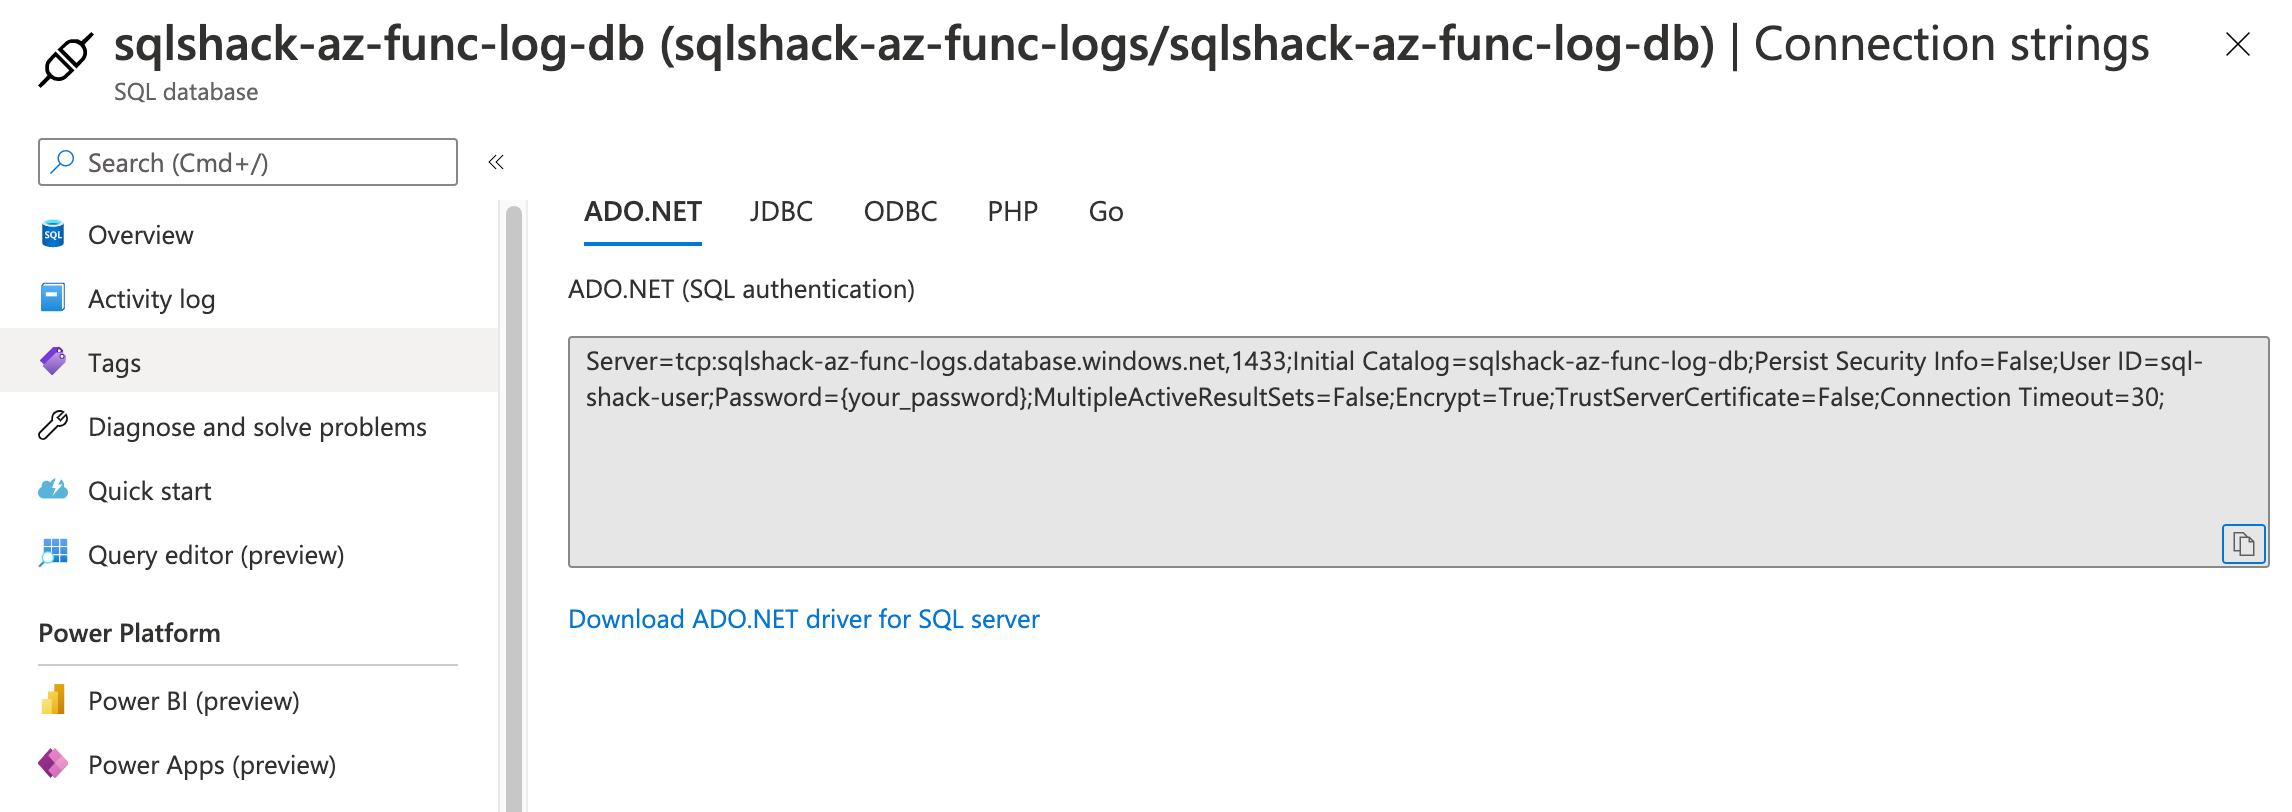
Figure 9 – Connection String
Server=tcp:sqlshack-az-func-logs.database.windows.net,1433;Initial Catalog=sqlshack-az-func-log-db;Persist Security Info=False;User ID=sql-shack-user;Password={your_password};MultipleActiveResultSets=False;Encrypt=True;TrustServerCertificate=False;Connection Timeout=30;
With this, our database is ready to be used by the Azure Function now.
Creating the Azure Function
Now that our database is ready, let us go ahead and create the Azure Function. Navigate to https://portal.azure.com and search for Function App. Click Create to create a new Azure Function App.
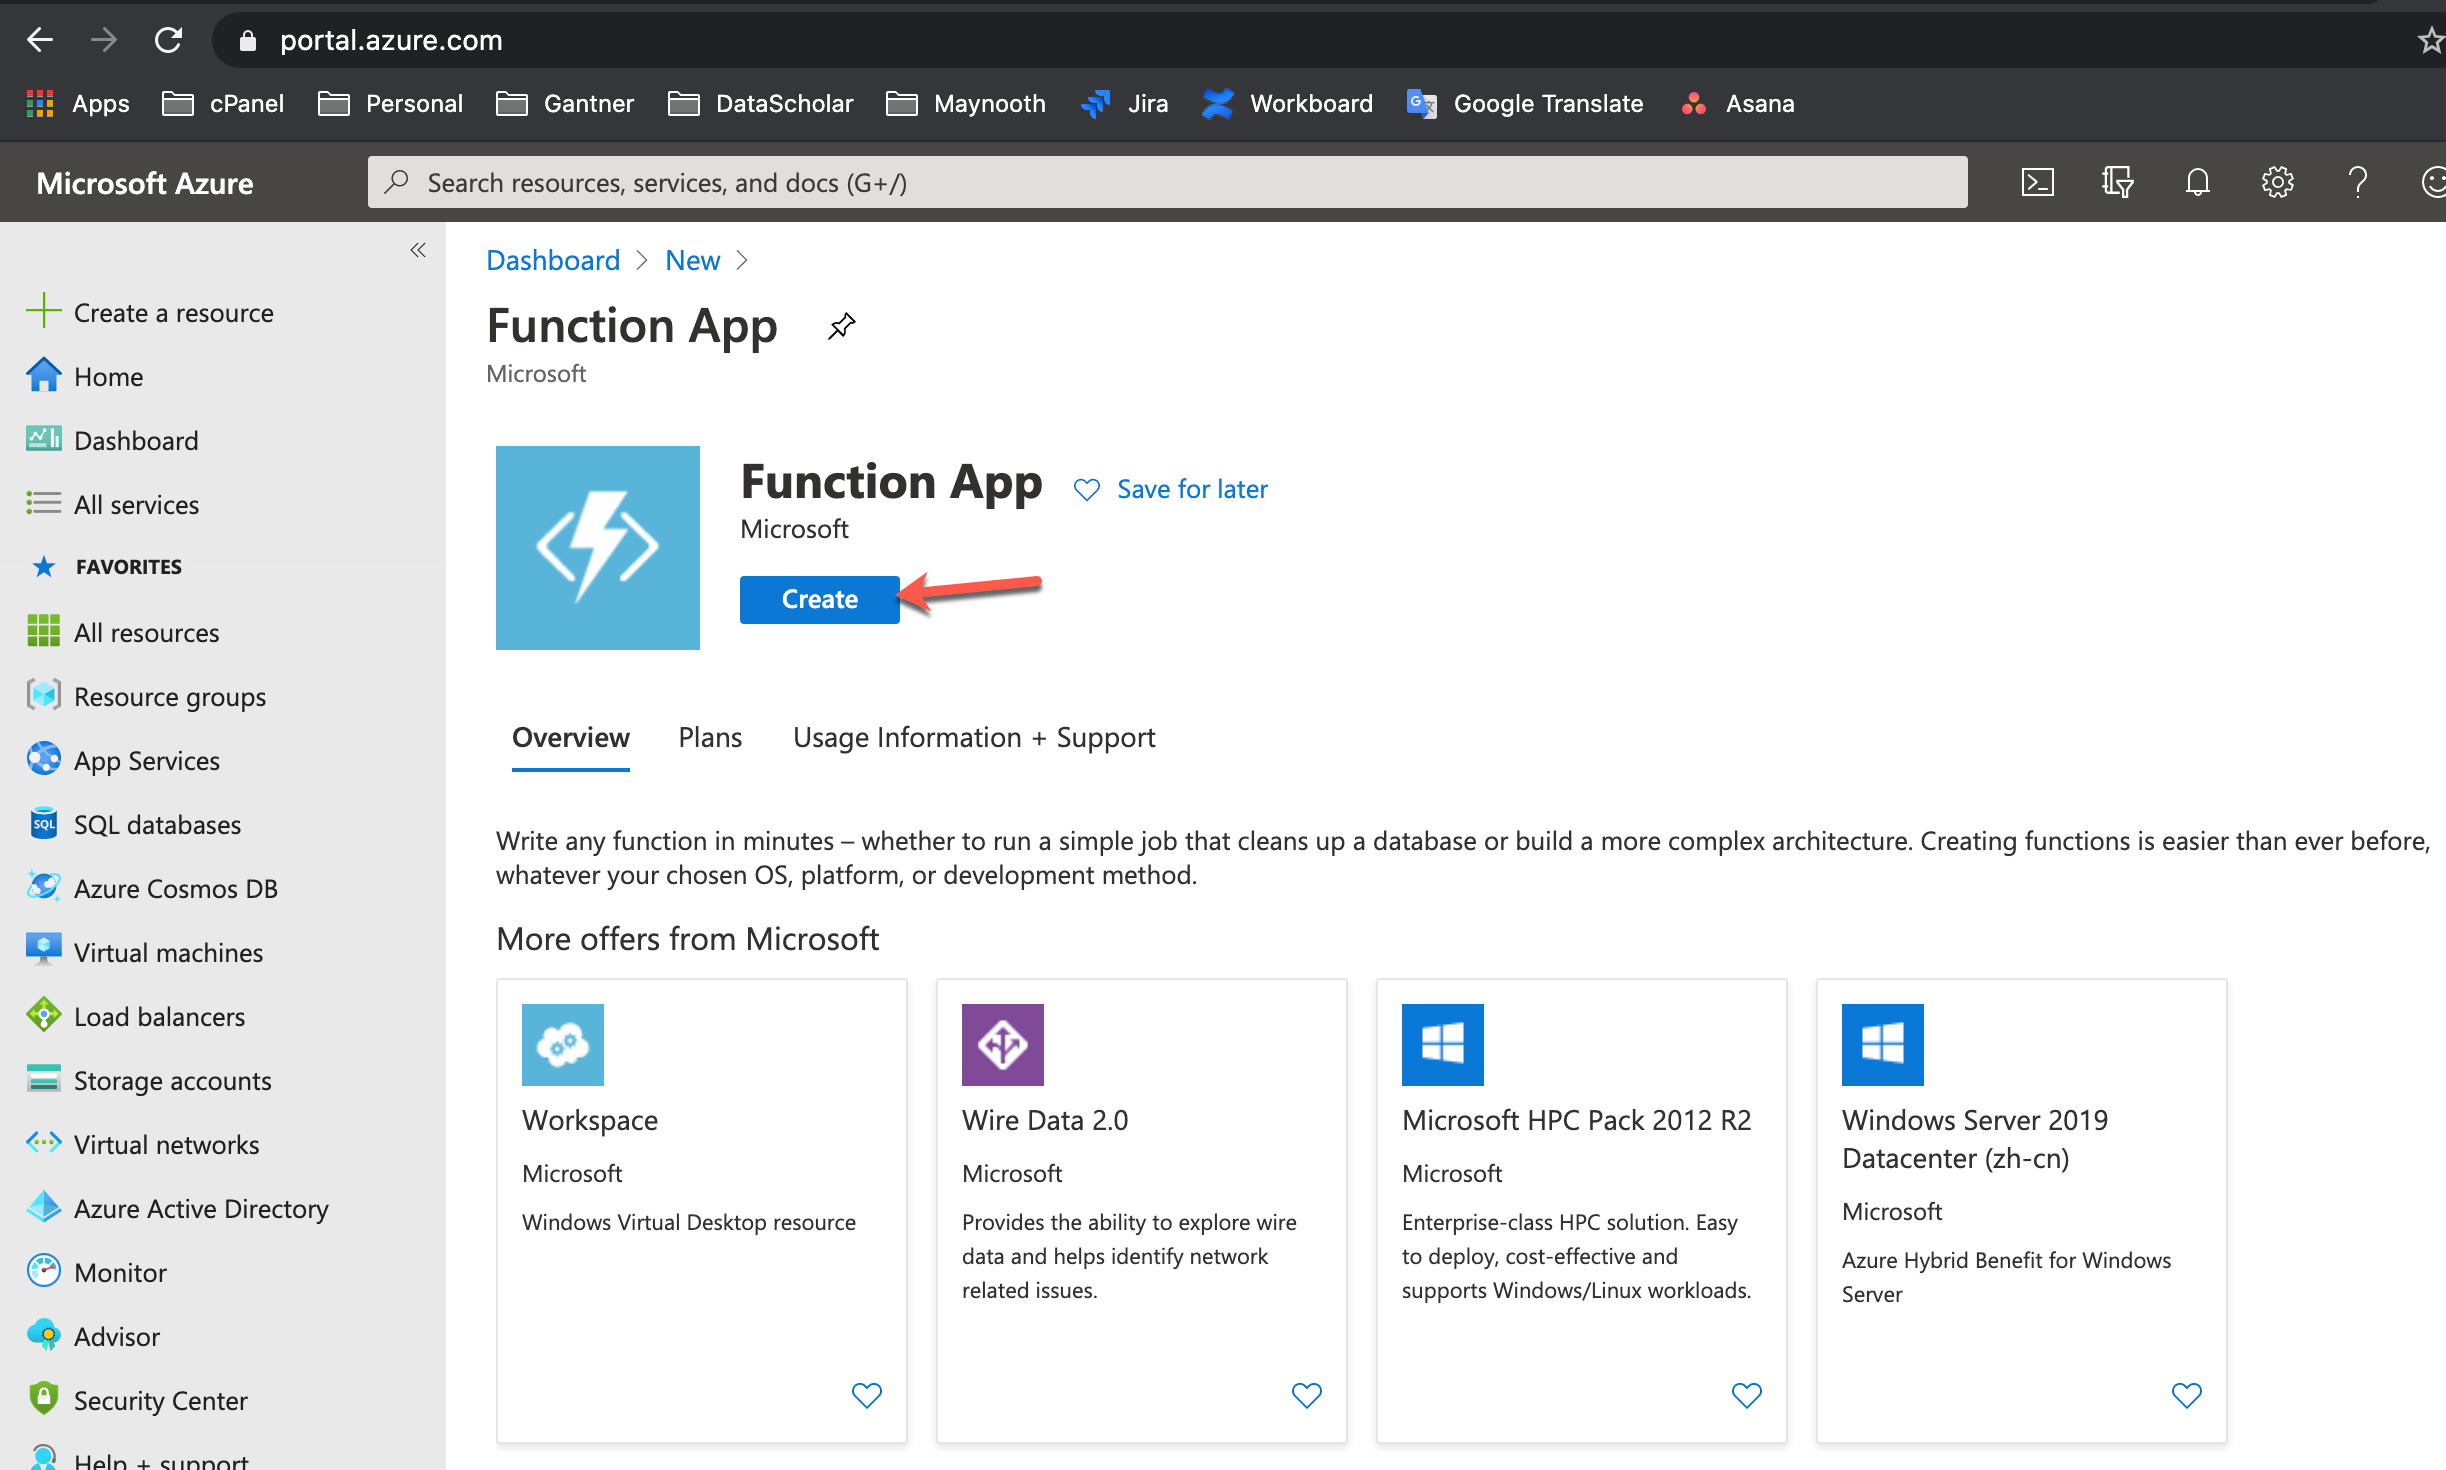
Figure 10 – Creating the Azure Function App
In the next pane that appears, select a resource group based on your preferences and provide a name to the function. Also, select the publish type, and the runtime stack along with version and region. These details are required by the function app to create your resource as per the configuration.
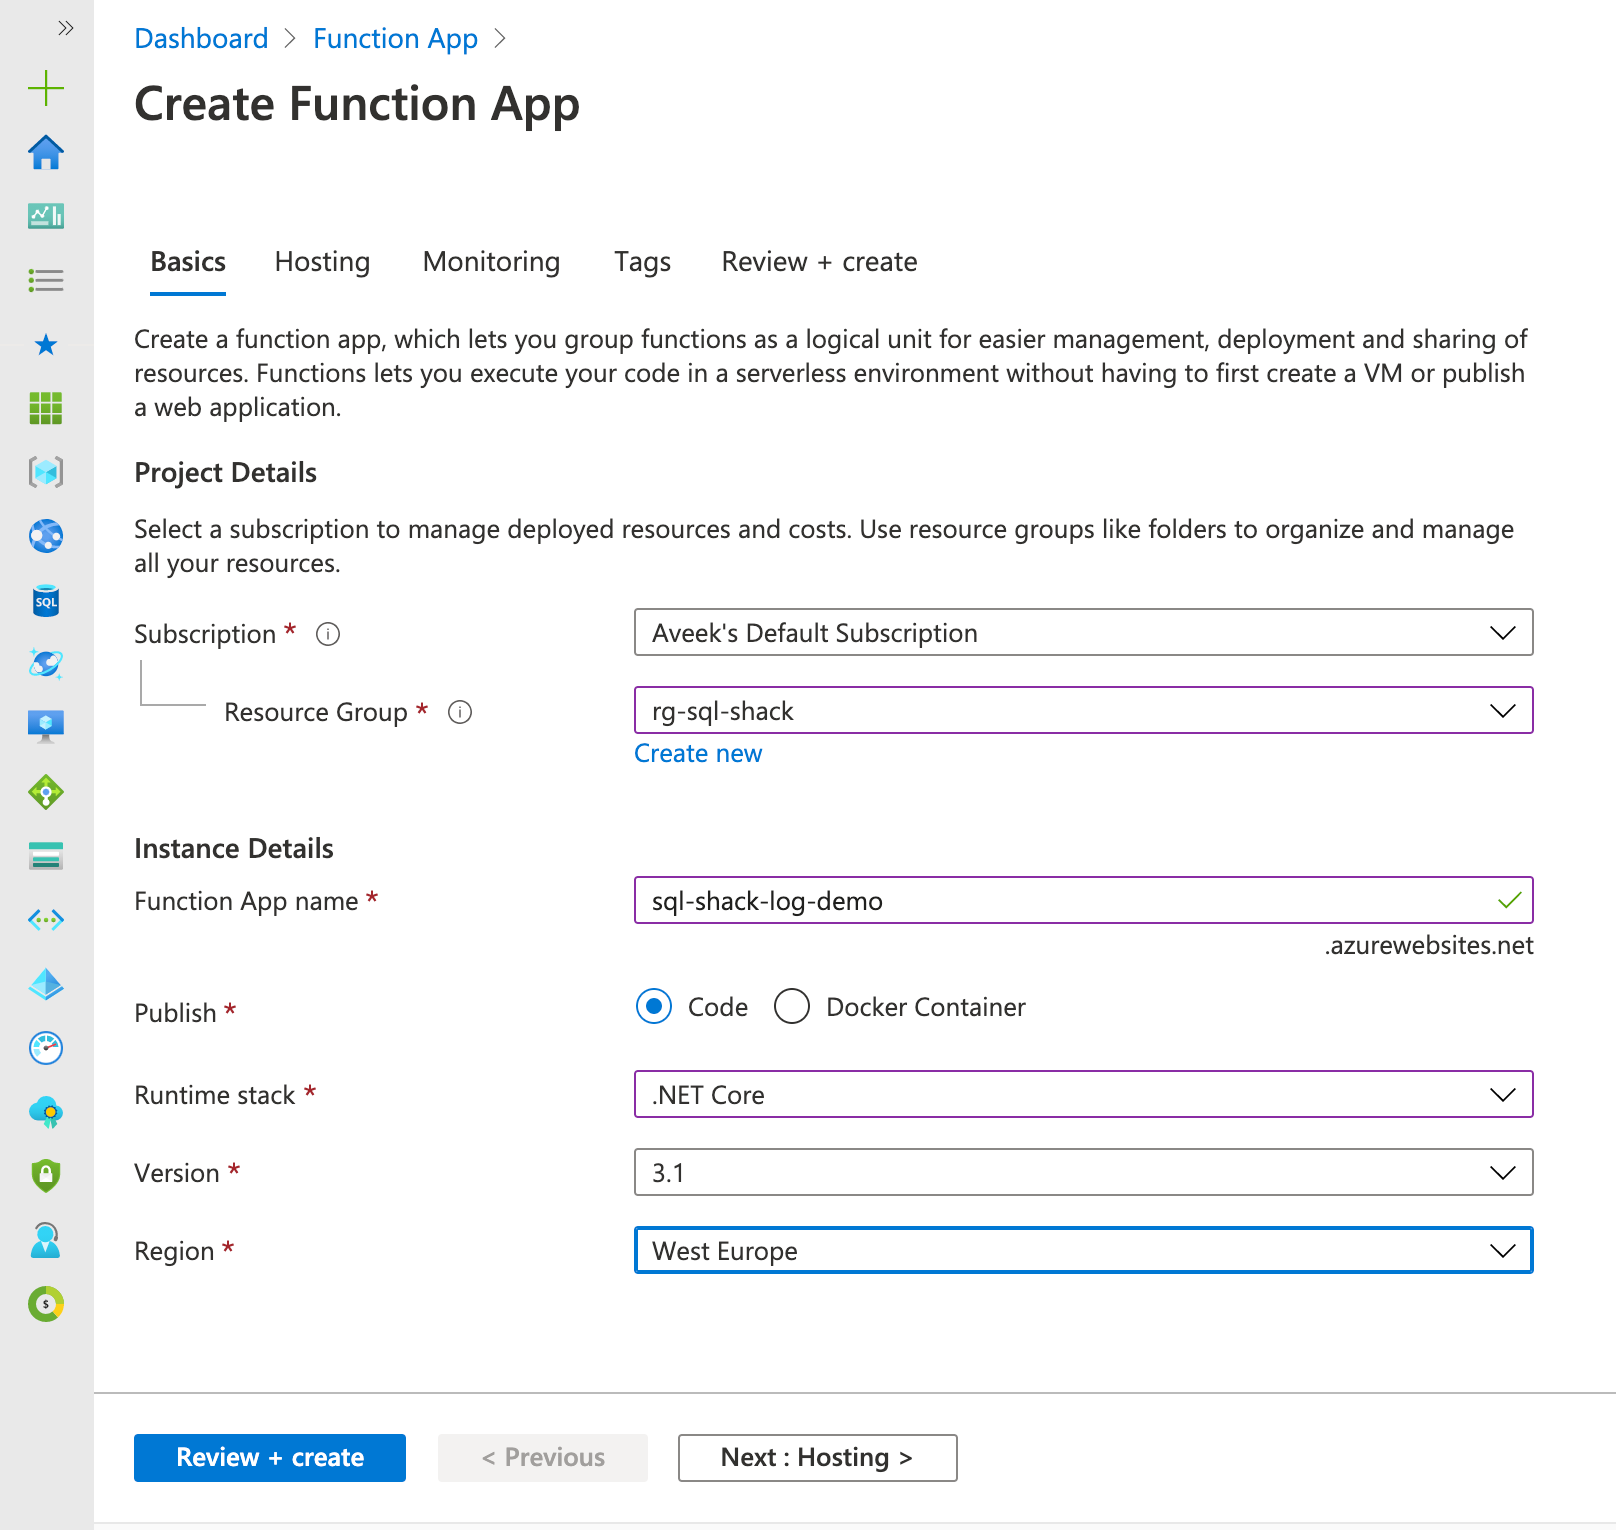
Figure 11 – Create Azure Function App
In the next steps, choose the relevant information like Plan Type, Operating System, Region etc. Once done, click on Review + Create.
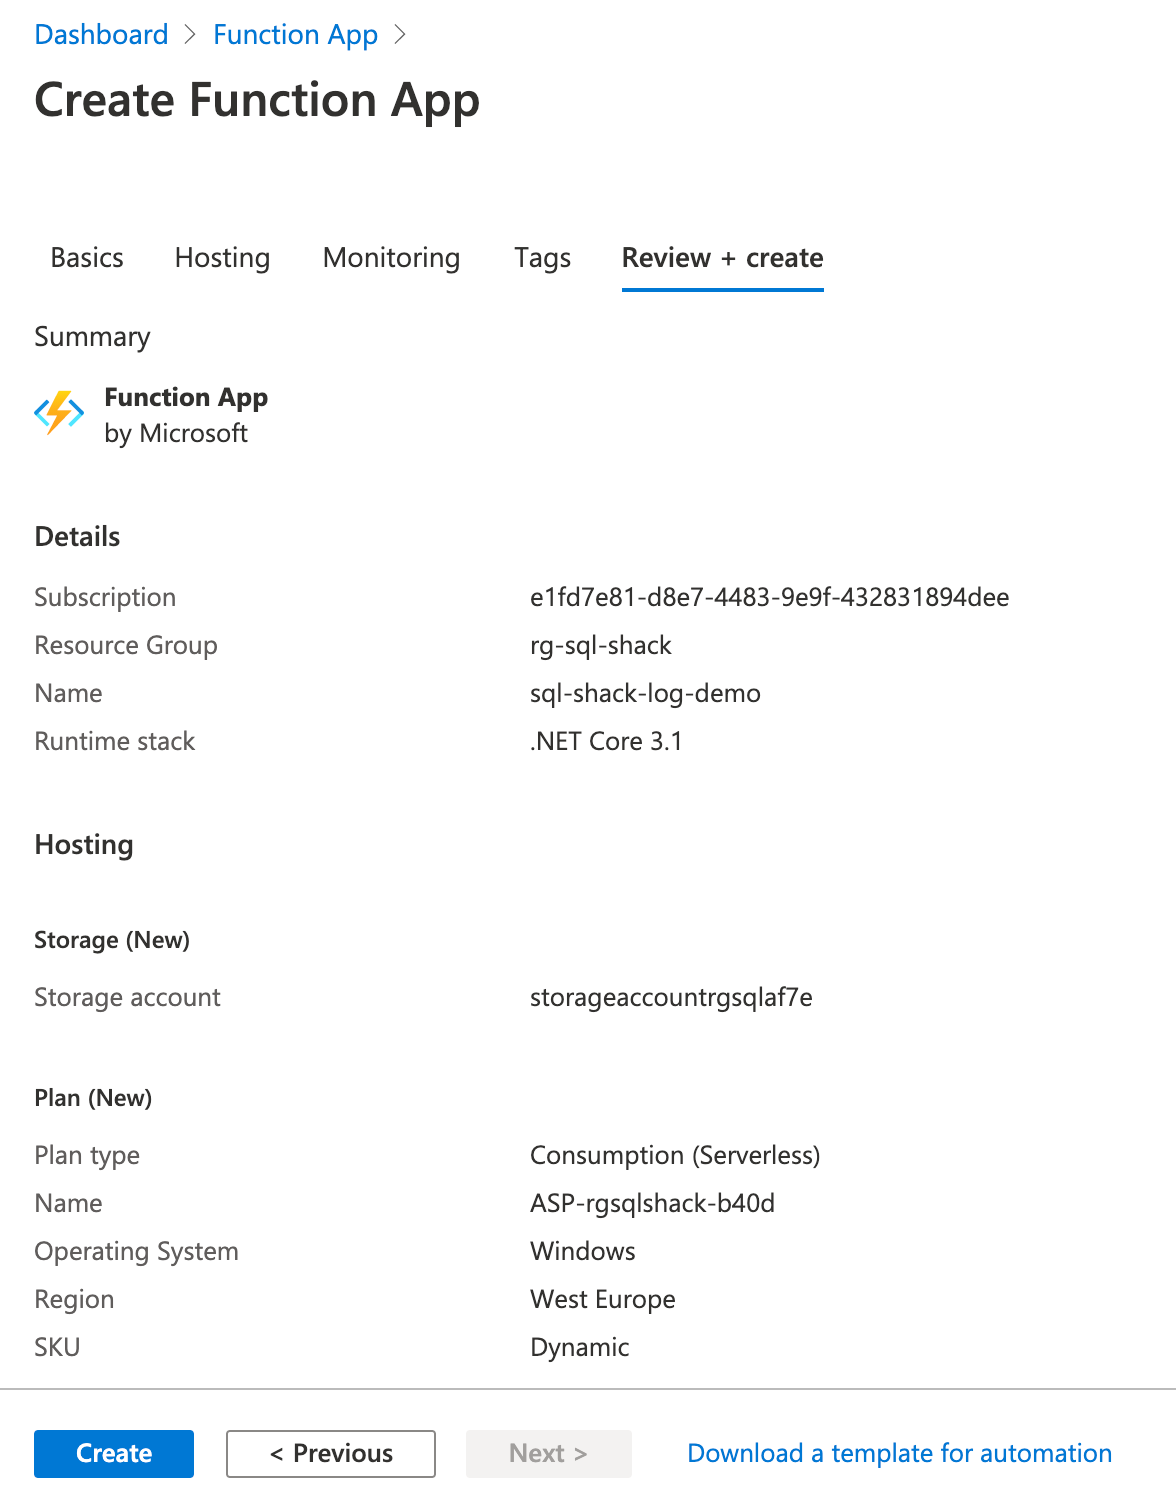
Figure 12 – Configuration Details for Azure Function App
Once the function app is created, you can see a message that says deployment has been completed. Click on Go to resource on this page.
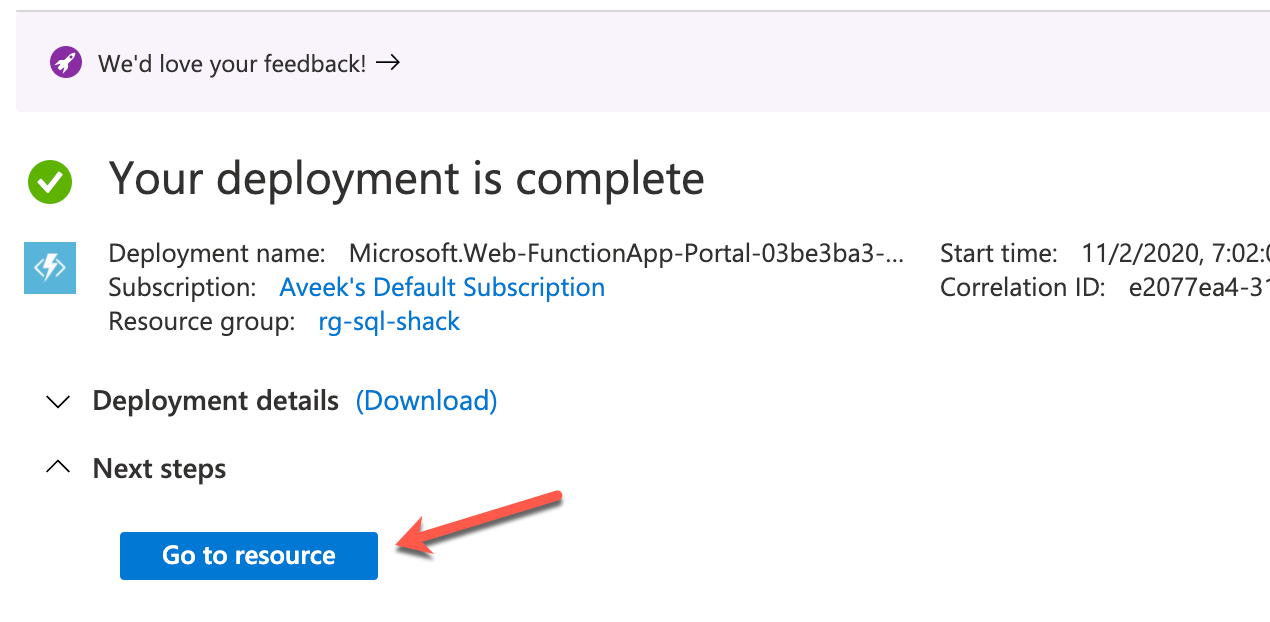
Figure 13 – Function App Deployed Successfully
You will be navigated to the Function App page. On the Functions page, click on Functions and then on Add. Select HTTP Trigger from the right-side pane that appears.
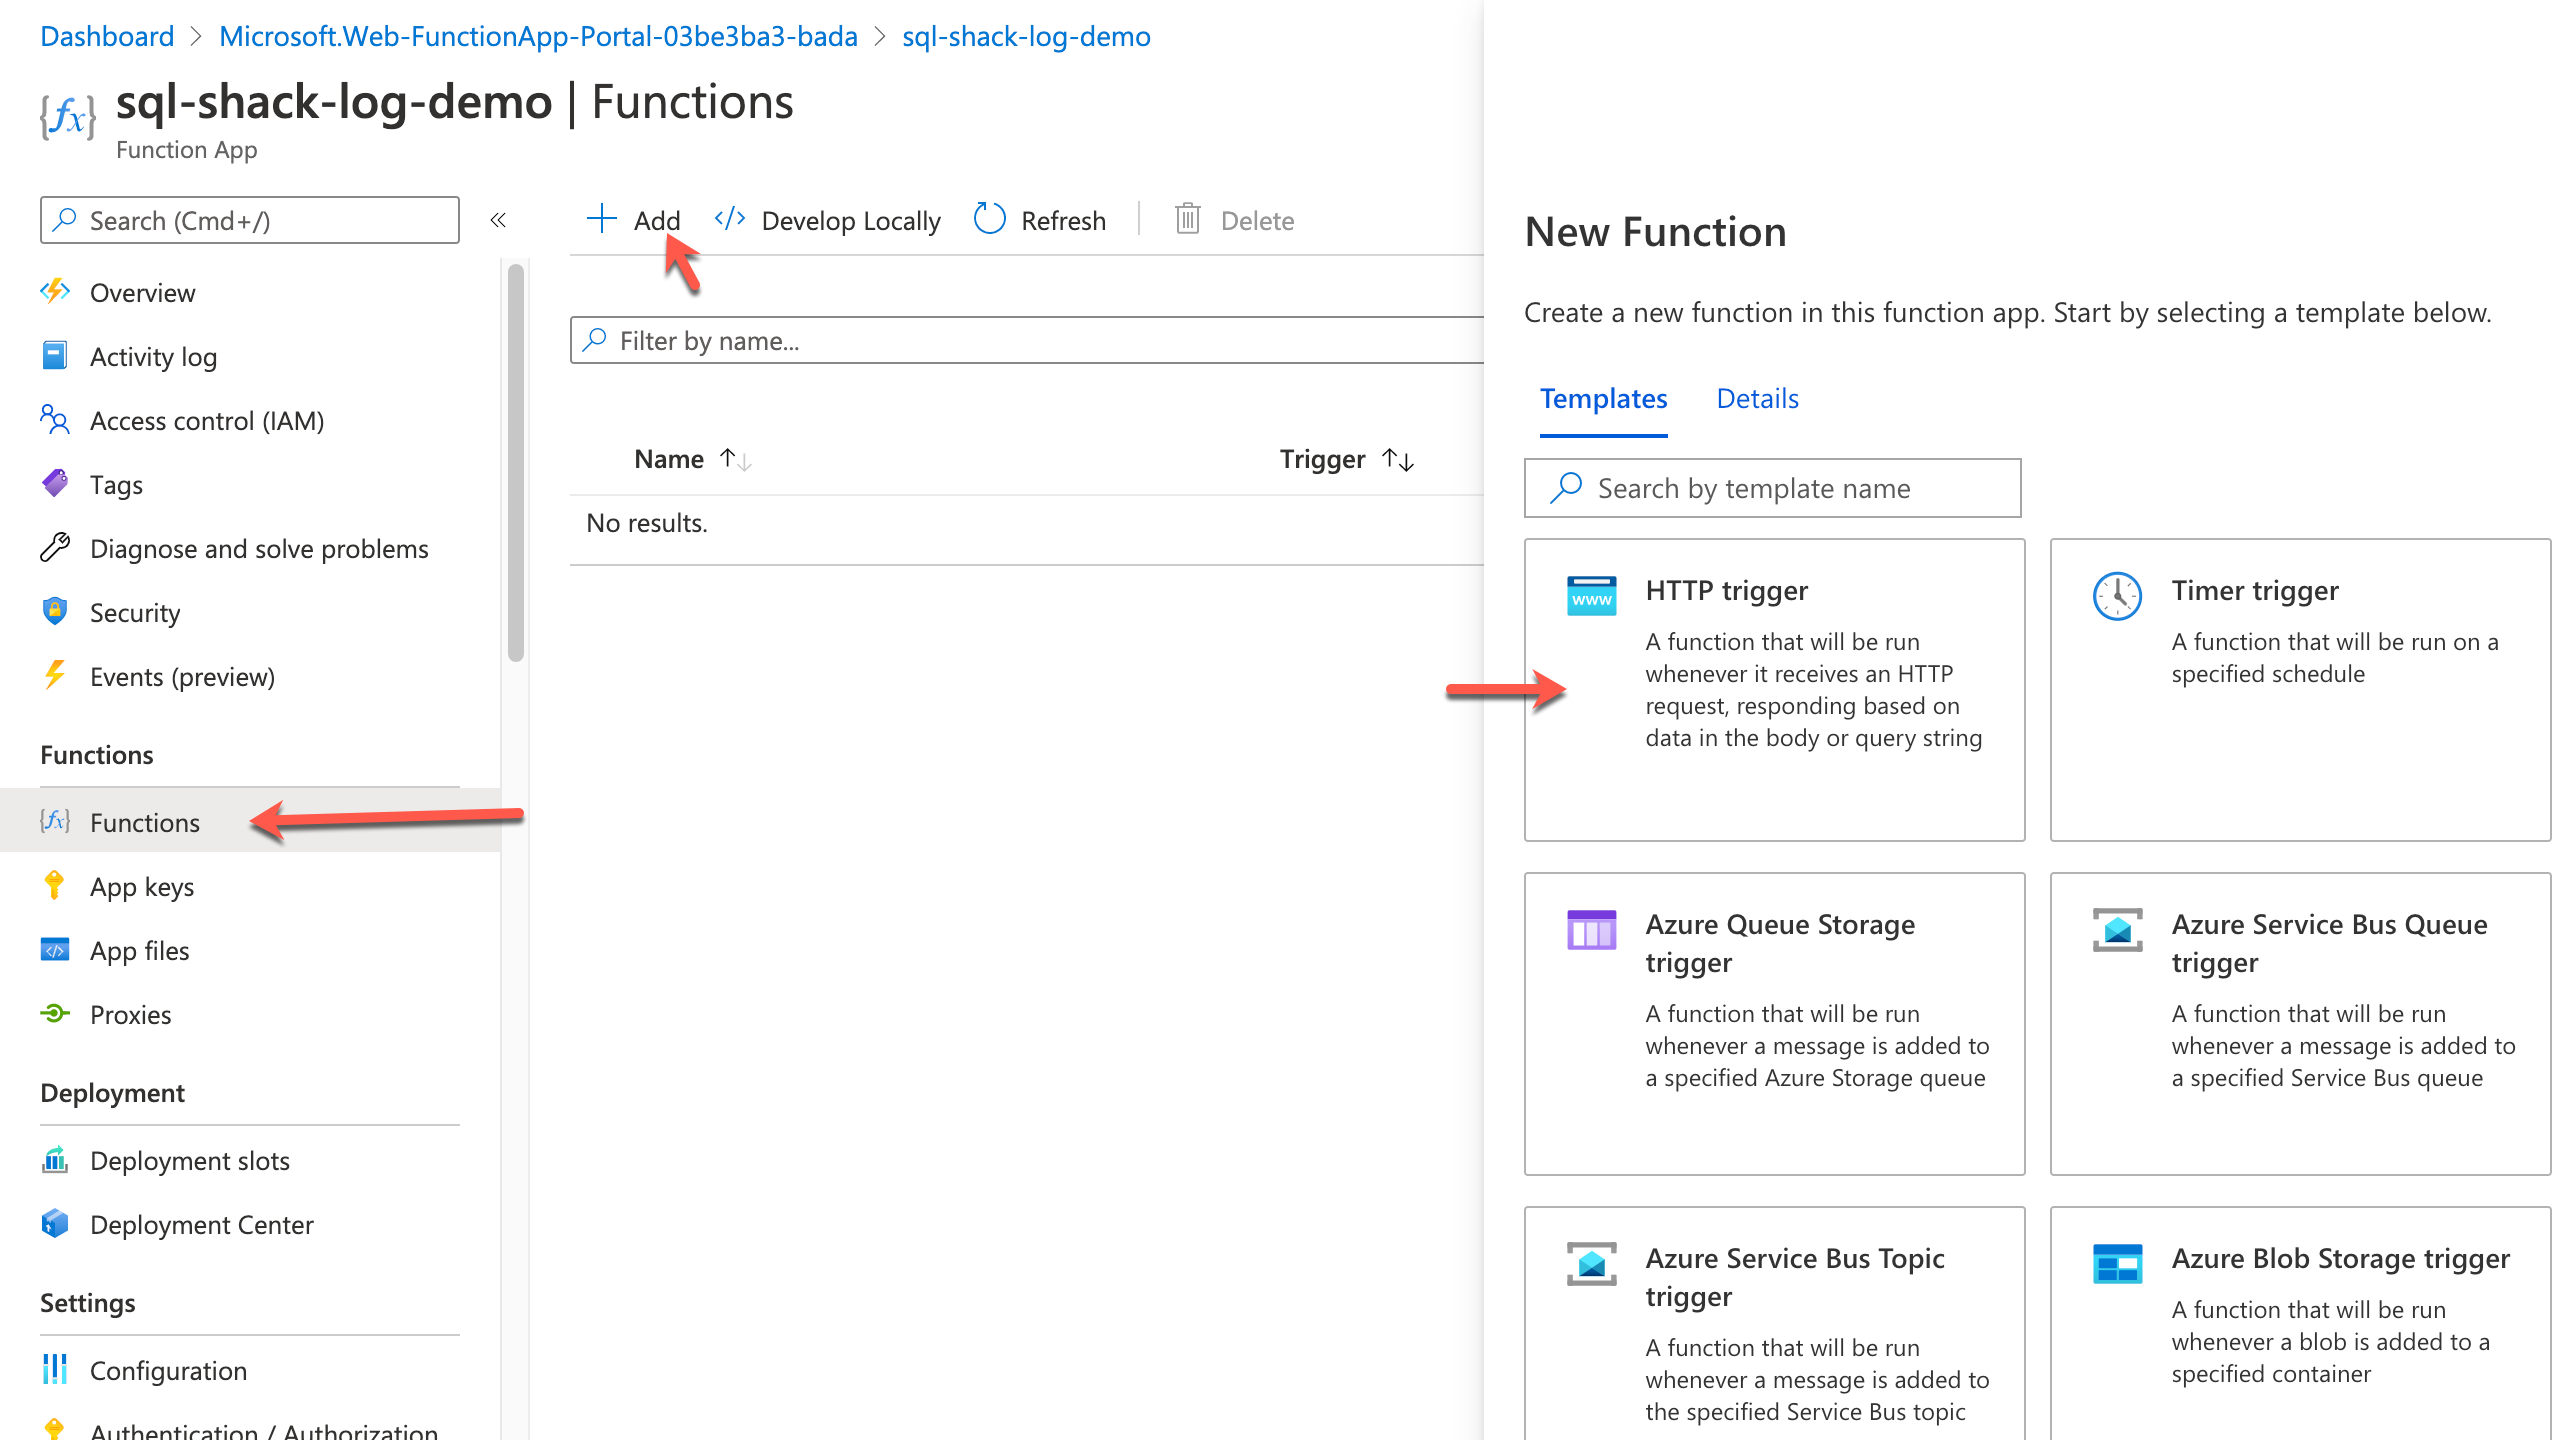
Figure 14 – Create a new Function App
Once you have created the function code, you can view and test it.
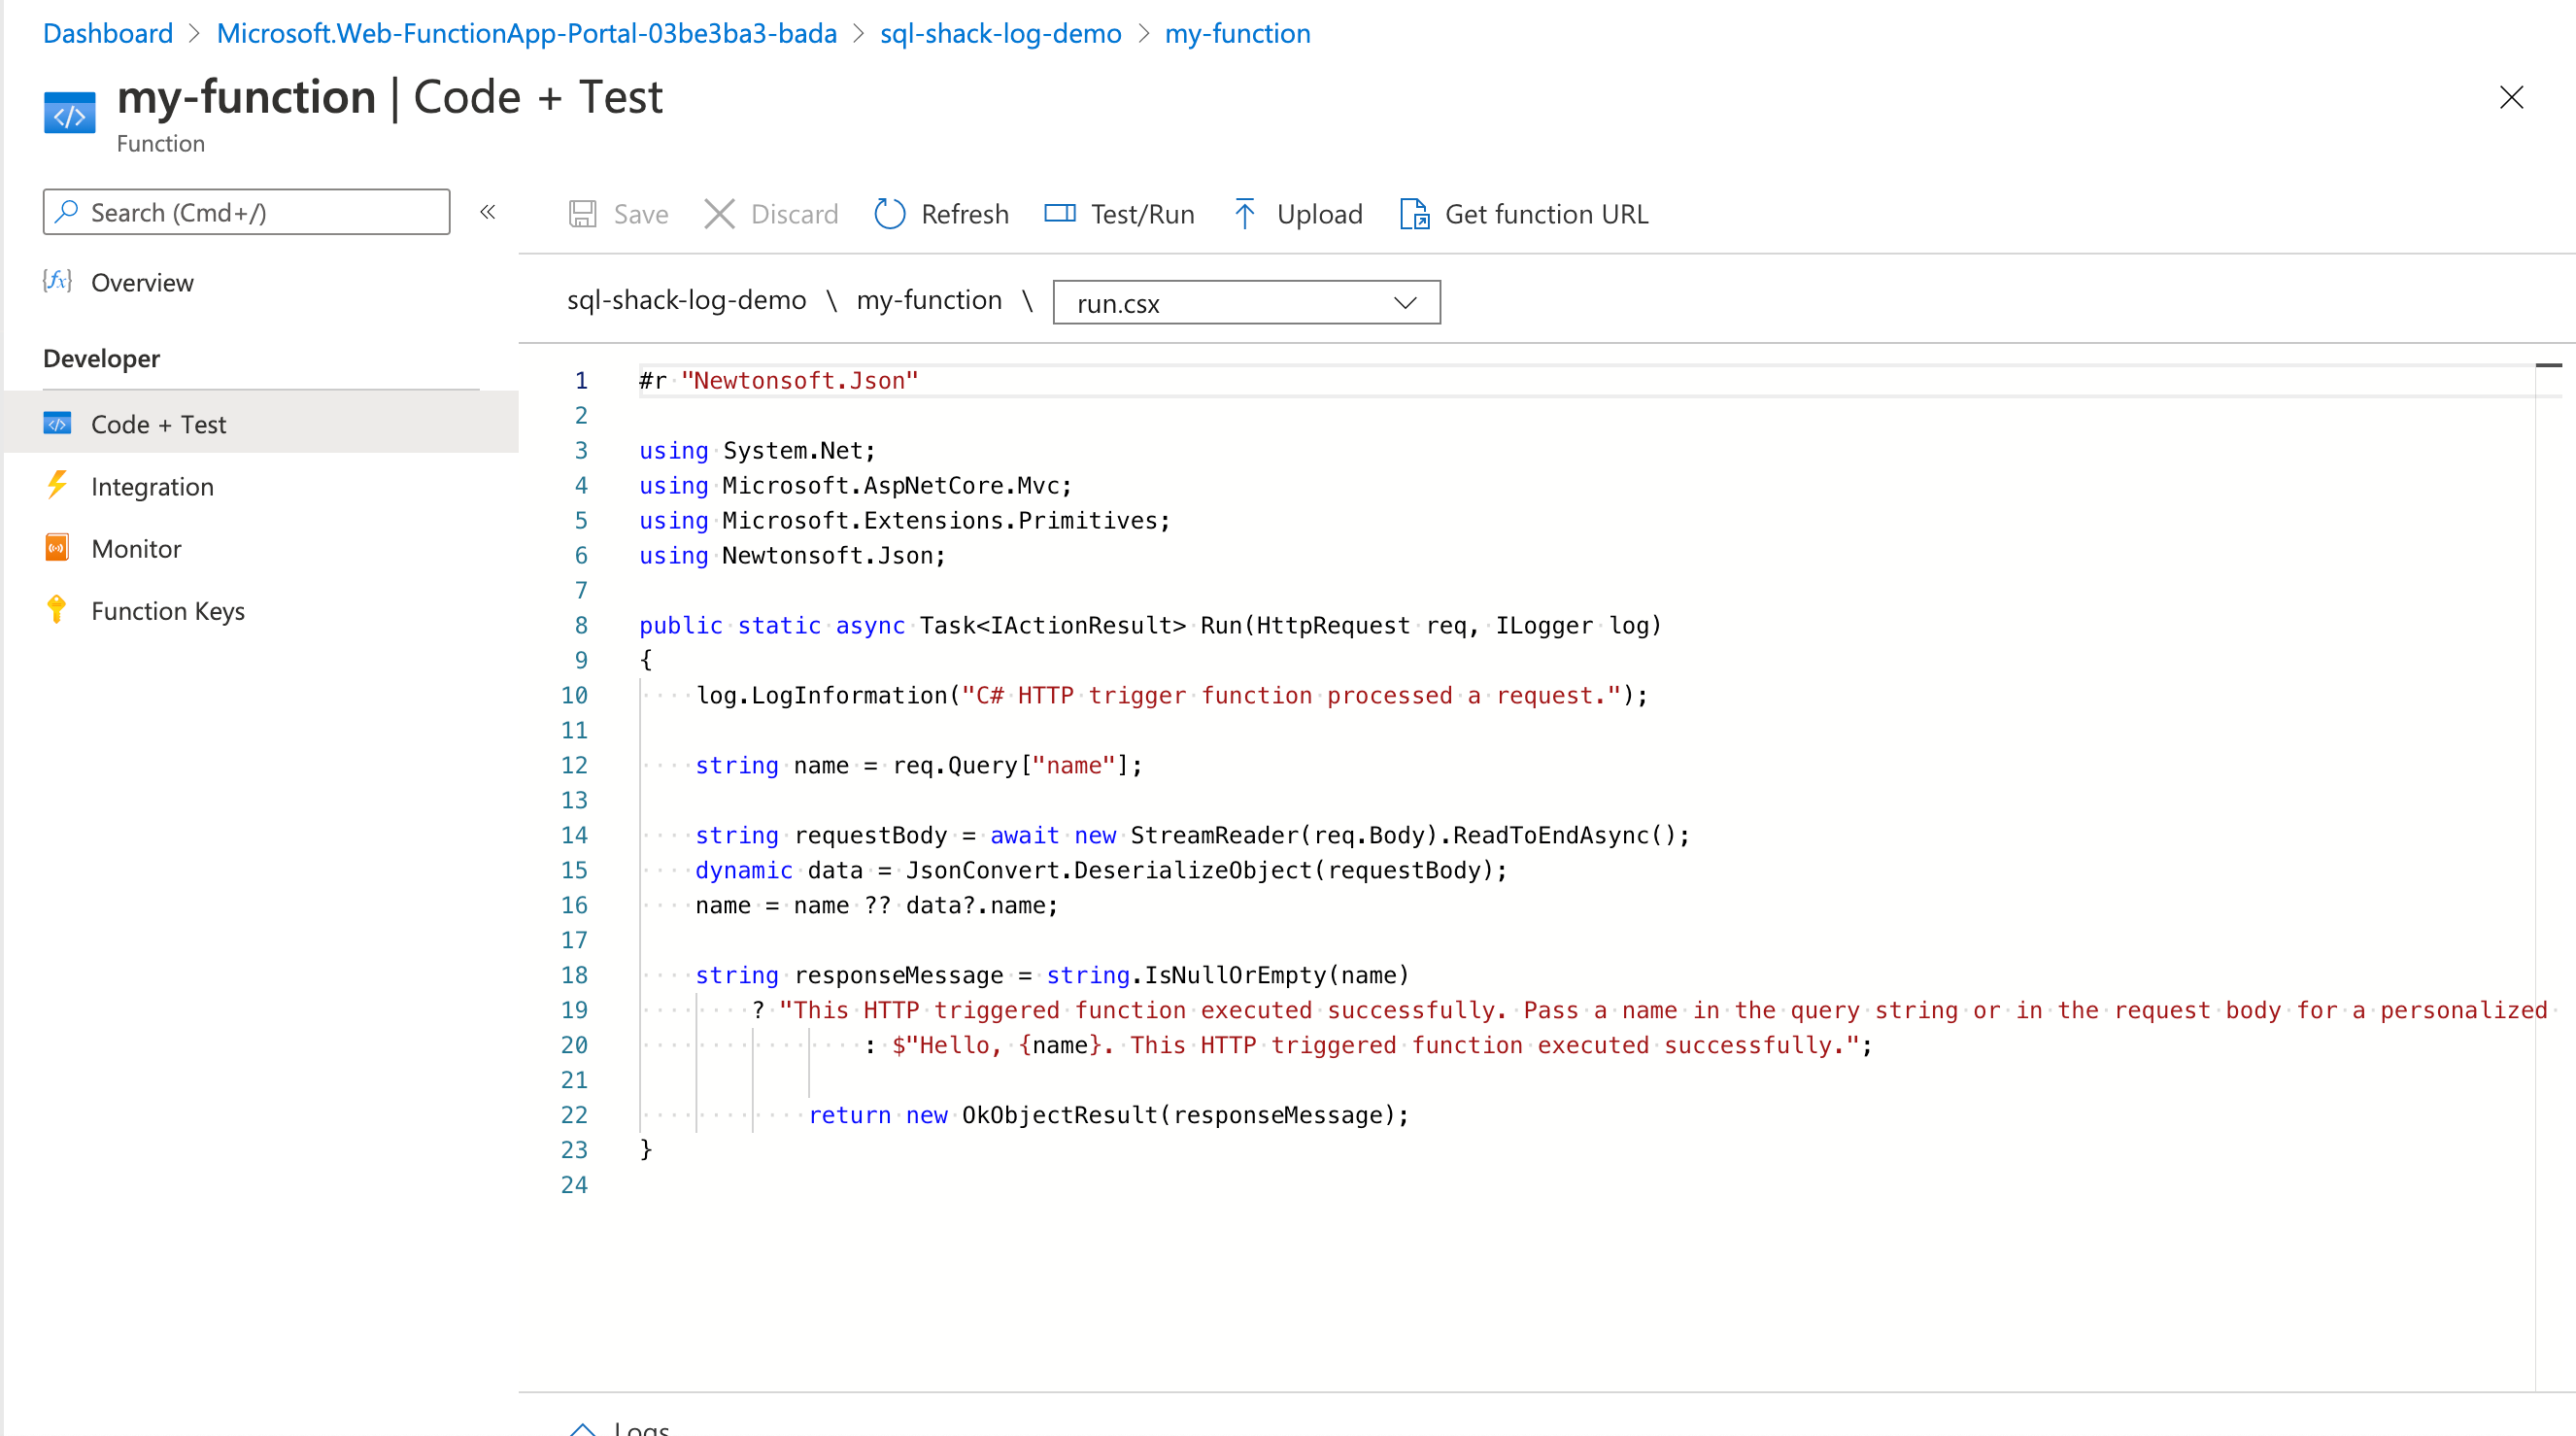
Figure 15 – Create the Function App Code
Click on the get function URL and paste it into the address bar of your browser. You can also append “&name=yourname” at the end of the query to display a personalized message.

Figure 16 – Function App Triggered

Figure 17 – Function App Triggered with Personalized Message
Now that the Function App has been set up successfully, let us customize the function to log a message to the Azure SQL Database every time we hit the URL.
Configuring the Function Locally
In order to connect the Function App to the Azure SQL Database, we need to install some dependencies. In this case, we need to import the System.Data.SqlClient into the app. Although this can be done using the browser, I prefer to use the Visual Studio Code to author the entire code and then deploy to Function App to execute. If you want to read how to author a function app using Visual Studio Code, please read my article, Deploy Python apps to Azure Functions using Visual Studio Code. This is related to creating python apps, however, the technique is the same for C# applications as well.
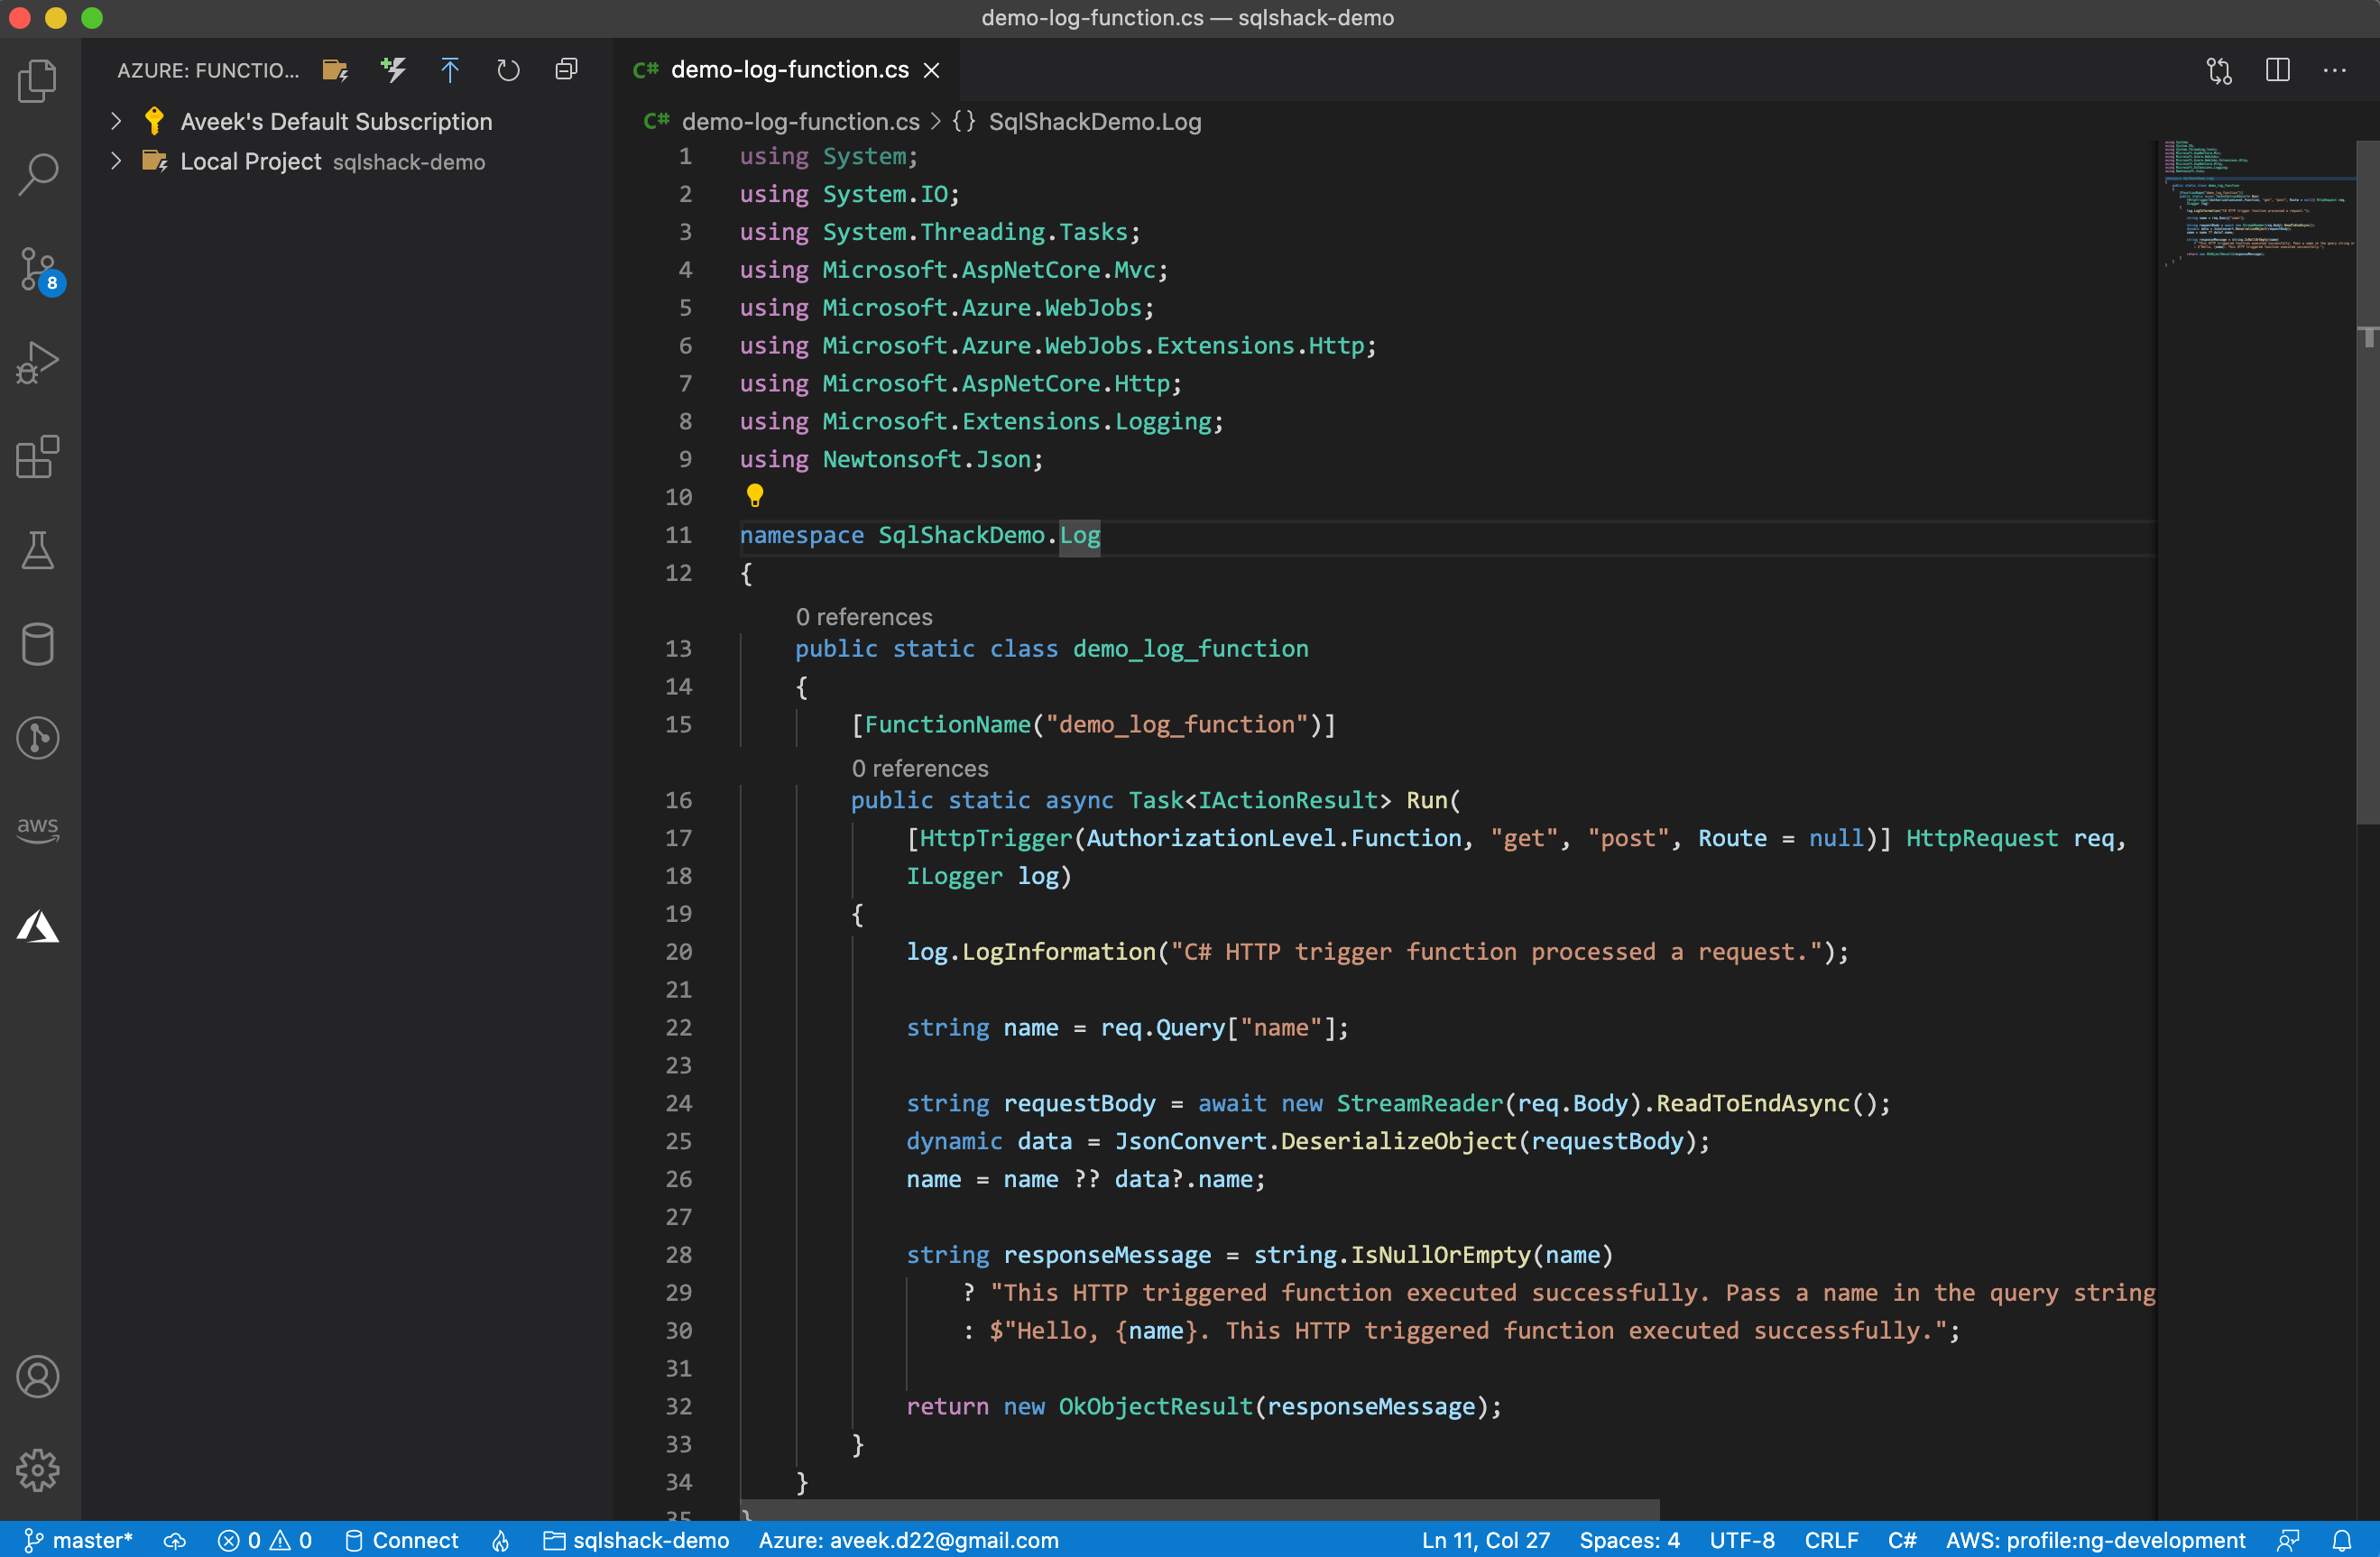
Figure 18 – Authoring application using Visual Studio Code
Once the app is deployed to Azure, you can test it by hitting the URL again.
Adding custom code for Database Connectivity
Now, I am going to modify the file and add a few lines of code that will extend the functionality to add log messages to the database whenever the function is triggered. You can use the following code and paste it while working. Please remember to update the connection string appropriately while applying the changes to your code.
|
1 2 3 4 5 6 7 8 9 10 11 12 13 14 15 16 17 18 19 20 21 22 23 24 25 26 27 28 29 30 31 32 33 34 35 36 37 38 39 40 41 42 43 44 45 46 47 48 49 50 51 52 53 54 55 56 57 58 59 60 61 62 63 64 65 66 67 68 69 70 71 72 73 74 |
using System; using System.IO; using System.Threading.Tasks; using Microsoft.AspNetCore.Mvc; using Microsoft.Azure.WebJobs; using Microsoft.Azure.WebJobs.Extensions.Http; using Microsoft.AspNetCore.Http; using Microsoft.Extensions.Logging; using Newtonsoft.Json; using System.Data.SqlClient; namespace SqlShackDemo.Log { public static class demo_log_function { [FunctionName("demo_log_function")] public static async Task<IActionResult> Run( [HttpTrigger(AuthorizationLevel.Function, "get", "post", Route = null)] HttpRequest req, ILogger log) { log.LogInformation("C# HTTP trigger function processed a request."); string name = req.Query["name"]; string requestBody = await new StreamReader(req.Body).ReadToEndAsync(); dynamic data = JsonConvert.DeserializeObject(requestBody); name = name ?? data?.name; string responseMessage = string.IsNullOrEmpty(name) ? "This HTTP triggered function executed successfully. Pass a name in the query string or in the request body for a personalized response." : $"Hello, {name}. This HTTP triggered function executed successfully."; //---------------------------------------------------------------------- // Adding custom code to log messages to the Azure SQL Database // Creating the connection string string connectionString = "Server=tcp:sqlshack-az-func-logs.database.windows.net,1433;Initial Catalog=sqlshack-az-func-log-db;Persist Security Info=False;User ID=sql-shack-user;Password=PLEASE_UPDATE_PASSWORD_HERE;MultipleActiveResultSets=False;Encrypt=True;TrustServerCertificate=False;Connection Timeout=30;"; // Using the connection string to open a connection try{ using(SqlConnection connection = new SqlConnection(connectionString)){ // Opening a connection connection.Open(); // Defining the log message and Create Date var logMessage = $"{name} has logged in."; var createDate = DateTime.UtcNow; // Prepare the SQL Query var query = $"INSERT INTO [ApplicationLogs] ([LogMessage],[CreateDate]) VALUES('{logMessage}', '{createDate}')"; // Prepare the SQL command and execute query SqlCommand command = new SqlCommand(query,connection); // Open the connection, execute and close connection if(command.Connection.State == System.Data.ConnectionState.Open){ command.Connection.Close(); } command.Connection.Open(); command.ExecuteNonQuery(); } } catch(Exception e){ log.LogError(e.ToString()); responseMessage = e.ToString(); } //------------------------------------------------------------------ return new OkObjectResult(responseMessage); } } } |
When you deploy this code to the Function App in Azure and run it using the browser, you can check the records inserted by the application into the Azure SQL Database.

Figure 19 – Running the latest code
We can select data from the SQL Database and verify the same.
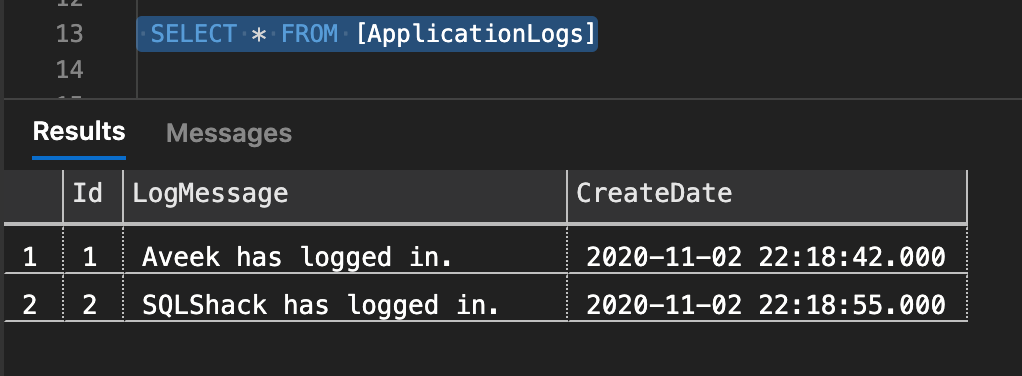
Figure 20 – Verifying the log messages
Conclusion
In this article, we have understood how to build an application using Functions App in Azure and write logs to Azure SQL Database. Logs are an essential part of any live application as these messages enable us to troubleshoot in case of any issues with the system. You can choose any data store to send your logs to, however, most cloud providers like AWS and Azure come with a pre-built monitoring service where you can easily store and view your logs. There are also some visualization tools, using which you can create fancy graphs and charts based on these log messages.

He is a prolific author, with over 100 articles published on various technical blogs, including his own blog, and a frequent contributor to different technical forums.
In his leisure time, he enjoys amateur photography mostly street imagery and still life. Some glimpses of his work can be found on Instagram. You can also find him on LinkedIn
View all posts by Aveek Das
- Getting started with PostgreSQL on Docker - August 12, 2022
- Getting started with Spatial Data in PostgreSQL - January 13, 2022
- An overview of Power BI Incremental Refresh - December 6, 2021