
In this article, I am going to explain what a REST API is all about and how to get started with creating APIs in Python using Flask. In the recent software world, REST APIs play a major role as a communication channel between different services. It has become the de facto standard of passing information across multiple systems in the JSON format. This is because it has a uniform interface to share messages across two different systems. Let us learn more about REST APIs in this article.
What is a REST API?
REST stands for Representational State Transfer which means when a client machine places a request to obtain information about resources from a server, the server machine then transfers the current state of the resource back to the client machine.
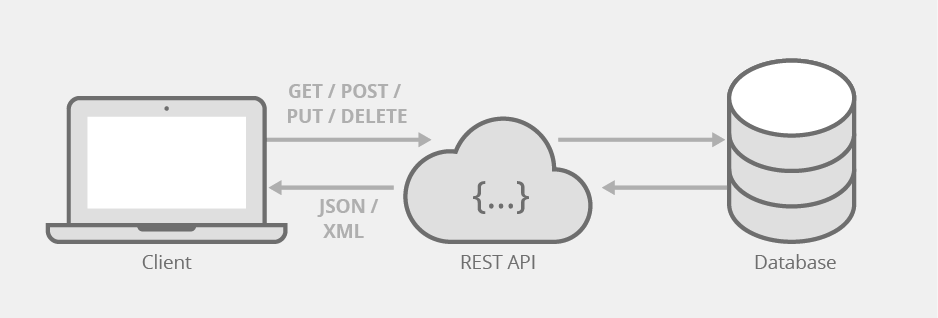
Figure 1 – Representational State Transfer Diagram (Image Author: Seobility (REST-API), License: CC BY-SA 4.0)
As you can see in the figure above, the client machine is just your PC from where you can request data from a database server and all the communication is done over the REST APIs. There are a few methods in this which are as follows.
- GET – Used by the client to select or retrieve data from the server
- POST – Used by the client to send or write data to the server
- PUT – Used by the client to update existing data on the server
- DELETE – Used by the client to delete existing data on the server
Now, the server is not only limited to a database but can also be another machine that reads and writes data from a flat file or any other data store.
You can follow this article to learn more about REST APIs. Some of the most popular REST APIs available to work with are available from Twitter, Instagram, Spotify etc.
How a REST API is created and tested
APIs can be created using any programming language of your choice like Java, C#, Python, etc. In this article, we are going to use Python to create an API and for that, we are going to leverage a library known as Flask to build the APIs. Flask is a popular light-weight web application development framework that does most of the heavy lifting to create a server for us and we as developers only need to focus on the business logic for creating the APIs.
Now, in order to consume these APIs, also known as endpoints, we need a client to place requests from. Typically, the client is supposed to be another application or machine that is going to request the server for resources. However, it is not always possible to develop an entire application to test your APIs. For that purpose, we have another tool, Postman, that will help us test our endpoints once we are done with the development. I would advise you to download and install Postman on your machine before continuing the next part of the article.
Creating the REST API using Flask in Python
Now that we have some idea about what an API is and how it works, let us try to get our hands dirty by creating one using Flask and then test it using Postman. For the sake of simplicity, we are going to read and write data to a CSV file that contains information about users. The structure of the CSV file is as below.
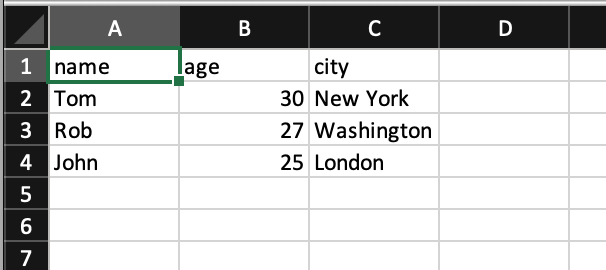
Figure 2 – CSV File Structure
- name – includes the name of the user
- age – includes the age of the user
- city – the city of the user
Import the modules and initialize an application
Let us now start writing our code by importing the Flask modules and initializing the web application. You can use the following snippet to initialize the application – flask_initialize.py
Creating the REST API endpoints
After the program has been initialized, the next step is to write the code for the endpoints that will allow us to consume the APIs. As we have already seen that we are going to read and write data from only one file i.e. users.csv, we will have only one endpoint for now. The URL for this endpoint can be reached by localhost/users if you are testing on your local machine, or www.yourwebsite.com/users once you deploy it to a web server.
In order to let Flask know which code to execute when the above endpoint is called, we need to write our code block in a Python class and then add the resource that tells Flask which class to bind with which endpoint.
If you see the above snippet, you can see that we have defined a new class with the name “Users” and initialized some methods inside the class. These are methods to implement the get, post, and delete methods to perform operations on the CSV file. Once the class is created and the methods defined, Flask needs to know which endpoint this particular class should bind to. In other words, when the “/users” endpoint is called, Flask needs to know, which class should it route to in order to execute the requested operation. This is achieved by using the method add_resource and passing the class and the endpoint to it. In case you have more than one endpoint, you can simply add more classes to your code and then add resources as required.
Writing methods to read and write data in the CSV file
Now that we have created the class and binded the endpoint, the next step is to write the individual methods to read, write, update or delete data from the CSV file. In order to read data from the CSV file, we are going to use another library Pandas, which will make our life easier to deal with data from flat files. You can read more about Pandas from my Getting started with Pandas in Python article.
As you can see in this snippet, there are three methods to fetch, write and delete records from the CSV file. I have explained the methods as follows.
- get : This is the most simplest one. It reads data from the CSV file, converts it into a Python dictionary object, and then returns it to the client. The status code is 200 which shows the request was successful
- post : This method is used to create a new user in the file. In order to create a new user, you need to pass the name, age, and city of the user as a parameter while calling the API endpoint. These parameters are then parsed, and a new dataframe is created to store this data. It is then appended to the end of the file. The status code returned here is 201, which means the resource was created successfully
- delete : This method is used to delete records from the file. Usually, while doing such operations, you need to pass in a unique identifier field, however, for the sake of the article, we will just pass the name of the user and it will be removed from the file
Finally, when all the methods are written, the last step is to run the application and start the web application. This can be done by implementing the following code. You can find the entire code here. Run the application after implementing all the code.
This will run the web application on the development server. You can see the URL endpoint on the console as follows.
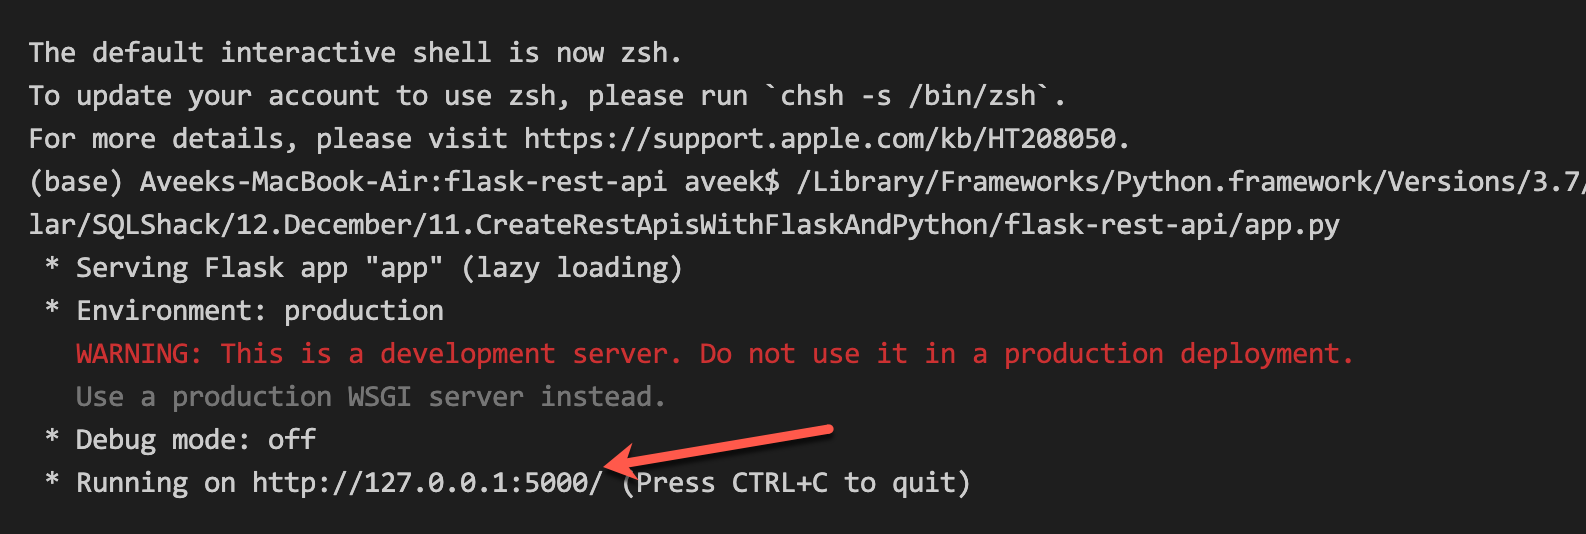
Figure 3 – Running the web server on the local machine
Testing the endpoints using Postman
Now that the web application server is up and running, we can start testing out REST API endpoints using Postman. Create a new GET request in postman with the information as shown in the figure below.
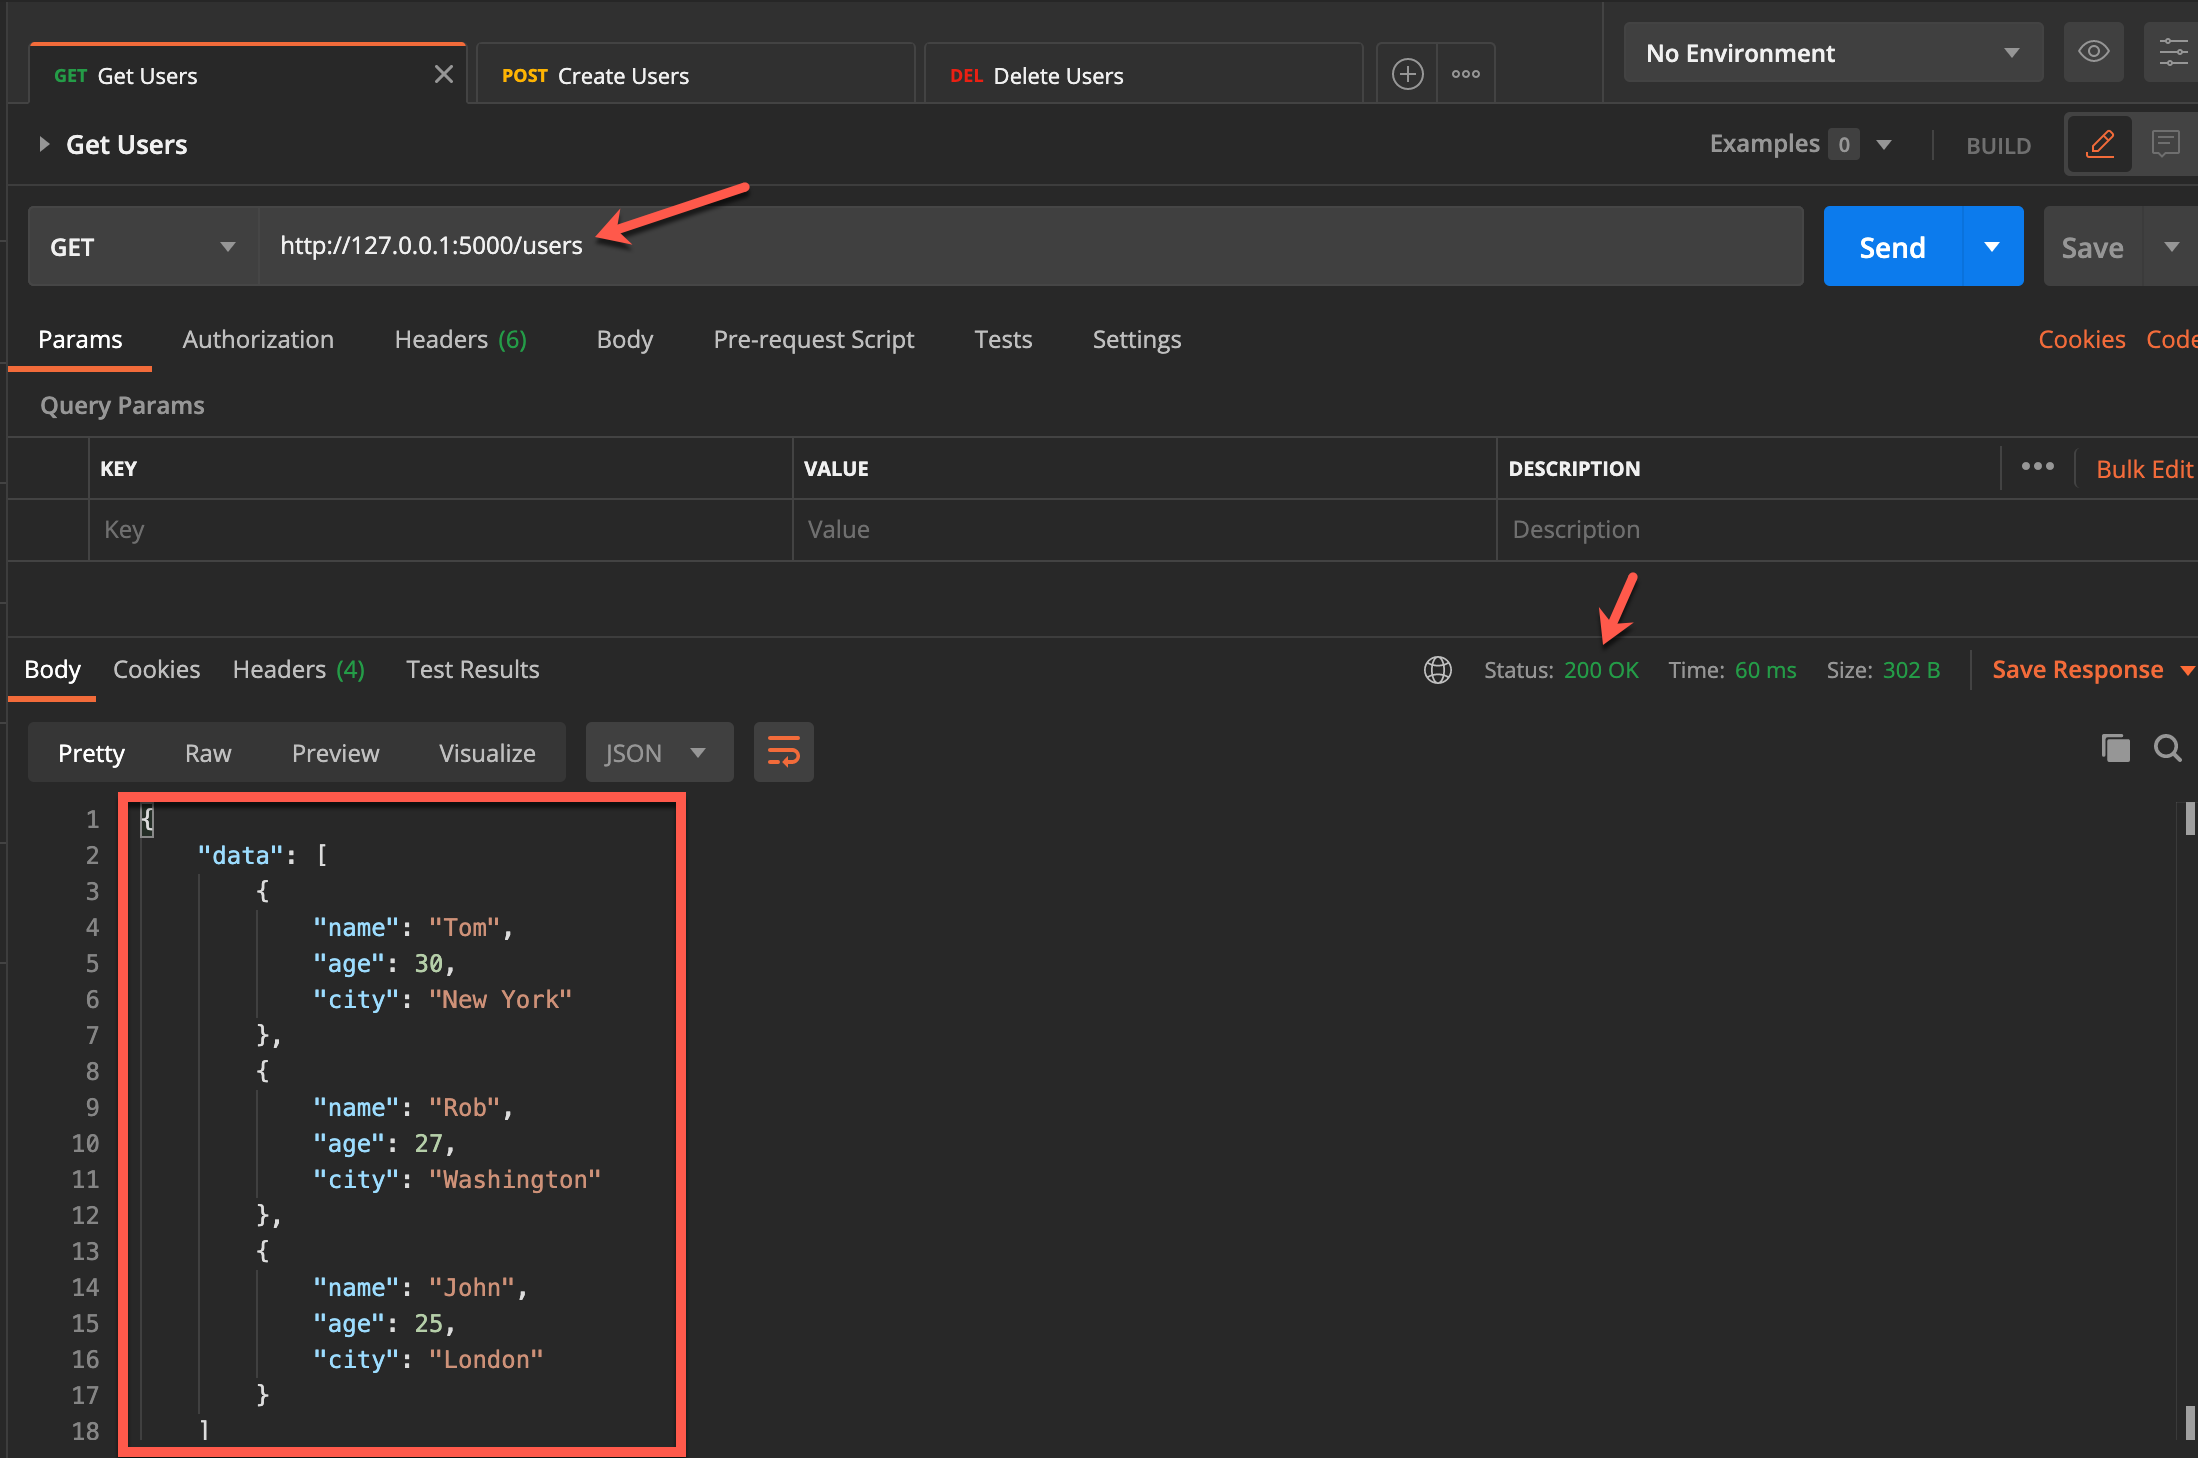
Figure 4 – Testing the GET method
As you can see in the figure above, the endpoint for the URL is http://127.0.0.1:5000/users which returns the data from the users.csv file with a status of 200.
Similarly, if you want to add a new user to the file, you can use the post method and provide the details as parameters to the URL.
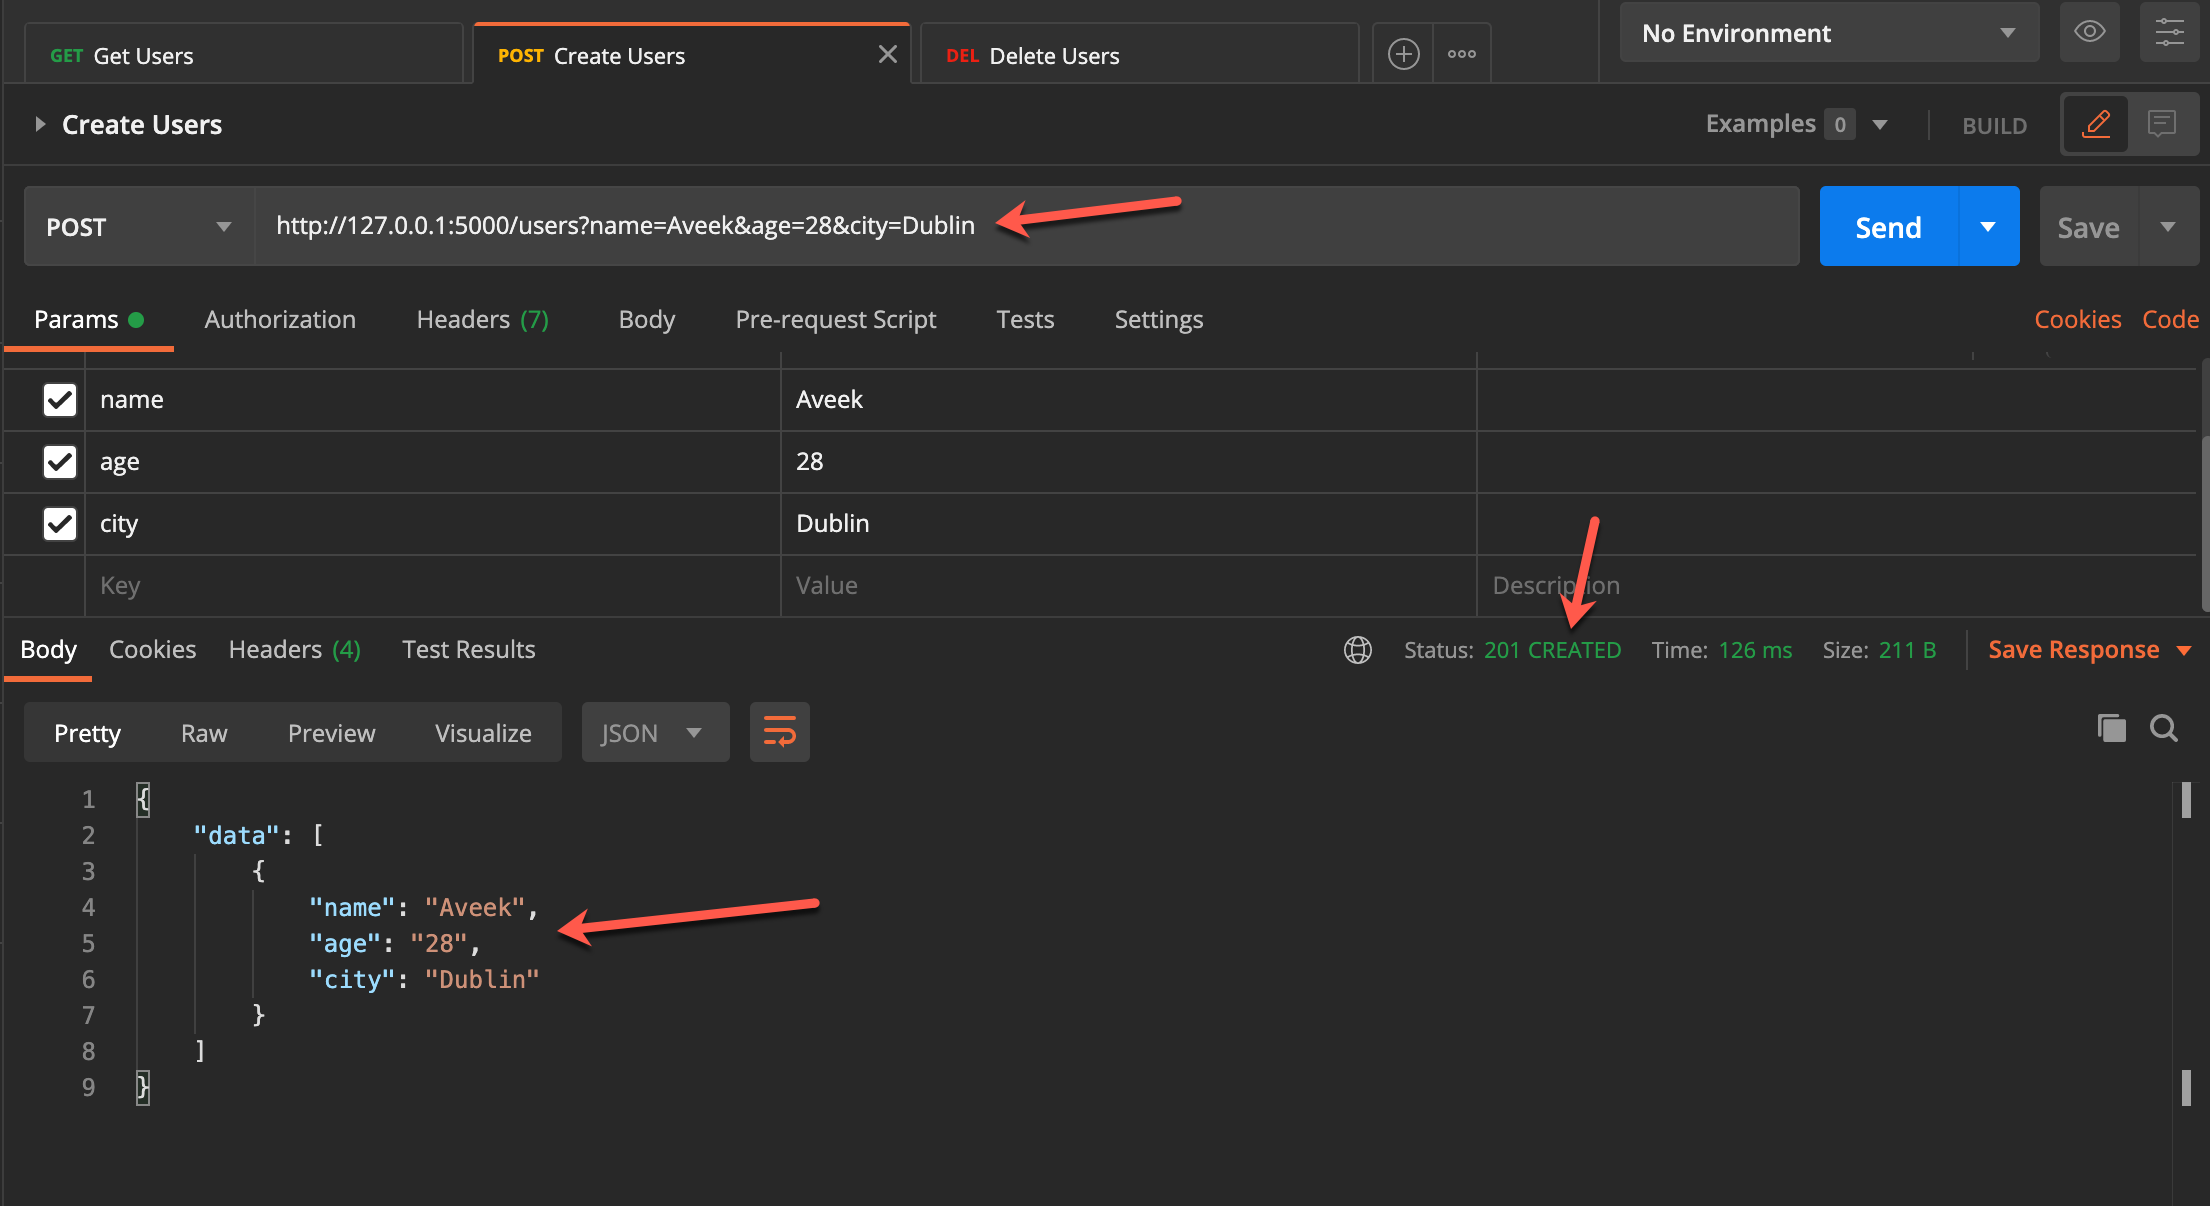
Figure 5 – Created a new user in the CSV file
You can also verify the users.csv file if the data has been added to it.
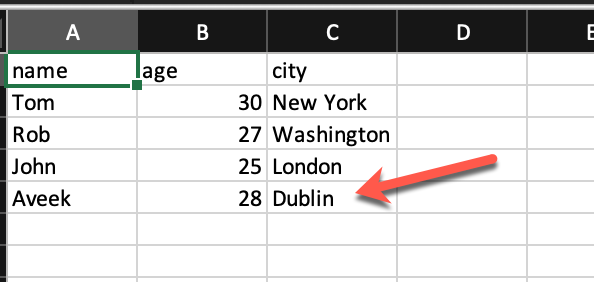
Figure 6 – New user added
Finally, let us also try the delete method to remove users from the file.
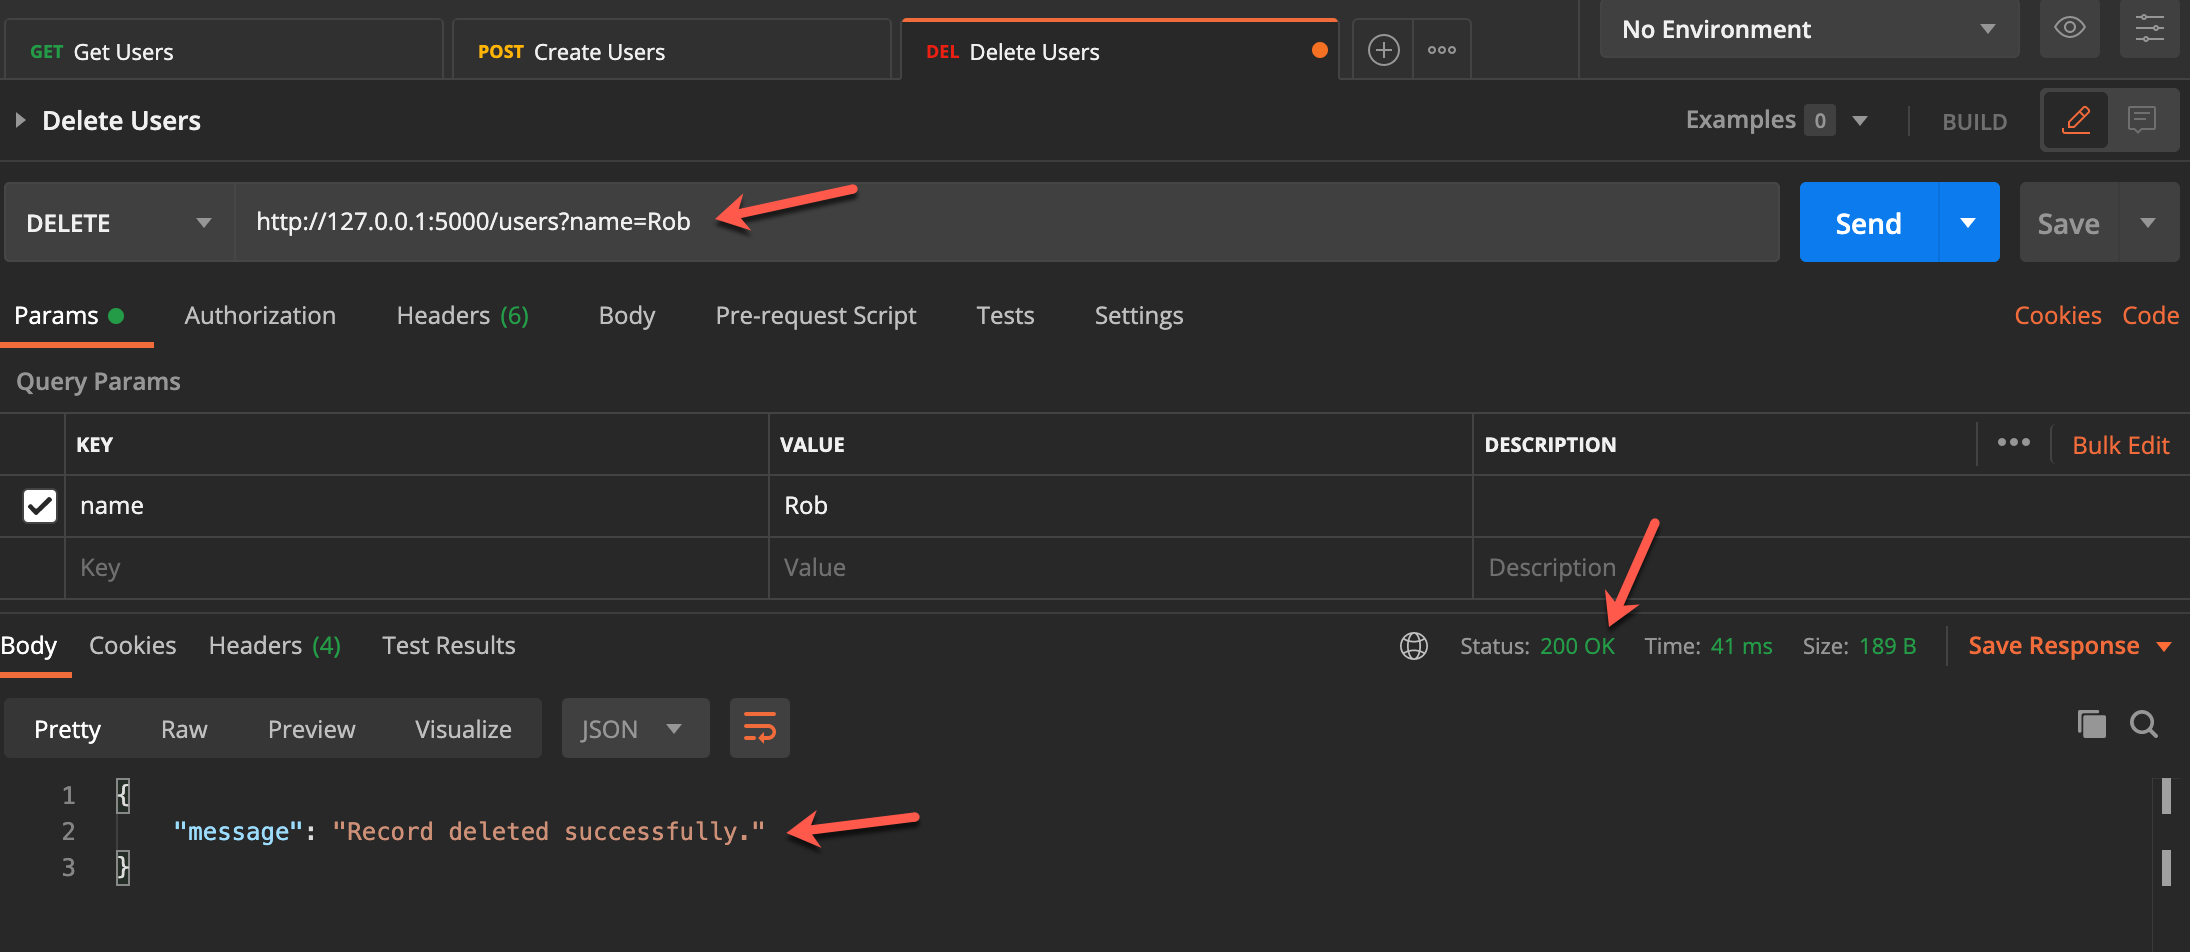
Figure 7 – Deleting users from the file
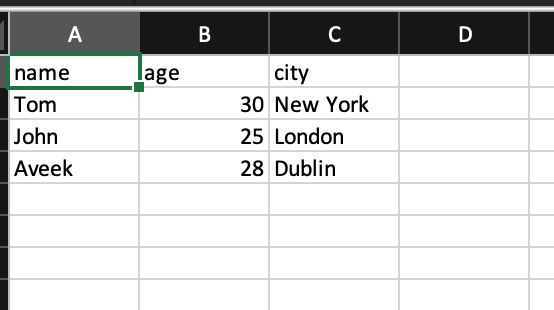
Figure 8 – User deleted from the file
Conclusion
In this article, we have understood what a REST API is and how to create one using Flask in Python. The example demonstrated in the article is quite a simple one and it can be extended from here to implement multiple classes, endpoints, and security features. REST APIs are an excellent way of communication between multiple systems and I think every engineer should have a solid foundation and understanding of how these APIs work.
Table of contents

He is a prolific author, with over 100 articles published on various technical blogs, including his own blog, and a frequent contributor to different technical forums.
In his leisure time, he enjoys amateur photography mostly street imagery and still life. Some glimpses of his work can be found on Instagram. You can also find him on LinkedIn
View all posts by Aveek Das
- Getting started with PostgreSQL on Docker - August 12, 2022
- Getting started with Spatial Data in PostgreSQL - January 13, 2022
- An overview of Power BI Incremental Refresh - December 6, 2021