

In this article, I am going to explain how to get started with Azure Function Apps. In my previous article, An introduction to Serverless Applications, I have mentioned the serverless architecture and the various cloud offerings to develop serverless applications. As we know, in serverless architecture, the users only write the business logic code, and all other worries are taken care of by the cloud provider. This helps businesses to quickly implement solutions and ship it to customers with more quality. Also, another important point about serverless applications is that they are scalable on-demand, which means as a developer, we no longer need to monitor or manually pull up the resources when the executions are more.
Let’s go ahead and understand the serverless application framework provided by Microsoft Azure, known as Azure Function App.
Prerequisites
There are a few prerequisites that we must be aware of before creating an Azure Function App. These are as follows:
- A valid Azure account with a subscription
- A Service Plan within which the function is to be created and executed. Usually, there are two types of service plans, App Service Plan and Consumer Service Plan. App Service Plan allows the user to continuously run the code on a virtual machine that is defined by the user, whereas the Consumer Service Plan bills only for the duration of which the function runs. There is also a timeout set, which is, by default, set to 5 minutes for these functions
- A Storage Account in Azure, which will be linked to the Function App and can be used to store information such as logging and managing triggers, etc. We can also use this storage account to store the configuration files for this function
Creating the Azure Function App
There are three ways in which we can create a Function app:
- Using the Azure portal https://portal.azure.com
- Using the Azure CLI (Command Line Interface)
- Using a code editor, like Visual Studio Code
In this article, we will explore the first option, that is, using the Azure portal. Let us sign in to the Azure portal by visiting https://portal.azure.com and search for Function App.
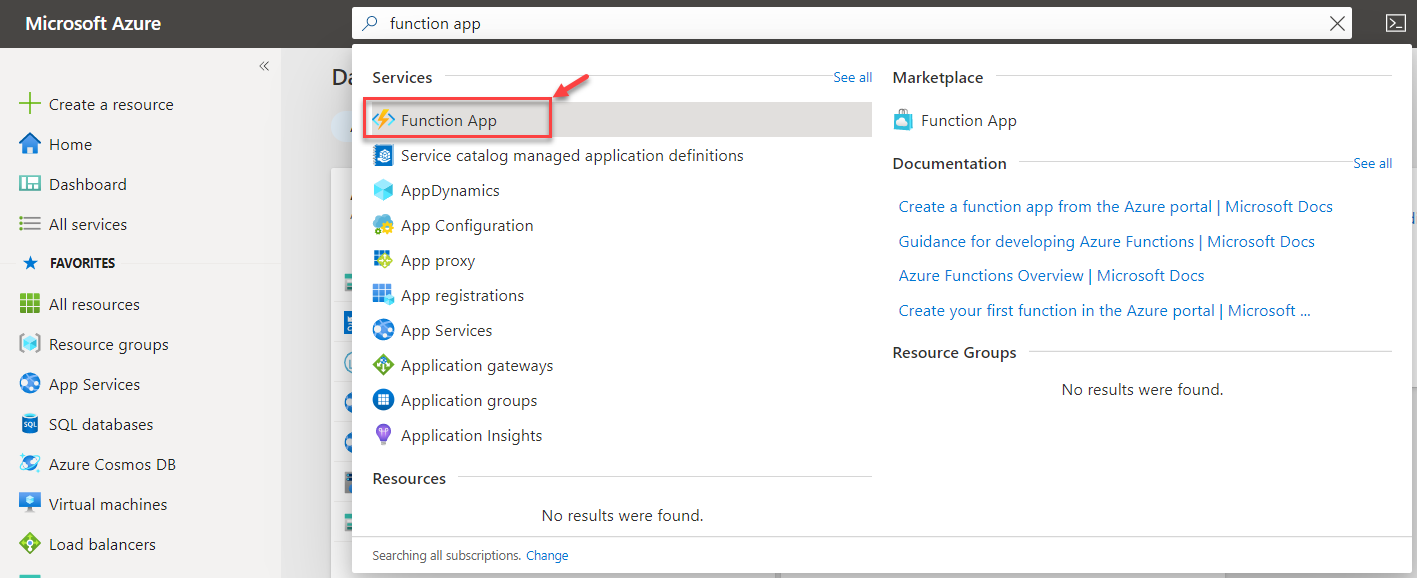
Figure 1 – Search in the Azure Portal
The Function App dashboard opens up, which is as below. Since I do not have any function already created, therefore the dashboard is empty. Otherwise, it will display a list of all the available functions that are created in this account.
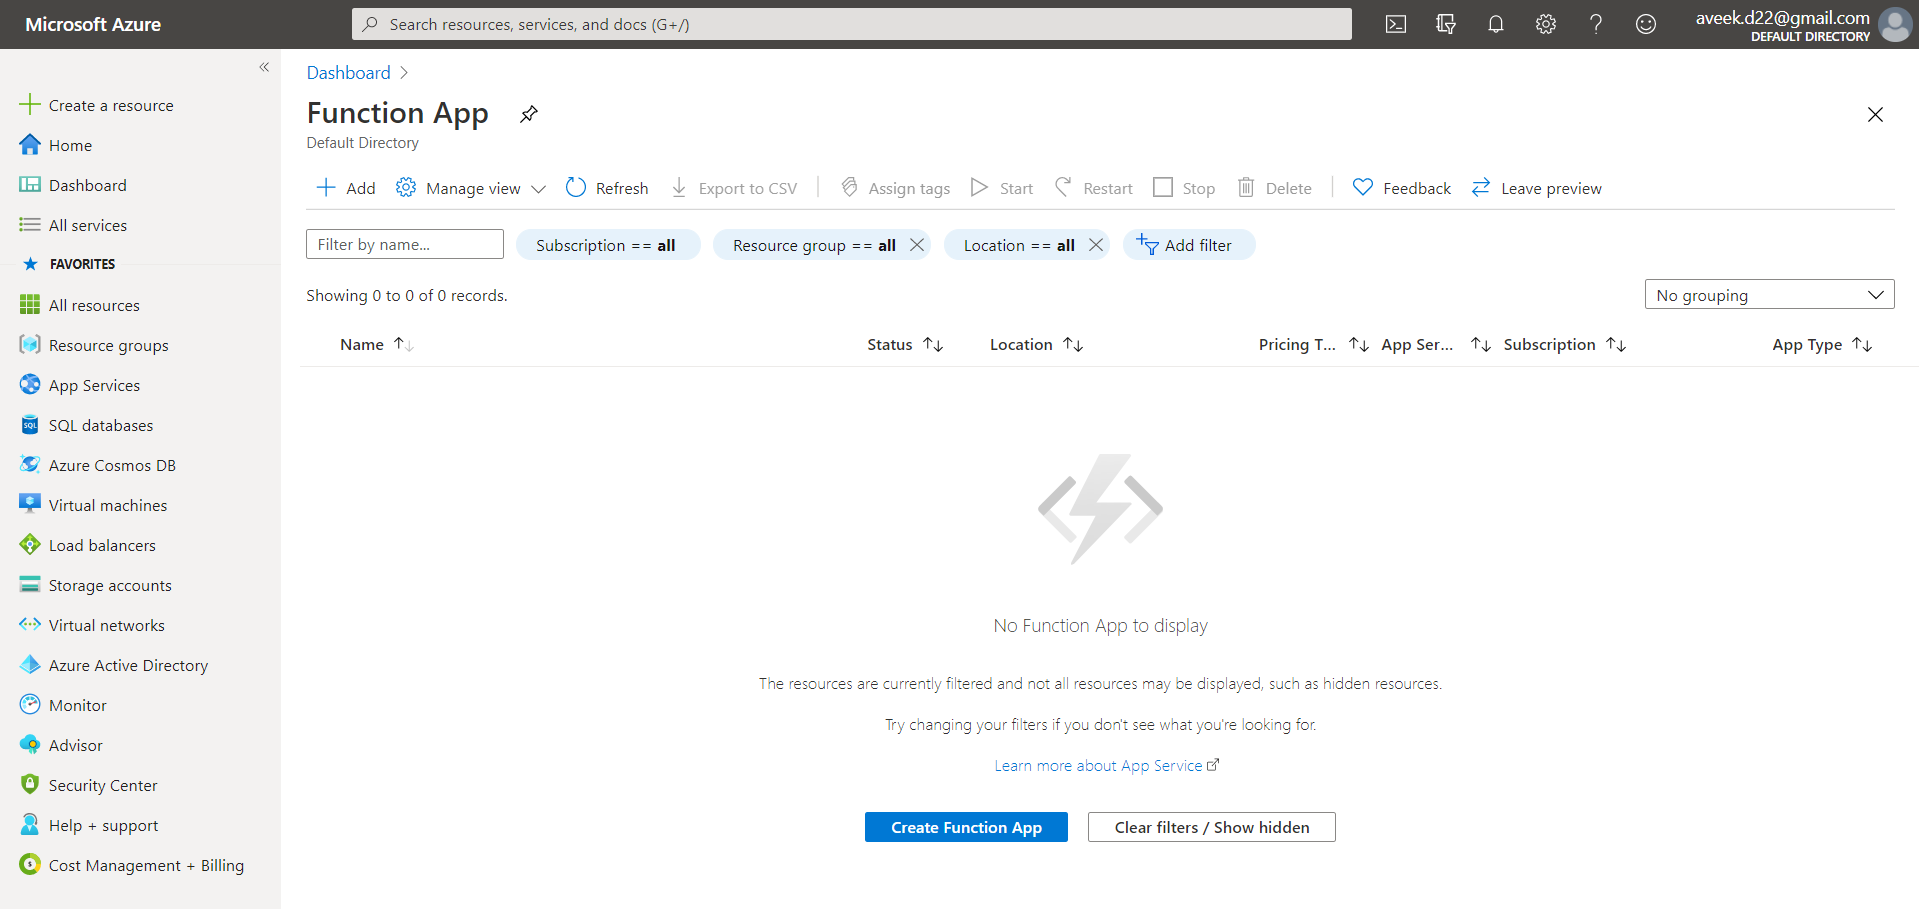
Figure 2 – Dashboard to list all the Azure Function App
Click on Add on the top, or you can also click on the Create Function App button to start creating the application.
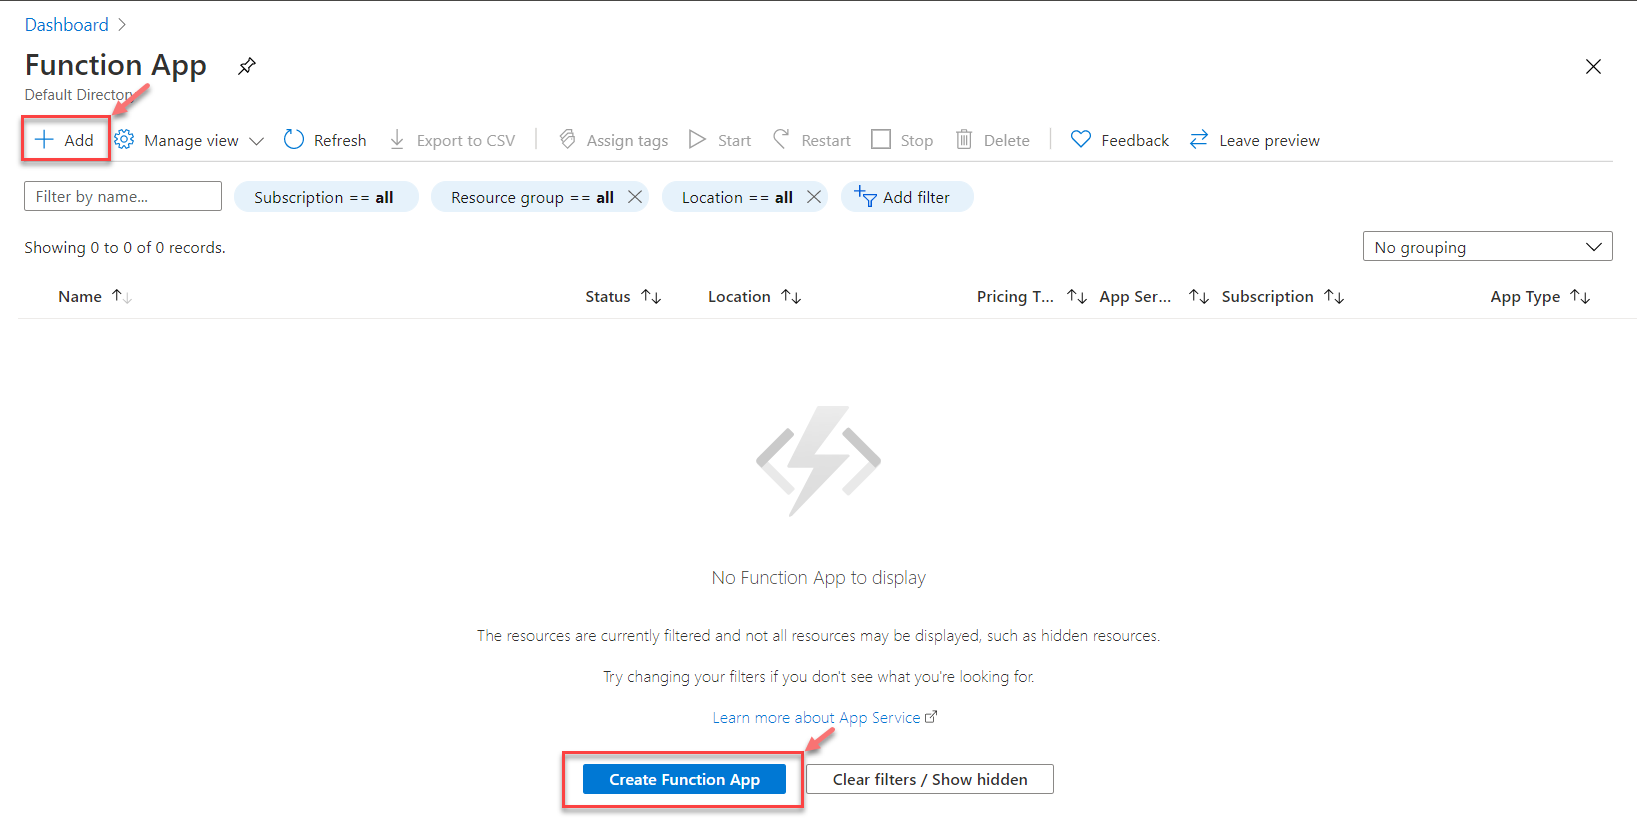
Figure 3 – Creating the Azure Function App
On the next page, you will need to provide a few configuration details about how you would like to create the function and its name along with a few other parameters. The first option here is to select the subscription account under which the function is to be created. You may consider this as a logical grouping for your billing management. I have a default subscription, which I am going to select and proceed forward.
The next parameter here is to select the resource group. The resource group is also a logical group and can be used to group various resources that belong to the same solution. You can select a pre-existing resource group or proceed by creating a new one as follows.
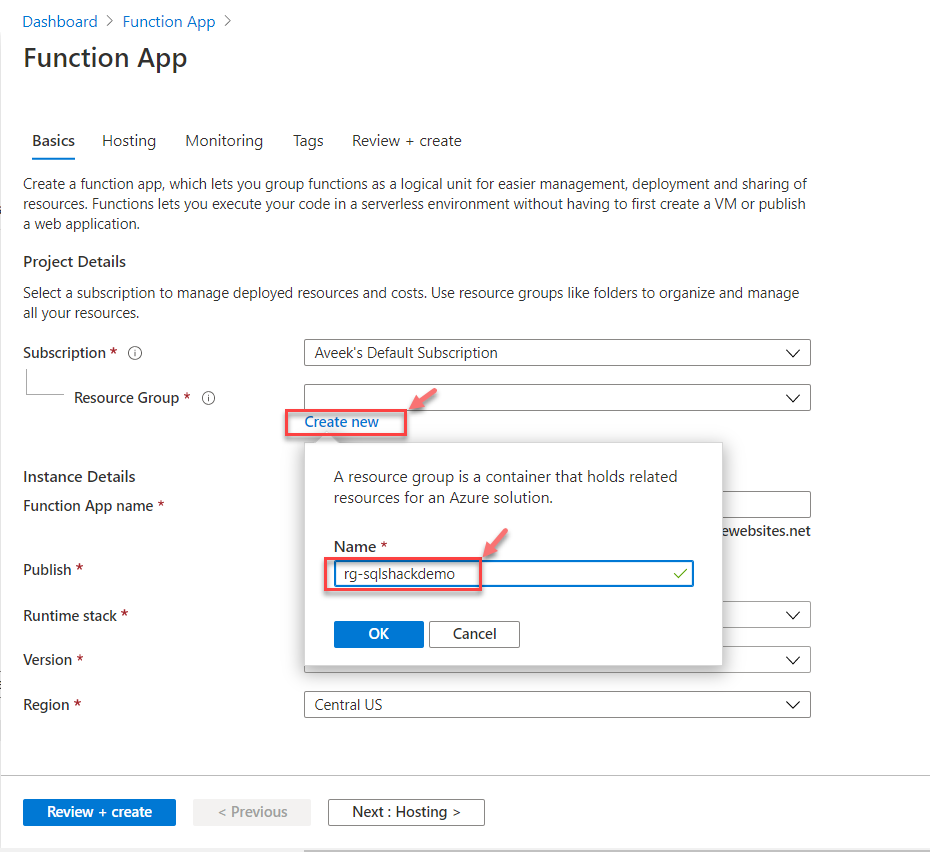
Figure 4 – Creating a new Resource Group
Once the resource group is created, we can move ahead with the other parameters. The next important point here is to provide a valid name for the function. Remember that this name has to be globally unique as it is going to be used as a part of the base URL.
Select the Publish option as Code and Runtime Stack as .NET Core. You can choose any other runtime stack based on your preference. Finally, you must select the region in which you want to deploy your function. As a best practice, the function should be deployed to a region nearer to where your customer is based upon. In my example, I am going to select the region as West Europe.
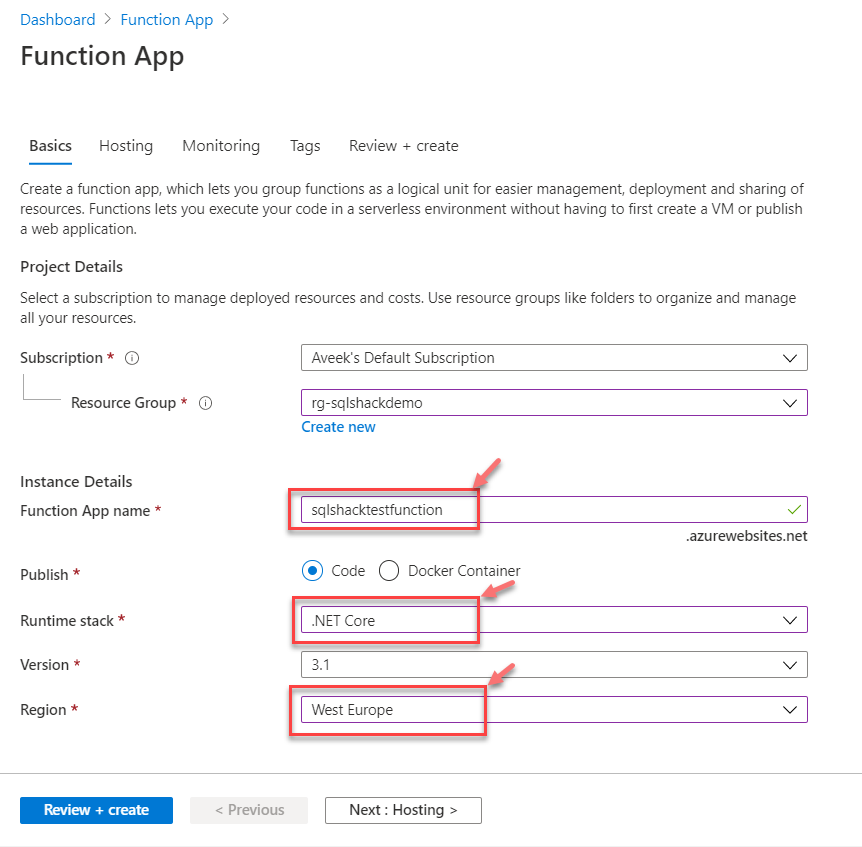
Figure 5 – Creating the Azure Function App
Once all this information is filled up, click on Next: Hosting and set up the hosting related parameters there.
Here we need to define the storage account details, which will be used by our function. If you already have a storage account, you can use that or create a new one.
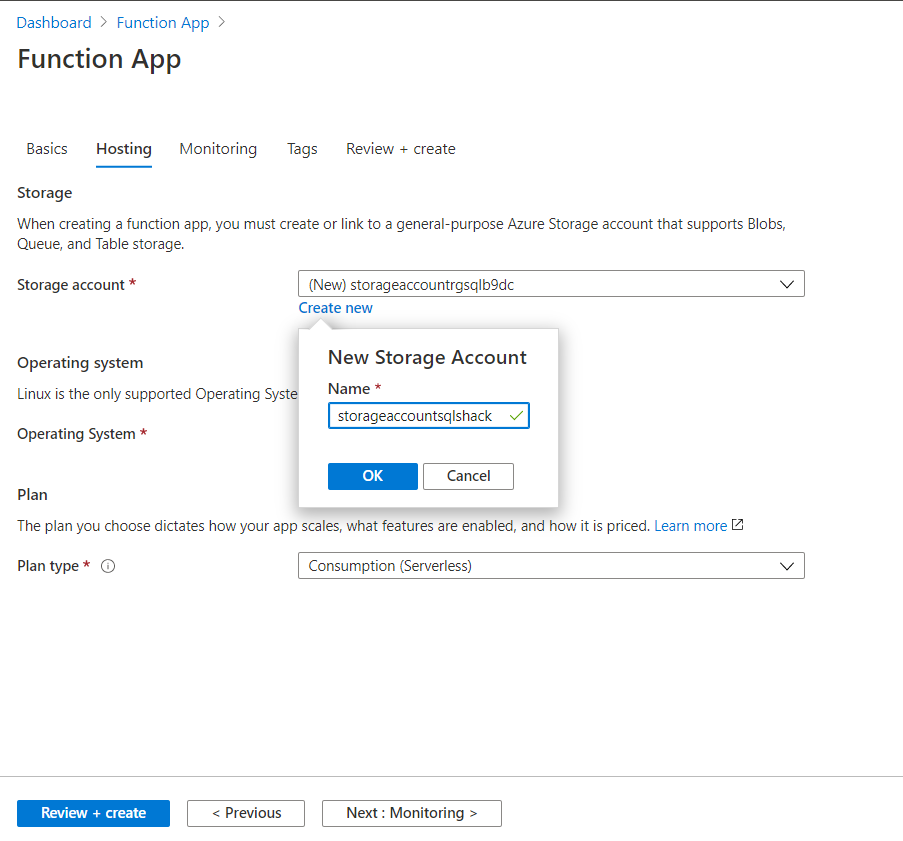
Figure 6 – Creating a Storage Account
Once the storage account is created, you can select the Operating System and the Plan for the function. The operating system for .NET Core, by default, is Windows. For the plan, we are going to select the Consumption Service Plan, which will be scaled based on when the function is triggered and priced based on the execution time.
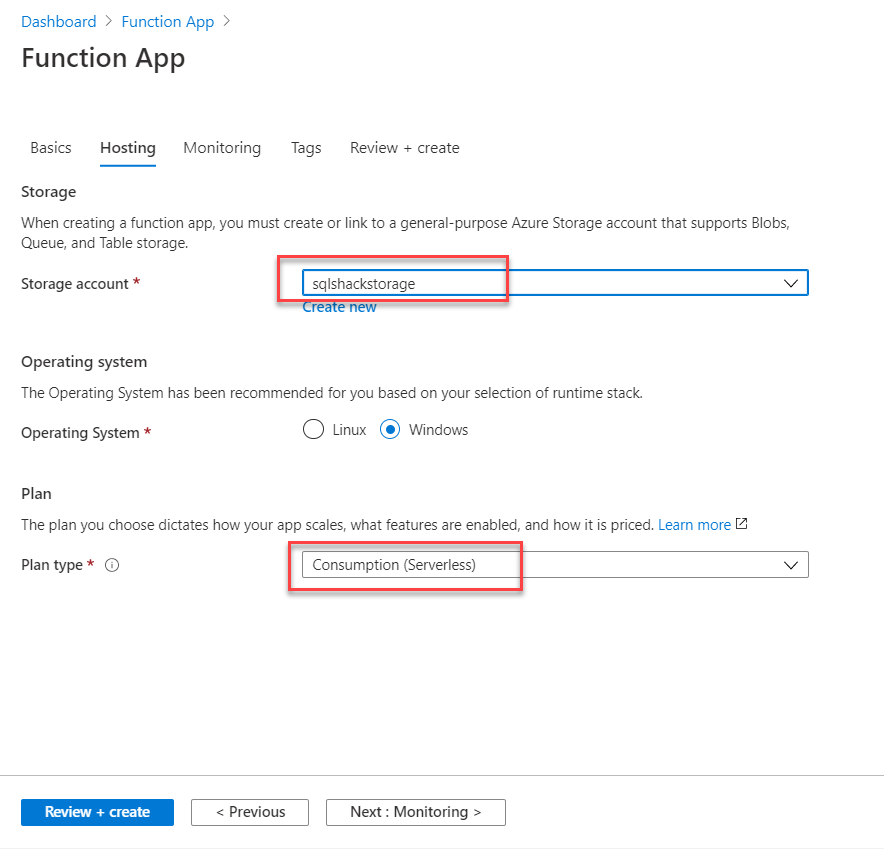
Figure 7 – Selecting the Operating System and Plan
Click on Next: Monitoring to set up the monitoring parameters. Here, you will be asked if you want to enable Application Insights or not. For this tutorial, I am going to disable it as it is out of scope. Click on No and proceed forward.
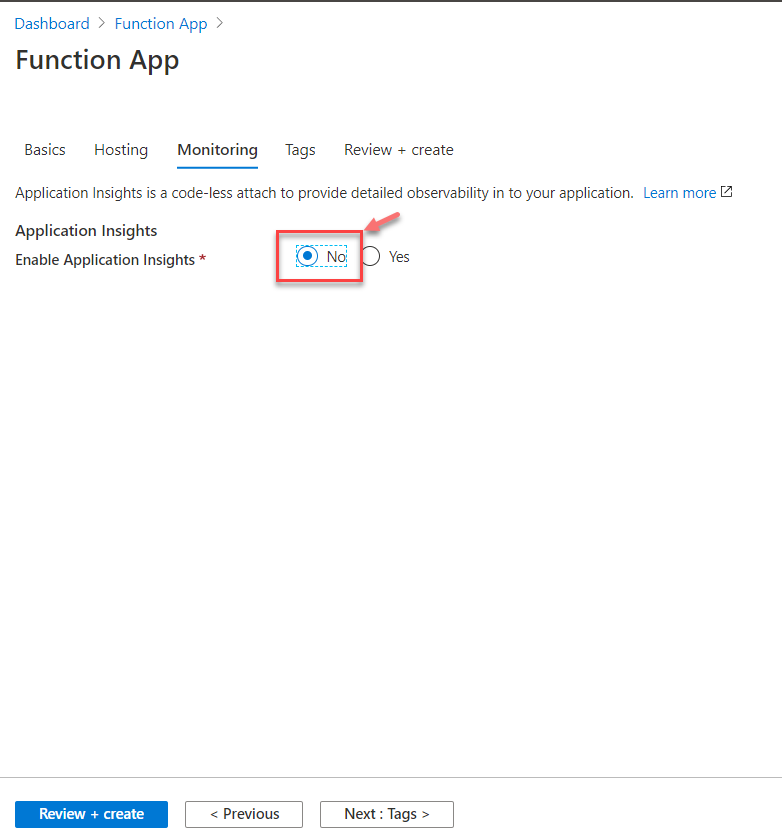
Figure 8 – Disable Application Insights
In this stage, you can click on Review + Create to create the function as specified. It will verify all the details and then display the details for your review. Once you have finally reviewed the details on this page, go ahead and click on Create.
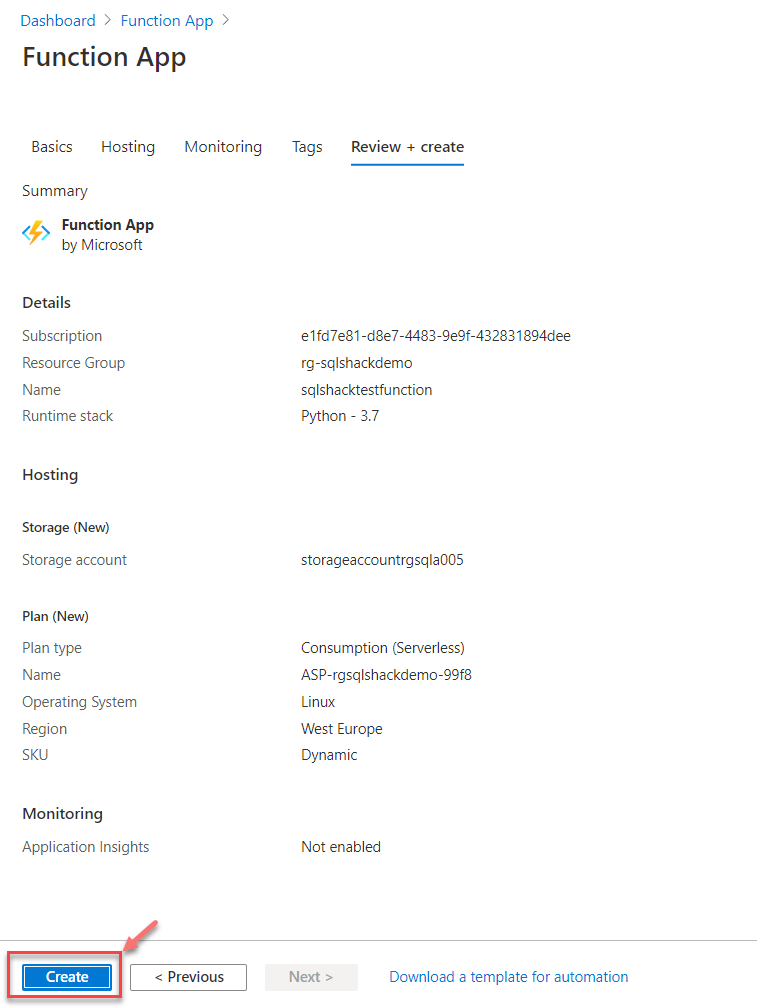
Figure 9 – Create the Azure Function App
The deployment of the function might take some time, depending on the resources available. Once the deployment is completed, you will see the following information appear on the dashboard.
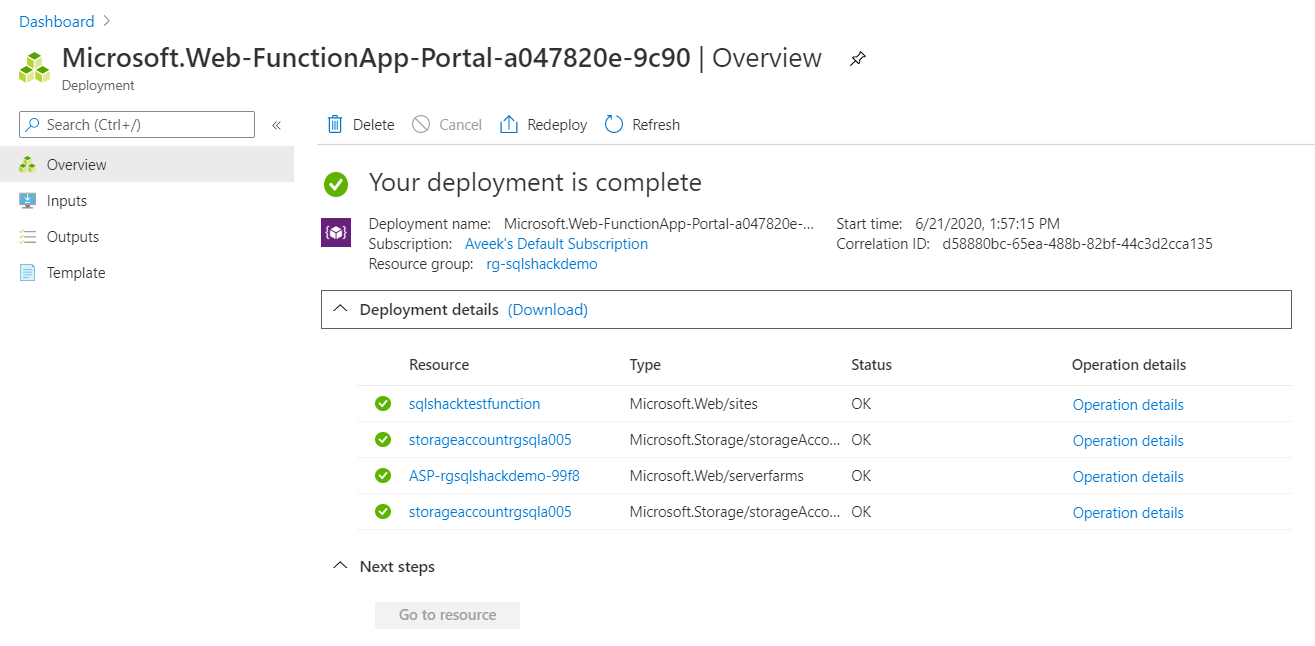
Figure 10 – Function App Created
Verify the function
Once the app function has been created, the next step is to verify the function URL and confirm if the app is up and running. Click on the URL, and you will be navigated to the homepage for your app function.
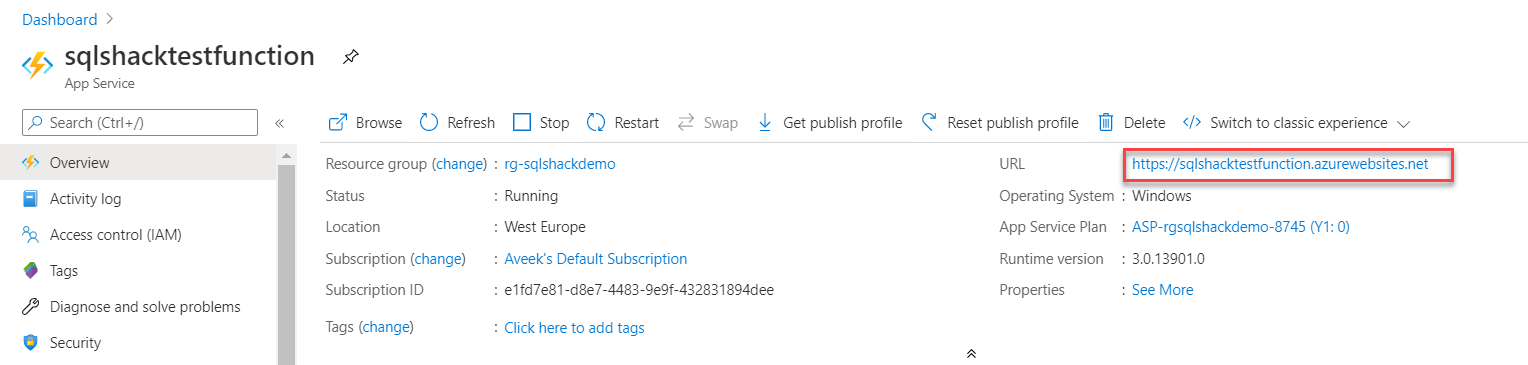
Figure 11 – Verify an App URL
You will be redirected to a new page, which looks something like the figure below. It means that the Azure Function App is now up and running.
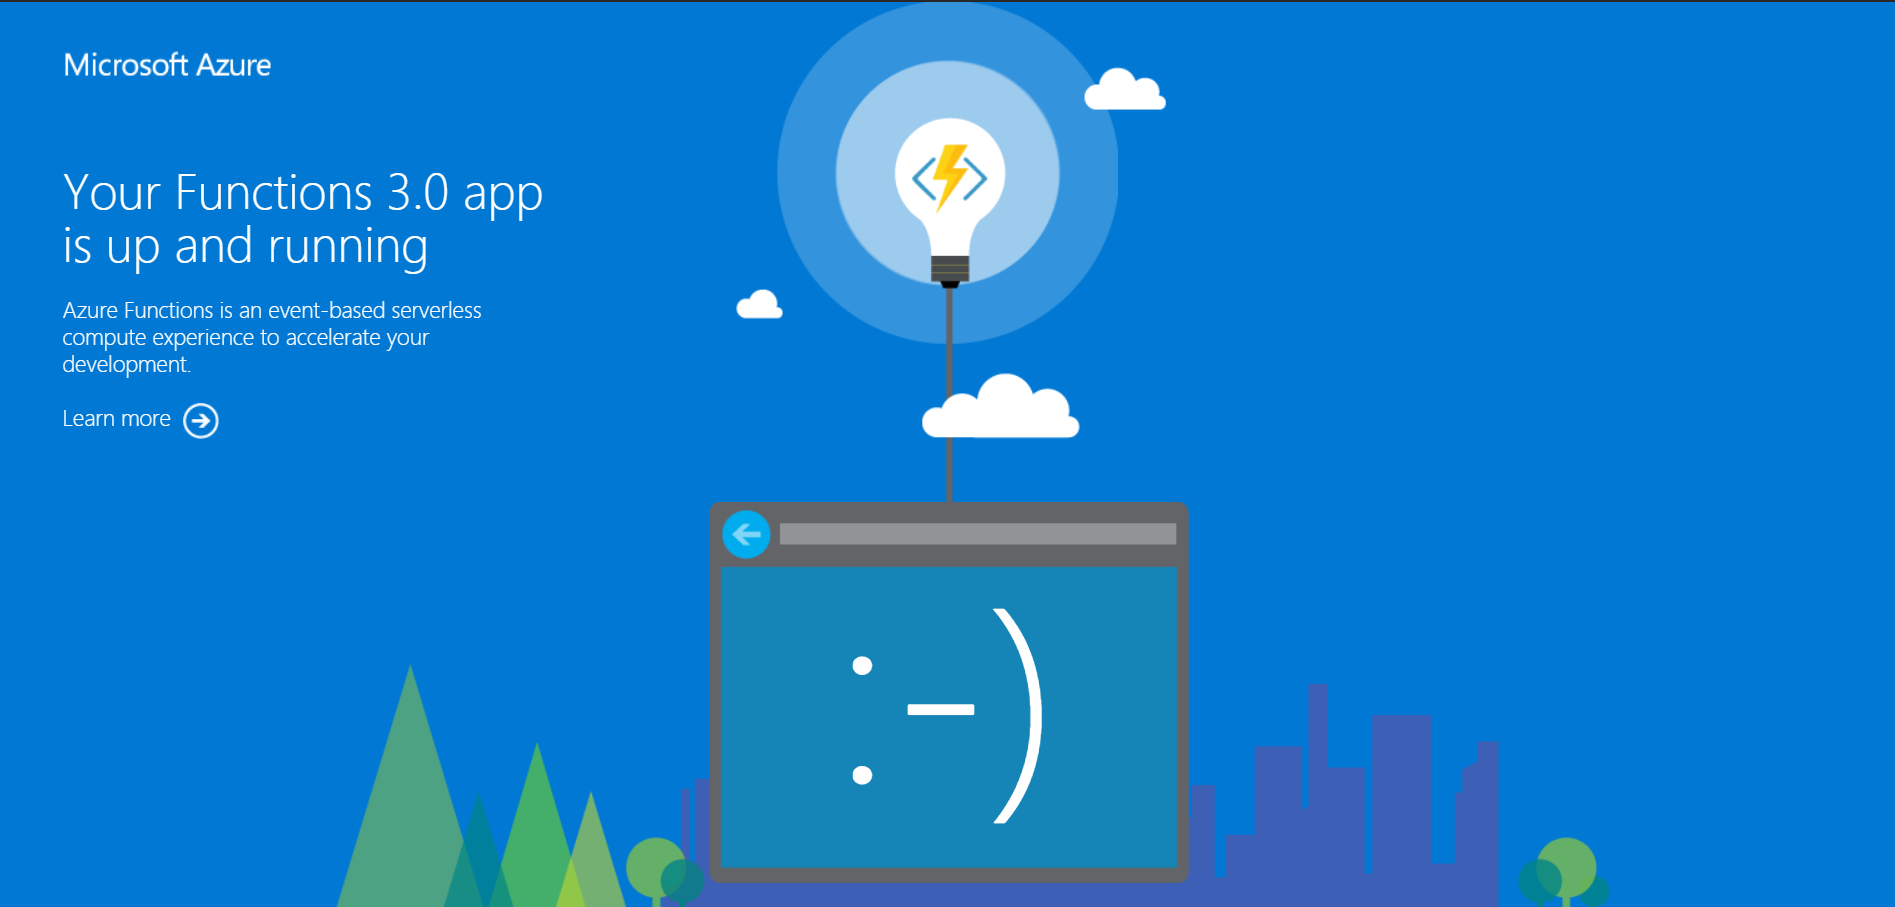
Figure 12 – Function URL up and running
Write code for the Azure Function App
Now that we know that our function is up and running, its time we write the code that we need to deploy to this function. While creating the new function, the following two points should be kept in mind before proceeding forward.
- Trigger Type – Defines how the function is to be called, it can be an HTTP call or a change in a database table or anything other which can trigger a function
- Authoring Options – Users can choose how they would prefer to write the code for this function. They can either write code using the built-in code editor in Azure, or they can choose from a preferred desktop code editor, like Visual Studio Code or Sublime Text
Click on Functions and then select Add. A list of templates will appear on the right, from which select HTTP Trigger.
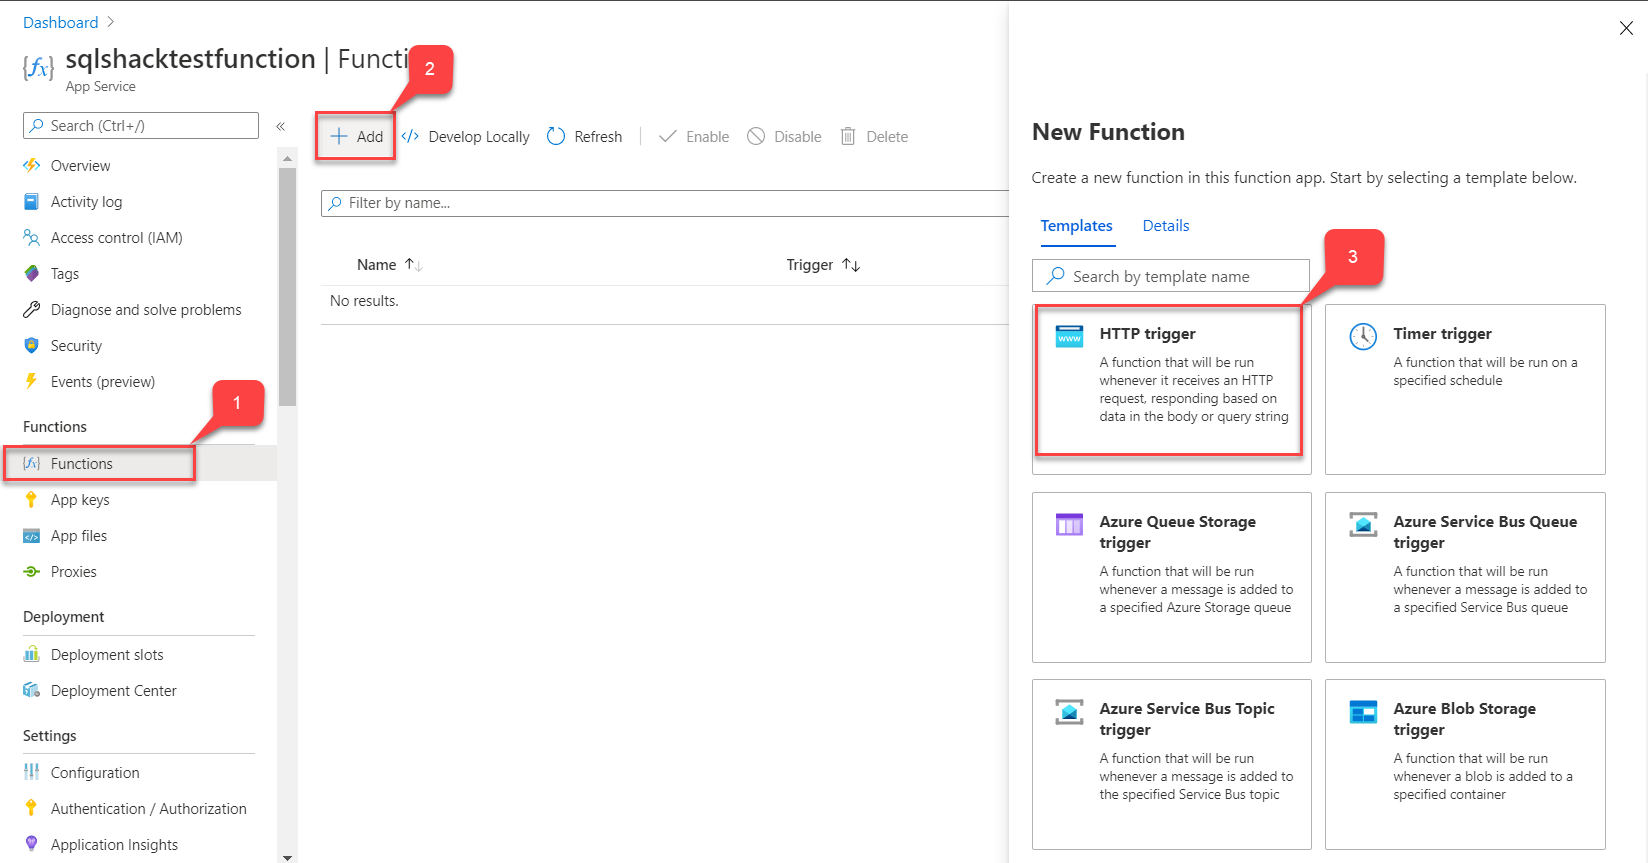
Figure 13 – Selecting a New Function Trigger
Once the trigger type has been selected, please provide details about the function. Provide a name for the function and the authentication level. Select Anonymous as the authentication level and click on Create Function.
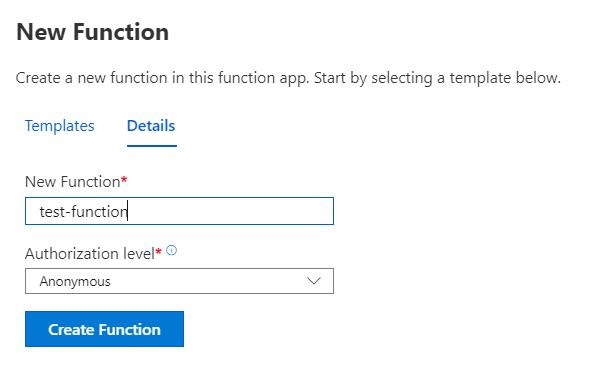
Figure 14 – Function Name and Authentication Level
The function will be created and deployed within minutes, and you can verify the details as follows.
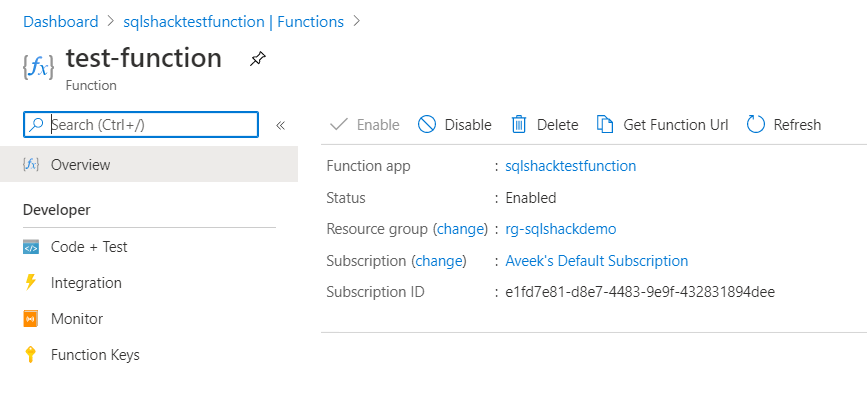
Figure 15 – Function Created
Click on Code + Test to view the code, which is provided by default.
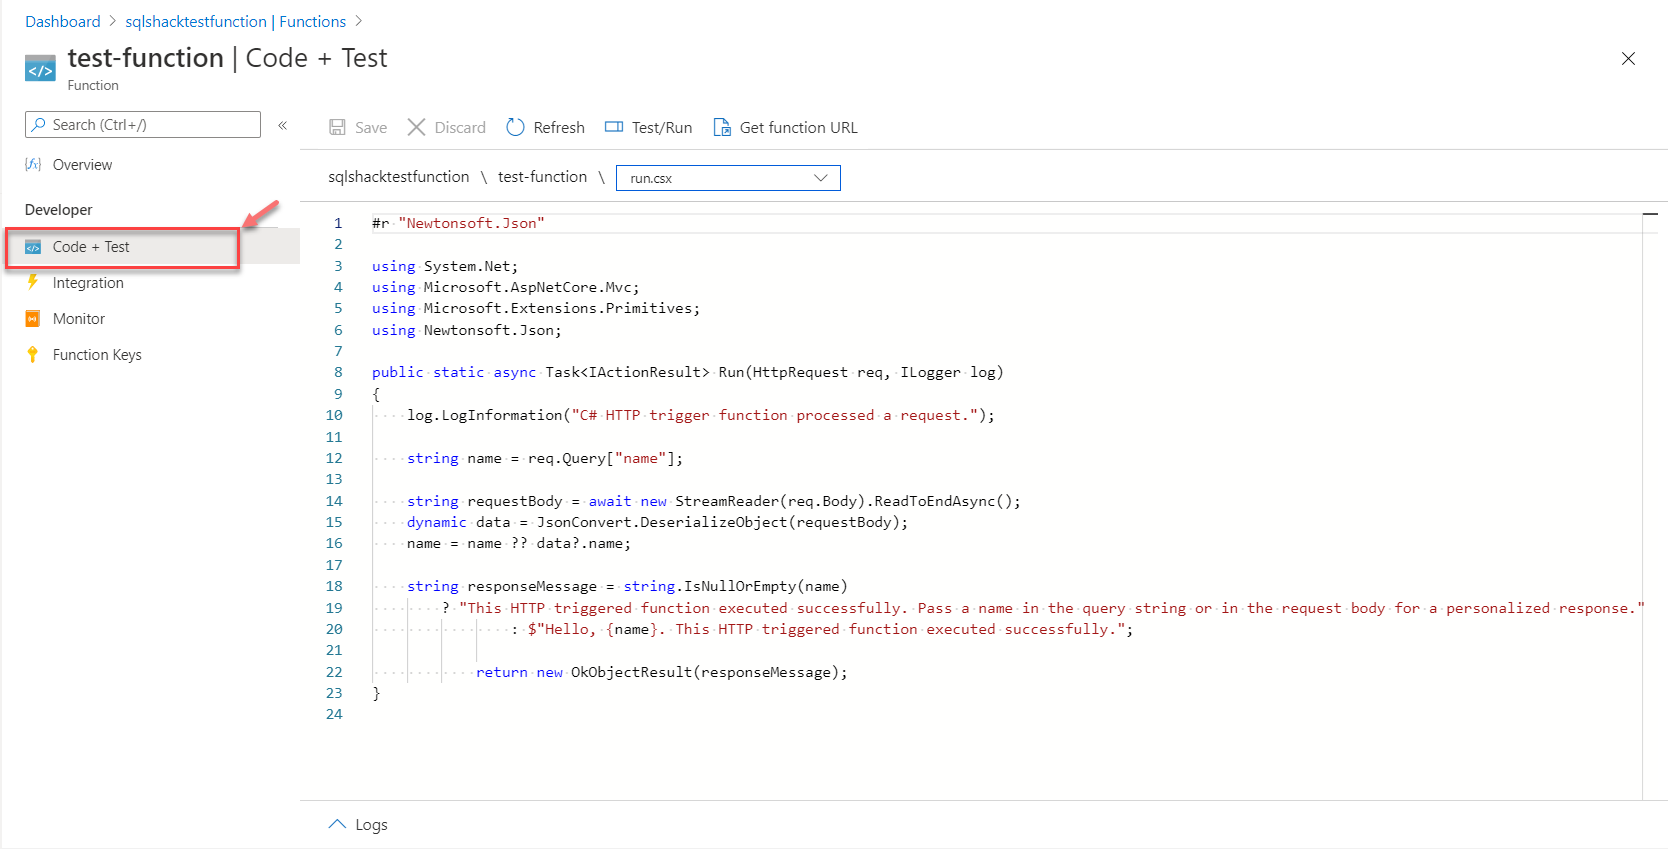
Figure 16 – Code and Test
In order to test this function, click on Test/Run. A blade appears on the right in which you need to set the HTTP Method as GET. Also, add a “name” to the list of queries with any value to it. In my example, I am adding my name here. Hit Run once completed.
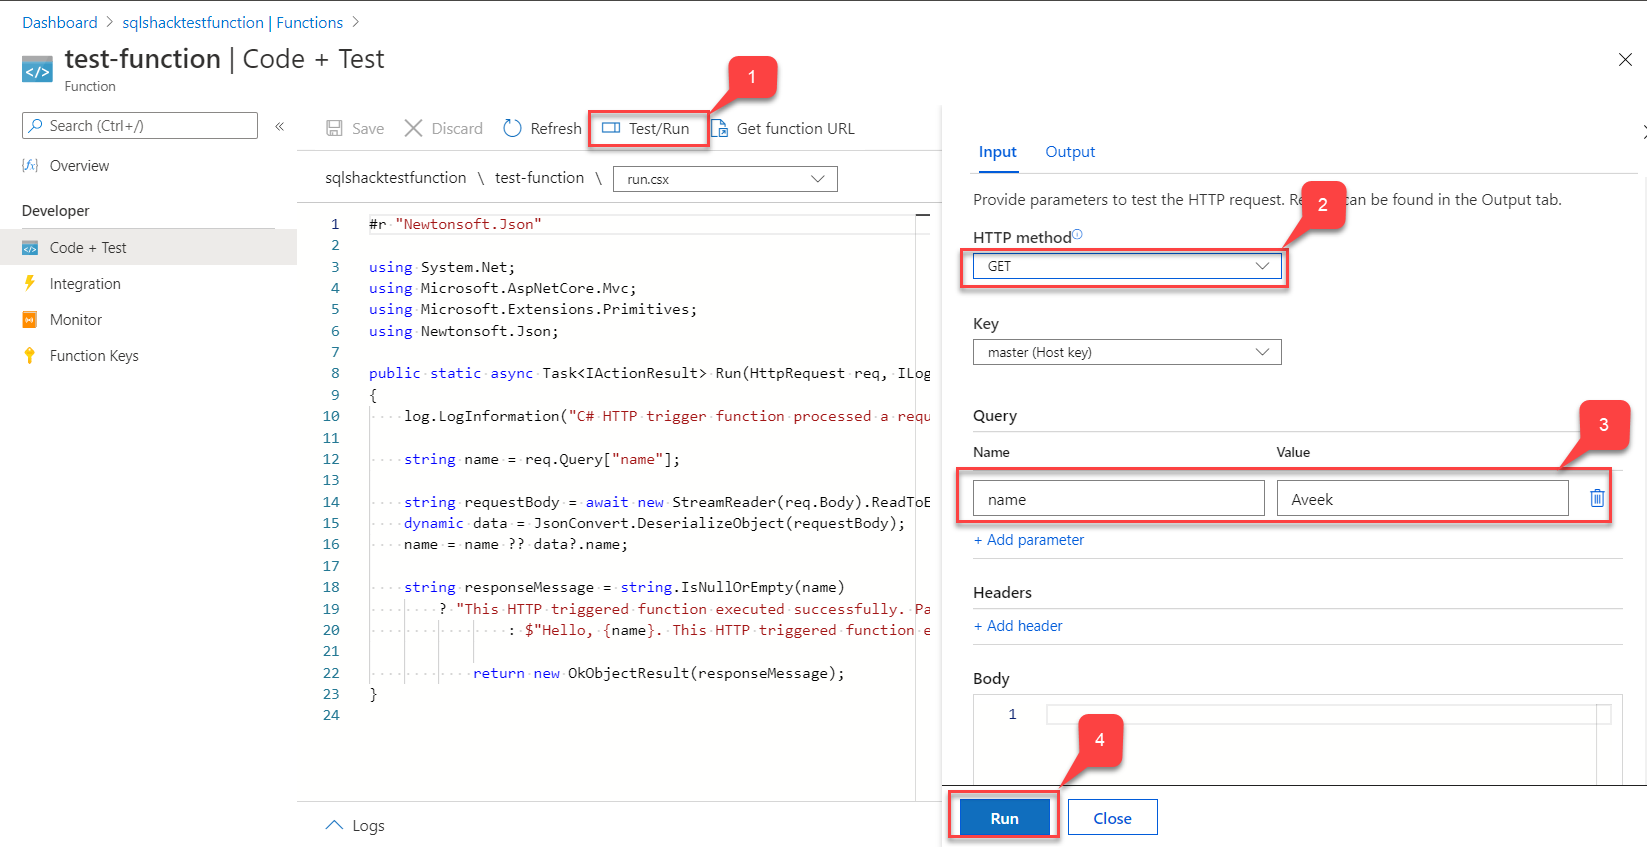
Figure 17 – Test the function
In the Output section, you can verify that the function has a response of 200 along with the name printed in the body of the response. Thus, the function is executed successfully.
Conclusion
In this article, I have explained how to start with writing code for Azure Function Apps and explained the steps in detail. For this tutorial, I have explained how to create the app function using the Azure Portal. In my next article, I will describe how to do the same using Visual Studio Code.

He is a prolific author, with over 100 articles published on various technical blogs, including his own blog, and a frequent contributor to different technical forums.
In his leisure time, he enjoys amateur photography mostly street imagery and still life. Some glimpses of his work can be found on Instagram. You can also find him on LinkedIn
View all posts by Aveek Das
- Getting started with PostgreSQL on Docker - August 12, 2022
- Getting started with Spatial Data in PostgreSQL - January 13, 2022
- An overview of Power BI Incremental Refresh - December 6, 2021