
This is article is a continuation of the previous: SQL Server replication: Overview of components and topography.
By now, you’re familiar with the components of replication. So far, we’ve seen a lot of theory about replication. It’s a time for practical walkthrough of setting up a basic transactional SQL Replication system. The best way to get a feel for how SQL Replication is implemented and how it works is to see it in action.
In this article, we’ll perform some simple exercises to setup a transactional SQL Replication solution. Transactional SQL Replication is a common solution to most of the problems of moving data continuously between different SQL Server databases. The good news is we have some robust tools available and it is very simple to use the Replication Wizard with which you can easily configure and administer your SQL Replication topology.
This guide will cover
- Initial SQL replication setup
- Pre-requisites
- How to prepare the replication snapshot folder
- How to configure a SQL replication distributor
- How to create a SQL replication publisher
- How to create a SQL replication subscriber
- And more…
Pre-requisites
- The account must at minimum be a member of the db_owner fixed database role in the SQL replication Publisher, Distributor and Subscriber databases
- For securing the replication snapshot folder using a Snapshot Agent, the account must have read and write or modify permission on the replication snapshot share
- At least one database should have an article and must possess Primary Key; a basic rule that every article should have a Primary Key is considered as best candidate for Transactional SQL Replication. The primary key is used to maintain uniqueness of records.
- Scheduling the agent and jobs
- Sufficient network bandwidth
- Enough disk space for the databases being published; we need to make sure that we have enough space available for the SQL transaction log for the published database
Initial setup
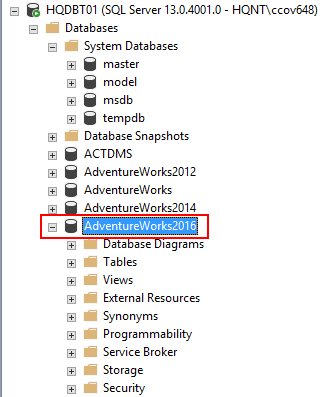
The exercises demonstrate how to configure SQL Replication to copy a few tables, stored procedures and views from AdventureWorks2016 sample database to another database. To keep this setup simple, we use SQL Server Management Studio. The transactional replication setup has a single SQL Server instance to play the roles of SQL replication Publisher, Distributor, and another SQL Server instance play the role of the SQL replication Subscriber.
Getting Started
To first set up transaction SQL replication, you must configure the SQL replication Distributor and create a SQL replication Publication, replication snapshot folder and a SQL replication Subscription.
Configure Distributor
The following steps walk you through the process of creating the SQL replication Distributor:
-
Open SSMS and connect to the SQL Server instance

-
In Object Explorer, browse to the replication folder, right-click the Replication folder, and click Configure Distribution
-
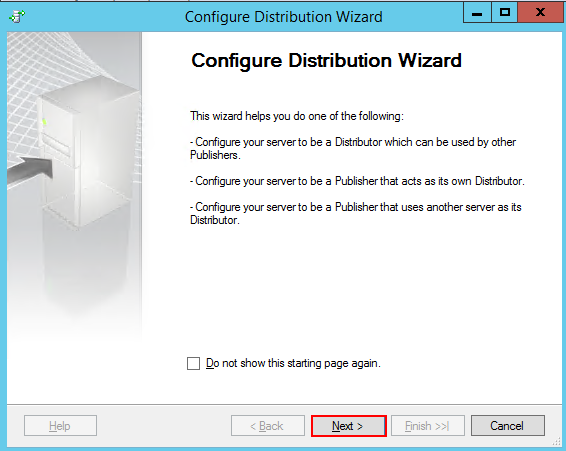
The first page of the Distribution Configuration Wizard appears. The pages outline the general details about configuration distributor aka Configure Distribution Wizard
-
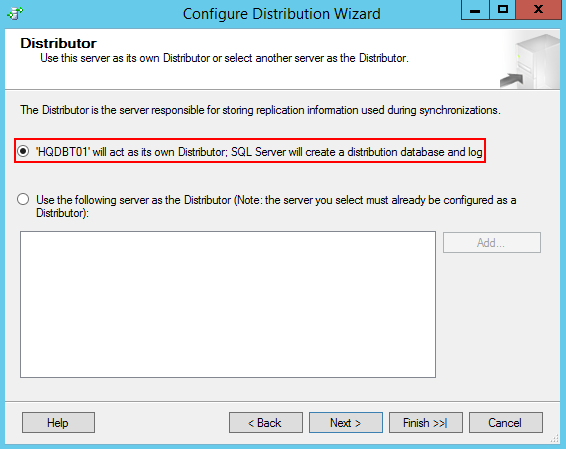
On the Distributor page, you’ve an option to choose to set up the current instance to be a Distributor or select another instance that’s already been configured as a Distributor. In this case, the distributor is local so leave the default setting “‘ServerName’ will act as its own Distributor;SQL Server will create a distribution database and log” and Click Next.
-
Next, in the configure Snapshot Folder, type in the path of the SQL replication snapshot folder or leave the default path of the SQL replication snapshot folder. The snapshot folder is used for initial data synchronization of transactional replication and make sure it is large enough to hold all the replicated data. In this case, I’ll leave the default values and Click Next.
-
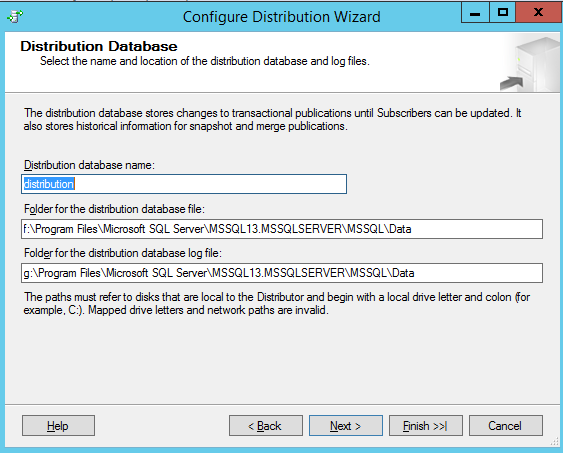
Now, configure the SQL replication distribution database. Specify the name of the distribution database and the folders where the data and log files should be located. Again, no change in the default values is required. Click Next.
-
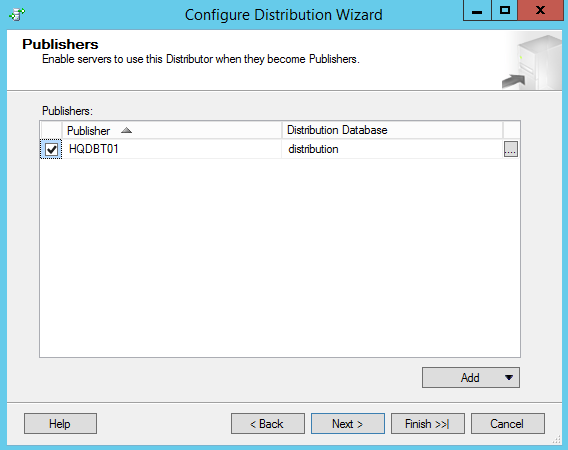
In the Publishers page, specify the SQL replication Publishers that are going to access the Distributor and Click Next
-
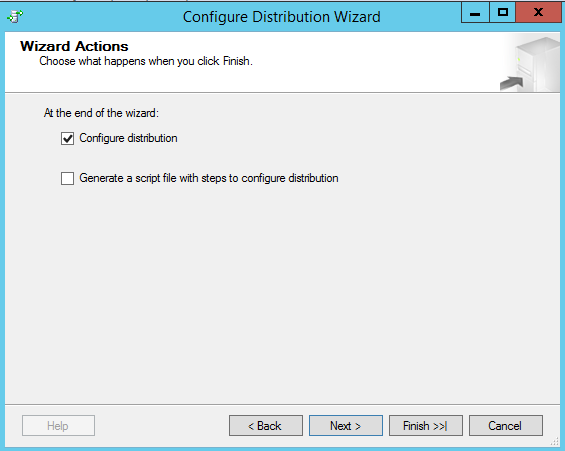
In Wizard Actions, You’ve an option to run immediately or create a script that can be executed at a later time and Click Next
-
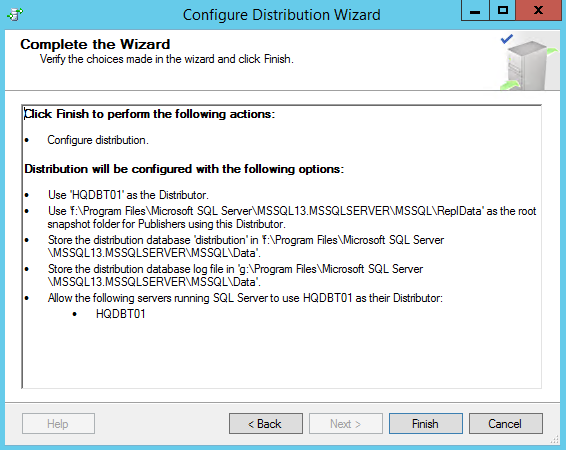
In the complete the wizard page, Review the settings and configuration options, and then click Finish to enable the Distributor
-
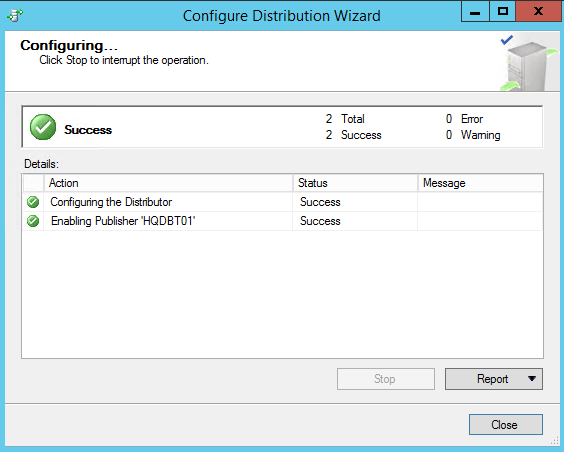
Now, for Configuring… the following page appears and it shows the progress of the distributor setup.


Configure Publisher
Once you’ve configured the Distributor, you can create a publication. Let’s follow the steps:
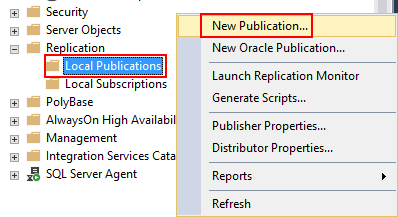
-
In Object Explorer, locate the Replication folder, right-click Local Publication, and then click New Publication
-
Next, the New Publication Wizard appears and outlines the general information about creating Publication.
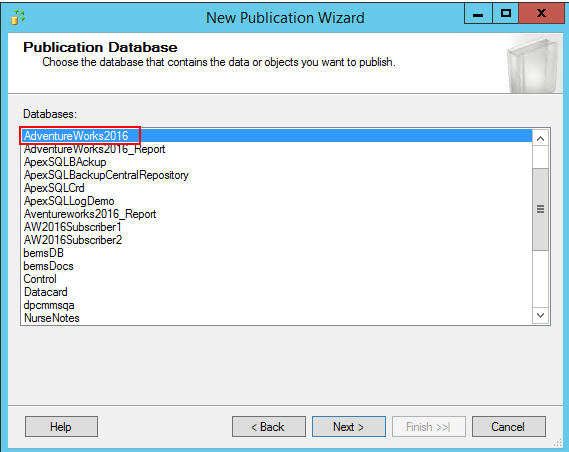
-
In the Publication Database page, select the Adventureworks2016 database and click Next.
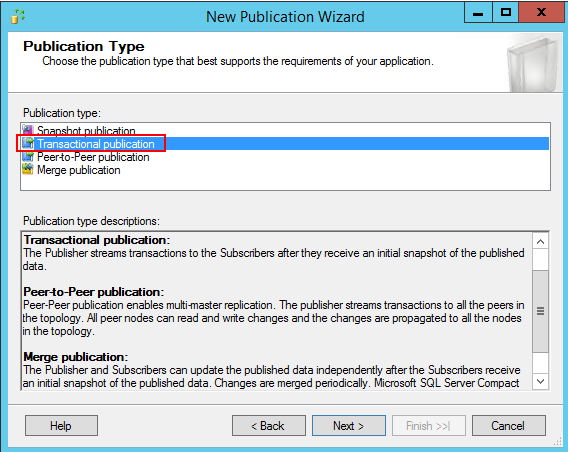
-
On the Publication Type page, select Transactional publication, and click Next.
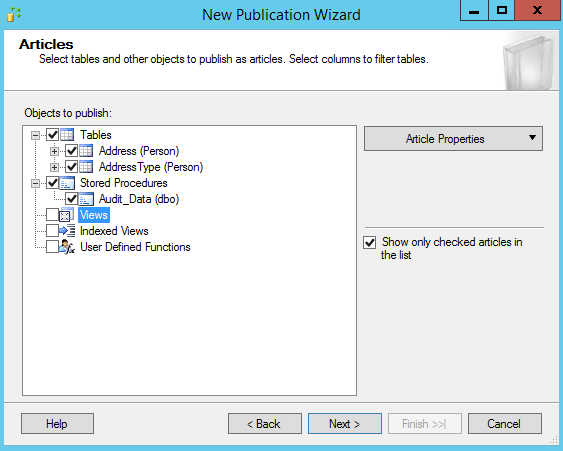
-
Now, on the Articles page, choose the articles should be part of this publication
-
Once you’re done with the object selection, Check the Show only checked articles in the list option to list candidates of Publication. In this case, 2 tables, 1 Stored Procedures are selected.
-
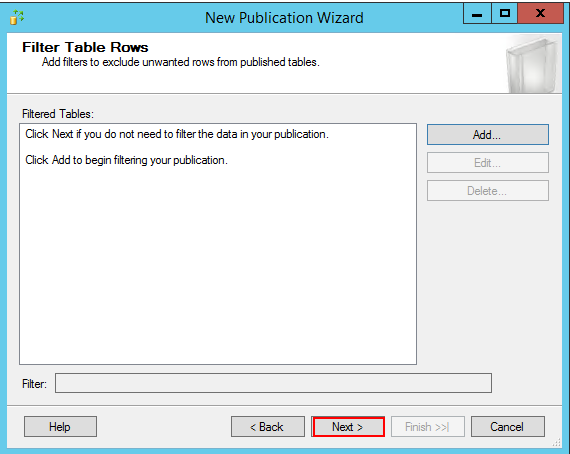
Next, in the Filter Table Rows page, define filters that should be applied to your articles. Let us go with the default values.
-
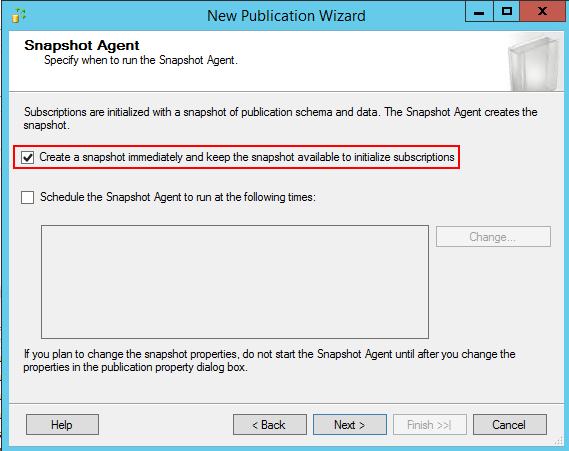
In the Snapshot Agent page specify when to run the Snapshot Agent. It can be run immediately or it can schedule to run at a later time. In this case, Create a snapshot immediately is used.
-
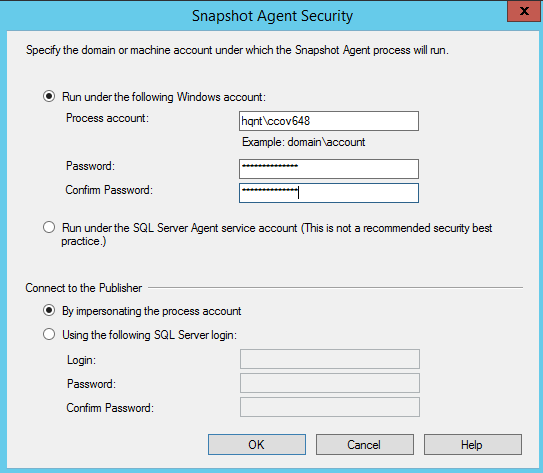
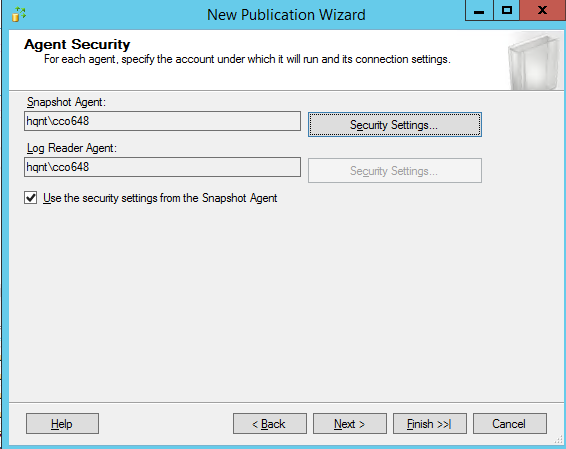
Now, in the Agent Security page, specify the account to use to run the Snapshot Agent using Security settings…
-
Click Ok
-
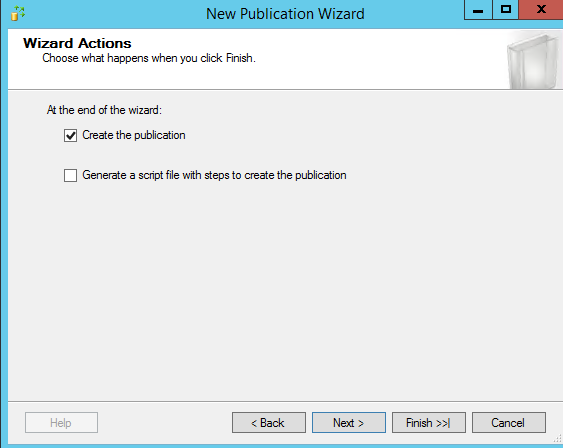
In the complete Wizard Actions page, you’ve two options. You can create the Publication immediately or save the configuration in the script file to run at a later time.
-
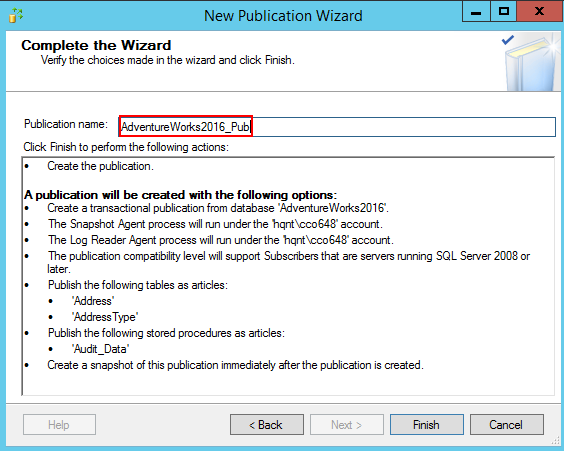
Type in the publication name and Click Finish.
-
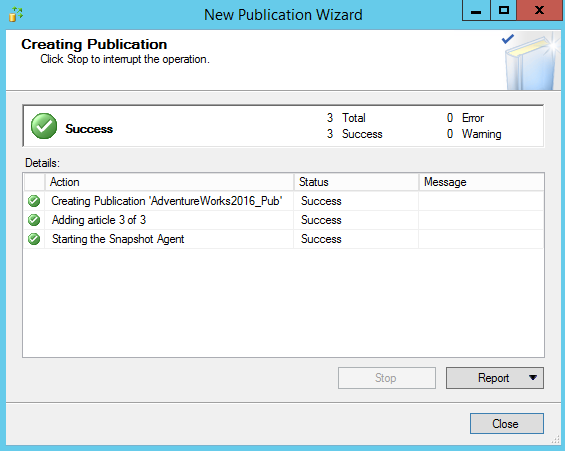
In the Creating Publication page, you’ll find information about the wizard’s progress as it works through each step of the process.
-
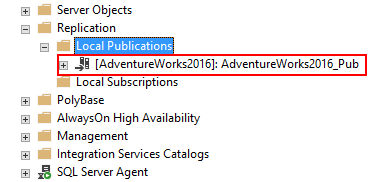
Now, you can see that Publication is created under the local publication folder
Configure Subscriber
The final step in setting up replication is to create the subscription. Let us walk-through the steps:
-
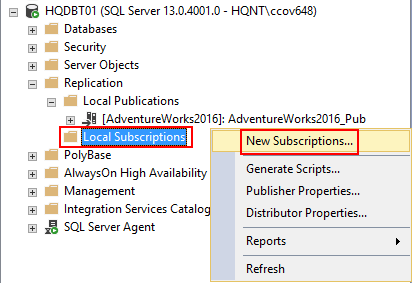
In Object Explorer, expand the Replication folder, right-click Local Subscriptions, and then click New Subscriptions
-
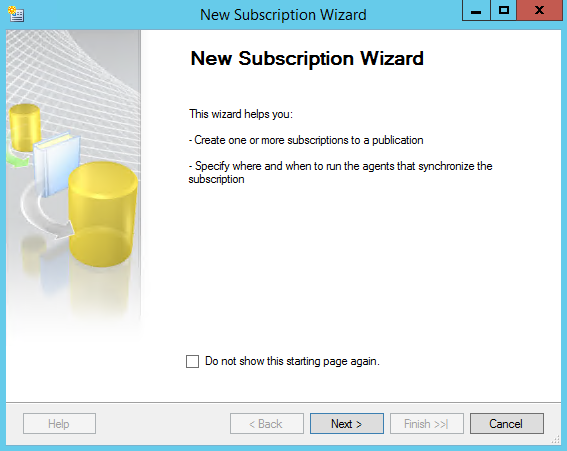
The New Subscription Wizard appears outlines the general information about the wizard.
-
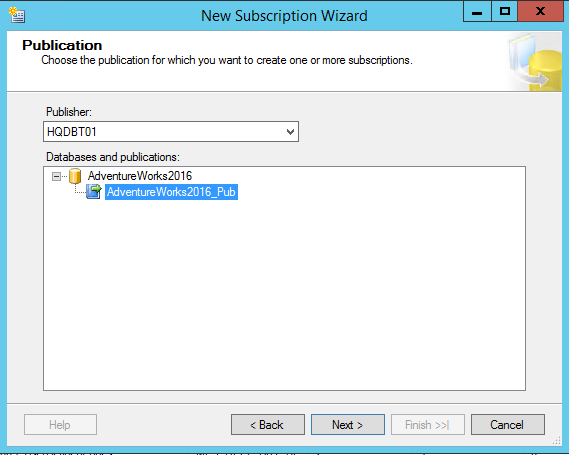
On the Publication page, select Publication and then click Next
-
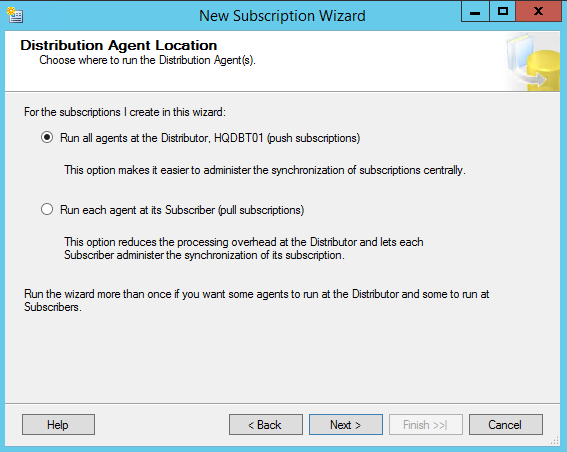
On the Distribution Agent location page, select “Run all agents at the Distributor” and Click Next
-
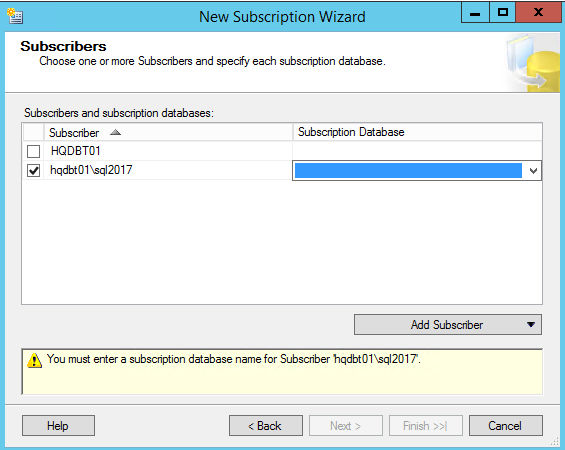
On the Subscribers page, select Add Subscriber, and then select Add SQL Server Subscriber from the drop-down. This step opens the Connect to Server dialog box. Enter the subscriber instance name and then select Connect.
-
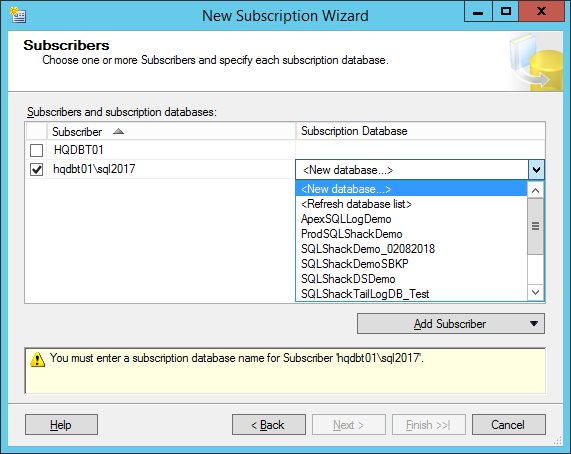
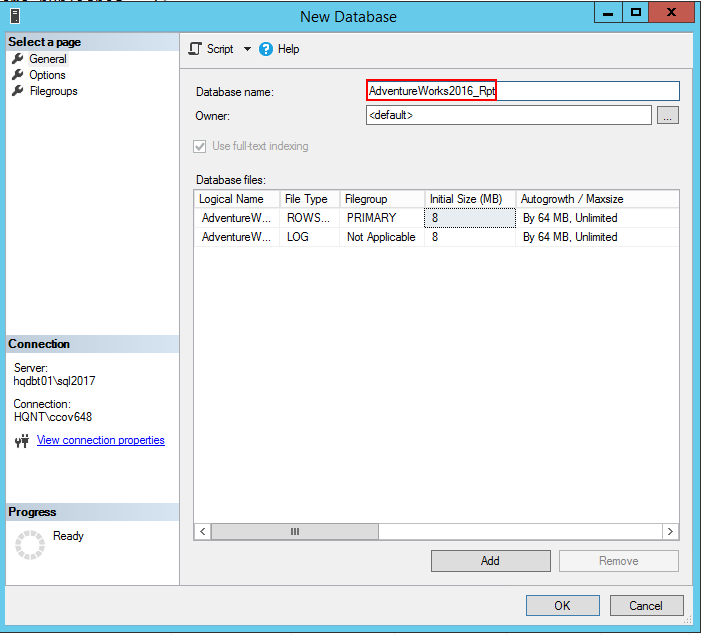
After the subscriber SQL instance has been added, select the drop-down next to the instance name of your subscriber. Then select New Database under Subscription Database and type in the database name and Click Ok.
-
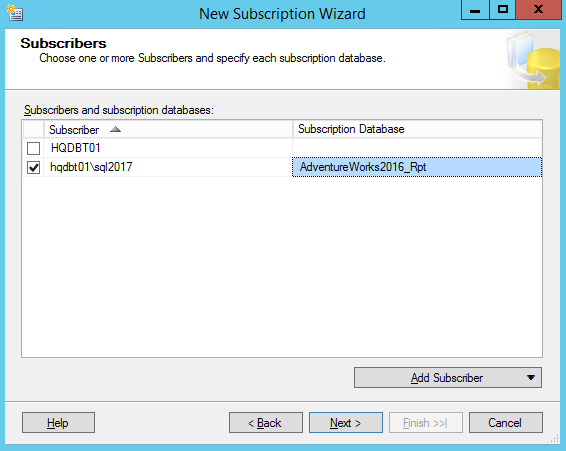
The subscription database is created and registered to the subscriber. Now, click Next. Make sure that the account has db_owner permission on the newly created database.
-
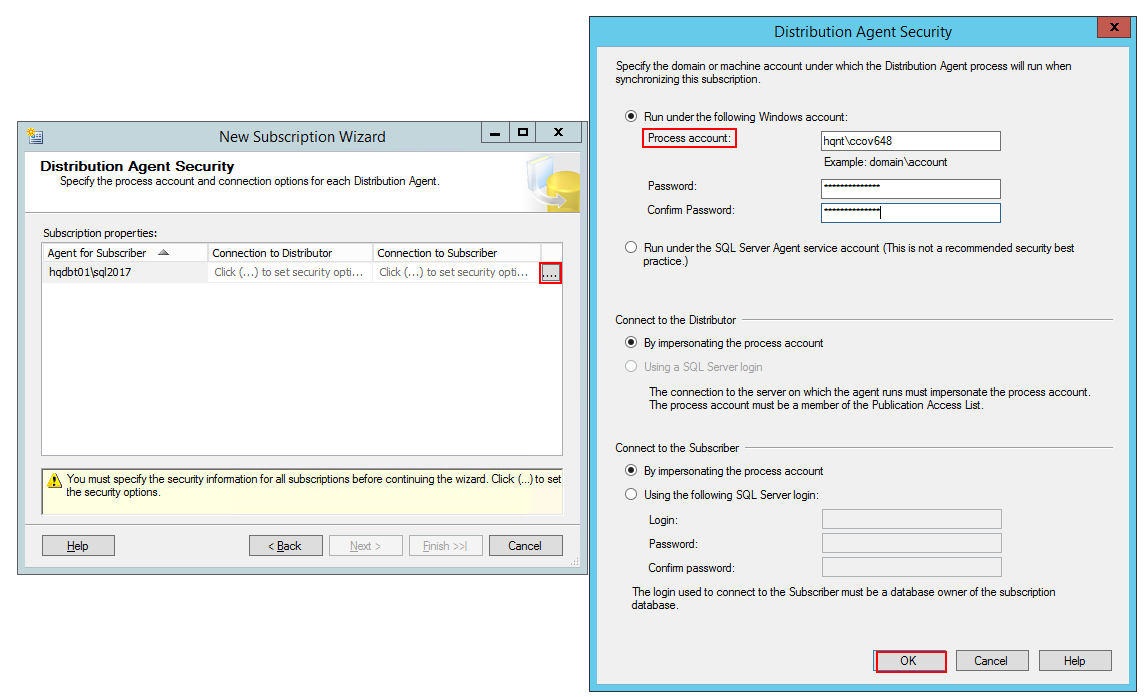
On the Distribution Agent Security page, select the ellipsis (…) button. Type in the process account details and Click Ok.
-
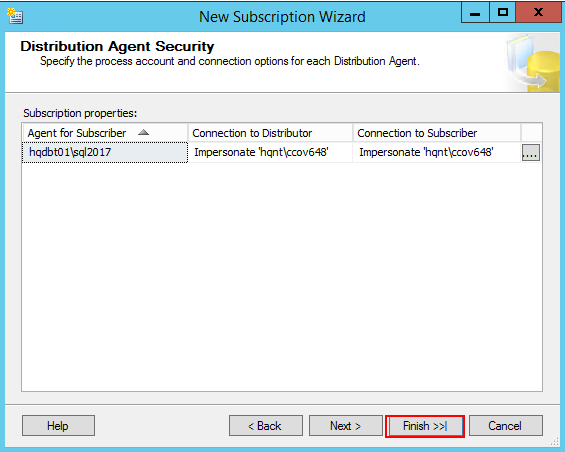
Select Finish accepting the default values on the remaining pages and completing the wizard.
-
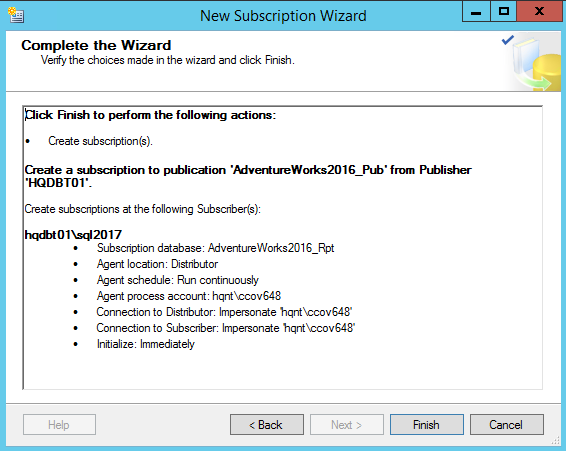
On the complete the wizard page, you can see the detailed summary of the newly created subscription. Click Finish
-
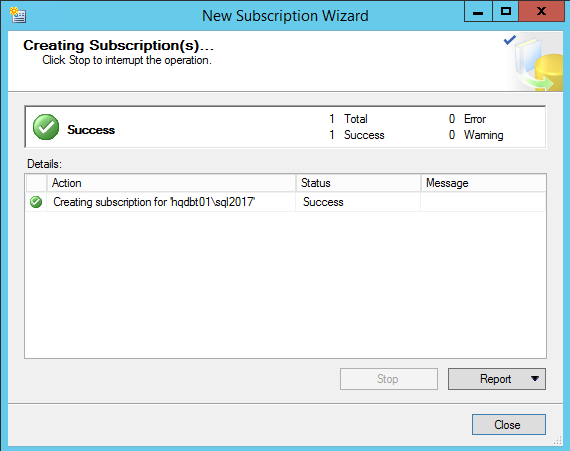
In the Creating Subscription(s)…page should show that the process has been successful or not.
-
Connect to the publisher in SQL Server Management Studio. In the Object explore, right-click the Replication folder, and then select Launch Replication Monitor to verify the status of the newly created transactional replication setup.
SQL replication wrap Up
In this article, we’ve successfully configured Publisher, Local Distributor and a remote Subscriber transactional SQL replication model. You can now insert, delete, or update the data in the Address and AddressType articles to see the data propagation mechanism between the servers.
In the next article, we will see how to run rebuild the setup using a backup file. Stay tuned…
Table of contents
I’m a Database technologist having 11+ years of rich, hands-on experience on Database technologies. I am Microsoft Certified Professional and backed with a Degree in Master of Computer Application.
My specialty lies in designing & implementing High availability solutions and cross-platform DB Migration. The technologies currently working on are SQL Server, PowerShell, Oracle and MongoDB.
View all posts by Prashanth JayaramLatest posts by Prashanth Jayaram (see all)- Stairway to SQL essentials - April 7, 2021
- A quick overview of database audit in SQL - January 28, 2021
- How to set up Azure Data Sync between Azure SQL databases and on-premises SQL Server - January 20, 2021
-