

In this article, you learn how to set up Azure Data Sync services. In addition, you will also learn how to create and set up a data sync group between Azure SQL database and on-premises SQL Server.
In this article, you will see:
- Overview of Azure SQL Data Sync feature
- Discuss key components
- Comparison between Azure SQL Data sync with the other Azure Data option
- Setup Azure SQL Data Sync
- More…
Azure Data Sync
Azure Data Sync —a synchronization service set up on an Azure SQL Database. This service synchronizes the data across multiple SQL databases. You can set up bi-directional data synchronization where data ingest and egest process happens between the SQL databases—It can be between Azure SQL database and on-premises and/or within the cloud Azure SQL database. At this moment, the only limitation is that it will not support Azure SQL Managed Instance.
Components of Azure Data Sync
Hub database: This repository database keeps track of all the changes made on the spoke databases. The responsibility of the hub database is to synchronize the data between individual members of the sync group.
Member or Spoke databases: They are the ones that are part of the sync group where member database should take part in the data synchronization between SQL databases. In this case, it’s between the Azure SQL database and the database in on-premises SQL Server.
Metadata database: This is a critical piece of the configuration as it holds metadata details and logs of the Data Sync service.
- The Metadata database must be an Azure SQL Database it should exist in the same region as that of Hub Database
- They allow only one sync metadata database per region and each subscription
- To clean up the metadata database, you must delete the sync group and agents
- Note: If you are using a sync group with a combination of Azure SQL and an on-premises instance then you must complete the pre-requisite of install and configure a local sync agent
Sync Group: This is the controller of the Azure Data Sync service where you configure everything related to data sync services. To configure the Data Sync service, you need to configure the Sync Group. This process intends to define all the configuration and hub database settings, configure metadata database and member database.
The properties of a sync group:
- Sync Schema – Describes the schema considered for the data synchronization process
- Sync Direction – It defines the data traversal direction—bi-directional or uni-direction. The direction is from Hub -> Member, Member ->Hub, or both
- Sync Interval – the frequency of the data sync process to occur
- Conflict Resolution Policy – It’s a sync group policy that describes who can be the winner in case of a conflict. We can define it as Hub wins or Member wins. During the data synchronization process, we can see several data sync conflicts because all the hubs and member databases are writable. If you’ve worked extensively in SQL Server merge replication, this is no different. You can define the policy to define which data to accept and what data to discard. If the option you have chosen is “Hub wins” then during the data sync process, if there is a conflict, then member data is discarded. If you opt for the other option “Member wins” then hub data is discarded
Automatic Sync: The Data Sync is of two types. The first one manual sync and the second is automatic sync, during the configuration of the Azure Data Sync group you can select the modes based on the requirement.
Sync Agent: When you choose an on-premises SQL server as a member database then you need to configure and install Microsoft Data Sync Agent. After the installation, you need to register the database using the key and metadata database credentials to sync the agent.
How to set up Data Sync between Azure SQL and On-Premises SQL Server
In this section, you will see step by step details to carry out to set up data sync between Azure SQL and on-premises SQL Server.
- Login to the Azure Portal
- Browse the Azure SQL Server and Azure SQL database
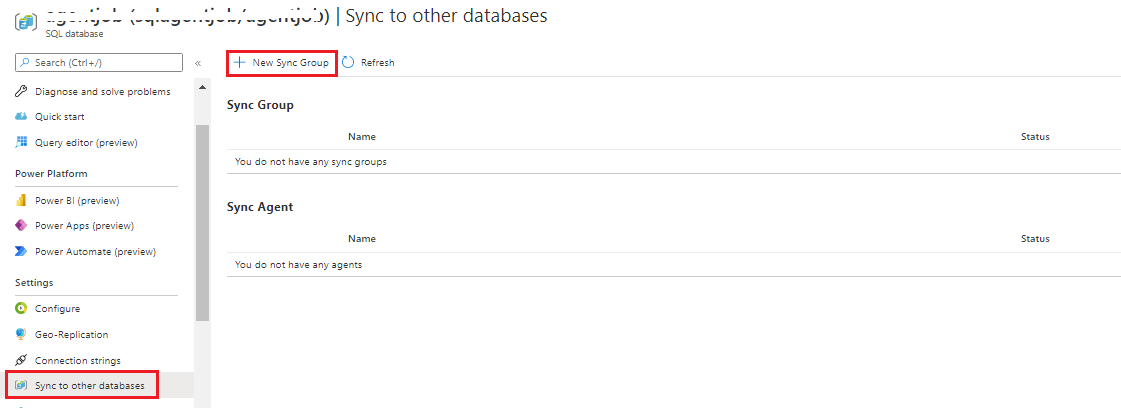
- On the left blade, under the settings, locate the Data Sync service. Click Sync to other databases
Next, create a sync group in the Azure portal. The sync group bridges the Azure SQL hub database and on-premise member database.
Now, Create a sync group as highlighted in the below image
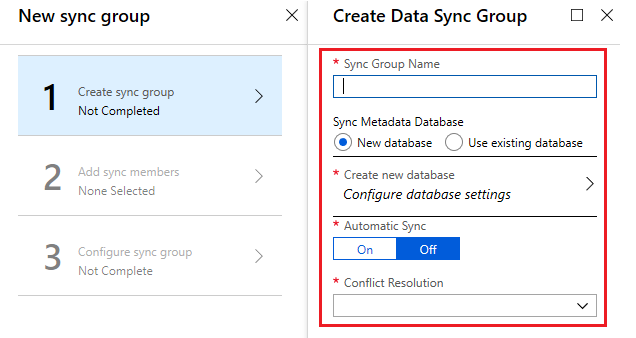
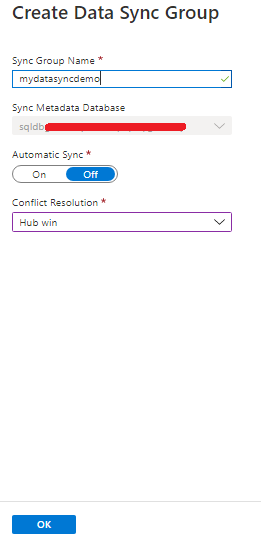
Type in the values as per the request to create a data sync group.
- Note: If you already configured the sync group, then the option “sync metadata database” field will be greyed out. Azure data sync will only allow having one Data Sync for any Azure region. Let us consider an example, the server “Azuredb1” hosted in Region -South Central US and you configure the Azure Data Sync. For the first time, it is allowed to configure metadata database “azuredatasync” if at all there is no prior azure data sync configuration
Now, if you try to configure Azure Data Sync service for another server “Azuredb2” which is located in South Central US then you will have default azuredatasync on sqldb. By default, the option is greyed out. In case if you want to create an Azure Data sync service, then you need to delete the underlying configuration and sync the metadata database azuredb1 completely or start building the solution in the new region.
Next step is to add sync members. After the deployment of mydatadyncdemo sync group, proceed further to configure sync members.
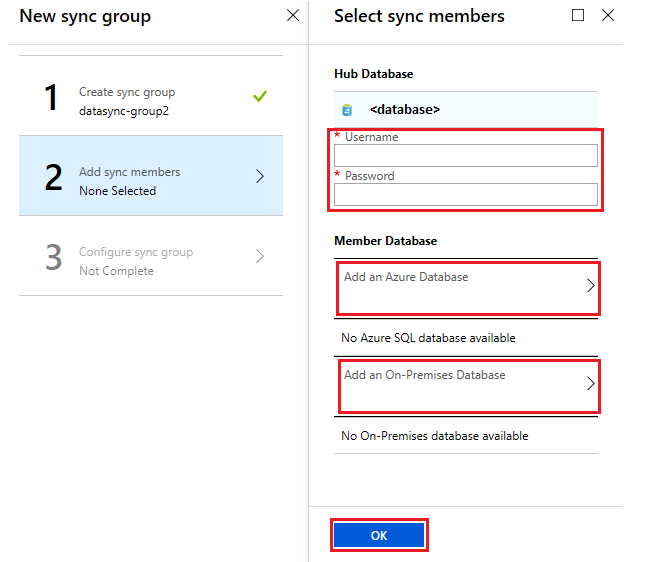
In this case, we are adding SQL Server. To add an SQL Server database select Add an On-Premises Databases
- Note: If you are using a sync group with a combination of Azure SQL and an on-premises instance then you must complete the pre-requisite of install and configure a local sync agent. To download the data sync agent follow the Azure SQL Data Sync Agent link
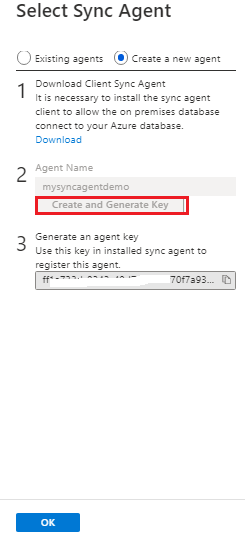
Configure the new agent and generate the key. Use this key to authenticate on-premises sql server.
Login to the on-premises server and install the Microsoft Data Sync Agent
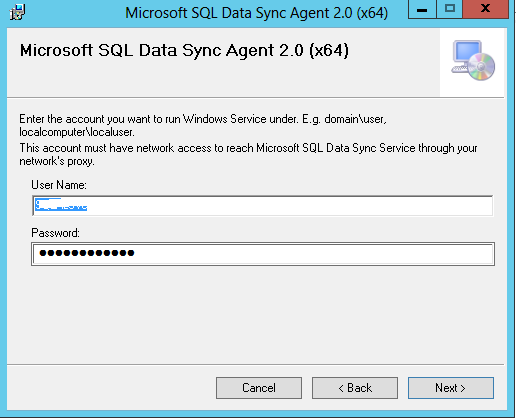
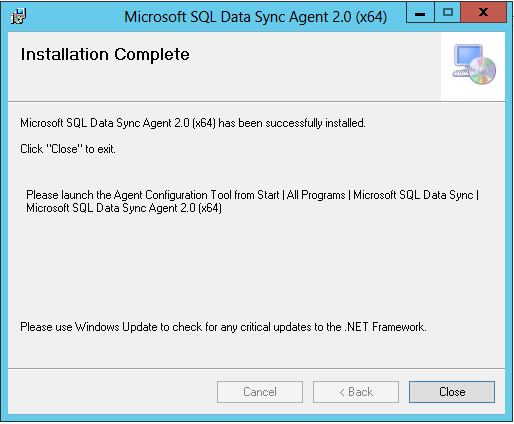
It is straightforward. You just need to follow the instruction to complete the setup.
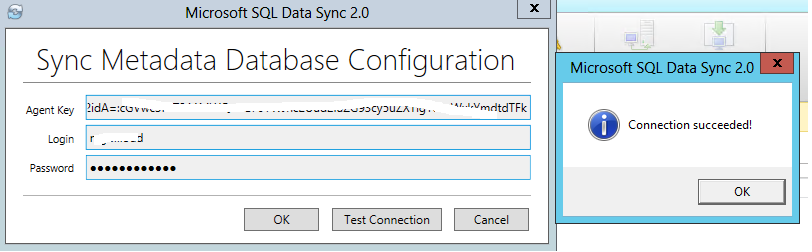
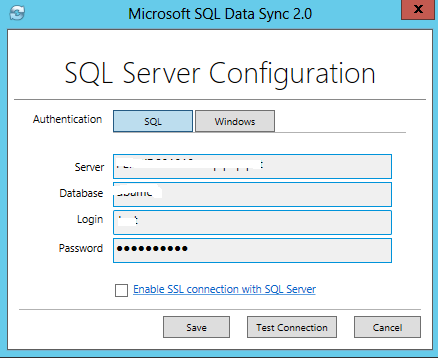
After the installation, test the Sync Metadata Database Configuration using the key. In addition, you need to type in the credentials of the metadata database.
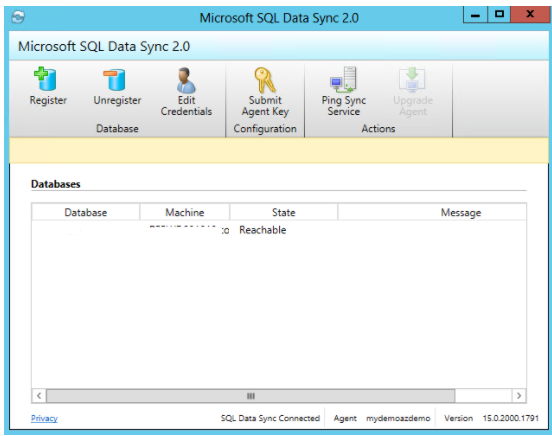
Next, register the SQL Server database with Microsoft SQL Data Sync 2.0 service. After the registration, Click on the Save button.
Now, you can see that the registered database is listed in the configuration pane.
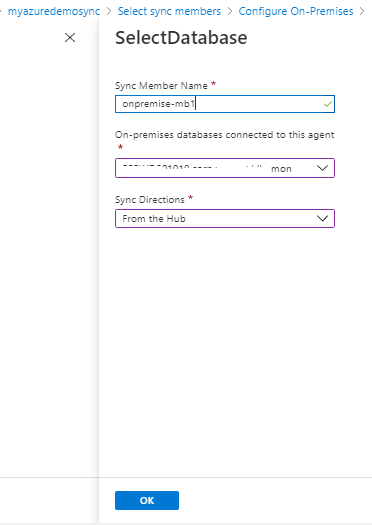
Back to the portal and select the on-premise member database. You need to type in the Sync Member Name, select the database and choose the Sync Directions.
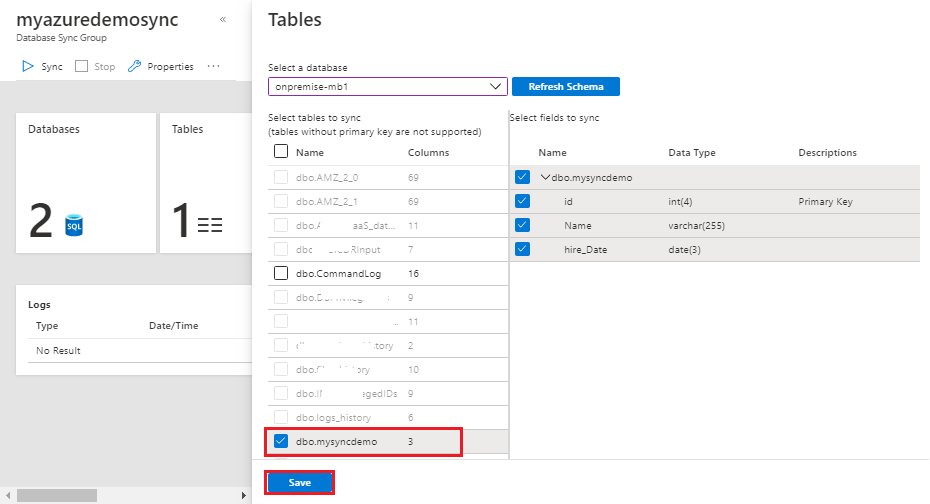
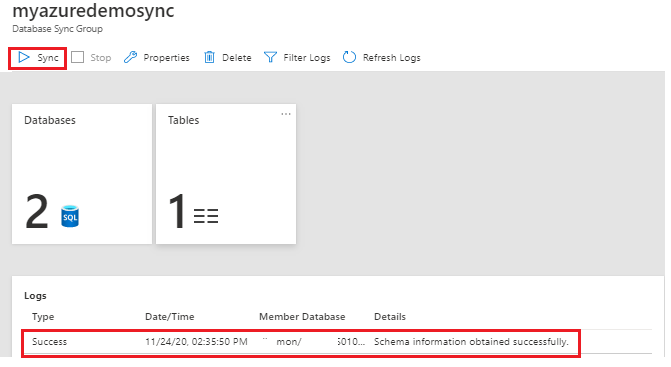
The final step is to configure the sync group. Choose the table that you want to sync and click save. Data Sync page opens. Select Sync.
To run manual sync, locate the database sync group in the Azure portal and click Sync. Verify the logs to see more details about the data sync event.
Conclusion
So far, we have learned how to set up the Azure SQL Data Sync service and how to configure sync service between Azure SQL database and On-premise SQL Server instance. I will discuss more on how to manage the data sync in the upcoming article. In addition, you need to understand the common scenarios where data sync can be helpful.
Azure Data Sync use-case scenario along with other Azure data options.
|
Use-Case |
Azure Data Sync |
Other Azure Data option |
|
The application that requires a Hybrid data sync technique |
Yes |
No |
|
Globally distributed application support |
Yes, It is easy to manage and synchronize the data across the regions. |
Azure geo-replication can be set up to support globally distributed applications but this is uni-direction and it supports secondary read-only replicas to manage workloads. |
|
Disaster Recovery(DR) strategy |
No |
|
|
Setup Read Scale |
Not an ideal candidate for read scalability |
By default, the read scale-out feature available in the Azure SQL database, elastic pool database, and managed instances that are configured with Premium and Business Critical service tiers. The primary intent is to offload the workload on the primary read-write-replica. Based on the connection string value of the ApplicationIntent—”readwrite” or “readonly”, the queries are redirected for the read-only or read-write workloads of the available replicas. With the read-scale out feature, the applications can get maximum performance benefits using the additional compute instance at no extra cost. |
|
ETL load (OLTP to OLAP) |
No |
Azure Data Factory or SQL Server Integration Services |
|
Database migration from On-Premise SQL Server to Azure SQL Database |
No |
Table of contents

My specialty lies in designing & implementing High availability solutions and cross-platform DB Migration. The technologies currently working on are SQL Server, PowerShell, Oracle and MongoDB.
View all posts by Prashanth Jayaram
- Stairway to SQL essentials - April 7, 2021
- A quick overview of database audit in SQL - January 28, 2021
- How to set up Azure Data Sync between Azure SQL databases and on-premises SQL Server - January 20, 2021