
SQL Notebooks are an interactive way of creating documents, executing T-SQL queries along with Python and PowerShell codes. It is available in Azure Data Studio, a cross-platform client tool that works on both Windows and Linux operating systems.
Before proceeding with this article, I would highly encourage you to go over the following articles to get familiar with SQL Notebooks.
- SQL Notebooks introduction and overview
- A handy SQL Notebook for troubleshooting in Azure Data Studio
- Learn Markdown language for SQL Notebooks in Azure Data Studio
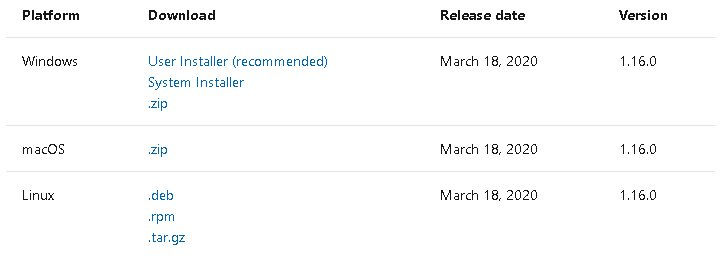
Azure Data Studio provides monthly enhancements, releases for bug fixes and new features. I am using the latest March 2020 version in this article. You can download the latest version of it from Microsoft docs.
Suppose we have a SQL Notebook for T-SQL scripts. Sometimes we want to run the notebook at a scheduled time similar to running scripts using a SQL Server agent job. In this article, we will explore how to schedule a notebook execution along with PowerShell command for it.
SQL Agent Extension in ADS
We can increase functionality using the extension in the ADS. It is available in the market place and free to download and use. You can explore a few useful extensions using the following links.
- Exploring the SandDance Visualizations extension in Azure Data Studio
- SQL Server Schema Compare extension in Azure Data Studio
- Database Administration Tool Extension for Windows in Azure Data Studio
- Access PostgreSQL databases using the Azure Data Studio extension
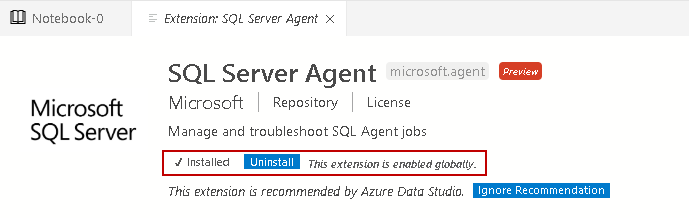
SQL Server agent extension is available in the market place to manage the SQL Server agent job, configuration and troubleshooting failures, if any. It is a recommended extension by the ADS.
Search for SQL Server Agent in the market place, as shown below.

Click on Install, and it enables extension globally for all users.
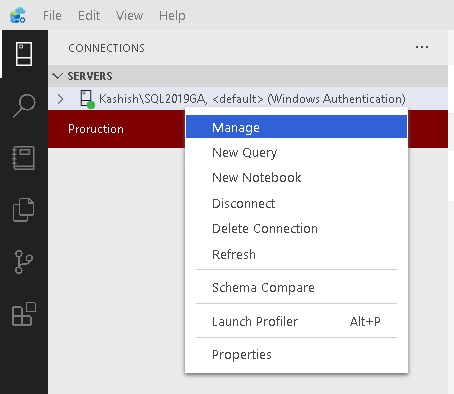
 Now, connect to a SQL instance in ADS. Right-click on it and go to Manage.
It opens the server dashboard along with a tab for SQL Agent. Click on it, and you get a view of all the current jobs on the connected SQL instance. Currently, I do not have a SQL agent job configured, so it shows only a default purge job.
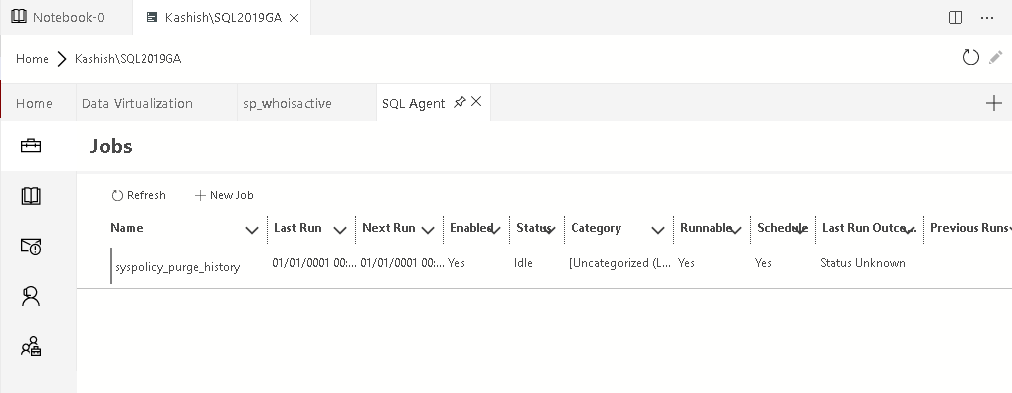
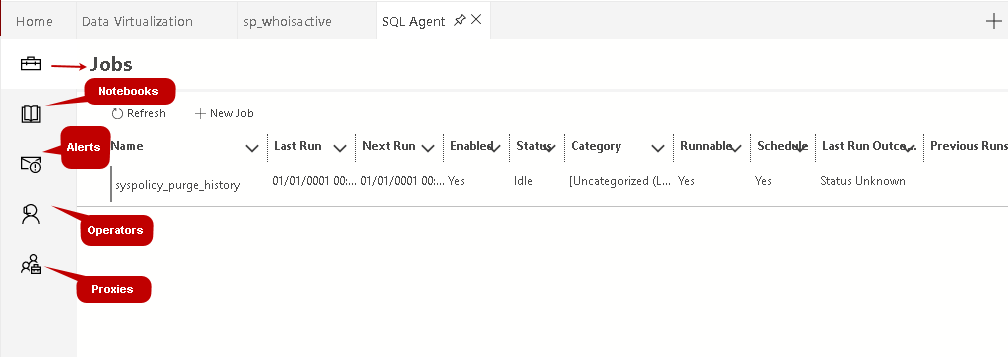
In the left-hand menu, you get a few options.
- Jobs
- Notebooks
- Alerts
- Operators
- Proxies
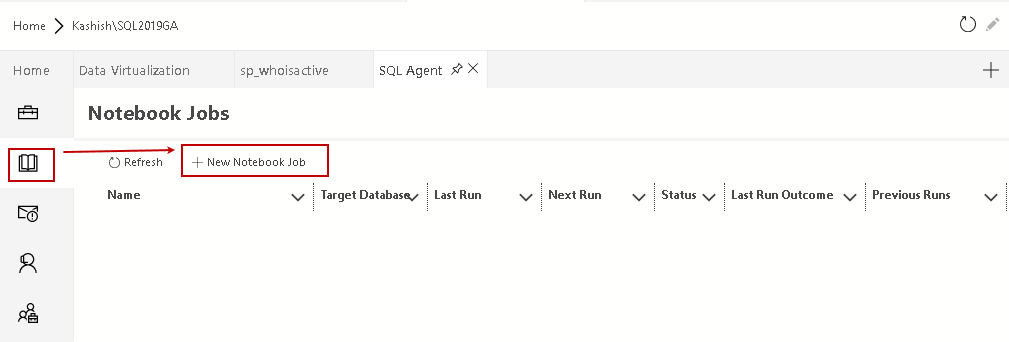
Click on the Notebooks. You get the following window for viewing and configuring notebook jobs.
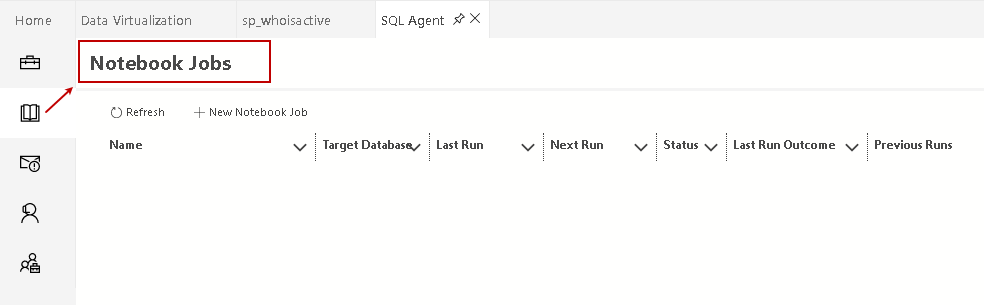
If you have configured a notebook job, it shows up here. I do not have any job as of now, so it does not show any details.
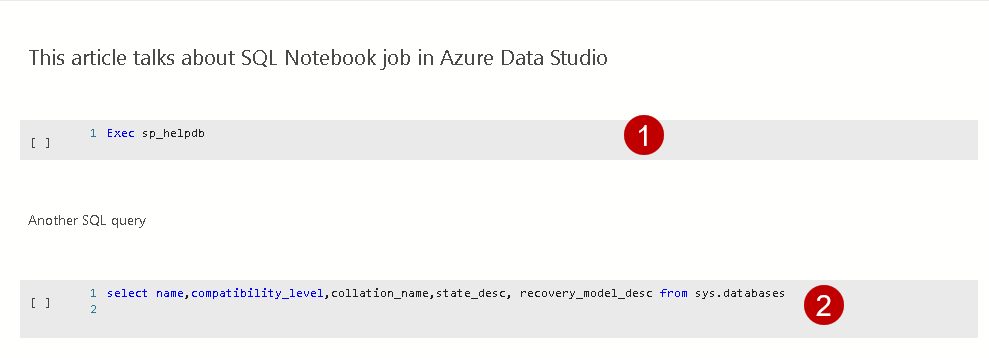
Before we move forward, let’s create a new SQL Notebook for this demo.
- Specify a heading in the notebook and format it using the markdown language, as highlighted in the article referenced earlier
- Specify a T-SQL script. This script drops a SQL table and creates a new table using SELECT INTO statement
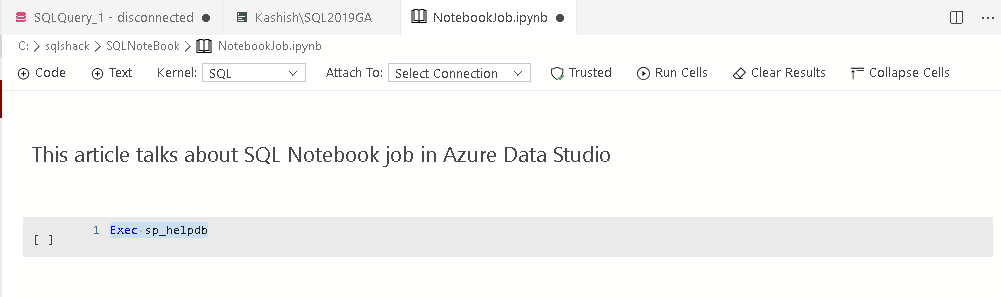
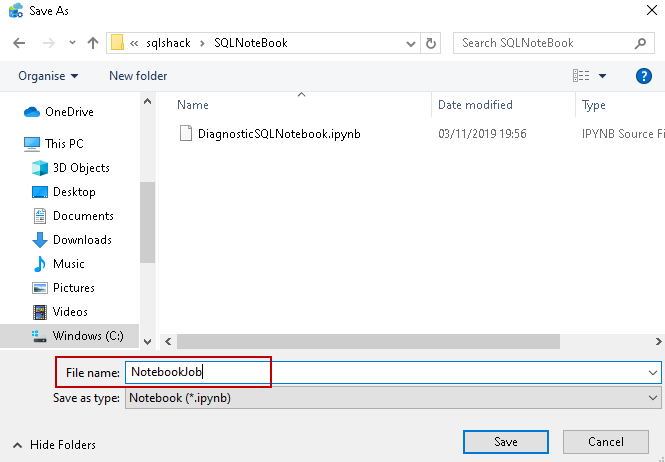
To save this notebook, go to File-> Save AS and specify a name and directory for the notebook.
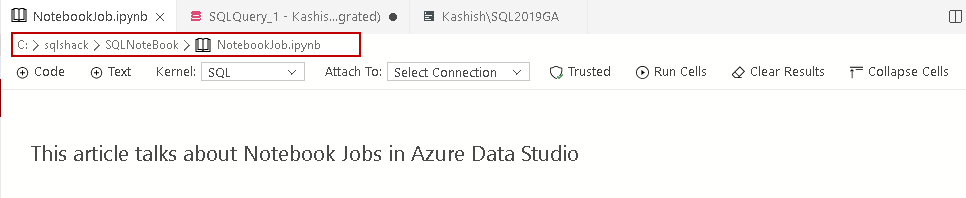
You can also check the path of the notebook file in the header, as shown below.
Now, move back to SQL Agent in Azure Data Studio and navigate to Notebook job. Click on New Notebook Job.
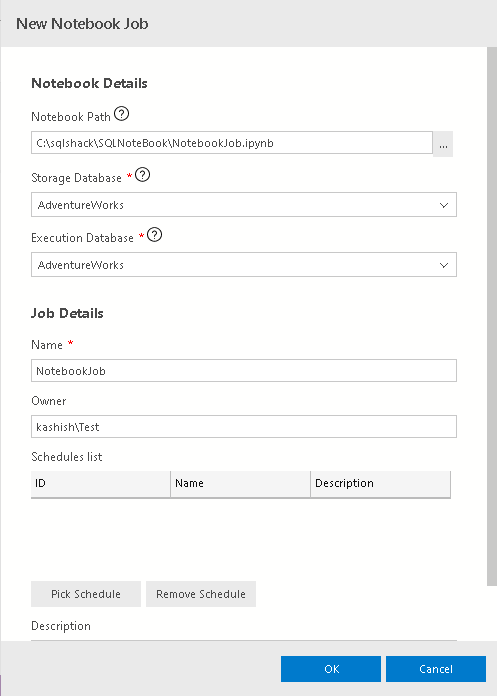
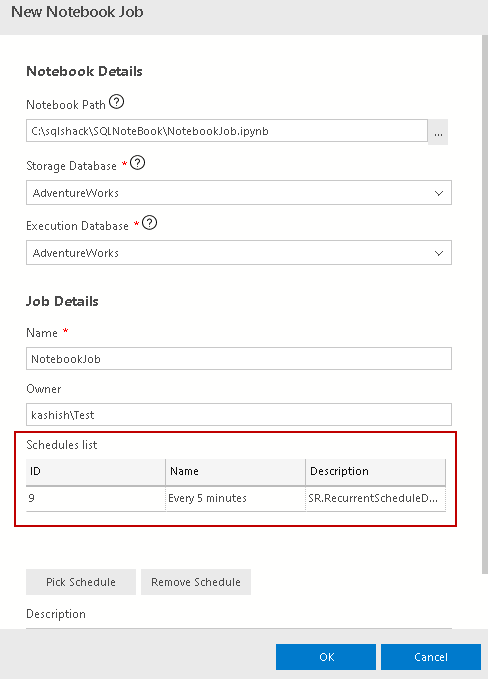
It opens the pop-up for the configuration of a new notebook job.
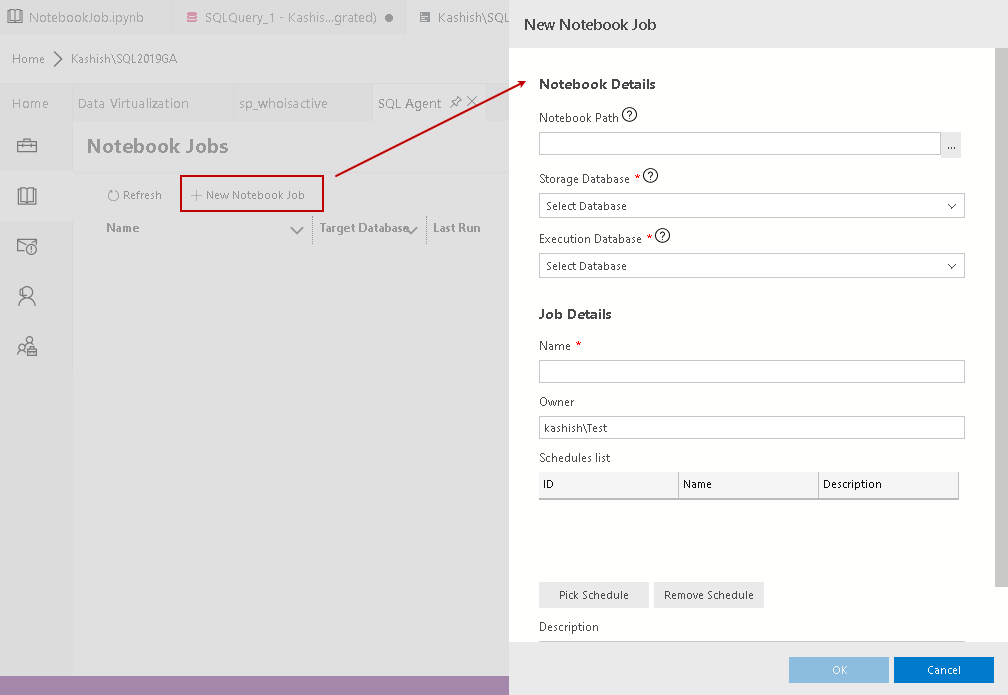
It requires the following details.
- Notebook Path: In this column, specify the path of the SQL notebook that we wish to schedule
- Storage database: As you know, SQL agent job stores in the MSDB system database. For a notebook, we can choose the storage database of the job. The notebook is a JSON format file so we can store it in any database. It creates two tables in the storage database for storing template and execution results. We will look at this later once configured the notebook job
- Execution database: It is the database content under which the query will execute. It can be the same database we specified in the storage database
- Job details: Specify a name for the SQL notebook job
- Owner: It is the job owner. By default, It takes the account by which we connected to SQL instance. This account should have permission to execute the query specified in the notebook
- Schedule: We can pick a schedule that already exists for the SQL Server agent job. Right-now, it does not allow configuring a new schedule in Azure Data Studio. We need to switch to SQL Server Management Studio for it
Fill out the information for configuring a notebook job as per the notebook created earlier.
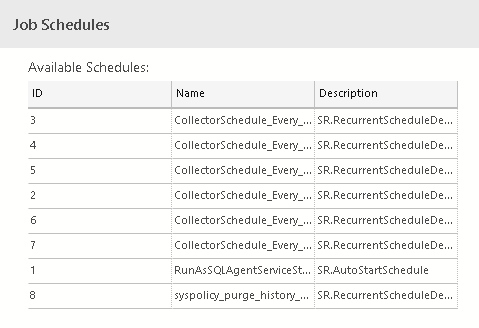
Click on the Pick Schedule, and it gives you a list of available schedules.
Suppose this schedule does not suit our requirements. Switch to SSMS and expand SQL Server Agent.
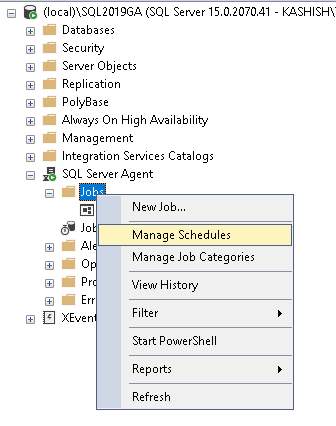
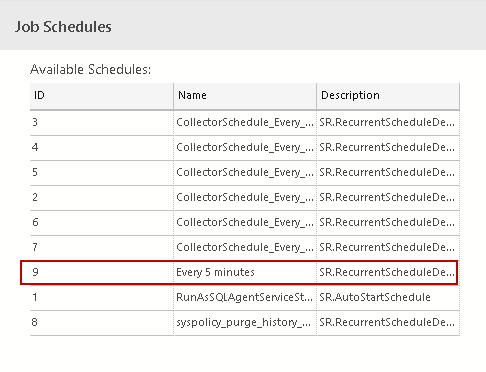
Click on Manage Schedules, and it shows a similar list that we saw in ADS.
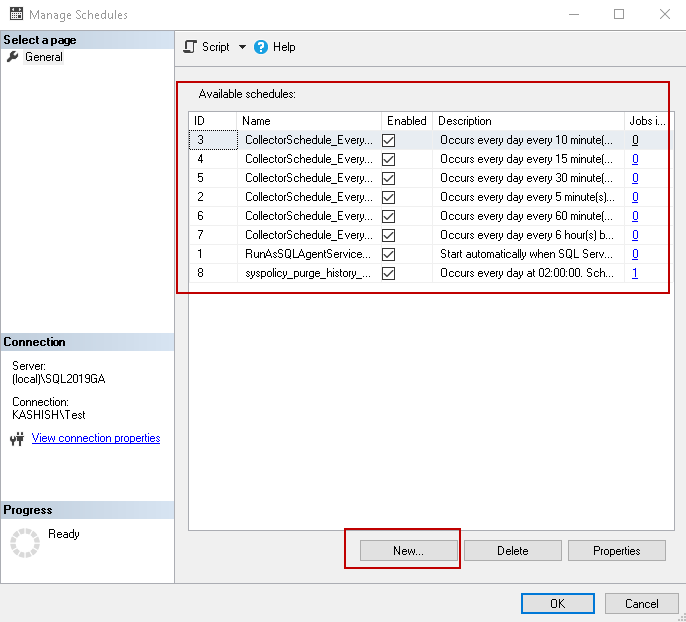
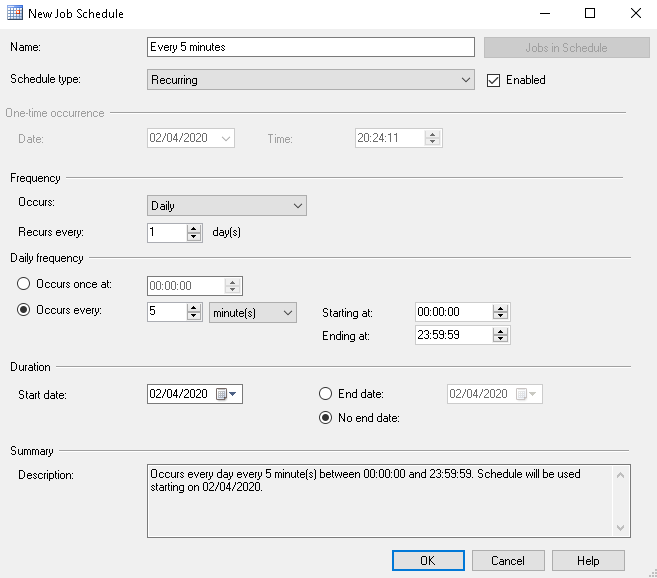
Click on New and configure a new job schedule. We can easily create a new schedule here. In the following screenshot, I configured a new schedule to run every 5 minutes.
Now, go back to ADS, and you can see the newly created schedule. Select the schedule and click ok.
You can see the job schedule in the notebook job configuration.
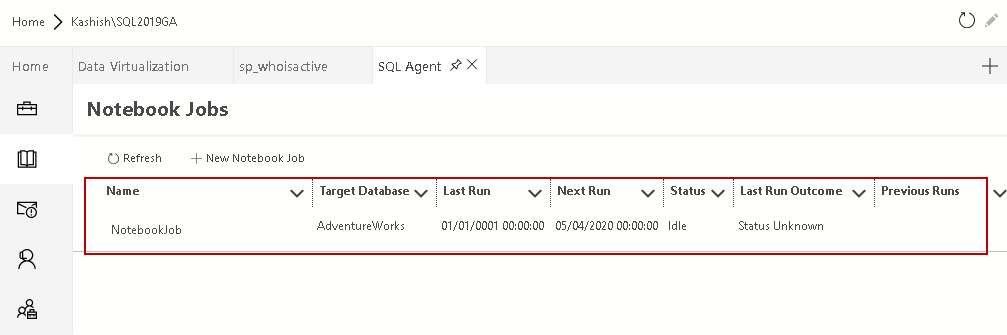
Click ok, and you get the notebook job, as shown here.
You can also run it manually. Right-click on the job and run it manually.
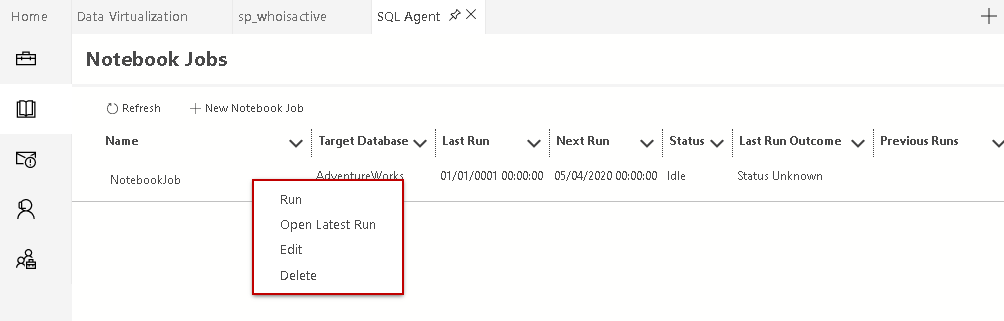
You get the job started message, as shown below.

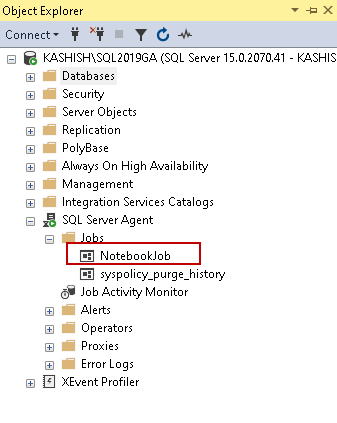
You can also view this job under SQL Server Agent in the SSMS.
Using PowerShell to execute SQL Notebook queries
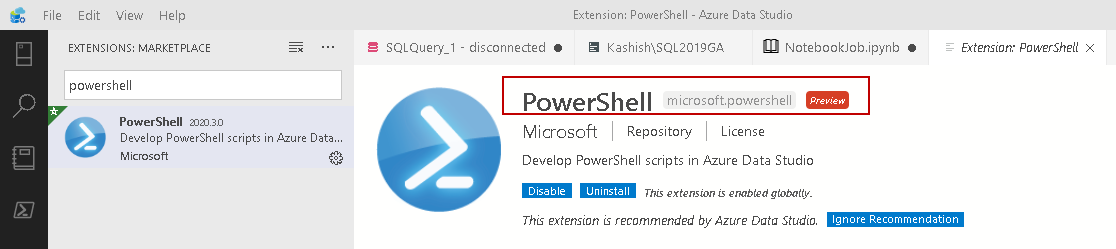
We can also use the PowerShell command for executing a notebook. It uses Invoke-SqlNotebook cmdlet for this. To use this command, we need to add PowerShell extension in Azure Data Studio. You can search for it in the market place and install it.
You should also have the SqlServer PowerShell module in your environment. In case the sqlserver module is not installed, you can use the following command in the administrative PowerShell prompt.
|
1 |
>install-module -Name sqlserver |
Let’s use the Invoke-SqlNotebook for executing the notebook. Here we need to specify the following parameters.
- ServerInstance: SQL instance details
- Database: Database in which query needs to be executed
- InputFile: It is the path of the stored notebook file
In the ADS, open the integrated PowerShell terminal and execute the following command.
>Invoke-SqlNotebook -ServerInstance KASHISH\SQL2019GA -Database Master -Inputfile c:\sqlshack\SQLNoteBook\NotebookJob.ipynb
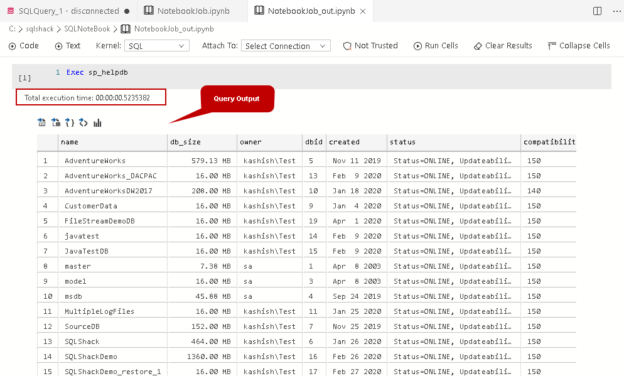
You get the following output along with the last write time in the notebook.
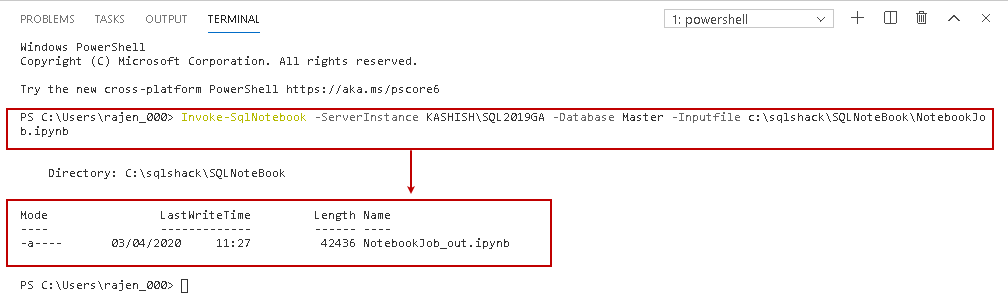
If you go in the directory that holds a notebook, you see an additional file with suffix _out. It is the file that holds output after the query execution in the notebook.

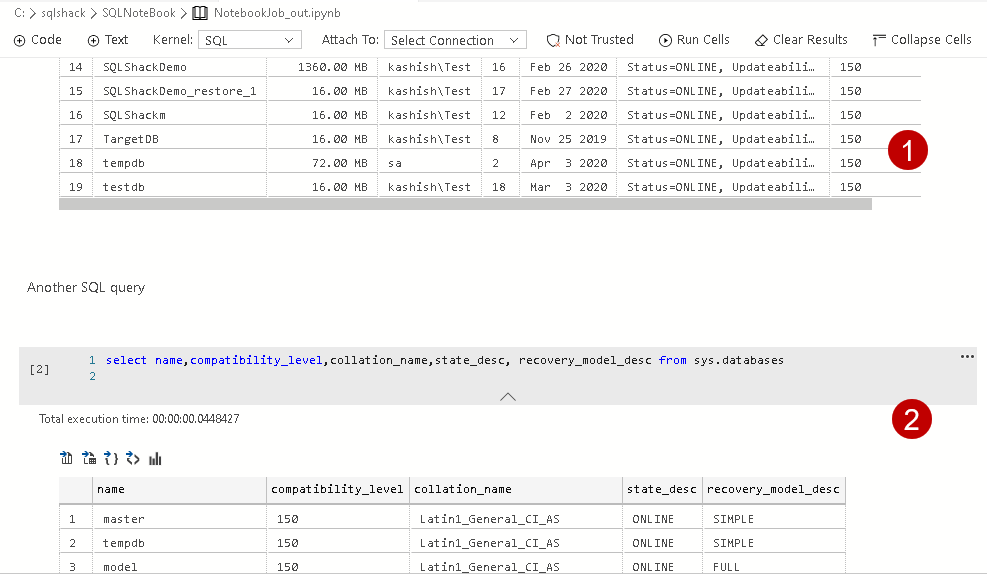
Double-click on this _out file, and you can see query output along with total execution time.

Let’s open the notebook and add another script to check the result of the sys.databases system view.
Now, if we execute the notebook using PowerShell, it should execute both the queries. Rerun the Invoke-SqlNotebook command specified above. I used argument -Force because the output file exists and you get an error message if it is already there. To overwrite the output file, use the -Force argument.

Open the output notebook. You see, it executed both T-SQL queries, and it includes the output of both in this file.
Conclusion
In this article, we explored executing SQL Notebook in Azure Data Studio from an SQL Agent job and PowerShell command. It is an interesting feature to use as an interactive notebook. You can explore this feature as per your requirement. I will be exploring more on notebooks and cover the same in my future articles. Stay tuned!

I am the author of the book "DP-300 Administering Relational Database on Microsoft Azure". I published more than 650 technical articles on MSSQLTips, SQLShack, Quest, CodingSight, and SeveralNines.
I am the creator of one of the biggest free online collections of articles on a single topic, with his 50-part series on SQL Server Always On Availability Groups.
Based on my contribution to the SQL Server community, I have been recognized as the prestigious Best Author of the Year continuously in 2019, 2020, and 2021 (2nd Rank) at SQLShack and the MSSQLTIPS champions award in 2020.
Personal Blog: https://www.dbblogger.com
I am always interested in new challenges so if you need consulting help, reach me at rajendra.gupta16@gmail.com
View all posts by Rajendra Gupta
- Understanding PostgreSQL SUBSTRING function - September 21, 2024
- How to install PostgreSQL on Ubuntu - July 13, 2023
- How to use the CROSSTAB function in PostgreSQL - February 17, 2023