
Introduction
The Jupyter notebook is a powerful and interactive tool that supports various programming languages such as Python, R, Julia. This open-source utility is popular among data scientists and engineers. This notebook integrates both code and text in a document that allows you to execute code, view visualization, solve mathematical equations.
We have covered SQL Notebooks in the Azure Data Studio in the following articles:
- SQL Notebook in SQL Notebooks introduction and overview
- A handy SQL Notebook for troubleshooting in Azure Data Studio
- Use Python SQL scripts in SQL Notebooks of Azure Data Studio
SQL Notebook is a version or reference from the Jupyter notebook. In this article, we will take an overview of the Jupyter notebook.
Getting started with the Jupyter notebook
Jupyter word is derived from the popular programming languages – Julia, Python, and R.
We can start by going through the project Jupyter website.
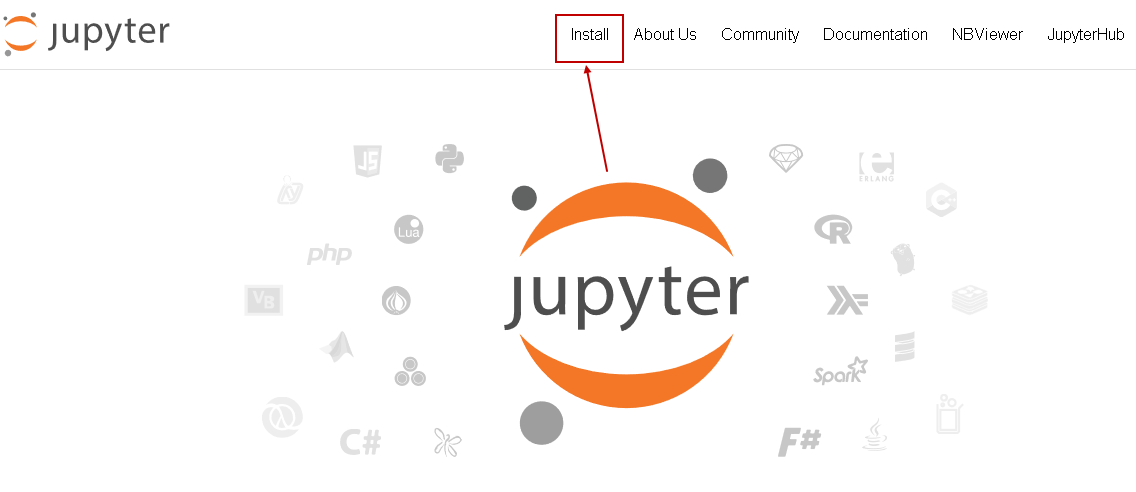
Scroll down, and you get options to install Jupyter lab in your machine or test it in your browser. It is an interactive development environment for the notebook.
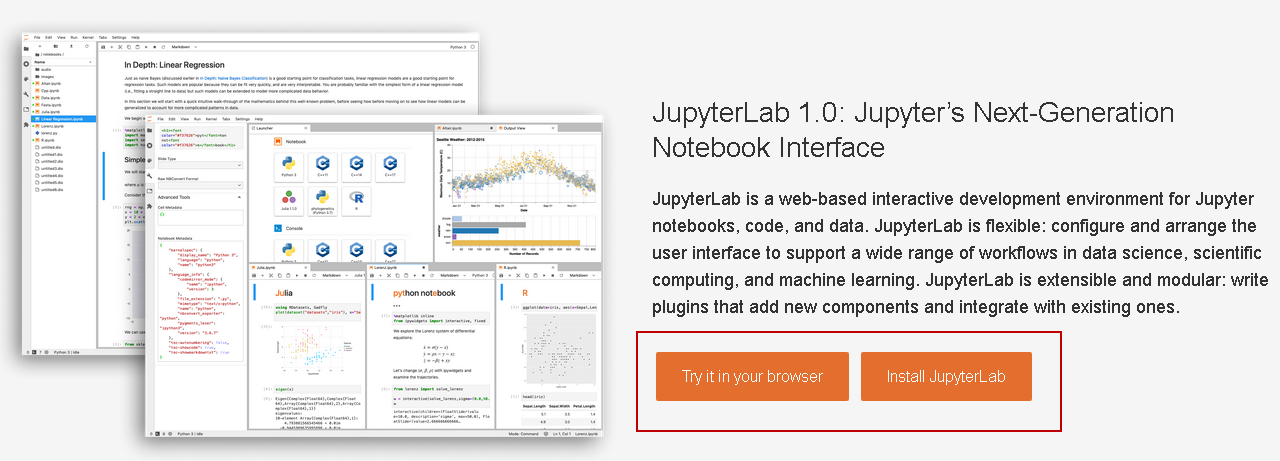
Try it in your browser
It gives you an option to try in the web browser without installing locally. Let’s click on this link. It gives you various options such as try the classic notebook, try JupyterLab, try Jupyter with Julia.
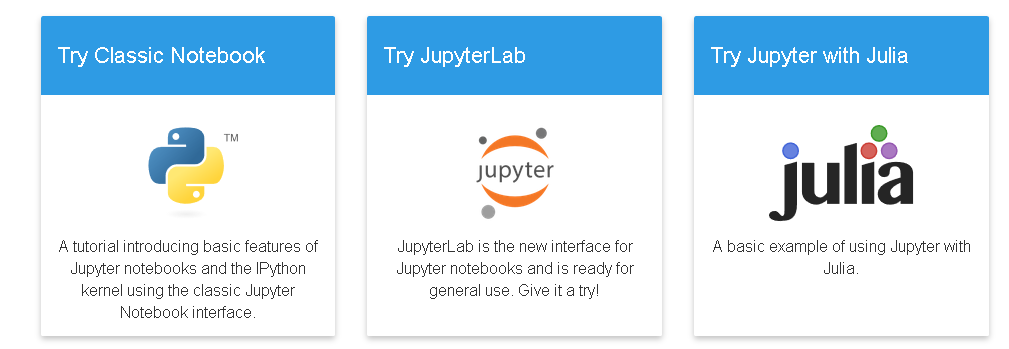
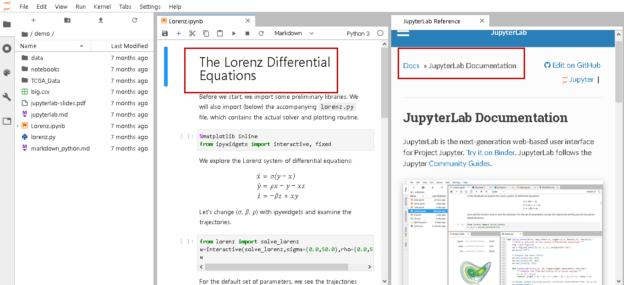
Let’s go with JupyterLab that provides a new interface for the Jupyter notebooks. It takes some time to load JupyterLab. It provides documentation for the JupyterLab as shown below.
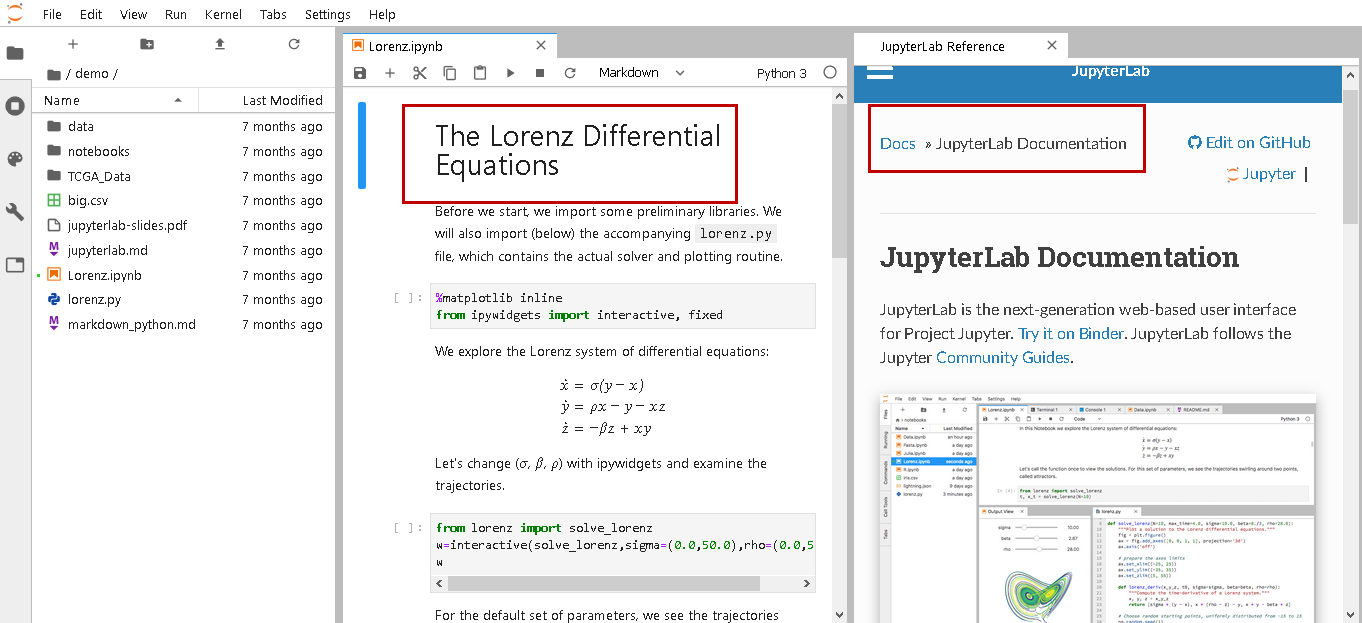
We will not focus on the online Jupyter lab in this article. You can explore it using the available documentation.
Install the Notebook locally
On the homepage of the Jupyter webpage, click on Install the notebook. It opens a documentation page and gives you two different ways to install it.
- Install using the Python’s package manager utility pip
- Install using the Anaconda distribution
In the article, Use Python SQL scripts in SQL Notebooks of Azure Data Studio, we use Python in SQL Notebooks. It would be easy for you as well to correlate the things so we will install Jupyter notebook using Python.
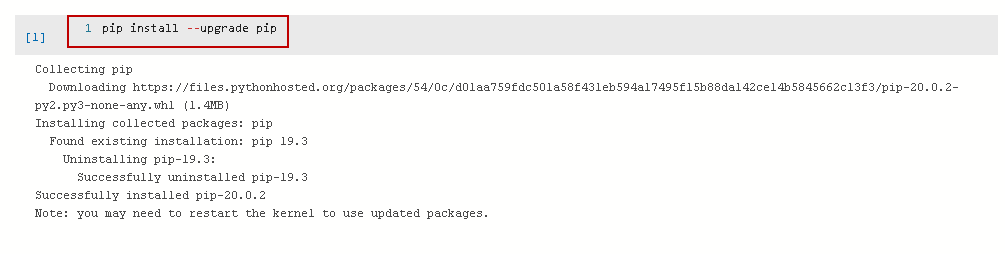
Open Azure Data Studio and a new SQL notebook. In this notebook, switch to kernel Python. First, upgrade the pip utility using the following command and restart the Azure Data Studio.
|
1 |
Pip install –upgrade pip |
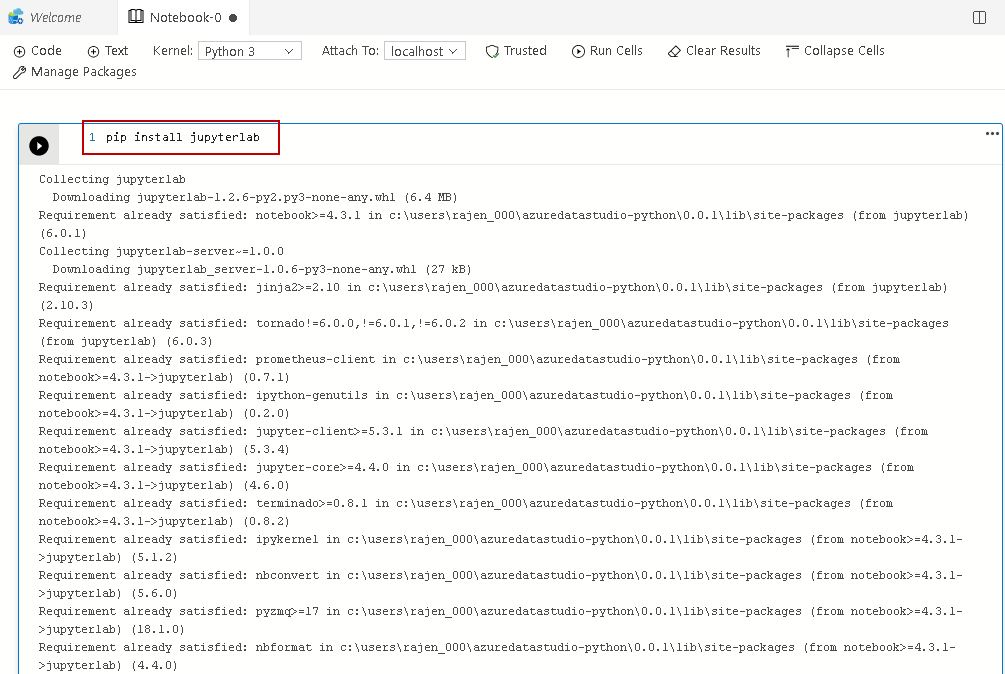
The following command installs the Jupyter lab with pip utility.
|
1 |
Pip install jupyterlab |
It downloads the required packages, dependencies for your system. If the requirement is already satisfied, you get messages like requirements already satisfied.
Once the set up completes, you can see a message that it successfully installed Jupyter lab.
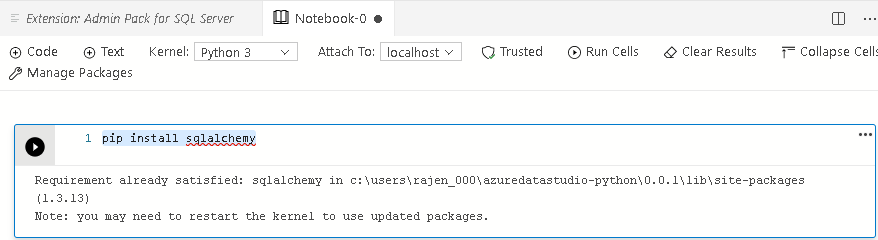
In the next step, install the sqlachemy library as well. We will use it to connect to the SQL Server database. It simplifies the connection string format for us. We can use it connecting with a different database such as Microsoft SQL Server, Oracle, PostgreSQL, MySQL.
|
1 |
pip install sqlalchemy |
I already installed it for my demonstration, and hence the following output.
Launch Jupiter notebook
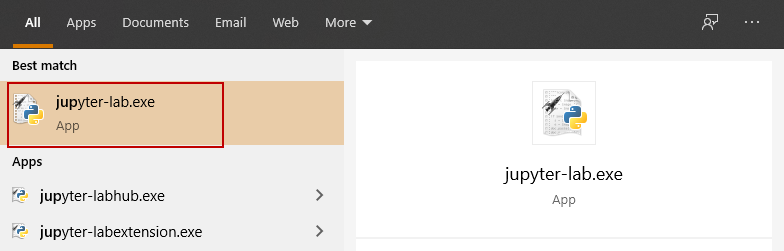
Once we installed it, go to start and launch jupyter-lab.exe. It is a good practice to right-click on it and launch using administrative rights.
It opens an administrative command prompt and loads the necessary configurations. This command prompt is open throughout the Jupyter session. We can view the essential messages on this command prompt while we work with Jupyter notebook. It also shows any error message.

It launches the Jupyter notebook web page installed locally as shown below.
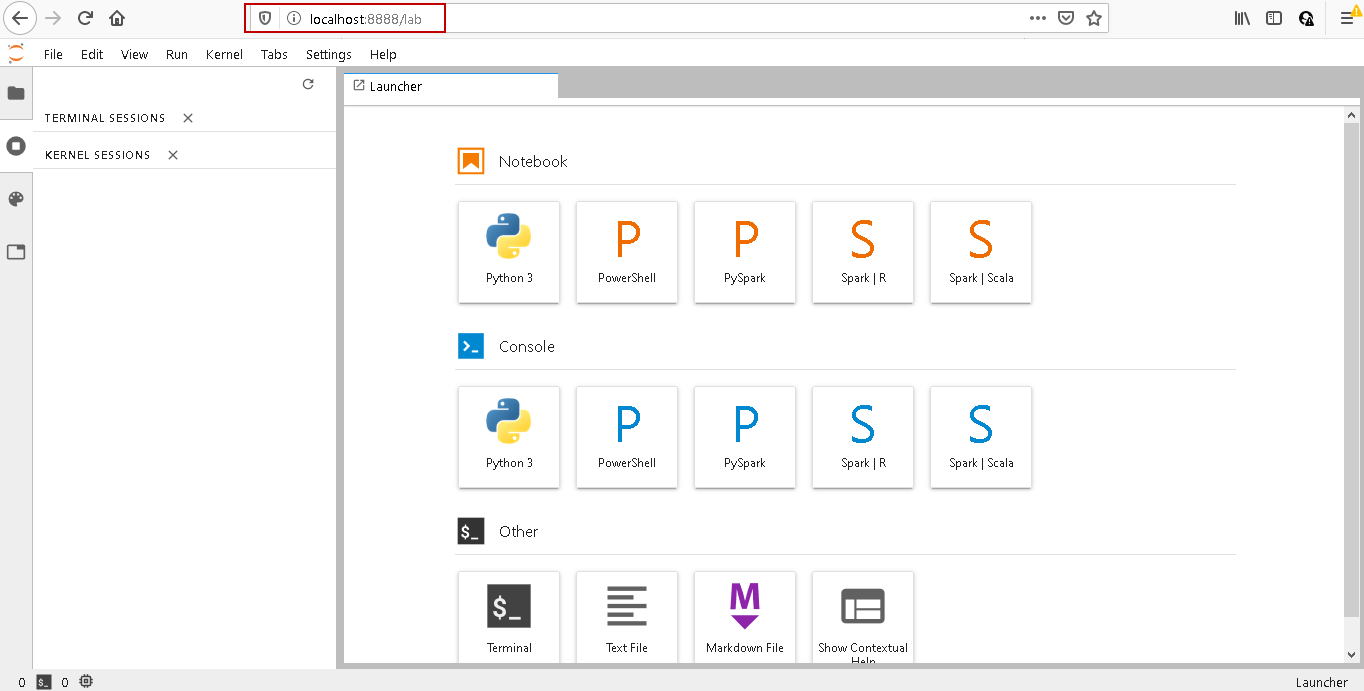
In this notebook, we can see various options.
- Notebook: Python 3, PowerShell, PySpark, Spark R, Spark Scala
- Console: Python 3, PowerShell, PySpark, Spark R, Spark Scala
- Other: Terminal, text file, Markdown file and Show contextual help
Let’ s launch Python 3 notebook.

By default, this notebook is named Untitled. We can give it a descriptive name. We can do it by moving the mouse over the word Untitled and rename the notebook. We can give it a name as per our requirement.
Jupyter notebooks also use Markdown language like a SQL Notebook in Azure Data Studio. You can refer to Azure Data Studio to learn this Markdown language.
In this article, we will execute SQL queries in the Jupyter notebook. It requires an ODBC system DSN pointing to SQL instance. Let’s create a DSN connection in the next step.
Create a system DSN for SQL Server
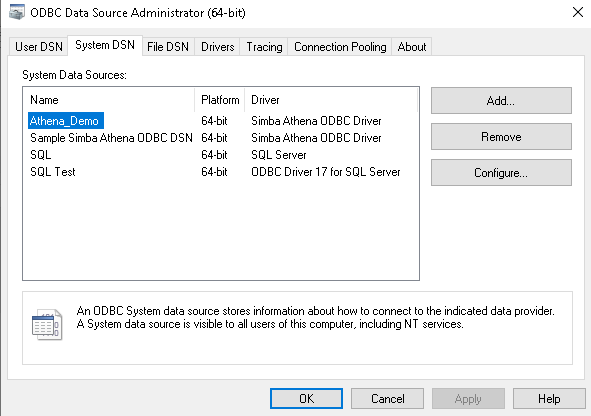
We require a system DSN ODBC connection to prepare a DB connection with SQL Server. Open ODBC from the start, and it opens ODBC Data Source Administrator (64-bit) as shown below.
Launch ODBC and click on System DSN.
Enter the DSN connection name and SQL instance details.

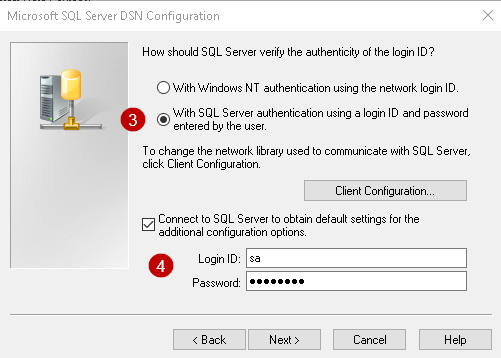
Choose an authentication method (Windows NT authentication) or SQL Server authentication. For SQL Server authentication, enter a username and password. Please ensure the user is having enough permission for executing queries in the database.
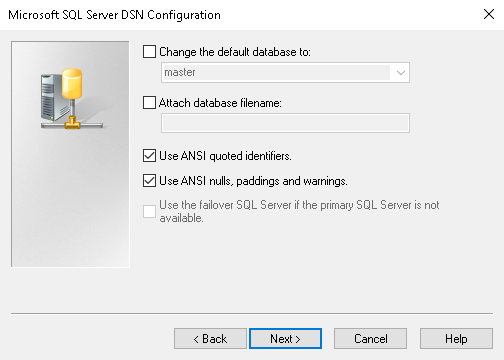
Skip the configuration on the next screen. We can change the default database if required.
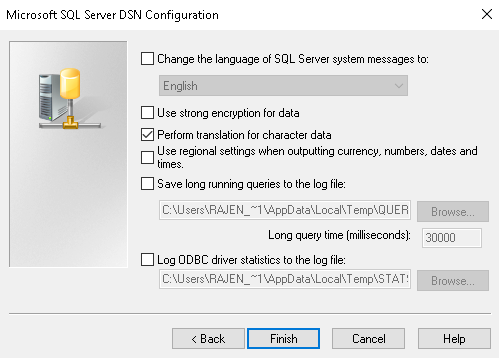
Click on the finish on the next page.
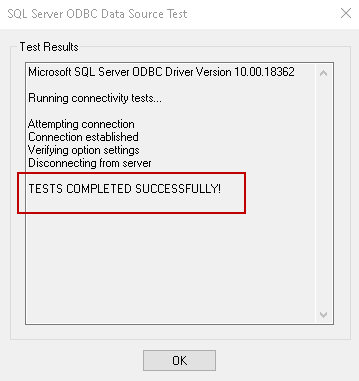
Review the ODBC configuration and test data source.
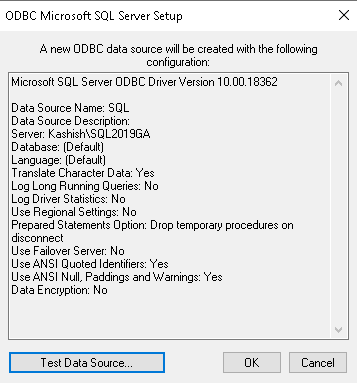
It connects to SQL Server using the credentials and instance details.
Click Ok and close the ODBC configuration page. At this point, for this demo, we have a data source SQL for a database connection.
Connect Jupyter Notebook to SQL Server instance
Now, let’s prepare a connection string using sqlalchemy package.
- Connection format : mssql+pyodbc://user:password@mydsn
For my demo, the connection string for SQL Server is as follows.
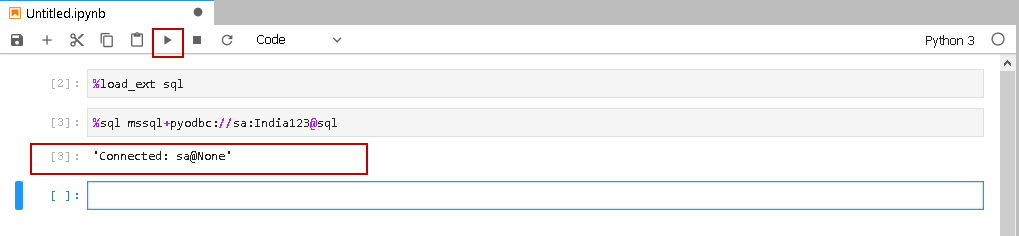
We also need to load the iPython SQL extension for SQL queries. In the python notebook, execute the following commands.
|
1 2 3 |
%load_ext sql %sql mssql+pyodbc://sa:India123@sql |
Click on the play icon to make a connection. Once it connects to SQL Server, it shows a connected message along with the username. It shows none in output because we did not specify any database in the connection string.
Execute a single line SQL query
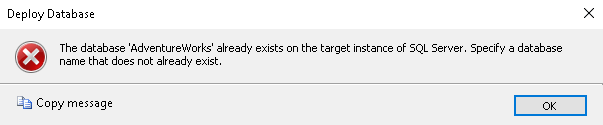
We can execute SQL queries now in this Jupyter notebook. We need to specify %sql for the SQL query. If we directly execute a query, it gives the syntax error message.

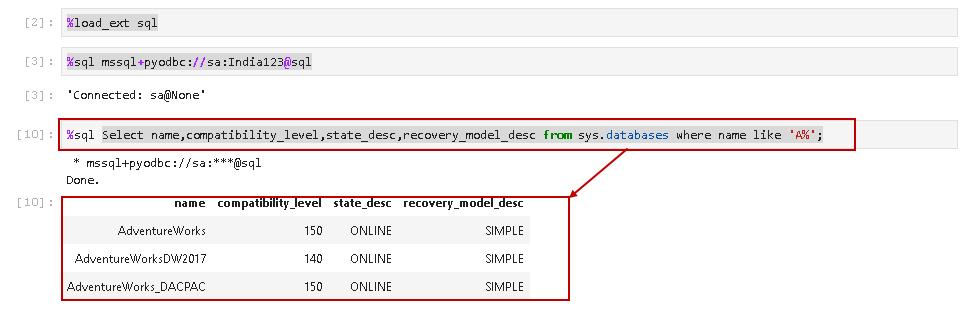
Now, execute the query with %SQL prefix.
|
1 |
%sql Select name,compatibility_level,state_desc,recovery_model_desc from sys.databases where name like 'A%'; |
Execute a multiline SQL query
if we split the same query into multiple lines, we get a similar error invalid syntax error message.

We can add %sql in multiple lines as well, but it does not work also. You get multiple invalid syntax errors this time.
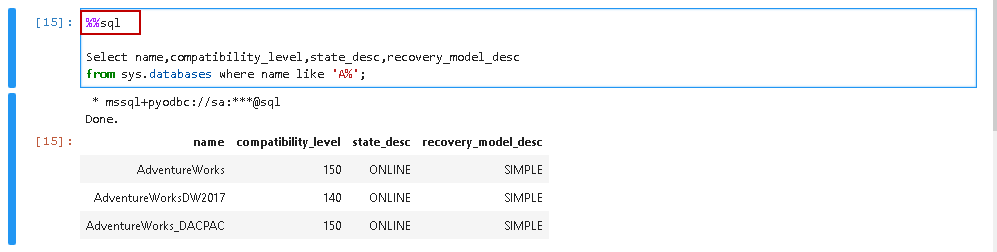
For multiline queries, we can use a %% prefix. It makes the entire code block as a single code block.
Run the following code in the notebook.
|
1 2 3 |
%%sql Select name,compatibility_level,state_desc,recovery_model_desc from sys.databases where name like 'A%'; |
Use Variable in SQL query for Jupyter Notebook
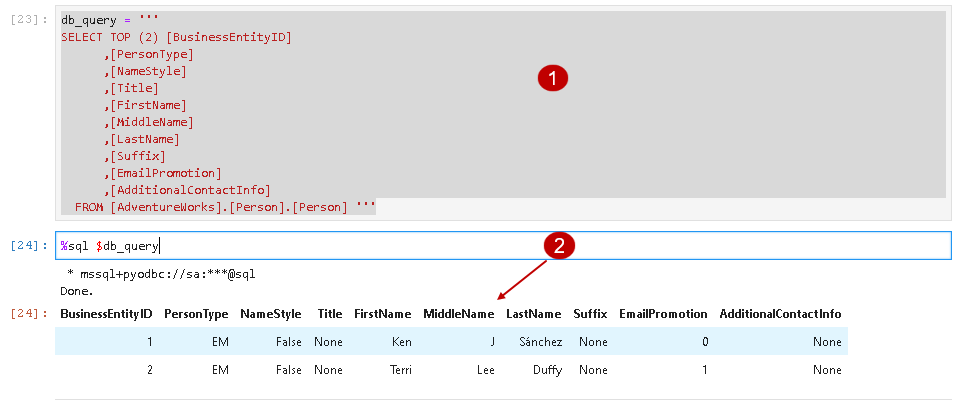
We can use a variable as well to execute a multiline query. In the following query, we specified the query in db_query variable and enclosed query in quotes.
|
1 2 3 4 5 6 7 8 9 10 11 12 13 |
db_query = ''' SELECT TOP (2) [BusinessEntityID] ,[PersonType] ,[NameStyle] ,[Title] ,[FirstName] ,[MiddleName] ,[LastName] ,[Suffix] ,[EmailPromotion] ,[AdditionalContactInfo] FROM [AdventureWorks].[Person].[Person] ''' |
Then call this variable along with %sql variable.
|
1 |
%sql $db_query |
You get the query output as shown below.
Query parameter and variable for SQL query
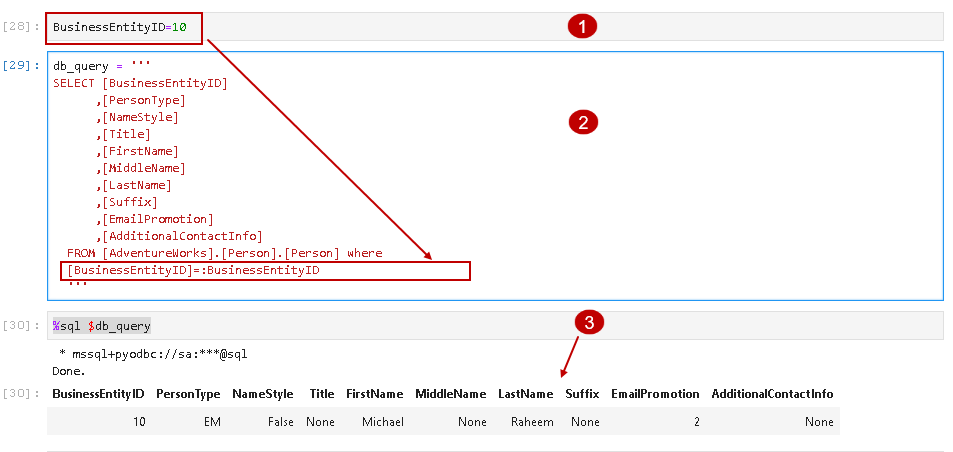
We can also use variables for query parameters as well. Suppose in the previous query, we want to retrieve the record for a specific condition. We can use the WHERE clause for defining a condition. We can use the following way to define where clause variable in Jupyter notebook.
|
1 2 3 4 5 6 7 8 9 10 11 12 13 14 15 16 |
BusinessEntityID=10 db_query = ''' SELECT [BusinessEntityID] ,[PersonType] ,[NameStyle] ,[Title] ,[FirstName] ,[MiddleName] ,[LastName] ,[Suffix] ,[EmailPromotion] ,[AdditionalContactInfo] FROM [AdventureWorks].[Person].[Person] where [BusinessEntityID]=:BusinessEntityID ''' %sql $db_query |
Data frame result and control the output
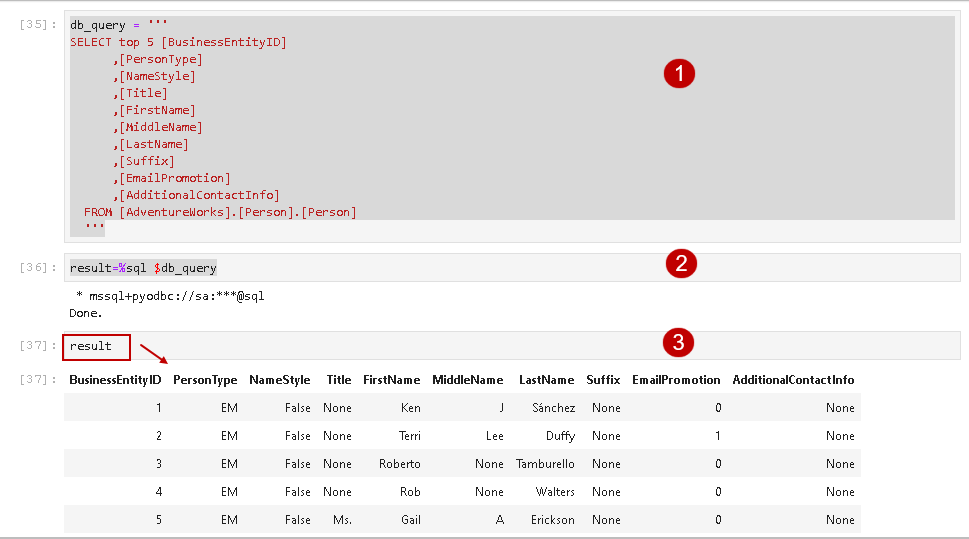
We can capture the result in a variable and control the results using a data frame. The below select statement returns the top 5 rows from the [Person].[Person] table.
|
1 2 3 4 5 6 7 8 9 10 11 12 13 |
db_query = ''' SELECT top 5 [BusinessEntityID] ,[PersonType] ,[NameStyle] ,[Title] ,[FirstName] ,[MiddleName] ,[LastName] ,[Suffix] ,[EmailPromotion] ,[AdditionalContactInfo] FROM [AdventureWorks].[Person].[Person] ''' |
Next, we execute SQL query and get the result in the data frame.
|
1 |
result=%sql $db_query |
Now let’s see how it helps us to control data in the output.
To view all records, we can use the query result for the print full data set, as shown below.
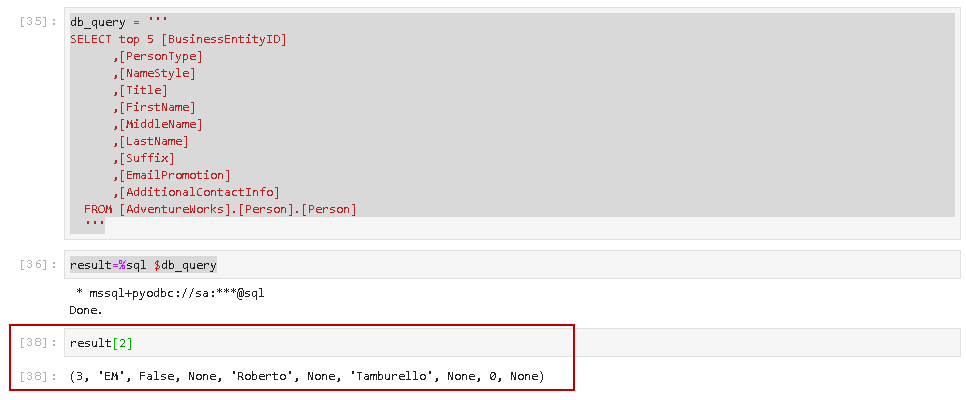
Now suppose we want to retrieve 3rd row from the output. The first row starts with the result [0] therefore, for 3rd row, use result[2] in the query.
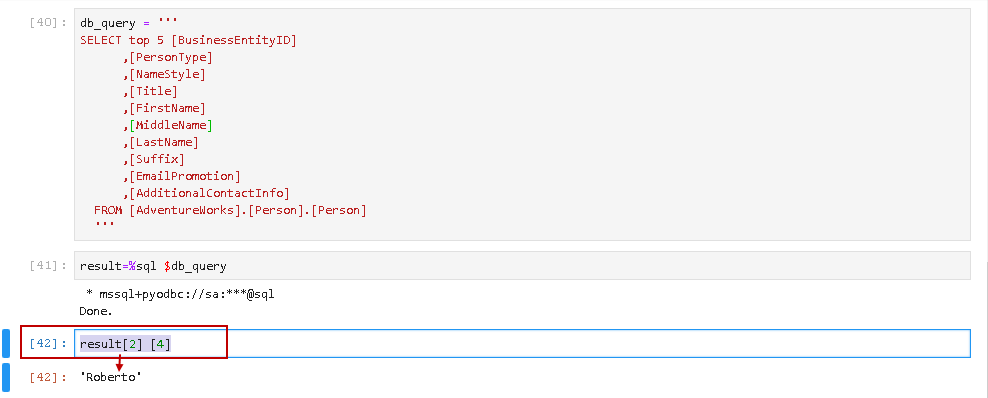
We can further filter results for a specific column. Let’s say we want to retrieve the 5th column value for the 3rd row. We execute the following code for it.
Result [2][4]
Create graphs using a matplotlib python library
We can use Matplotlib in Python to create various charts such as bar column, scatter, line, image. We can use this Matplolib in the Jupyter notebook as well. We will create a bar and pie chart for our sample data.
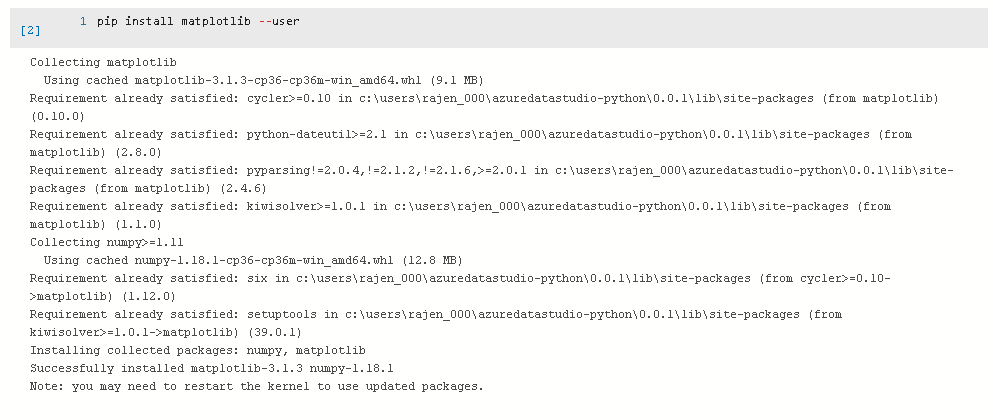
First, install the matplotlib library using the following PIP command. Here we specify –user to install matplotlib for logged in user. If we want it for all users, we can remove this parameter.
|
1 |
Pip install matplotlib --user |
The following code fetches the output of the select statement in a result data frame.
|
1 2 |
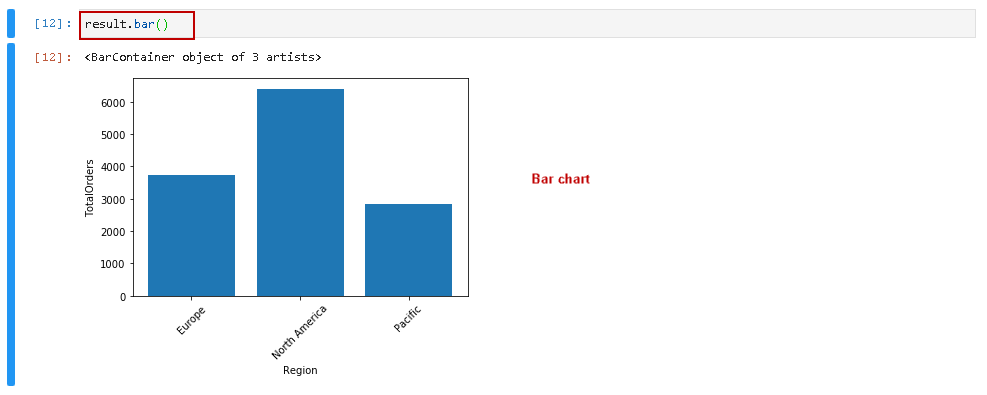
result=%sql SELECT count([OrderNumber]) AS TotalOrders, Region FROM [AdventureWorksDW2017].[dbo].[vAssocSeqOrders] GROUP BY region |
We can call this data frame with the required chart such as pie and bar.
Pie Chart
Execute result.pie()for a pie chart.

Bar Chart
Similarly, execute result.bar() for a bar chart from the same data set.
Conclusion
In this article, we explored the Jupyter Notebook which is a popular tool among data scientists. We also connected it with SQL Server and executed SQL queries. We can also visualize results set in various charts like pie, bar, scatter, etc. Try exploring the Jupyter notebook along with the SQL notebook in Azure Data Studio.

I am the author of the book "DP-300 Administering Relational Database on Microsoft Azure". I published more than 650 technical articles on MSSQLTips, SQLShack, Quest, CodingSight, and SeveralNines.
I am the creator of one of the biggest free online collections of articles on a single topic, with his 50-part series on SQL Server Always On Availability Groups.
Based on my contribution to the SQL Server community, I have been recognized as the prestigious Best Author of the Year continuously in 2019, 2020, and 2021 (2nd Rank) at SQLShack and the MSSQLTIPS champions award in 2020.
Personal Blog: https://www.dbblogger.com
I am always interested in new challenges so if you need consulting help, reach me at rajendra.gupta16@gmail.com
View all posts by Rajendra Gupta
- Understanding PostgreSQL SUBSTRING function - September 21, 2024
- How to install PostgreSQL on Ubuntu - July 13, 2023
- How to use the CROSSTAB function in PostgreSQL - February 17, 2023