
Initial configuration
We have been exploring the SQL Server FILESTREAM feature in this ongoing series of articles. In this previous article, Managing data with SQL Server FILESTREAM tables, we wrote about inserting FILESTREAM data into a FILESTREAM table and performing DML activities on it. Suppose we have created the FILESTREAM database in our instance and now we want to insert a large number of files into a FILESTREAM container. It is easy to write out the insert queries for a small number of files, but if the numbers of files were in huge quantity, it would be difficult to write out the code and insert data into it. It is difficult to manage such kind of requests regularly in the environment.
Therefore, in this article, we are going to explore how to insert into FILESTREAM table if there are N number of files to be inserted. We do not want manual efforts here, therefore; we will complete the task using an SSIS package.
Before we start this article, below are the pre-requisites.
- Basic knowledge of the SQL Server FILESTREAM, you can refer to article FILESTREAM in SQL Server
- Follow the article Managing data with SQL Server FILESTREAM tables to enable FILESTREAM feature, configure access level and create FIELSTREAM database along with the dedicated filegroup FILESTREAM
-
We will use SQL Server Data Tools (aka SSDT) to prepare the integration service package
You can download the set up from the Download and install SQL Server Data Tools (SSDT) for Visual Studio. You need to have an active internet connection to download and install it. You can do offline installations as well, however; it would be easy to install with the active internet connections. During the installation, select the option ‘SQL Server Integration Services’ which we will use for the SSIS package.
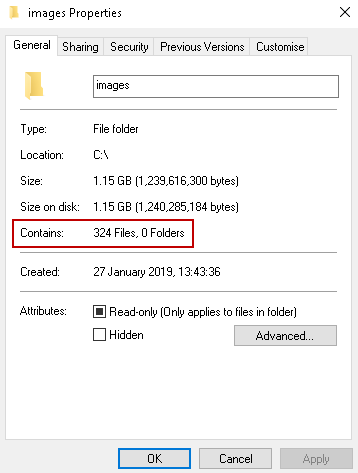
Now let us assume we want to insert the objects present in our folder ‘C:\Chesington’. As shown below we have 324 files in this folder having total size 1.15 GB. We do not want to spend time on writing the t-SQL for these 324 files individually. We can use SSDT Integration service package to do this work for us.
First, create the FILESTREAM table in our SQL Server FILESTREAM enabled instance and database.
|
1 2 3 4 5 6 7 |
Create Table Tbl_Insert_Bulk_Objects ( Object_ID UNIQUEIDENTIFIER ROWGUIDCOL NOT NULL UNIQUE, ObjName varchar(1000), [Object] varbinary (max) FILESTREAM , ) Go |
If we want to insert the records into this FILESTREAM table, we need the complete file name(path\file.extn) of the object. For example, in the article Managing data with SQL Server FILESTREAM tables, we used the below query to insert the record into this FILESTREAM table.
|
1 2 3 4 5 6 7 8 9 10 11 12 13 14 15 |
DECLARE @File varbinary(MAX); SELECT @File = CAST( bulkcolumn as varbinary(max) ) FROM OPENROWSET(BULK 'C:\sqlshack\akshita.png', SINGLE_BLOB) as MyData; INSERT INTO DemoFileStreamTable_1 VALUES ( NEWID(), 'Sample Picture', @File ) |
In this query, you can see the highlighted portion as complete path of the file. In the current scenario, we want to insert 324 objects, we need to have the complete path of each object. We will use SSIS to capture these file names and insert into ‘TBL_FileList’ table.
|
1 2 3 4 5 6 |
Create Table Tbl_Filelist ( Object_ID UNIQUEIDENTIFIER ROWGUIDCOL NOT NULL UNIQUE, ObjName varchar(1000), ) Go |
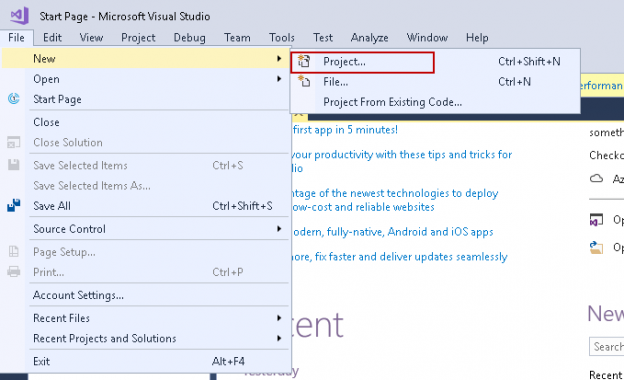
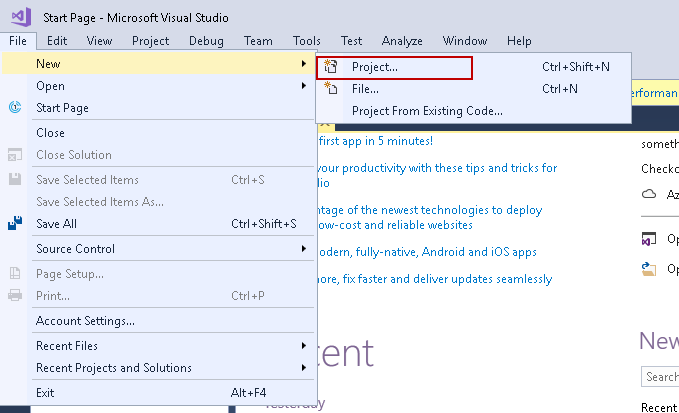
Let us create the SSIS package now to perform this bulk insert on SQL Server FILESTREAM table. Launch the Visual Studio 2017 (SSDT) from the start menu.

In the start page, click on File -> New -> Project
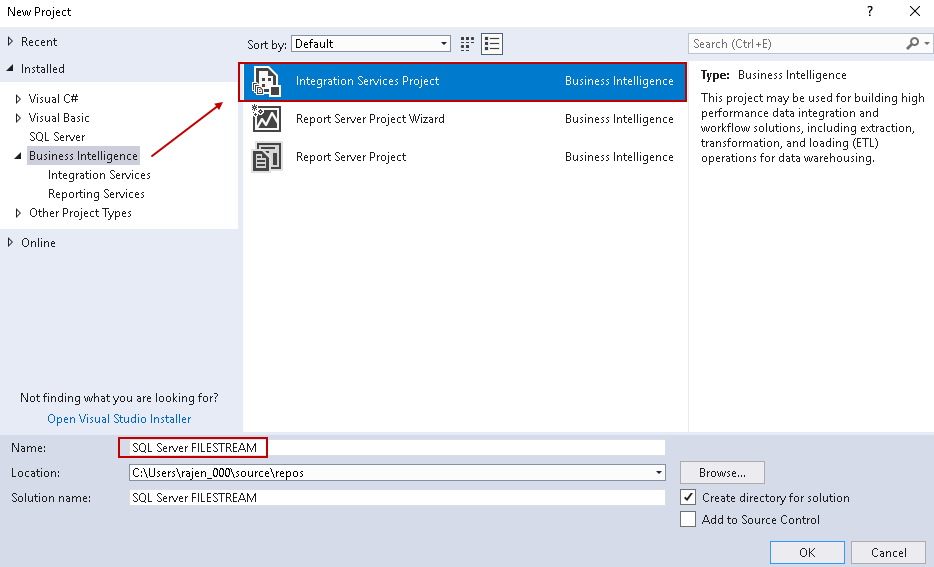
If you run the Visual Studio 2017 (SSDT) for the first time, make sure you select the layout Business intelligence. In the Business Intelligence, click on the Integration Service Project and provide the project name, location for this project.
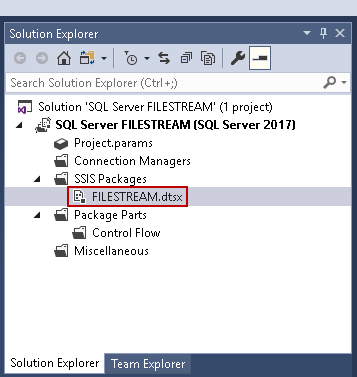
SSDT will create a directory for this solution inside the location. In the Solution Explorer, Right-click on the package and rename it as per your choice.
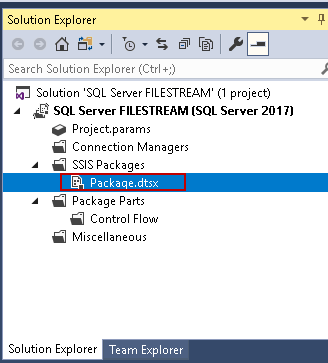
I renamed this to ‘FILESTREAM.dtsx.’
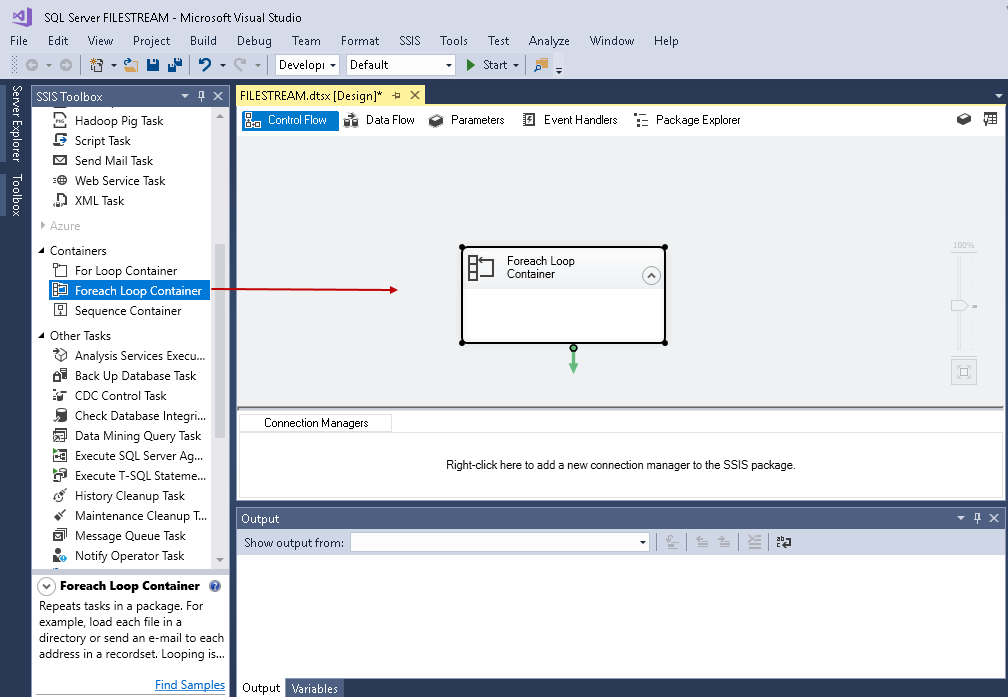
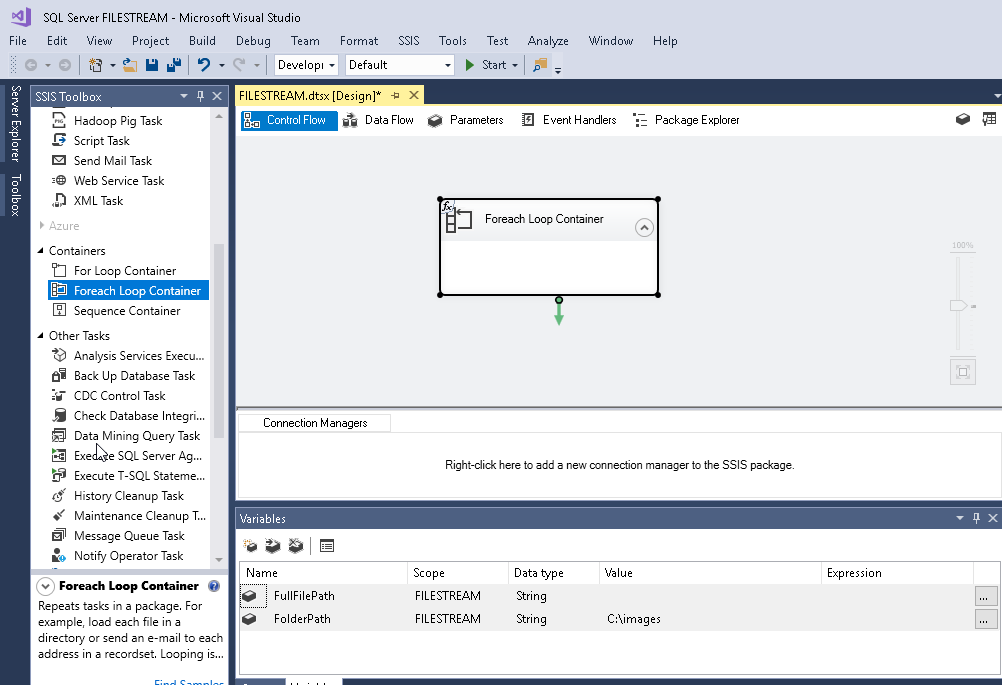
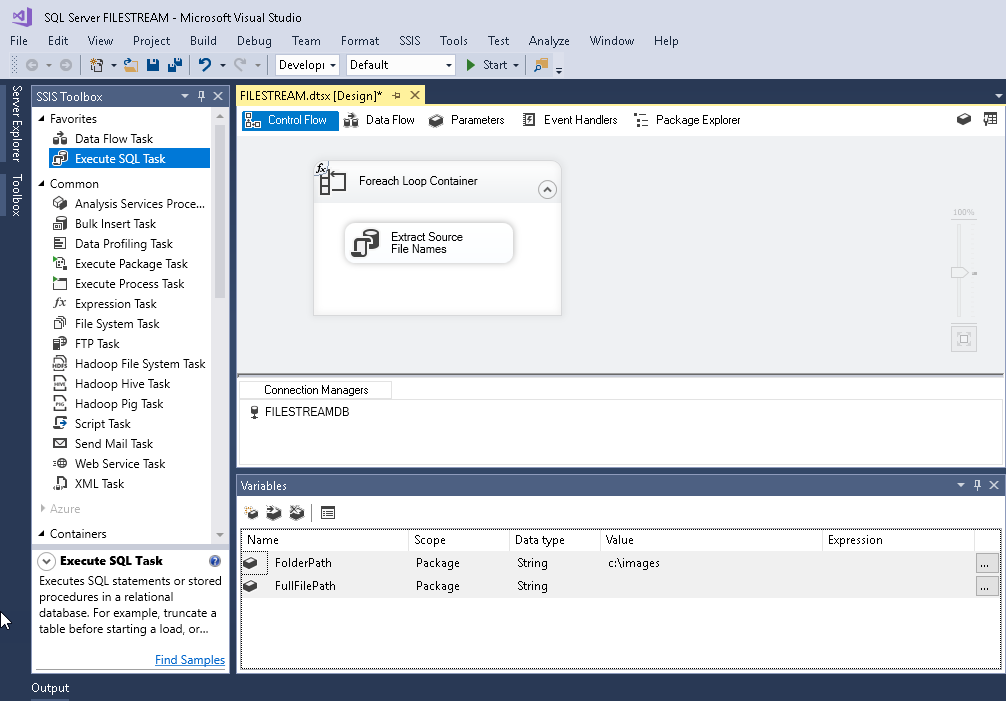
- For Each Loop container to capture the file names: We can use the ForEach Loop container to repeat the control flow task ‘N’ number of times. It is similar to a for loop we have used in the programming languages. We are going to use this container to loop through the source files and retrieve the file names. Drag the ‘Foreach loop Container’ i the Control flow area.
Right click on the blank area in the control flow and click on Variables. It opens the ‘Variables’ window as shown here.
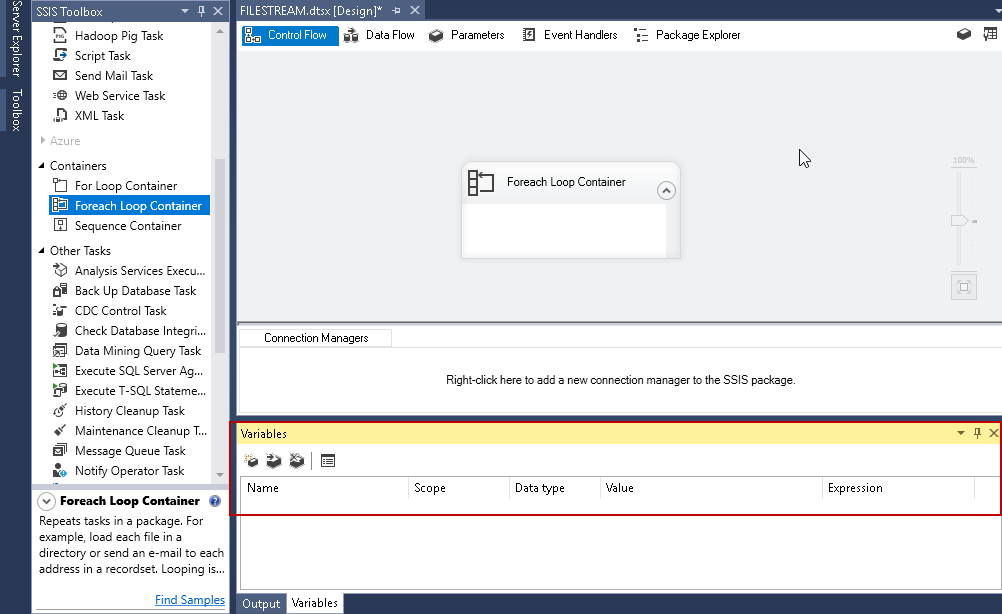
Click on ‘Add Variable’ to add the variable to this SSIS package.
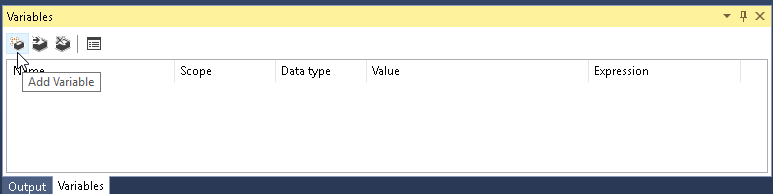
We are going to define two variables here.
- FolderPath: In this variable, we will pass the folder path where we have the files to import into SQL Server FILESTREAM table
- FullFilePath: This variable will capture the full object path
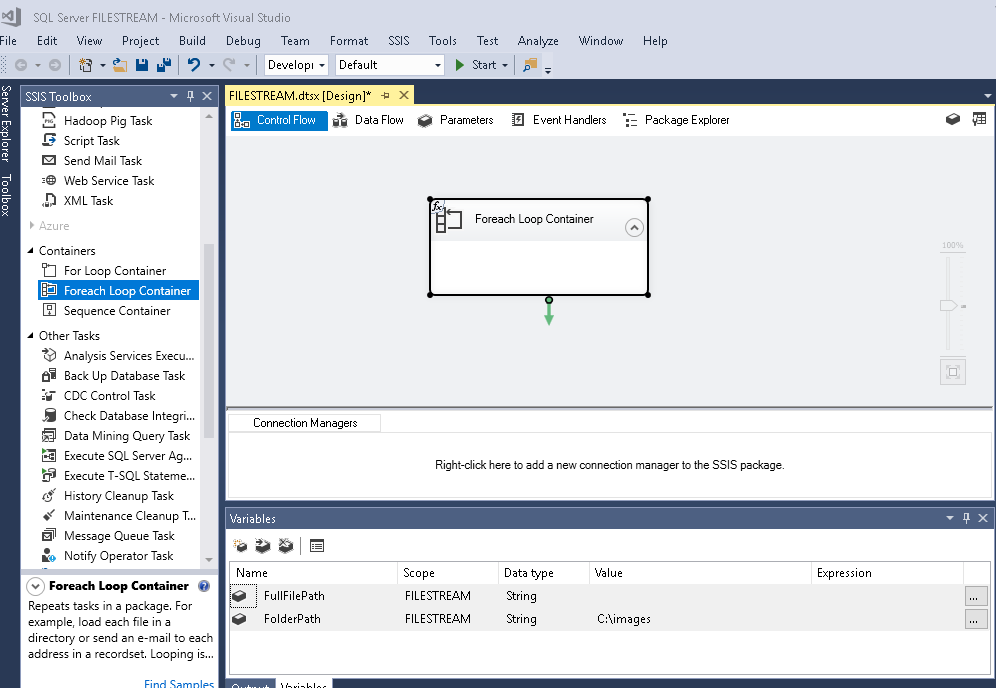
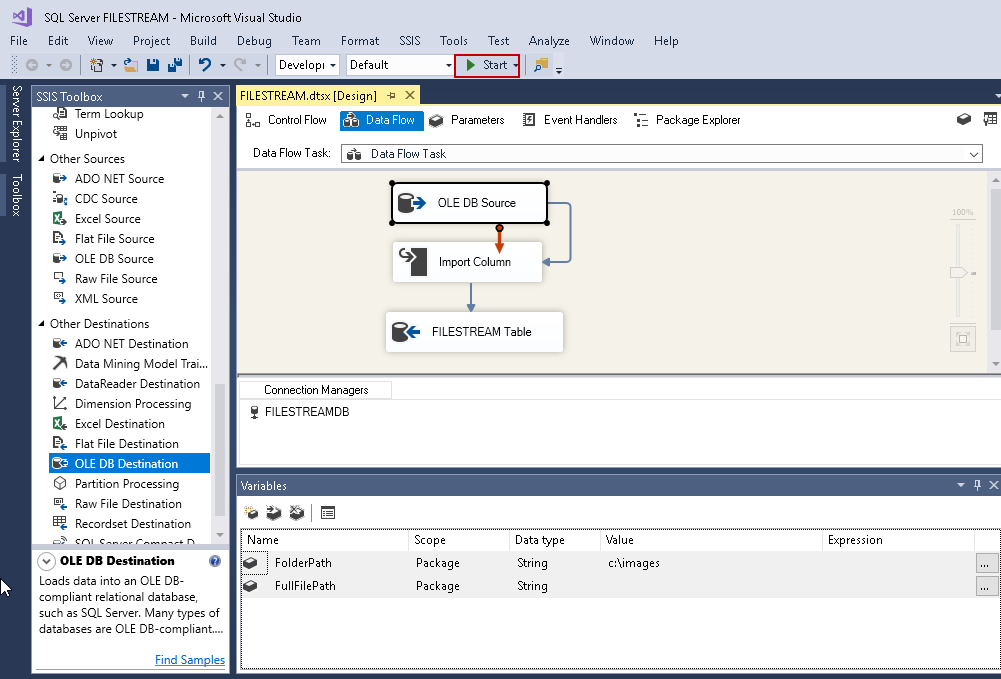
Define the variables as shown in the below screenshot. In the ‘FolderPath’ variable, you can notice the value ‘C:\Images’. It is the folder in which we have all the files placed as of now.

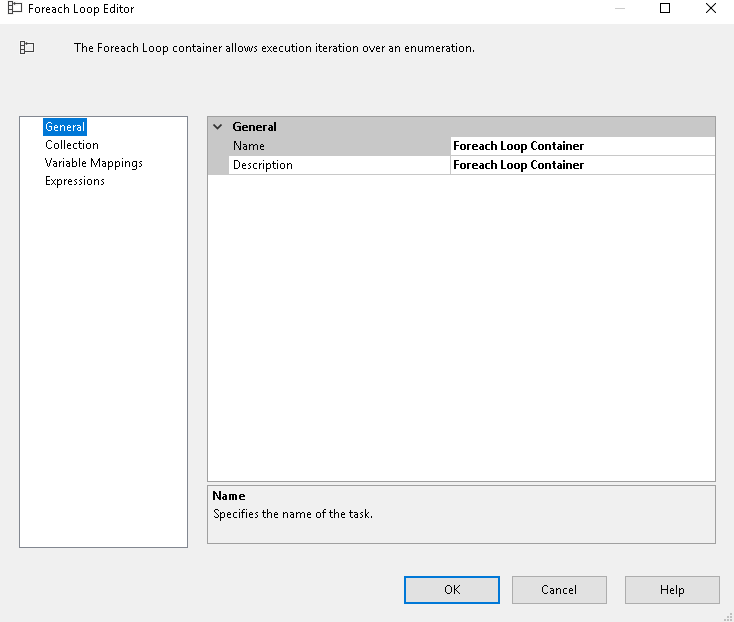
Now double click on the ‘Foreach loop container’, and it opens the pop-up window to do furthe Configuration.
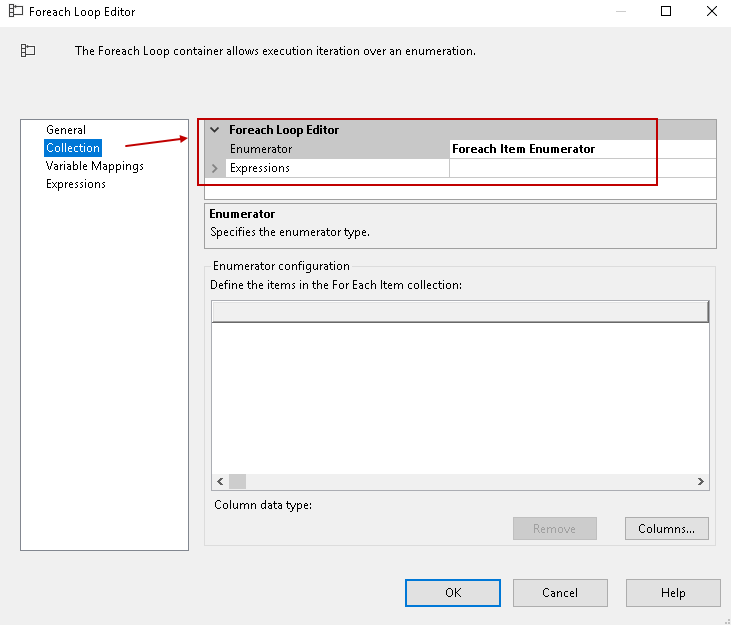
Click on the ‘Collection’. By default, it shows the Enumerator ‘Foreach Item Enumerator’
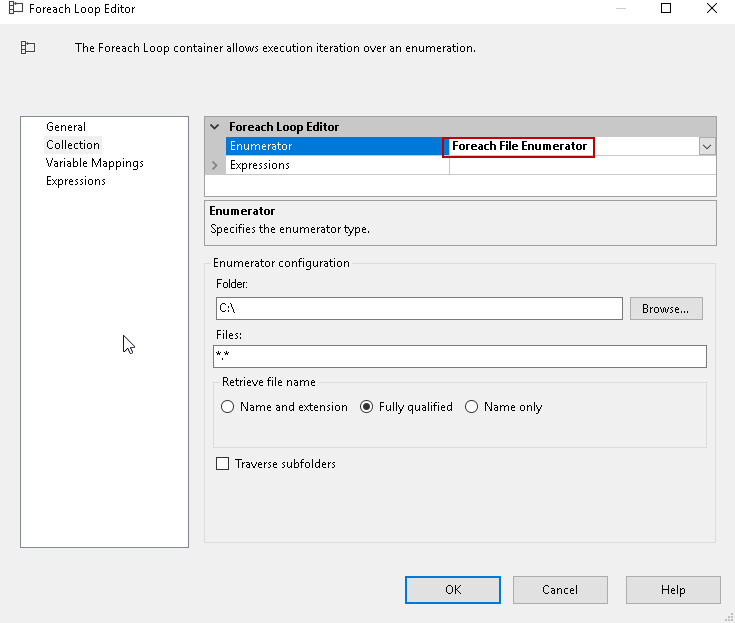
We need to select the enumerator ‘Foreach File Enumerator’ from the drop-down menu.
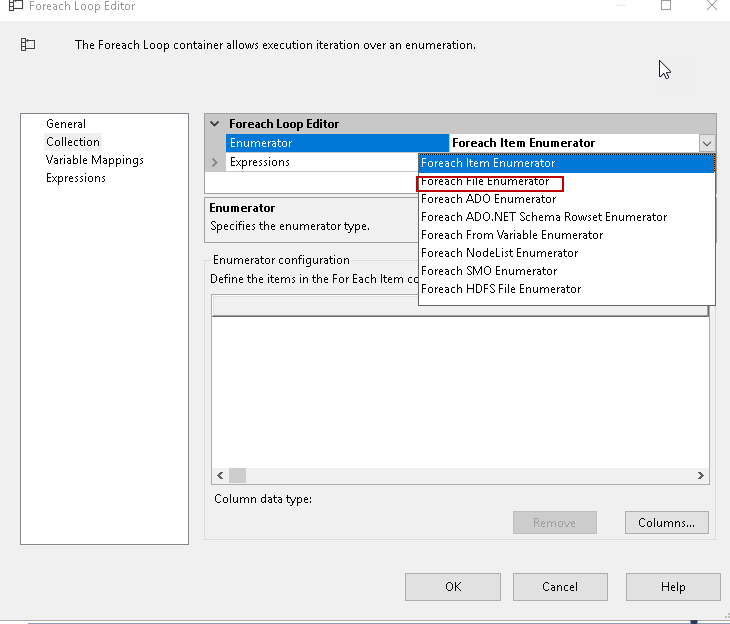
It shows the below window once we select the ‘Forach file enumerator’.
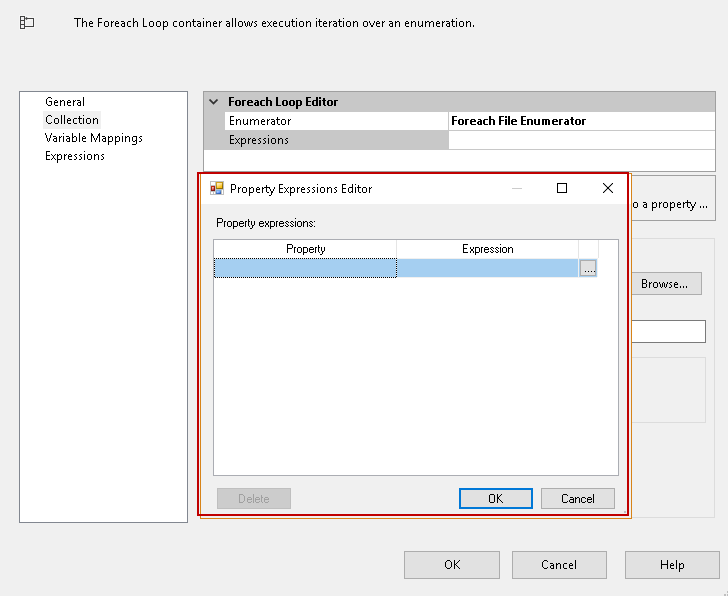
Click on ‘Expressions’ and browse it. You get the property expression editor window.
In this property expression editor, select the ‘Directory’ from drop-down values.

Once we select the ‘Directory’ option, we get the three dot icons to give the expression input.
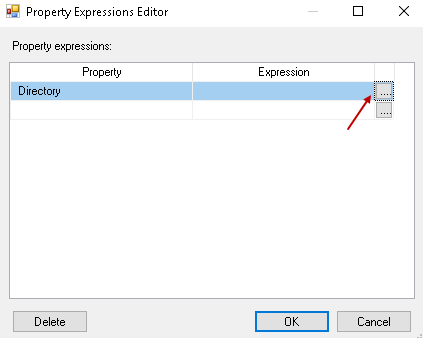
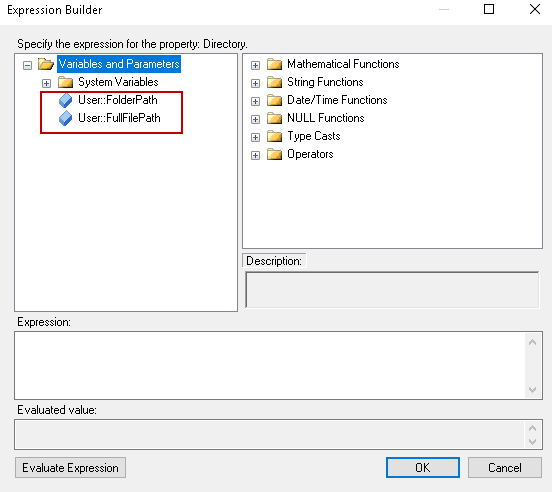
Click on the three dots icon (…), and you get the expression editor.
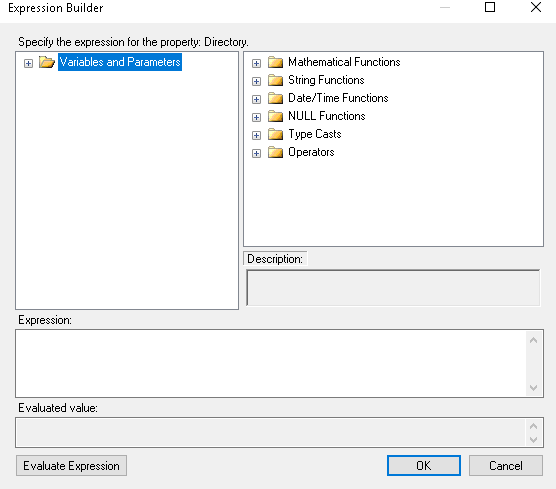
Expand the ‘Variables and Parameters’, and you can see the variables we created in the above step.
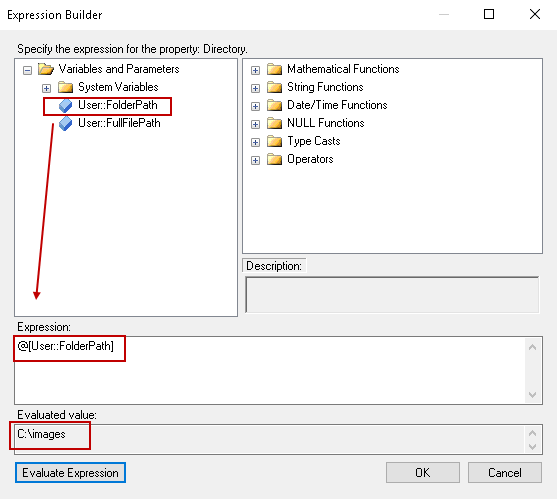
Drag the variable ‘User: FolderPath’ to the ‘Expression’ window and click on ‘Evaluate Expression’. You can see the source folder name in the ‘Evaluated value’.
Click on ‘Ok’, and you can see the below ‘Foreach loop editor’ window.
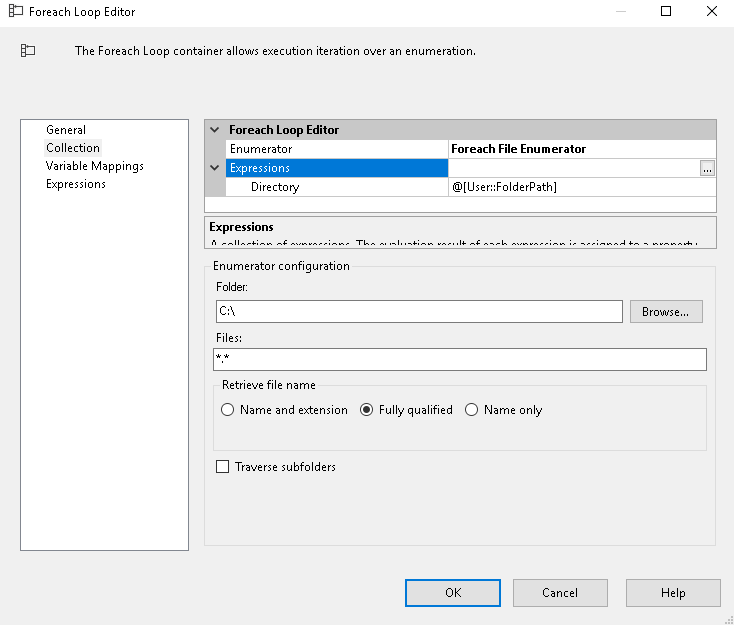
In the retrieve file name, you get the below options.
- Name and Extension: We can get the file name along with the extension using this
- Full Qualified: We get the fully-qualified name for the file. The full qualified name denotes the file name along with the extension and the source path
- Name Only: We get only file name if we select this option
In this article, we want to get the fully qualified name for all the files placed in the source folder. Therefore, we will select ‘Full Qualified’ option here.
Now we need to map the variable to hold this fully qualified name, therefore, click on the ‘Variable Mapping’ from the left menu bar.
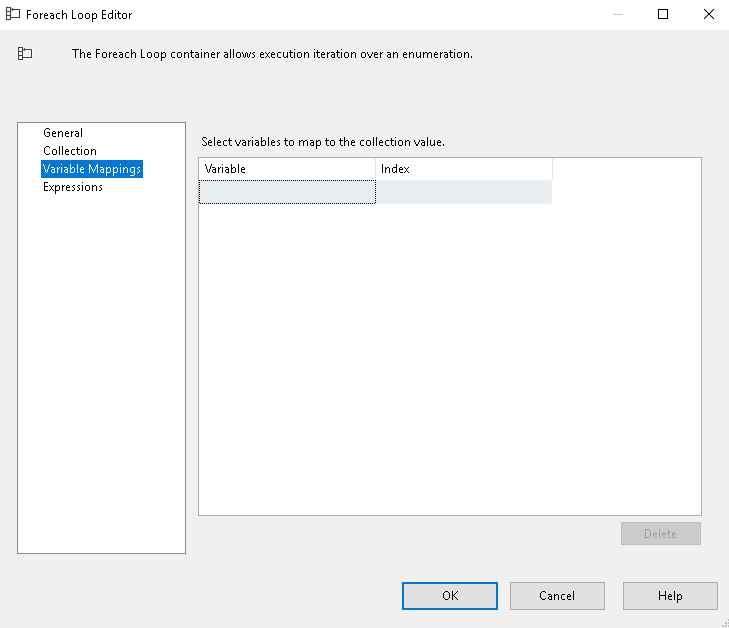
In the variable Mapping, select the variable ‘User: FullFilePath’ which we created earlier and give the value 0 in the Index column.
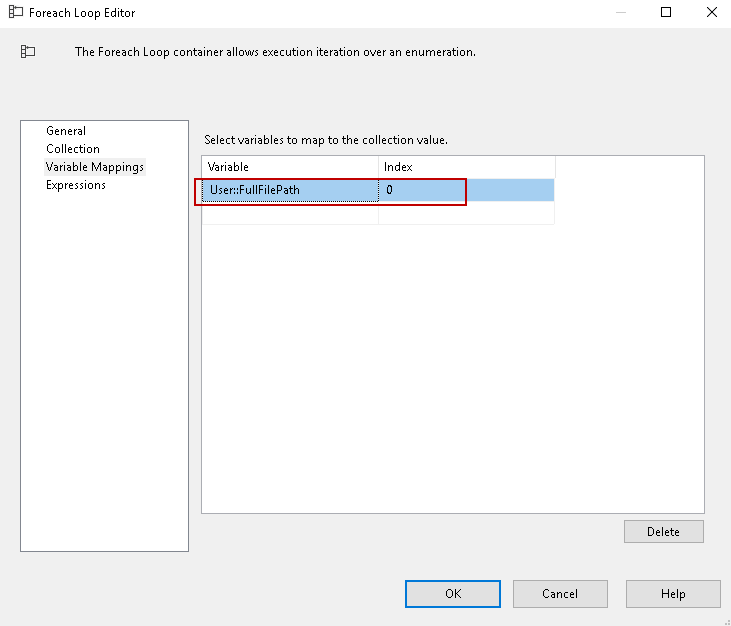
Click on ‘OK’ and return to the ‘Foreach loop Container.’
Advanced configuration
In the first part of this article on FILESTREAM and SSIS configuration, we wrote about exploring SSIS packages for the SQL Server FILESTREAM import objects. In this part, we will take over from there and do multiple configurations to load objects into FILESTREAM tables at once.
We configured the ‘Foreach loop Container’ to loop through the source folder and put the result (fully qualified name) into a variable.
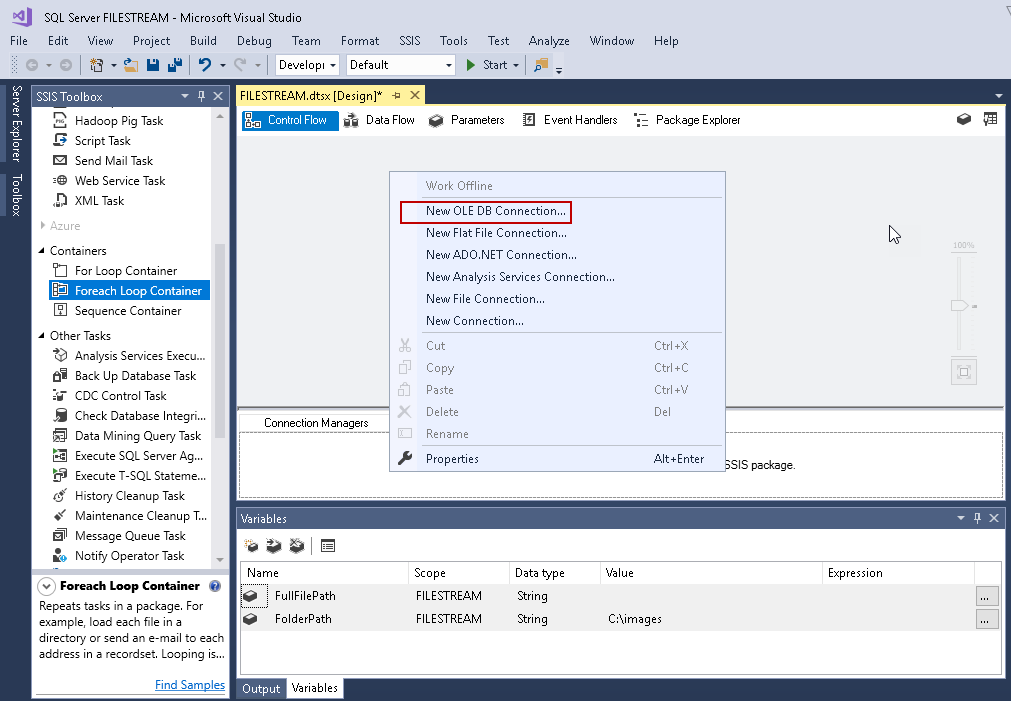
Now, we need to create the connection to our SQL database table in which we want to store the fully-qualified name of the objects.
In the Connection Managers, right click and select ‘New OLE database Connection’
If there are any existing connections, you can see in the ‘Data Connections’ window. Let us create new OLE database connections to show the required steps.
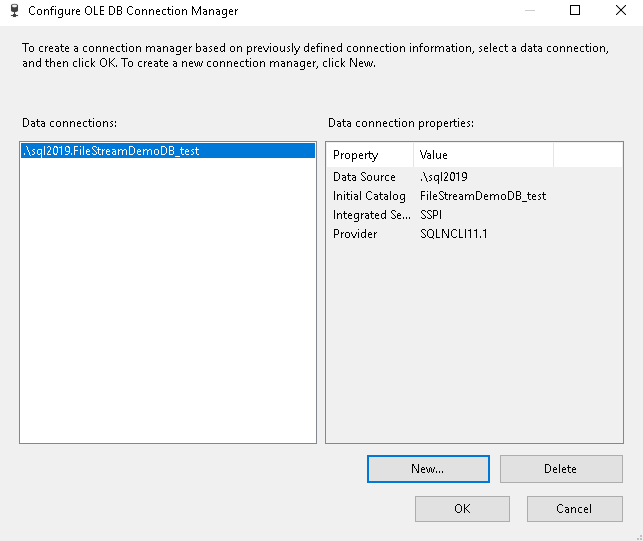
In the new connection window, enter the following details.
- Server name: Enter the SQL Server instance name along with the port number (if we are using non-default port)
- Authentication method: Select the Windows or SQL authentication. If we are using SQL authentication, enter the user name and password
- Database name: Select the database name in which table exists to hold the fully qualified file names
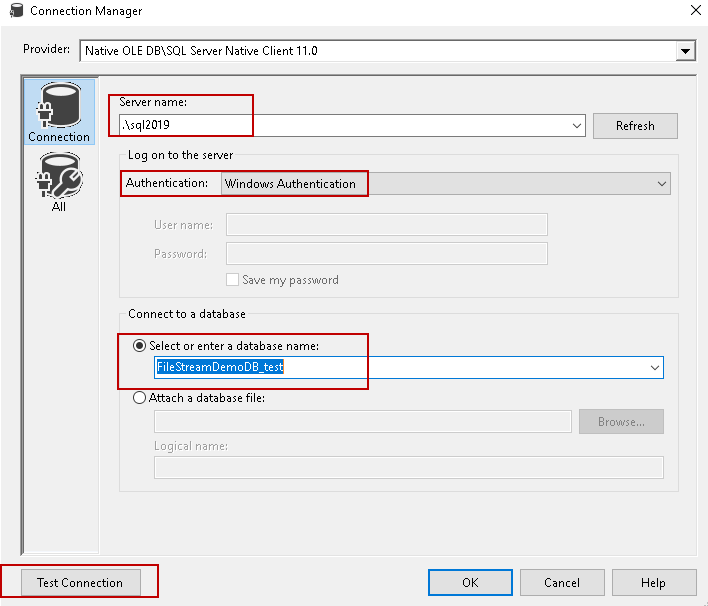
Click on the ‘Test connection’ to check the successful connection.

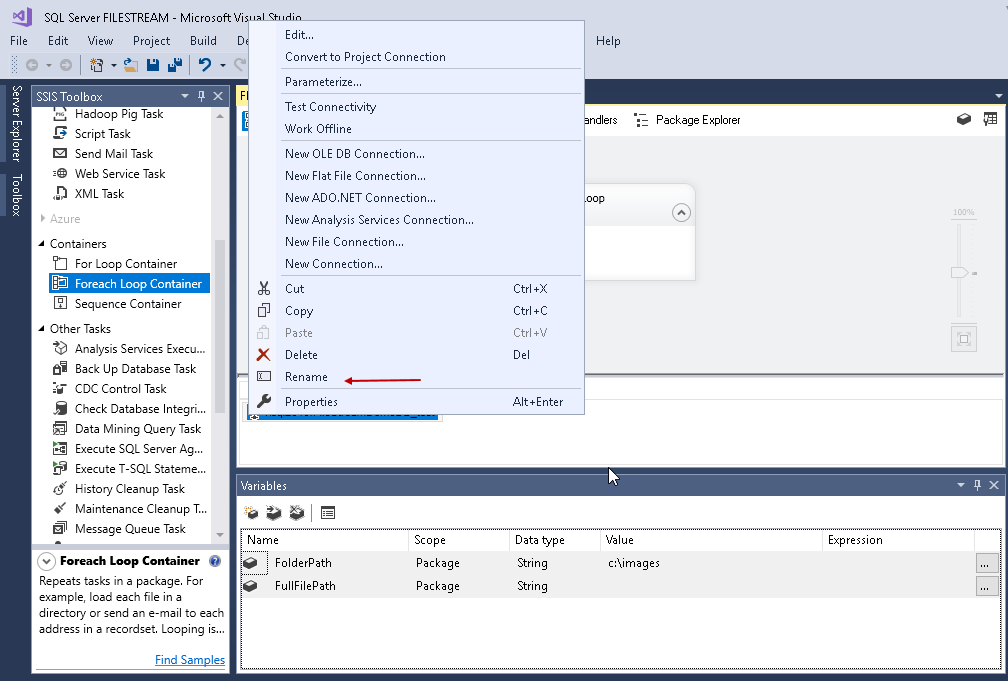
You can see the connections in the ‘Connection Manager’ window.
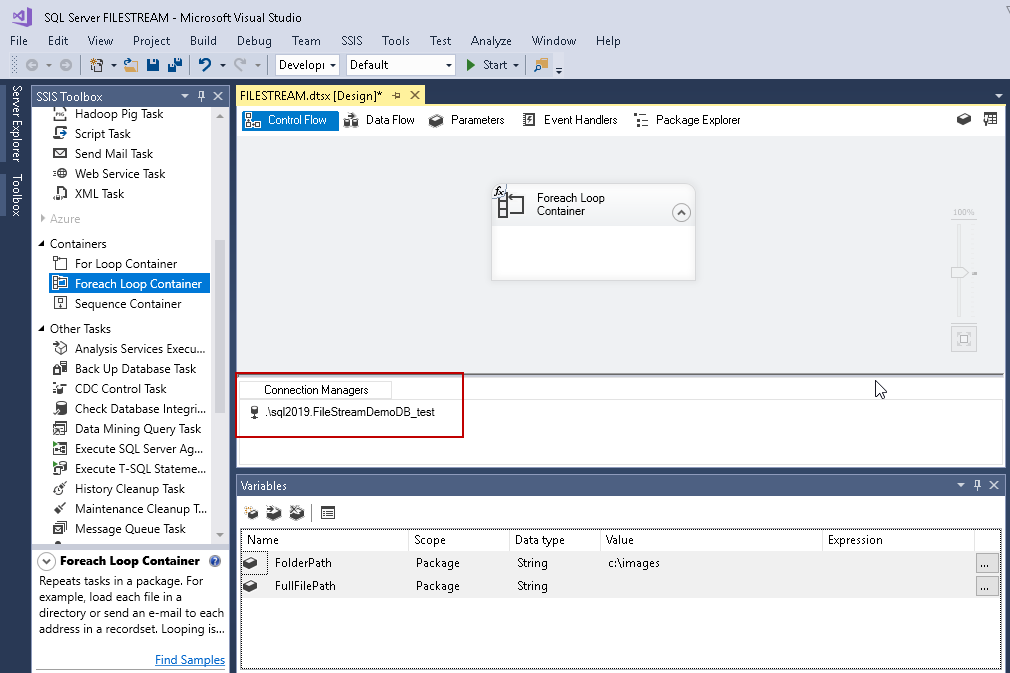
Right click on the connection and rename the connection to ‘FILESTREAMDB’.

- Execute SQL Task: In this step, drag the ‘Execute SQL Task’ from the SSIS toolbox in the ‘Foreach loop container’. You can see a red colour cross icon in the execute SQL task. It is because we have not specified any connection in this task
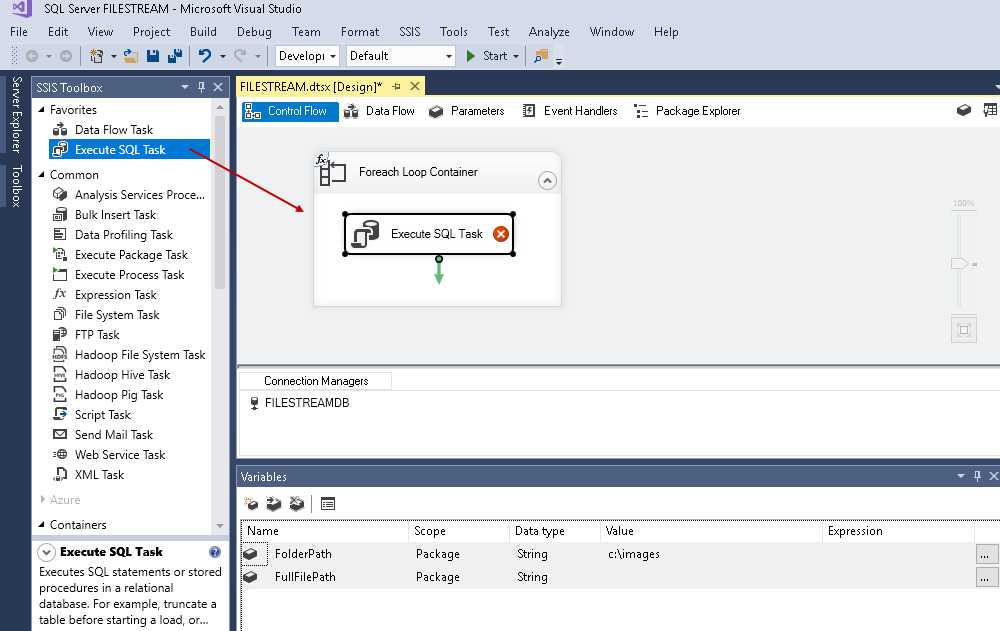
Double click on the ‘Execute SQL Task’ to open the execute SQL task editor window.
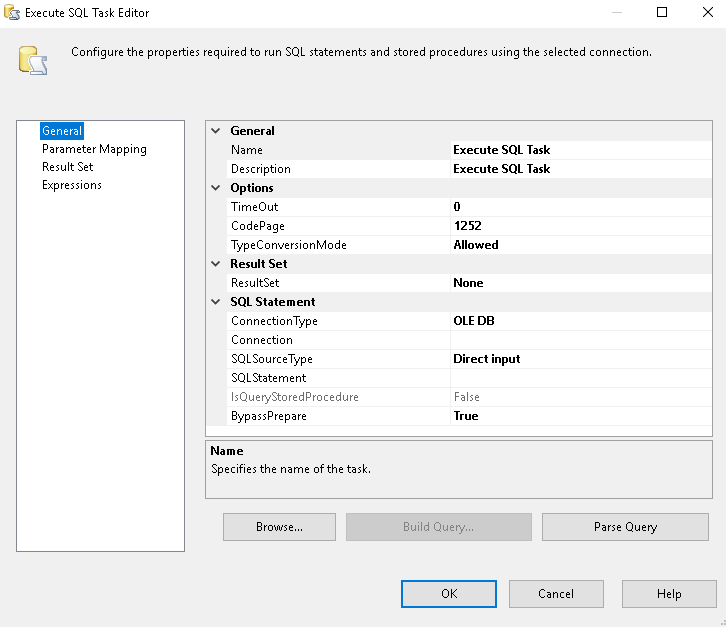
In the Execute SQL Task do the following configurations.
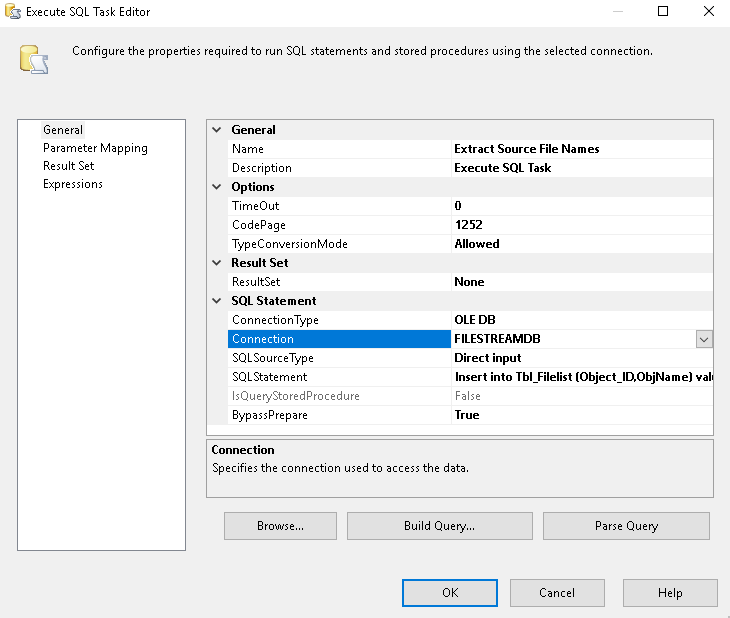
- Name: Change the name of this task to a meaningful name. We can give it a name like an extract source file names
- Connection Type: OLE database
- Connection: Select the connection we created earlier from the drop down value. We can create a new connection as well here. To create a new connection select <create connection..) From the drop-down
- SQLSource type: Direct input
- SQL Statement: Enter the below query to insert the FILE full qualified names and unique ID in the table we created earlier, in the ObjName you can see value as ‘?’, it will be replaced by the result set variable in the run time
Insert into Tbl_Filelist (Object_ID,ObjName) values (NEWID(),?)
Now we need to define this parameter from the ‘Parameter Mapping’ page list. It opens the below page.
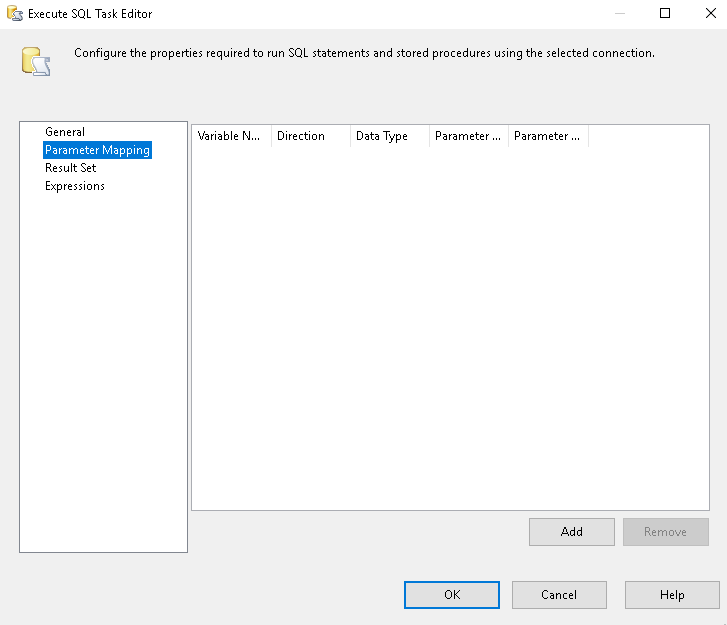
Click on ‘Add’, and it shows the below mapping, by default.

Change these parameter mapping as per below list.
- Variable Name: user:FullFilePath
- Data Type VARCHAR
- Parameter Name: 0
- Parameter Value:-1
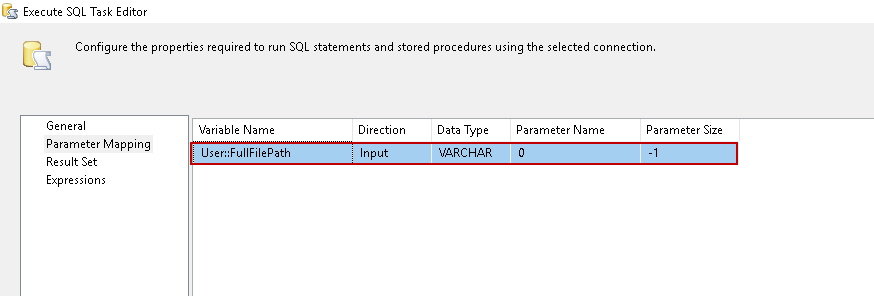
You can see that the red icon is not present now in front of ‘Extract Source File format.’
We have extracted the fully qualified file names from the source path till now using the Foreach Loop Container.
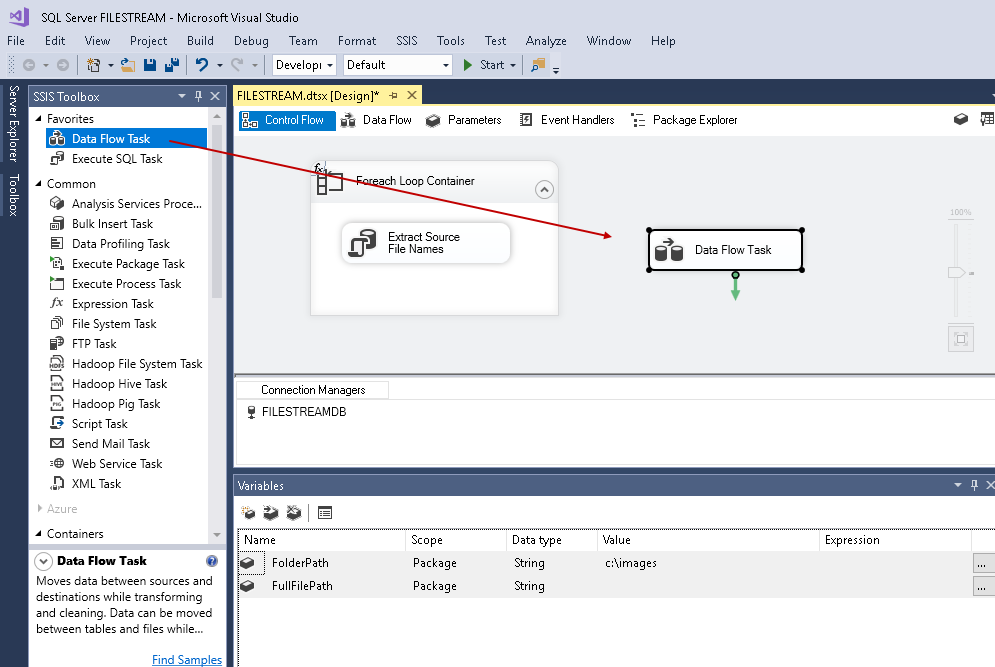
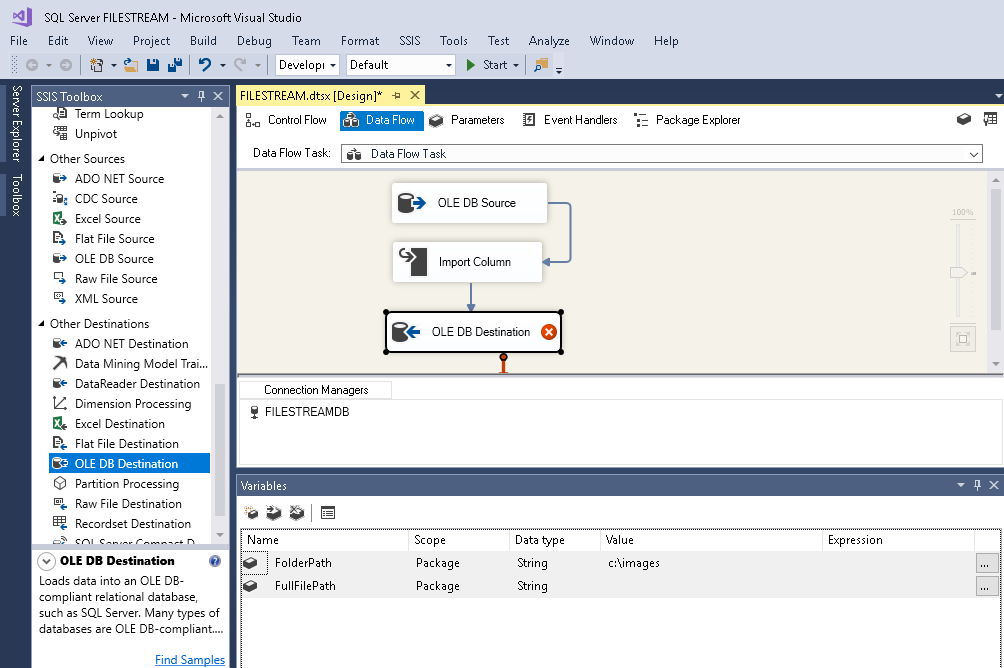
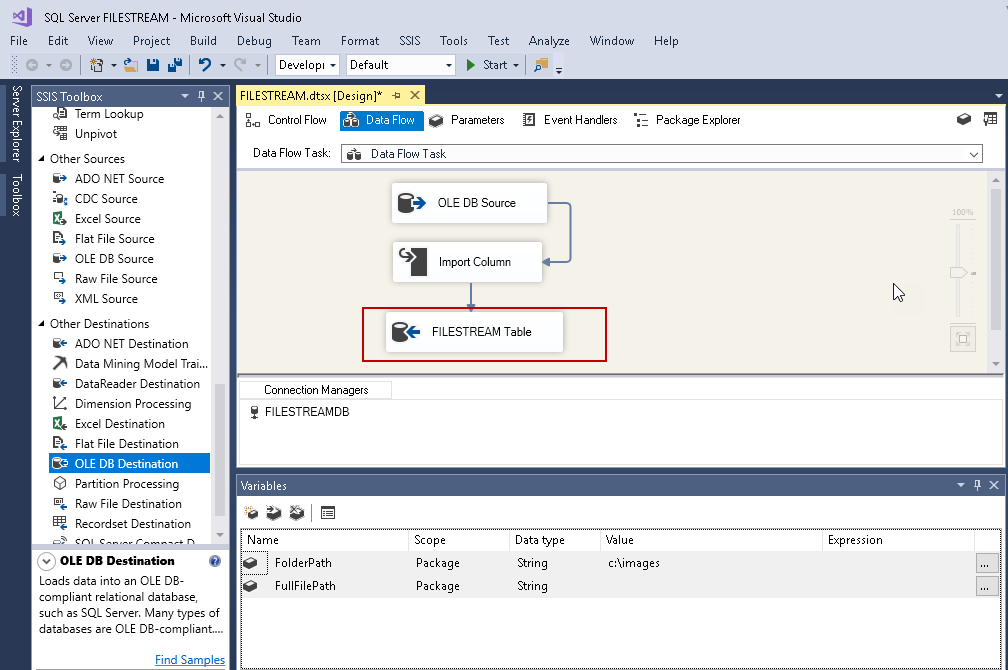
In the next step, we need to prepare a dynamic query to insert the records into the SQL Server FILESTREAM table. Add a ‘Data Flow Task’ outside the container as shown here.
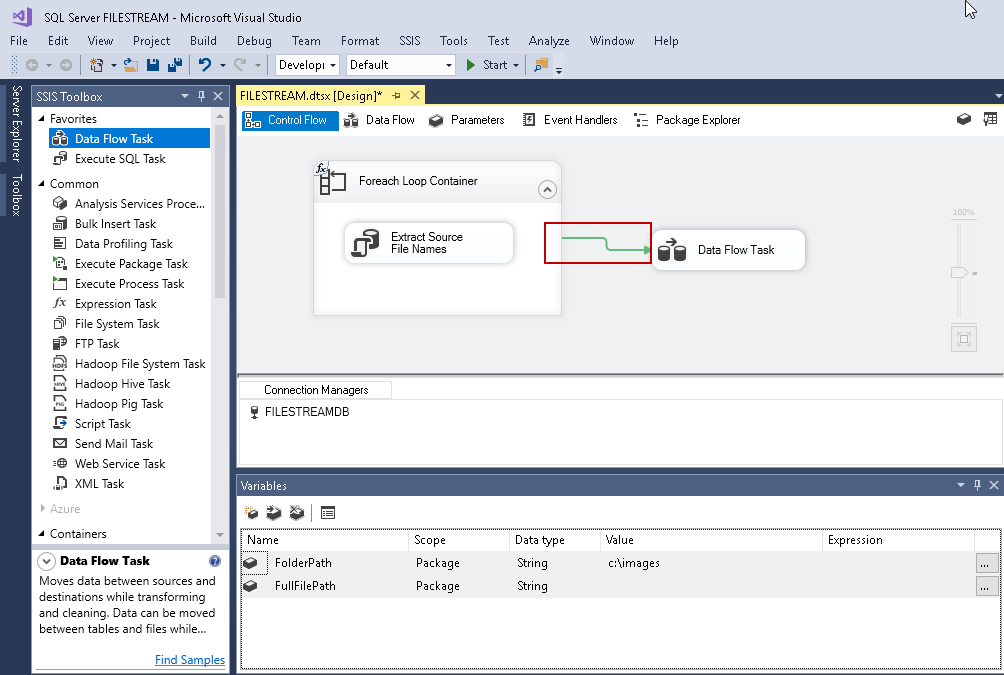
Connect the precedence constraint to the data flow task as shown here.
Double click on the ‘Data Flow task’ and it moves you to ‘Data Flow page’. In this page, we are going to define the source and the destination to insert the records.
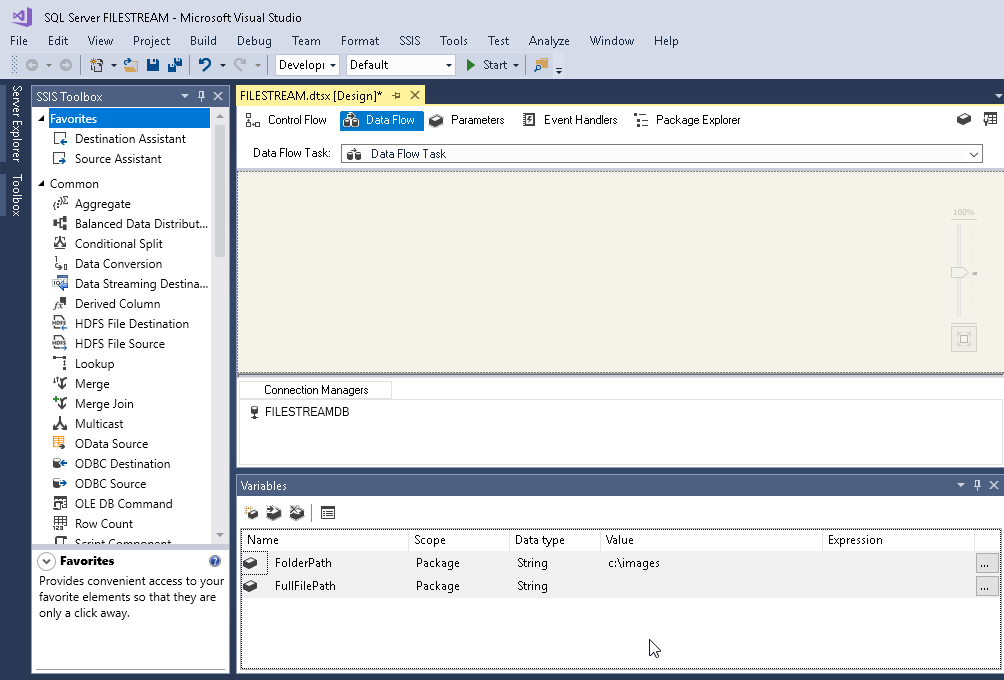
Drag the ‘OLE DB Source’ in the Data Flow page.

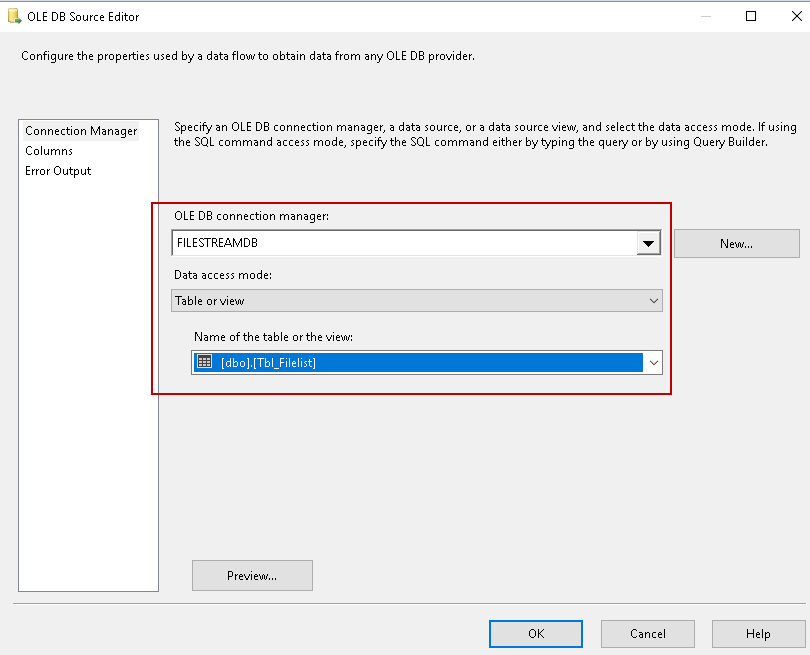
Double click on the OLE DB source, and it opens the OLE DB Source Editor. In the editor, specify the OLE DB connection Manager (you can also create a new connection from here also) and select the table contains the file list from the drop-down list.
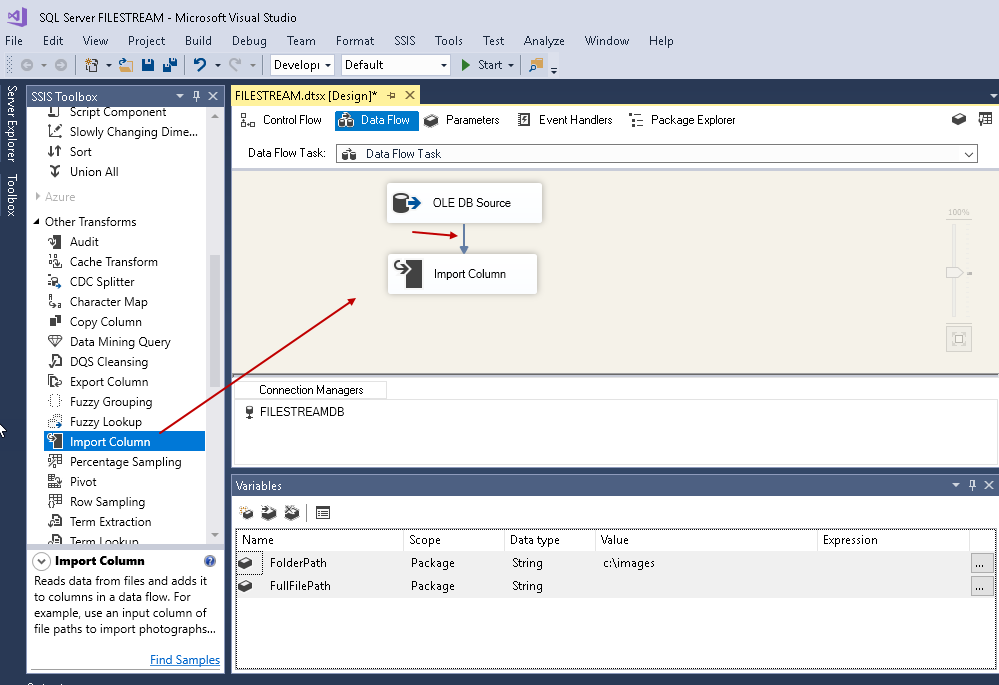
In the next step, add an ‘Import Column’ transformation. It is used to import the data and perform manipulations before sending the data over to the destination path. We are going to use to create a BLOB for the SQL Server FILESTREAM table.
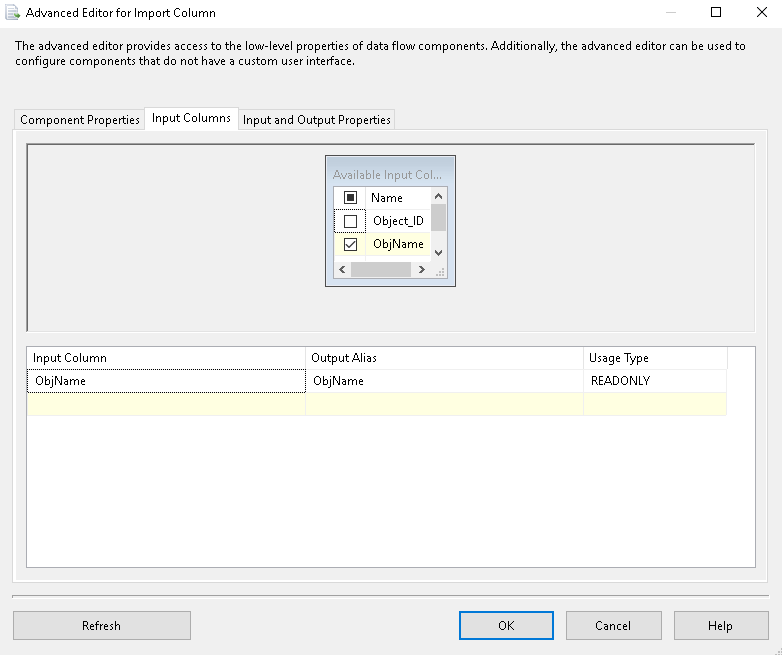
Double click on the Import columns transformation.
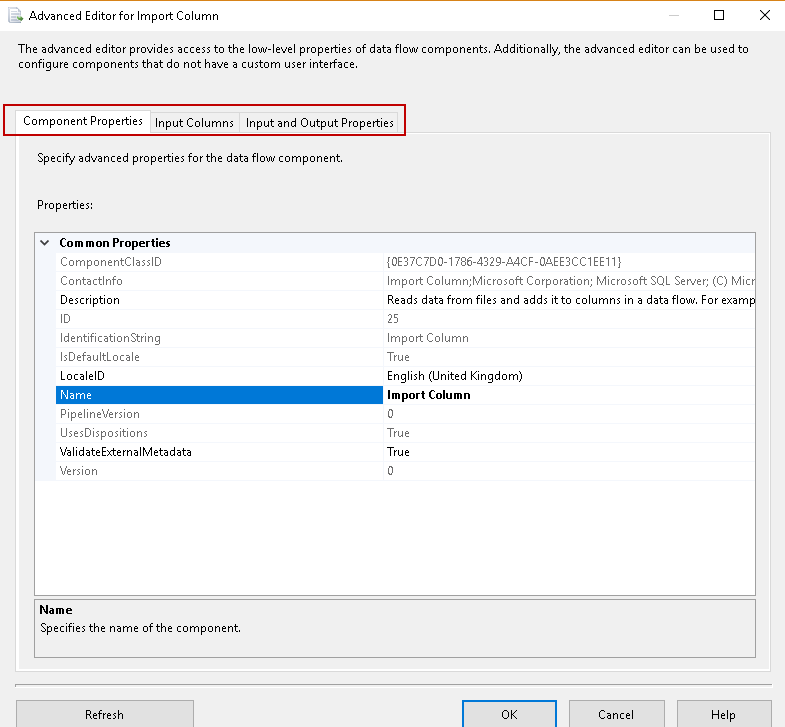
In this advanced editor for import columns, go to the Input Properties tab. Select the column field contains the file path.
Now, go to the Input and Output Properties tab.
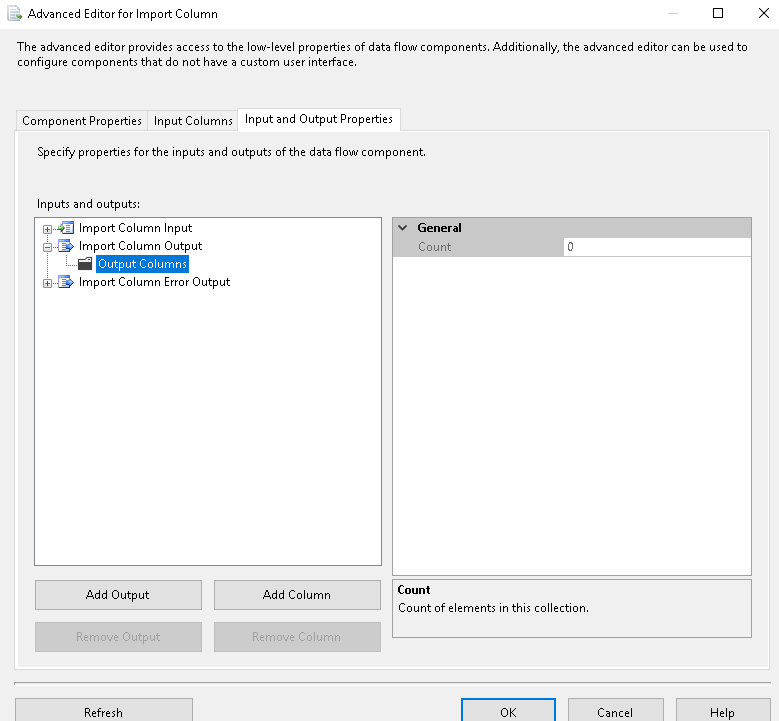
Expand the Import Columns Output and Click on the Add Column to do the transformation. In the Import Column Output, add a new column and select datatype DT_IMAGE. This data type is useful for FILESTREAM objects.

You need to note down this LineageID, and we will specify it to connect the input and the output. Now, will link both the Import column output and Import Column input using the LeneageID.
Expand the ‘Import Columns Input’ and click on the input column name. In the ‘FileDataColumnID’ enter the lineage ID as shown below.

Click ‘OK’ and add an ‘OLE DB destination’ in the package. This OLE destination will point to the FILESTREAM table.
We are using the same connection for the FILESTREAM table as well, therefore, select the destination SQL Server FILESTREAM table from the drop-down.
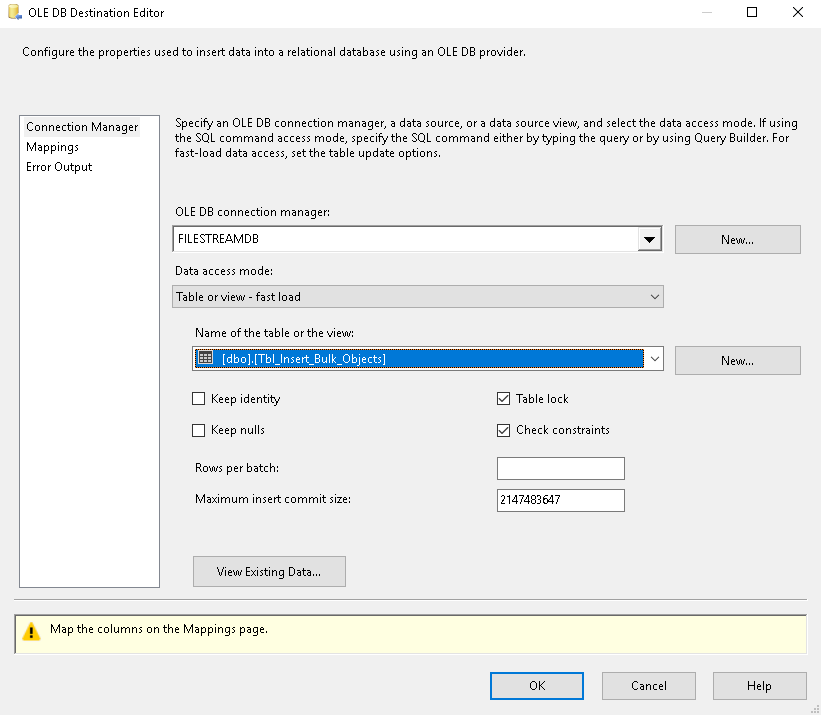
Click on the ‘Mapping’. In the mapping, select the input and the output columns. In this case, we will select new column ‘ImageData’ for the Object destination which is a FILESTREAM column.
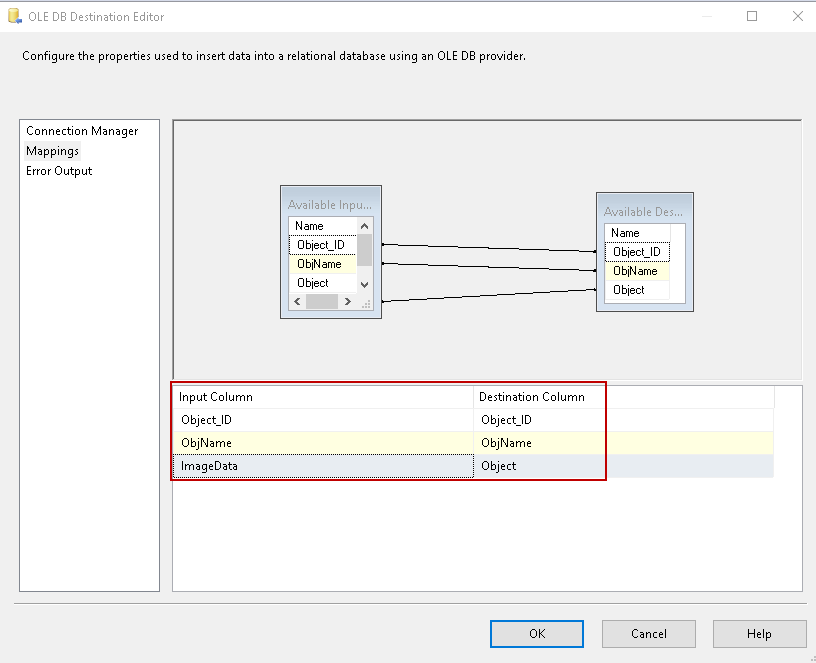
Rename the OLE DB destination to understand the package quickly.
Now we have configured the SSIS package to do the following tasks
- Import the fully-qualified file names into the table
- Insert the data into the FILESTREAM table
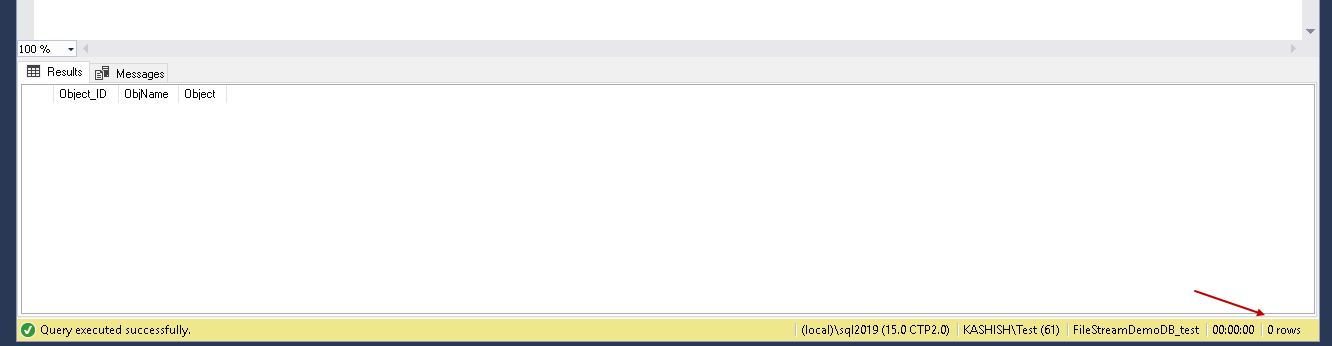
Before we execute the package, verify that we have an empty FILESTREAM table.
|
1 |
select * from Tbl_Insert_Bulk_Objects |
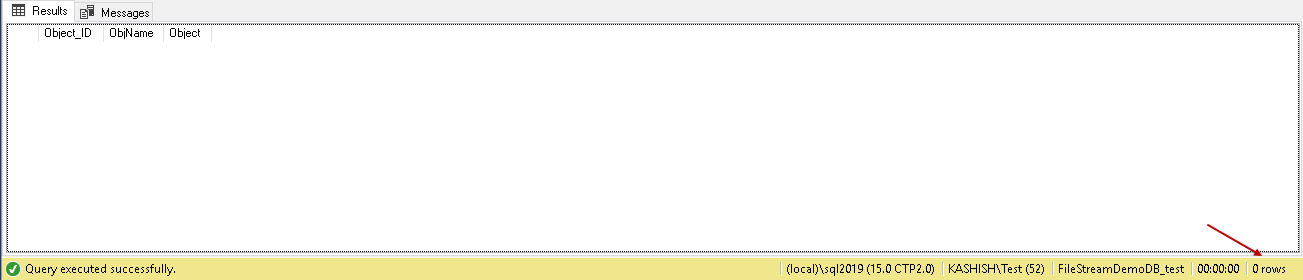
We can also verify that we do not have any file name stored in the table.
|
1 |
SELECT * FROM [FileStreamDemodatabase_test].[dbo].[Tbl_Filelist] |
Let us execute the package now. Click on the ‘Start’ button.
It might take time depending upon the number of files and their sizes for the package to execute. While the package is running, you can graphically see the status.
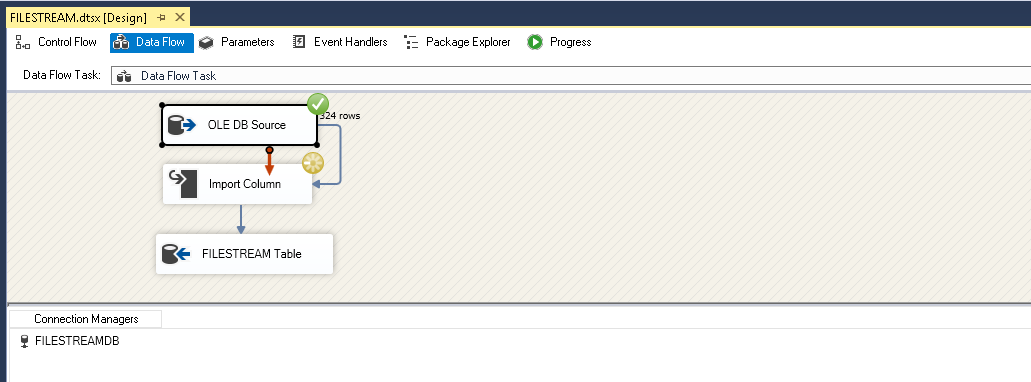
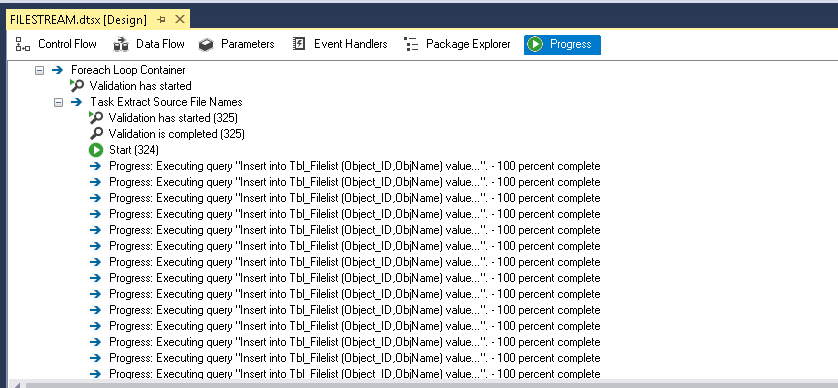
If you want detailed information about the execution, click on the ‘Progress’. It shows the complete information about each operator, statement, warning, errors in this page.
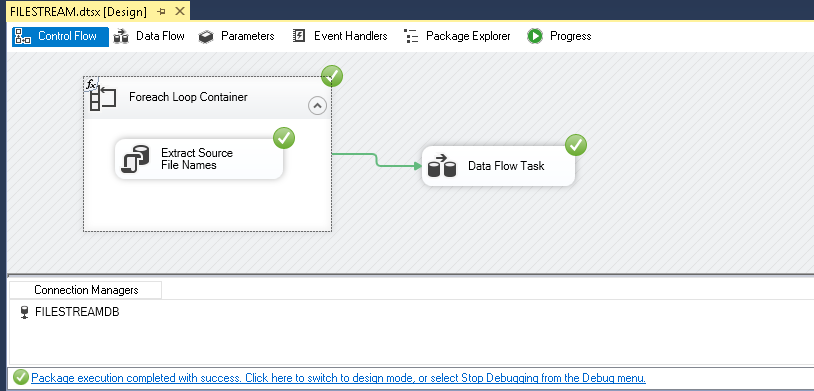
Once the package is executed successfully, you can see the Green tick against each operator. You also get a message ‘Package execution completed with Success.’
Now it turns to verify the things.
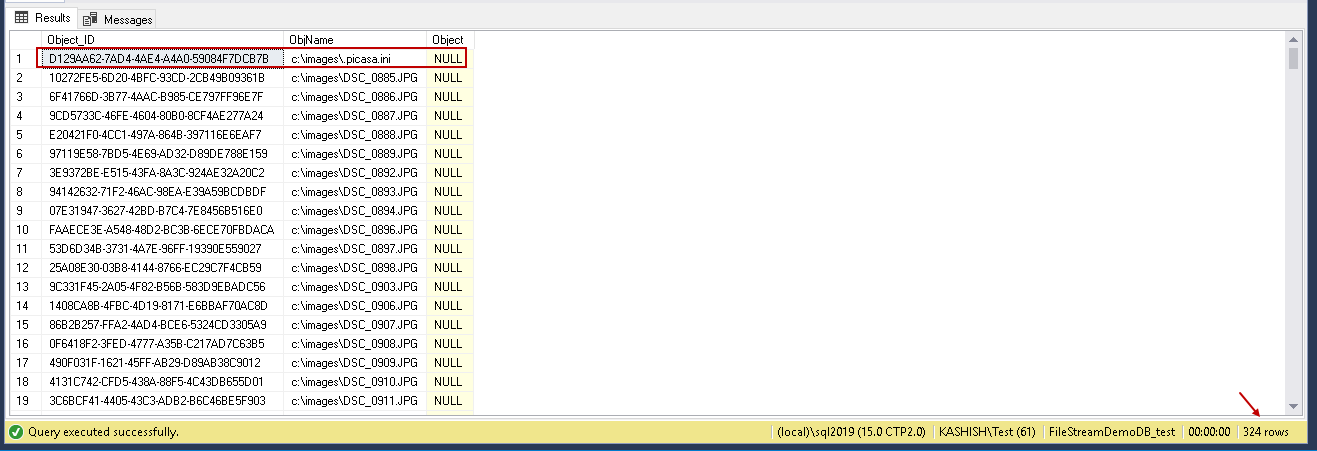
- Verify the file names in the [Tbl_Filelist] table: in the below screenshot, you can see the full-qualified name for each file in ObjName column along with the unique ID in Object_ID column. We have 324 files in the source folder

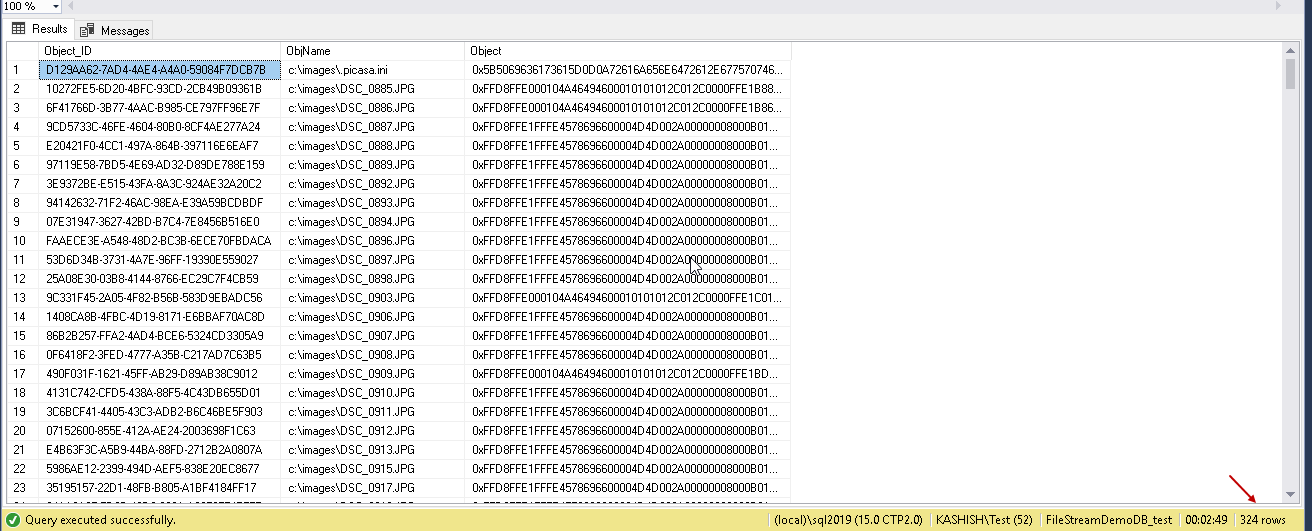
- Verify the SQL Server FILESTREAM table: In the below screenshot, we have 324 records in the FILESTREAM table as well. It shows that we have successfully inserted all records into this table
- Verify the files in the FILESTREAM Container: let us go to the FILESTREAM container and check the count of files and their total size. We have 324 files in this FILESTREAM container as well, and total size matches with the source folder size.
Conclusion:
We have explored to the benefits of using SSIS packages to import objects into a SQL Server FILESTREAM table without writing T-SQL for each file insert. Feel free to provide any feedback in the comments below.

Table of contents

I am the author of the book "DP-300 Administering Relational Database on Microsoft Azure". I published more than 650 technical articles on MSSQLTips, SQLShack, Quest, CodingSight, and SeveralNines.
I am the creator of one of the biggest free online collections of articles on a single topic, with his 50-part series on SQL Server Always On Availability Groups.
Based on my contribution to the SQL Server community, I have been recognized as the prestigious Best Author of the Year continuously in 2019, 2020, and 2021 (2nd Rank) at SQLShack and the MSSQLTIPS champions award in 2020.
Personal Blog: https://www.dbblogger.com
I am always interested in new challenges so if you need consulting help, reach me at rajendra.gupta16@gmail.com
View all posts by Rajendra Gupta
- Understanding PostgreSQL SUBSTRING function - September 21, 2024
- How to install PostgreSQL on Ubuntu - July 13, 2023
- How to use the CROSSTAB function in PostgreSQL - February 17, 2023