

In this article, we will explore the following topics:
- Amazon Aurora or Amazon RDS database snapshot export to S3 bucket
- Use AWS Glue to crawl the Snapshot and generate a data catalog
- Use Amazon Athena to query the data catalog
- Export Amazon Athena query results into S3 bucket
Introduction and Requirements
Amazon RDS is a relational managed database service for Microsoft SQL Server, MySQL, PostgreSQL, Oracle and Aurora (MySQL & PostgreSQL compatibility). AWS automatically takes regular database snapshots and stores them into the S3 bucket. It uses these backups for point-in-time recovery. Its maximum retention period is 35 days for these snapshots.
AWS also allows users to take manual snapshots as well. Recently, in January 2020, AWS added the flexibility to export these snapshots into the S3 bucket in an Apache Parquet format. It is an open-source format that consumes very less storage and efficient in interaction with serverless solutions like AWS Athena. The export to S3 bucket functionality is available for MySQL, PostgreSQL, MariaDB, Aurora (MySQL & PostgreSQL compatibility).
In the article, Query Amazon Athena external tables using SQL Server, we use Amazon Athena for querying a CSV file stored in the S3 bucket without importing it into a database. You should go through it to get a basic understanding of the data flow.
For this article, we have the following requirements.
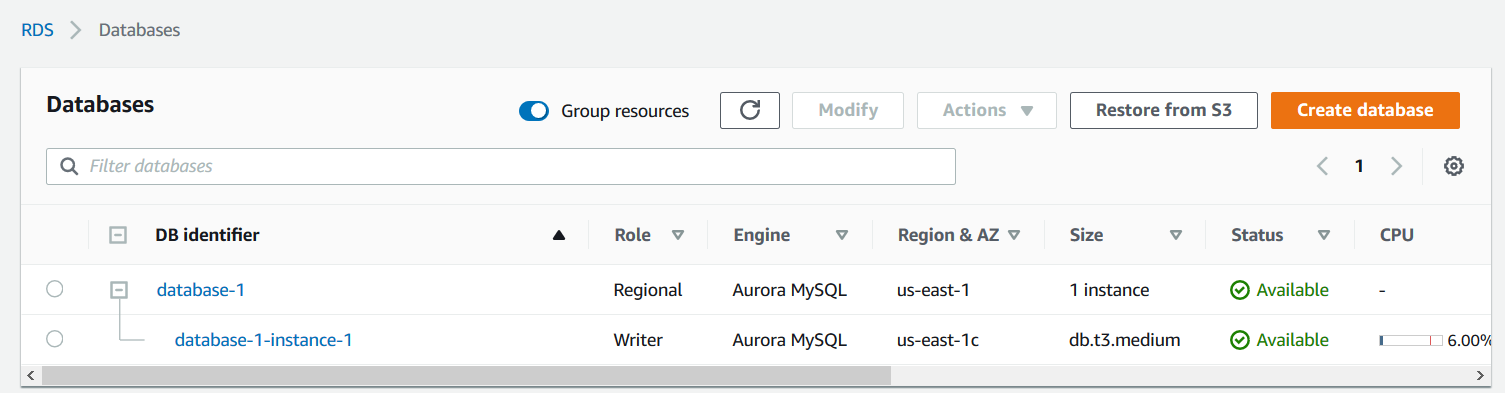
Amazon Aurora cluster
An Aurora cluster for MySQL compatibility. You can refer to the article, Explore Aurora Global Database for MySQL compatibility for its implementation.
- DB identifier: database-1
- Region: us-east-1
- size:db.t3.medium
- status: Available
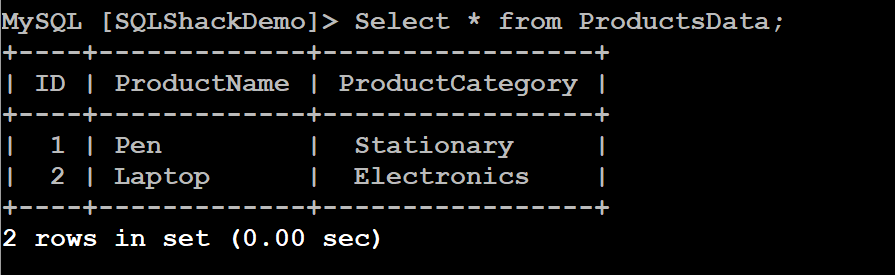
You require a MySQL database and sample data in the Amazon Aurora instance. You can refer to the article, Rewind or Forward the Amazon Aurora Cluster using the backtrack feature to prepare sample data in the [SQLShackDemo] database.
- Sample database: [SQLShackDemo]
- Number of records: 2
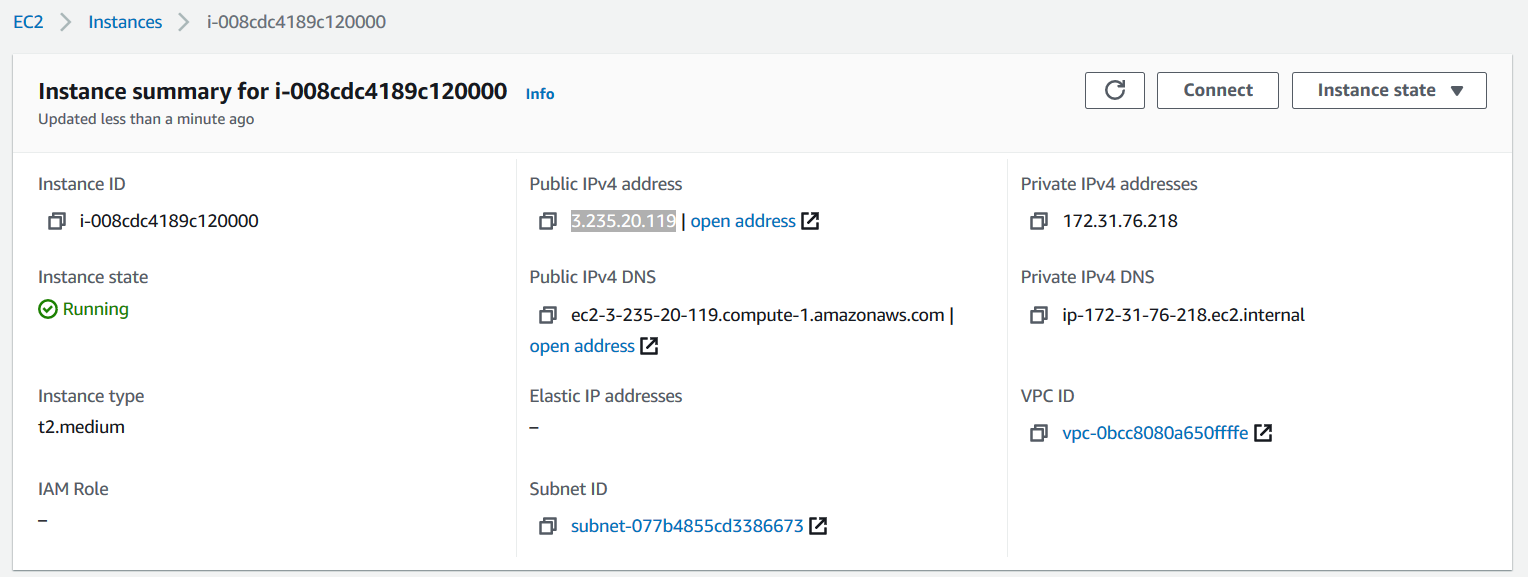
Amazon Linux EC2 instance
An Amazon Linux EC2 instance to connect with the Aurora MySQL.
- Public IPv4 address: 3.225.20.119
- Instance state: Running
- Instance type: t2.medium
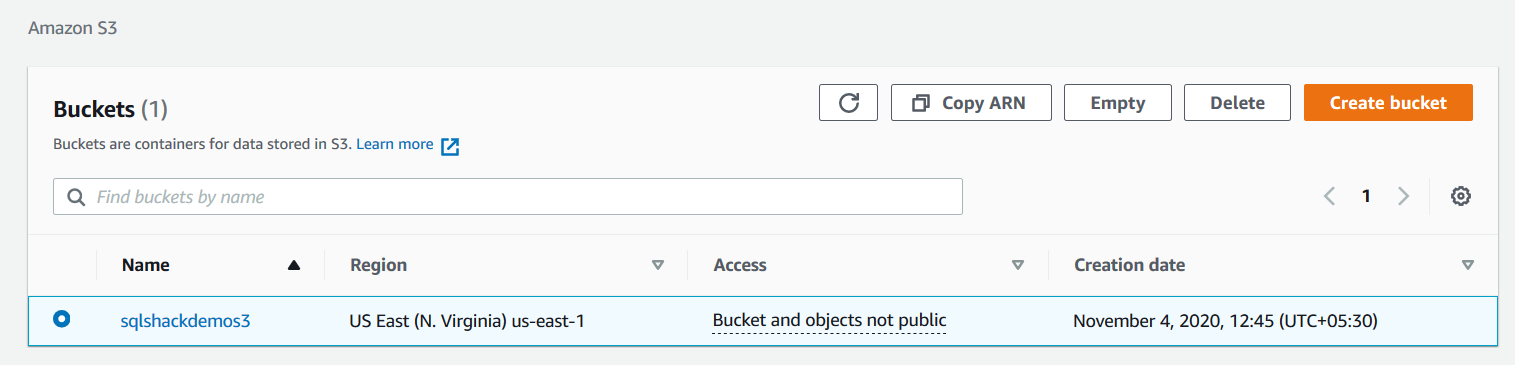
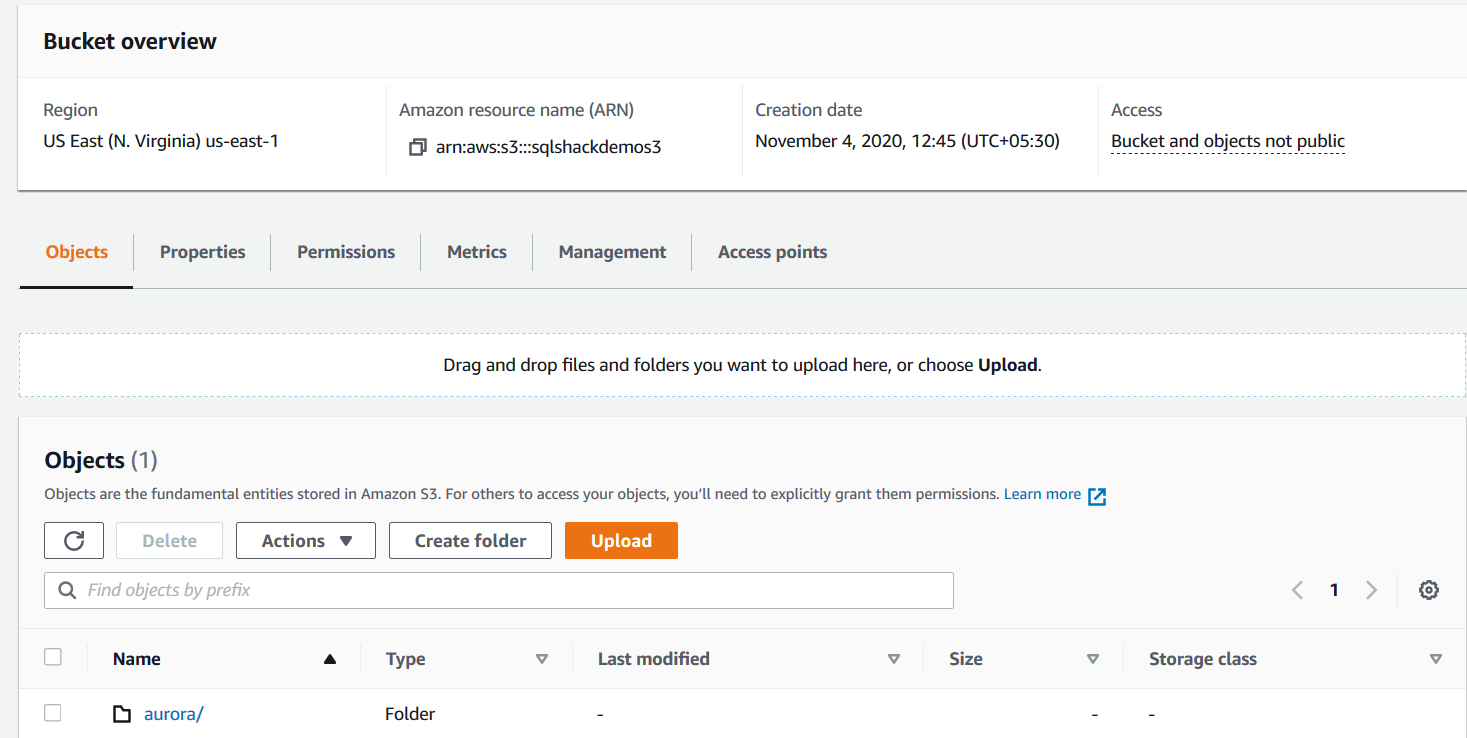
AWS S3 bucket
We require an S3 bucket in the same region where our RDS or Amazon Aurora instance exists. You can go to S3 services and create a bucket.
- S3 bucket: sqlshackdemo3
- Region: us-east-1
Open the S3 bucket and create a folder aurora/ to hold the exported objects. We require this S3 bucket and folder in the later section of the article.
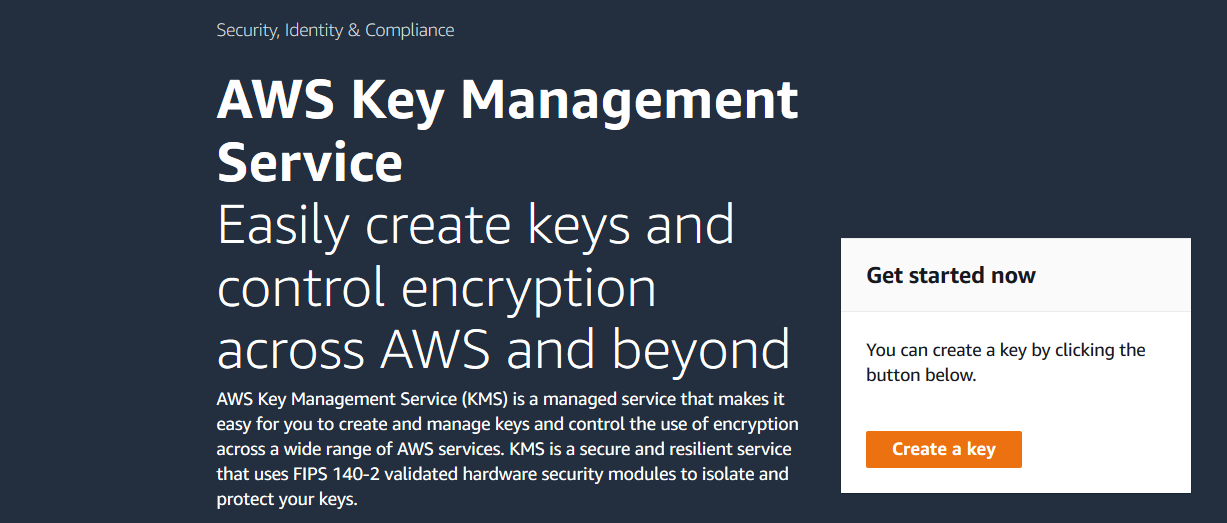
AWS symmetric key
Create an AWS symmetric key using the AWS key management service. Click on Create a key.
Step 1: Configure key
Select the Symmetric key type to use a single encryption key for both encrypt and decrypt purposes.

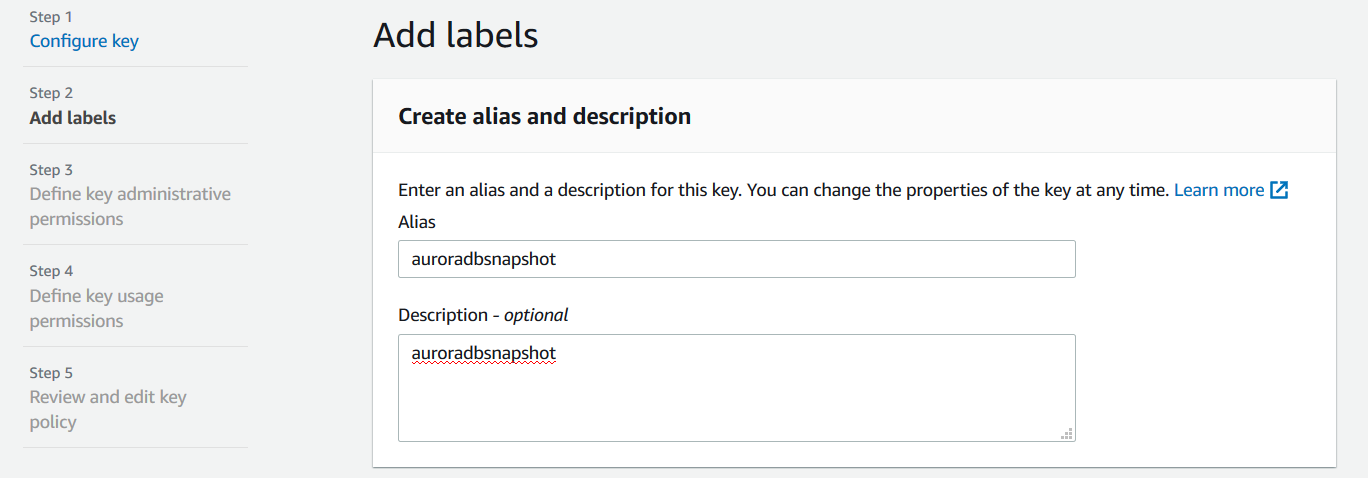
Step 2: Add Labels
Specify an alias name and its description for the KMS key.
Step 3: Define key administrative permissions
In this step, we select the AWS IAM user that is the administrator for the AWS key.

Step 4- Define key usage permissions
We can skip step 4 here because we do not want to give any user permissions to access the AWS key at the moment.
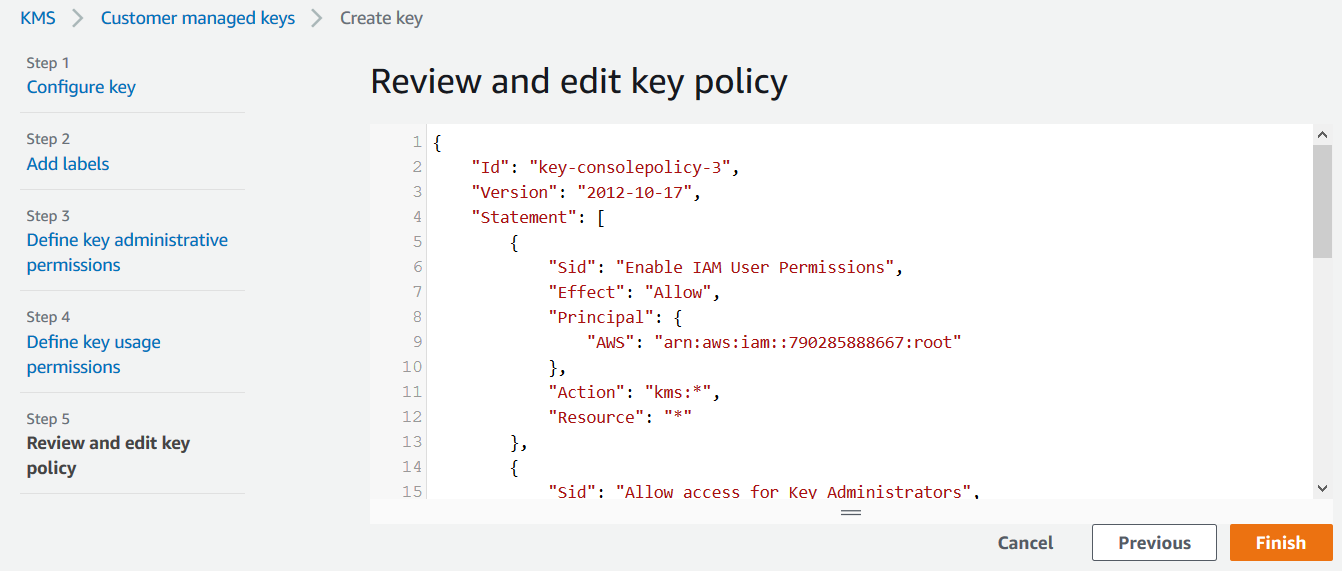
Step5- Review and edit key policy
It gives your JSON statement for the AWS key. Click on Finish to create the key with your configuration.
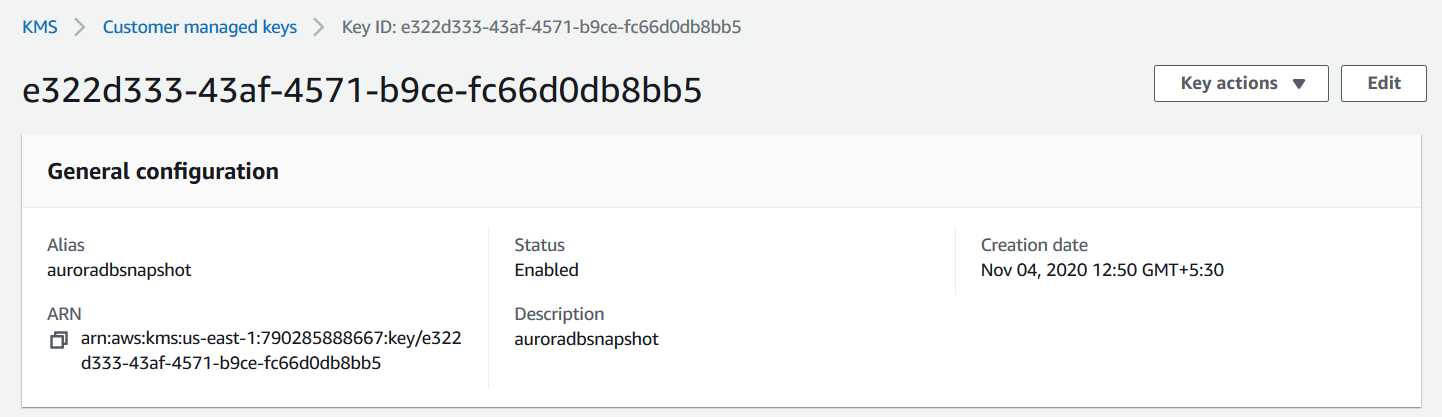
It creates the customer-managed AWS key, as shown below.
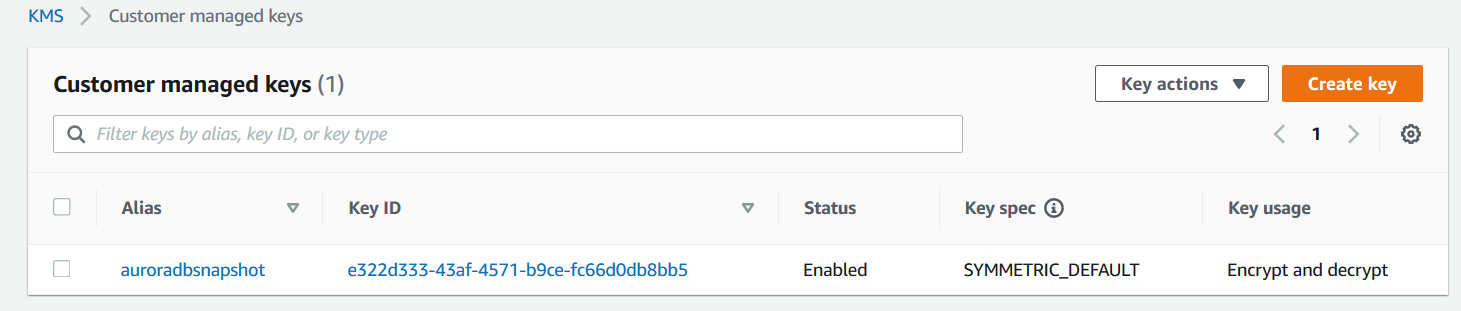
Click on the key name and note down the key ARN. We require this ARN while exporting the Snapshot to the S3 bucket.
At a high-level, we implement the following architecture in this article:
- Aurora MySQL instance manual snapshot
- Export the Snapshot into AWS S3 bucket
- Use a crawler process to prepare a data catalog from the Snapshot and store it into S3 in parquet format
- Use Amazon Athena to query the data catalog
- Stores the query results into the S3 bucket
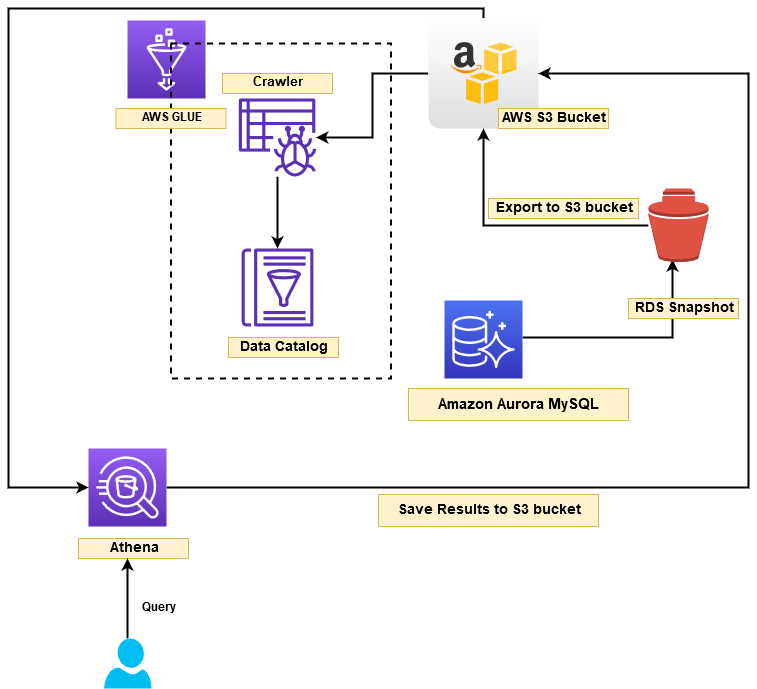
Let’s starts the deployment as per defined high-level architecture.
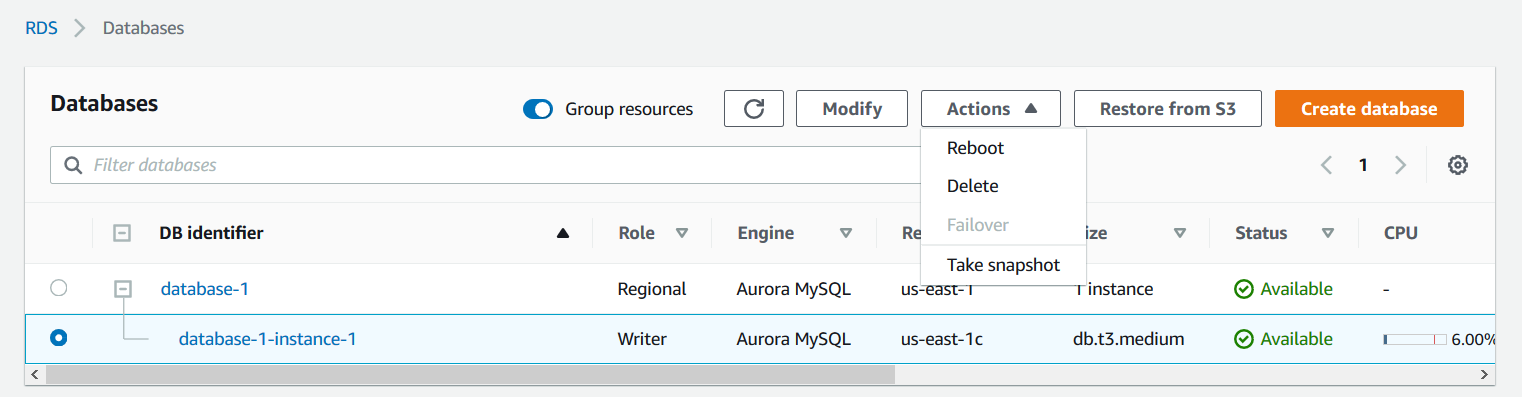
Take a Manual snapshot for the Amazon Aurora database
We can use either manual or automated Snapshot for the export feature. In my lab environment, I do not have any automated snapshot, therefore initiate a manual snapshot with the following steps.
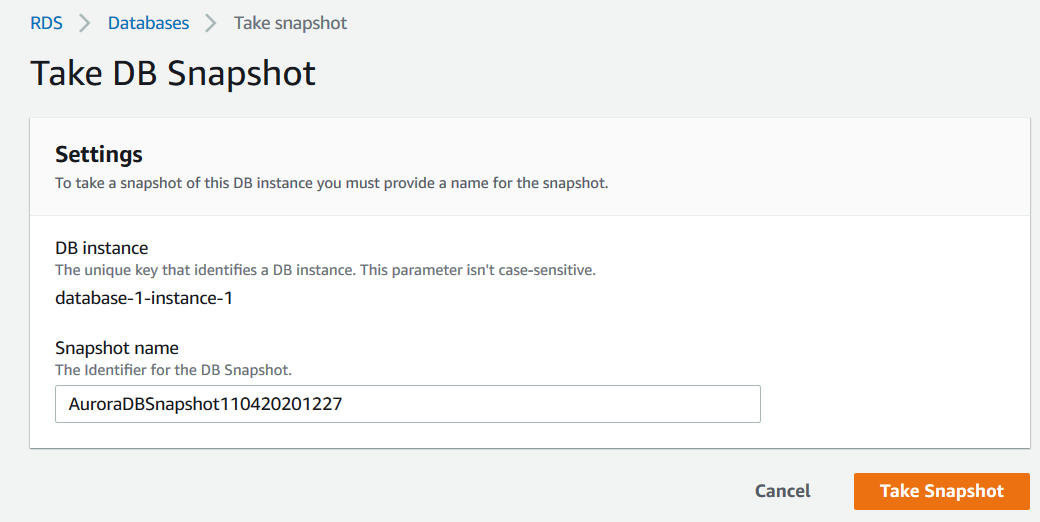
Click on the Aurora instance in the Amazon RDS console, go to actions and choose to Take Snapshot
In the snapshot window, specify a familiar name for your manual database snapshot and click on Take Snapshot as shown below.
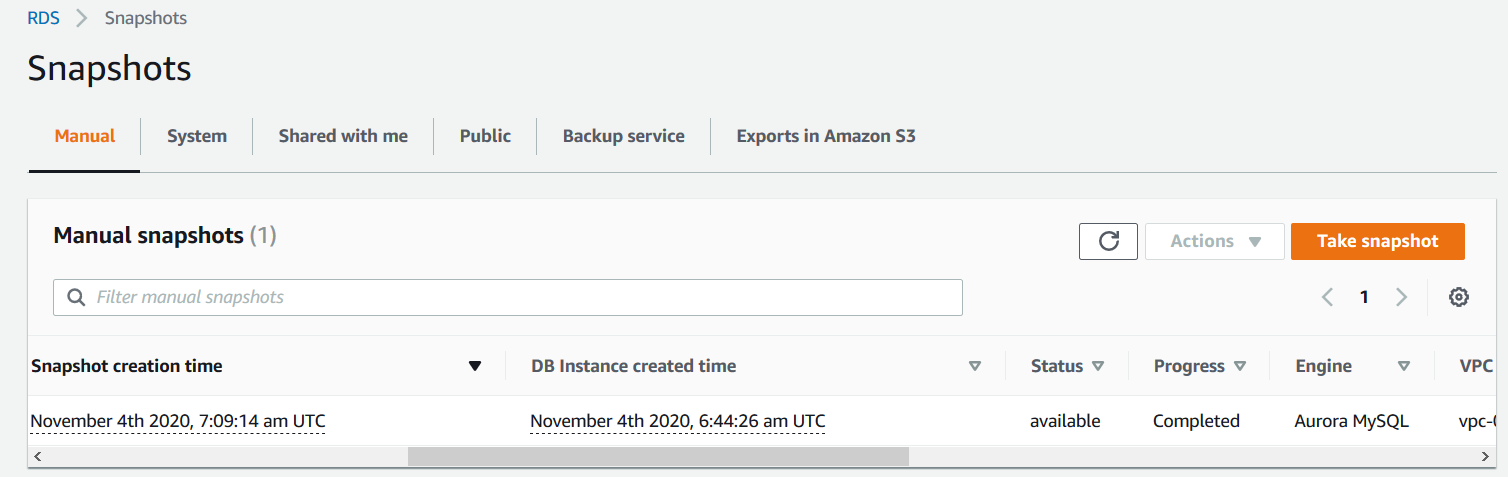
It takes some time to create the manual Snapshot depending upon your database size. It shows completed in the following screenshot.
Export to Amazon S3 for Aurora snapshot
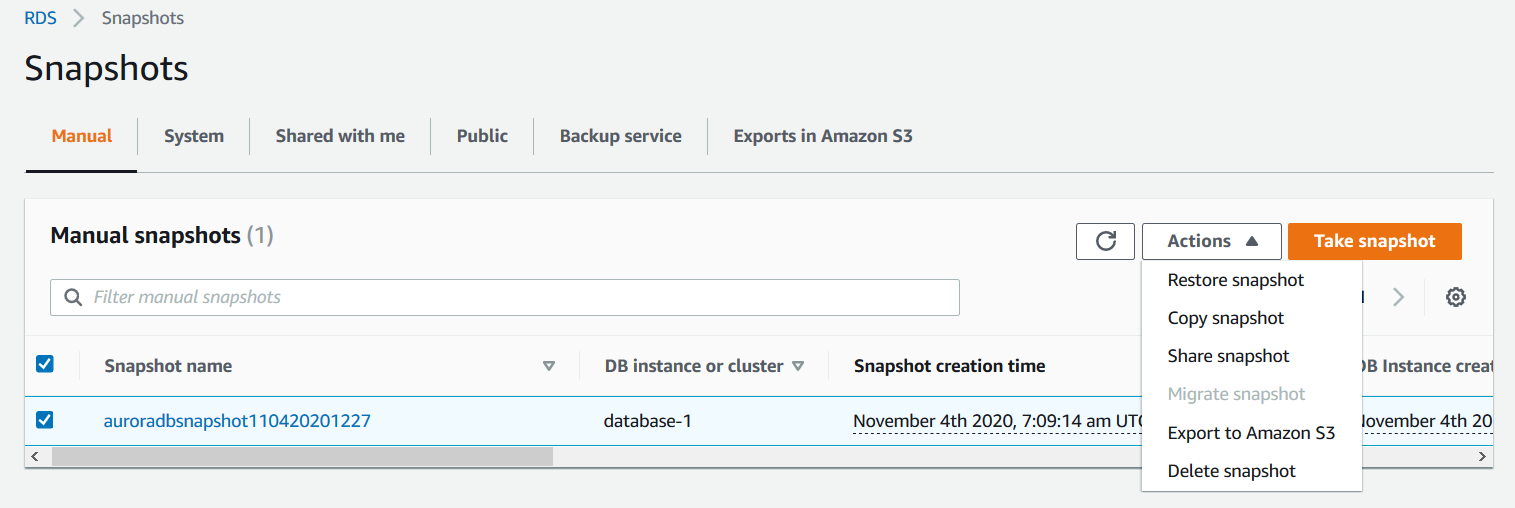
In the RDS console, select the Snapshot that you want to export into the AWS S3 bucket. Now, go to the Actions menu and choose Export to Amazon S3.
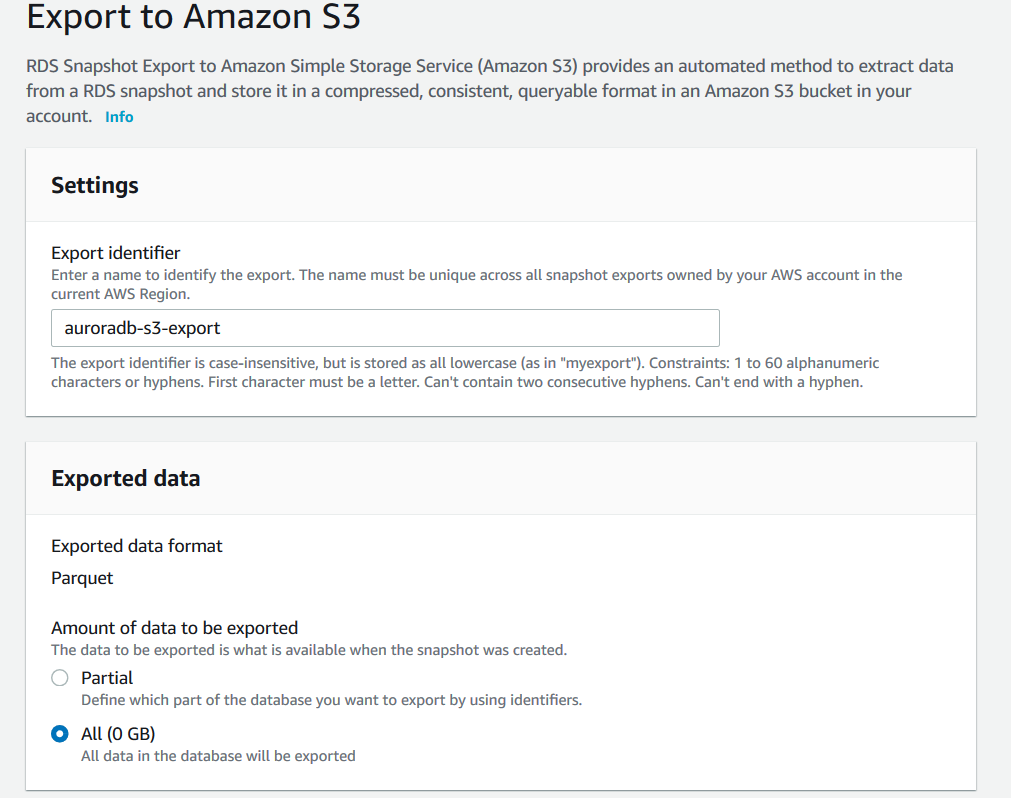
In the RDS snapshot export page, select the following parameters.
- Export identifier: It is the name for the export snapshot
- Export data format: It displays the export format as Parquet. You cannot modify this data format
-
Amount of data to be exported: You have the flexibility to choose the export data from the Snapshot
- All: It exports all data in the database to the S3 bucket
- Partial: In the partial, we can define the identifier such as schema, table names that we want to export
AWS charges you based on the per GB of the snapshot size. You can review AWS documentation for more details on the pricing part.
In my case, the [sqlshackdemo] database is relatively small(<1GB); therefore, I choose the option All.
In the S3 destination, select the bucket name from the drop-down and write the folder name in the s3 prefix section as shown below.
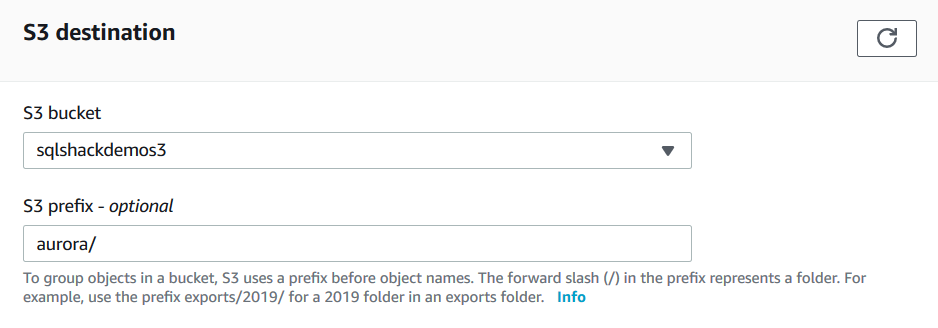
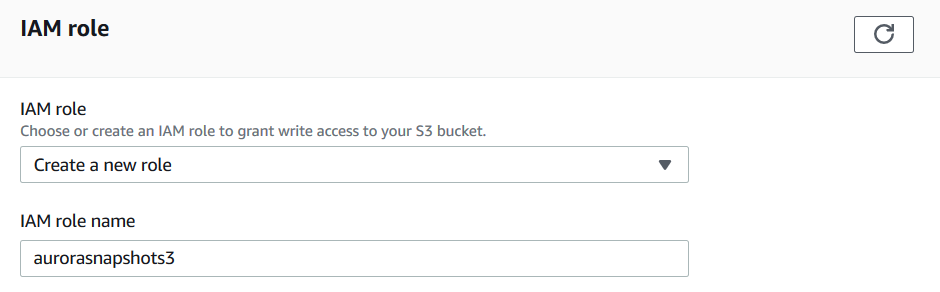
Next, create a new IAM role or choose an existing IAM role for exporting objects into an S3 bucket. Here, I specify the IAM role as [aurorasnapshot3].
In the encryption section, enter the AWS key ARN we created earlier.
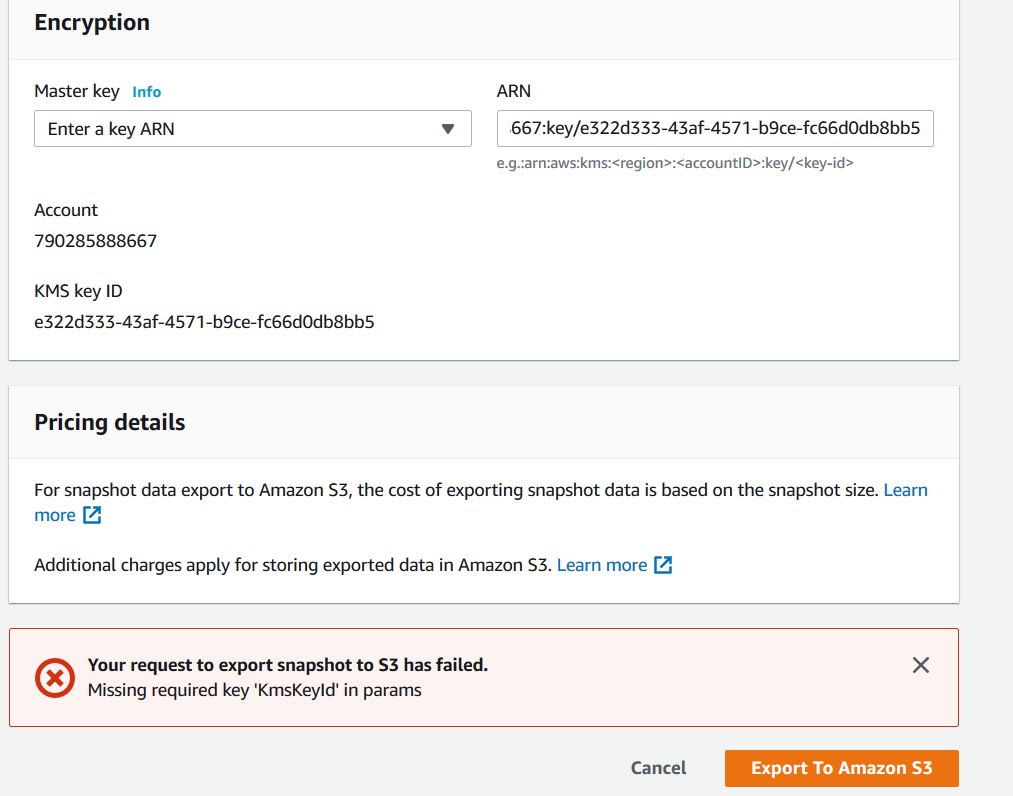
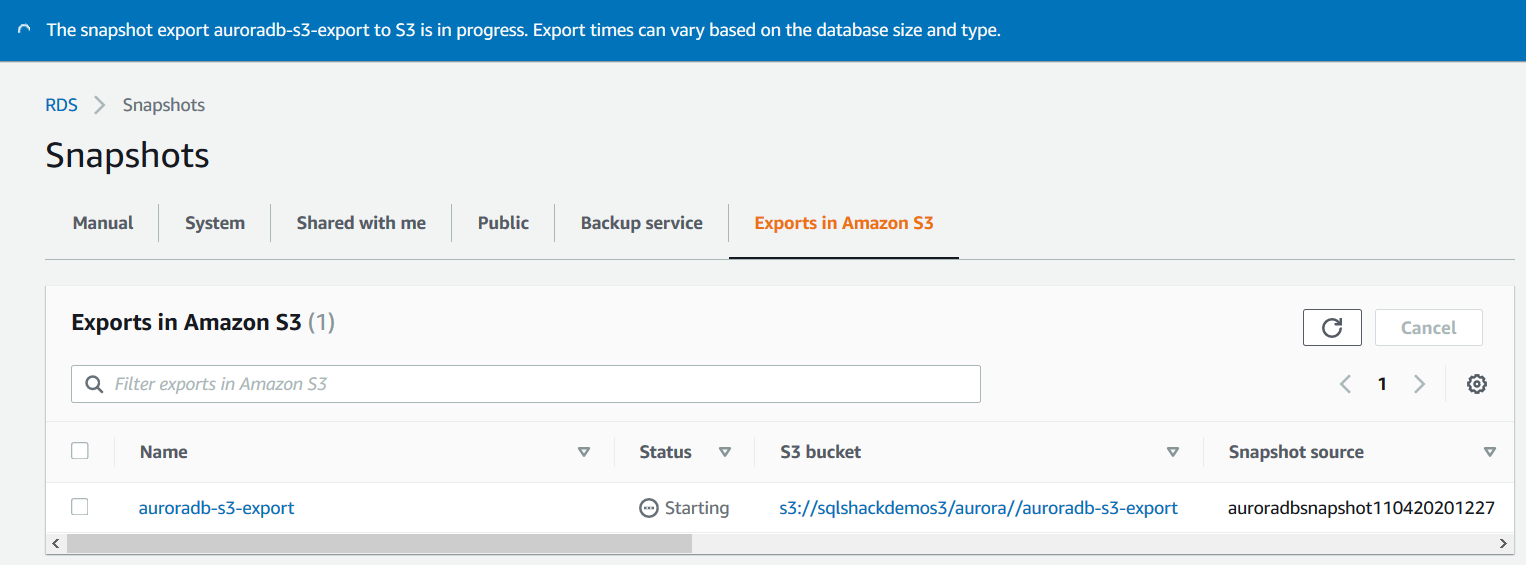
Click on Export to Amazon S3, as shown below. Its status is Starting -> In Progress -> Complete as shown below.
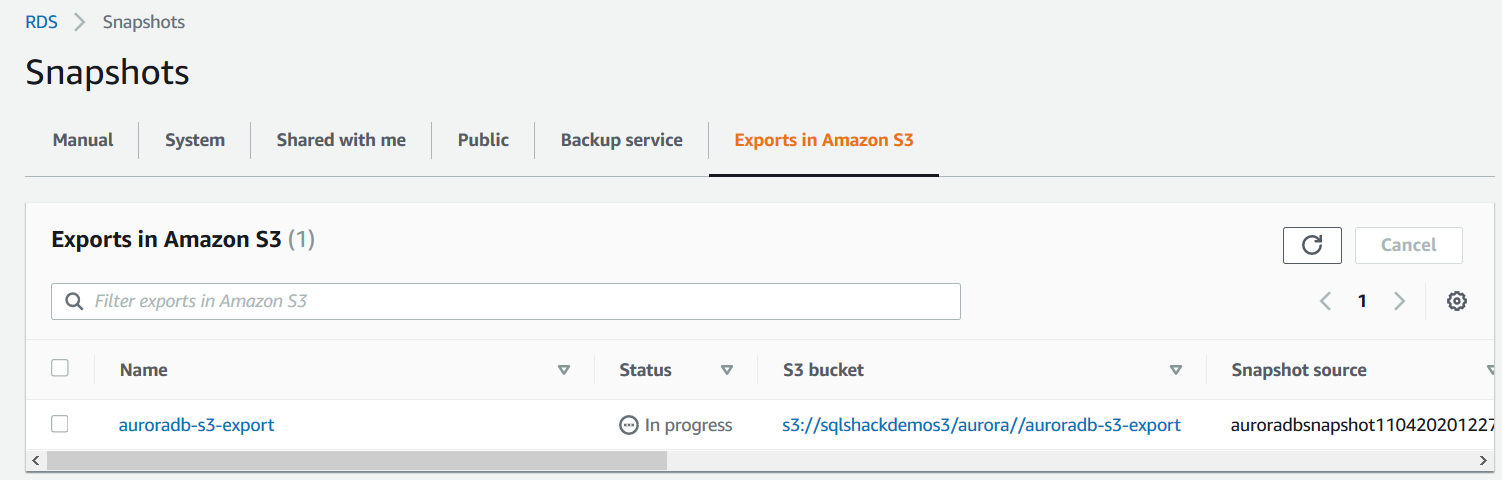
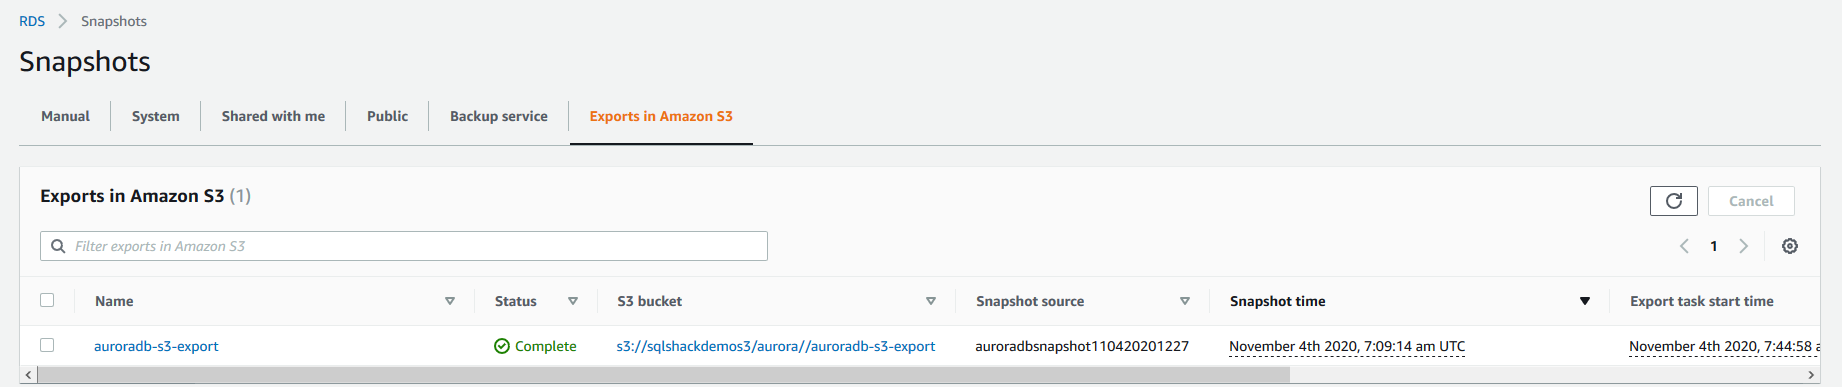
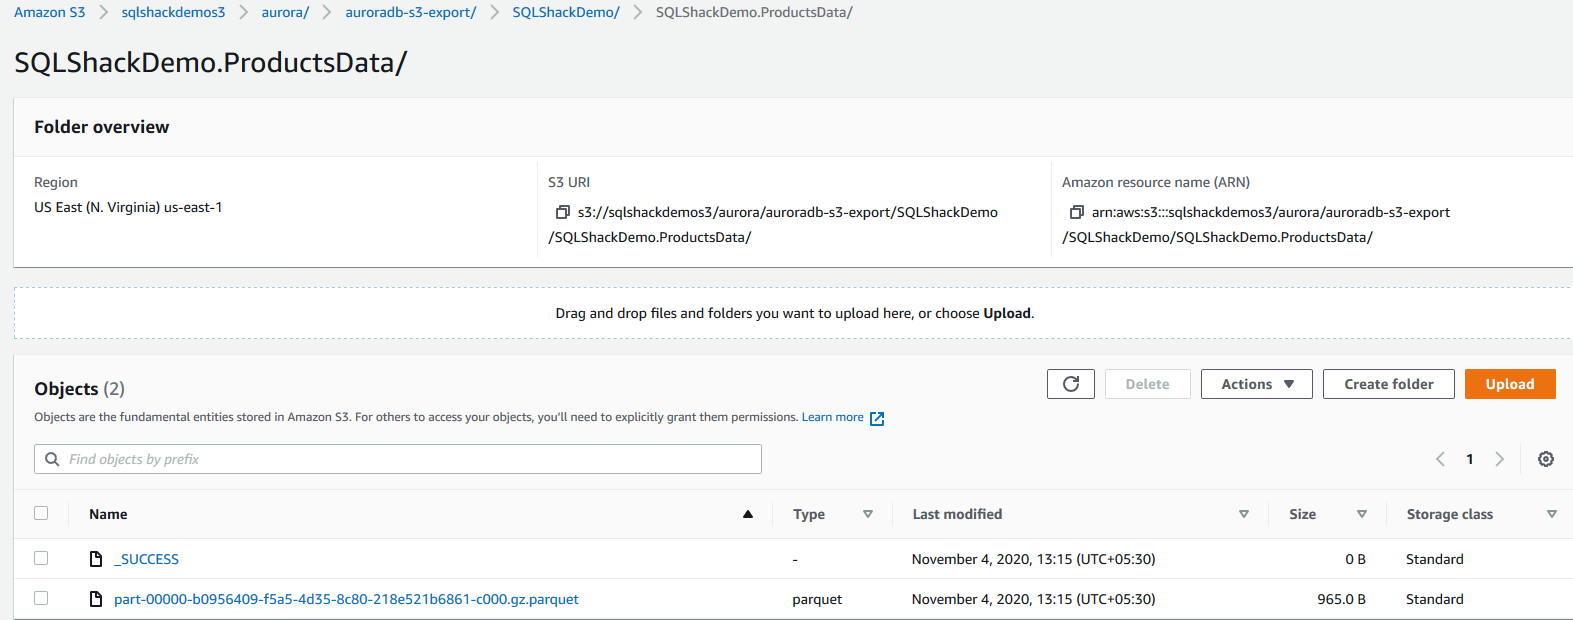
Once the export to the S3 bucket is completed, you can navigate to the AWS S3 bucket and view the folder contents.
It creates a subfolder as per the defined export identifier.
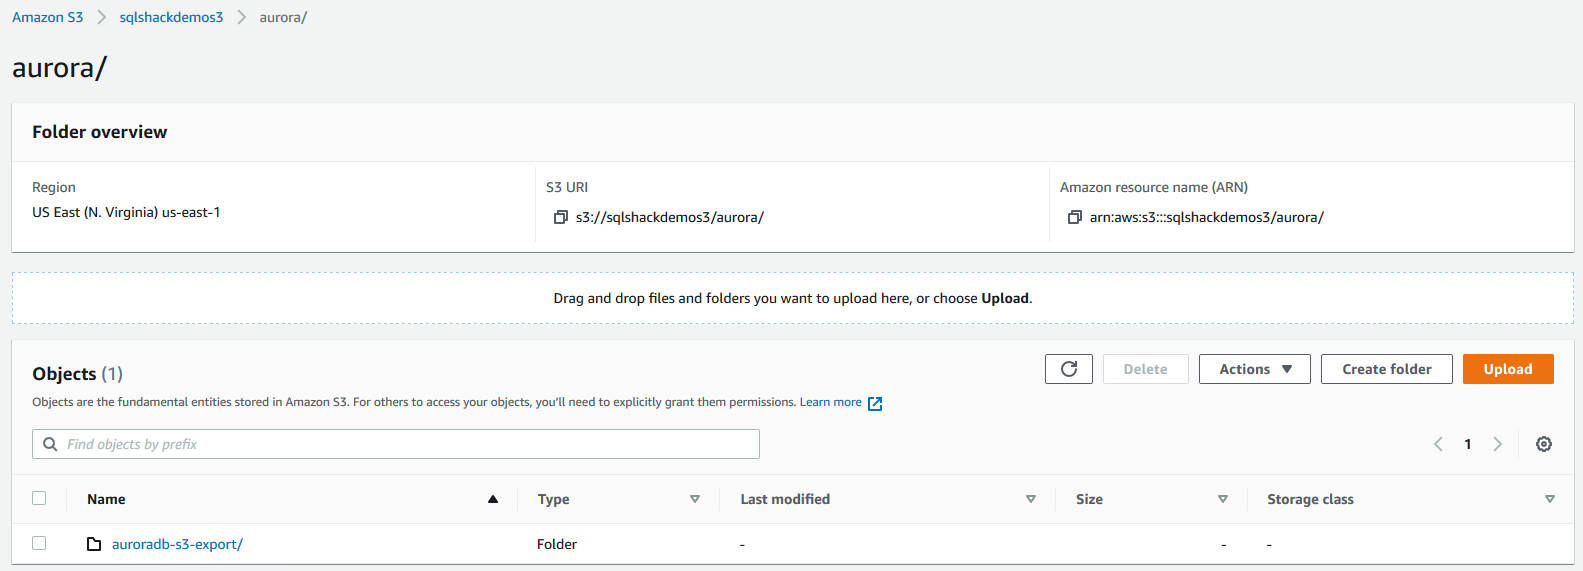
In the folder, we have JSON files that have the export configurations and folder for the database.
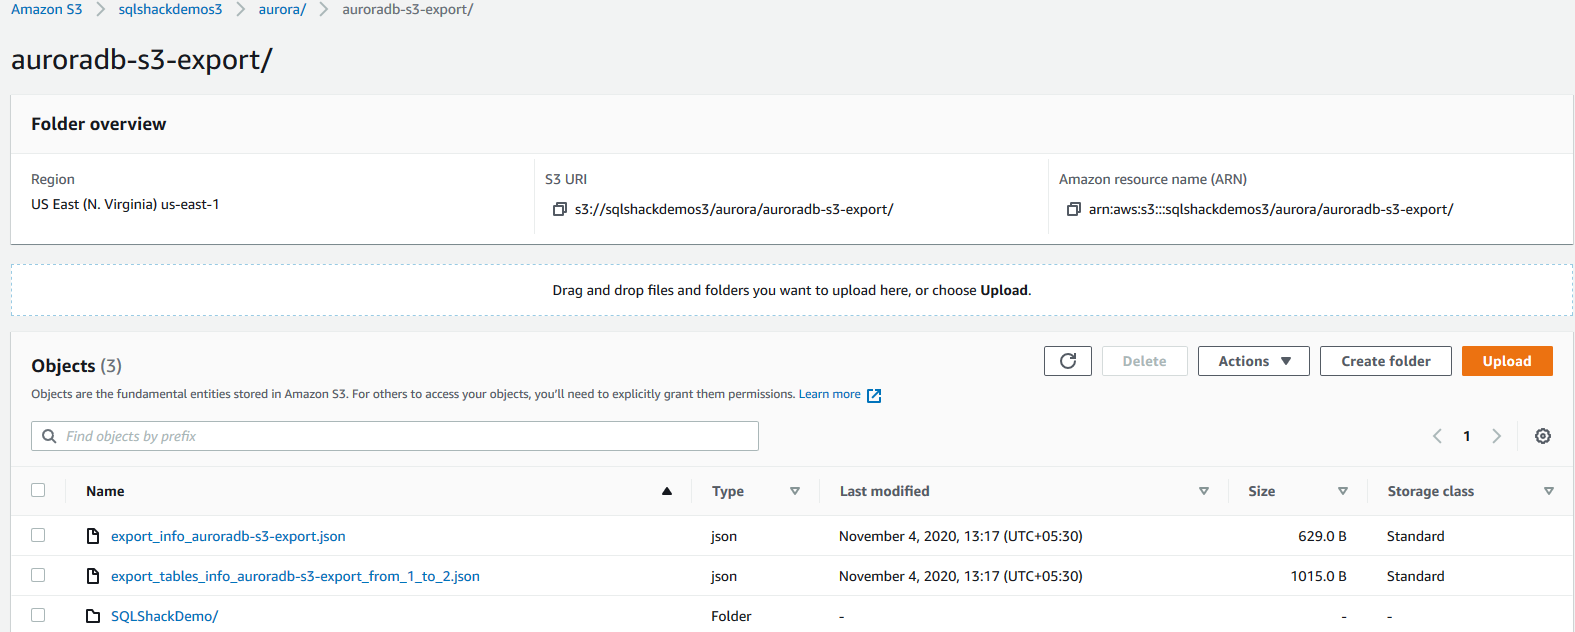
In our case, [SQLShackDemo] is the database name in the Amazon Aurora cluster. Therefore, it has a folder [SQLShackDemo/] in the S3 bucket.
Inside the [SQLShackDemo/] folder, we get the exported result in the parquet format.
Configure a crawler for Amazon Aurora using the AWS Glue
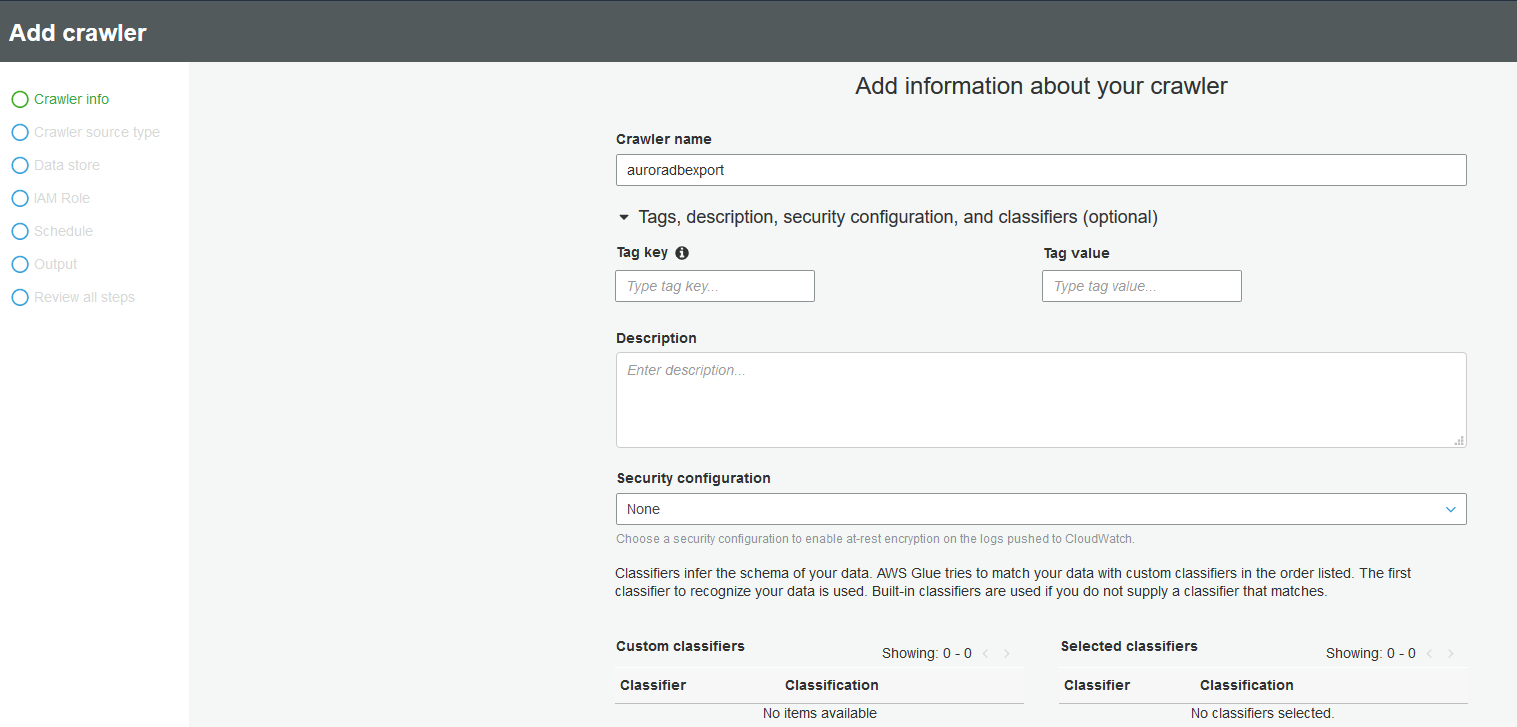
In the AWS web console, launch AWS Glue to add tables using the crawler.

Click on Add tables using a crawler. It has the following steps in the crawler wizard:
Crawler info: Enter a crawler name. In my case, I specify [auroradbexport]

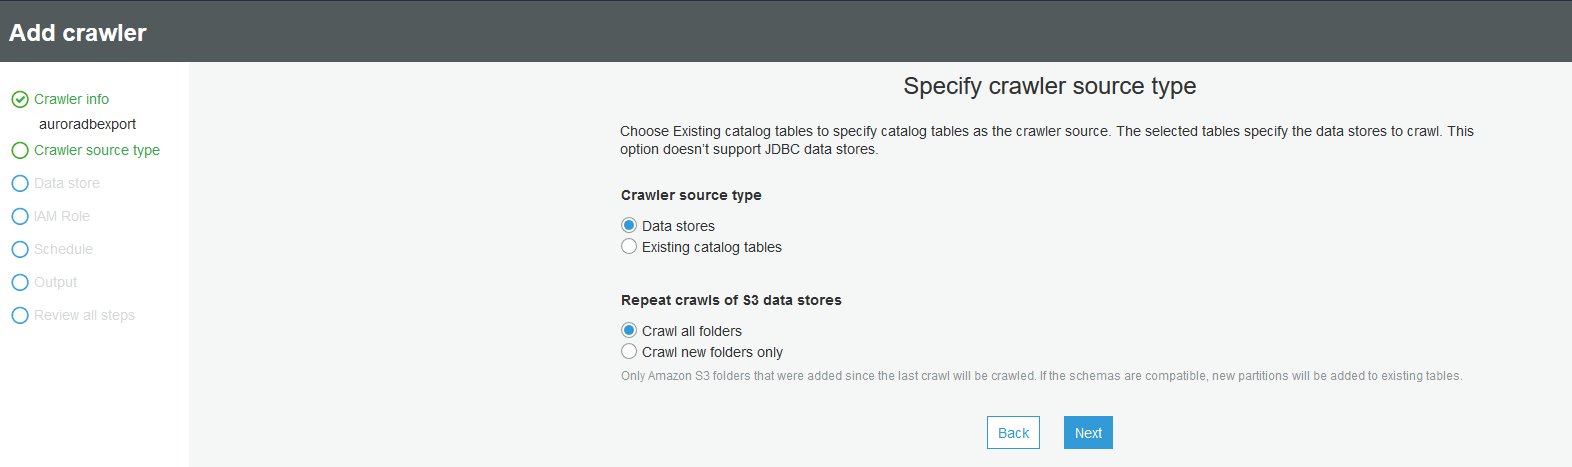
Crawler source type: The crawler source type is data stores. If you have multiple folders ( multiple databases), you can configure crawl for all folders or new folders only
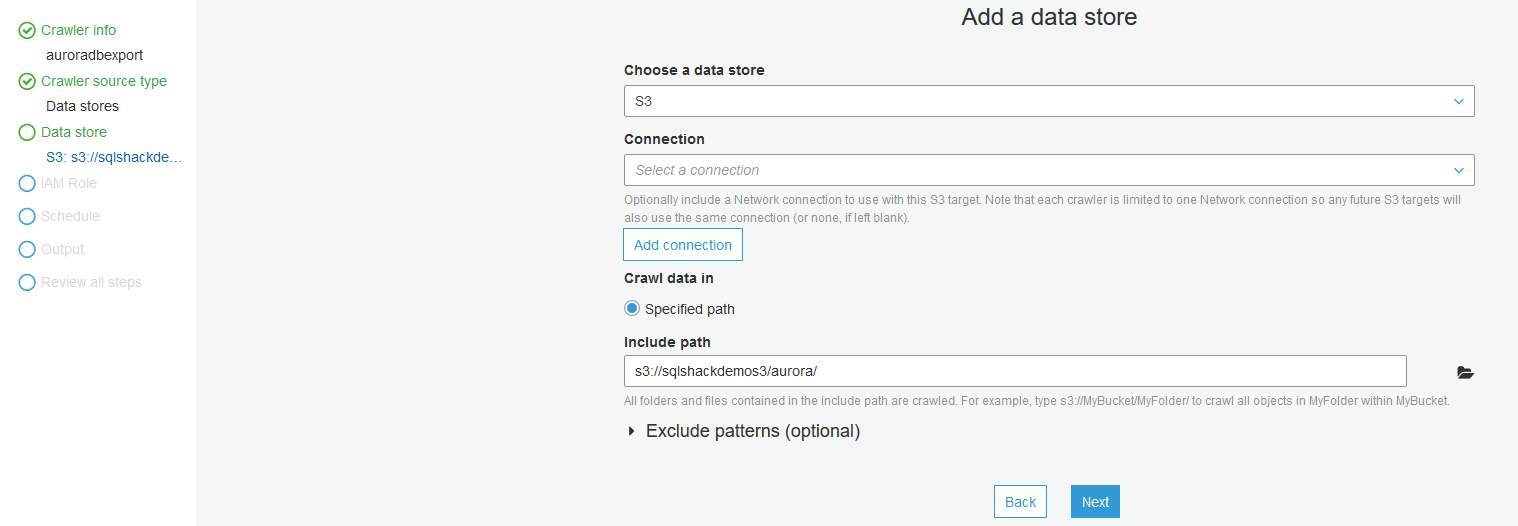
Data Store: In the data store, choose S3 and specify the S3 bucket and folder name in the Include path column
Click No to add another data store
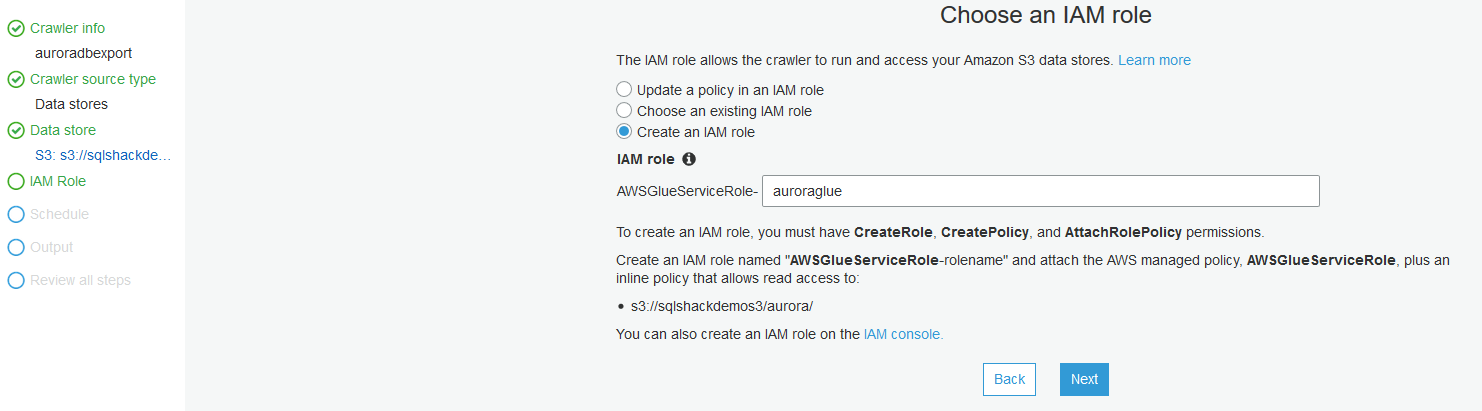
IAM Role: Create an IAM role for the crawler to run and access the AWS data stores. Here, I specify the IAM role name as [auroraglue]. AWS creates the IAM role and allows read access to the S3 bucket
Schedule: Select the frequency as Run on Demand
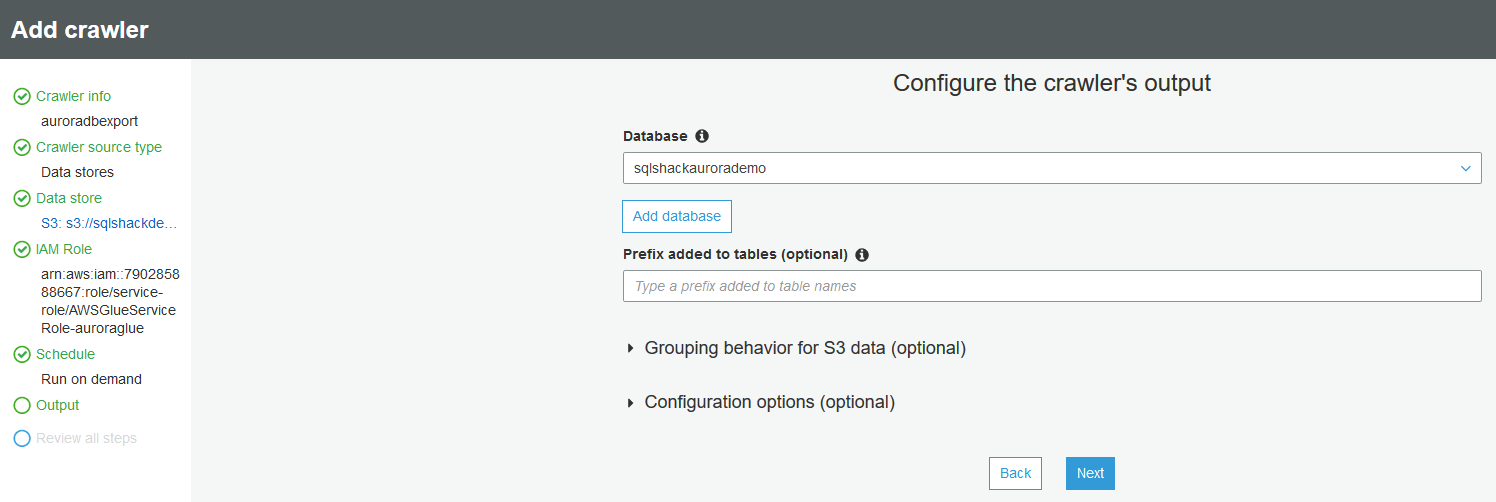
Output: In the output, click on the Add database and specify a database name for the data catalog


Review all steps and click on Finish to configure the AWS crawler.
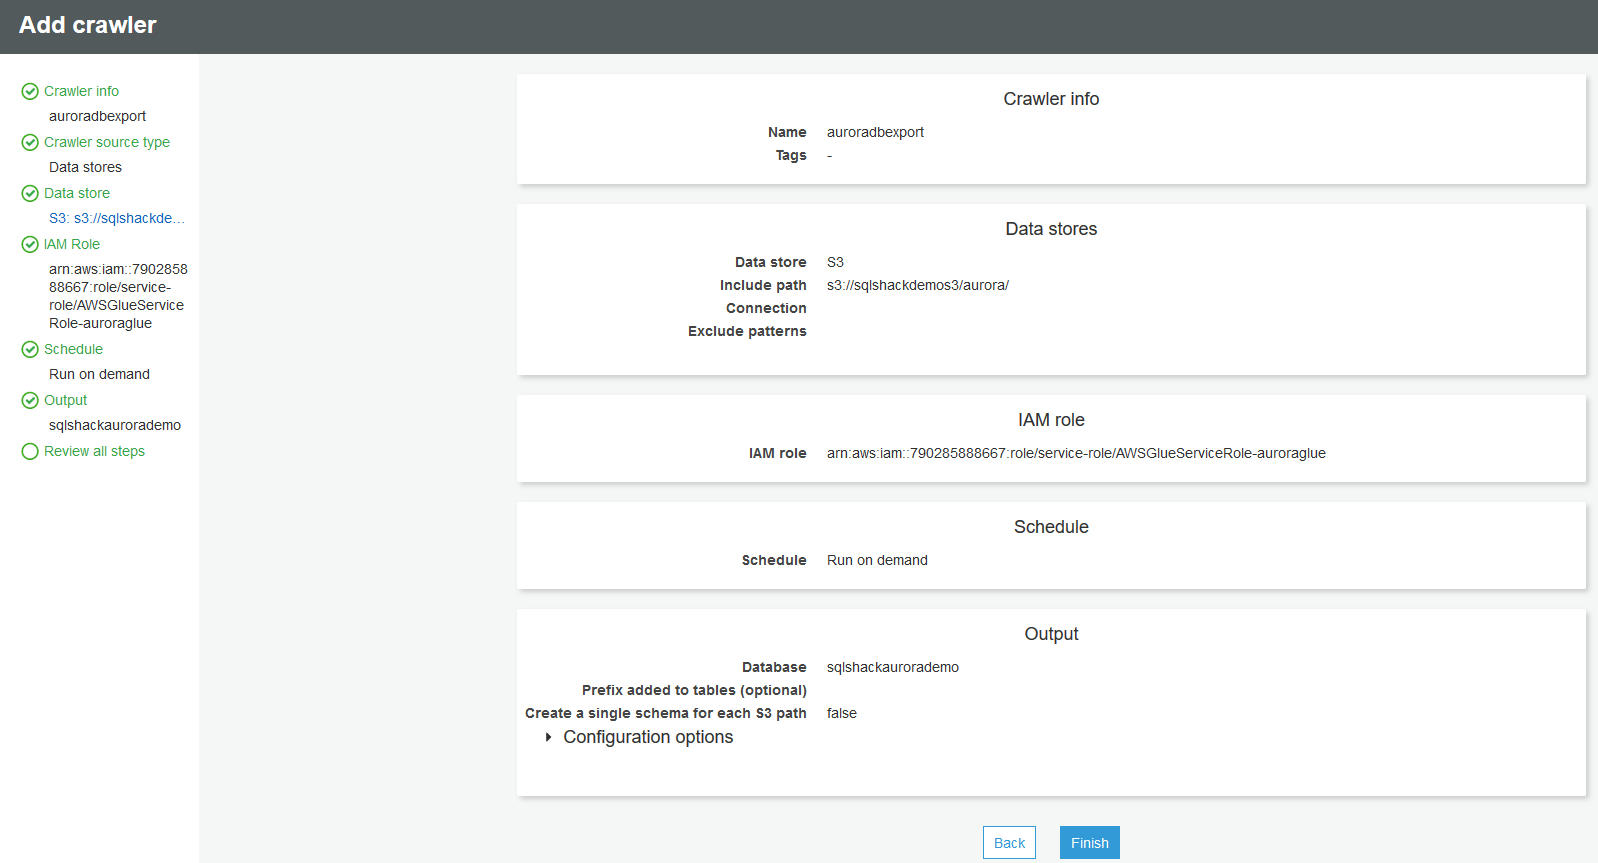
It creates the crawler. Its status should be Ready for you to run and process data.

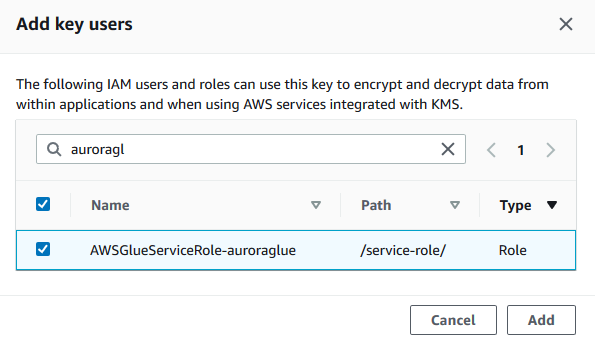
Before we execute the crawler, go back to your AWS key and add the IAM Role [auroraglue] for encrypting and decrypting data.
Now, select the crawler and click on Run Crawler.

It takes less than in comparison with the time taken in an export snapshot to the S3 process.

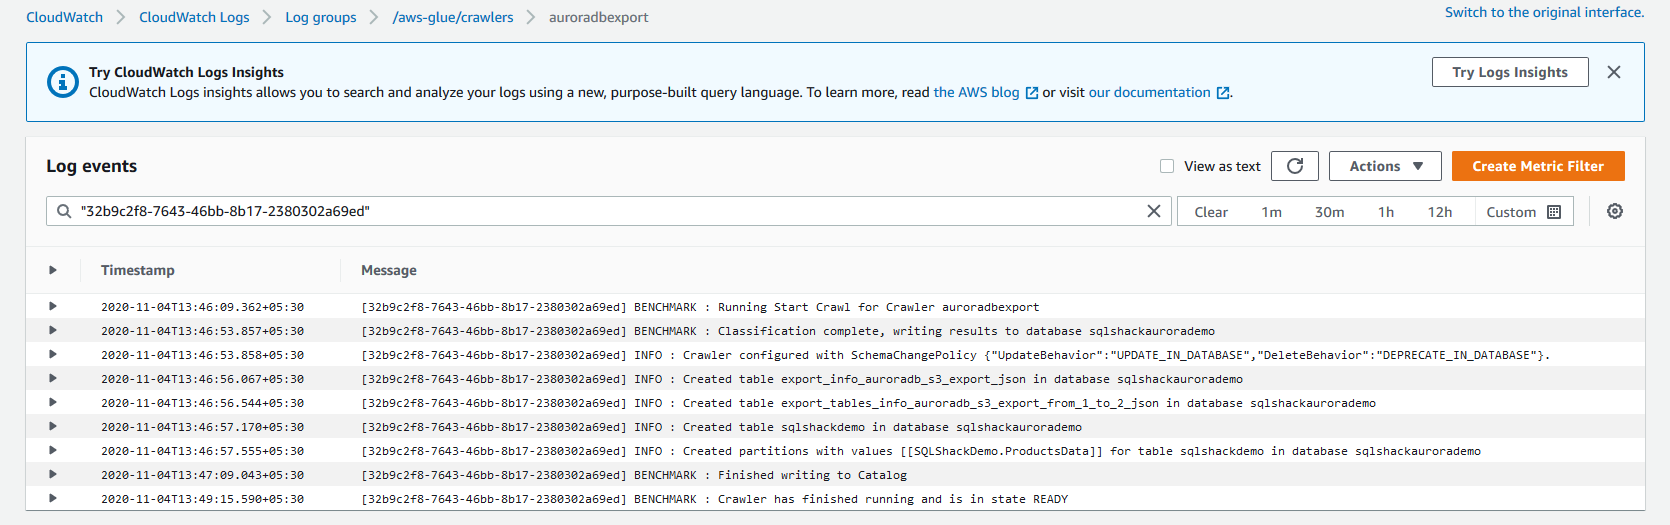
Once the status changes to Ready, you can view the logs or use Amazon Athena to query data from the data catalog.

Click on Logs to get detailed messages for each step for the crawl.
Use Amazon Athena to query data stored in parquet format
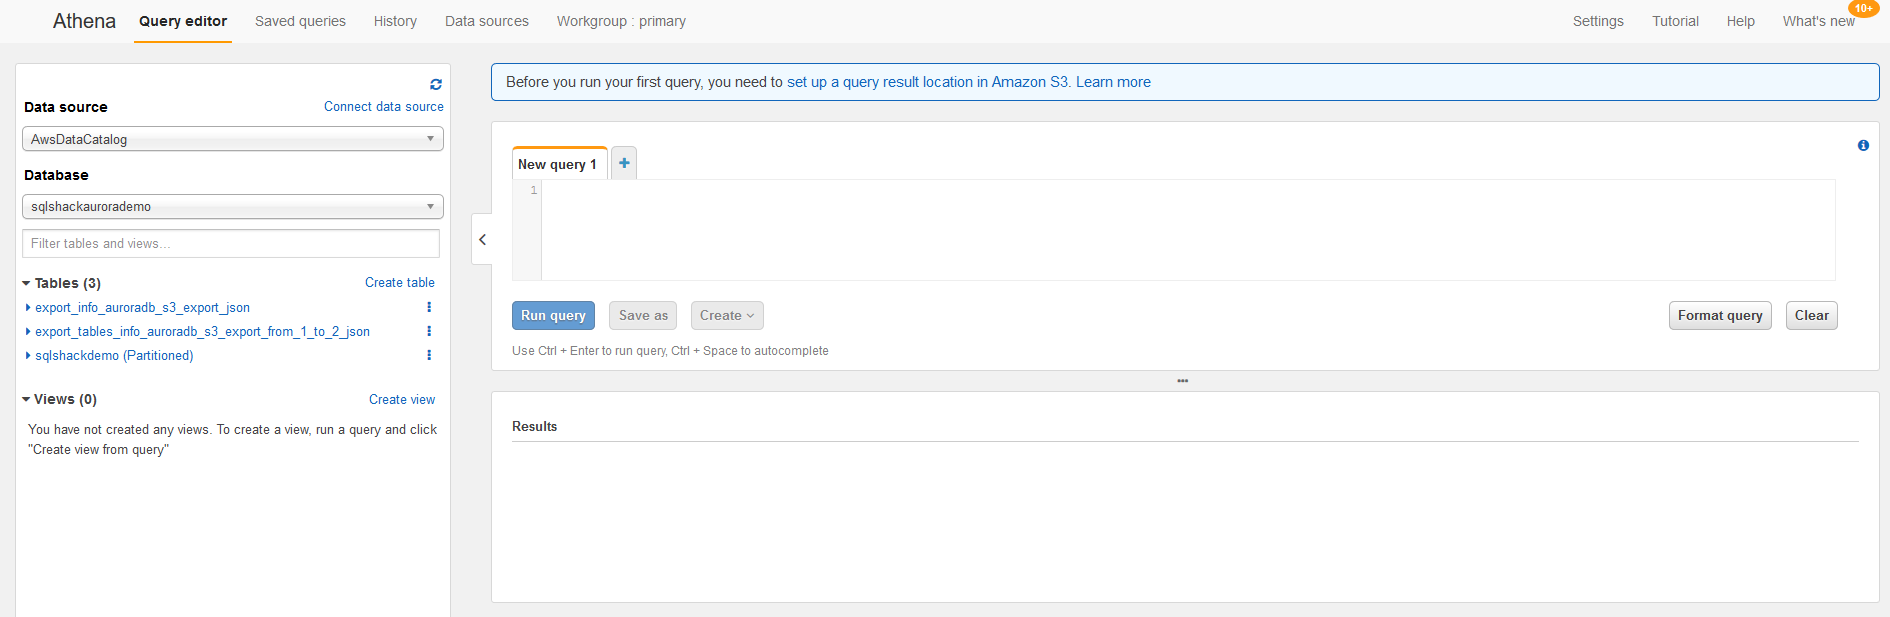
To query crawled data, launch Amazon Athena from the AWS services. In the console, select the data source and database name as per your earlier configurations.
It shows the JSON tables and portioned table for your Amazon Aurora database.
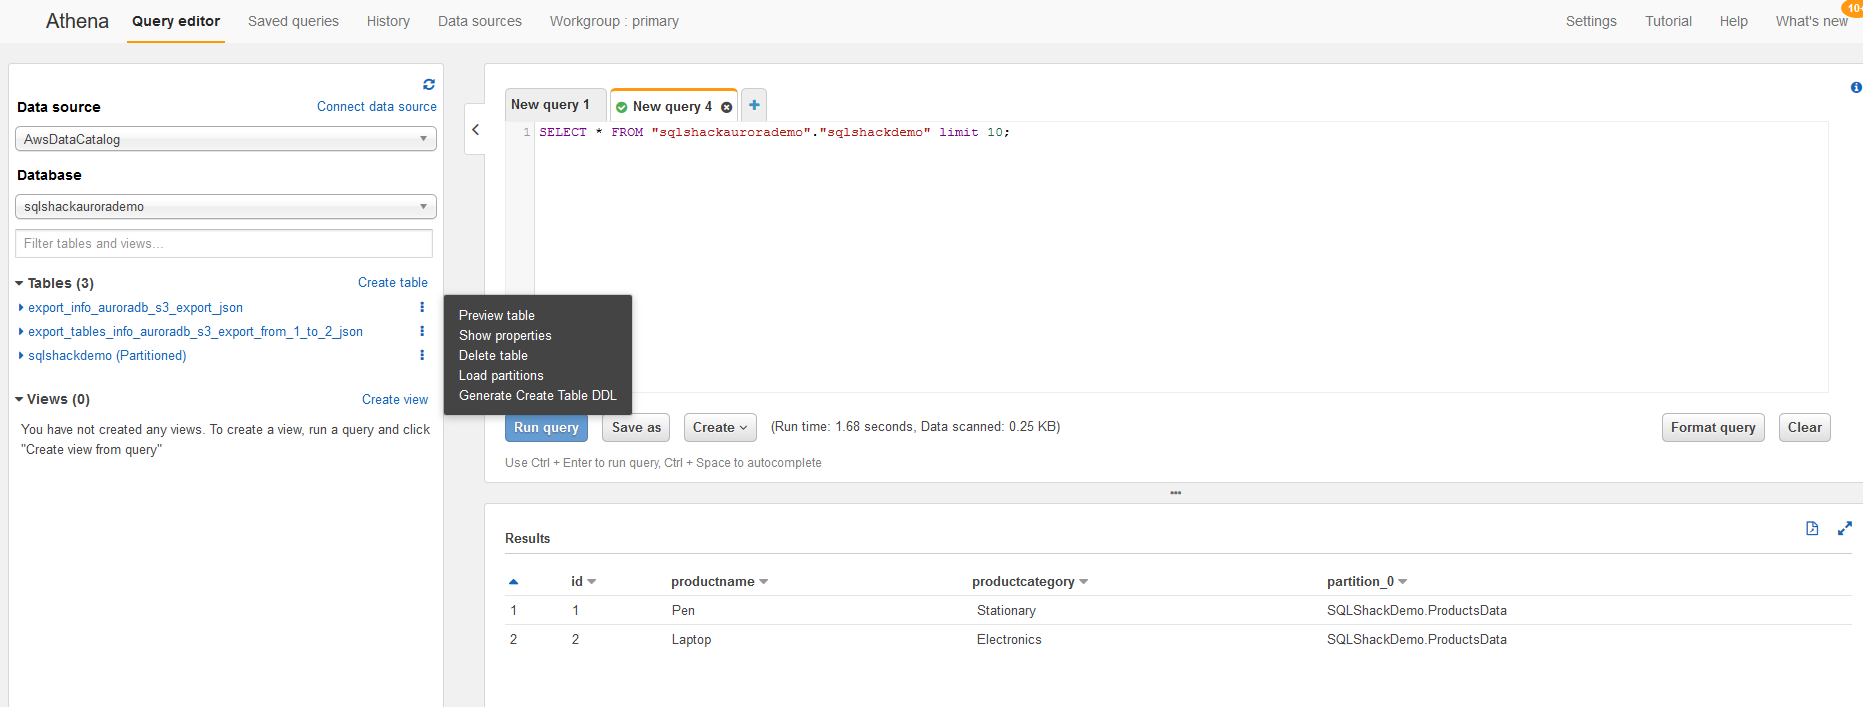
Click on the Preview table for the sqlshackdemo(partitioned) and Choose the Preview table.
It shows you the query and its output. In the preview, it limits the 10 records however we have only two rows in the sample table. You can compare it with the earlier screenshot of the Amazon Aurora sample table.
You can note there that the query window name is [New Query 4].
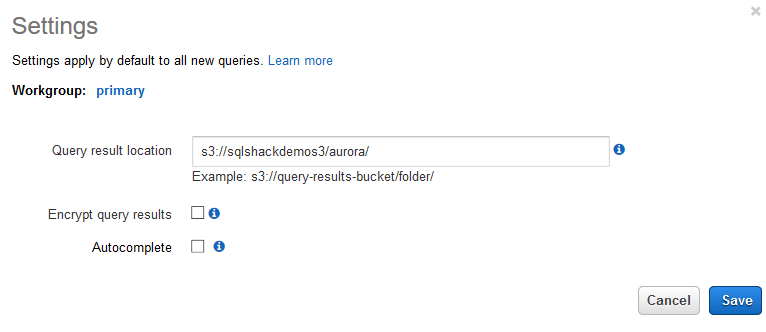
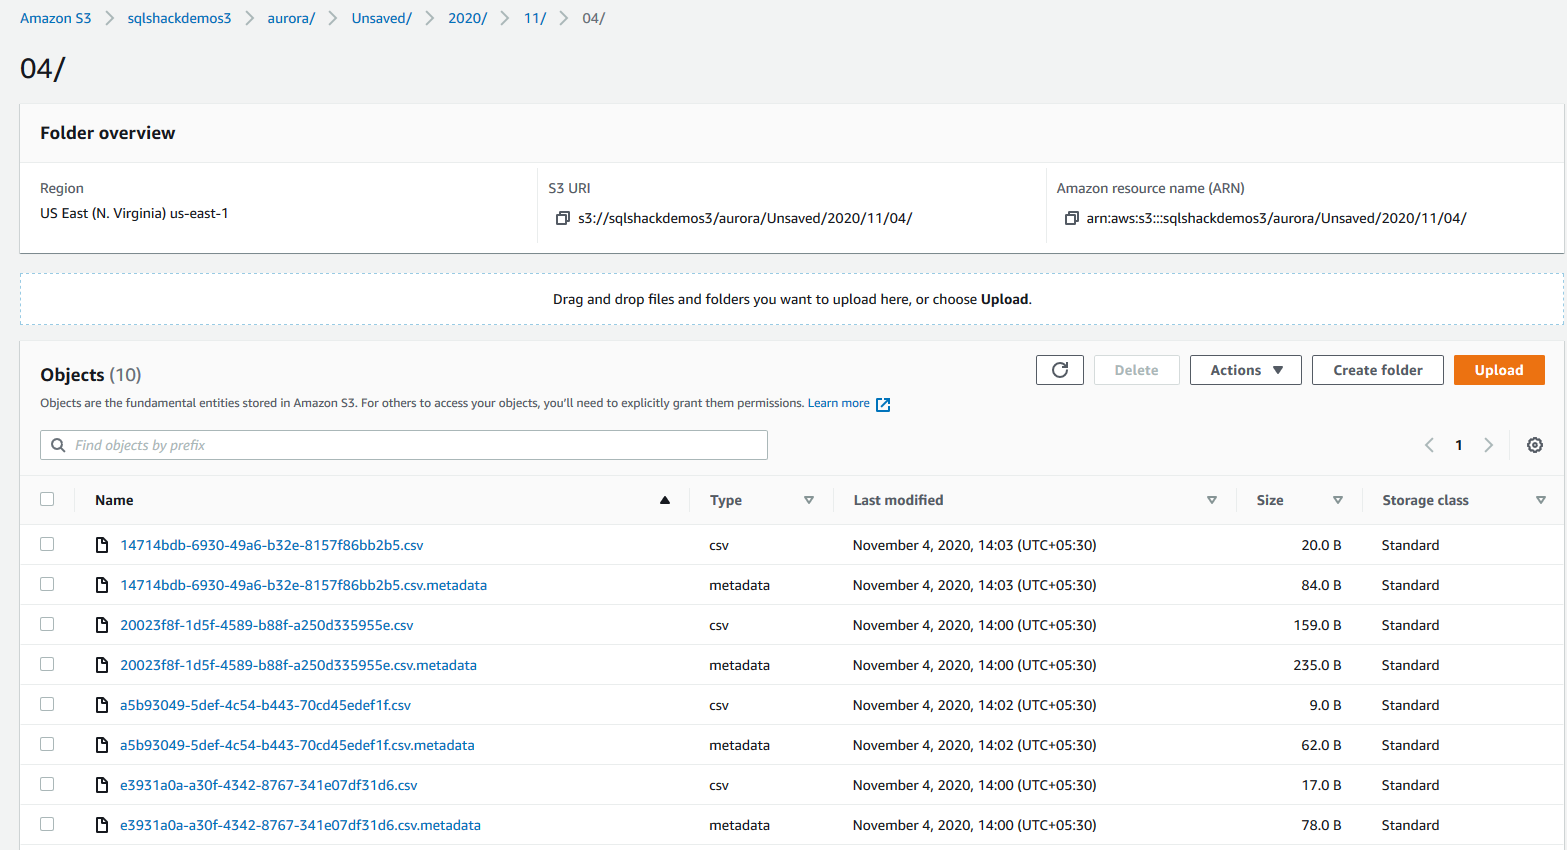
Click on the Settings in Amazon Athena and specify the Query result location as an AWS S3 bucket.
In the AWS S3 bucket, you can view the query metadata and output in the CSV format. AWS Athena stores the results in the S3 bucket for each query execution. You can note the folder name is 04 because of the query window name [New Query 4].
Conclusion
In this article, we explored the snapshot export to the S3 bucket for Amazon Aurora or supported AWS RDS databases. It gives the flexibility to access data without any performance impact on the actual production database. You can use Amazon Athena to query tables like a regular table. You can work with Snapshot’s data and recover data as well in case of any requirements.
Table of contents
| Deploy your Amazon Aurora database clusters for MySQL |
| Explore Amazon Aurora global databases with MySQL compatibility |
| Rewind or Forward the Amazon Aurora Cluster with MySQL compatibility using backtrack feature |
| Implement an Amazon Aurora Serverless cluster |
| Database Cloning in Amazon Aurora |
| Export Amazon Aurora MySQL or Amazon RDS snapshots to AWS S3 buckets |

I am the author of the book "DP-300 Administering Relational Database on Microsoft Azure". I published more than 650 technical articles on MSSQLTips, SQLShack, Quest, CodingSight, and SeveralNines.
I am the creator of one of the biggest free online collections of articles on a single topic, with his 50-part series on SQL Server Always On Availability Groups.
Based on my contribution to the SQL Server community, I have been recognized as the prestigious Best Author of the Year continuously in 2019, 2020, and 2021 (2nd Rank) at SQLShack and the MSSQLTIPS champions award in 2020.
Personal Blog: https://www.dbblogger.com
I am always interested in new challenges so if you need consulting help, reach me at rajendra.gupta16@gmail.com
View all posts by Rajendra Gupta
- Understanding PostgreSQL SUBSTRING function - September 21, 2024
- How to install PostgreSQL on Ubuntu - July 13, 2023
- How to use the CROSSTAB function in PostgreSQL - February 17, 2023