
In this article, we will explore the useful backtrack feature for Amazon Aurora clusters.
Introduction
Suppose you are watching a movie online with your friends. In between, you get an important call, and you missed five minutes of video while your friends were viewing. You might think, what’s the big deal. I can go back and play it again from 5 minutes back. Similarly, if you want to skip some content, you can move forward quickly.
Now, imagine the same scenario with your databases. Is it possible to rewind or forward your database clusters similar to movies?
Yes, Amazon Aurora gives you flexibility using the backtrack feature. In this article, let’s explore with a practical demonstration.
An overview of the Amazon Aurora Backtrack feature
AWS backtrack feature rewinds the entire database cluster to your specified time. Suppose you executed a SQL to delete specific rows, but by mistake, you missed to add the Where clause. The query was executed successfully but it removed all rows from that table. Using the backtrack feature, you can quickly bring your cluster to the initial state.
- Backtrack is not a replacement for your backup and restores mechanism. AWS automatically takes the regular backups for Aurora databases
- The Backtrack does not create a new database cluster. It rewinds the existing DB cluster
- You can repeatedly rewind or forward a database cluster. Suppose you are not sure about the time at which the accident happened for your database. You backtrack and aurora cluster 4 hours but the later realized that you need to take it forward 2 hours. You can easily do that
By default, the backtrack is not enabled for the Amazon Aurora cluster. You can specify the backtrack feature during the initial cluster configuration or modify the existing cluster.
Environment details
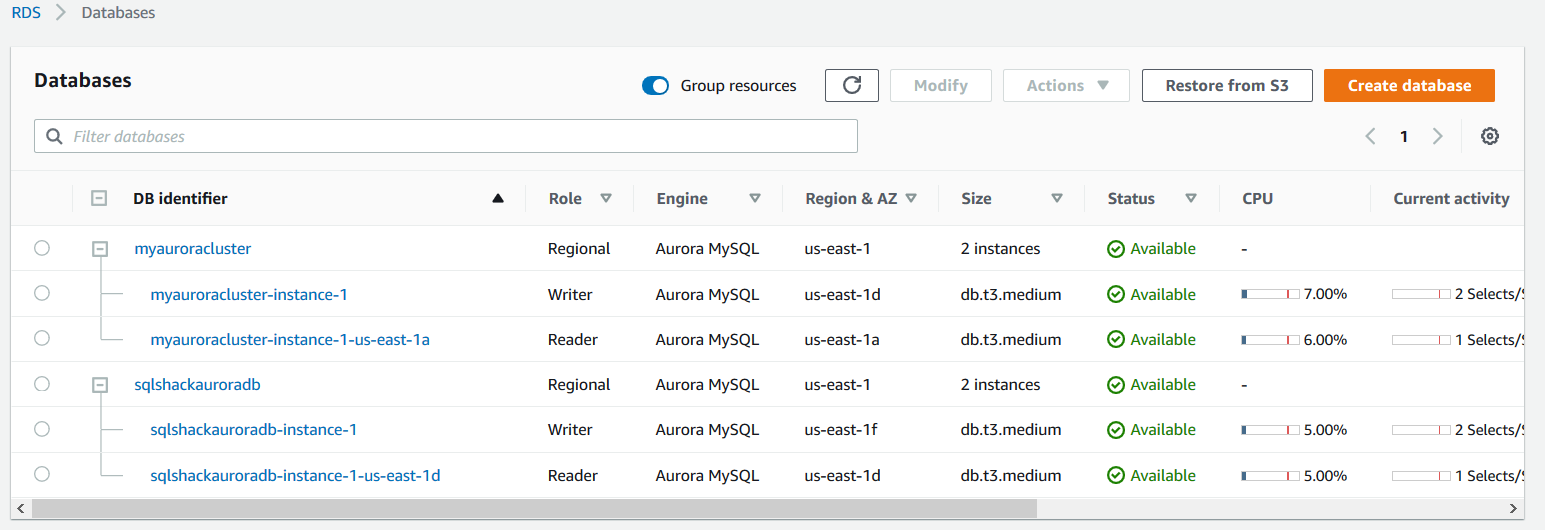
For this article, I have following the existing Amazon Aurora cluster in the us-east-1 AWS region. You can refer to the article Deploy your AWS RDS Aurora Database clusters for MySQL for instructions.
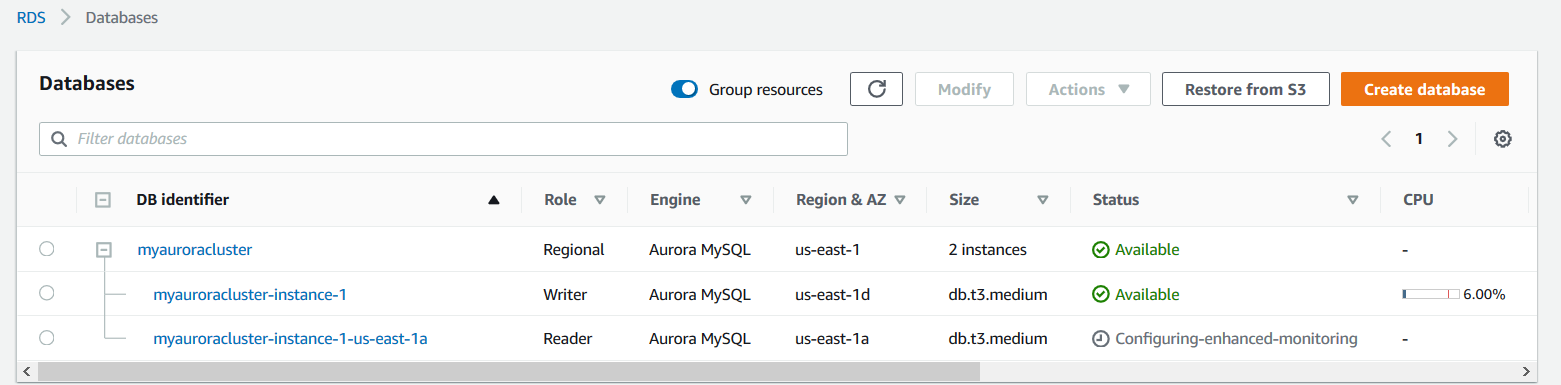
In the below image, we have [MyAuroraCluster] with one writer and one reader in different availability zones.
Enable backtrack feature on an existing Amazon Aurora cluster
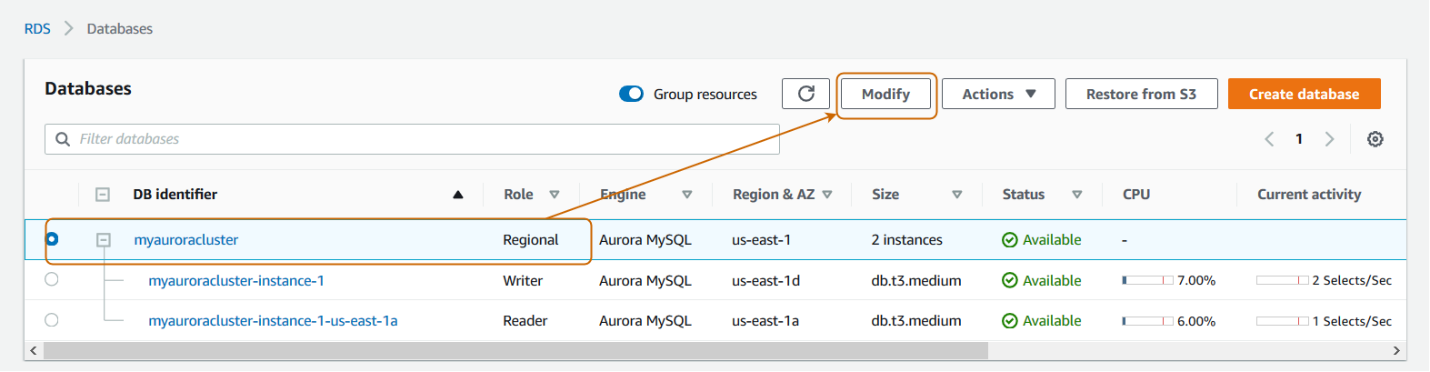
To enable the backtrack feature on an existing cluster, select the cluster and click Modify.
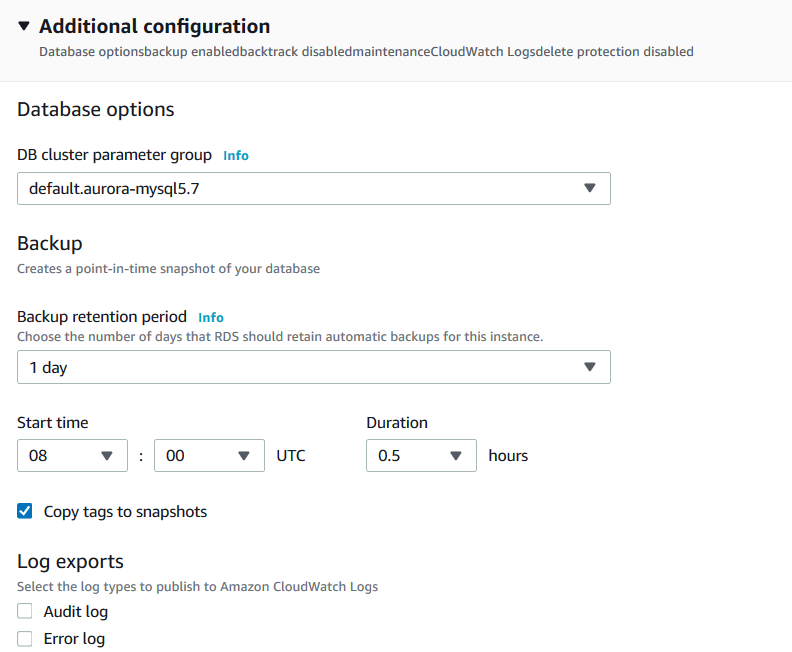
You do not get the backtrack option in the existing aurora cluster if you have not enabled it during the initial cluster configuration. Previously, we haven’t enabled this feature; therefore, in the modify cluster properties, you do not get the backtrack section.
For the demonstration, let’s configure a new aurora cluster. You can follow the article for detailed instructions Deploy your AWS RDS Aurora Database clusters.
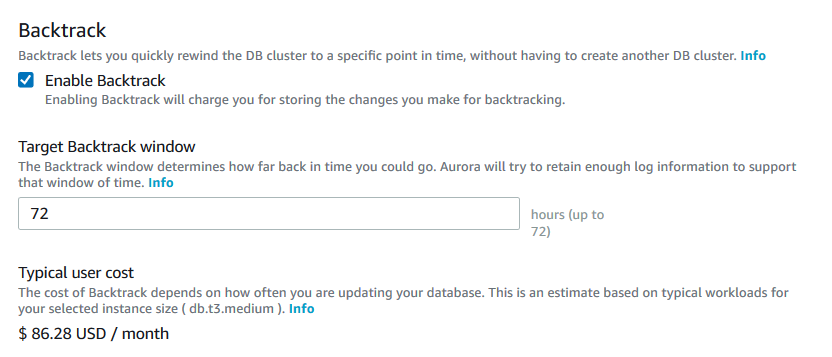
In the new cluster creation wizard, enable the backtrack and specify the target backtrack window. Aurora allows a maximum of 72 hours of rewinds for the aurora cluster. You can specify the value as per your requirement. Suppose you specify the 24 hrs. Target backtrack window, then it allows you to rewind a maximum of 24 hours.
It shows you a typical user cost for enabling the backtrack. The cost depends upon the database workloads.
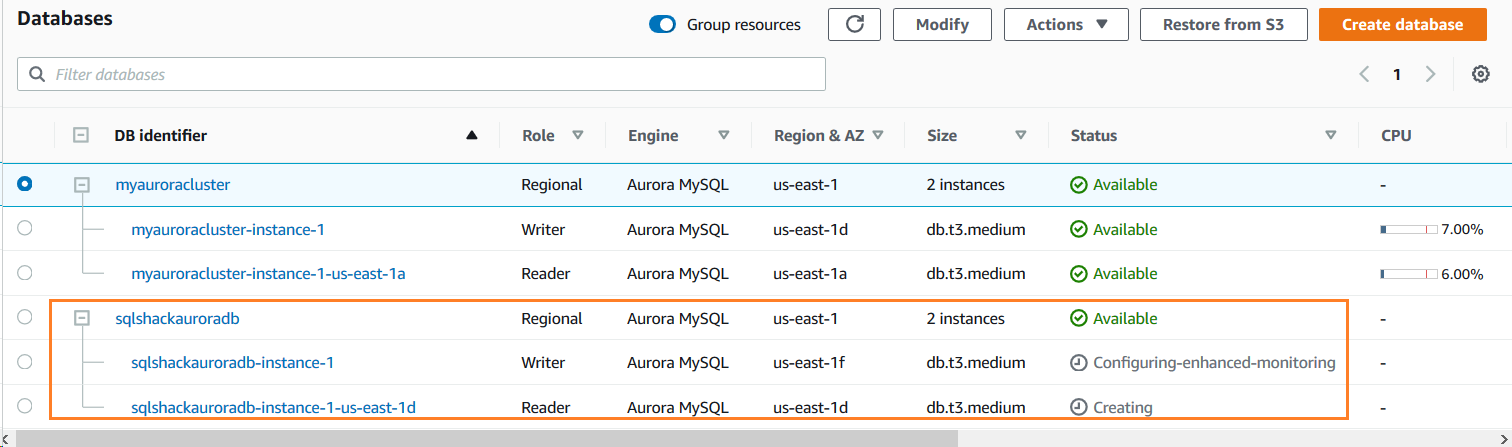
My new aurora cluster with a backtrack feature is being created as highlighted below.
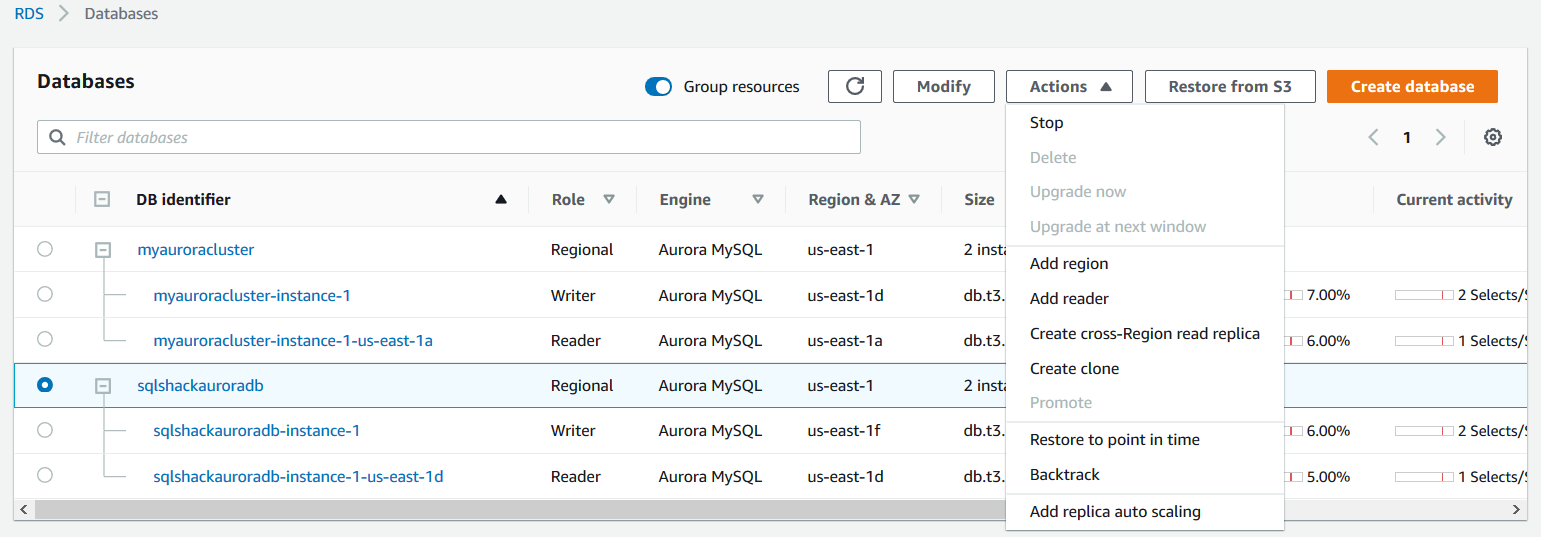
Once your aurora cluster instance is available, navigate to the Actions menu and click on backtrack.
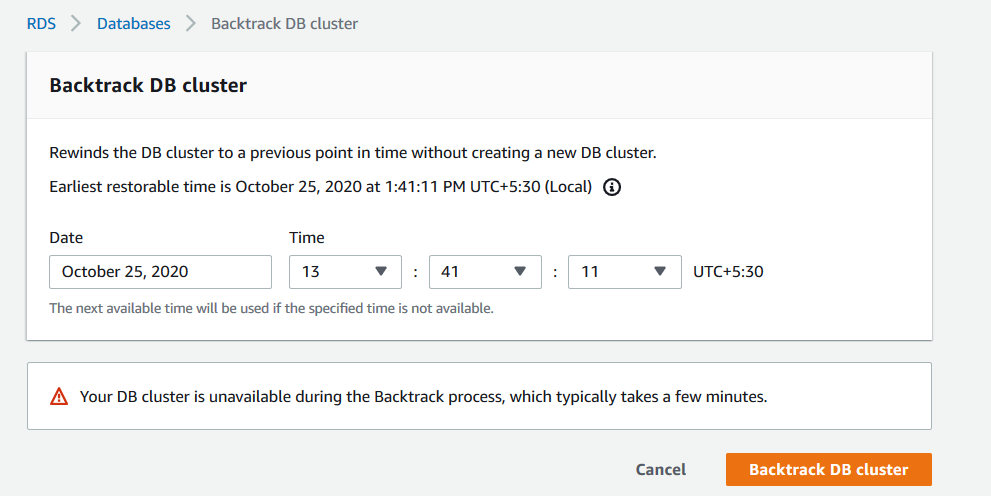
For my database cluster, it shows the earliest restorable time (backtrack) for your cluster.
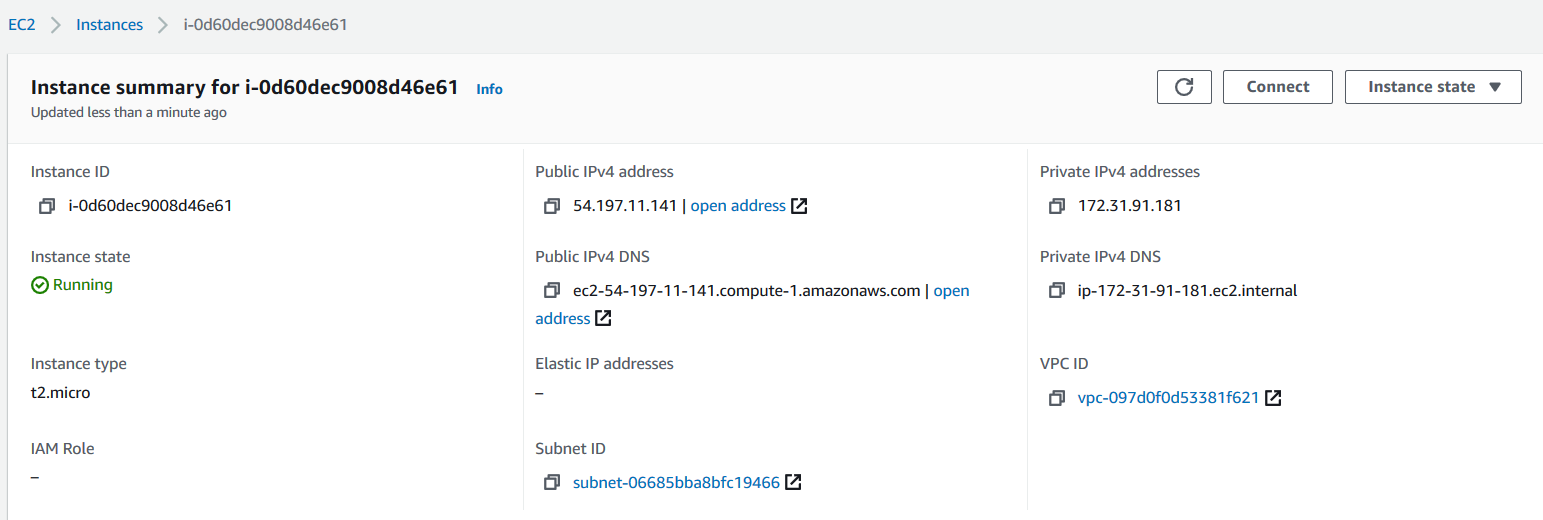
Launch an Amazon EC2 instance for MySQL client
We require an Amazon EC2 instance for installing the MySQL client. We will connect with the Amazon Aurora database using the MySQL client and perform DDL, DML queries.
For this purpose, I choose the Amazon Linux 2 AMI, as shown below.

You can follow the article, Installation of SQL Server Linux on Red Hat in Amazon EC2 instances for detailed information on configuring an EC2 instance in AWS.
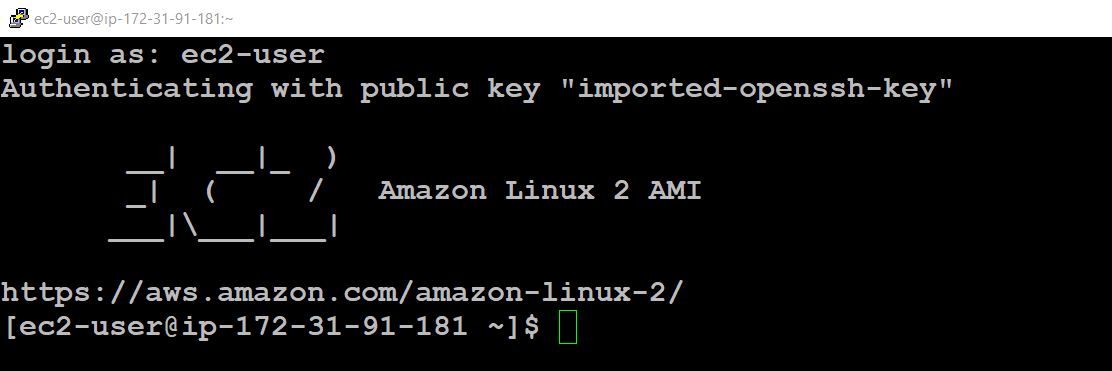
Once the EC2 instance is available, use the Putty to connect it using the terminal.
Open PuTTY and connect to the Linux EC2 using the public DNS or IP address. Before connecting, convert your PEM key file to PPK using the PuttyGen application.
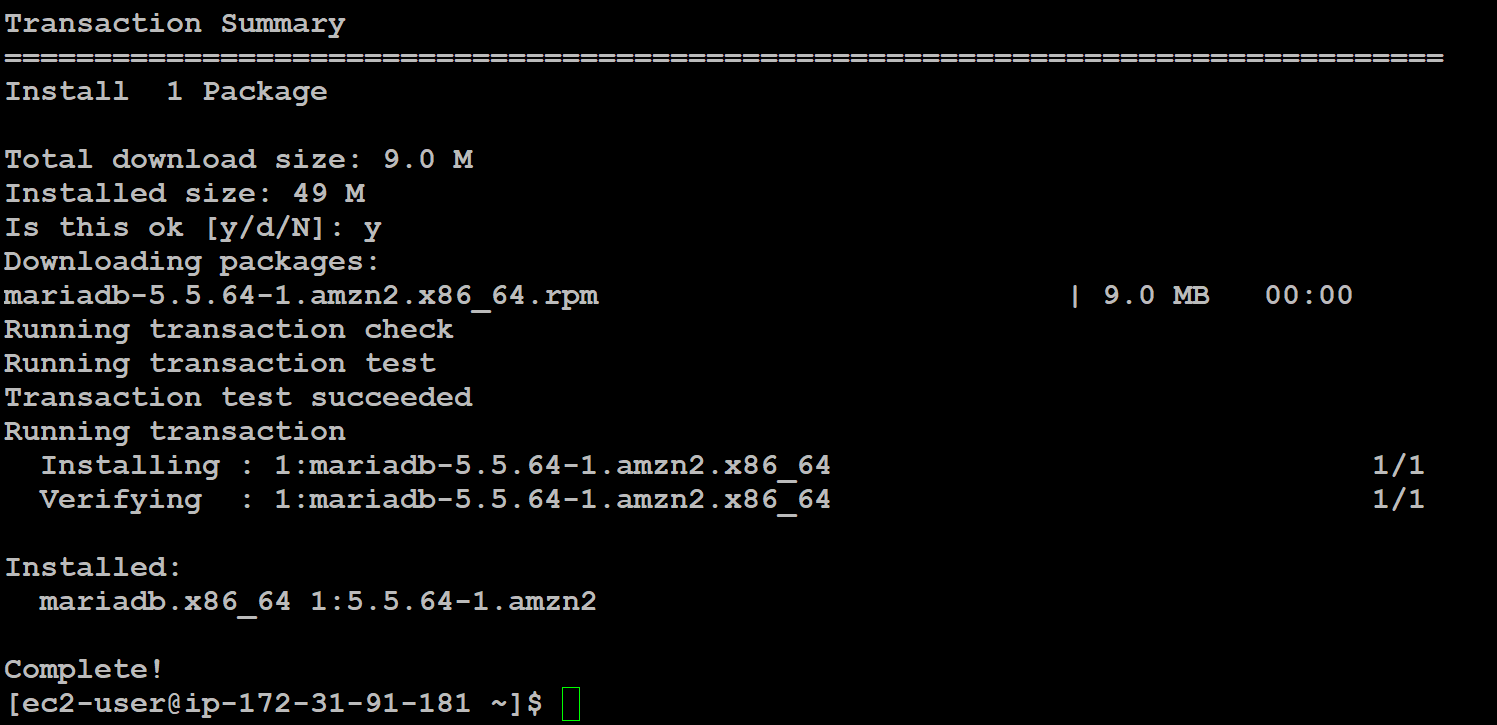
Use the following command to install MySQL client of Linux EC2 instance:
$ sudo yum install mysql
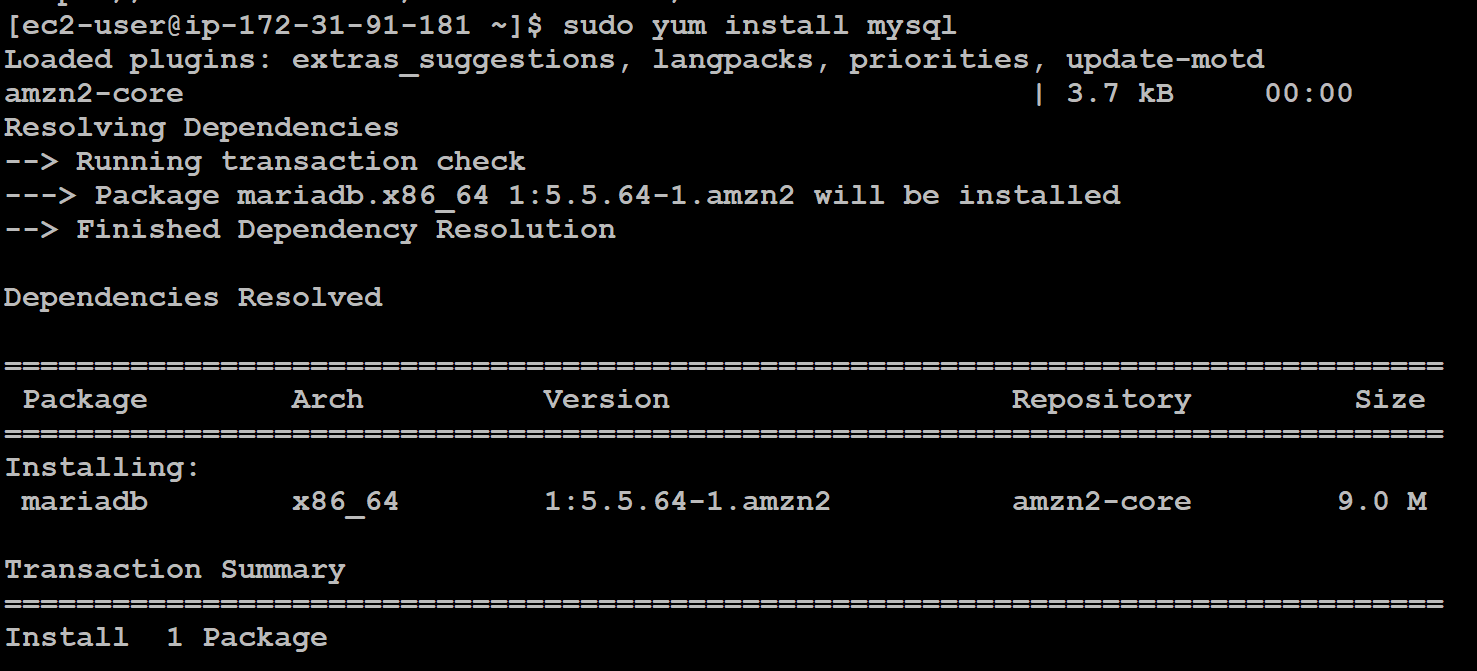
It downloads and installs the MySQL client on the EC2 machine, as shown below:
Connect to the Amazon Aurora using endpoints
As specified in the earlier article, we use endpoints to connect with the Amazon Aurora clusters. Navigate to RDS, open the aurora cluster properties and note down the writer endpoint.

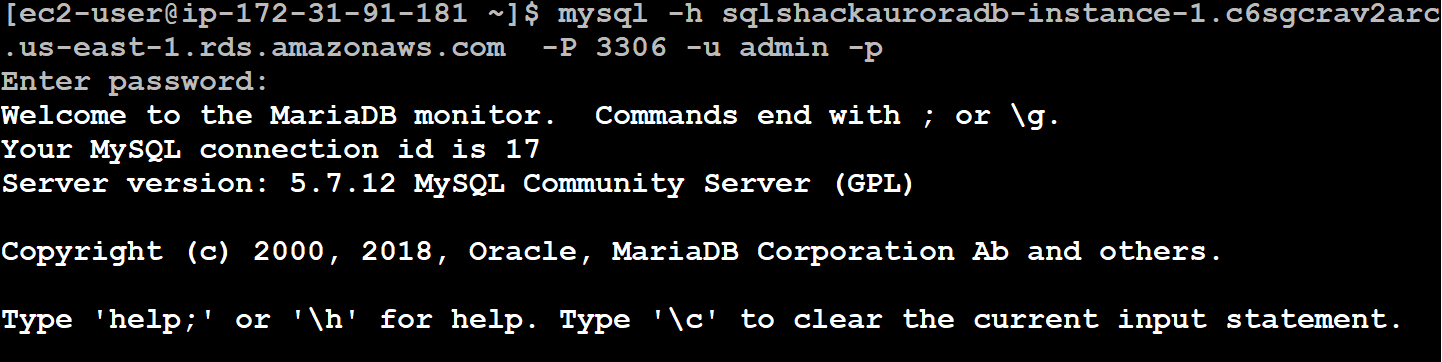
To connect with the Aurora using MySQL client, run the following command:
> mysql -h sqlshackauroradb-instance-1.c6sgcrav2arc.us-east-1.rds.amazonaws.com -P 3306 -u admin -p
In the command, we have the following parameters:
endpoint – sqlshackauroradb-instance-1.c6sgcrav2arc.us-east-1.rds.amazonaws.com
Enter your admin account password, and it takes you to MySQL[{None}] prompt:
- Note: If you get connection errors from EC2 to Amazon Arora cluster, verify the allowed traffic for the security group for the EC2 group or aurora security group
Now, create a database, table and insert few records in it. For each step, I noted the time as well.
Create Database: Executed at 14:45

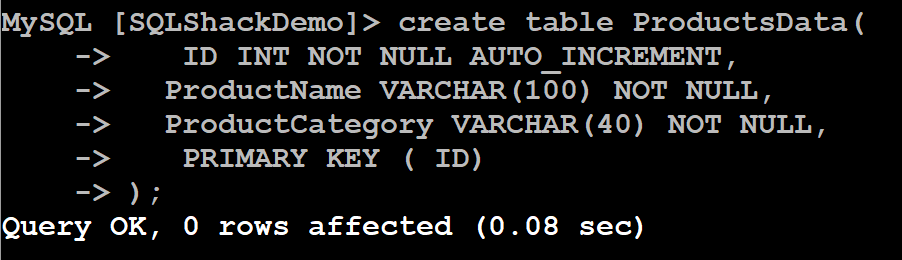
Create table: 14:52 PM
1234567Use Products;create table ProductsData(ID INT NOT NULL AUTO_INCREMENT,ProductName VARCHAR(100) NOT NULL,ProductCategory VARCHAR(40) NOT NULL,PRIMARY KEY ( ID));


Insert sample data into the Products table.
Insert first Record: 14:55 hrs
1Insert into ProductsData (ProductName, ProductCategory) Values('Pen',' Stationary')Insert second Record: 14:58 hrs
1Insert into ProductsData (ProductName, ProductCategory) Values('Laptop',' Electronics');Remove the Records: 15:01 hrs
By mistake, we removed both rows from the ProductsData table:


Usually, in a relational database, we look for database backups, restore it with another name and recover the data. In the Amazon Aurora, we can rewind the database for reverting the changes.
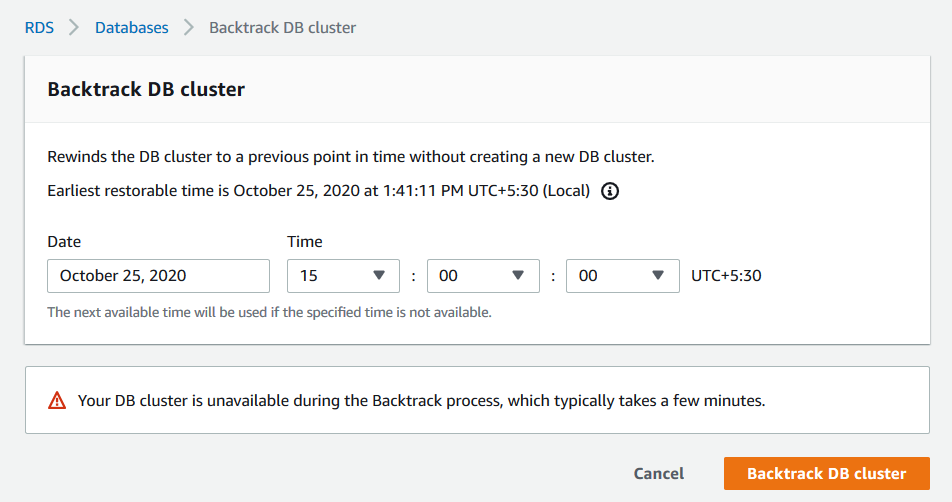
Open the backtrack console for your aurora cluster and specify the time at which you want to recover your database. In the earlier example, someone removed the record at 15:01 but let’s say we are not aware of it.
To check the records, specify the time 14:50 hrs. At this point, your database SQLShackDemo should exist but without any user table.
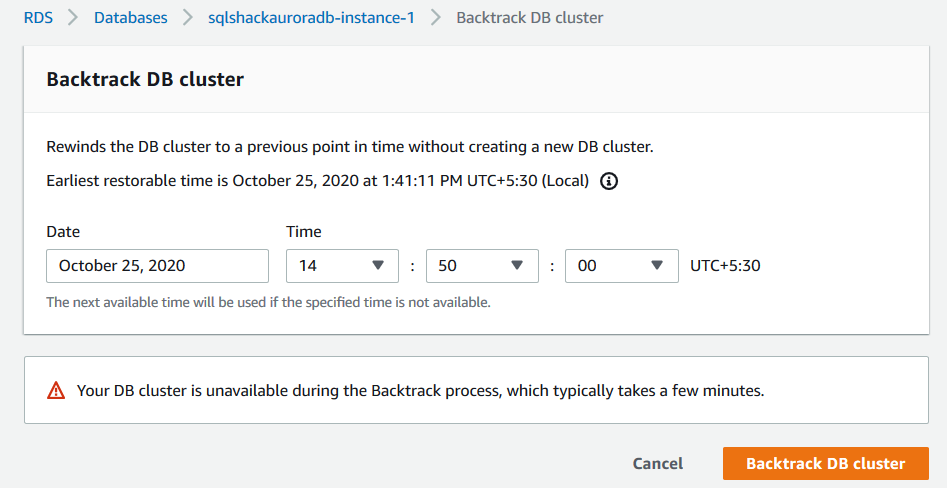
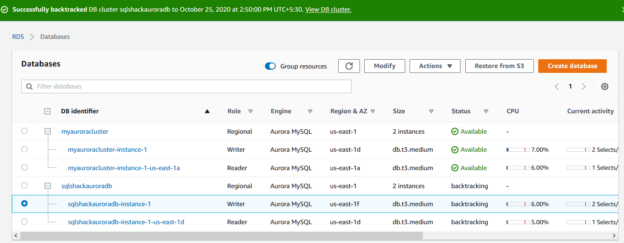
Click on the Backtrack DB cluster. It starts the rewind process and changes the instance status to backtracking from available.

The backtracking process is completed, and it gives the status at the top with a timestamp.

Refresh AWS Web console and aurora cluster are in available status now.
Reconnect using the aurora endpoint and check the tables using the Show Tables command. It returns an empty result set because we backtracked the database at 14:50 hrs. But the table was created at 14:52 hrs.

It is possible to rewind or forward the database again using backtrack. For example, let’s rerun the process for 15:00 hrs.
It started the backtracking process again, as shown below.
![]()
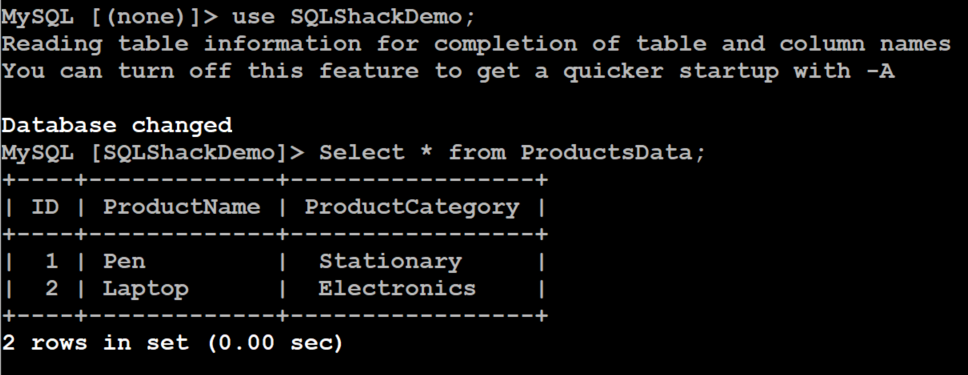
As highlighted earlier, we accidentally deleted the records from the [ProductsData] table at 15:01 hrs. And we are now at 15:00 hrs. Therefore, if you reconnect the aurora database and it returns both records in the [ProductsData] table as shown below.
Limitations of the backtrack feature in Amazon Aurora
- The Backtrack process impacts the entire aurora cluster. You cannot revert a specific database or object
- It requires a small downtime. Therefore, you should stop your application before initiating the backtrack operation. Once you initiate a backtrack request, AWS closes the open transactions and drops the uncommitted read-write operations
- Backup is not available for all Aurora versions and AWS regions. You should check AWS documentation before implementations. For example, Europe (Milan) does not support this feature as of now
- If you have configured a multi-master cluster, the backtrack feature is not supported
- You cannot rewind your database from the earliest restore time shown in the AWS console
- This feature does not replace your existing snapshots or backups
Conclusion
In this article, we explore the useful backtrack feature of the Amazon Aurora MySQL database cluster. It is an excellent feature, but you should be cautious while using it as well. It reverts the entire cluster; therefore, you want a specific object or database revert, you should look for database snapshots or backups.
Table of contents
| Deploy your Amazon Aurora database clusters for MySQL |
| Explore Amazon Aurora global databases with MySQL compatibility |
| Rewind or Forward the Amazon Aurora Cluster with MySQL compatibility using backtrack feature |
| Implement an Amazon Aurora Serverless cluster |
| Database Cloning in Amazon Aurora |
| Export Amazon Aurora MySQL or Amazon RDS snapshots to AWS S3 buckets |

I am the author of the book "DP-300 Administering Relational Database on Microsoft Azure". I published more than 650 technical articles on MSSQLTips, SQLShack, Quest, CodingSight, and SeveralNines.
I am the creator of one of the biggest free online collections of articles on a single topic, with his 50-part series on SQL Server Always On Availability Groups.
Based on my contribution to the SQL Server community, I have been recognized as the prestigious Best Author of the Year continuously in 2019, 2020, and 2021 (2nd Rank) at SQLShack and the MSSQLTIPS champions award in 2020.
Personal Blog: https://www.dbblogger.com
I am always interested in new challenges so if you need consulting help, reach me at rajendra.gupta16@gmail.com
View all posts by Rajendra Gupta
- Understanding PostgreSQL SUBSTRING function - September 21, 2024
- How to install PostgreSQL on Ubuntu - July 13, 2023
- How to use the CROSSTAB function in PostgreSQL - February 17, 2023