
In this article, we will show how to use the GIT repository during the pipeline development phase in Azure Data Factory, to save the changes incrementally before publishing it completely to the Data Factory production environment.
Why GIT
When working directly under the Azure Data Factory mode, which is the default mode, you will have no option to save the changes in a repository before publishing it to the production environment, where the only option is to publish the changes directly to the Data Factory service, which contains no versioning control or tracking process. But what if the pipeline development is not completed yet and we need to partially save the pipeline without passing the Data Factory validation test? In this case, the publish to Data Factory will fail!
To overcome these limitations, Azure Data Factory provides us with the ability to integrate with a GIT repository, such as Azure DevOps or GitHub repository, that helps in tracking and versioning the pipelines changes, and incrementally save the pipeline changes during the development stage, without the need to validate the incomplete pipeline, preventing these changes from being lost in case of any crash or failure. In this case, you will be able to test the pipeline, revert any change that is detected as a bug, and publish the pipeline to the Data Factory when everything is developed and validated successfully.
With the GIT repository, it is not only you, but also teamwork! Your team members can also work with you in the same repository, during the pipeline development, code review and testing stages, based on the permissions provided to each member.
You have multiple environments; GIT is the best friend during the CI/CD that makes the process easier!
Configure a Git Repository
GIT repository can be enabled and configured during the Azure Data Factory provisioning or after creating your Data Factory. Consider that, in order to connect your Data Factory to a repository, you should have administrator permissions on the Azure subscription that you are using.
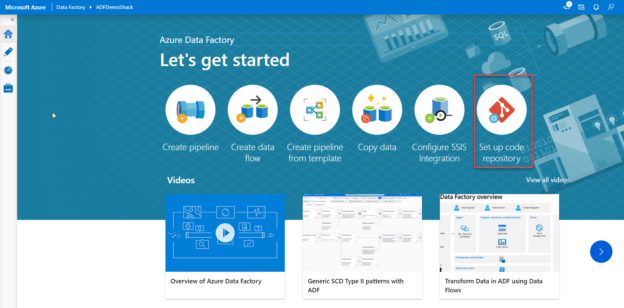
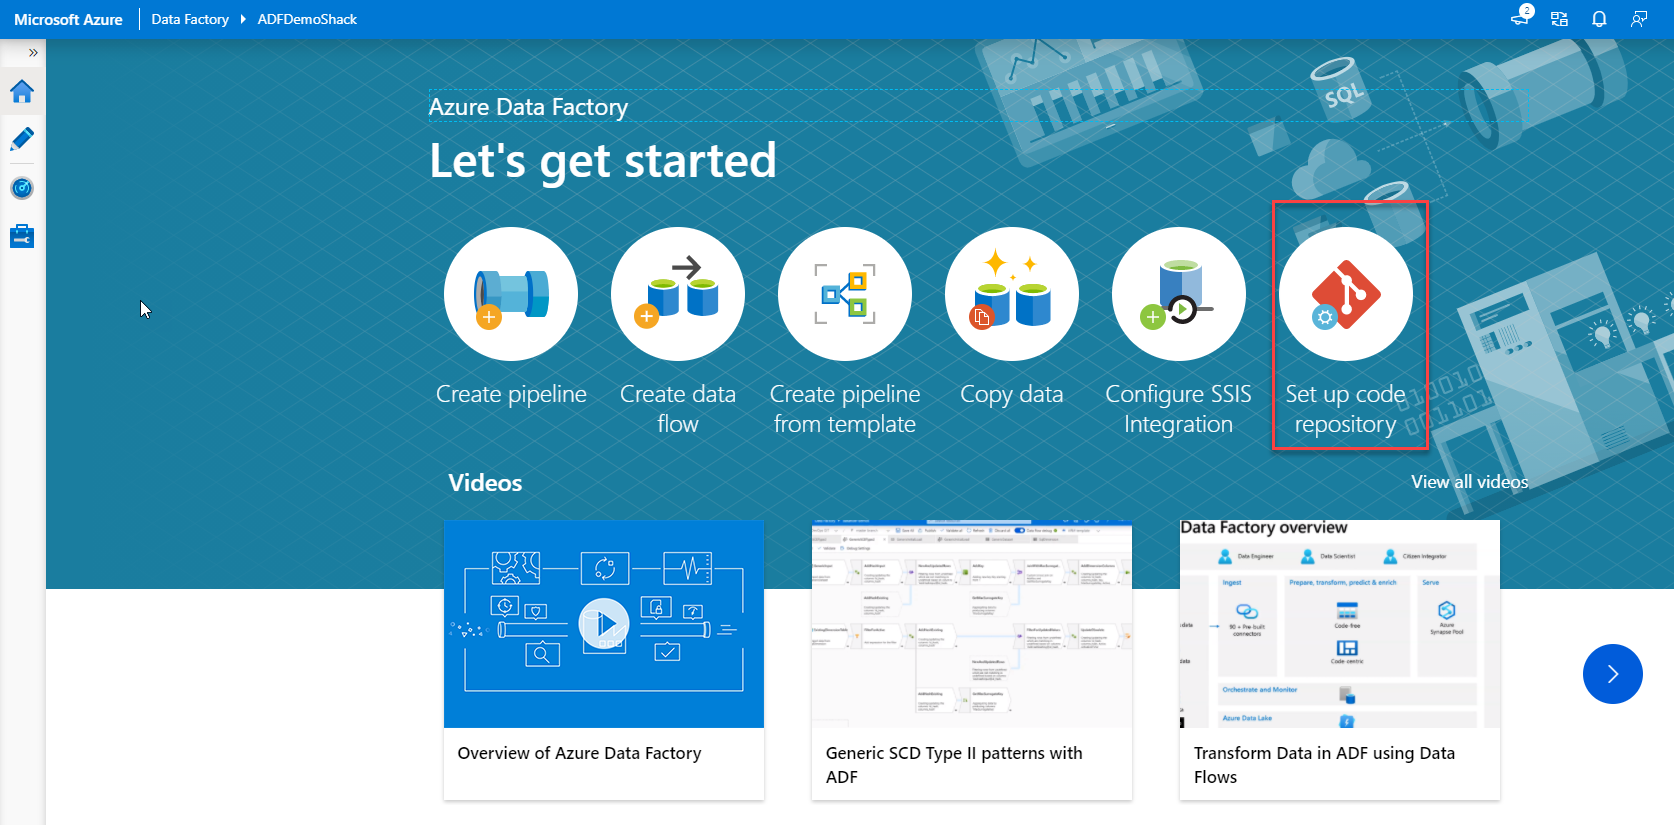
If not configured yet, you can set up the code repository by opening the Azure Data Factory from the Azure portal then choose the Author and Monitor option. From the opened Data Factory page, click on the Set up code repository option, to connect the Data Factory to a GIT repository, as shown below:
Or choosing the same Set up code repository option from the Author window, as shown below:

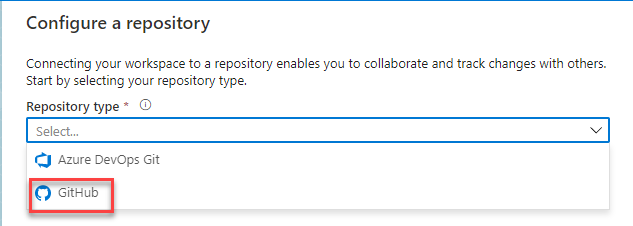
From the displayed Configure a Repository window, choose whether to use an Azure DevOps Git or GitHub repository, as below:
And based on your choice, you need to provide the required information to connect to the Git repository, taking into consideration that a single Git organization can have multiple repositories, but each Git repository can be connected to only one data factory.
For example, if you decide to associate the Azure Data Factory with a GitHub repository, you will be asked to use the GitHub Enterprise server or provide the name of your GitHub account and select the repository that will be used to save the Data Factory pipelines changes in this GitHub account, then click Apply to proceed:
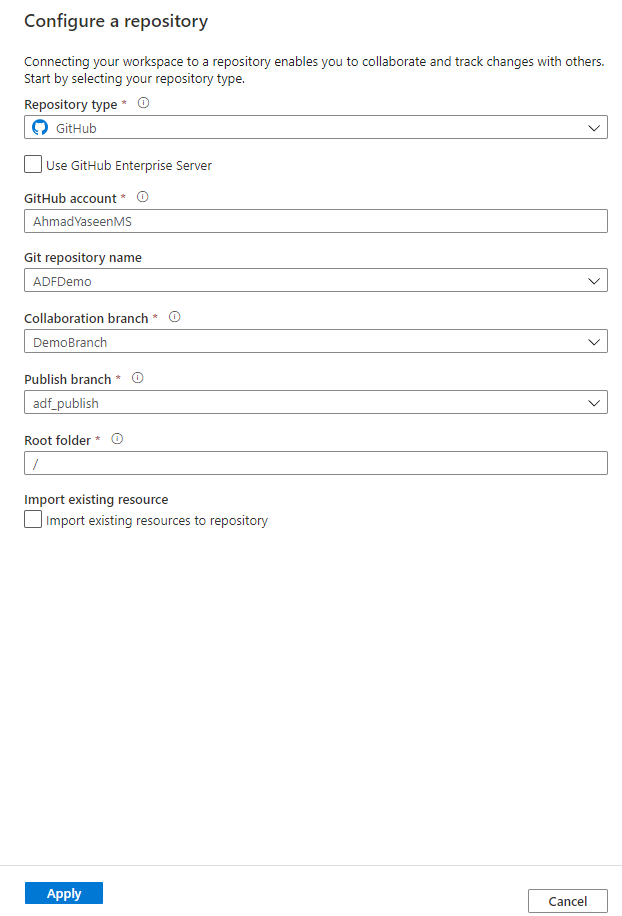
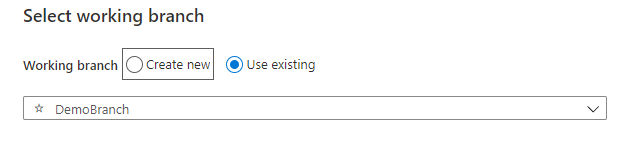
In addition to the default master branch, Azure Data Factory will ask you to create a new working branch within the configured Git repository or use an existing branch before start creating new pipelines. In this demo, we will use an existing branch in the selected GitHub account, as shown below:
Now, we are ready to save and track the changes using the GitHub repository. This is clear from the Author window, where you have two options to work under the Data Factory mode, which is the production mode, where you can publish the changes after testing it completely, and the GitHub source control mode, which is the development mode, where you can save the changes incrementally before publishing it to the Data Factory mode. If you start working under the GitHub mode, a new dropdown list will be displayed, that lists the working and collaboration branches that are configured under that repository, with the master branch is the default collaboration branch, as shown below:

Working under GIT
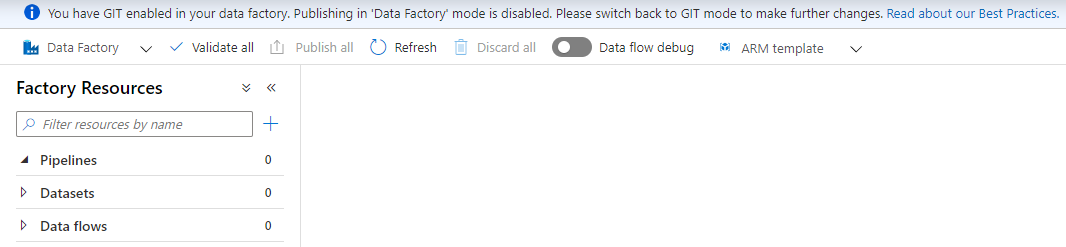
An important point to consider here is that, when the GIT mode is enabled in your data factory, publishing in the Data Factory mode will be disabled. So, in order to make any changes in your pipelines, you should switch back to GIT mode and publish the changes from there. This is clear from the warning message that we get if we try to switch to the Data Factory mode and start working there, as shown below:
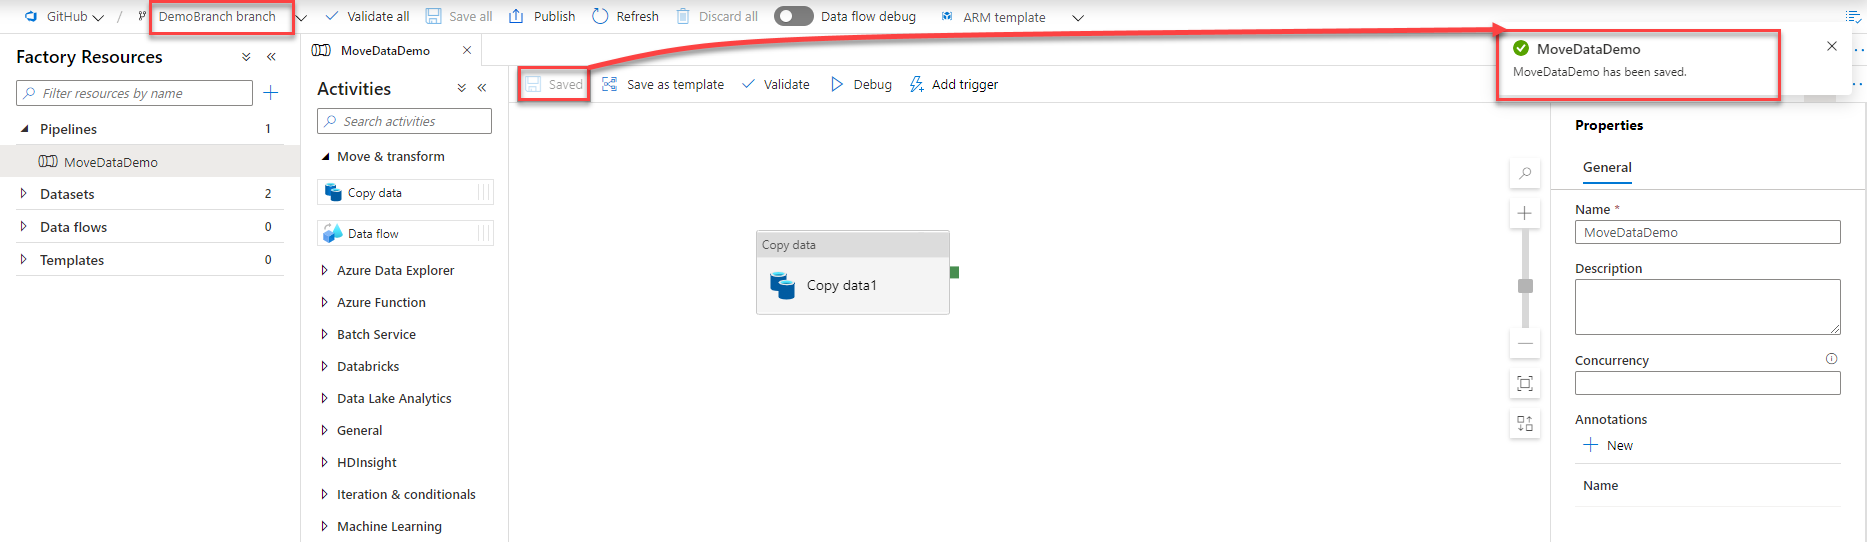
Switching back to the GitHub mode and creating a new simple pipeline, you will see that the changes will be saved incrementally to the working branch each time you perform a change in your pipeline, as shown below:
Publish to Azure Data Factory
After performing all required changes and test the pipeline using the Debug option, it is time to publish the pipeline and the related components to the Data Factory mode.
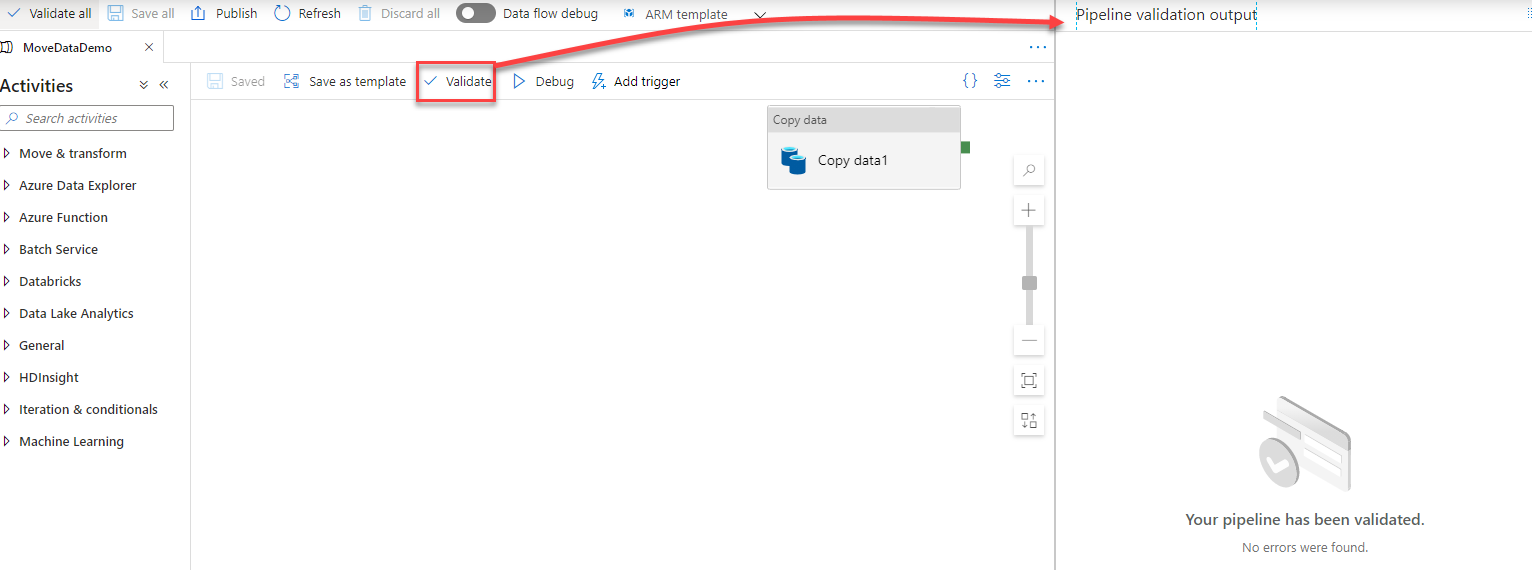
First of all, you should validate the pipeline, to make sure that it contains no blocking issue that will cause the publish to fail, as shown below:
Then, we need to review the code and merge the changes from the feature branch to the collaboration branch, which is the master branch, from where we can perform the publish to the Data Factory service. To perform the merge, choose the Create pull request option from the branch dropdown list, as below:

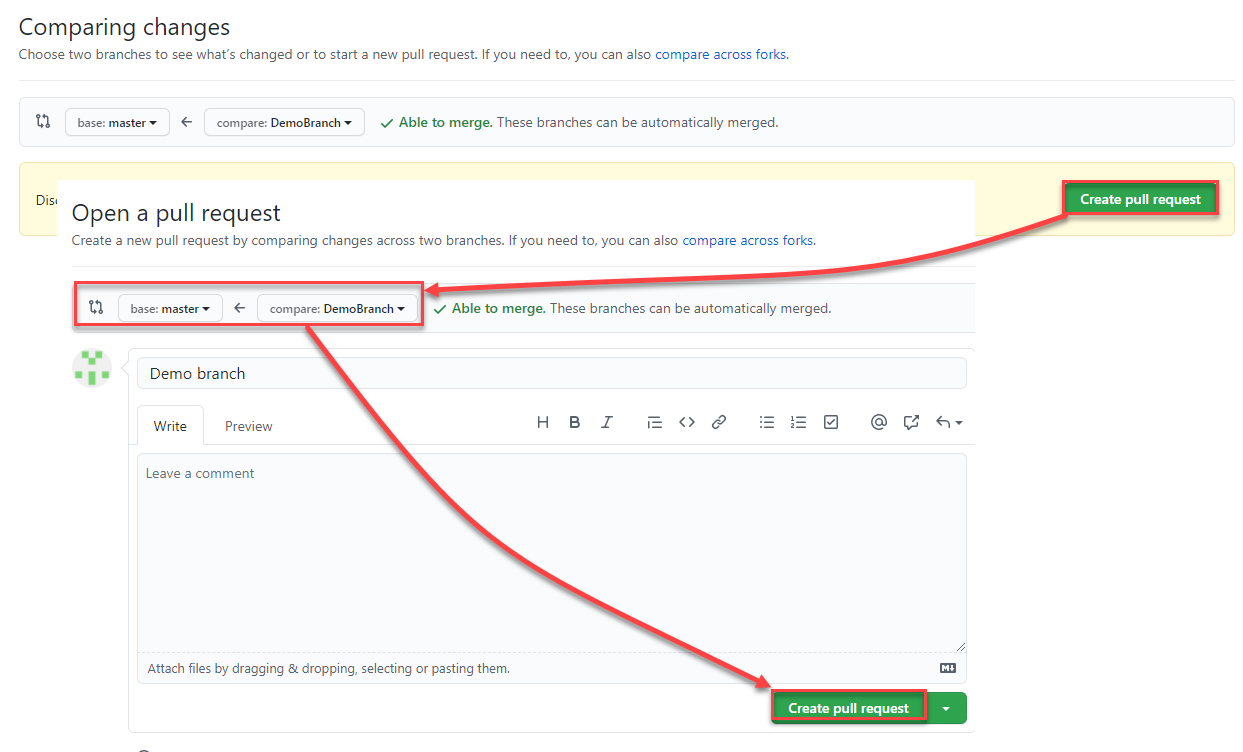
Which will open your GitHub account in a new tab, where you need to select the feature and master branches to compare the changes between them in the pull request, leave your comments if any, then click on Create Pull Request to proceed, as shown below:
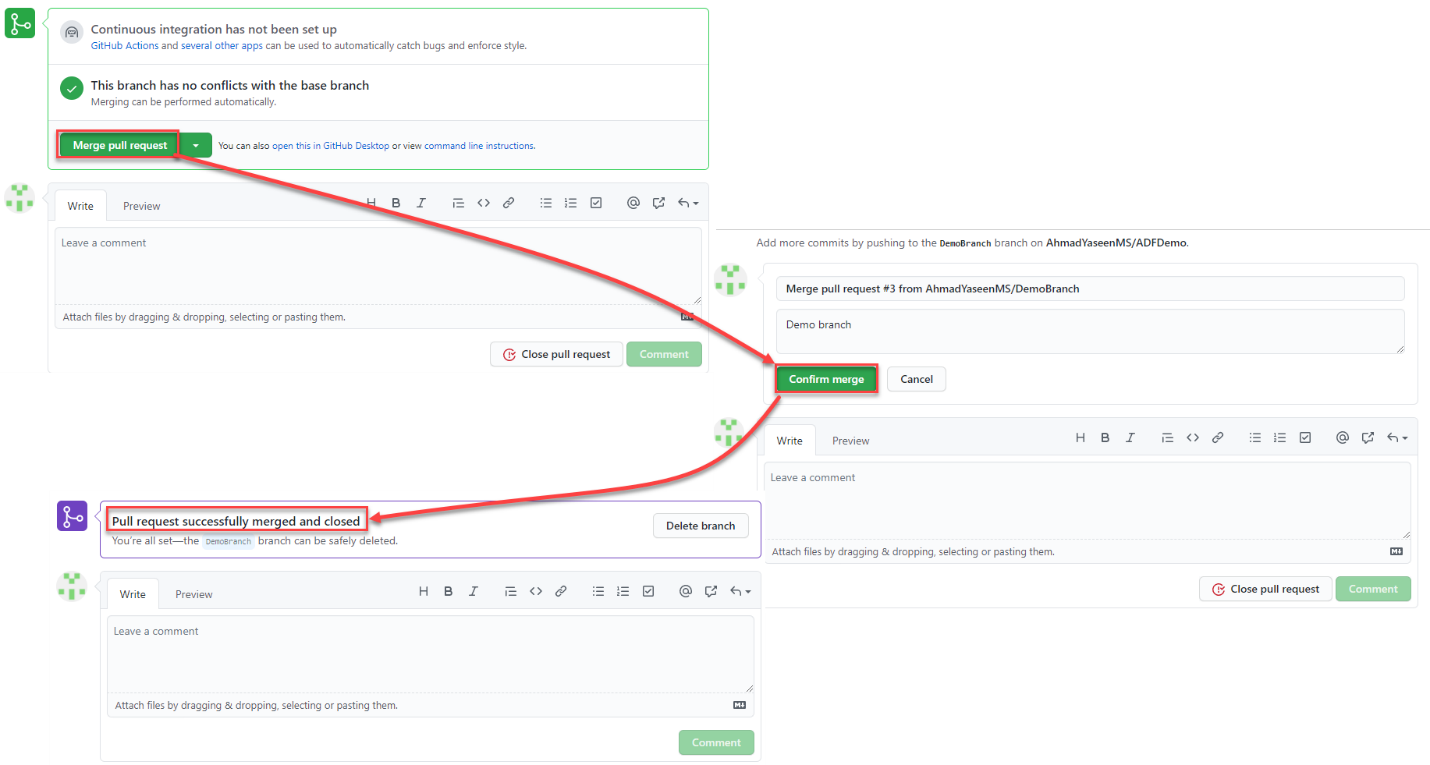
Now, the list of code changes will be displayed, so that you will be able to review these changes, leave any comments then perform the merge operation between the feature and collaboration branches. Notice that, like any development source control, performing changes in the code requires reviewing the code changes by the authorized team then approving these changes before publishing it to the production environment, as shown below:
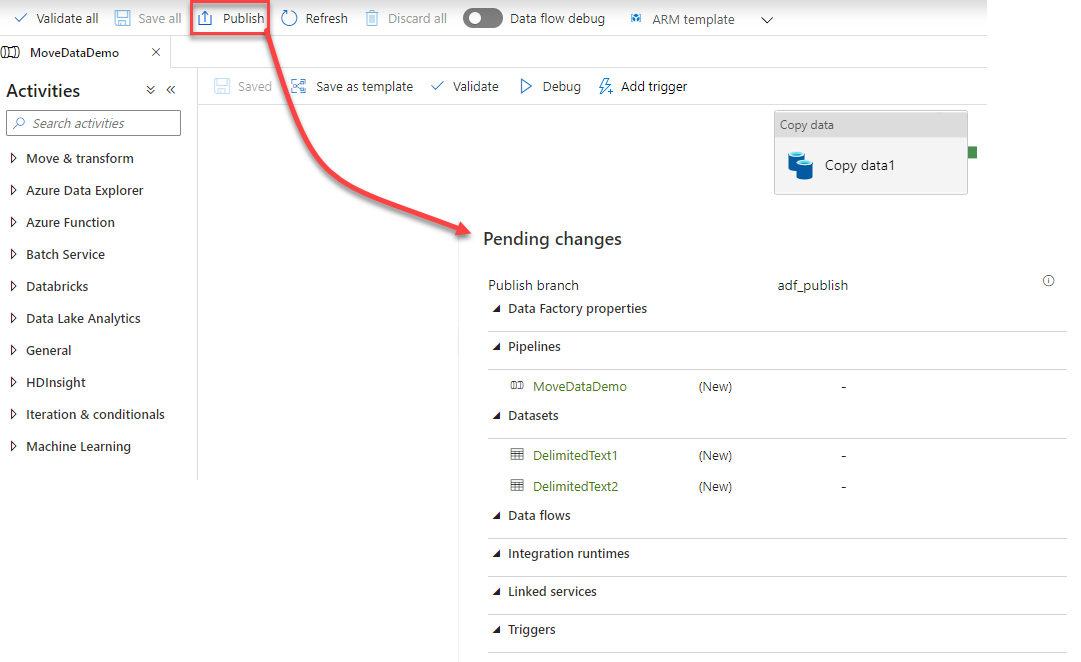
Now we have all changes performed on the feature branch merged to the master collaboration branch. The next step is to publish the confirmed changes to the Data Factory service, by clicking on the Publish option from the pipeline Author window, as shown below:
To confirm that the pipeline changes are published successfully, in addition to the notification that you will receive from the Azure Portal, you can switch to the Data Factory mode and review the created pipeline and the latest changes performed on that pipeline, as shown below:

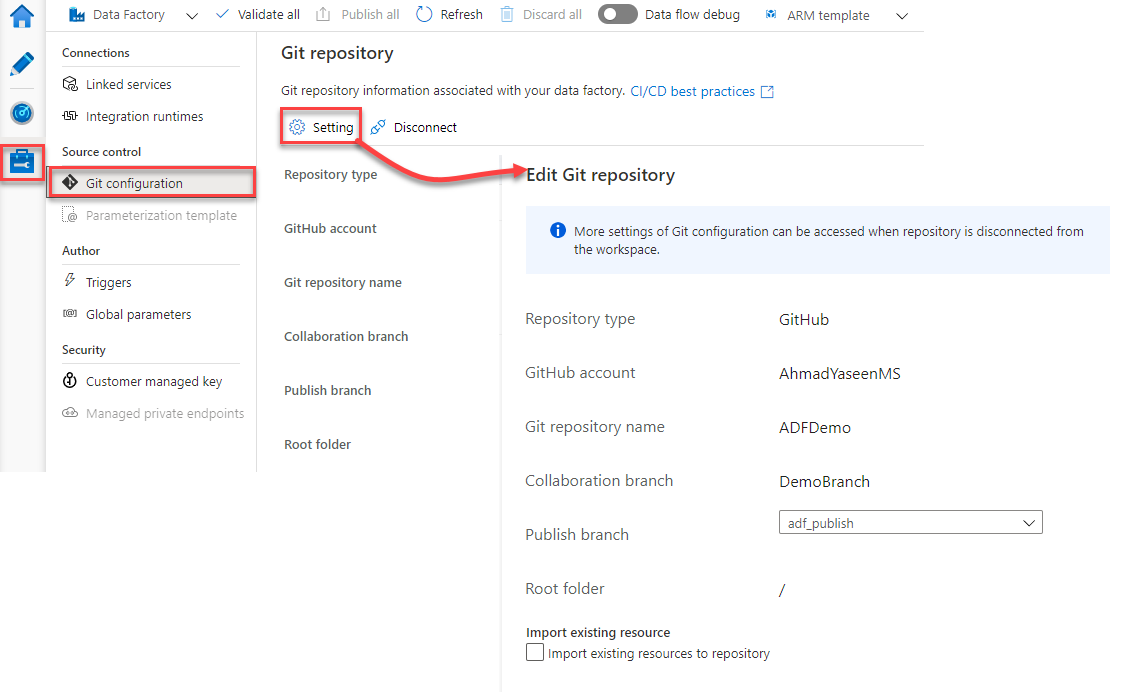
Azure Data Factory allows you to perform limited changes in the Git repository that is associated with the Azure Data Factory. To change the publish branch or import resources to the repository, browse to the Manage window, and from the Git Configuration list click on the Settings button, as shown below:
In order to perform more changes in the Git configuration that is associated with your Azure Data Factory, or associate a new repository to the Data Factory, you should disconnect that repository from the Data Factory, after publishing all changes to your Data Factory, as all these changes will be lost when the Git repository disconnected from the Data Factory.
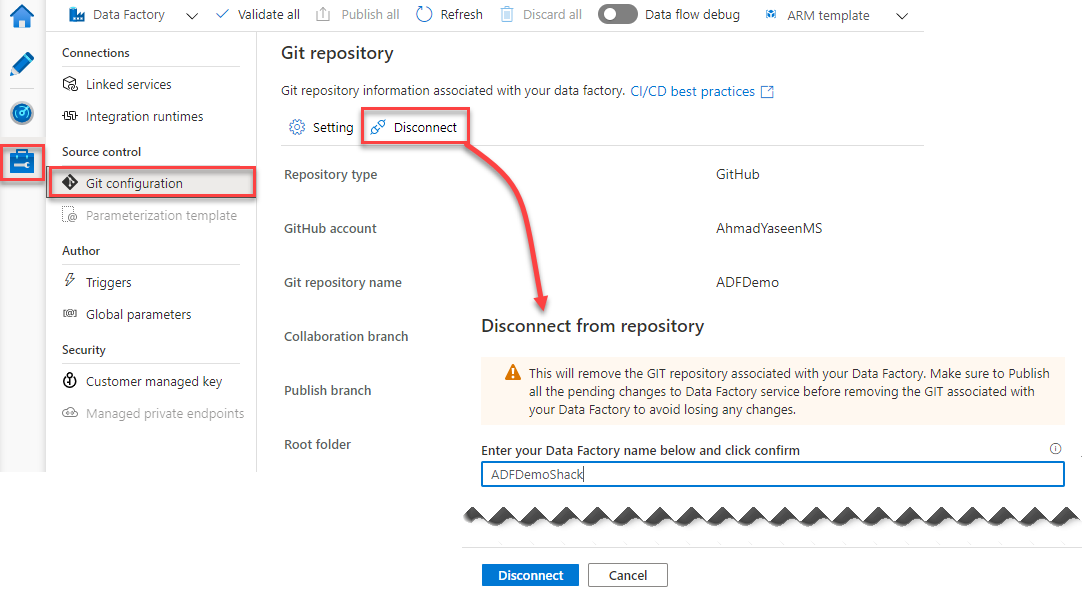
The Git repository can be disconnected from the Azure Data Factory by browsing to the Manage window, and from the Git Configuration list click on the Disconnect button, where you will be asked to provide the name of your Data Factory as a confirmation for the disconnection process, as shown below:
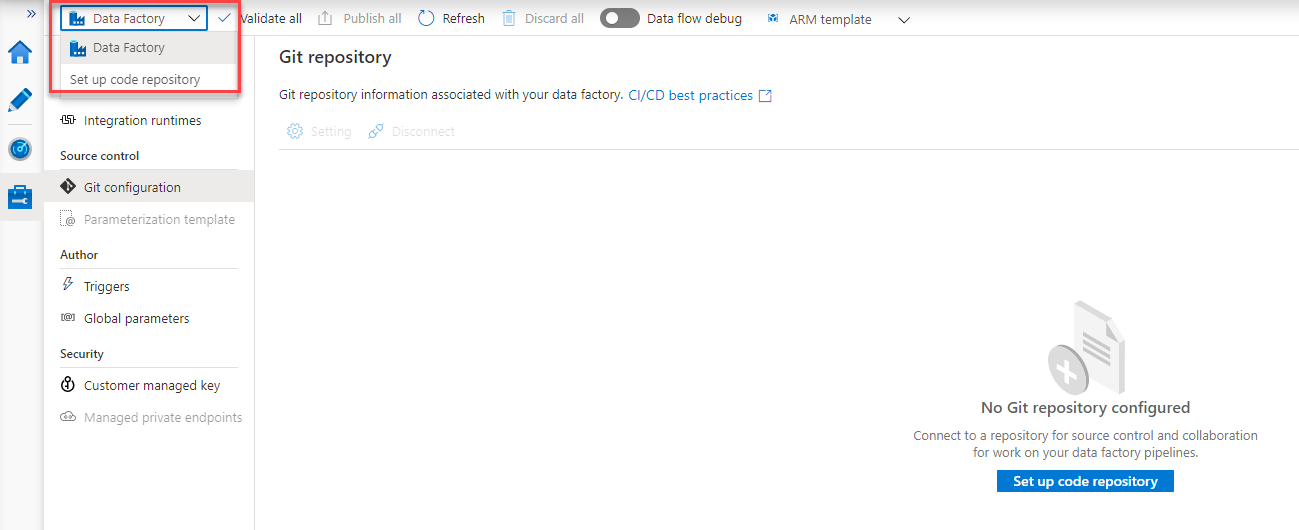
Where you will see no Git repository associated with your Data Factory, allowing you to configure a new repository to save, control and track the Data Factory changes, as below:
Conclusion
Now we are familiar with the importance of the Git Repository in tracking and saving the pipeline changes in the Data Factory and how to associate and use the Git repository in the Data Factory. Still like to know more about Azure Data Factory? Stay tuned for the next article!
Table of contents

He is a Microsoft Certified Solution Expert in Data Management and Analytics, Microsoft Certified Solution Associate in SQL Database Administration and Development, Azure Developer Associate and Microsoft Certified Trainer.
Also, he is contributing with his SQL tips in many blogs.
View all posts by Ahmad Yaseen
- Azure Data Factory Interview Questions and Answers - February 11, 2021
- How to monitor Azure Data Factory - January 15, 2021
- Using Source Control in Azure Data Factory - January 12, 2021