
In the previous articles, we discussed how to create an Azure Data Factory pipeline to copy data between different data stores that are located in on-premises servers or in the cloud, how to transform data using Azure Data factory Mapping Dataflow activity and how to run an SSIS package using Azure Data Factory.
In this article, we will show how to use the Iterations and Conditions activities in the Azure Data Factory.
Demo Overview
In the demo that we will discuss in this article, we will create an Azure Data Factory pipeline, that will read data stored in CSV files located in an Azure Blob Storage container, making sure that the file extension is CSV and the size of the file larger than or equal to 1KB, and write the data to an Azure SQL Database table.
Prerequisites
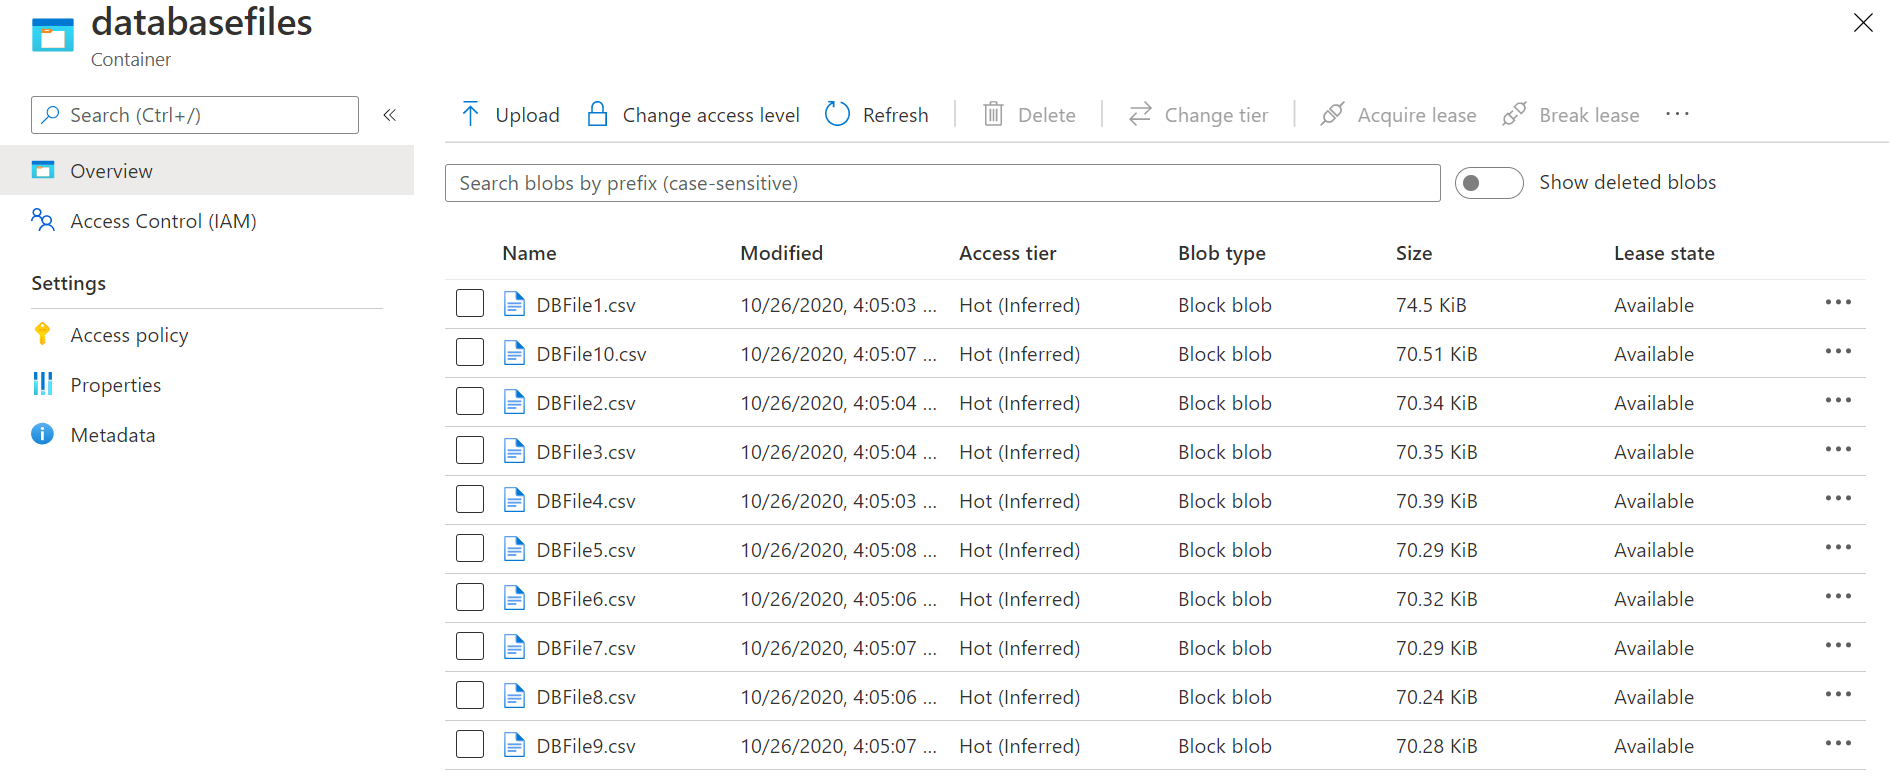
In order to create that pipeline, make sure that you have an Azure Data Factory, an Azure Storage account where the CSV files are stored, as shown below:
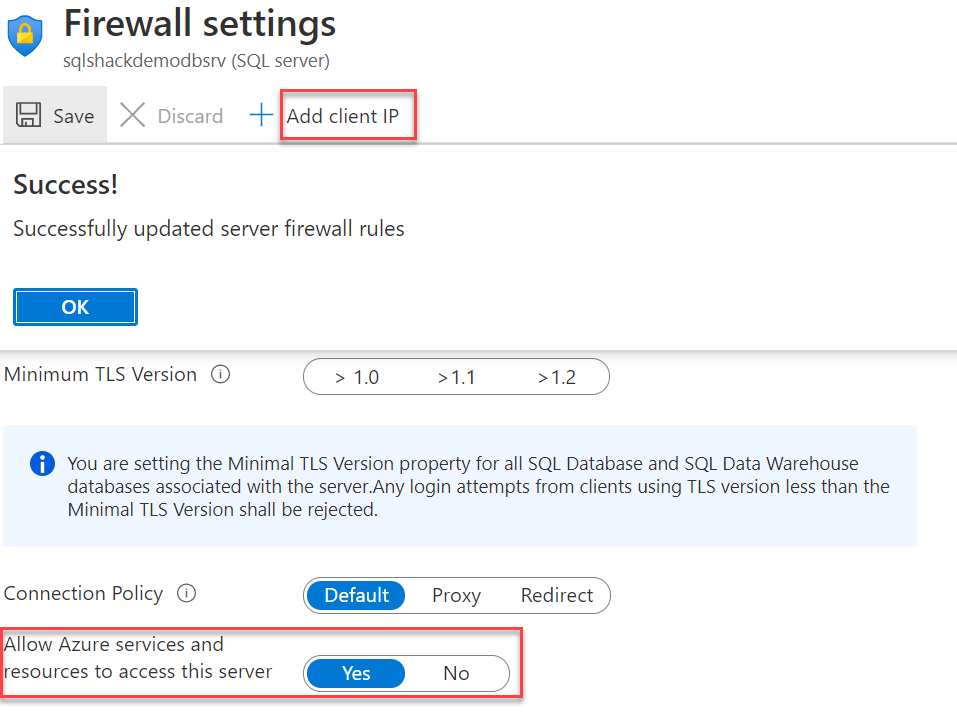
And an Azure SQL Database where the data will be written, where we need to add the current client IP address to the Azure SQL Database firewall settings, in order to be able to connect using SSMS from my machine, and enable Allow Azure Services and Resources to access this Server firewall setting to allow the Azure Data Factory to access it, as shown below:
Getting started
Linked Services and DataSets
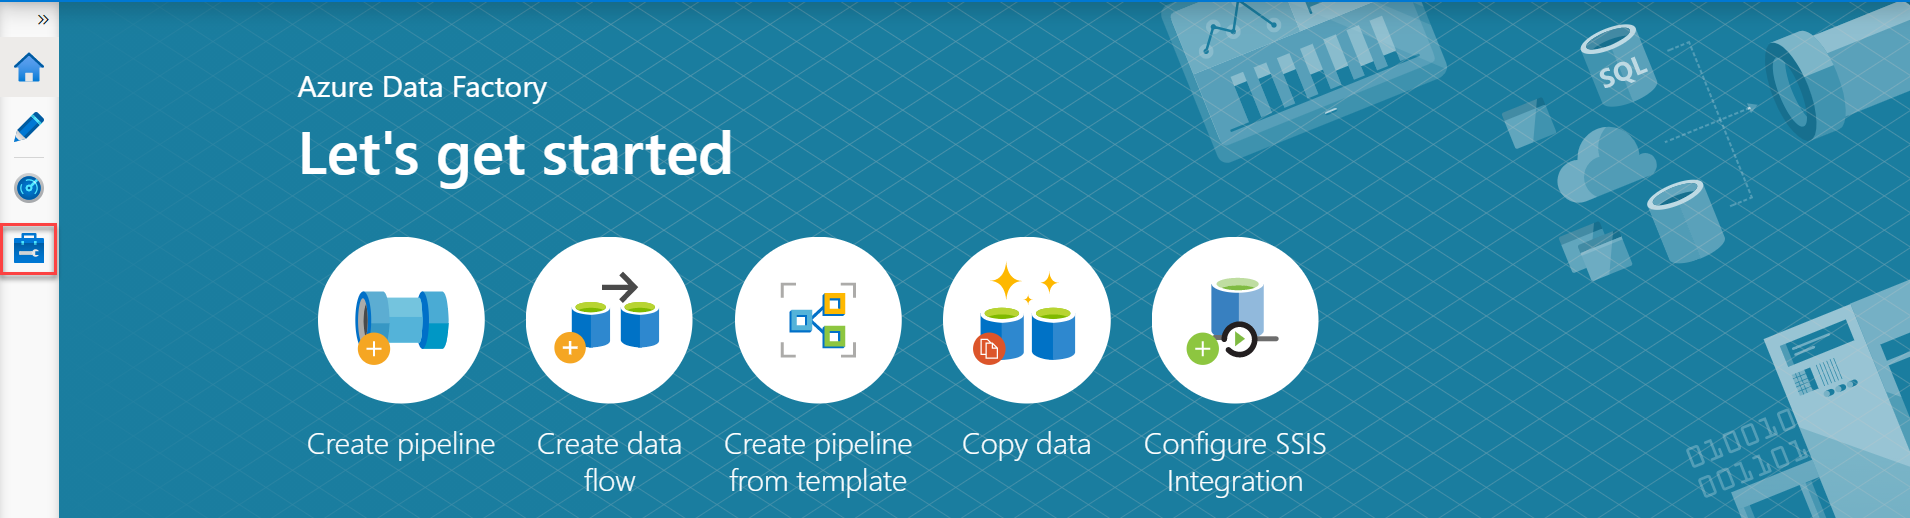
The first step in creating the Azure Data Factory pipeline is creating the source and sink linked services and datasets. To achieve that, open the Azure Data Factory, click on Author & Monitor to launch the Data Factory UI.
From the opened Azure Data Factory UI in the Azure Portal, click on the Manage button to create the Linked Services, as shown below:
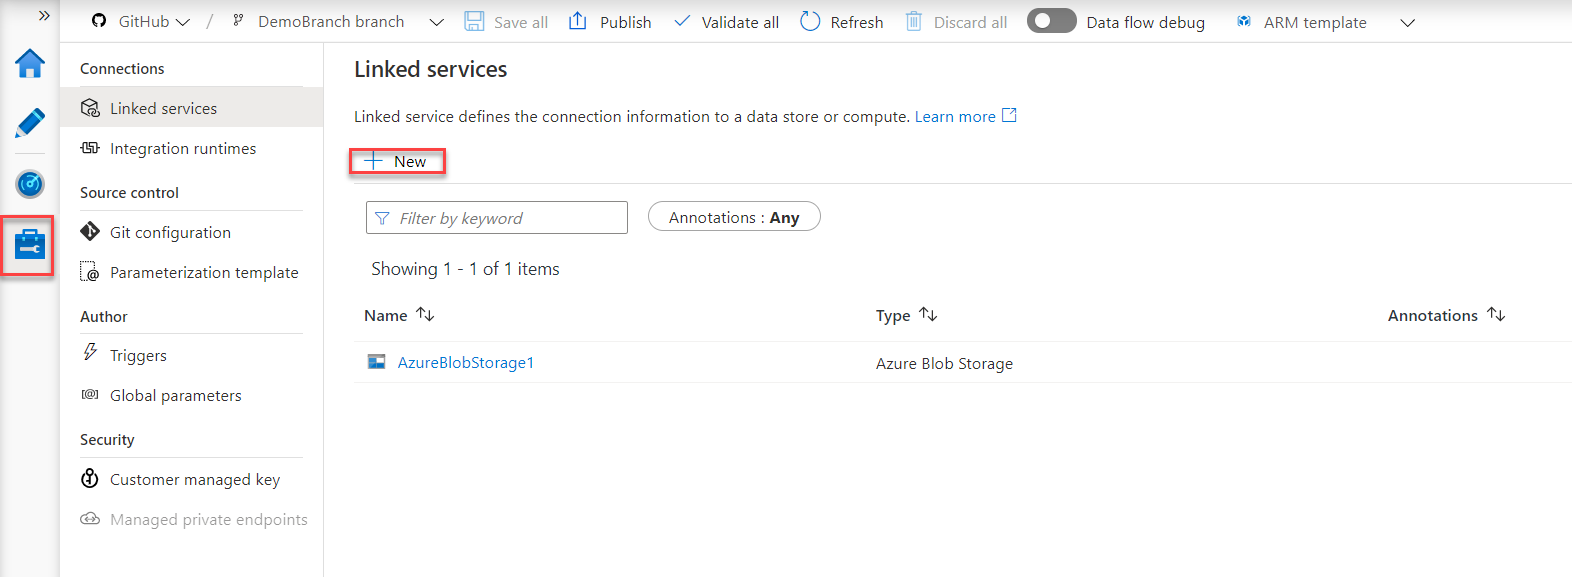
Now, we need to create the linked service that points to the Azure Blob Storage container where the CSV files are stored. To create the linked service, click on the Linked Services option under the Connections list, then click on the New button, as below:
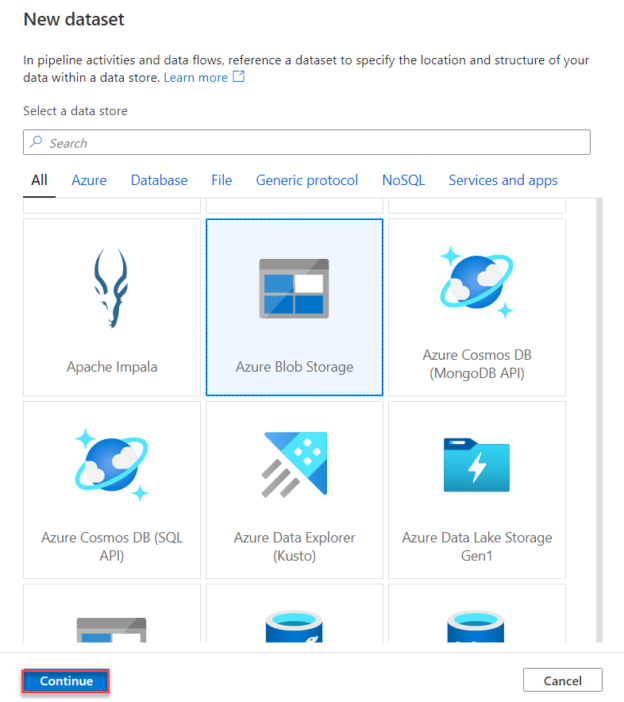
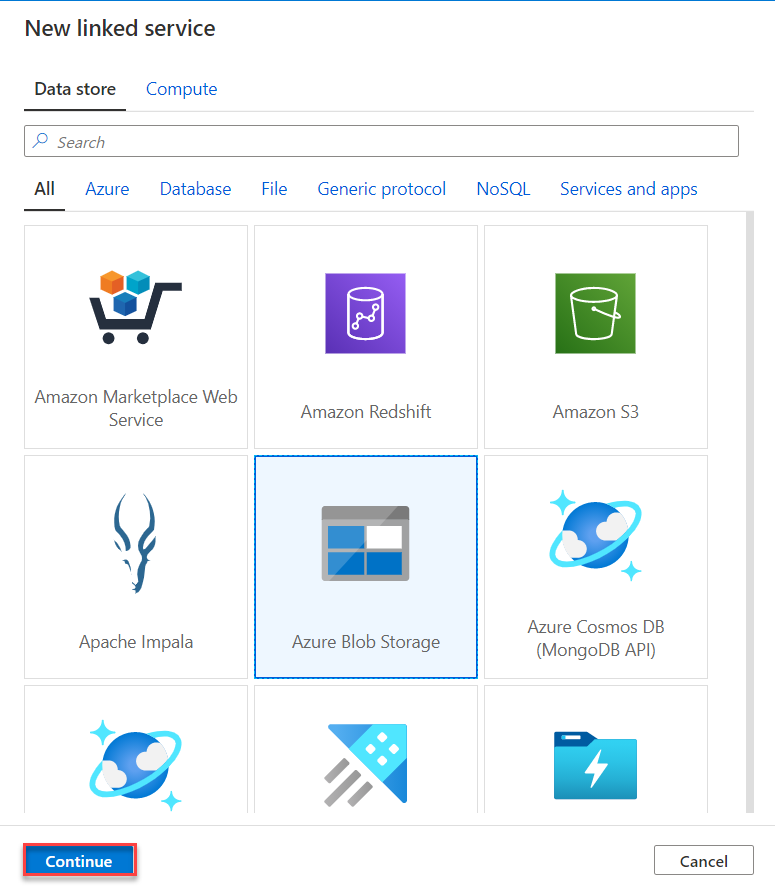
From the New Linked Service window, choose the Azure Blob Storage data store, then click Continue to proceed:
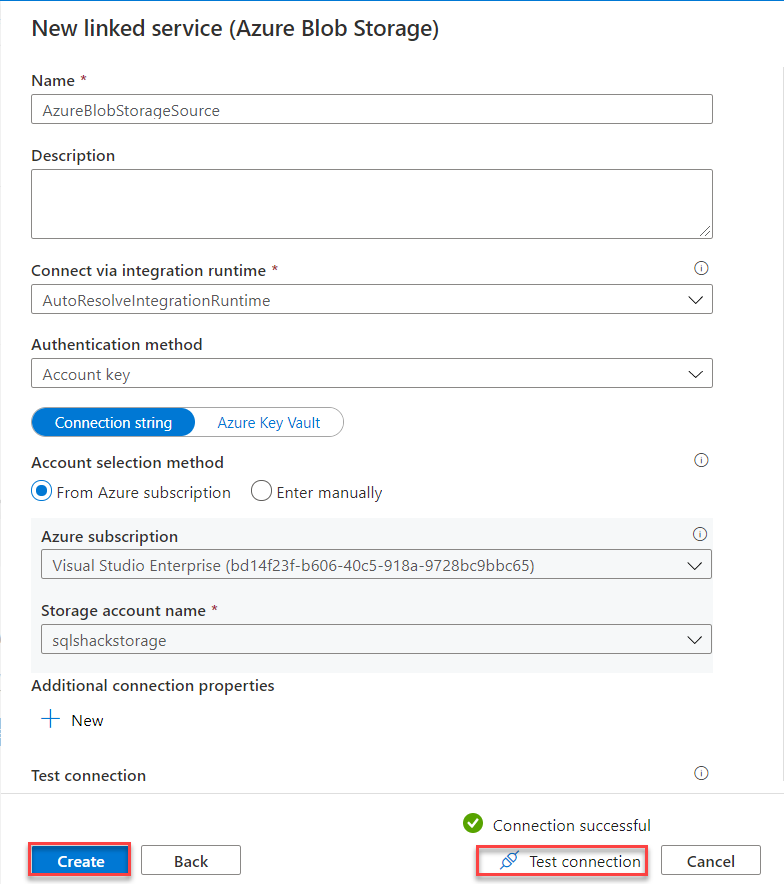
In the new Azure Blob Storage Linked service window, provide a meaningful name for the linked service, the Integration Runtime that will be used to connect to the Azure Blob Storage, which is Azure IR in our case, the authentication method that will be used to connect to that storage account, the Azure Subscription where this storage account is created and the name of that storage account.
After providing all required information, click on Test Connection to verify whether we are able to connect to that storage account using the provided information or not then click Create if the connection is tested successfully, as shown below:
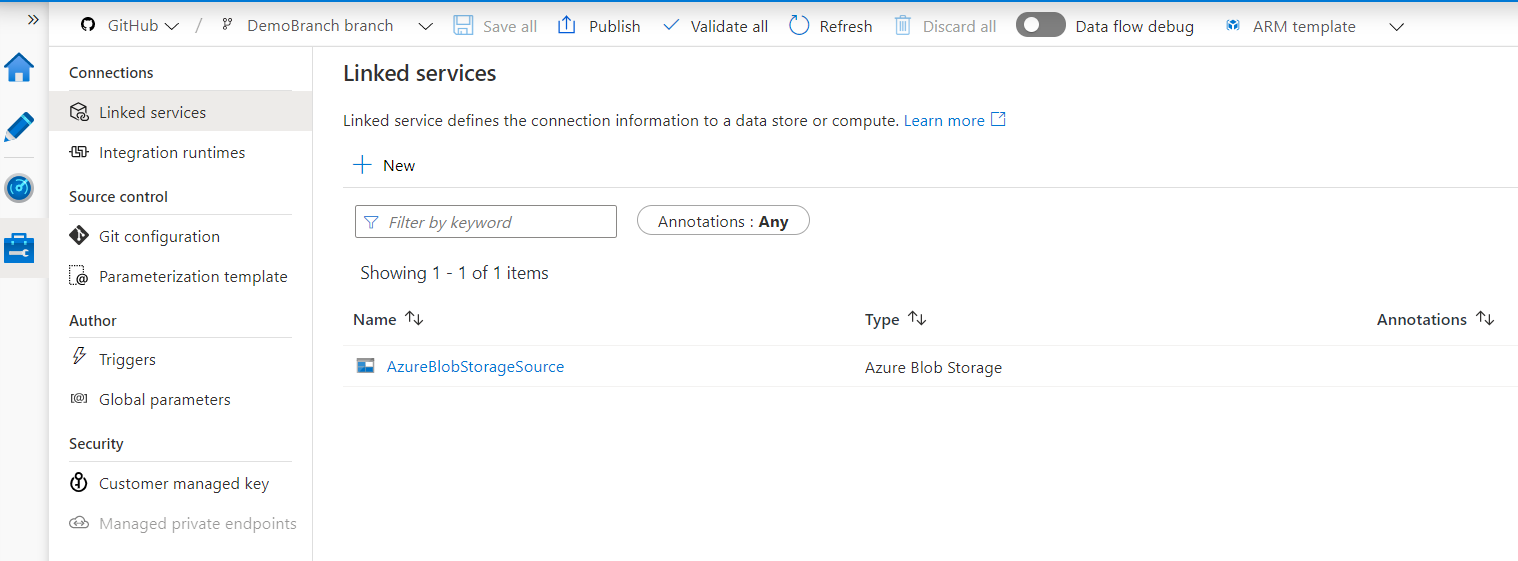
And the created Azure Blob Storage linked service that will act as the data source in our pipeline will be shown in the linked services list, as below:
With the source linked service created, we need to create the source dataset, which points to the container, folder or file under the source storage account that contains the source data.
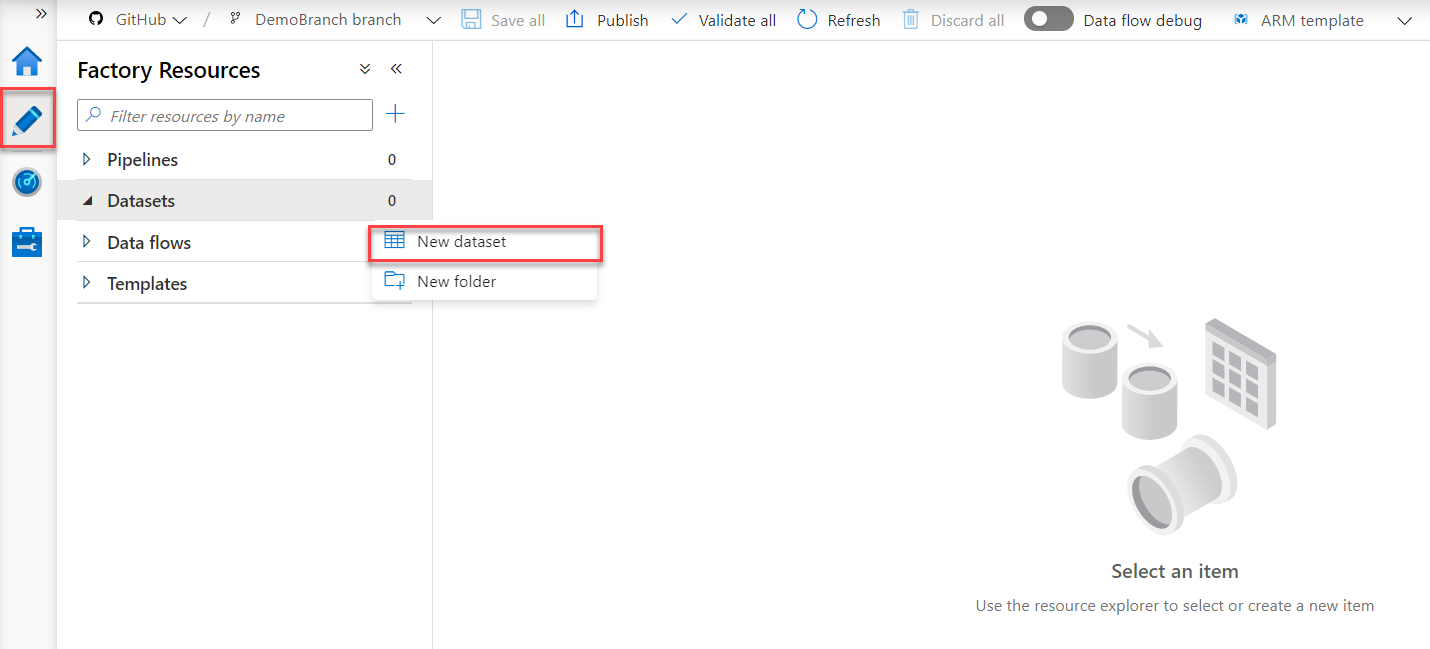
To create a new dataset, click on the Author button, choose Datasets under the Factory Resources list, choose to create a New dataset, as shown below:
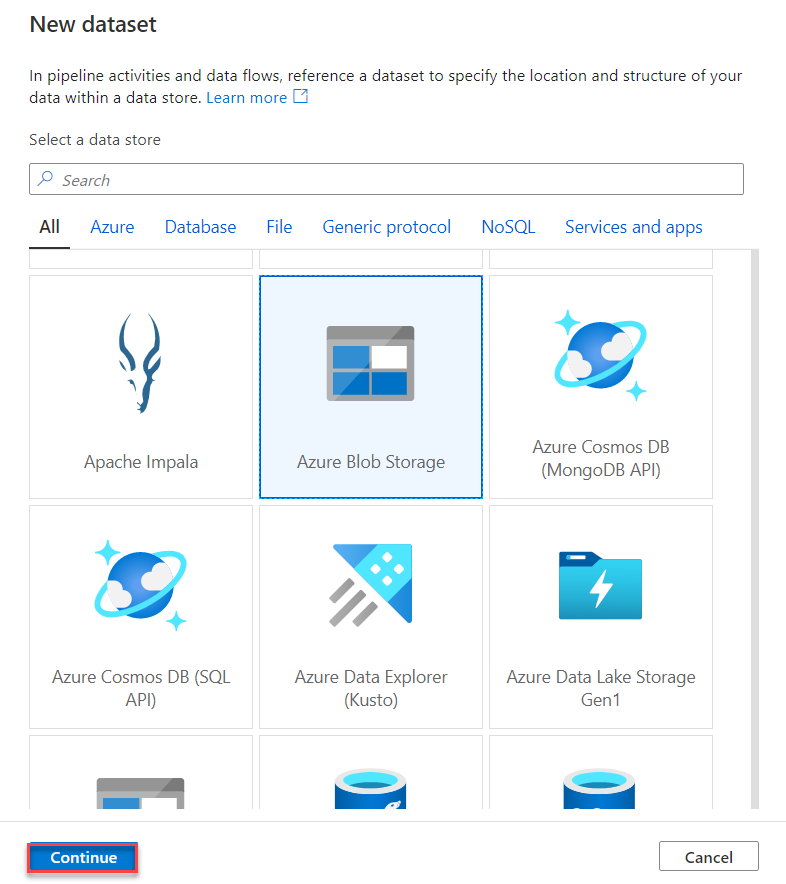
In the New Dataset window, choose Azure Blob Storage data store, then click Continue to proceed:
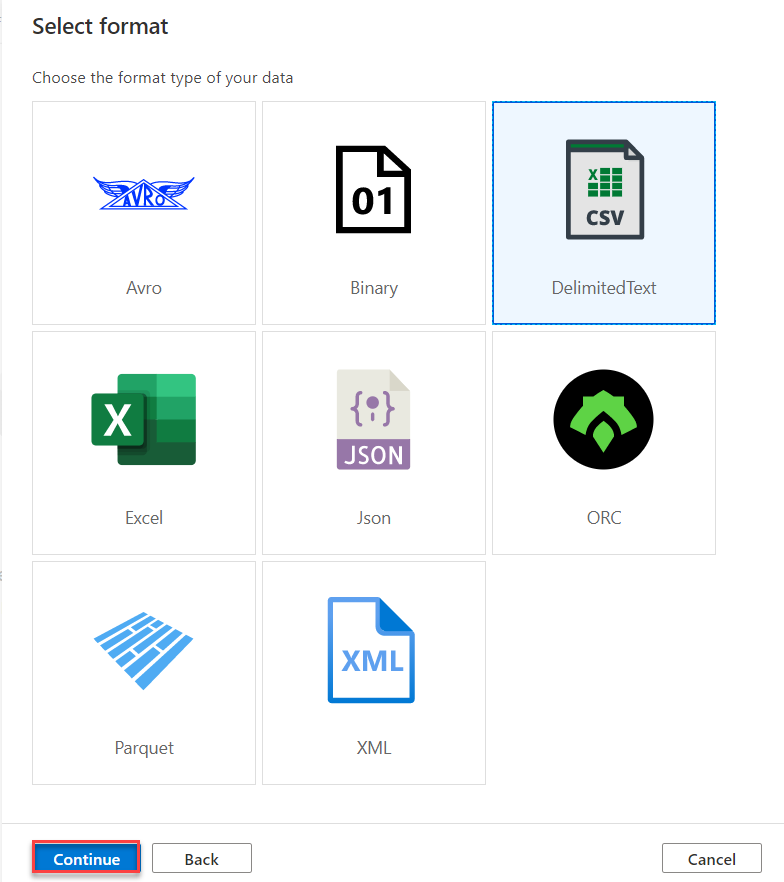
In the Select Format window, choose DelimitedText format as we will read from CSV files, as shown below:
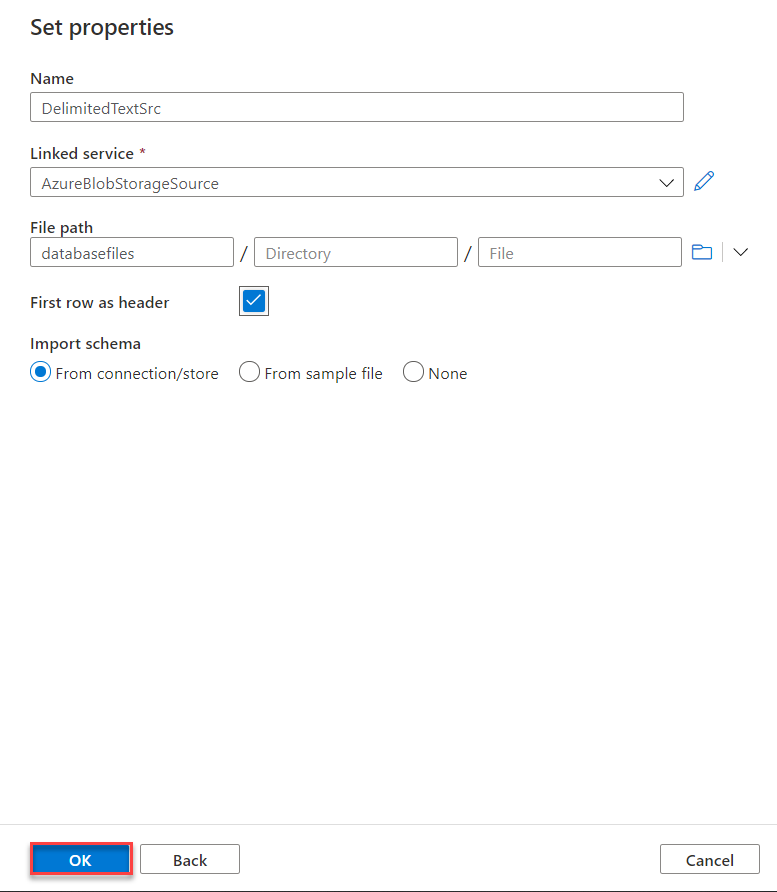
From the DataSet Set Properties window, provide a meaningful name for the source dataset, the linked service that contains the connection information for that dataset, browse to identify the container and the folder where the data source files are located and check the “First row as header” option if the CSV files contain the names of the columns in the first row, then click OK to proceed:
Before saving all dataset settings, review the delimiter and path settings then click Save to create the dataset, as below:
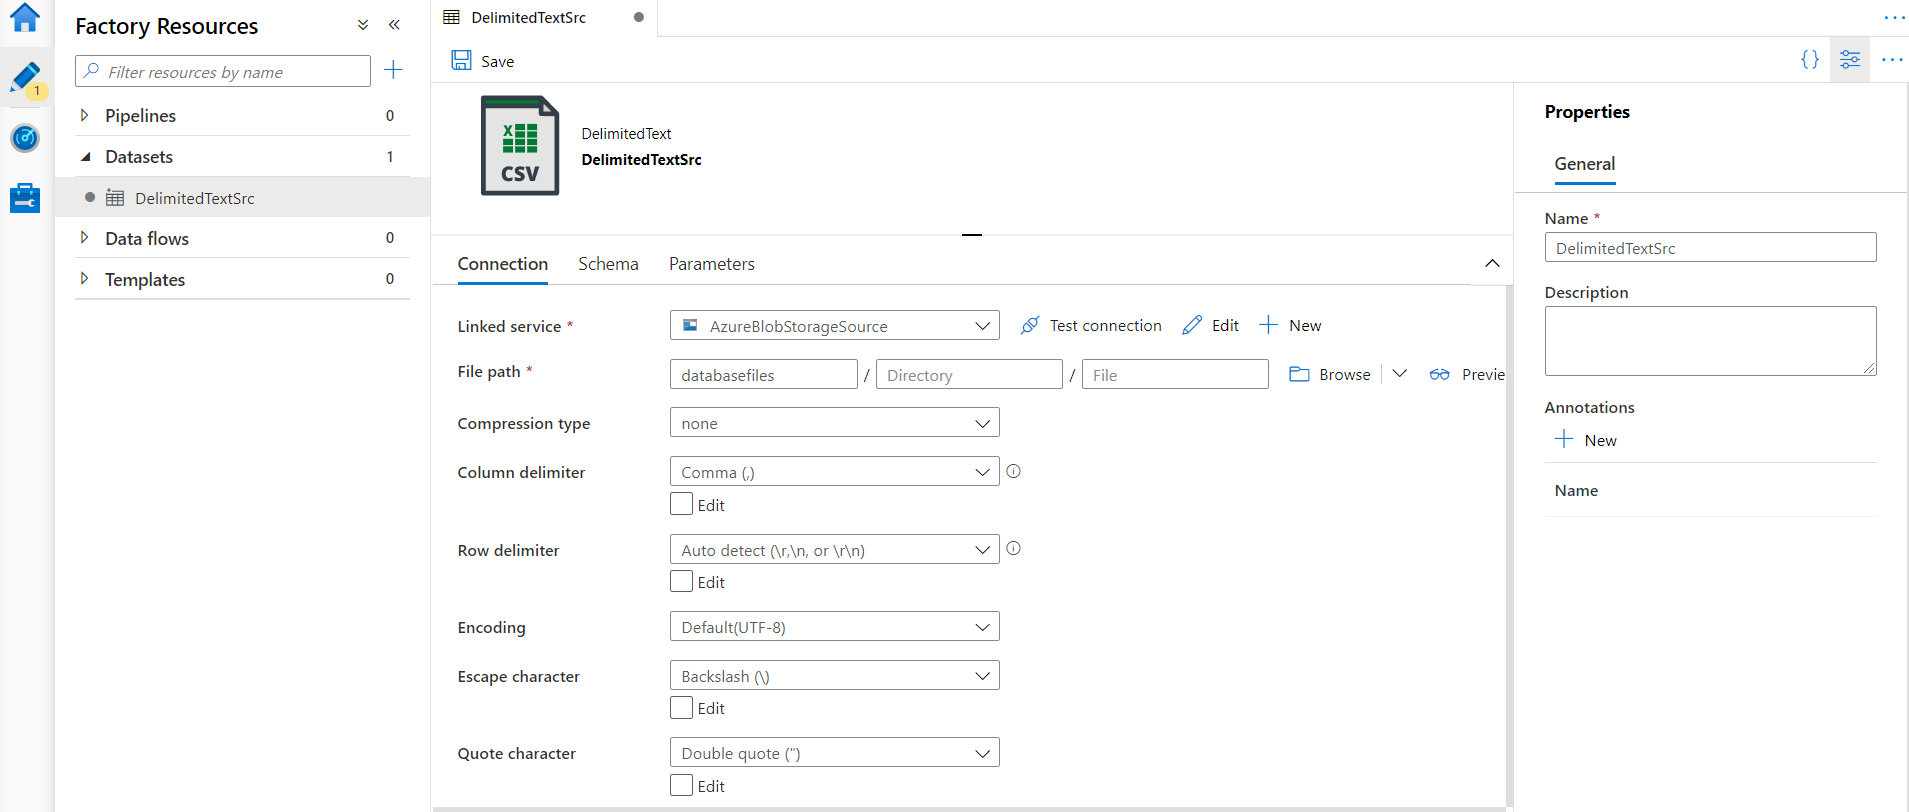
You can also click on the Preview option to review the shape of the source data, as shown below:

Let us move to the next step, in which we need to create the linked service and dataset for the sink data store, which is the Azure SQL Database in this demo.
We will follow the same steps, but this time, from the New Linked Service data stores, we will choose the Azure SQL Database store then click Continue to proceed:

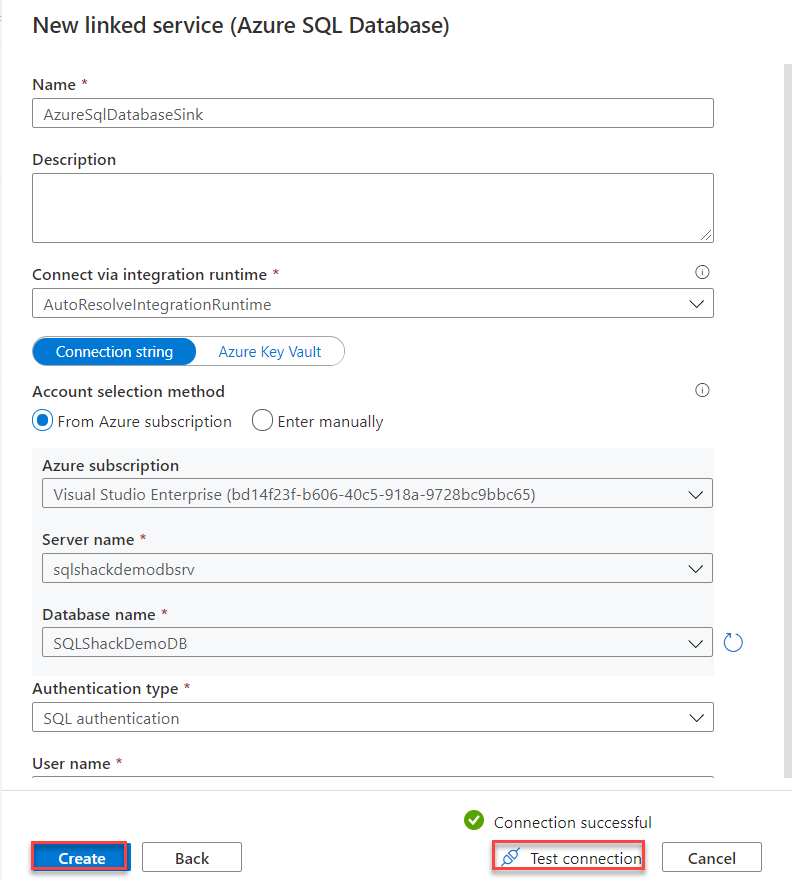
In the New Linked Service window, provide a meaningful name for the Azure SQL DB linked service, the Integration Runtime that will be used to connect to that database, which the Azure IR in this scenario, the subscription where this database is created, the name of the Azure SQL server and database and finally the credentials that will be used to connect to that Azure SQL Database.
After providing all required information, click on Test Connection to verify whether we are able to connect to that Azure SQL Database using the provided information or not then click Create if the connection is tested successfully, as shown below:
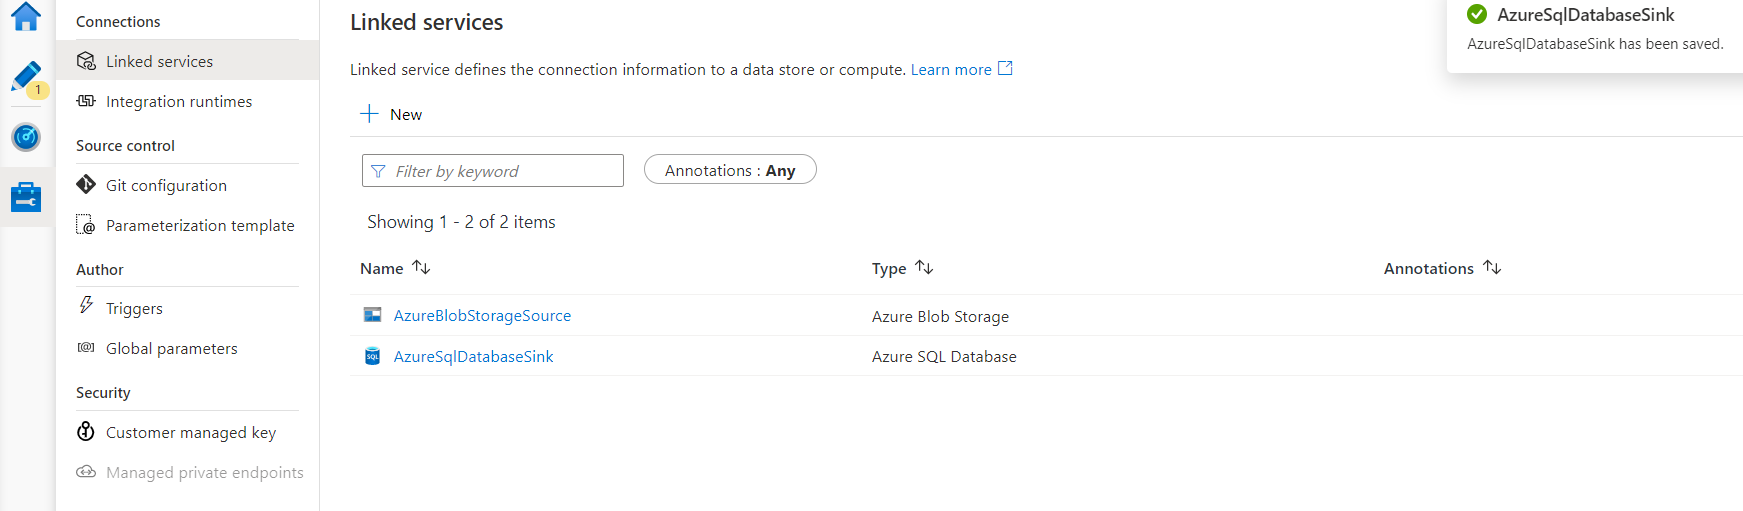
And the created Azure SQL Database linked service that will act as the data sink in our pipeline will be shown in the linked services list, as below:
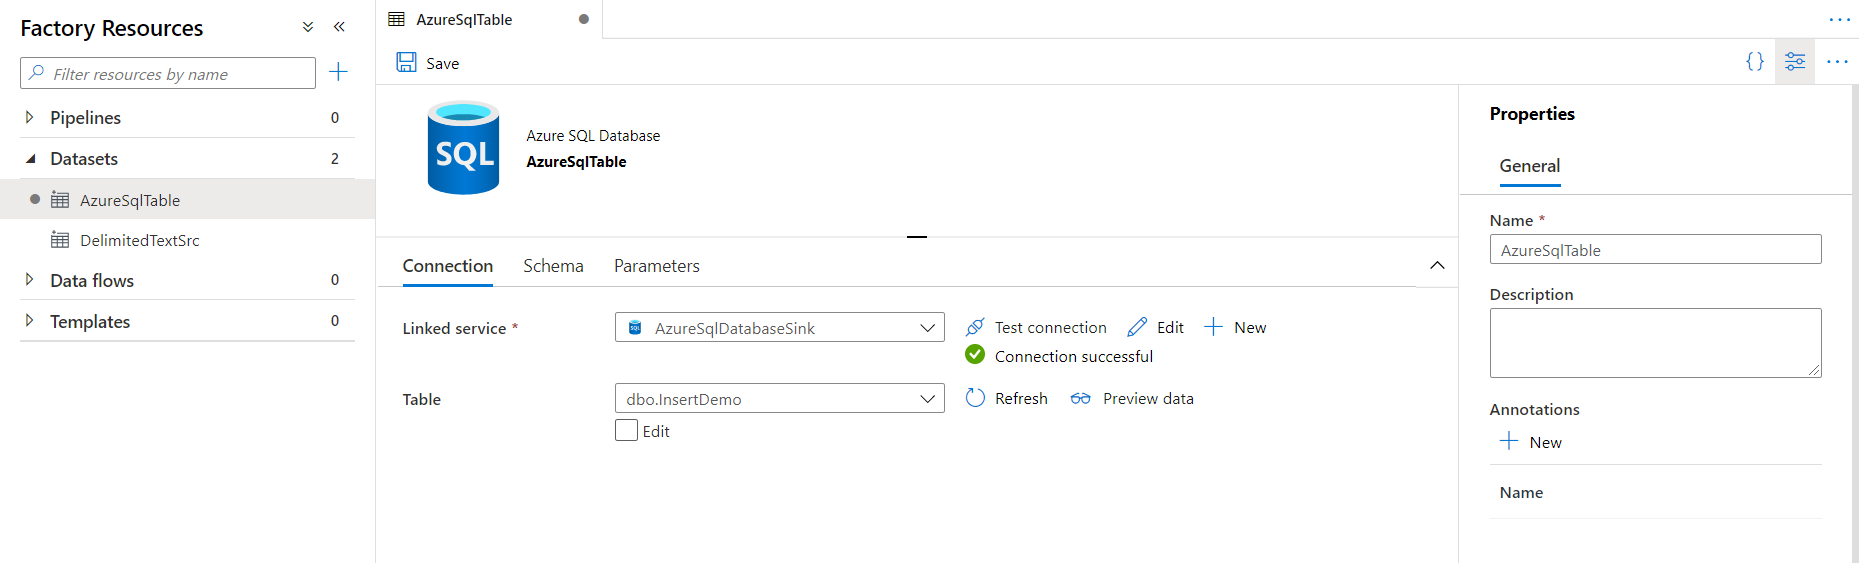
With the sink linked service created successfully, we will create the dataset that points to the database table where the data will be written in the Azure Data Factory pipeline.
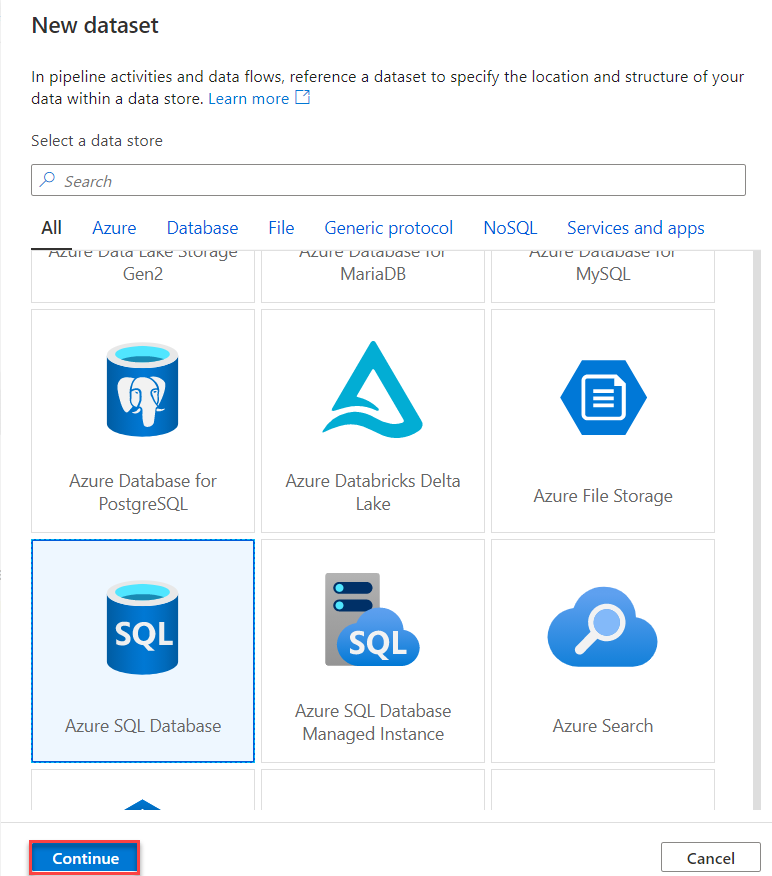
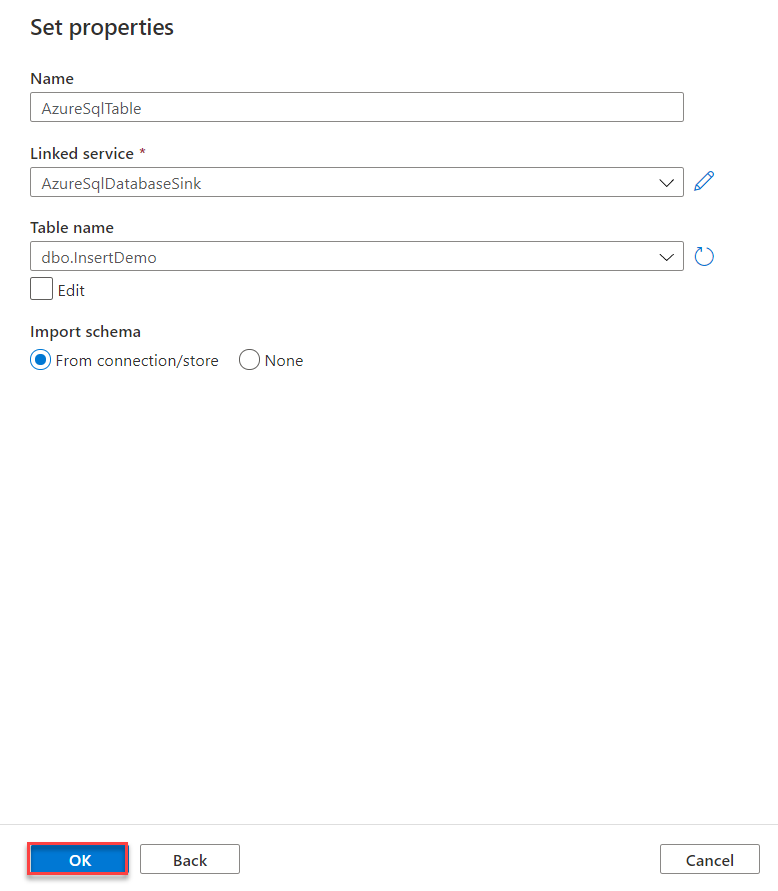
Following the same previous steps, clicking on the New Dataset option from the Author window, select the Azure SQL Database as the data store type for that dataset then click Continue, as shown below:
In the dataset properties window, provide a meaningful name for the dataset, the linked service that contains the connection information, the name of the table where the data will be written, then click OK to proceed:
Now, review the dataset information then click Save to create the dataset, as shown below:
Well done! The linked services and datasets that will be used to connect to the source and the sink of our pipeline are created and configured successfully. Let us move to the next step in which we will create the Azure Data Factory pipeline.
Create a New Pipeline
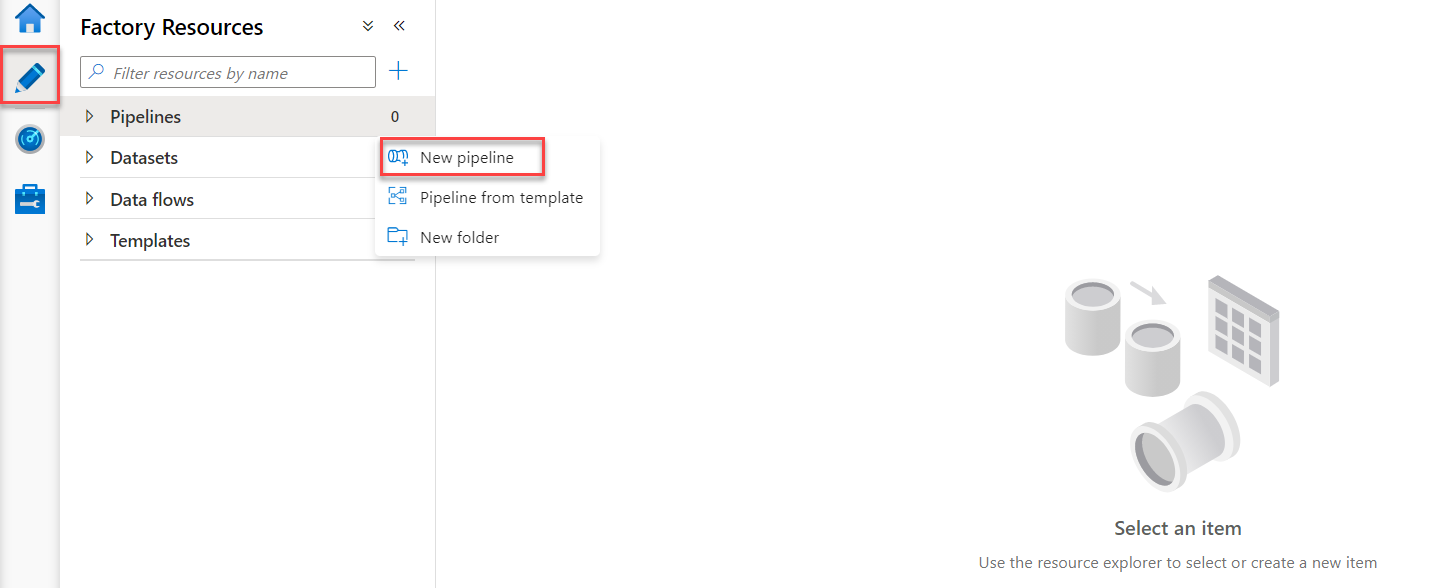
To create a new pipeline, click on the New pipeline option under the Factory Resources of the Author page, as shown below:
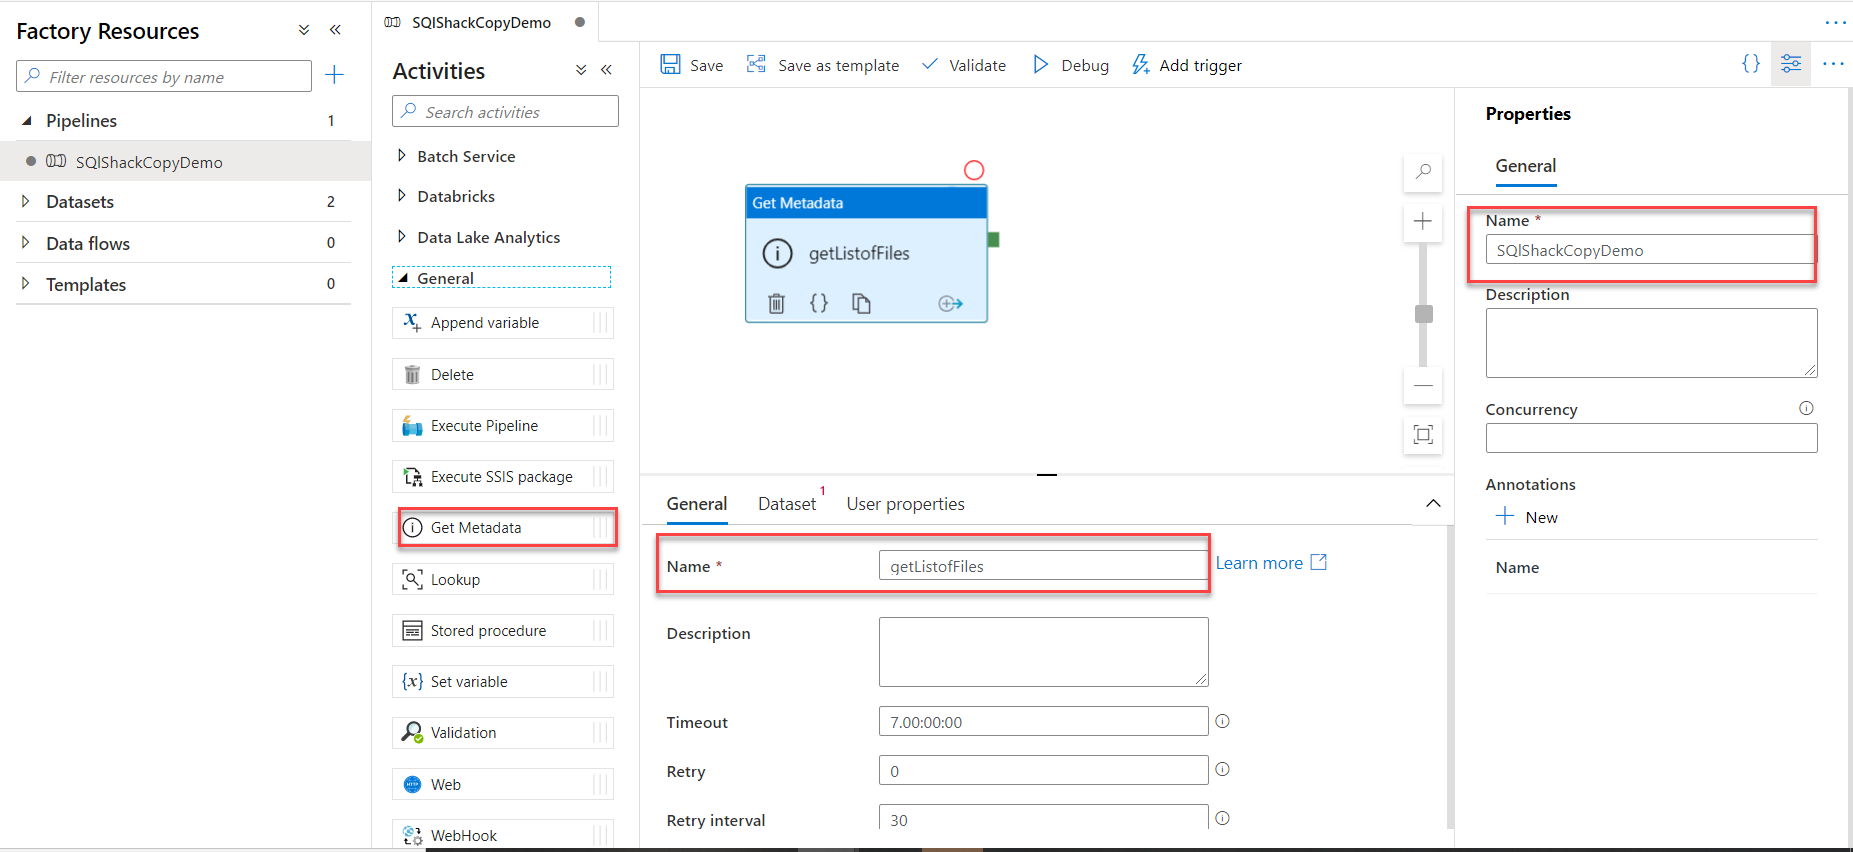
In the new pipeline page, expand the General Activities and drag then drop the Get Metadata activity to the design surface. We will use this Get Metadata activity to get the list of all source files and retrieve the name of these files, so that it will be easier for us to filter the types of these files.
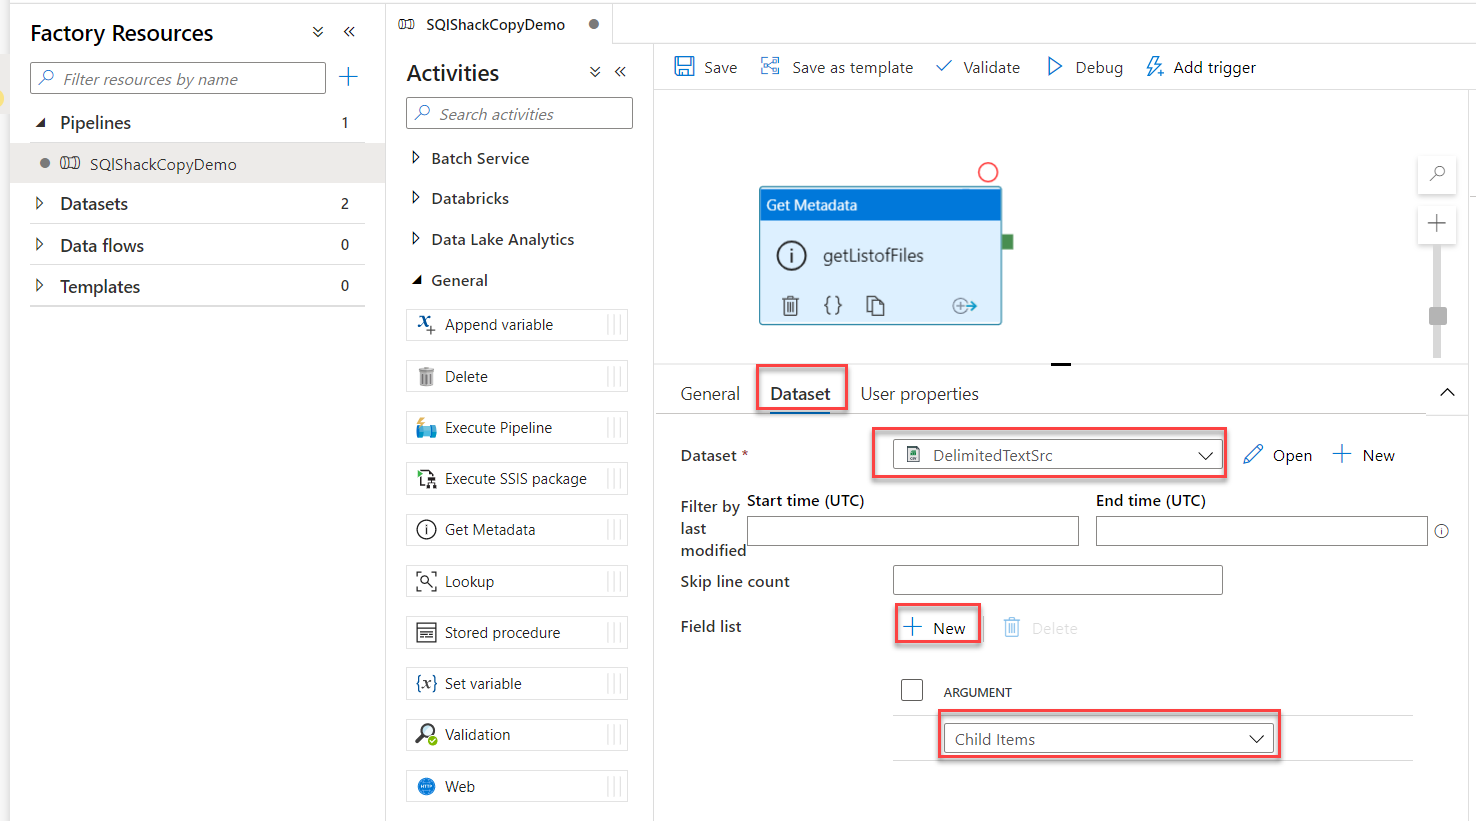
In the General tab of the Get Metadata activity, provide a meaningful name of the activity that reflects the purpose of that activity, as shown below:
In the Dataset tab of the Get Metadata activity, provide the name of the source dataset, which points to the Azure Blob Storage container, where the source files are stored.
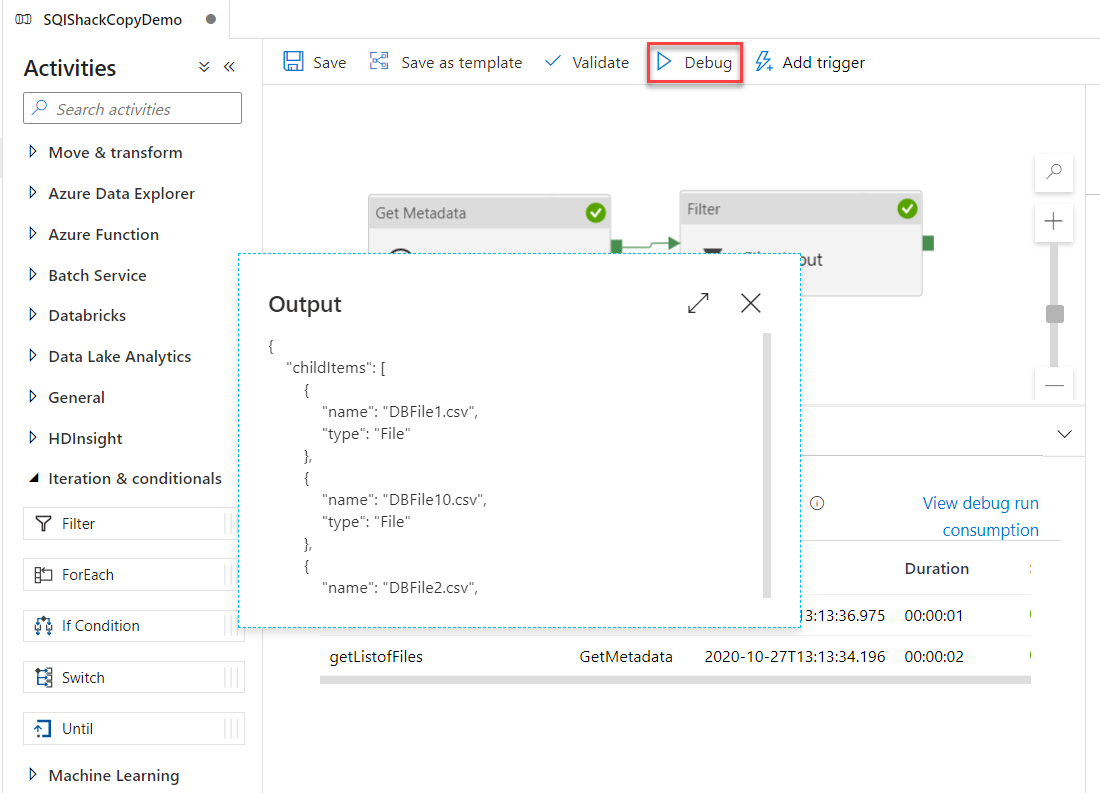
In the Field List, click New to add a new argument and choose the Child Item as an argument to get the names of the source files, as below:
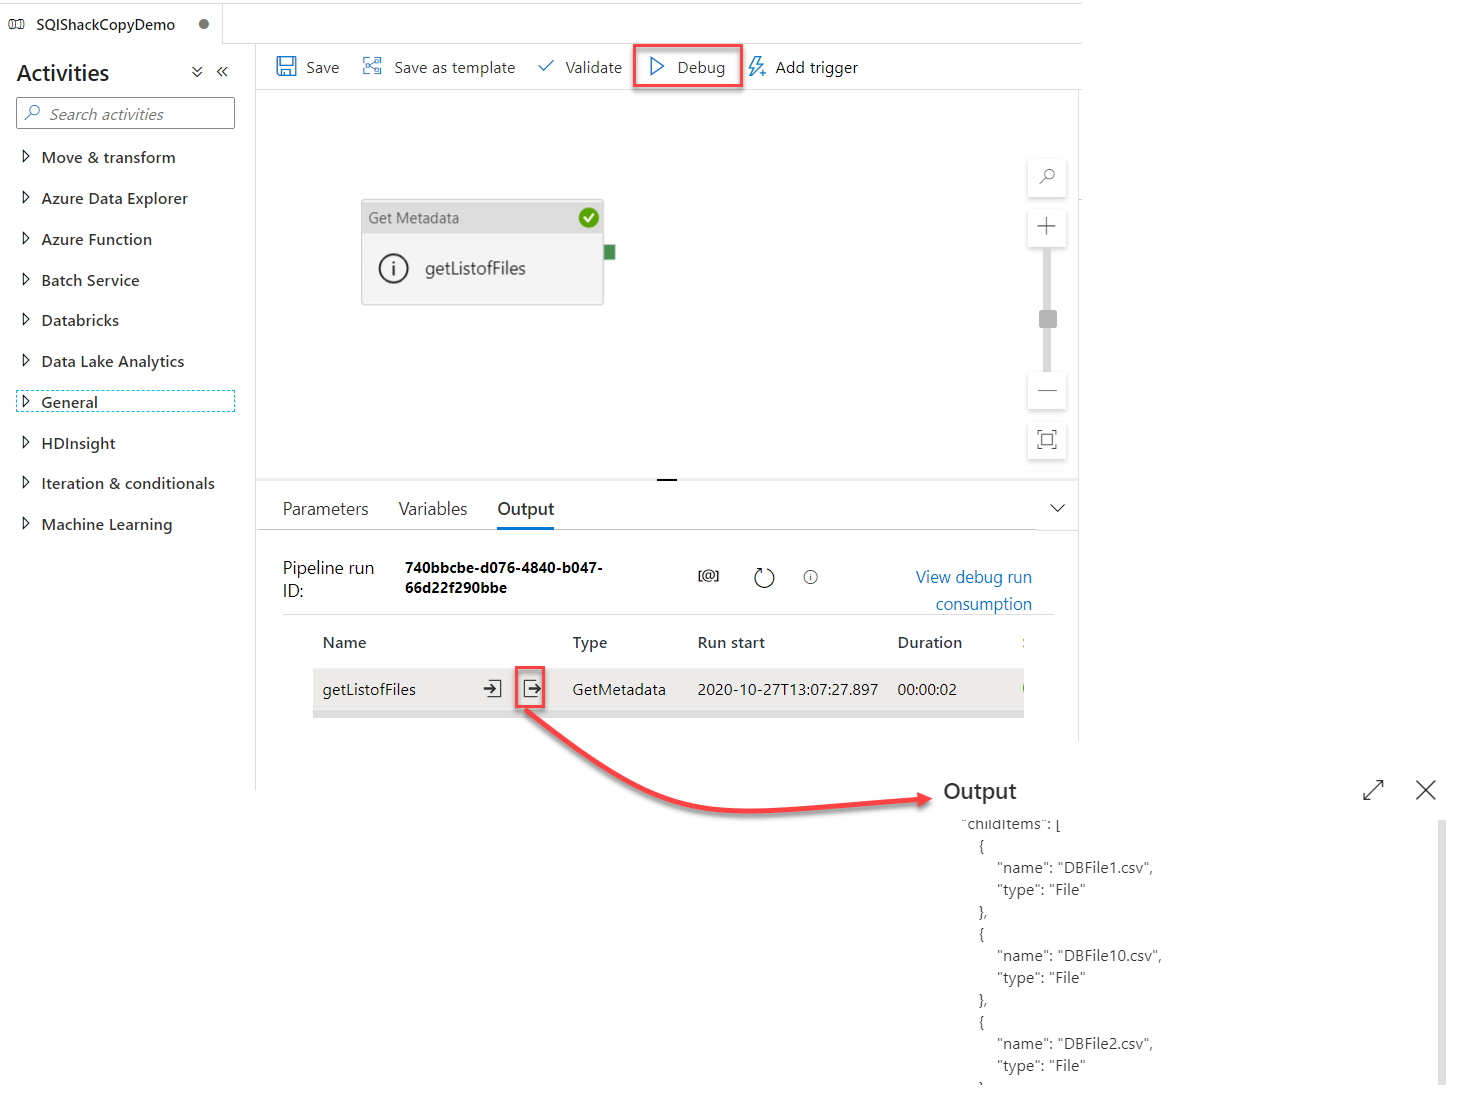
To test that activity, click on the Debug option, to execute that activity within the Azure Data Factory pipeline in the debug mode, then click to check the output of the activity execution, where it will return the list of files located in the source container and the names of these files, as shown below:
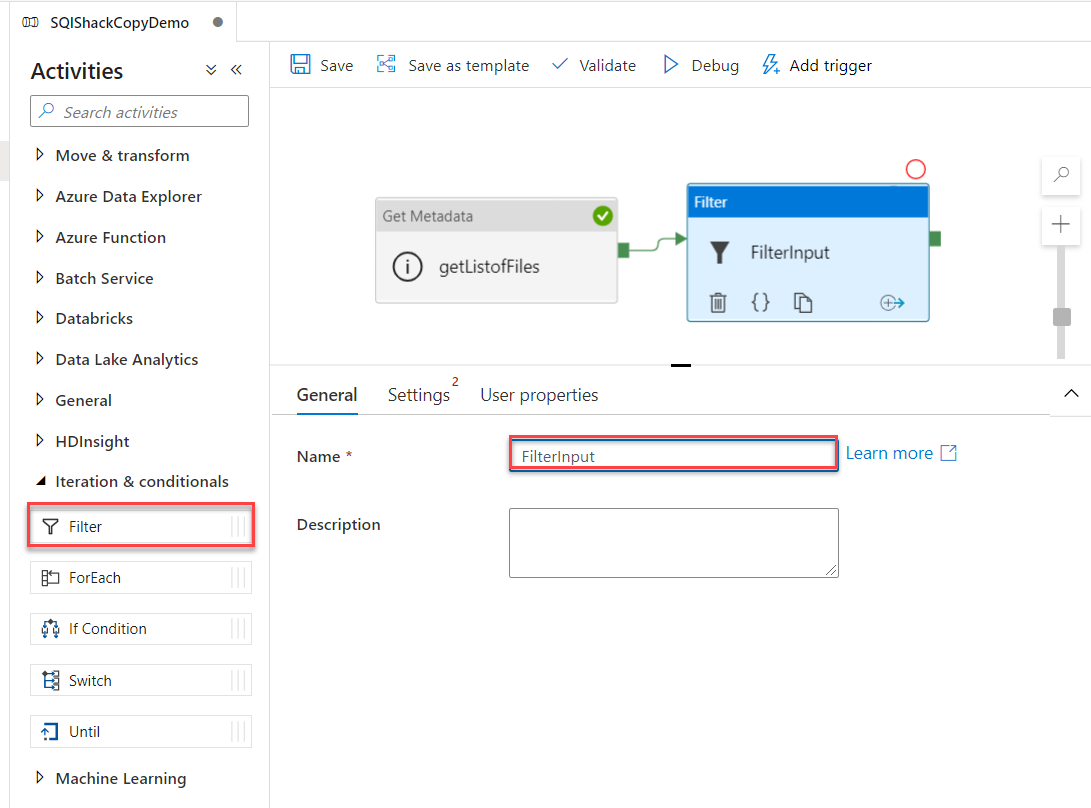
The next activity that we will add to the pipeline is the Filter activity, which will be used to take the name of the files from the Get Metadata activity and pass only the files with CSV extension.
The Filter activity can be found under the Iterations and Conditions activity list then dragged and dropped to the pipeline designer surface. After adding the Filter activity, drag the output of the Get Metadata activity to be the input of the Filter activity, then provide a meaningful name for the Filter activity, as shown below:
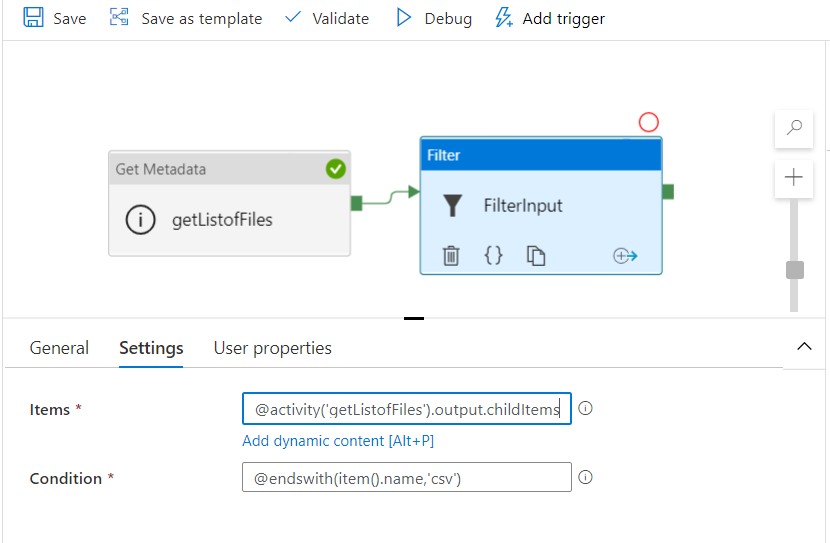
In the Settings tab of the Filter activity, specify the Items option value as @activity().output.childItems to return the list of files from the Get Metadata activity and the Conditions option value as @endswith(item().name,’csv’) to pass only the files with CSV extension, as shown below:
Let us test the Azure Data Factory pipeline until that point. Click on the Debug button to execute the pipeline under debug mode and confirm that both activities are executed successfully, and that the output of the Filter activity is the files with CSV extension, as shown below:
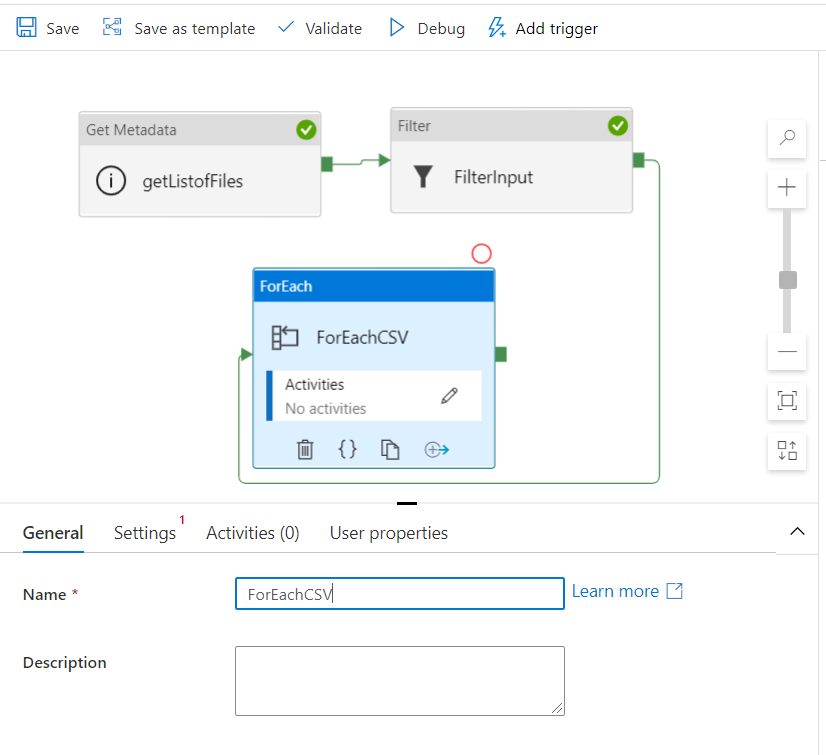
Now, we will add to the Azure Data Factory pipeline the ForEach activity that will help in iterating through all files passed from the Filter activity and check the size of these input files, if the size of the file is equal to or larger than 1KB, the file will be written to the Azure SQL Database table, otherwise, the file will be deleted from the source container.
Expand the Iterations and Conditional activities then drag and drop the ForEach activity to the designer surface. Once added, drag the output arrow of the Filter activity and drop it as an input to the ForEach activity and provide a meaningful name for that activity, as shown below:
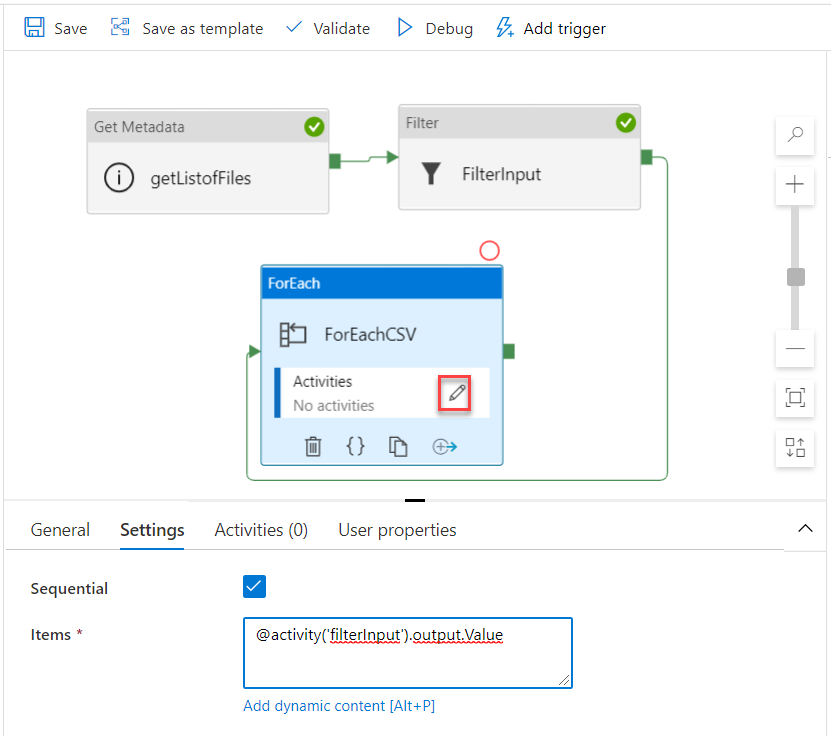
In the Settings tab of the ForEach activity, check to loop the input items Sequentially and provide the @activity(‘filterInput’).output.Value in the Items option to take the value returned from the Filter activity as an input to the ForEach activity, as shown below:
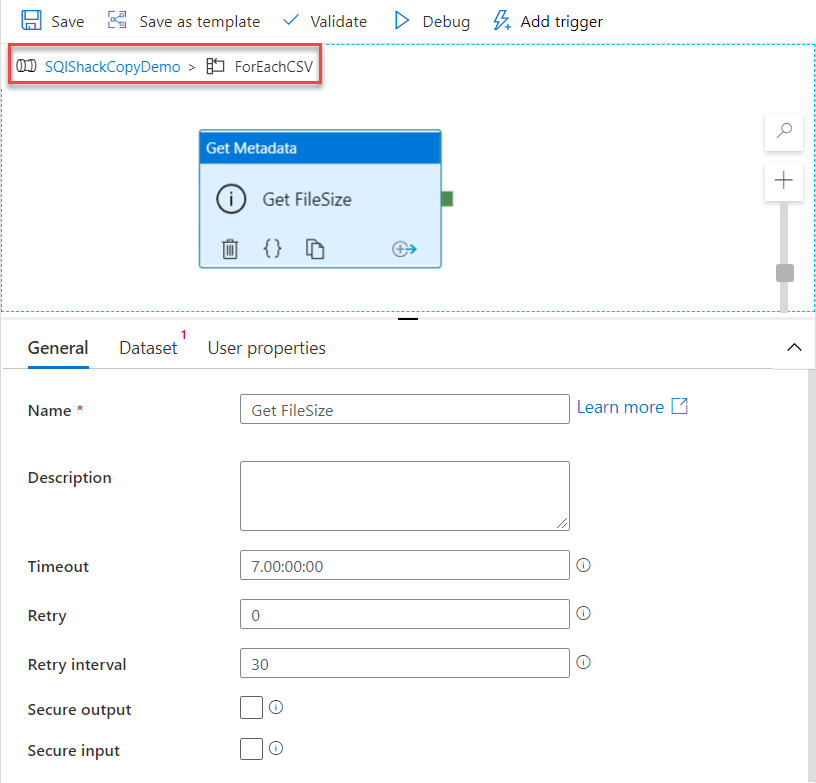
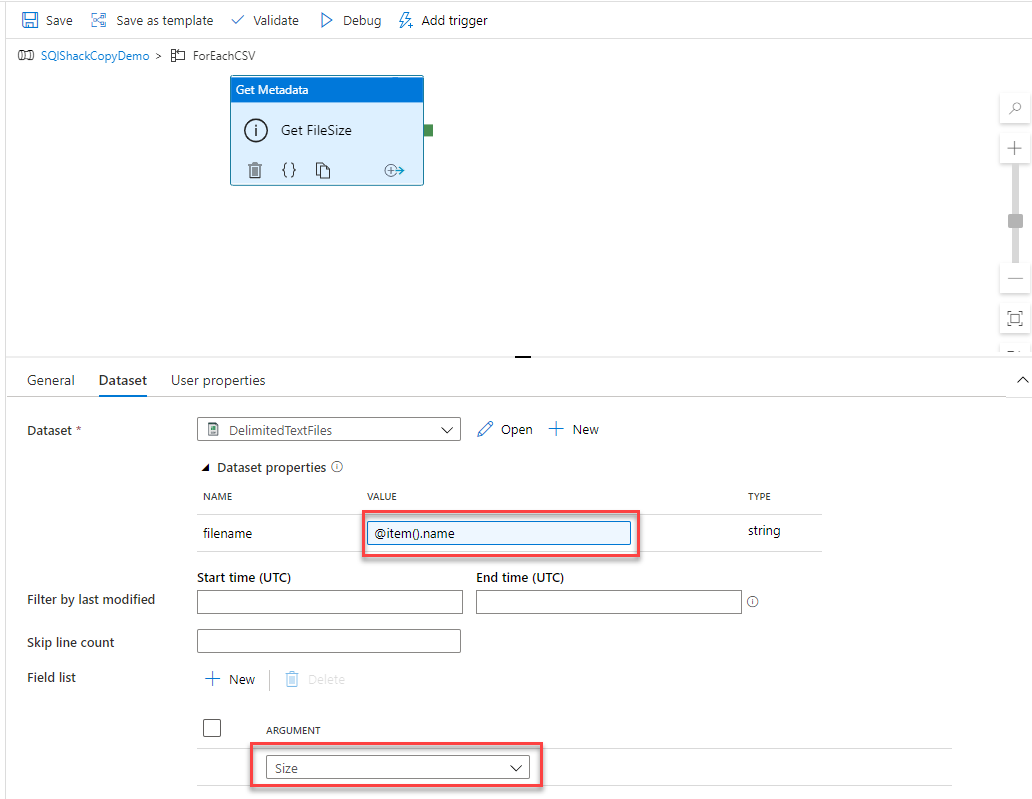
Inside the ForEach activity icon, click on the pencil icon to add a new sub-activity inside the ForEach activity. Here we will add a new Get Metadata activity that will check all the input files and return the size of each file. First, provide a meaningful name for that activity, as shown below:
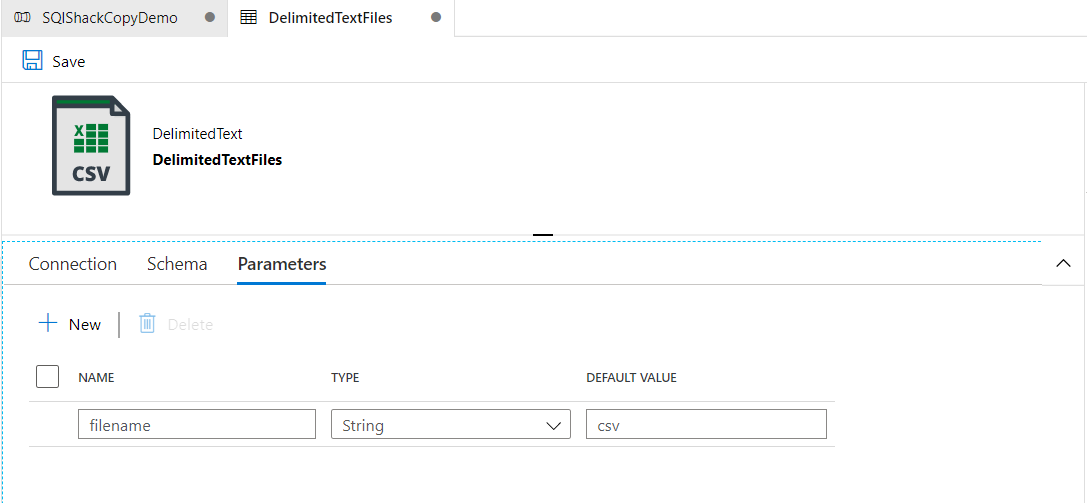
Under the Dataset settings, we will create a new Azure Blob Storage dataset with DelimitedText format and add “Filename” as a parameter for that dataset with “CSV” as a default value, as shown below:
And set @dataset().filename as the file name value in the File Path setting of the dataset, as below:
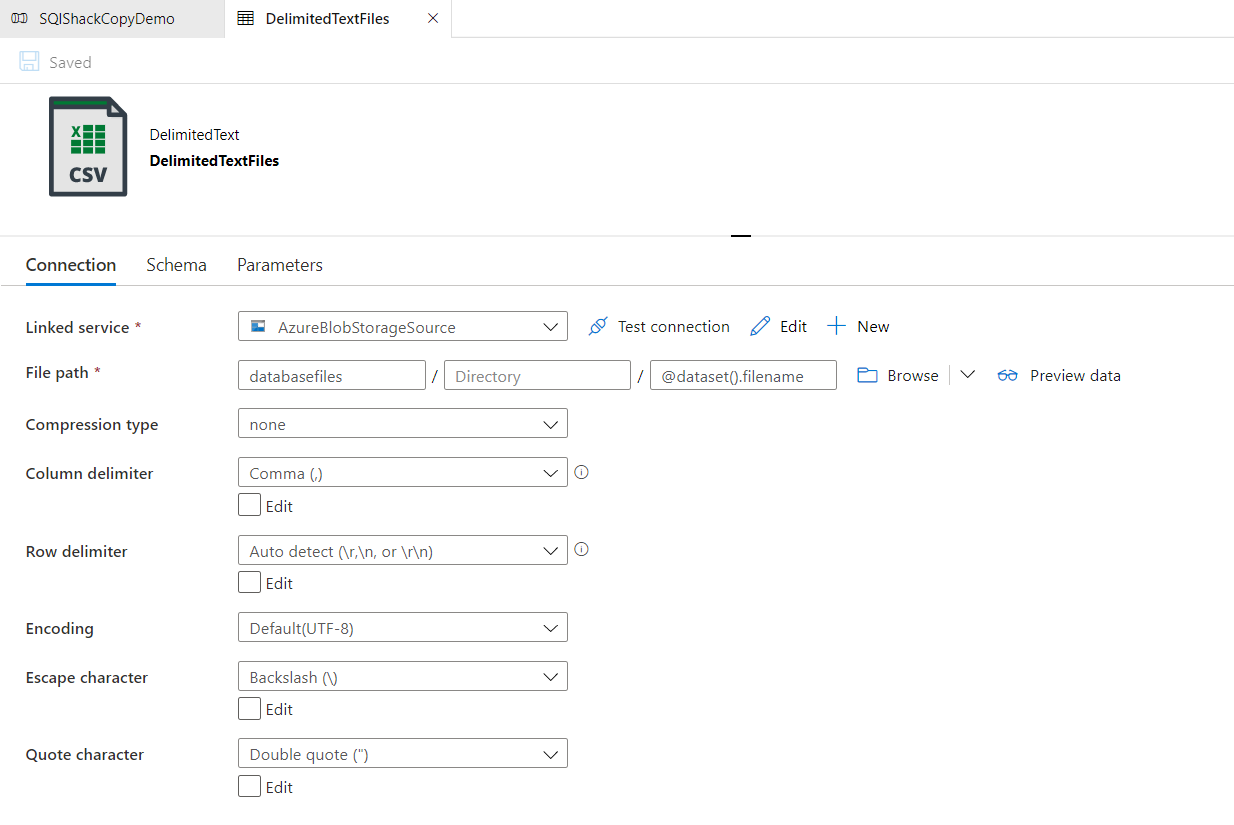
Once the Dataset is created, go back to the Dataset settings of the Get Metadata activity and set the filename parameter value as @item().name to parse the name of the files that are returned from the dataset, then from the Field List, add a new argument and select the Size as an argument, to return the size of the files that are pointed by the source dataset, as shown below:
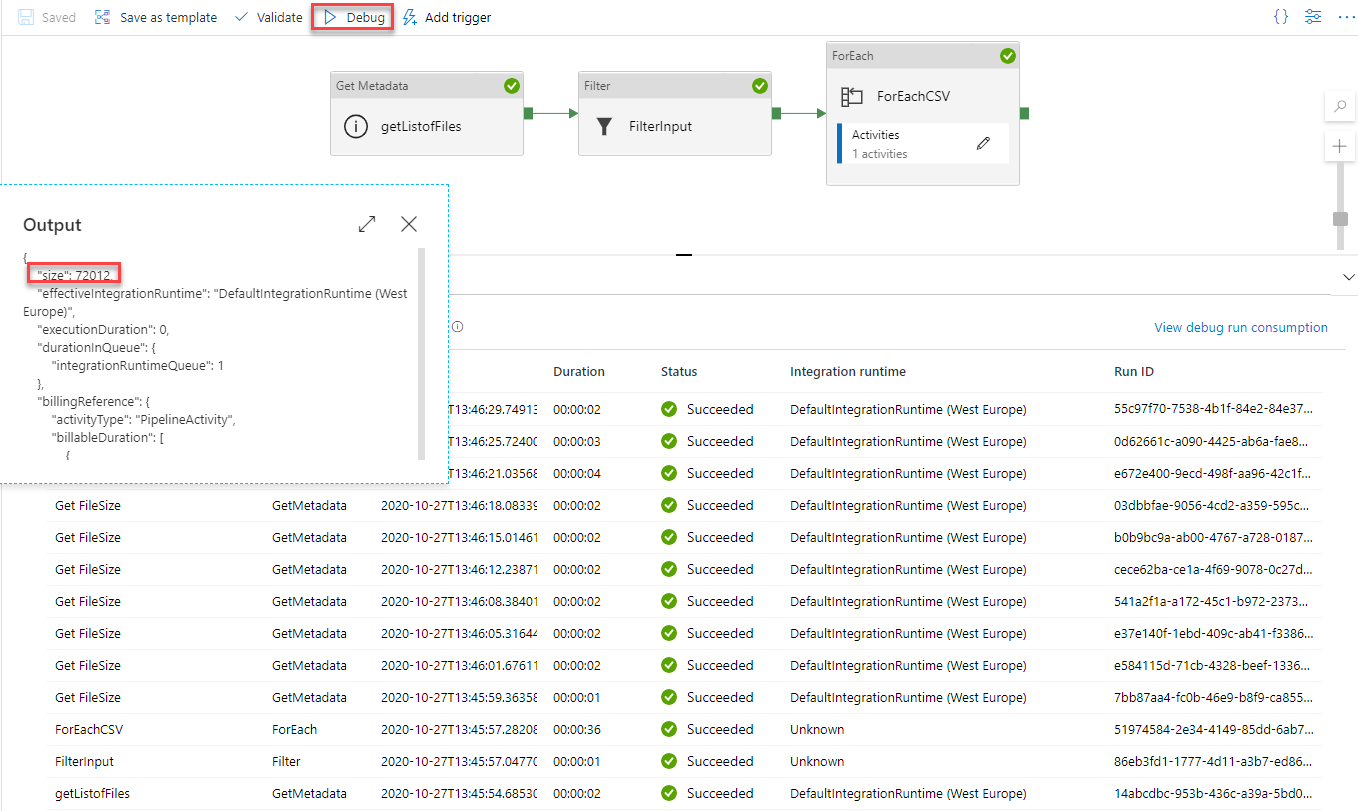
Let us test the Azure Data Factory pipeline execution till that point, by clicking on Debug to execute the pipeline under the debug mode, and check the output of the Get Metadata activity, where you can see that it is executed inside the ForEach activity number of times equal to the number of files in the source container, and return the size of each file, as shown below:
Now we will add a new activity to the Azure Data Factory pipeline inside the ForEach activity that will be used to act based on the source file size, where we will copy the data inside the file if the file size is larger than or equal to 1KB and delete the file that is smaller than 1KB.
The best activity that will help in that scenario is the If Condition activity under the Iterations and Conditional activities list that will take the input of the Get Metadata activity and check the returned size. After dragging the If Condition activity and drop it inside the ForEach activity then drag the output arrow of the Get Metadata activity and use it as an input for the If Condition, provide a meaningful name for the If Condition activity, as below:
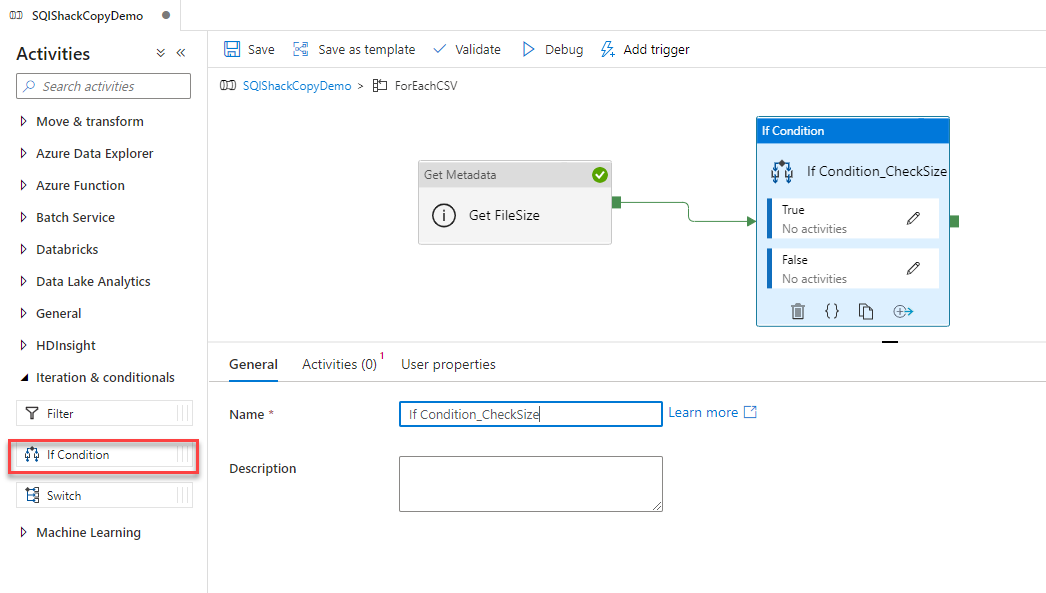
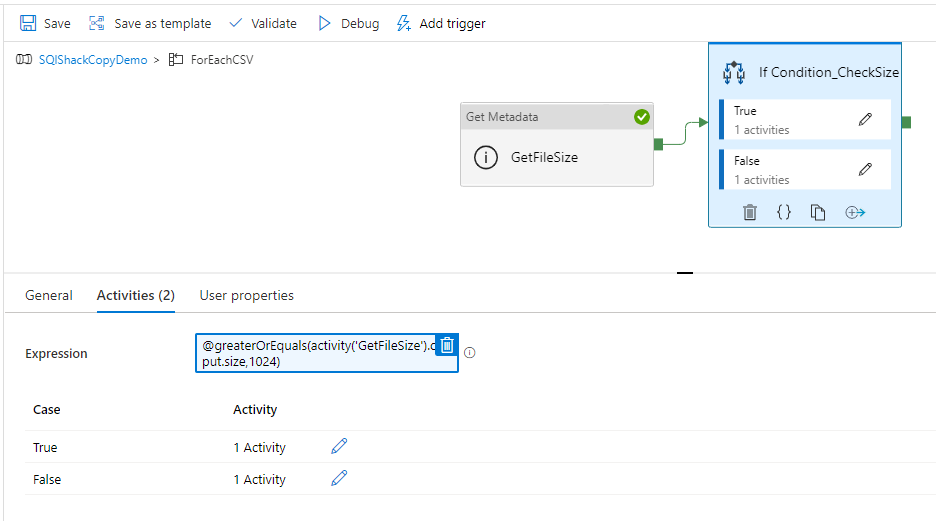
In the Activities tab of the If Condition activity, provide this Expression: @greaterOrEquals(activity(‘GetFileSize’).output.size,1024) as the Boolean condition of the If Condition that will be used to evaluate the size of each file and ensure that it is equal to or larger than 1 KB, as below:
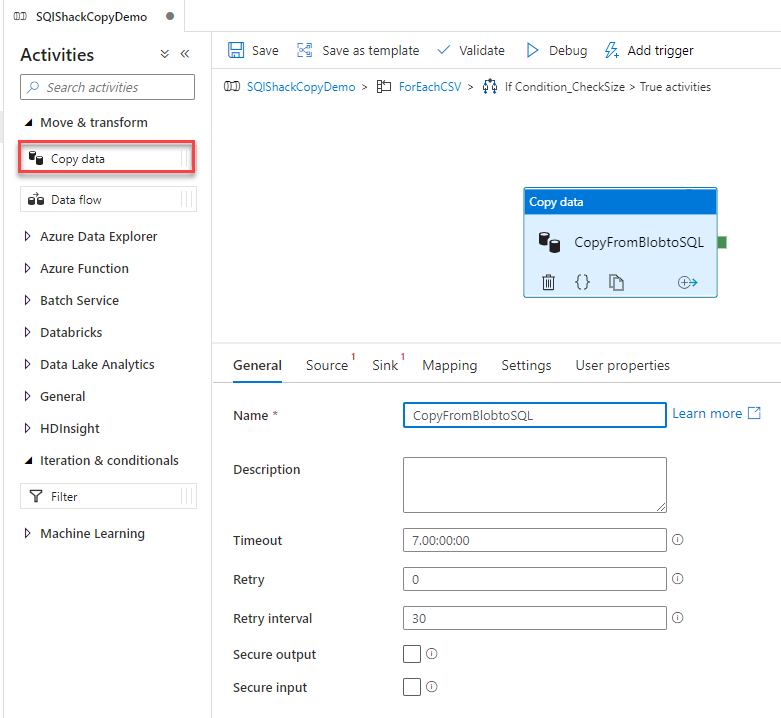
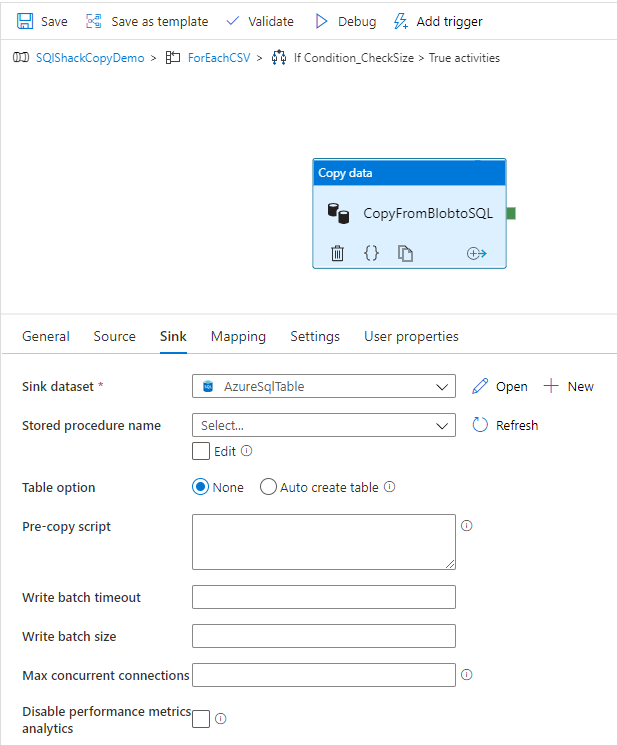
Now, click on the pencil icon to add a Copy activity when the condition evaluates True, where you need to provide a meaningful name for that copy activity as below:
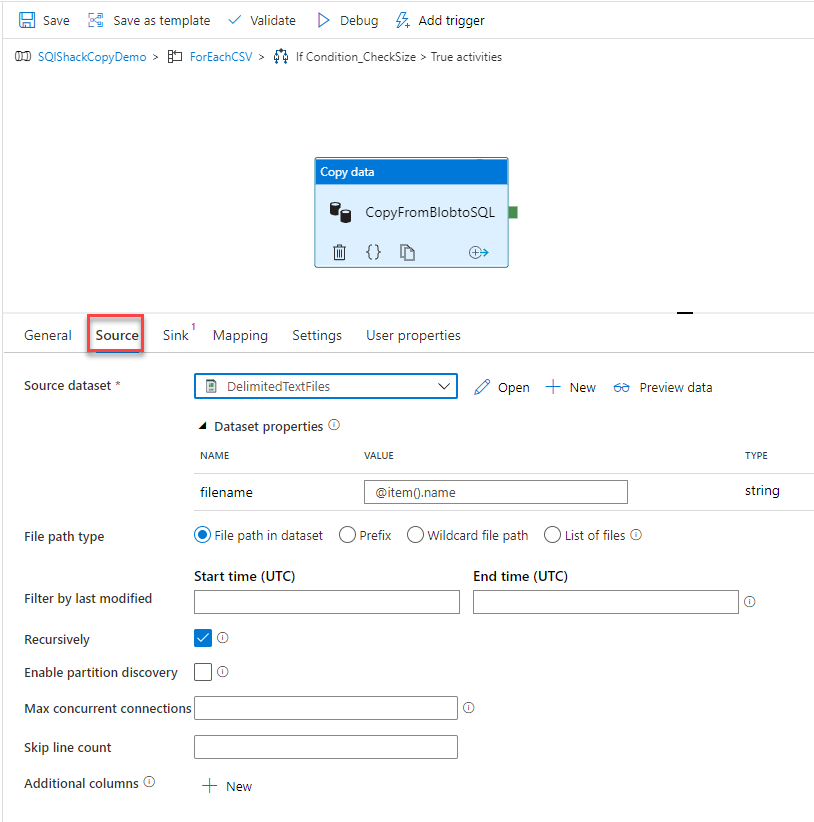
And select the previously created Dataset that points to the Azure Blob Storage container as a source for the Copy activity, making sure to provide the @item().name as a value for the filename dataset parameter, as shown below:
Then select the Azure SQL Database dataset as a sink for the copy activity, as below:
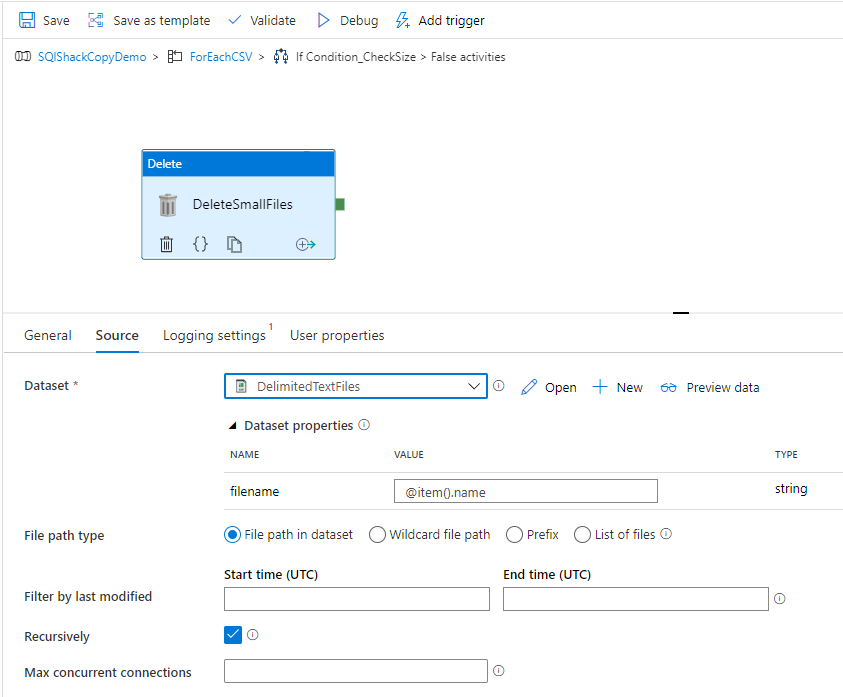
Again, we need to add a Delete activity for the False If Condition evaluation, to delete the files that are smaller than 1KB, where you need to provide first a meaningful name for that activity as shown below:

And select the previously created Dataset that points to the Azure Blob Storage container as a source for the Delete activity, considering to provide the @item().name as a value for the filename dataset parameter, as shown below:
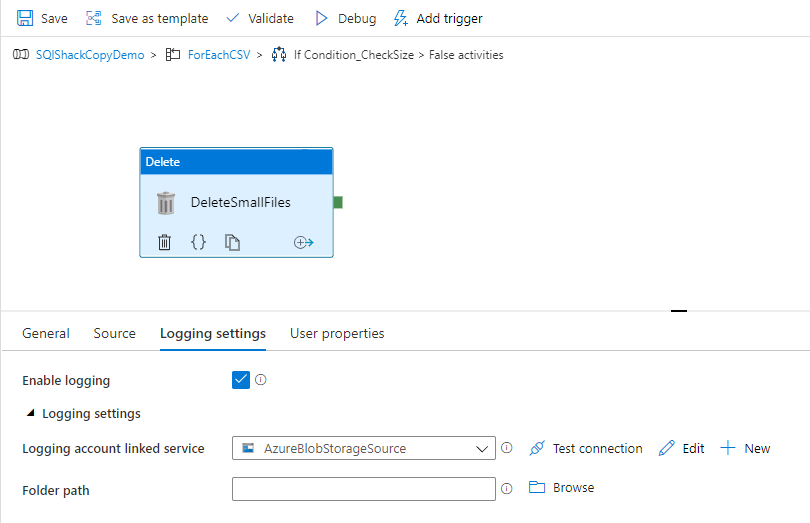
Then selecting the Azure Storage account that will be used for the Delete activity logging, as below:
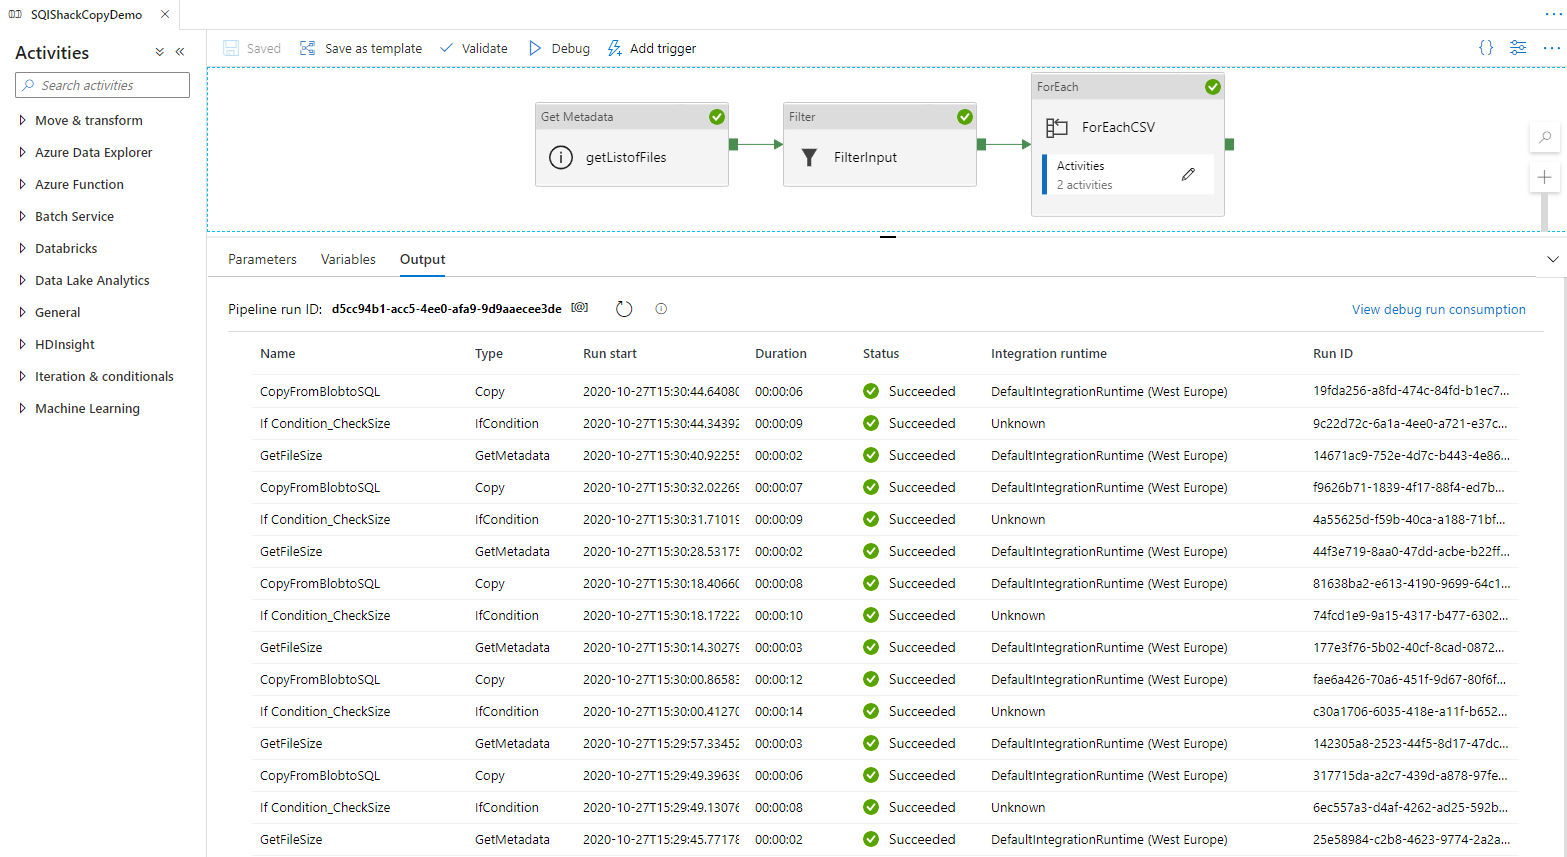
Now, the Azure Data Factory pipeline is ready with all loops and conditions. Let us execute it under debug mode, using the Debug button, to confirm that it is working as expected and you can later create a trigger to schedule it.
After executing it, you will see that, as we have 10 files in the source container that meets both CSV and 1KB size conditions, the files will be copied to the Azure SQL Database successfully, as shown below:
Also, we can confirm that the data is copied successfully to the Azure SQL Database by connecting to the database using SSMS, and querying the data, as shown below:

Conclusion
In this demo, we have discussed how to use the different iterations and conditions activities in Azure Data Factory to work with different data stores and validate the data stored in these stores. Stay tuned for the next articles to dig deeper into the Azure Data Factory world!
Table of contents

He is a Microsoft Certified Solution Expert in Data Management and Analytics, Microsoft Certified Solution Associate in SQL Database Administration and Development, Azure Developer Associate and Microsoft Certified Trainer.
Also, he is contributing with his SQL tips in many blogs.
View all posts by Ahmad Yaseen
- Azure Data Factory Interview Questions and Answers - February 11, 2021
- How to monitor Azure Data Factory - January 15, 2021
- Using Source Control in Azure Data Factory - January 12, 2021