

In the previous article, Starting your journey with Microsoft Azure Data Factory, we discussed the main concept of the Azure Data Factory, described the Data Factory components and showed how to create a new Data Factory step by step.
In this article, we will show how to use the Azure Data Factory to orchestrate copying data between Azure data stores.
Copy Activity Overview
The Copy activity in Azure Data Factory is used to copy data between the different data stores that are located on-premises and in the cloud, in order to use the copied data in other transformation or analysis tasks or copy the transformed or analyzed data to the final store to be visualized.
The copy activity supports various numbers of data stores such as Azure data stores, On-premises relational and non-relational data stores, file stores, generic protocols such as HTTPS and services and applications such as Service Now. Azure Data Factory supports reading from and writing to different file formats, including Avro, Binary, Delimited text, Excel, JSON, ORC, Parquet and XML file formats. For a complete list of the supported data sources (called sources), and data targets (called sinks), in the Azure Data Factory copy activity, check the Supported Data Stores and Formats.
Azure Data Factory uses the Integration Runtime (IR) as a secure compute infrastructure to run the copy activity across the different network environments and make sure that this activity is performed in the closest possible region to the data store. You can imagine it as a bridge between the copy activity and the linked services.
Azure Data Factory supports three types of Integration Runtimes: (1) Azure Integration Runtime that is used when copying data between data stores that are accessed publicly via the internet, (2) Self-Hosted Integration Runtime that is used to copy data from or to an on-premises data store or from a network with access control and (3) Azure SSIS Integration Runtime that is used to run SSIS packages in the Data Factory as we will see later in this articles series. For more information, check the Integration Runtime in Azure Data Factory.
Take into consideration that, you can perform the copy activity in the Data Factory using different tools and SDKs, include the Copy Data tool, Azure portal, .NET SDK, Python SDK, Azure PowerShell, REST API and Azure Resource Manager template.
Copy Data from Azure Blob Storage to Azure SQL Database
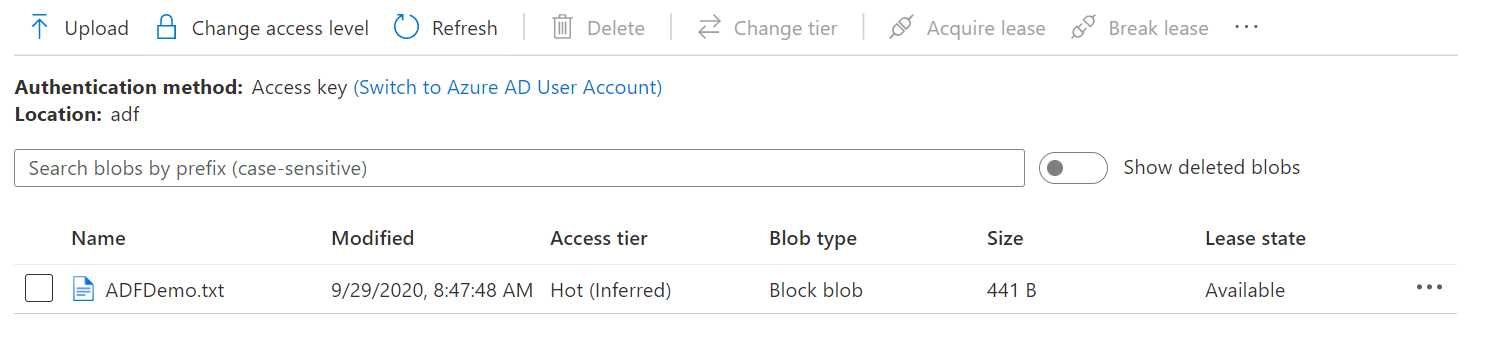
In order to copy data from a text file stored in an Azure Blob Storage to an Azure SQL Database table, we need to make sure that we have a storage account with a blob container that contains the data file, as shown below:
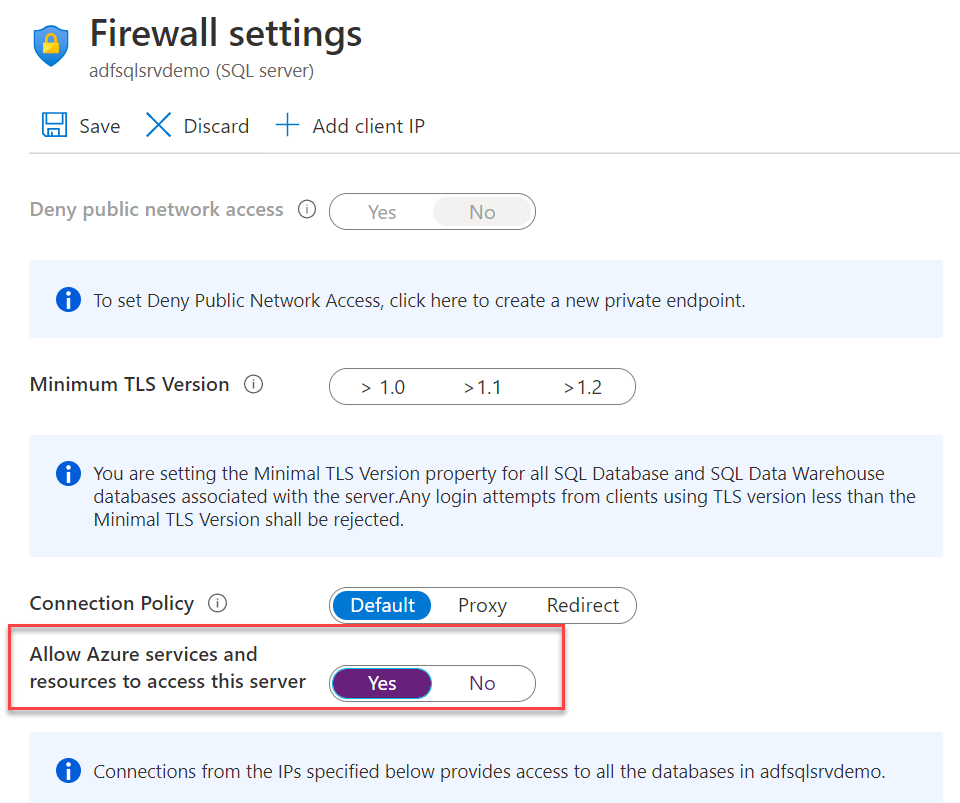
And an Azure SQL Database, with Allow Azure services and resources to access this server firewall option enabled, to allow the Azure Data Factory to access that database server, as below:
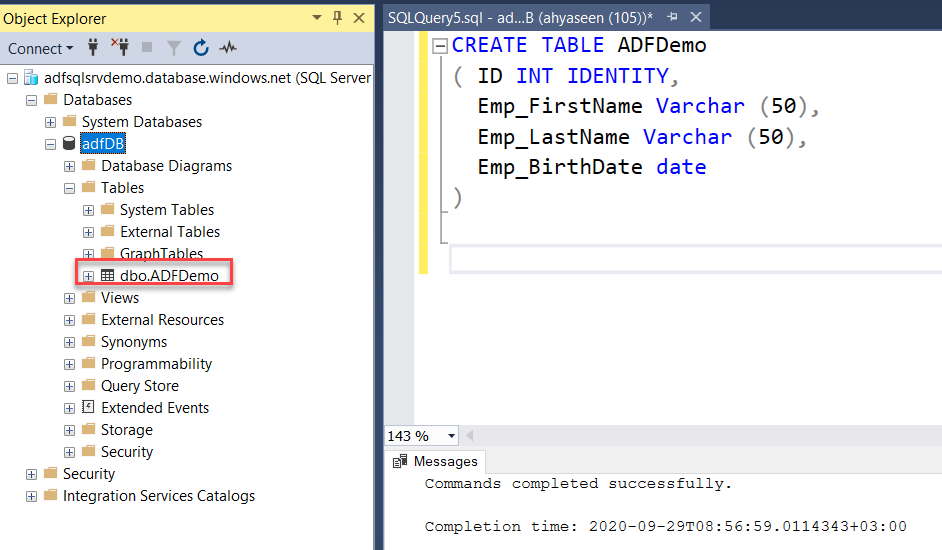
Also, we will create a new table in the Azure SQL Database, in order to insert the data from the text file stored in the blob container to that Azure SQL Database table, as in the CREATE TABLE T-SQL statement below:
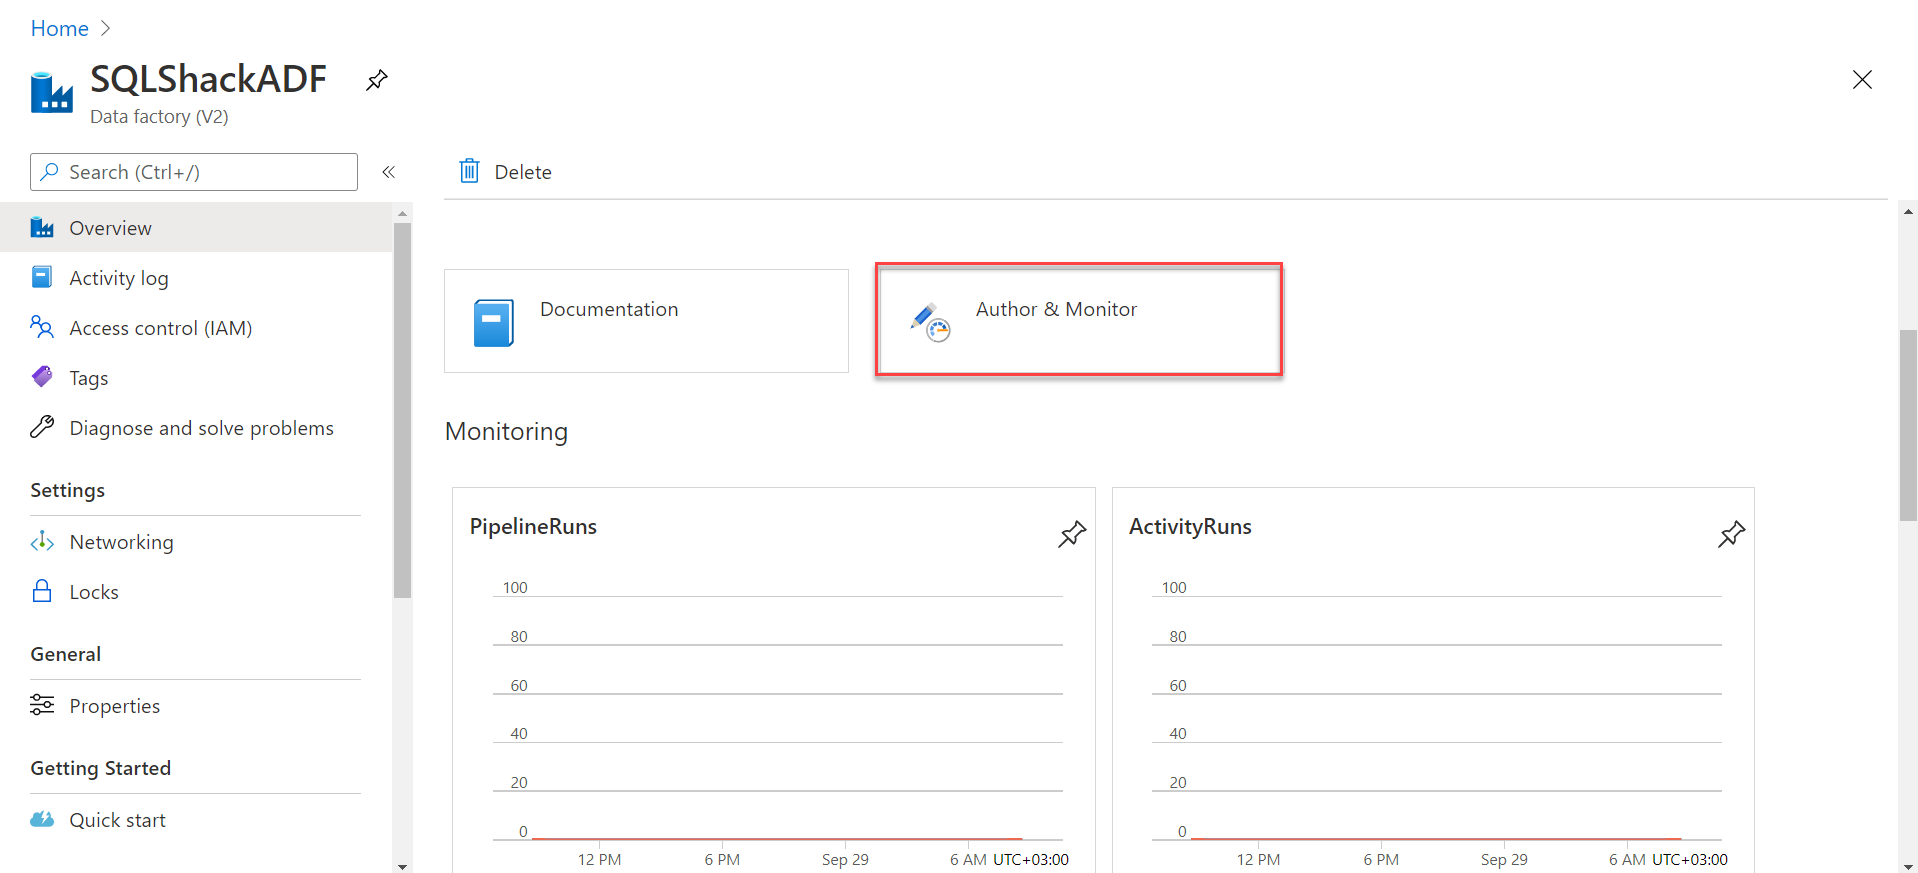
Now we are ready to configure the Data Factory pipeline that will be used to copy the data from the blob container to the Azure SQL Database. To configure the copy process, open the Azure Data Factory from the Azure Portal and click on the Author & Monitor option under the Overview tab, as shown below:
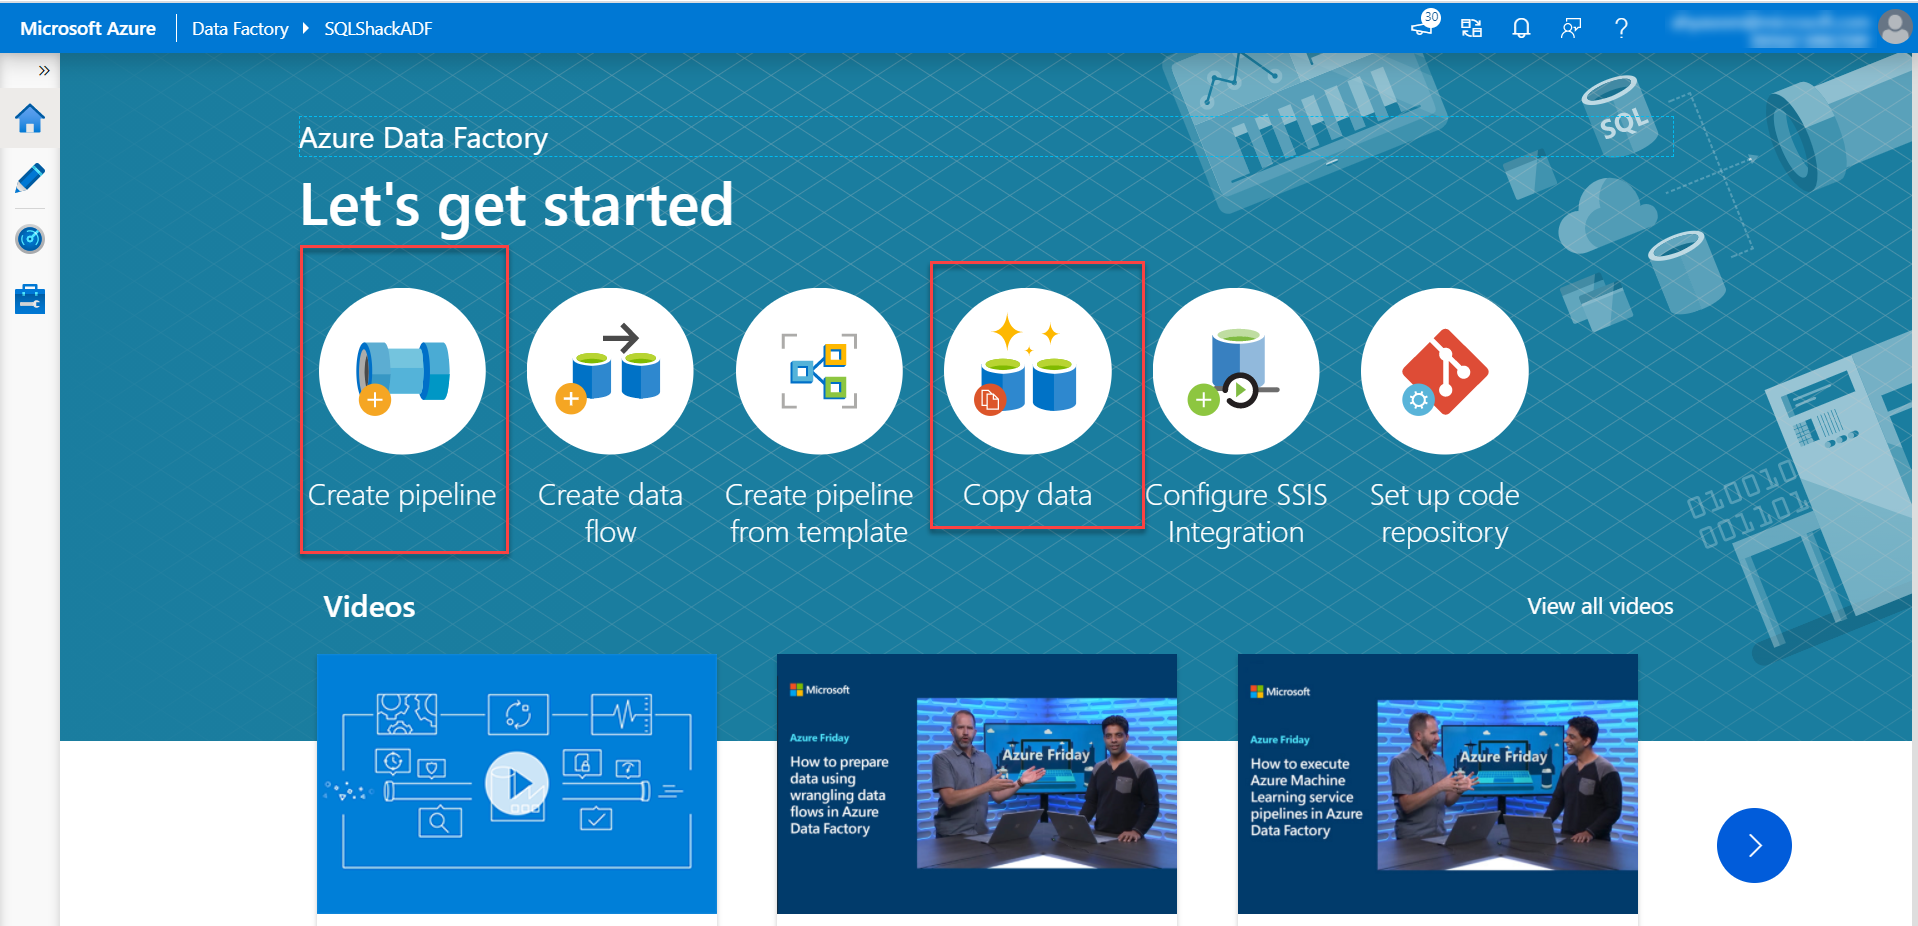
From the opened Data Factory, you have two options to configure the copy pipeline, the first one is to create the pipeline components one by one manually, using the Create Pipeline option. The second option, which we will use in this demo, is to create the pipeline using the Copy data tool, as shown below:
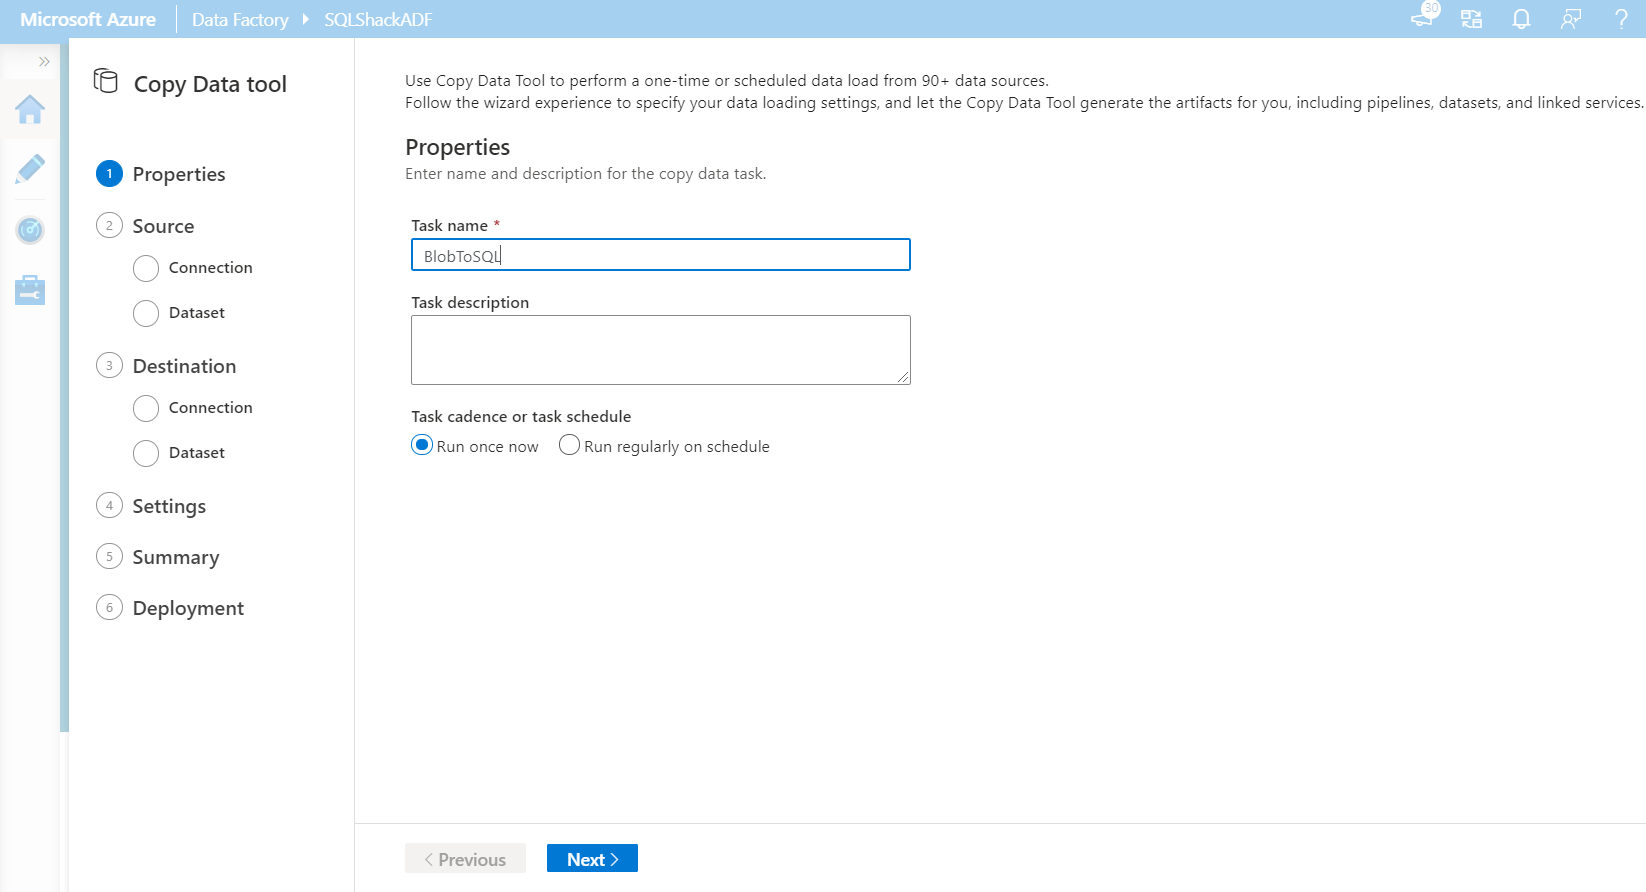
The first step in the Copy Data tool is to provide a unique name for the copy activity and specify whether to schedule this copy process or run it once, as shown below:
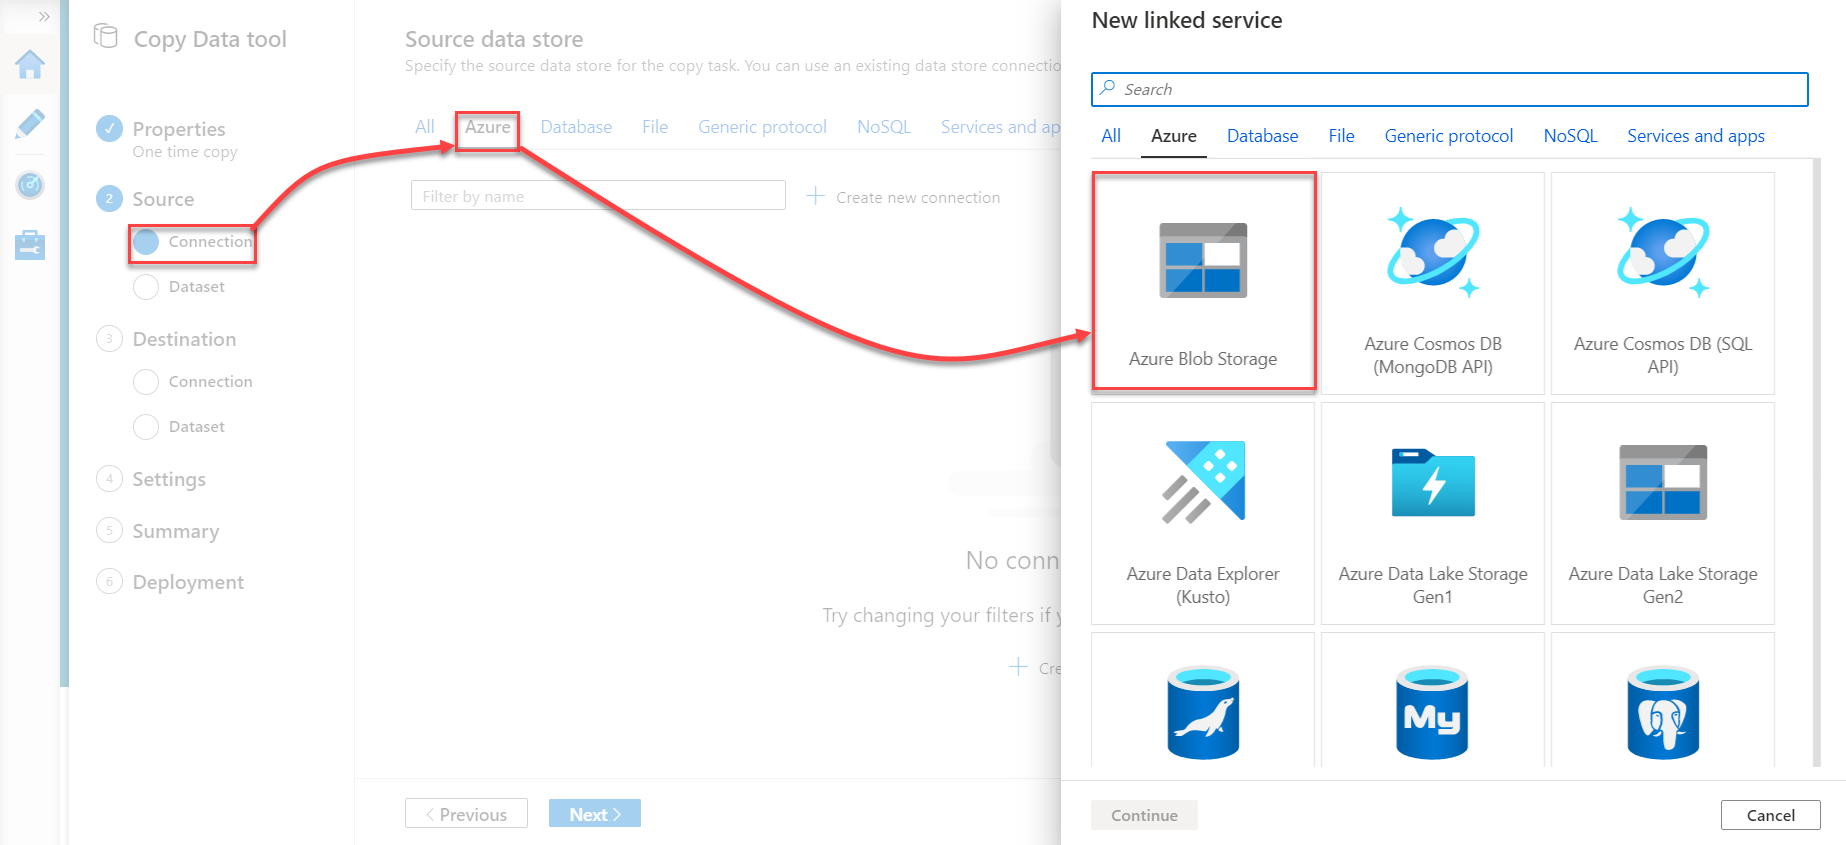
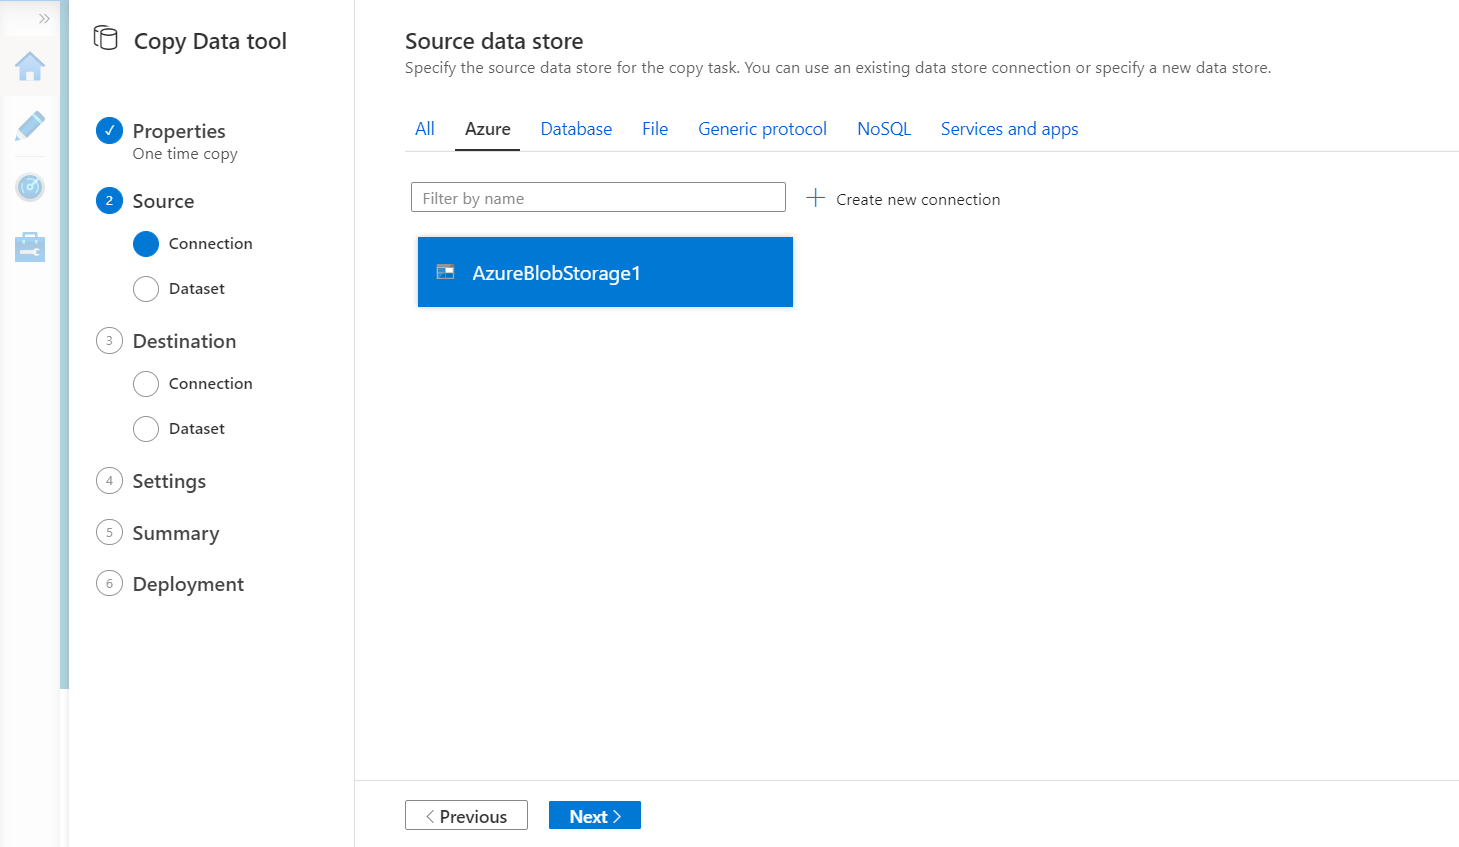
After that, the Copy Data wizard will ask you to specify the type of source data store in order to create a Linked Service to connect to that data source. In this demo, we will copy data from an Azure Blob Storage, as shown below:
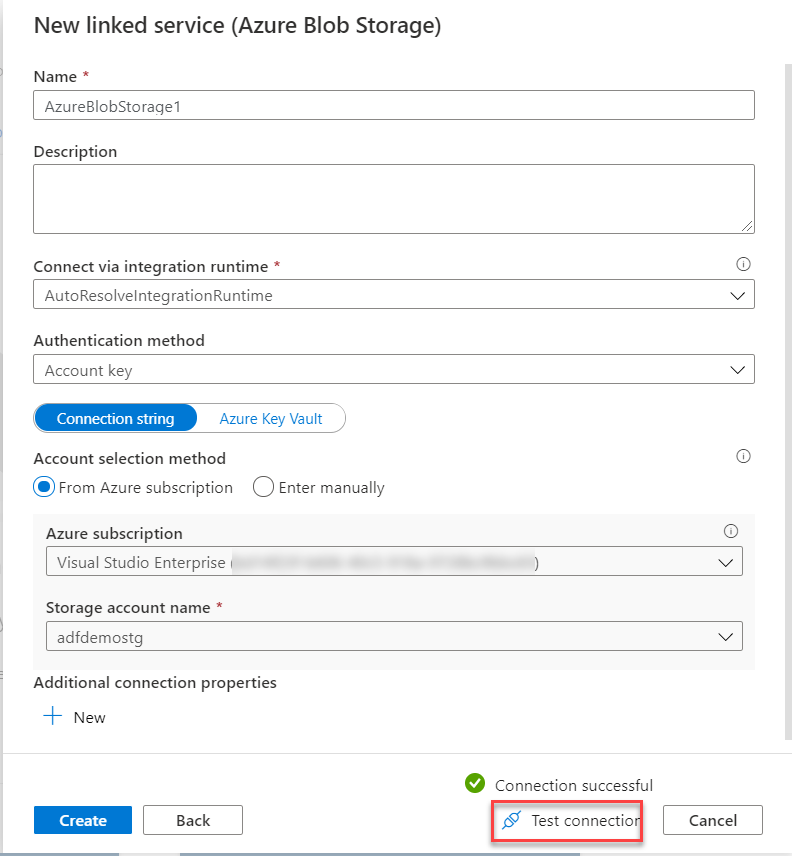
When you click on the Azure Blob Storage source type then click on Continue, a new window will be displayed, in which you need to provide a unique name for the Linked Service, the subscription where the storage account is created, the name of the storage account and the authentication method that will be used to connect to that storage account. After providing all required information, click on Test Connection to verify that you can reach that storage account then click on Create to create the Linked Service, as shown below:
Once created successfully, the source linked Service will be displayed in the data sources window, as below:
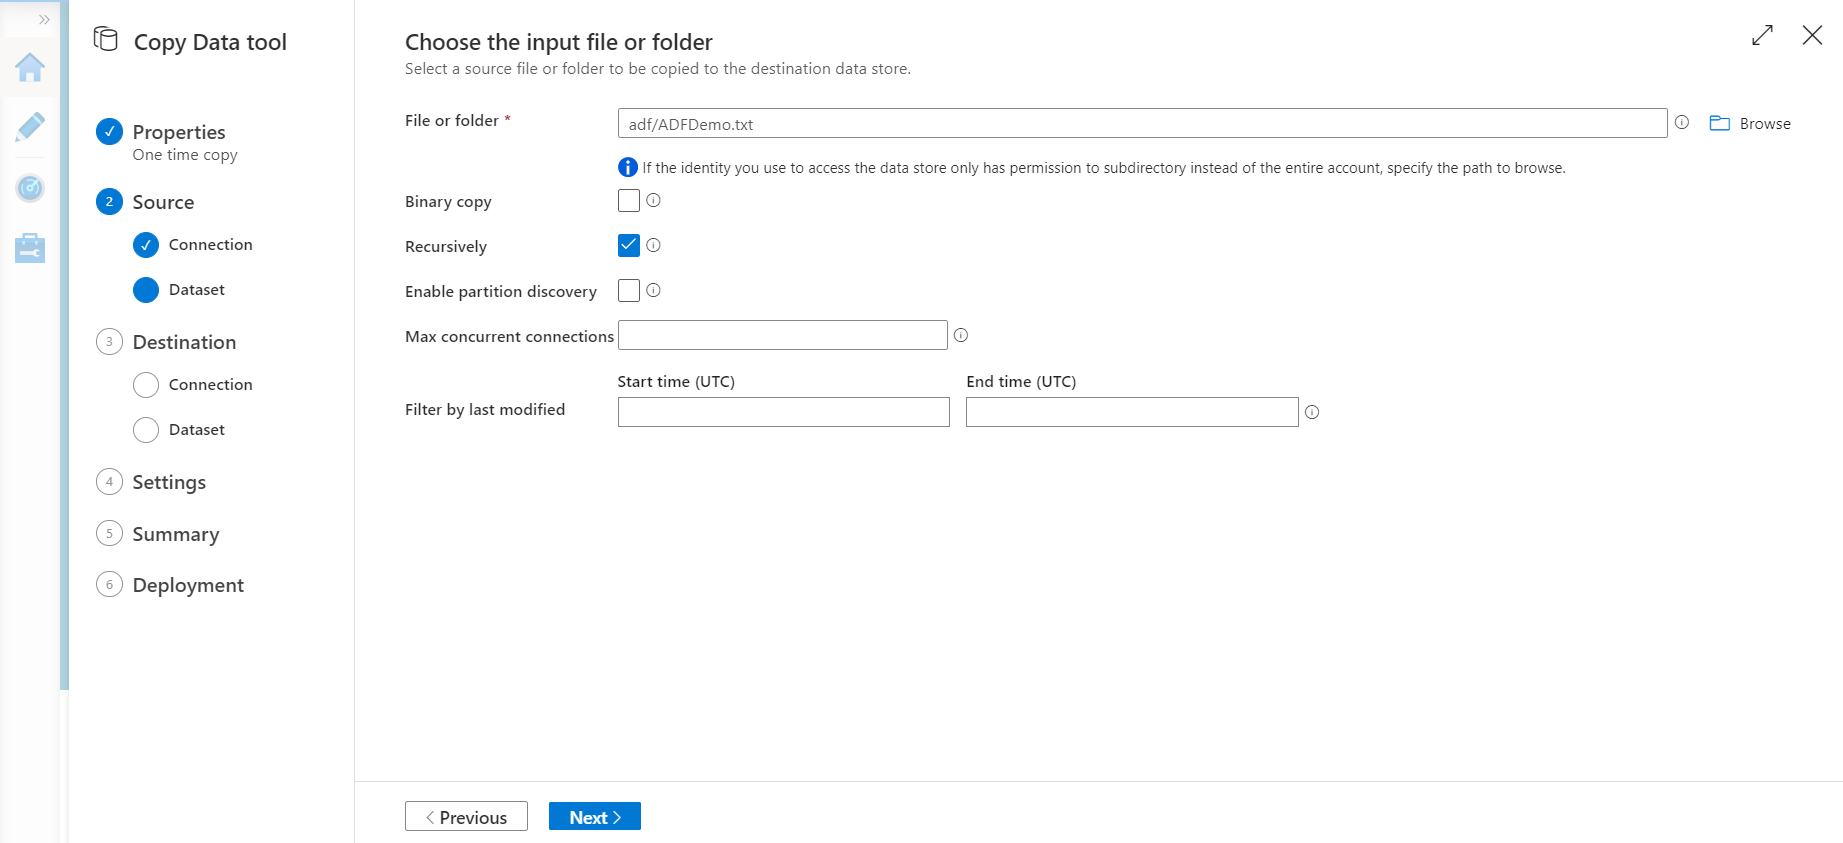
After that, you need to create the Dataset for the data source, in which you simply need to specify the input data file, or folder in case you need to copy multiple files recursively, as shown below:
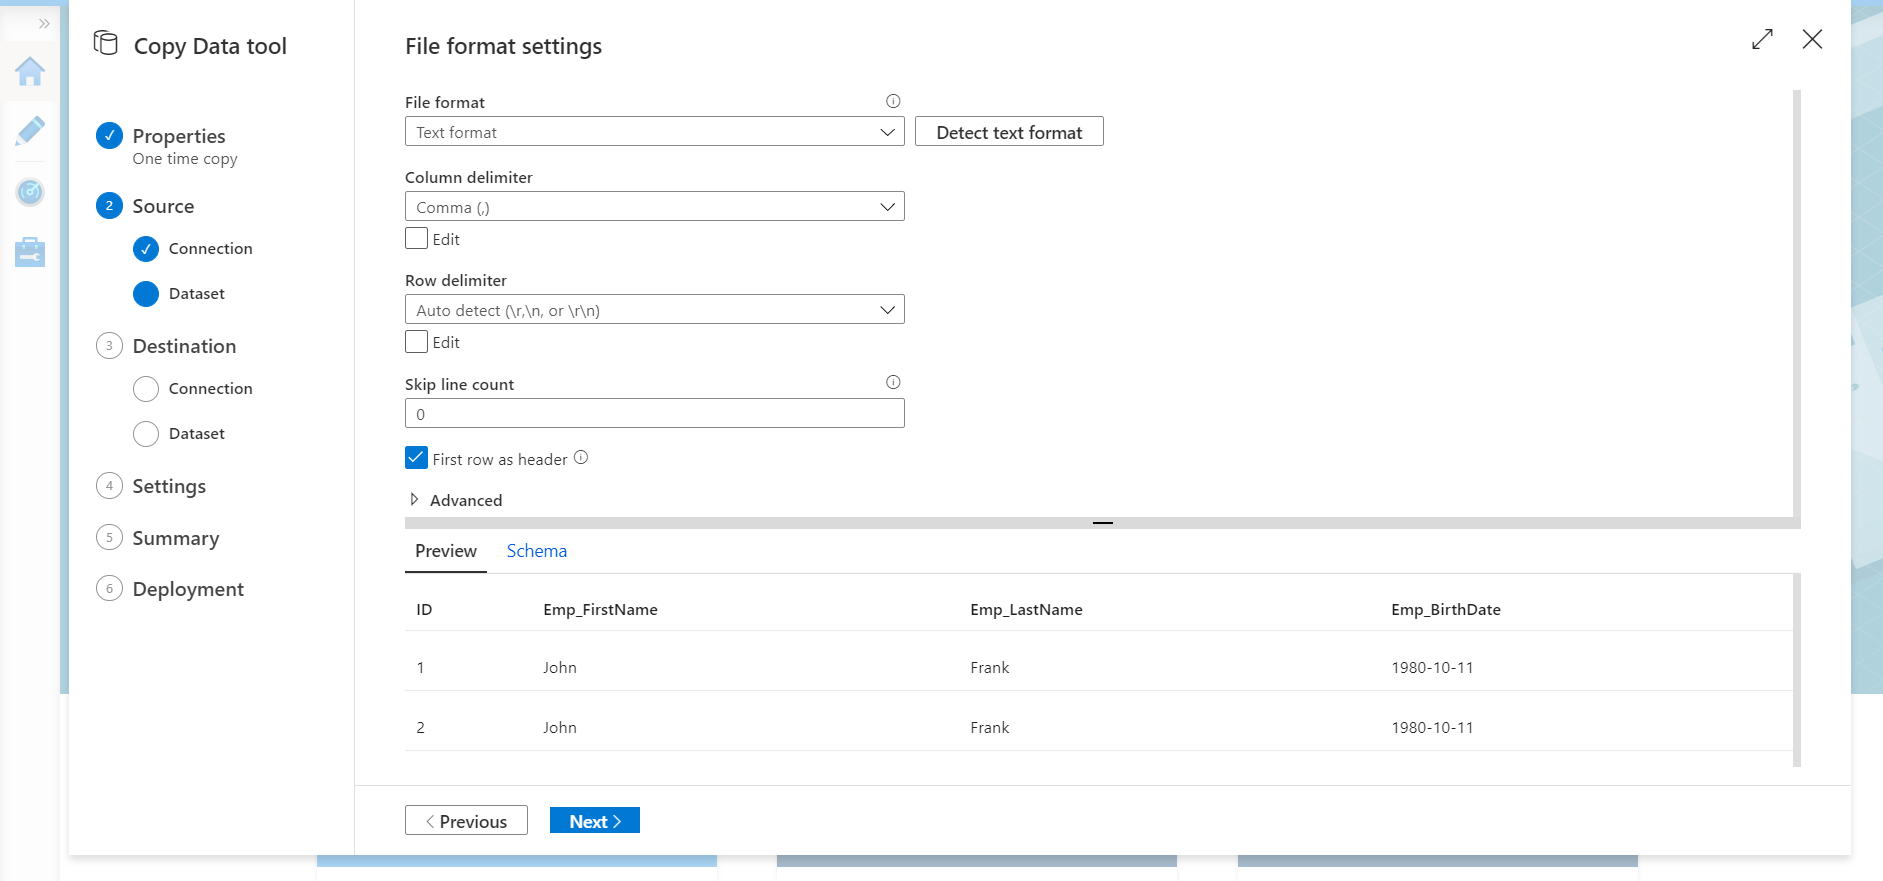
When you specify the input file, the Data Factory will check the format for that file and allow you to review the file format settings, preview the source data and perform the required changes to fit your requirements, as shown below:
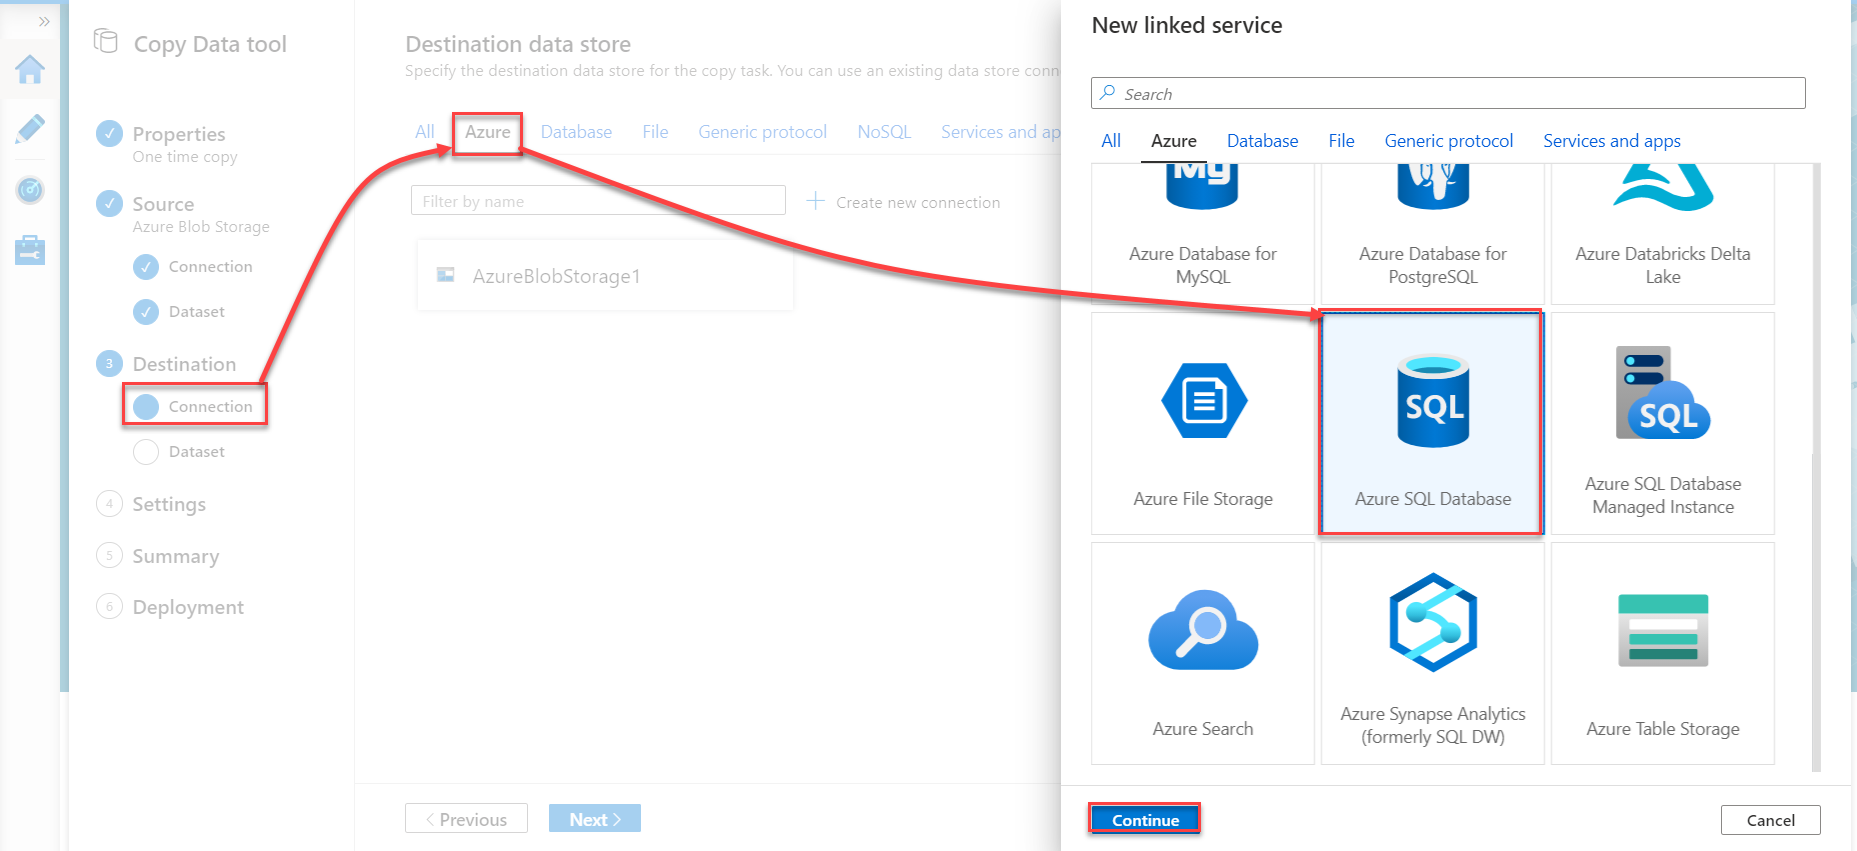
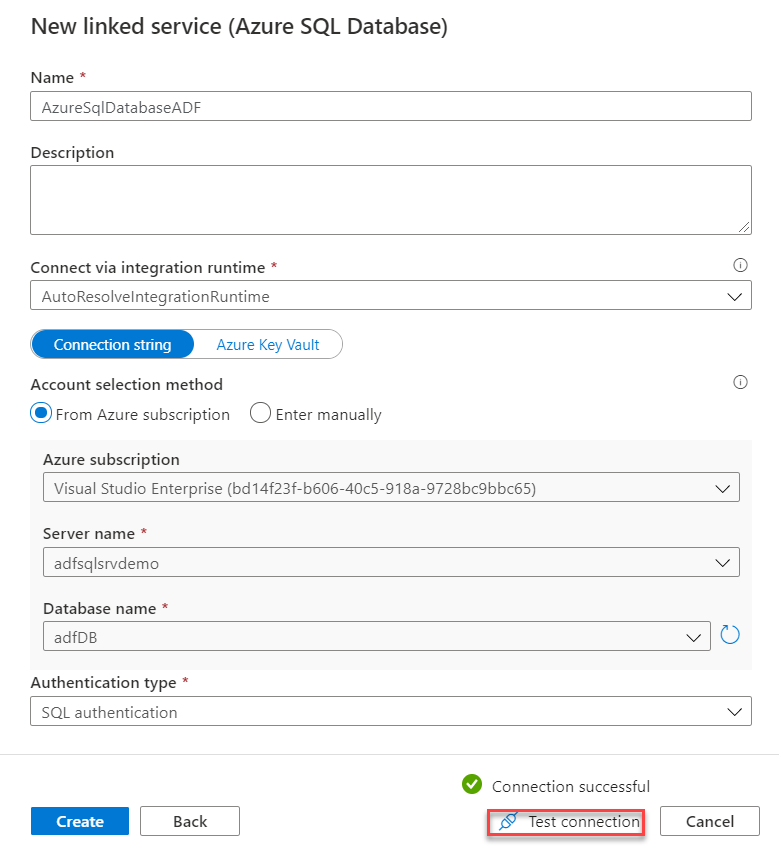
The next step is to configure the Linked Service and Dataset for the destination data store. In this demo, we will copy the input file to an Azure SQL Database table. To achieve that, choose the Azure SQL Database from the New linked Service list, then click Continue to configure the sink Linked service, as shown below:
In the displayed New linked Service window, provide a unique name for the sink Linked Service, the subscription name, the Azure SQL server and database names and finally the credentials that will be used by the Azure Data Factory to access the Azure SQL Database. After providing all the required information, click on the Test Connection option to verify the connection between the Data Factory and the Azure SQL Database then click Create to create the Linked Service, as shown below:
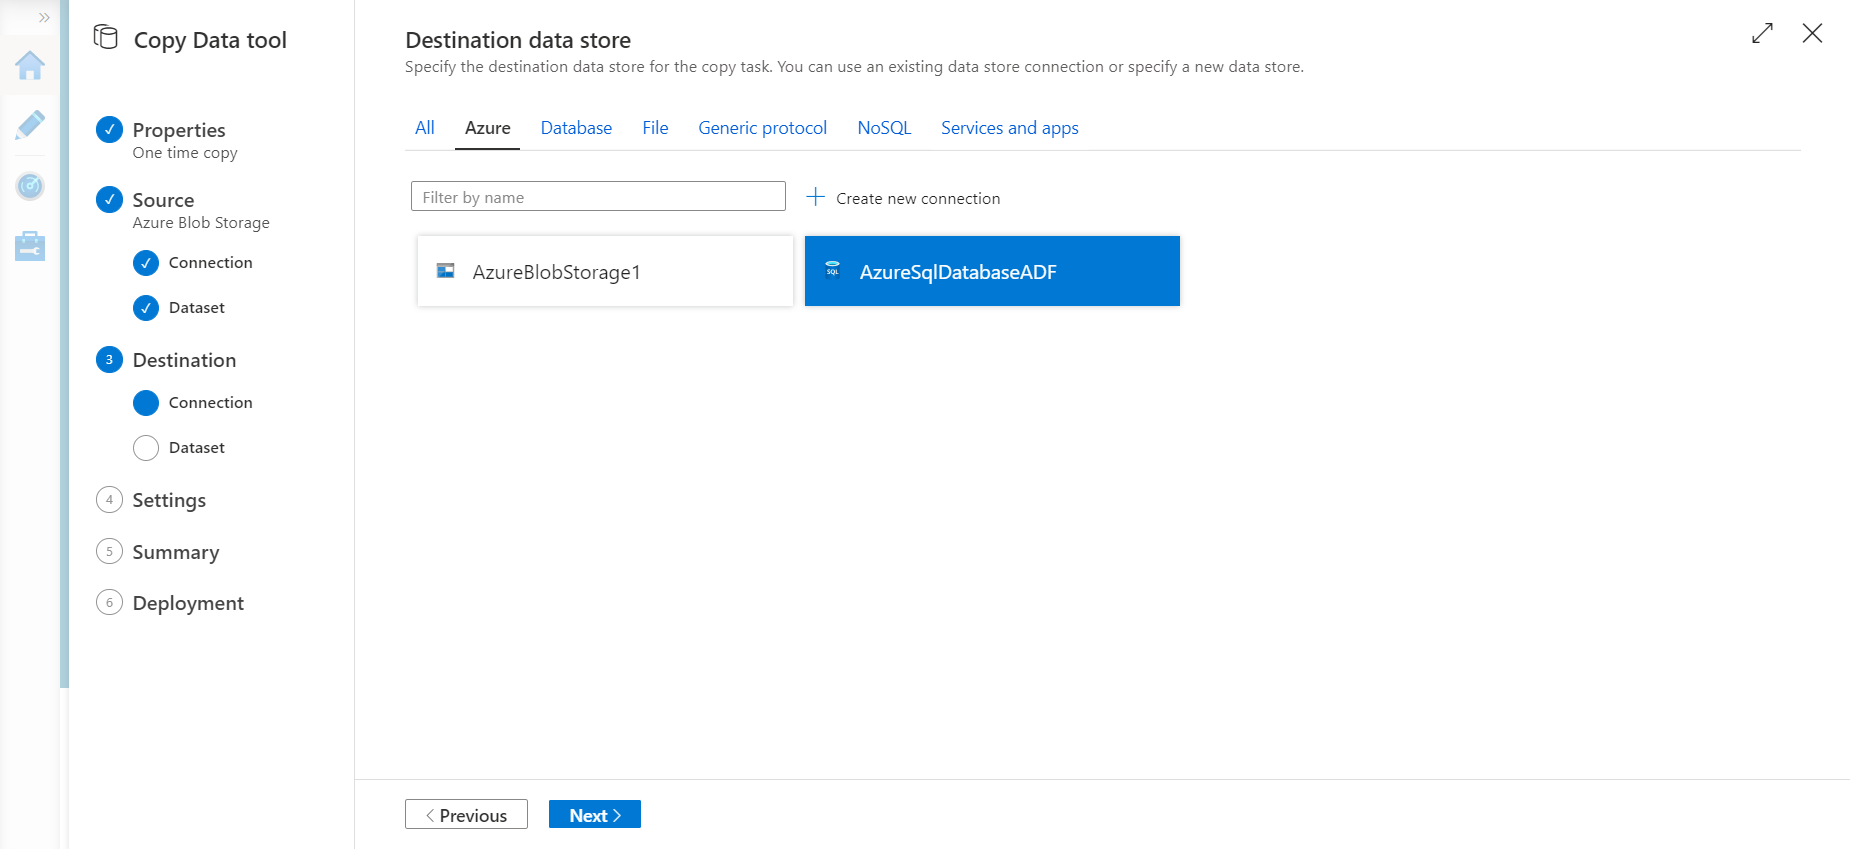
Once created successfully, the sink Linked Service will be listed in the Destination Data stores, as below:
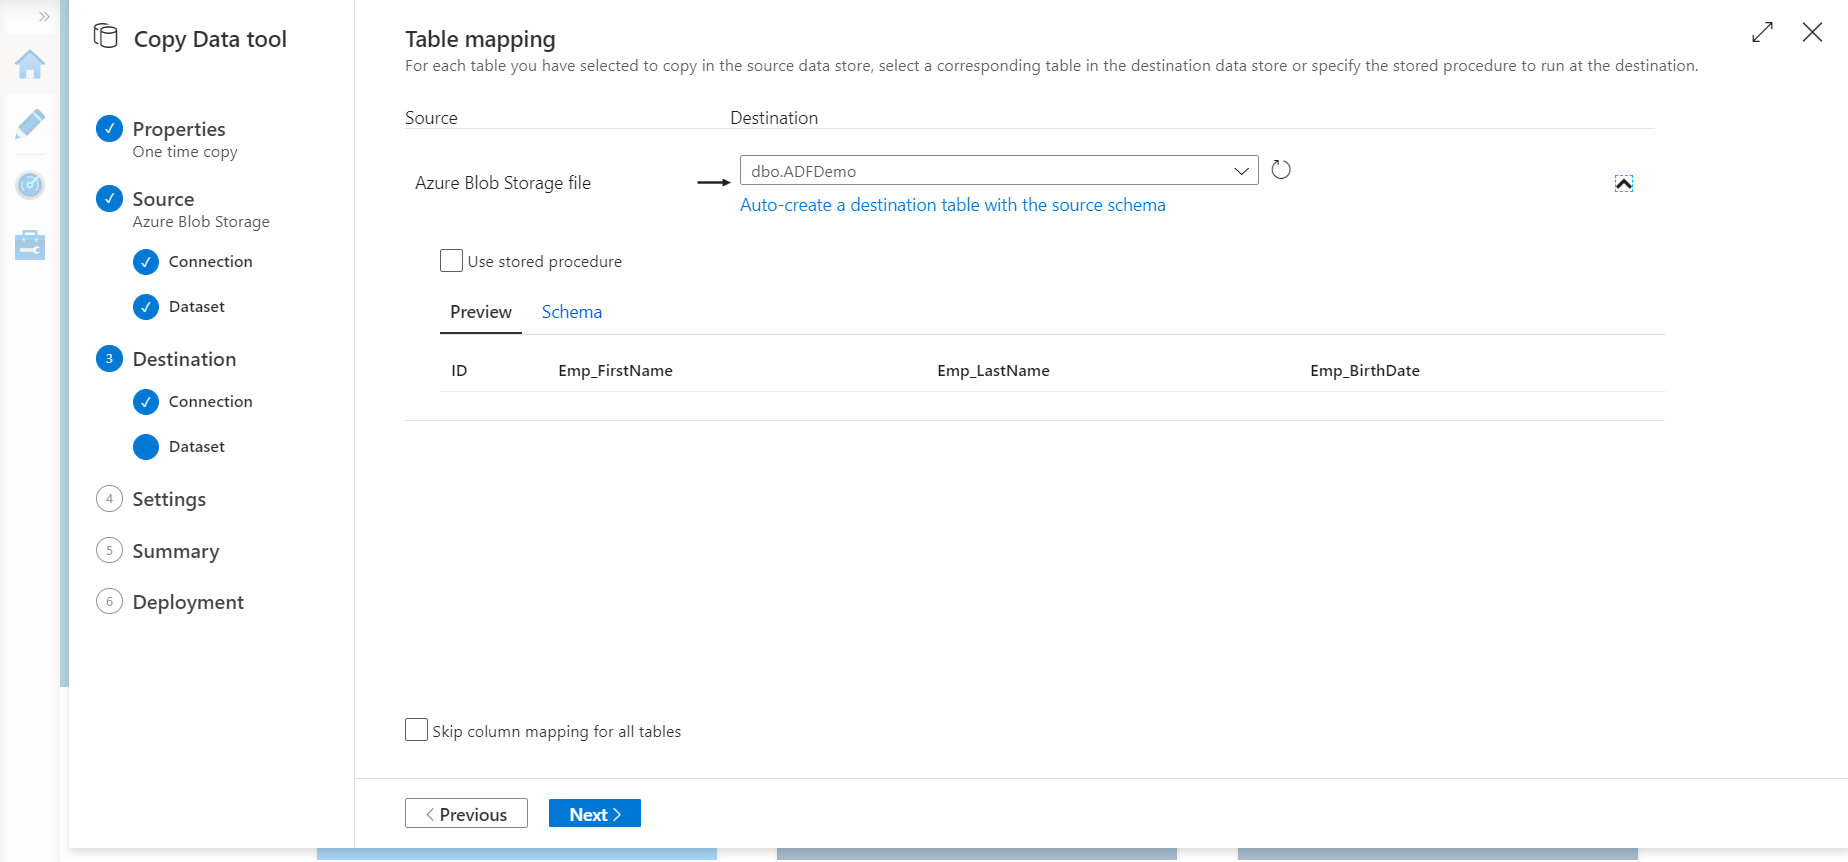
After creating the Linked Service that points to the Sink data store, we need to create the sink dataset, that specifies the target database table, as shown below:
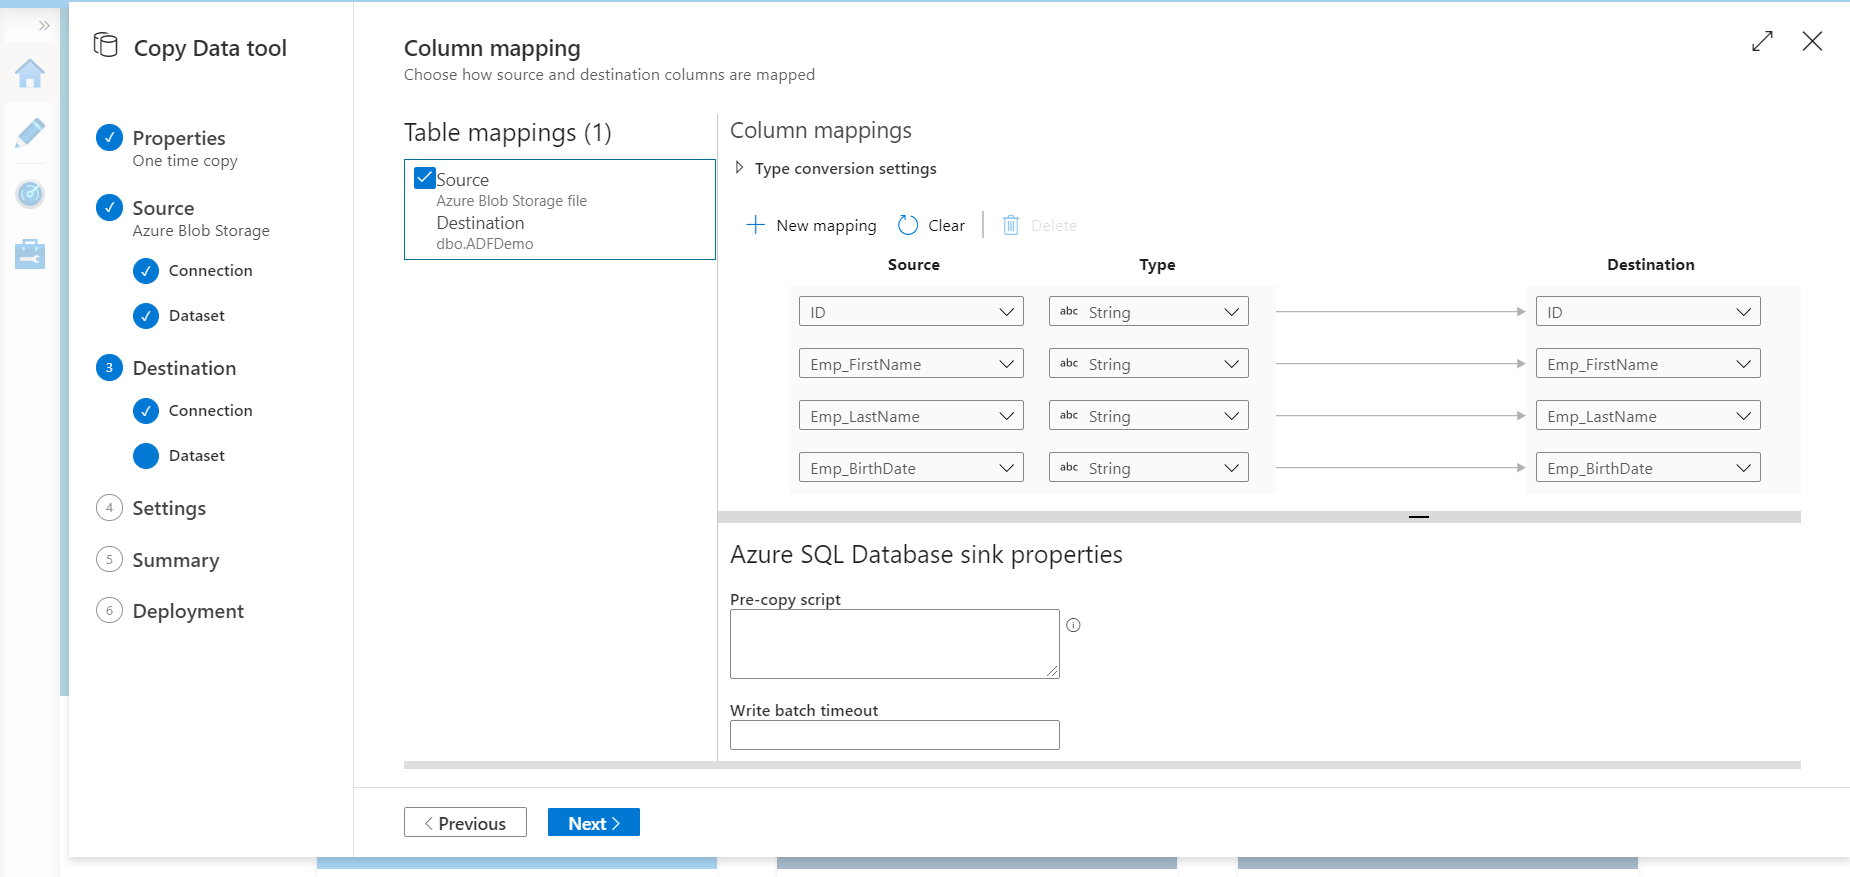
Also, you need to review the schema mapping between the input data file and the sink data table and provide any script that should be executed before copying the data, as shown below:
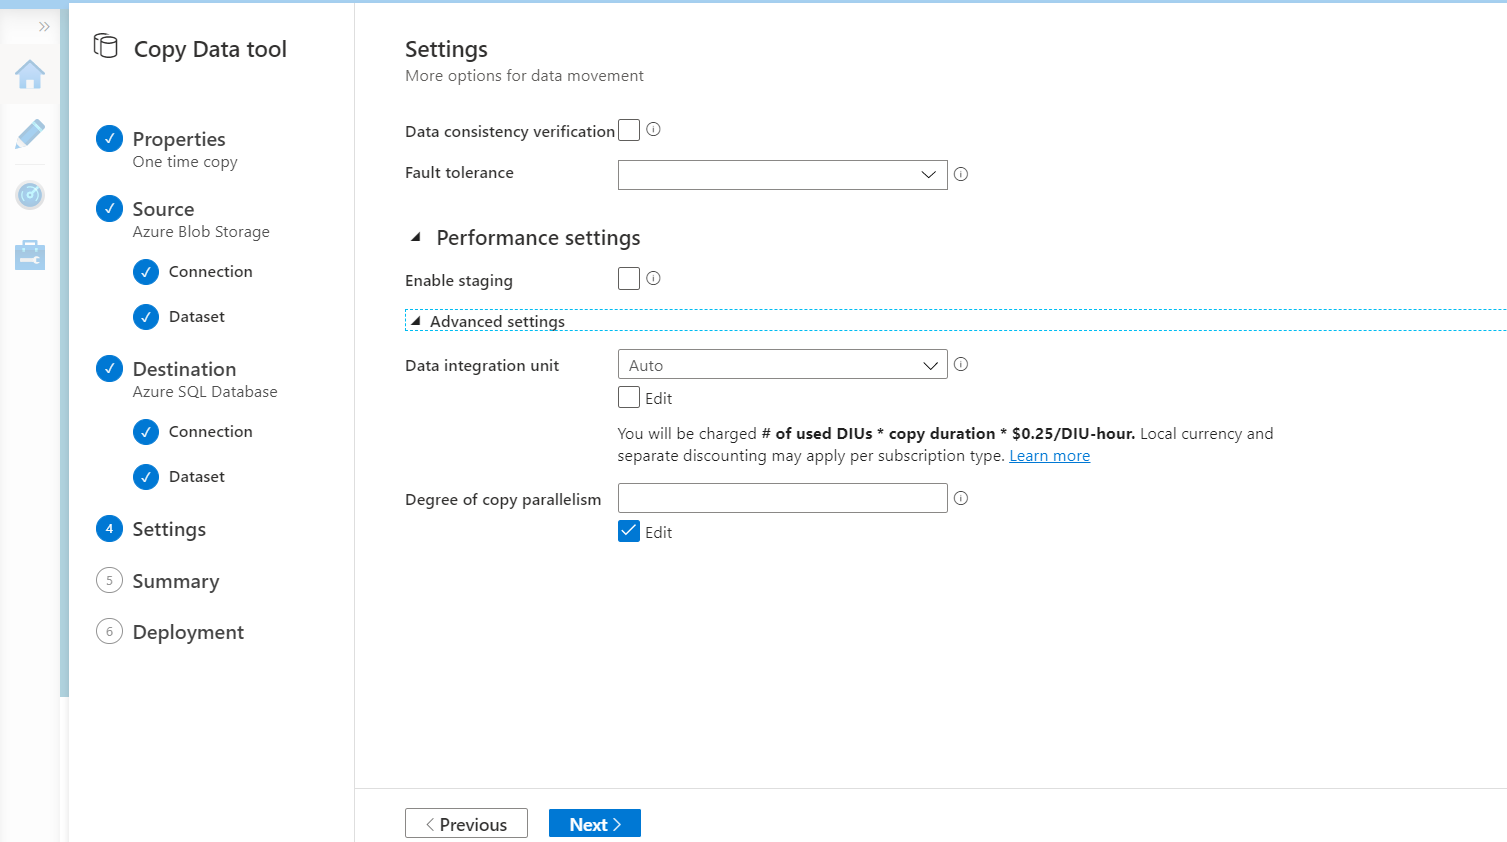
Now we have the Linked Services and Datasets for both the source and sink data stores configured successfully. The next step now is to configure the copy activity settings, such as the performance and fault tolerance settings, as below:
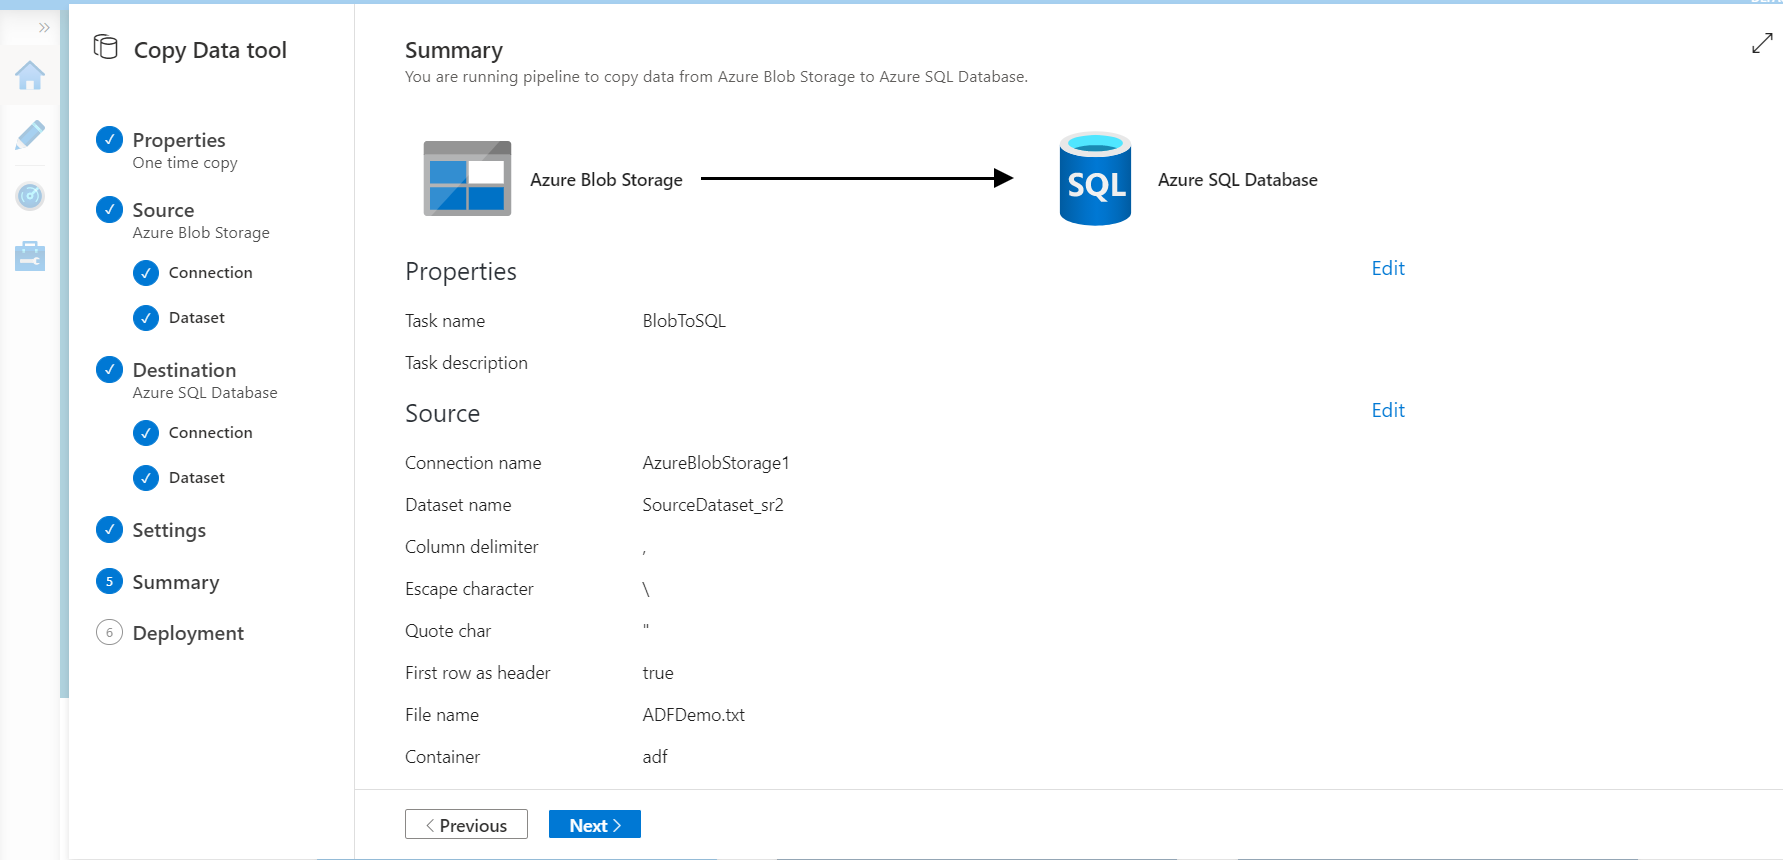
From the Summary window, review all the copy process configurations, with the ability to edit it from the Summary window before running the pipeline, as shown below:
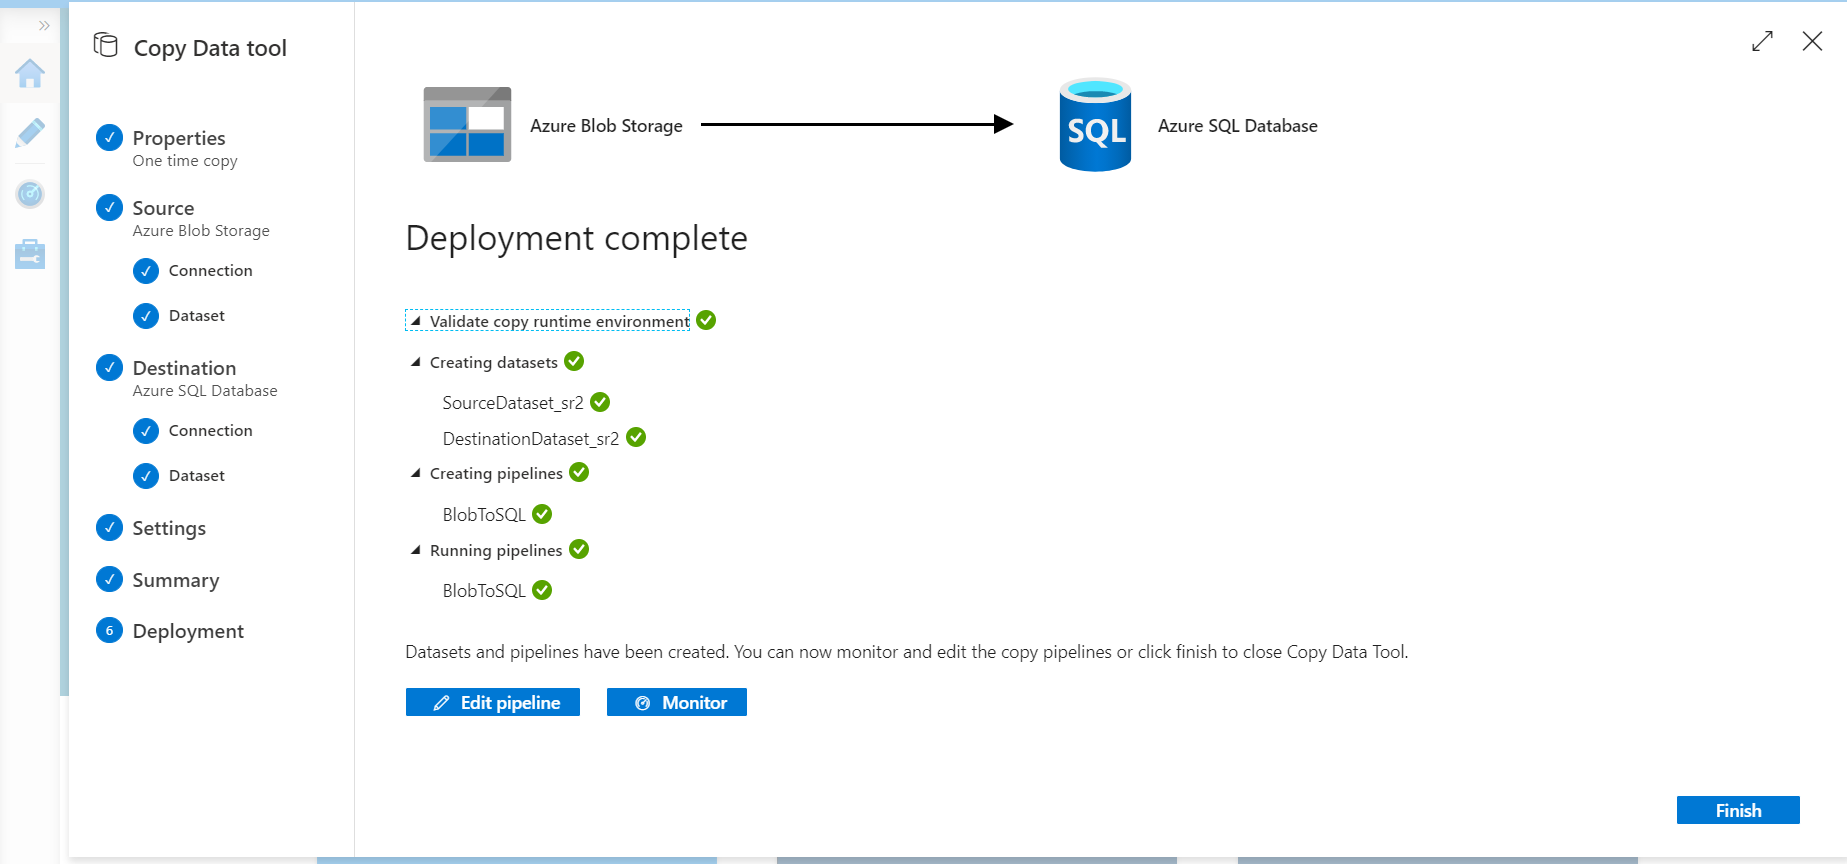
Now we have reviewed all the pipeline settings and it is ready for deployment and execution. The Data Factory will create all pipeline components then execute the pipeline. Executing the pipeline means executing the copy activity that will copy the data from the input file that is stored in the Azure Blob Storage and write it to the Azure SQL Database table, as shown below:
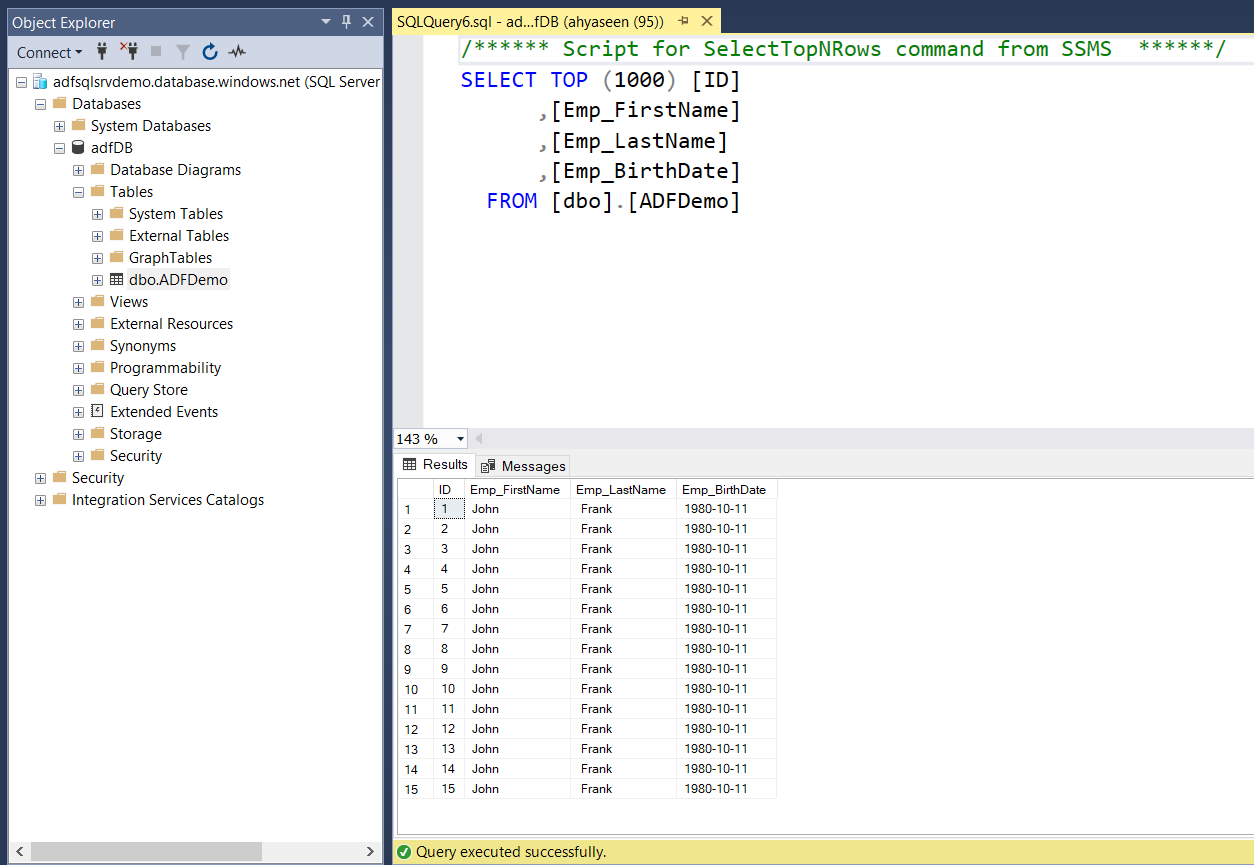
To verify that the data is copied to the Azure SQL Database table, connect to the Azure SQL Database using the SSMS then run a select statement to read the table data, and you will see that the data is copied successfully, as shown below:
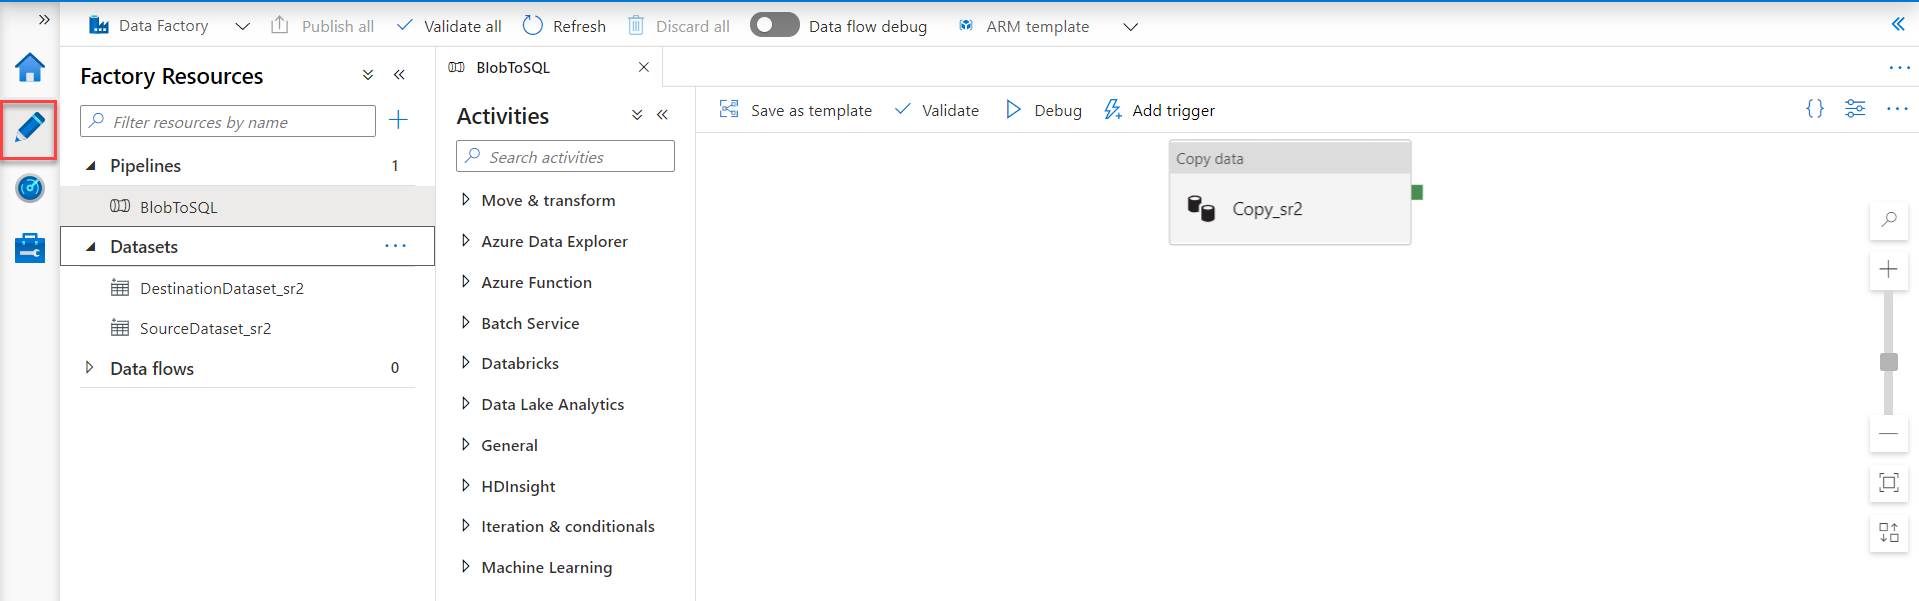
Let us see where the different pipeline components are created in the Azure Data Factory. Click on the Author button of the Data Factory and review the available pipelines and datasets, where you can see that the pipeline that is created using the Copy Data tool is saved in the Data Factory pipelines list and the source and destination datasets are available under the Datasets list. Clicking on the created pipeline, you will see the Copy Activity that is used to copy the data from the source file to the destination table, as shown below:
Clicking on the Monitor button, you can review the execution logs of the created pipeline, including the execution time, duration, and result, as shown below:

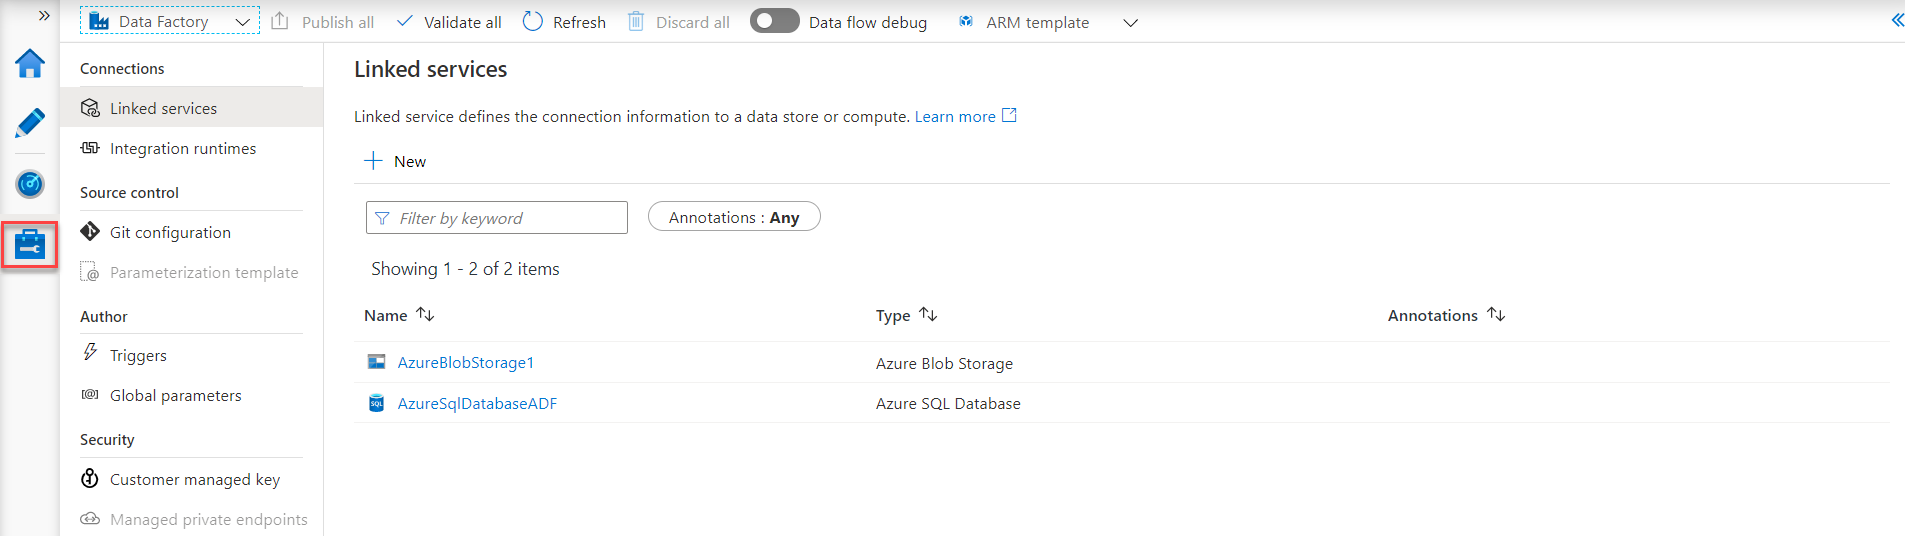
The Linked Services of the Data Factory pipelines can be checked by clicking on the Manage button, allowing you to review all available Linked Services and edit it based on your requirements, as shown below:
Conclusion
In this article, we showed how to copy data between Azure data stores and verify the pipeline components and results. In the next article, we will see how to copy data from an On-premises data store to an Azure data store using Azure Data Factory. Stay tuned!
Table of contents

He is a Microsoft Certified Solution Expert in Data Management and Analytics, Microsoft Certified Solution Associate in SQL Database Administration and Development, Azure Developer Associate and Microsoft Certified Trainer.
Also, he is contributing with his SQL tips in many blogs.
View all posts by Ahmad Yaseen
- Azure Data Factory Interview Questions and Answers - February 11, 2021
- How to monitor Azure Data Factory - January 15, 2021
- Using Source Control in Azure Data Factory - January 12, 2021