
This article gives an insight into the terms in the Git repository of Azure Data Studio. In the previous articles, we learned the following things:
- Source Control using Git in Azure Data Studio (ADS)
- Introduction, overview, installation, and integration of Git in ADS
- Initiate the repository, commit changes, and view timeline.
- Integrating Azure Data Studio with Git and GitHub
- Comparison of Git and GitHub repositories
- Create GitHub repository, Integrate GitHub and Git using Azure Data Studio
- Bidirectional commit
- View script changes
As you know, Git provides a version control system to track changes in your scripts. It is a shared repository in which team members can view, modify, and commit their changes. It is useful to know the components of Git repositories.
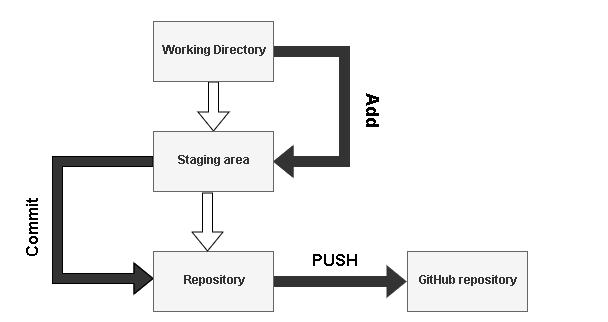
Git repositories components and workflow
It has three main components – Working directory, staging area, and local repository. In the below screenshot, it shows all changes move from the Working directory -> Staging area-> Local repository.
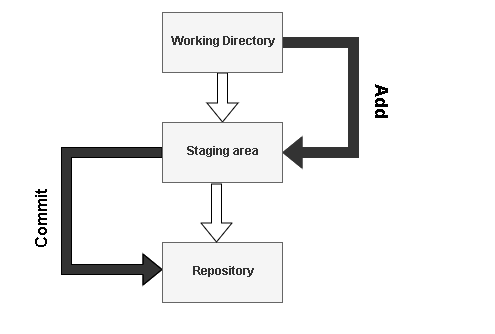
Let’s explore these areas in detail.
The Working directory or tree
It is the area where our scripts exist. In Git, we can also call it an untracked area. It means that if you make any changes in your script, Git marks them in the Working tree but do not explicitly save it. You may lose your changes at this point because Git is not tracking your changes. We need to instruct Git to track and save these changes.
In the Azure Data Studio, open the integrated terminal for PowerShell commands. In this terminal, run the command Git Status.
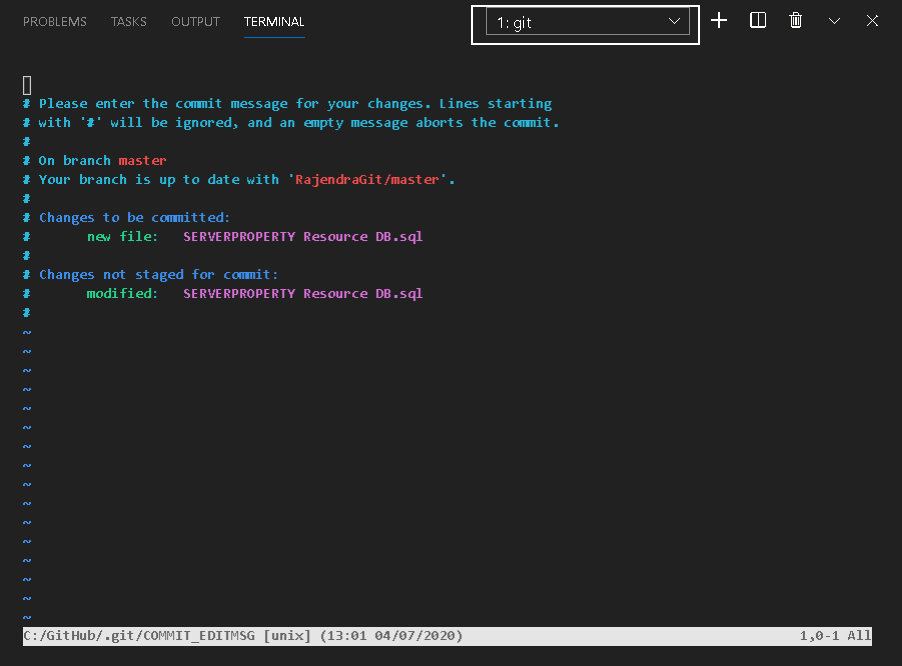
In the output, you get a message nothing to commit, working tree clean.
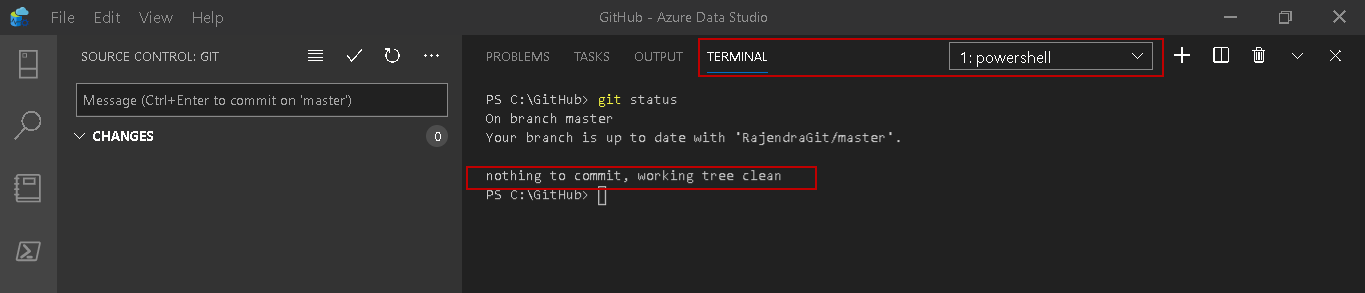
It shows that Git does not have any tracked file that is being modified. It also tells you about the Git branch. By default, Git uses the master branch.
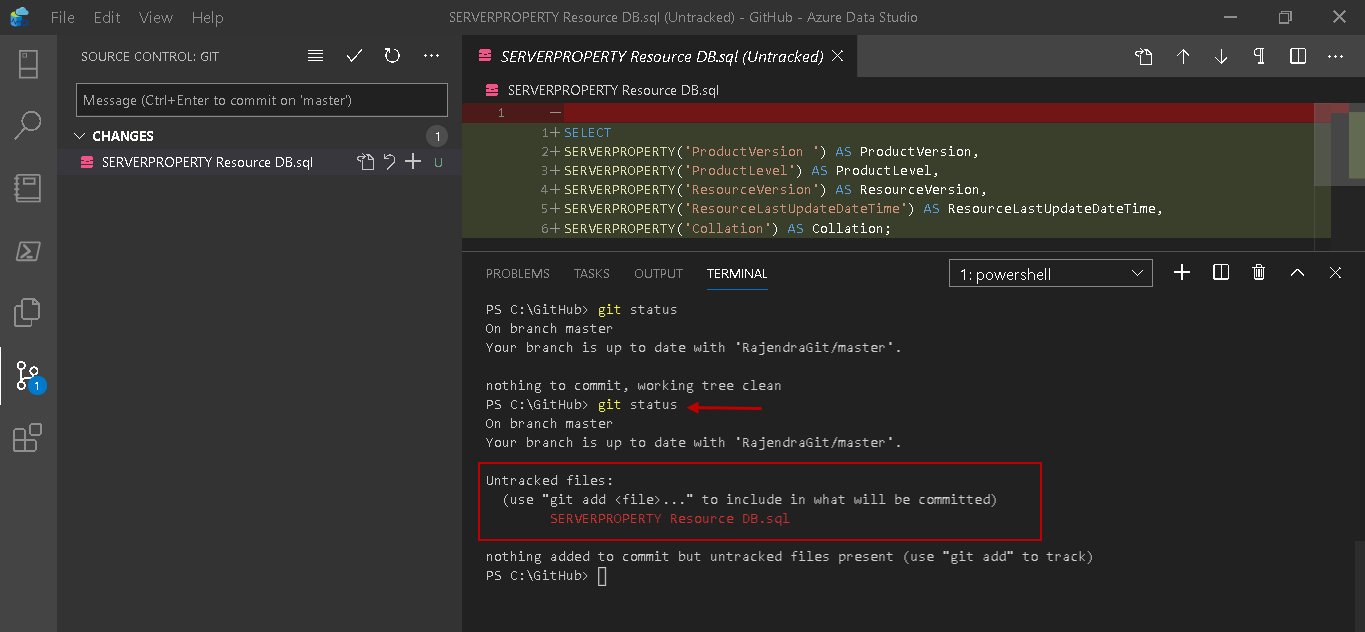
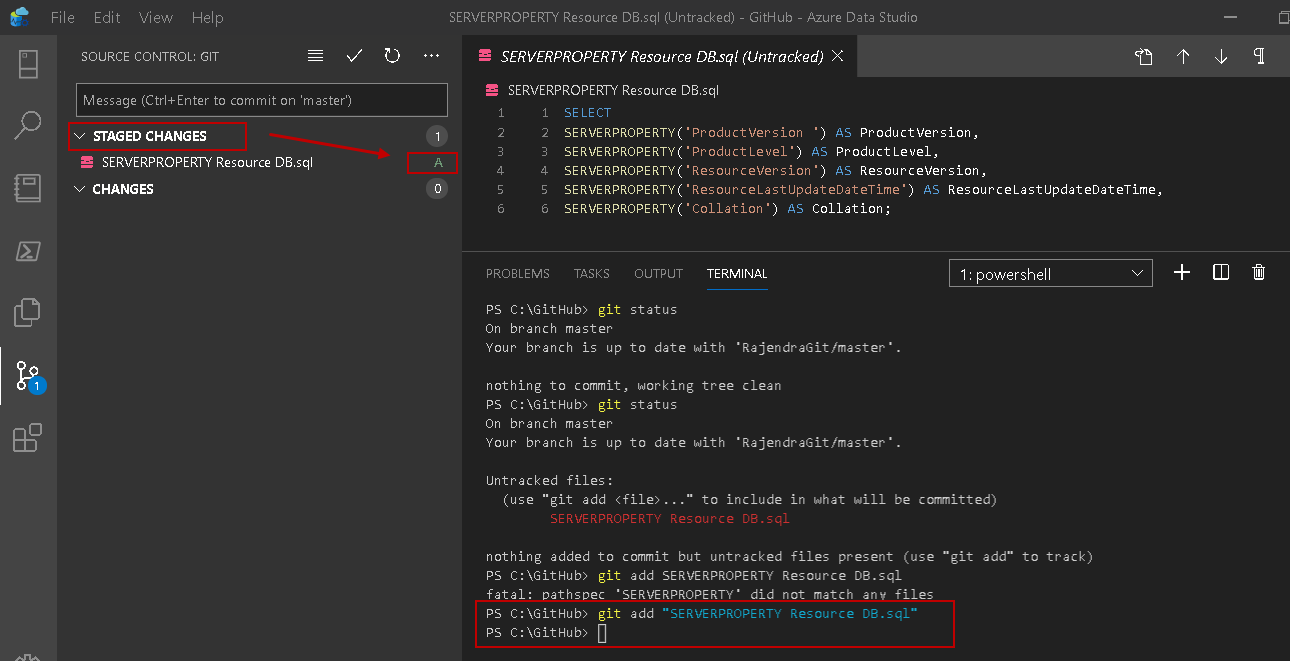
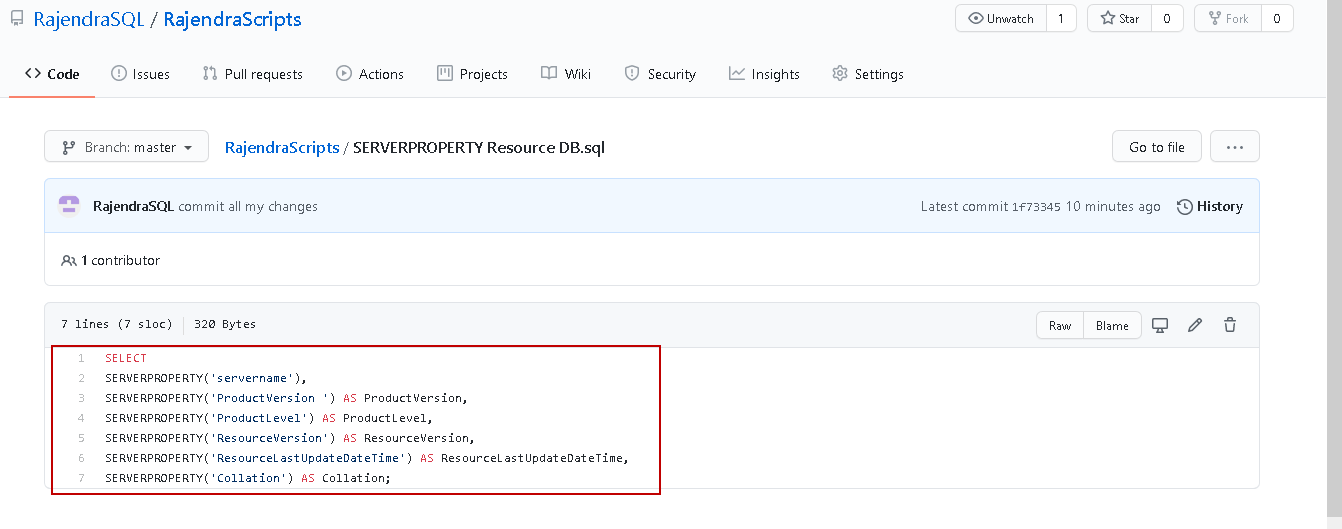
Now, add a new script in the repository folder we initiated earlier. Rerun the git status command. It is a new file that does not exist before the last commit. It is an untracked file, so in the output of git status, it gives you information for the untracked files as well. Git does not automatically include in the commit snapshots.
Staging area
Git starts tracking the files in the staging area. As per the above screenshot, it instructs you to run the Git add command to move the file from the working tree to the staging area. Git does not track any additional changes to these files after you added into the staging area. It requires an explicit notice to Git.
Let’s add the file into the staging area using the below command.
git add “filename”
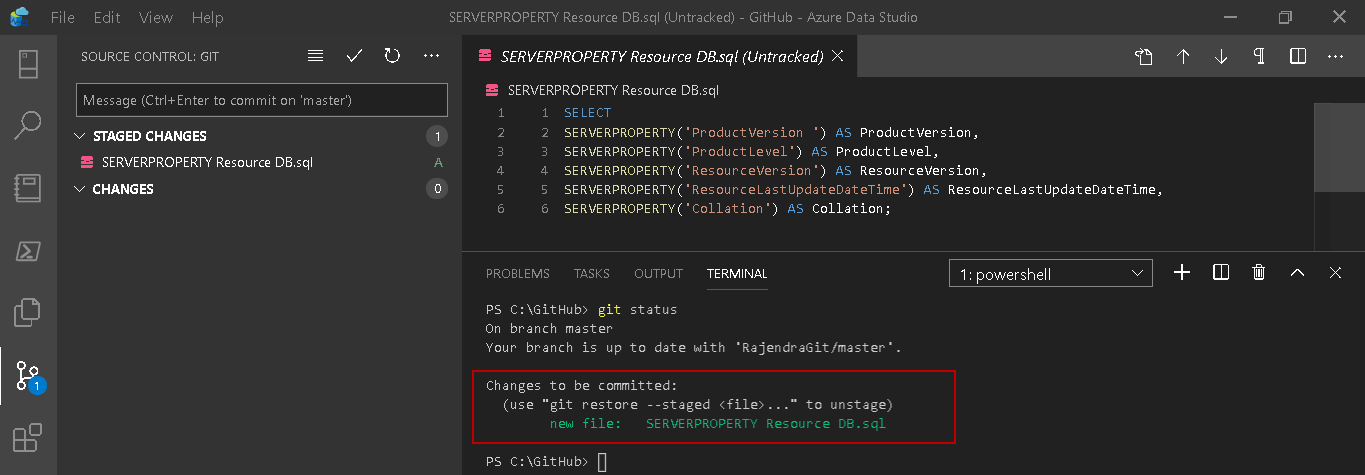
You need to specify the file name in double-quotes, or else it won’t add the files. Once you add the file, notice that Git shows the file under the staged changes.
Hover the mouse over icon A, and you get index added message in the pop-up.

Rerun the git status command. It shows the changes that need to be committed. Git now tracks the file in the staged area.
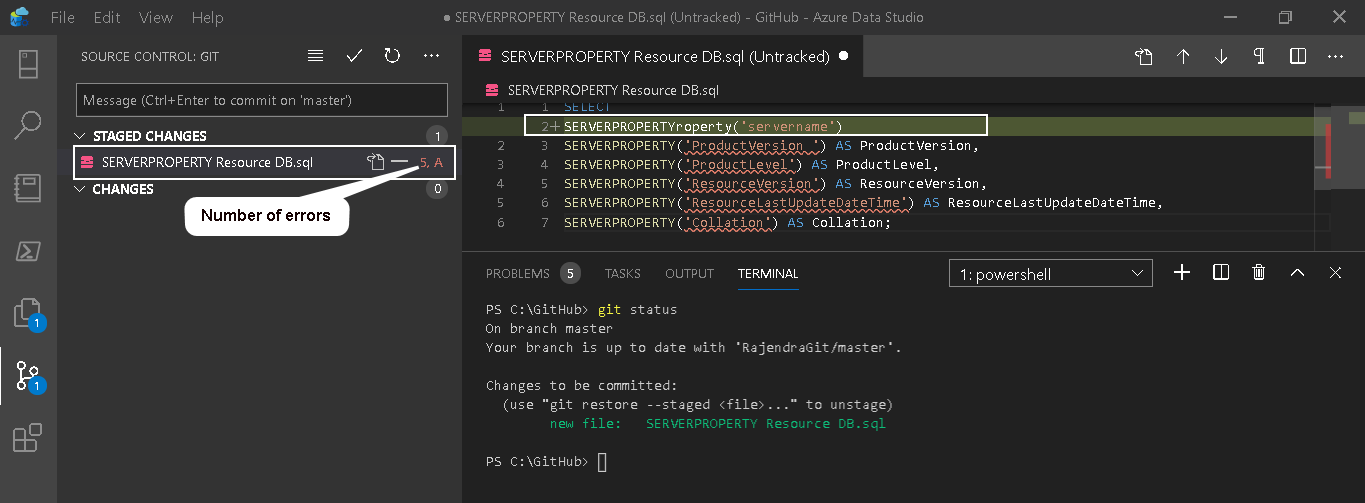
Let’s modify this file that is in the staging area but not yet committed. I added the highlighted line and made some errors in this script knowingly. It immediately shows the number of errors in this file.
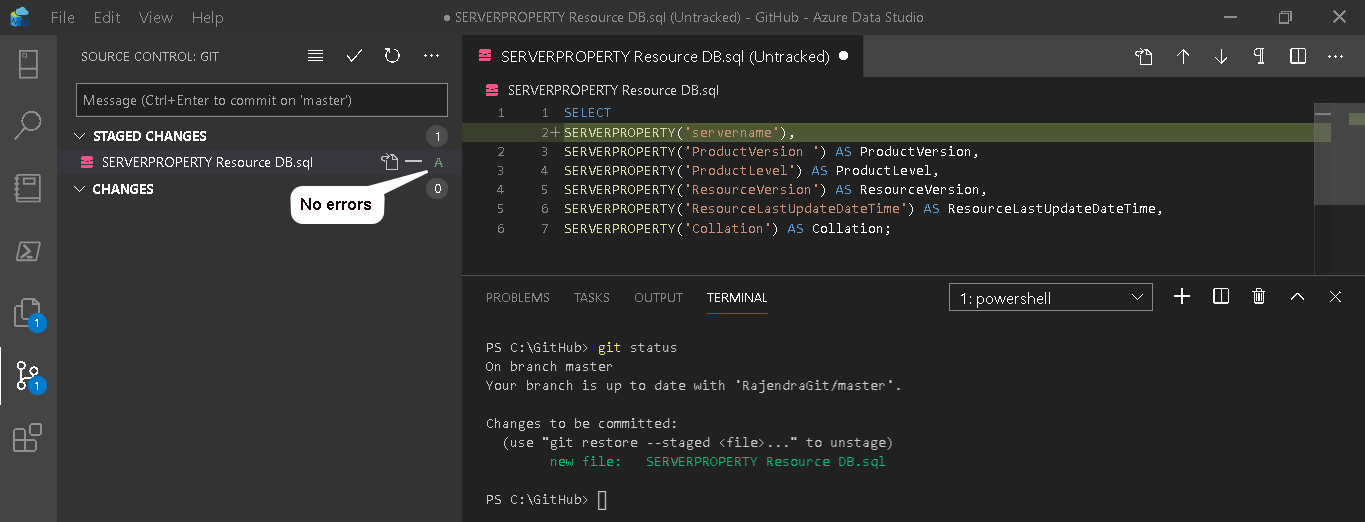
Modify the script to remove any syntax errors. You do not see the number of errors now in the below screenshot.
Save your changes and check the output of git status. You see two entries for the same file.
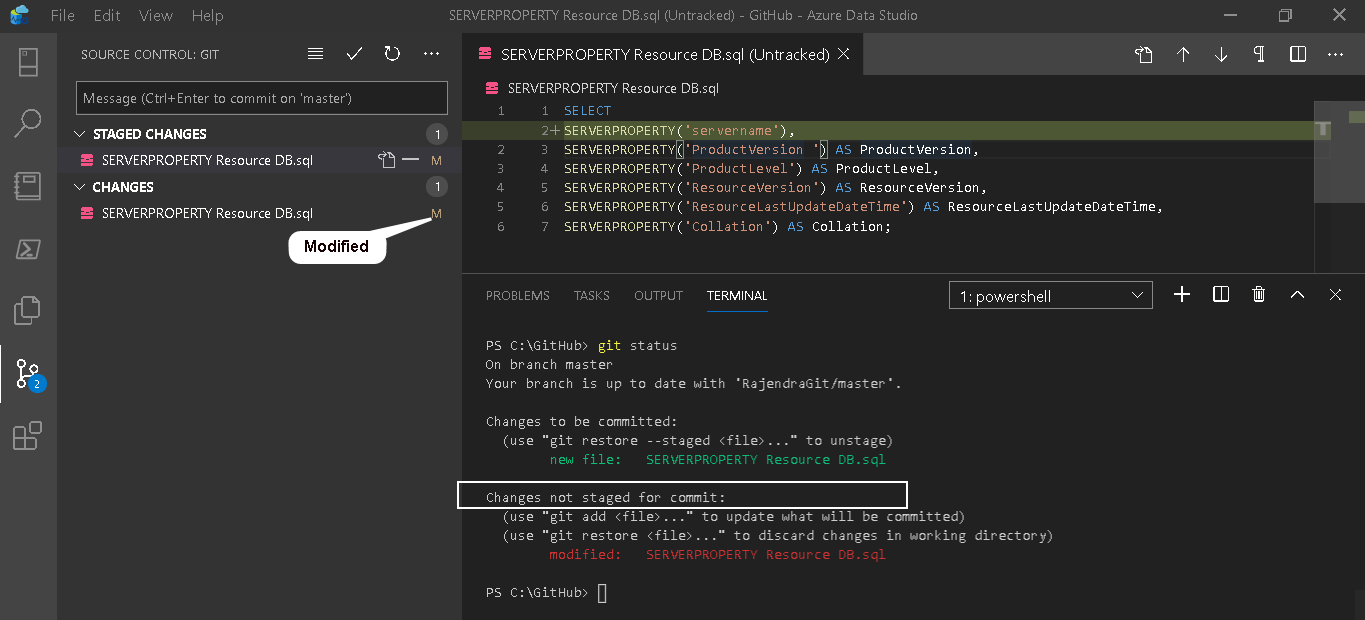
Changes to be committed:
It is the file version we moved from the working tree to the staged area.

Changes not staged for commit
We modified the file in the staged area. Git does not track the changes in the staged area until we explicitly ask Git to do so.

We can run again the Git add command to move the changes as well from the working tree to the staged area.
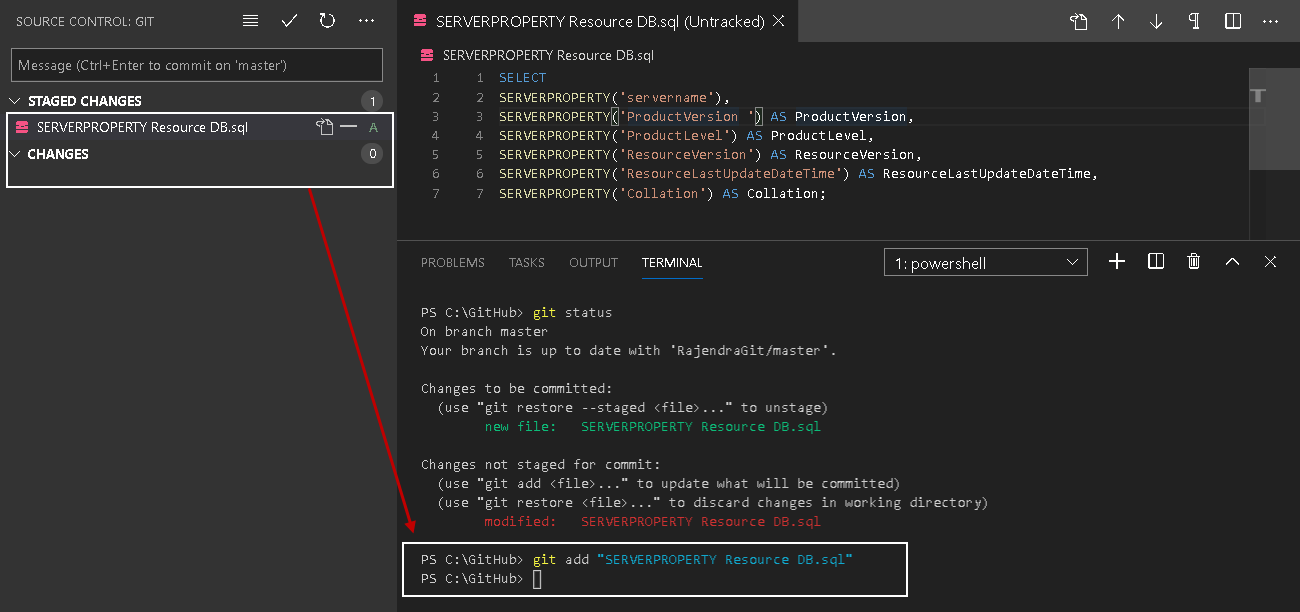
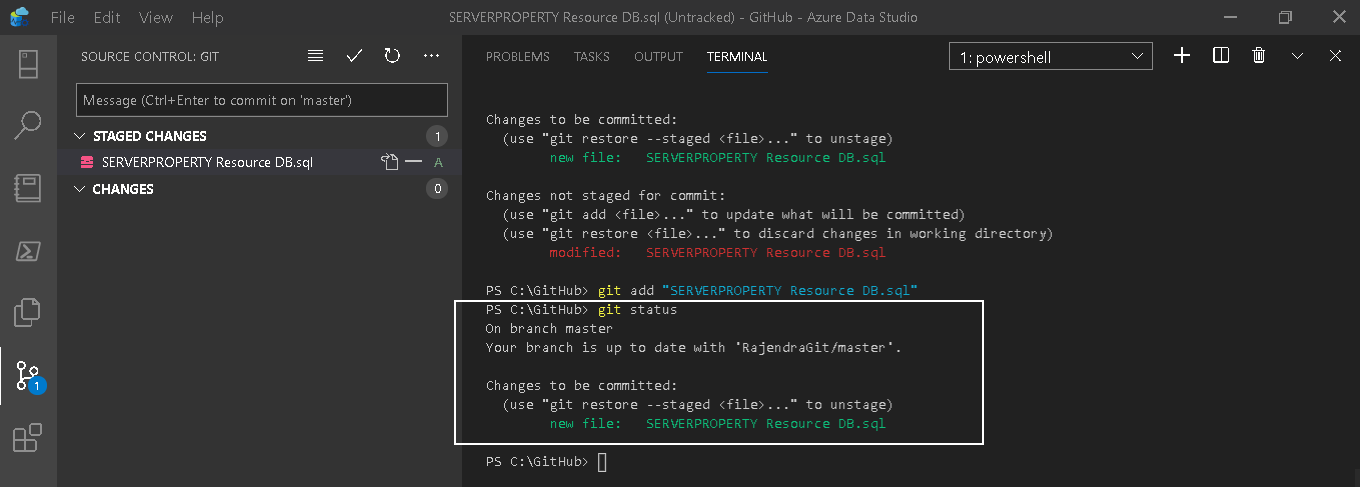
Now, in the git status command output, you get the only row for the changes to be committed. It is the tracked version of the script.
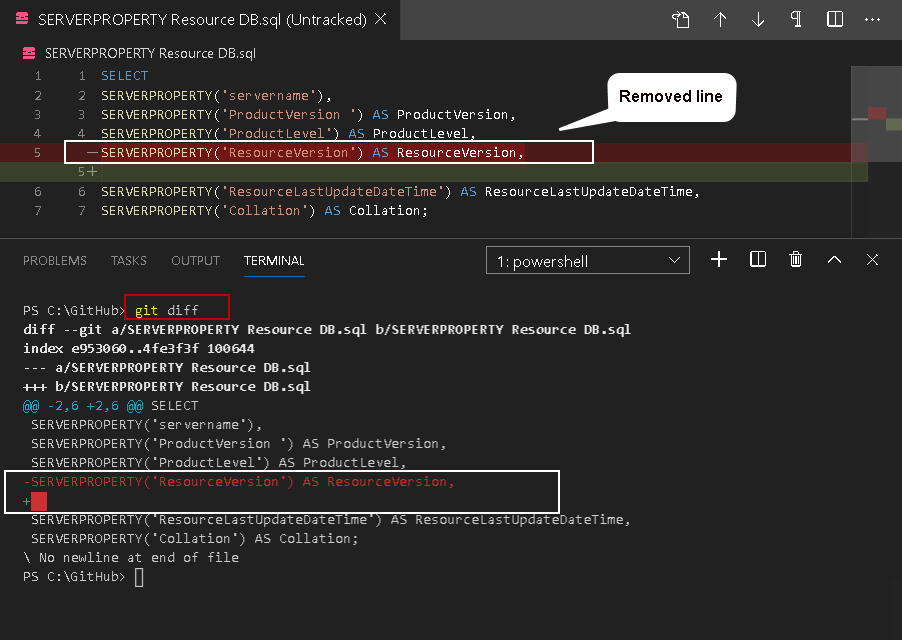
View the changes that are not staged
Suppose we want to view the changes that are not staged yet. We performed the changes in the working tree area.
For this purpose, we can use command git diff without any arguments. Git diff command compares the working directory and staging area files. In the below screenshot, we removed a line from the script in the working area. The staged copy of this file has this line added. Therefore, we get the difference in these scripts as the changes not staged.
Similarly, we can use argument –staged in the git diff command to view staged changes that will go in the next commit.

The Local Repository
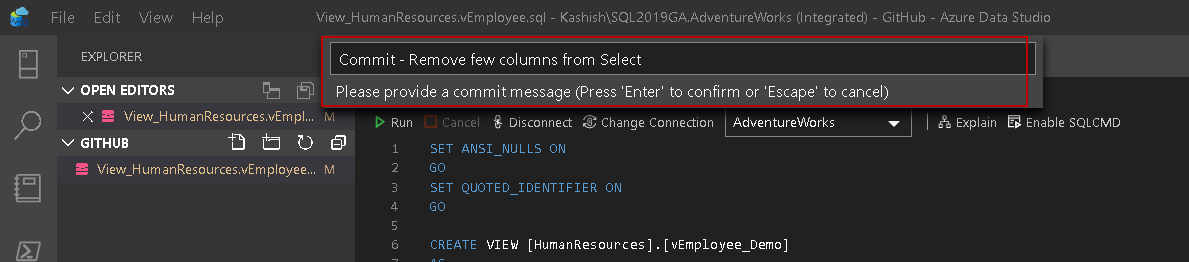
The local repository contains the version of the file after you performed a commit operation. It is the final version that is saved in the Git. You can move the items from the staging area to the local repository using the git commit command. In the Azure Data Studio, you can also use Command Palette -> Git commit for this purpose.
This command gathers all changes in the staging area tracked) and puts them in the local repository. A commit command is similar to a Checkpoint command in SQL Server. Once it moved the changes to the local repository, you do not see any item in the staging area.
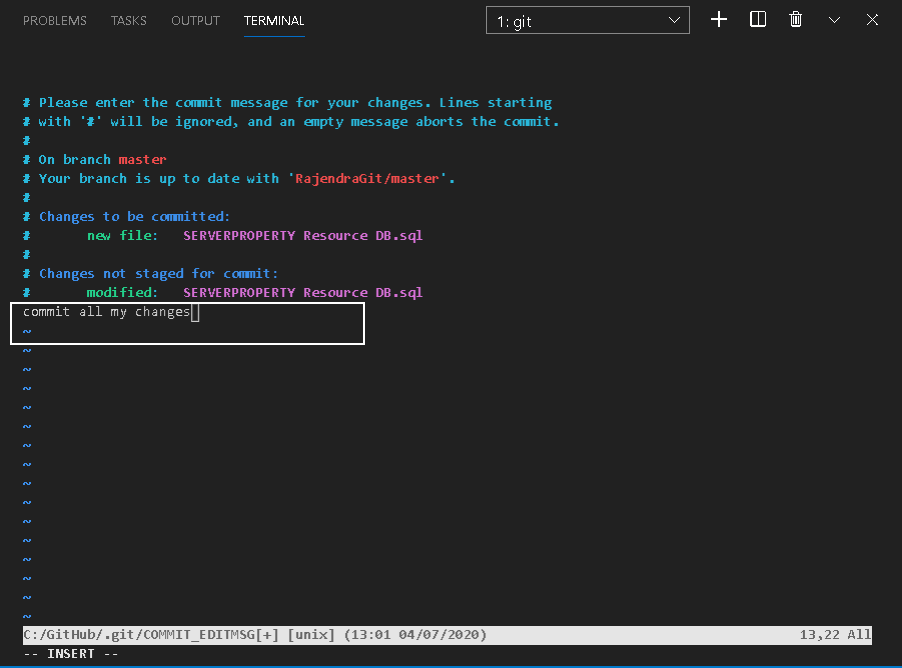
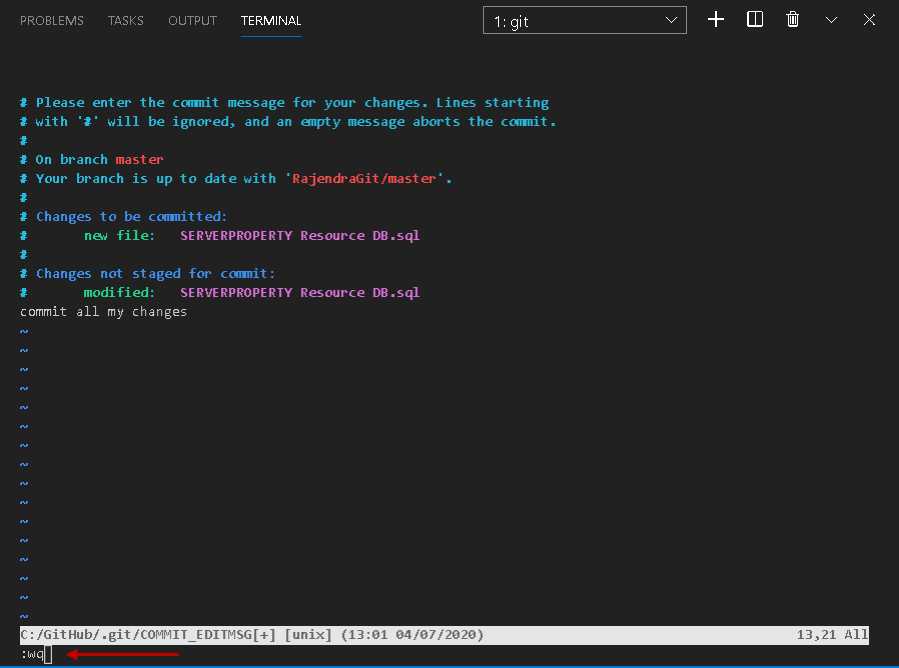
Execute the git command in the terminal, and it opens the following window. You need to enter the commit message in this window.
To insert the commit message, press I and enter. It changes the prompt to Insert, as shown below.
Use arrow keys to take the cursor to a specific position and enter your commit message.
To save this file, press ESC followed by wq. WQ stands for write and quit.
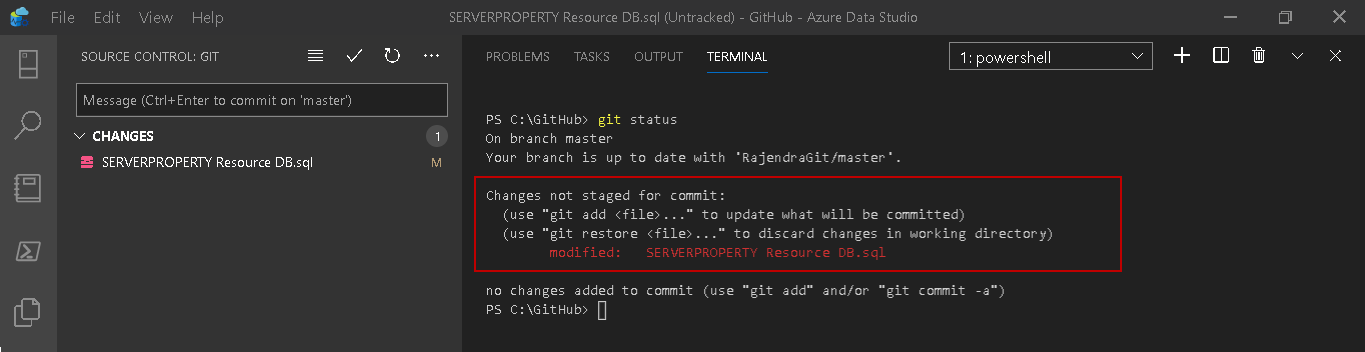
After the commit, check the output of the git status command. It says that your branch is ahead of ‘Rajendra/master’ by 1 commit.
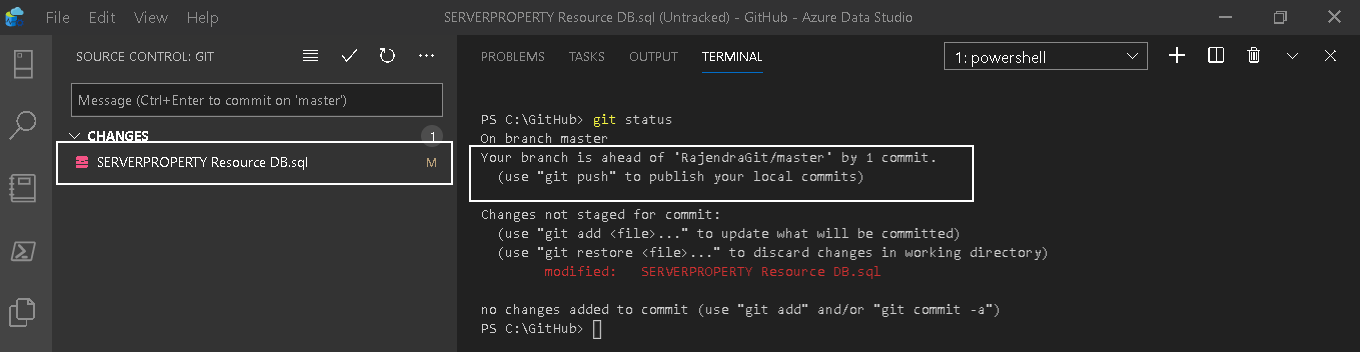
In the previous article, we integrated the GitHub cloud-based repository without the Git repository in the Azure data studio. Git commit performs the commit in the local repository. It does not sync it with the GitHub repository.
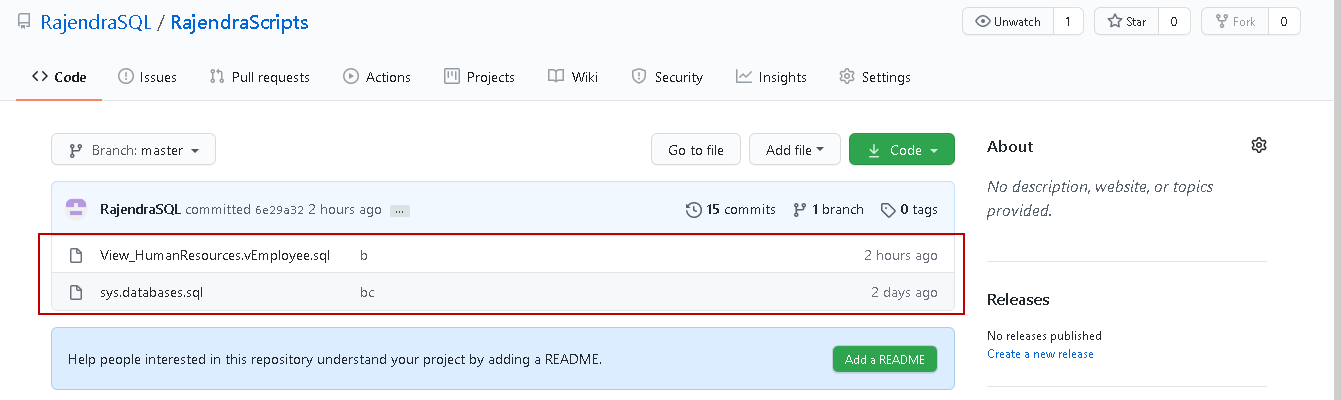
To verify it, open the GitHub repository and check the actual items. In this article, we added a new file, “SERVERPROPERTY Resource DB.sql”, but it is not available in the GitHub as shown below.
We have already linked Git repository with GitHub, but it is not in sync; that’s why we get the message – your branch is ahead by 1 commit.
We can either use Azure Data Studio command palette – > Git Sync or use the command git push for it. It compares the Git local repository and GitHub repository and starts synchronization. It does not take sync any changes from the Git working tree or stage area.
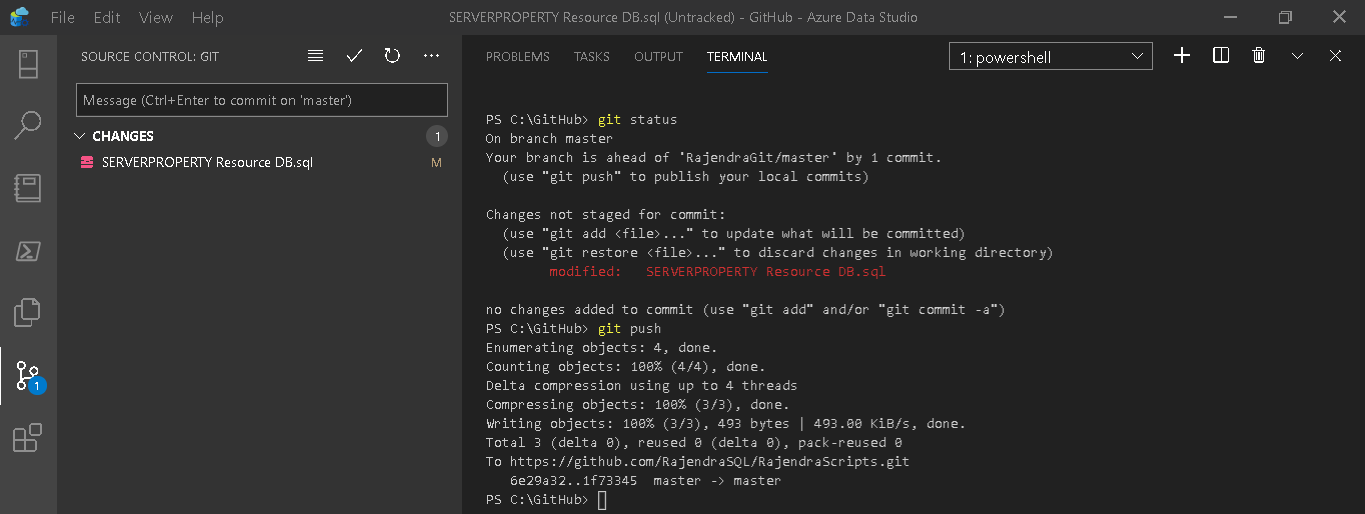
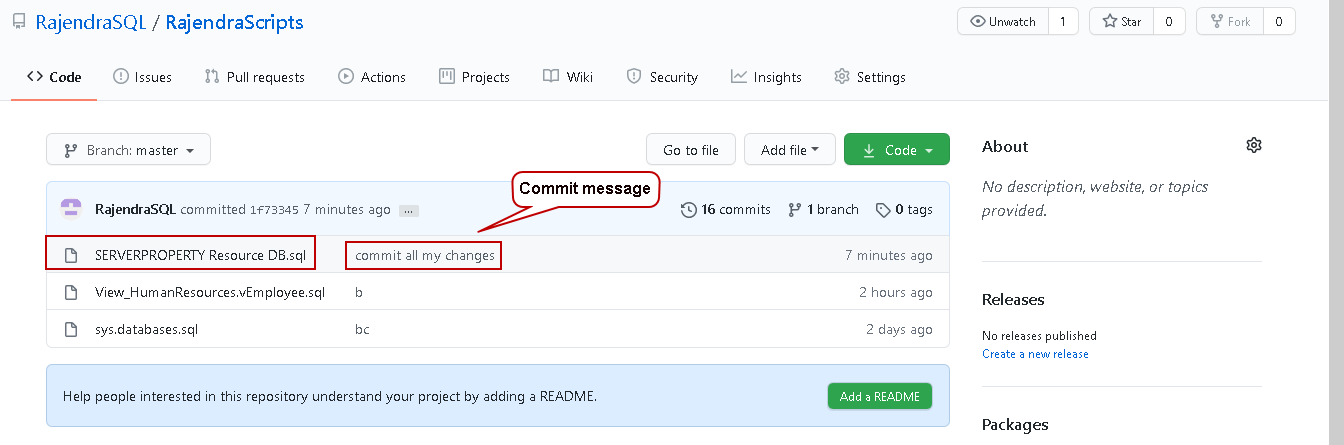
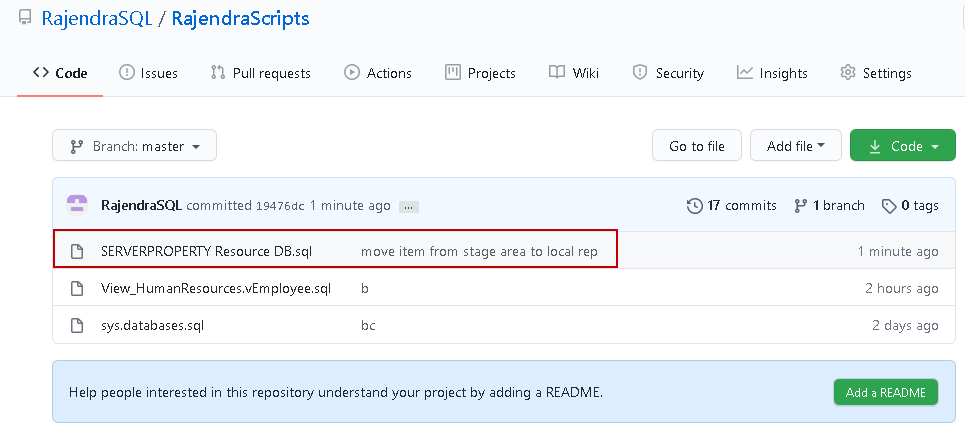
Refresh the GitHub web browser, and you get the additional file that we used in this article. It also shows the commit message we inserted earlier.
Click on the file name and view its content.
Let’s go back to the Azure Data Studio terminal and run git status. It still shows a change not staged for commit. Previously, we removed a line in the working tree but did not move the change to the staged area. It is still in the working tree, although we performed the git commit activity.
To commit this change, do the following steps
- Run a git add “filename” command
- Run a git commit command and specify a commit message
- Run a git push command to sync changes with the GitHub repository
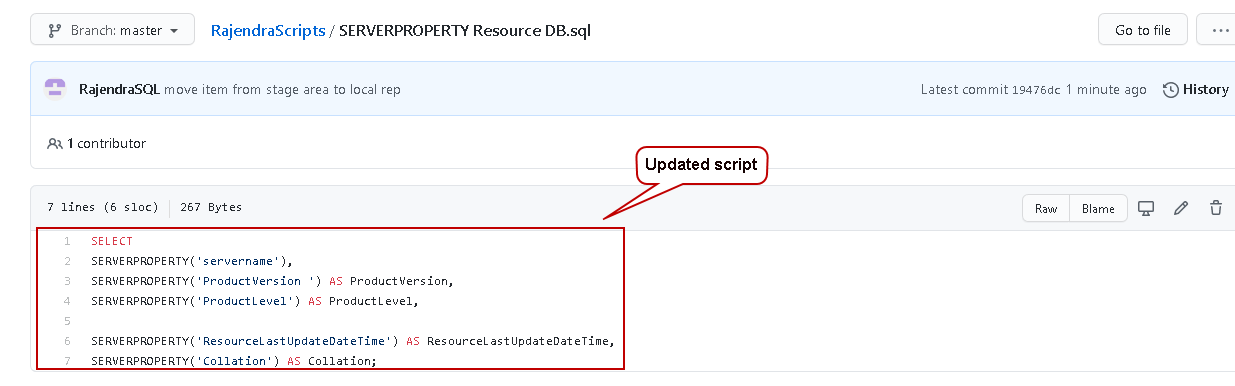
Now, you can see the updated commit message in GitHub.
The script in GitHub is also modified to reflect the last commit.
Now, in the git status, it shows the message – nothing to commit, working tree clean.

We completed the cycle of moving the changes from Working tree-> staged area-> local repository -> GitHub

Conclusion
In this article, we explored the useful components of Git – Working tree, Staging area, and repository. We learned the lifecycle of items moving through these components and synchronization with GitHub using Git commands. I hope it gives you get a good understanding of git integration in Azure Data Studio. Stay tuned to learn more about Git in my upcoming articles.
Table of contents
| The SQL Server Assessment Extension for Azure Data Studio |
| Source Control using Git in Azure Data Studio (ADS) |
| Integrating Azure Data Studio with Git and GitHub |
| Working with Git components in Azure Data Studio |
| Explore branches in Git Source Control |

I am the author of the book "DP-300 Administering Relational Database on Microsoft Azure". I published more than 650 technical articles on MSSQLTips, SQLShack, Quest, CodingSight, and SeveralNines.
I am the creator of one of the biggest free online collections of articles on a single topic, with his 50-part series on SQL Server Always On Availability Groups.
Based on my contribution to the SQL Server community, I have been recognized as the prestigious Best Author of the Year continuously in 2019, 2020, and 2021 (2nd Rank) at SQLShack and the MSSQLTIPS champions award in 2020.
Personal Blog: https://www.dbblogger.com
I am always interested in new challenges so if you need consulting help, reach me at rajendra.gupta16@gmail.com
View all posts by Rajendra Gupta
- Understanding PostgreSQL SUBSTRING function - September 21, 2024
- How to install PostgreSQL on Ubuntu - July 13, 2023
- How to use the CROSSTAB function in PostgreSQL - February 17, 2023