
This article discusses the concept of SQL Server backup and the various components required to use the Microsoft Azure Blob storage service as a target for the backup. As we all know, disk and tapes were the default destinations of choice until the evolution of the cloud platform. In addition to this, now we can expand the native functionality of SQL Server backup to cloud storage; the Windows Azure Blob storage. This functionality was added first in SQL Server 2012. In general, backup and restore functionality to and from the cloud are similar to using disk or tape, with very few differences.
SQL Server database Backup to Azure Blob Storage is a process designed to perform almost like a backup device, such as disk or tape. During the backup or restore process, a URL is selected as a “device type” which in turn triggers a VDI (Virtual Backup Device Interface) client process. The process acts as an intermediary agent to send the database backup to the Azure Blob Storage.
In this article we touch base on the following topics:
- Creating an Azure Storage account
- Configuring Storage Container
- Creating a credential for authorization using SSMS and T-SQL
- Using the GUI to Perform a database backup and restore
- Using a T-SQL script to backup and restore the database
- Implementing the backup-and-restore functionality using PowerShell
- And more…
Before we perform the database backup, it’s important to understand the Blob Storage Service and SQL Server key components, and their concepts. To start, let’s do a little prep work to setup Microsoft Azure Create an Azure Storage account. In the first step, we create a storage account at the Azure Portal. Using the Blob Storage Service, we configure the Azure Blob Storage Container.
Next, let’s review the SQL Server components.
- The URL is a unique identifier used for every backup file.
- A SQL Server credential is used for authenticating the resources. The backup and restore process must use this credential to authenticate the blob storage service and its associated containers.
- In the last step, perform the backup to the cloud storage. The steps are almost the same as all the other backups, albeit with a few more configuration options.
Step-by-step instructions to configure Azure Blob Storage
- First, Login to the Azure Portal
-
Locate Storage accounts on the left pane, click Create storage accounts
- This section deals with creating the storage account to be able to opt for the required model which has a direct impact on the cost based on usage.
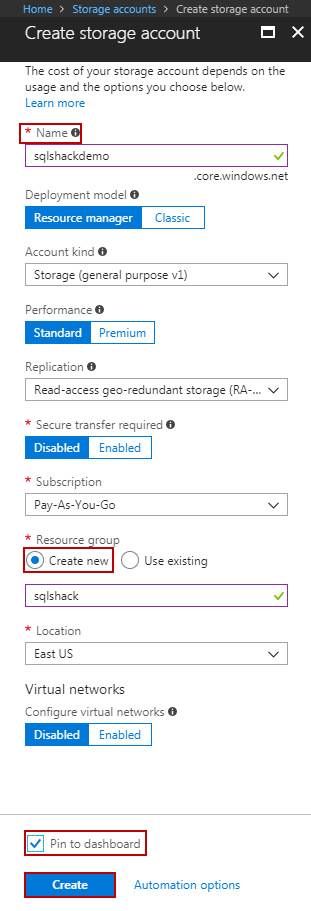
- Name the account; in our example we’ll use sqlshackdemo. The next step is to assign this storage account to a resource group. We have two options here; either use an existing resource group or create a new one. Let’s create a new one for the demonstration and name it as sqlshack.
-
Next, choose the location, depending on where you want to host the storage. (I’ve opted for US-East.) Click on the Create button. Wait a minute or two for the storage account to be created.
The following information is required to create a storage account:- Name: sqlshackdemo; a unique name, all lowercase letters
- In this case, the default setting is used for the Account Kind
- Default Performance setting – Standard
- Default setting – Storage service encryption – Enabled
- Resource group – Create new resource group named sqlshack
- Select Location – East-US is selected
- Check the Pin to dashboard option
- Click on the Create button
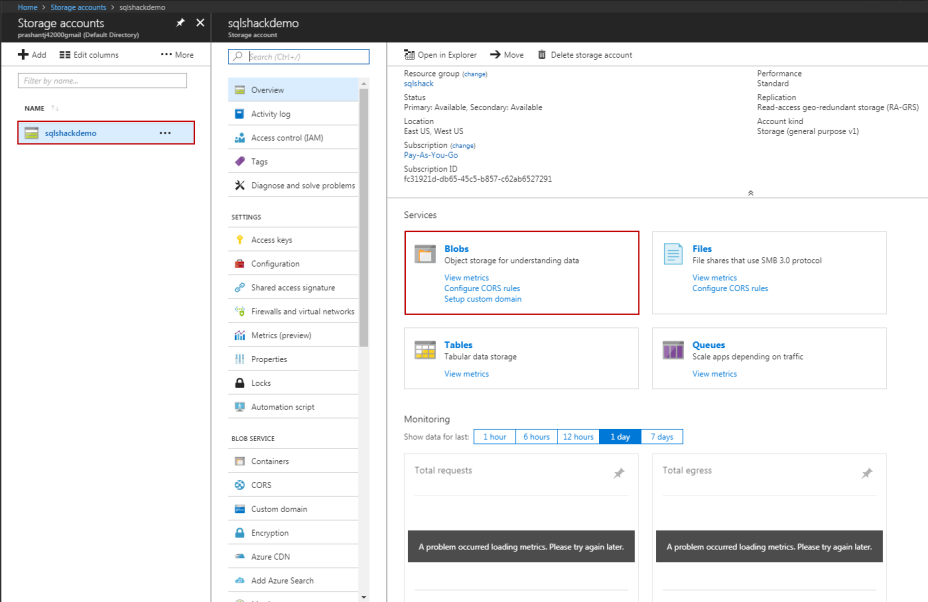
- Once the storage account is created, we’ll need to provision the blob storage. To do this,
- browse the storage account, in the Overview blade, select the option to create a blob storage.
- Click on Blobs. It would open up a new window.
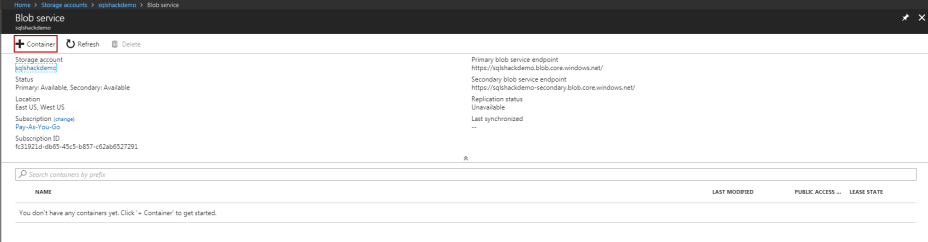
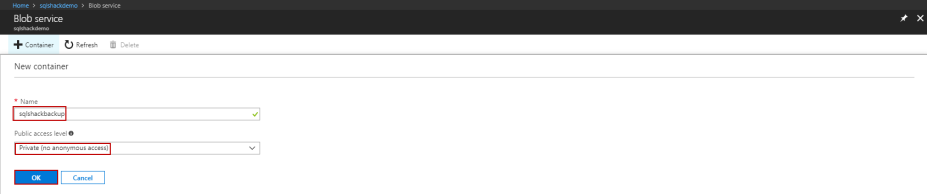
- Click the + container icon to create a new container.
- Name the container; I chose sqlshackbackup. Remember that the name has to be all lowercase letters.
- Select Private as the Access type
- and then click on the Create button.

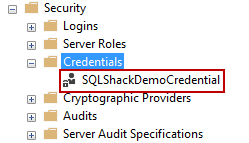
Now, we can go over to SQL Server and start working on creating the credentials that will be used to authenticate into the Azure account. In the New query window, use CREATE CREDENTIAL to create credential.
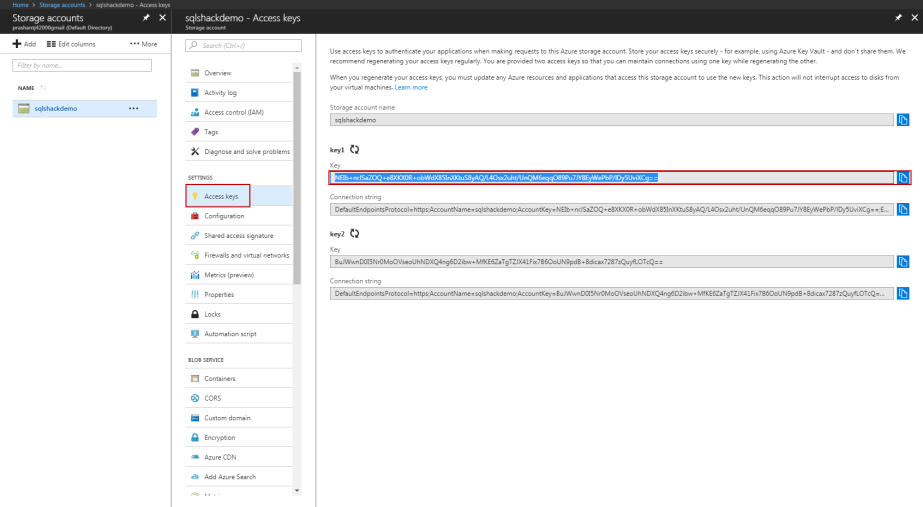
The Identity property is the name of the storage account. In this case, it is sqlshackdemo.
The Access key is the secret key of the storage account. To find the access key, click on Settings and select Access keys in the Storage account blade. To the right, you should fine key1, which is the access key, select the Copy to clipboard icon. Save this key information somewhere safe. The syntax to create to credential is as follows:
|
1 2 3 |
IF NOT EXISTS (SELECT * FROM sys.credentials WHERE name = '<CredName>') CREATE CREDENTIAL <CredName>] WITH IDENTITY = '<StorageAcccountName>' , SECRET = '<AccessKey>'; |
|
1 2 3 |
IF NOT EXISTS (SELECT * FROM sys.credentials WHERE name = 'SQLShackDemoCredential') CREATE CREDENTIAL SQLShackDemoCredential WITH IDENTITY='sqlshackdemo', SECRET='NEIb+nrJSaZOQ+e8XKX0R+obWdX85InXKtuS8yAQ/L4Osx2uht/UnQM6eqqO89Pu7JY8EyWePbP/lDy5UviXCg==' |
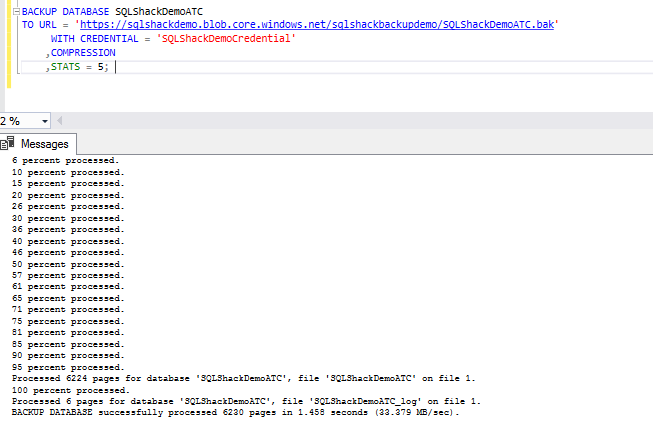
Now, Prepare the T-SQL to backup the database to the URL using blob storage account service and the access key. The following example initiates a full database backup of the SQLShackDemoATC database to the blob storage (URL+Storage+Container+filename).
|
1 2 3 4 5 |
BACKUP DATABASE SQLShackDemoATC TO URL = 'https://sqlshackdemo.blob.core.windows.net/sqlshackbackupdemo/SQLShackDemoATC.bak' WITH CREDENTIAL = 'SQLShackDemoCredential' ,COMPRESSION ,STATS = 5; |
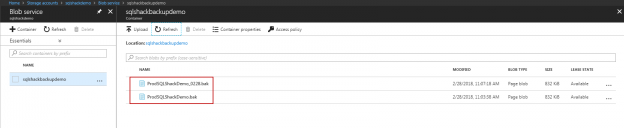
Validate the output by browsing the blob storage. We can see that the SQLShackDemoATC.bak file exists at the storage. We can browse the URL of the file and this pointer is used in the upcoming section to restore the database.

For the demo, I will be restoring the SQLShackDemoATC with a different name SQLShackDemoATC_Clone to the same SQL instance.
|
1 2 3 4 5 6 7 |
RESTORE DATABASE SQLShackDemoATC_Clone FROM URL = 'https://sqlshackdemo.blob.core.windows.net/sqlshackbackupdemo/SQLShackDemoATC.bak' WITH MOVE 'SQLShackDemoATC' to 'f:\PowerSQL\SQLShackDemoATC_Clone.mdf' ,MOVE 'SQLShackDemoATC_log' to 'f:\PowerSQL\SQLShackDemoATC_CloneLog.ldf' ,NORECOVERY ,REPLACE ,STATS = 5; GO |
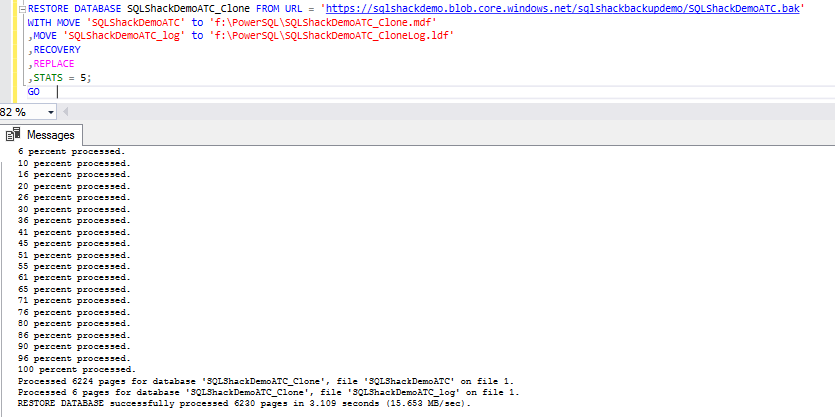
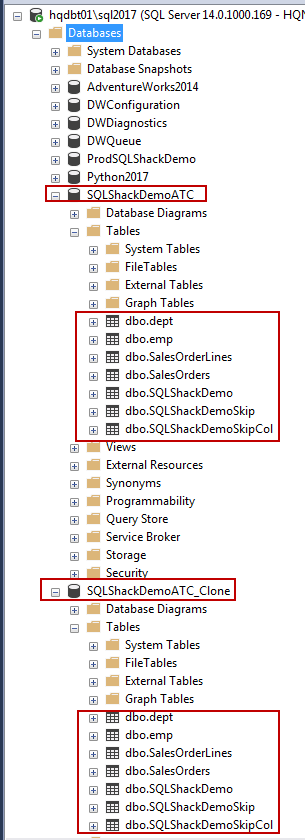
The following output shows that the database was restored and with the same number of tables as the source database. This proves that the restoration of the database was successful.
Perform Database backup task using SSMS (SQL Server Management Studio)
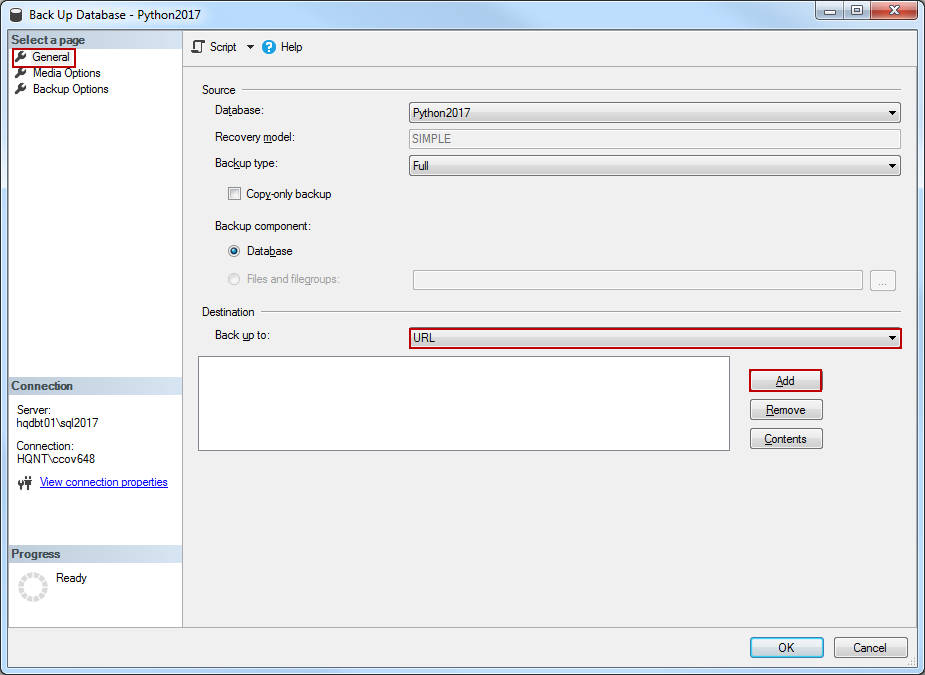
In the Object Explorer, browse the Databases, right-click on the database, go to Tasks, and then click Back Up…

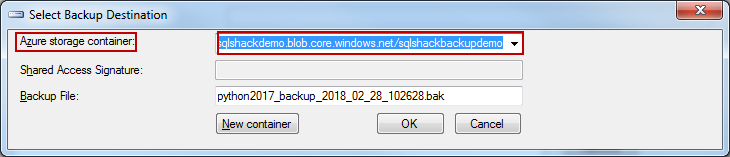
On the General page, go to the Destination section. At the Back up to: drop-down list, select URL, and then click Add. This will open the Select Backup Destination dialog box
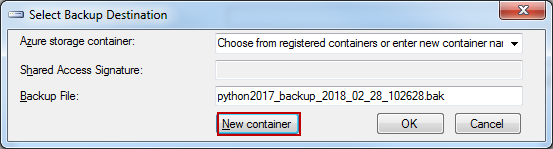
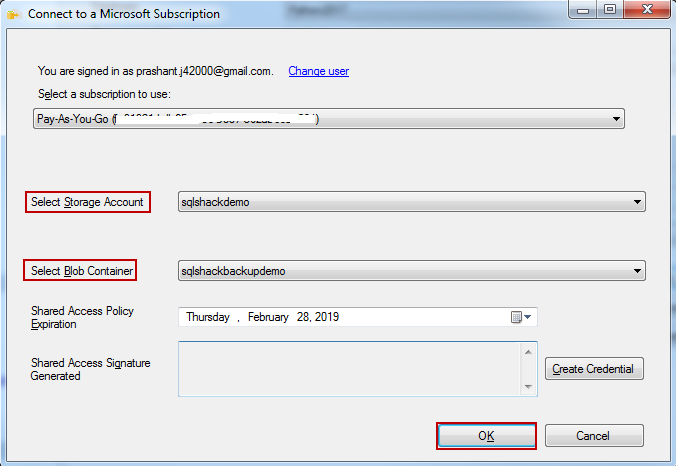
Click on New container. This will open a Connect to Microsoft Subscription page.
At the Select Storage Account drop down, select the storage account. In this case, it’s sqlshackdemo.
In a similar way go to Select Blob Container, and choose sqlshackbackupdemo
Click on OK.
-
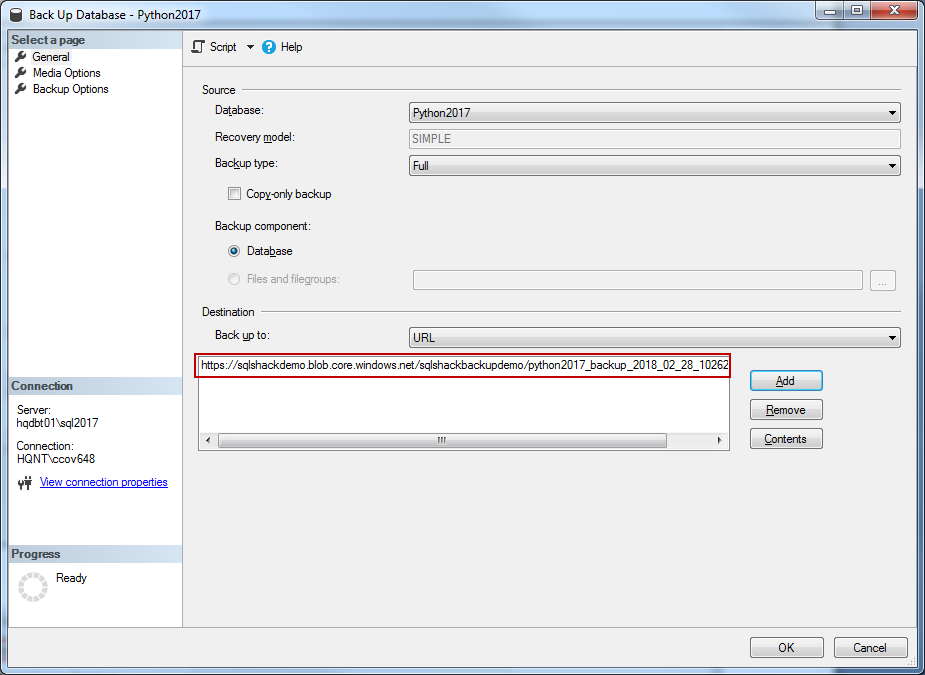
Now, you’re in the Back Up Database wizard window. At the destination field, we can see the URL of the backup file at the storage.
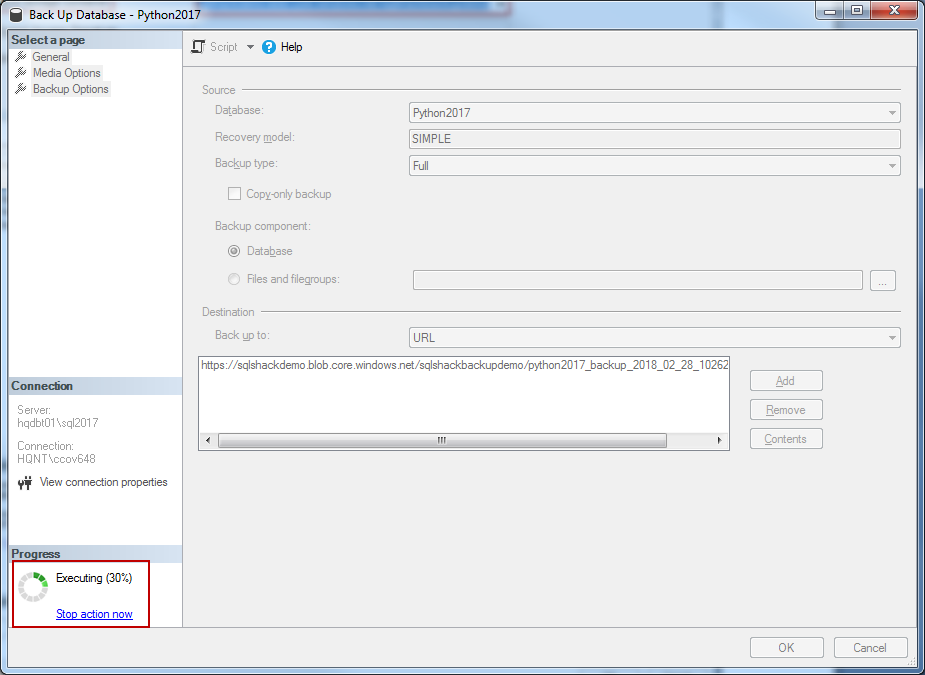
The next screen shows the progress of the backup.
The last screen displays a message stating that the backup was successful.


We can see that the backup file was written to the blob storage. This shows us that the backup can also be taken using SSMS.

Next, this lets us demonstrate the steps to perform database backup to URL using PowerShell.
This section provides the PowerShell scripts to automate the database backup using the available PowerShell cmdlets.
- Backup-SqlDatabase—used to back-up the database
- Restore-SqlDatabase—used to restore the database backup
- New-SqlCredential—used to create the SQL credentials to authenticate at the Azure Blob Storage
- Get-SqlCredential—used to fetch the existing credentials
|
1 2 3 4 5 6 7 8 |
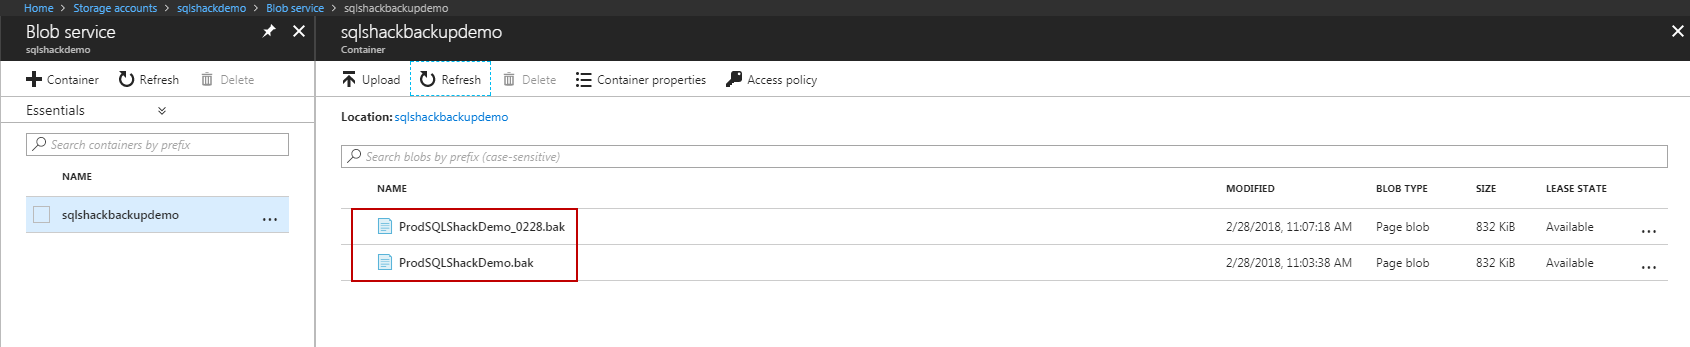
#List the Credential detail $credentialName = "SQLShackDemoCredential" # define the backup file location URL+Storage+Container+filename $backupFile = "https://sqlshackdemo.blob.core.windows.net/sqlshackbackupdemo/ProdSQLShackDemo.bak" # Initiate Backup using backup-sqldatabase cmdlet to URL Backup-SqlDatabase -ServerInstance hqdbt01\sql2017 -Database "ProdSQLShackDemo" -backupFile $backupFile -SqlCredential $credentialName -CompressionOption ON |

Summary
The three different ways to back-up the database to URL have been explained with examples using SSMS, T-SQL and PowerShell.
Points to remember
- It is recommended to use unique file names for every backup in order to prevent accidental overwriting of the blobs.
- During the creation of the container, it is recommended that you set the access level to private so that only the users or accounts that can provide the required credentials can read or write to the blobs in the container.
- For SQL Server databases on an instance of SQL Server running in a Windows Azure Virtual Machine, use a storage account in the same region as the virtual machine itself in order to avoid the costs incurred in transferring data between regions. Using the same region also ensures optimal performance of the backup and restore operations.
- Backup failurs can result in an invalid backup file. We recommend periodic identification of failed backups and deleting the blob files. For more information, see Deleting Backup Blob Files with Active Leases.
- Using the WITH COMPRESSION option during backup can minimize your storage costs and storage transaction costs. It can also decrease the time taken to complete the backup process.
Table of contents
References
- Use PowerShell to Backup Multiple Databases to Windows Azure Blob Storage Service
- Back up Multiple Databases to Azure Blob Storage – PowerShell
- SQL Server Backup to URL

My specialty lies in designing & implementing High availability solutions and cross-platform DB Migration. The technologies currently working on are SQL Server, PowerShell, Oracle and MongoDB.
View all posts by Prashanth Jayaram
- Stairway to SQL essentials - April 7, 2021
- A quick overview of database audit in SQL - January 28, 2021
- How to set up Azure Data Sync between Azure SQL databases and on-premises SQL Server - January 20, 2021