
We introduced Azure Databricks, how it is created and some of its important components in my previous article here. We will look at how we can work with Azure Blob Storage in Azure Databricks in this article.
Azure Blob Storage is a storage service in Azure that enables users to store large amounts of unstructured data like videos, audios, images, text, backup data, etc. This cloud service is a cost-effective and scalable approach when compared to on-premises storage options. There are four types of storage in Azure, including Blob (Binary large object) storage; you can learn about them here: Different Azure Storage types (File, Blob, Queue and Table).
Azure Databricks is an implementation of Apache Spark on Microsoft Azure. It is a powerful chamber that handles big data workloads effortlessly and helps in both data wrangling and exploration. It lets you run large-scale Spark jobs from any Python, R, SQL, and Scala applications. Spark is written in Scala (a high-level language) and there are definitely some performance benefits if commands are run in Scala in Azure Databricks.
Pre-requisites
To follow along with this article, you need to have the following requisites:
- Azure Subscription – Each resource is tagged to a subscription on Azure. You can create one for yourself here
- Azure Databricks Service – You can refer to this site, to know how to create a Databricks service on Azure
- Azure Blob Storage – For this, you first need to create a Storage account on Azure. Go here if you are new to the Azure Storage service. Afterward, we will require a .csv file on this Blob Storage that we will access from Azure Databricks
Once the storage account is created using the Azure portal, we will quickly upload a block blob (.csv) in it. Note: Azure Blob Storage supports three types of blobs: block, page and append. We can only mount block blob to DBFS (Databricks File System), so for this reason, we will work on a block blob.
-
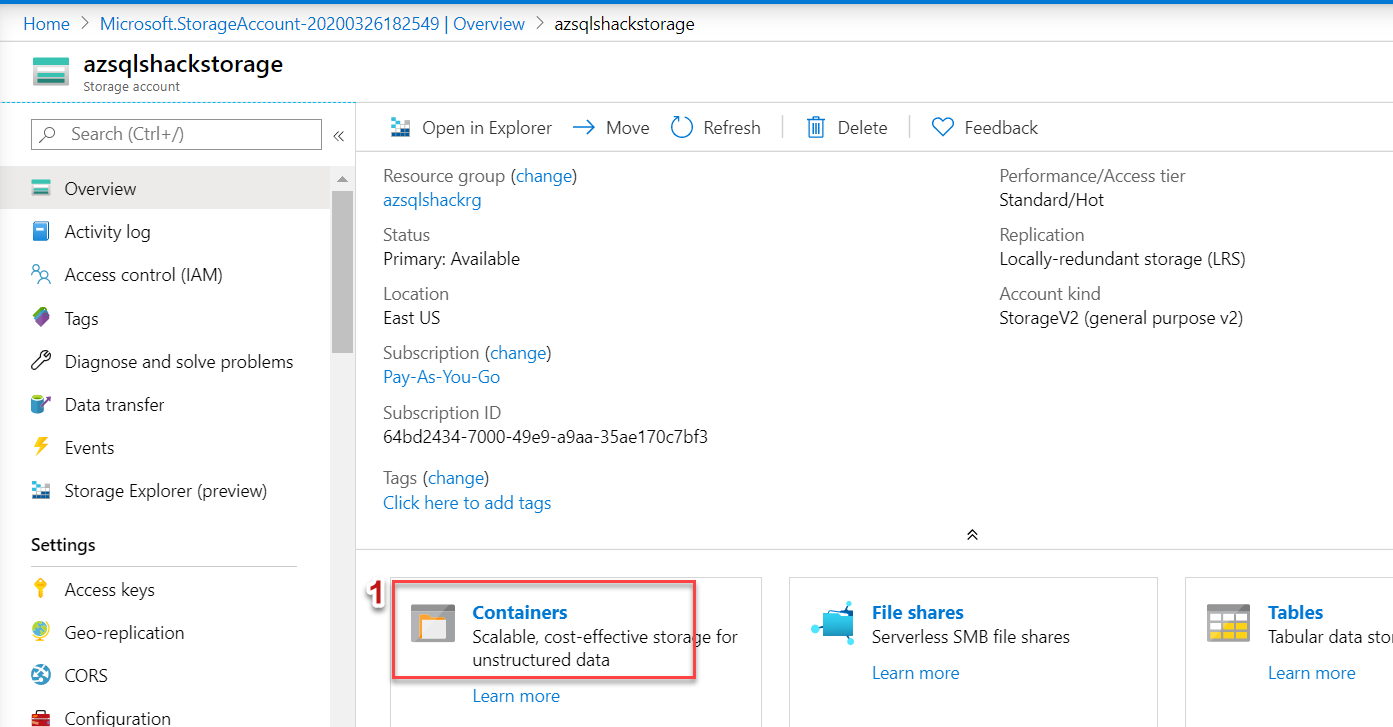
Navigate to your Storage Account in the Azure portal, and click on Containers

-
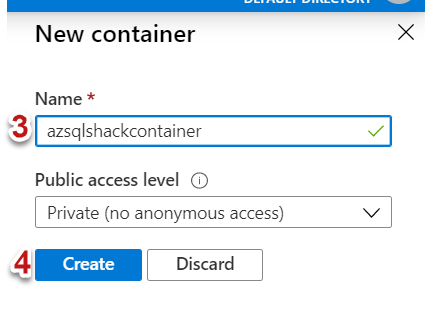
Click on + Container to create a new container
-
Type a name for the container, I am selecting the default access level as Private and finally hit the Create button
-
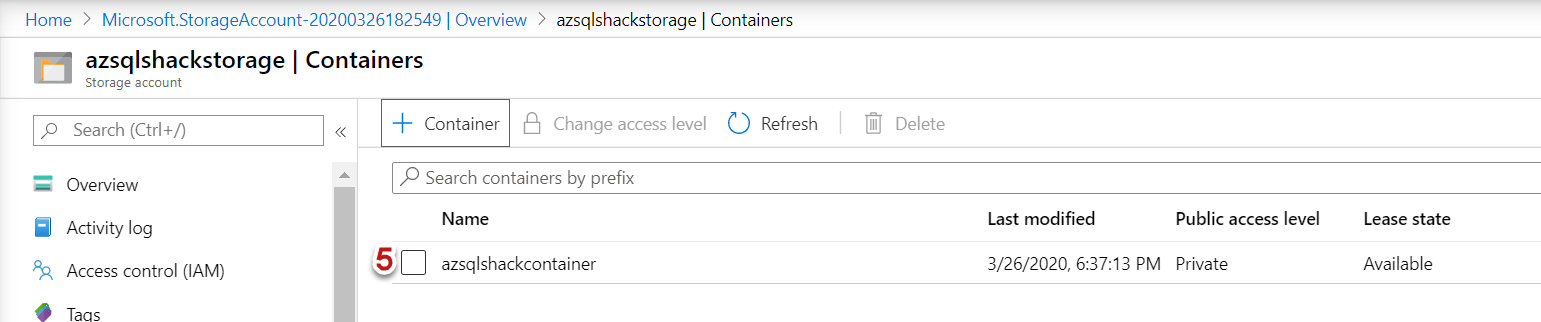
The container ‘azsqlshackcontainer’ is successfully created in the storage account
-
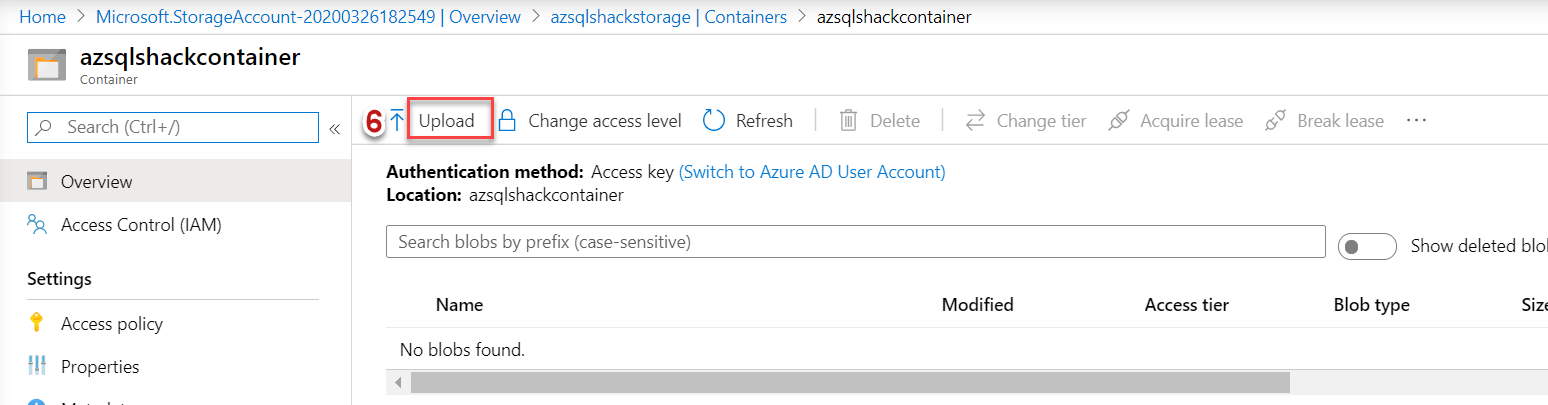
Click the Upload button to upload a blob
-
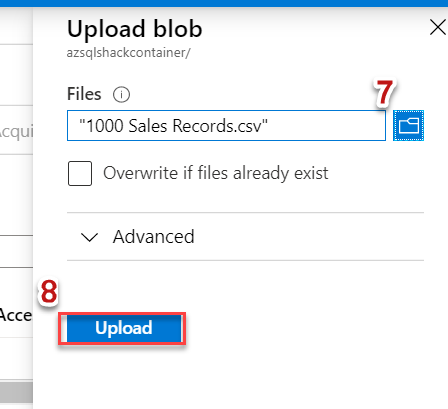
This will open the Upload blade, browse your file and click on the Upload button. You can use any .csv file, in case you want to refer to the one we are using in this demonstration, you can download it from here
-
The block blob “1000 Sales Records.csv” is successfully uploaded in the container


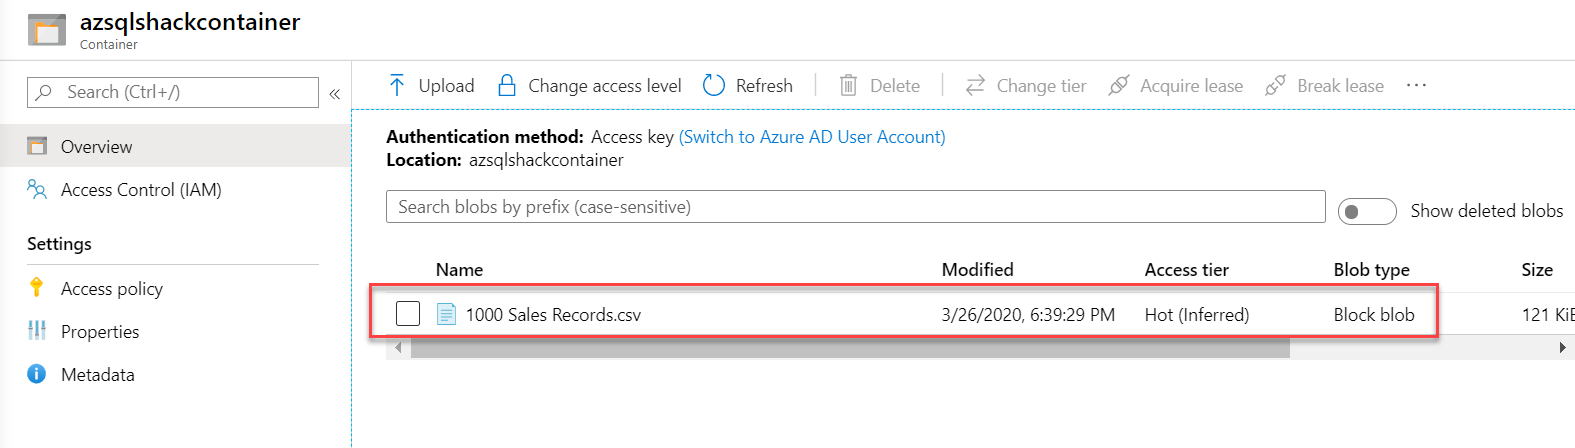
Our final Azure Storage account structure looks like this: Azure Storage Account (azsqlshackstorage) >> Container (azsqlshackcontainer) >> Block Blob (.csv file).
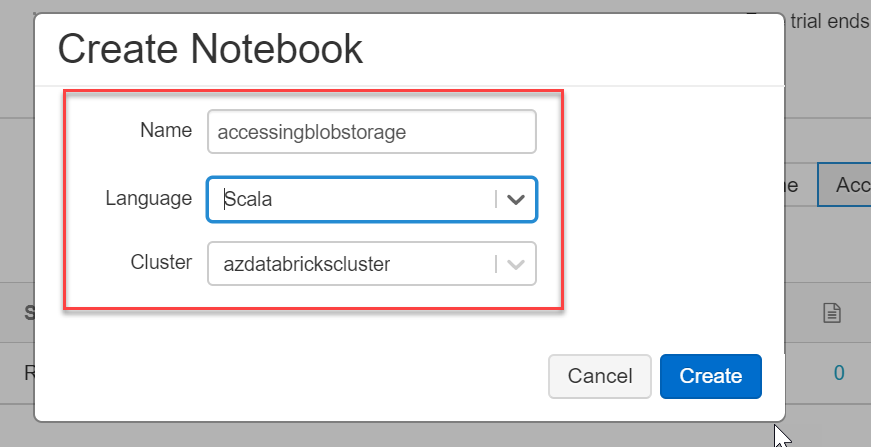
Let’s pick up from where we left off in our last article. For the azdatabricks cluster, created in this article, create a notebook named accessingblobstorage and select Scala language, as shown below. We will be working on this databricks notebook to access Azure Blob Storage in this article.
How to create a Scala notebook in Azure Databricks?
On the Databricks portal, click on the Workspace in the left vertical menu tab and select Create >> Notebook. In the Create Notebook dialog, give a name for your Notebook, choose Scala as the language from the Language drop-down and all the running clusters will be displayed in the Cluster drop-down. Since we just have one, so it will automatically be populated.
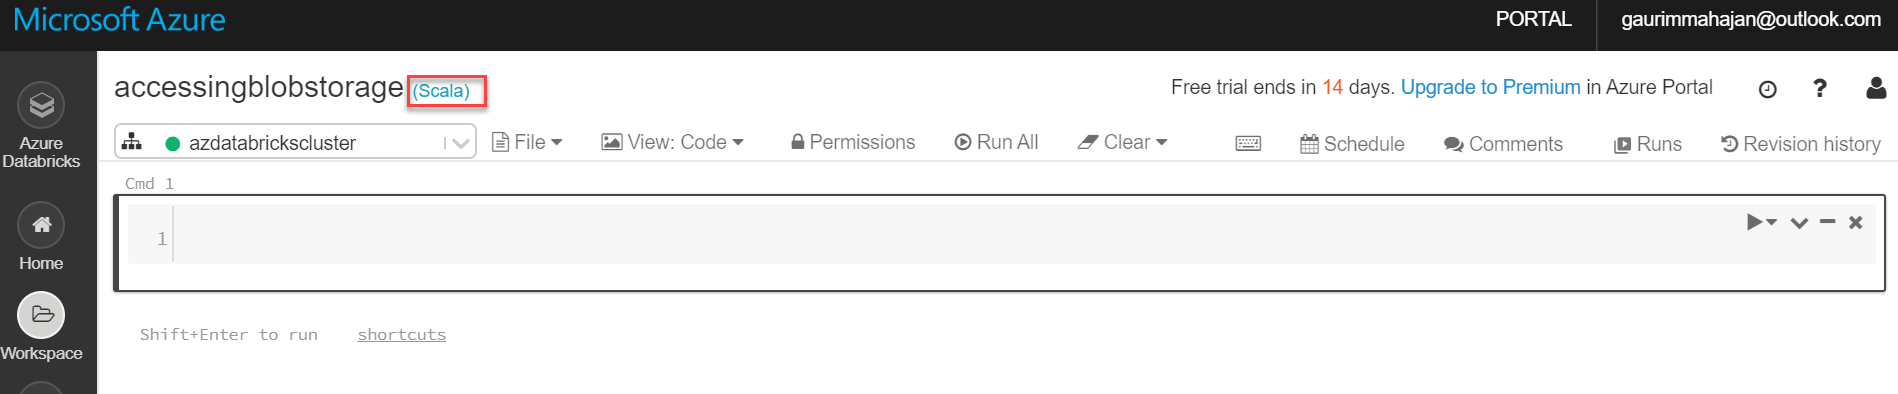
The Scala notebook shown below is created successfully in the databricks portal.
Outline summary
Since our base set-up comprising of Azure Blob Storage (with a .csv file) and Azure Databricks Service (with a Scala notebook) is in place, let’s talk about the structure of this article. We will demonstrate the following in this article:
- We will first mount the Blob Storage in Azure Databricks using the Apache Spark Scala API. In simple words, we will read a CSV file from Blob Storage in the Databricks
- We will do some quick transformation to the data and will move this processed data to a temporary SQL view in Azure Databricks. We will also see how we can use multiple languages in the same databricks notebook
- Finally, we will write the transformed data back to the Azure blob storage container using the Scala API
Step 1: Mount an Azure Blob Storage container
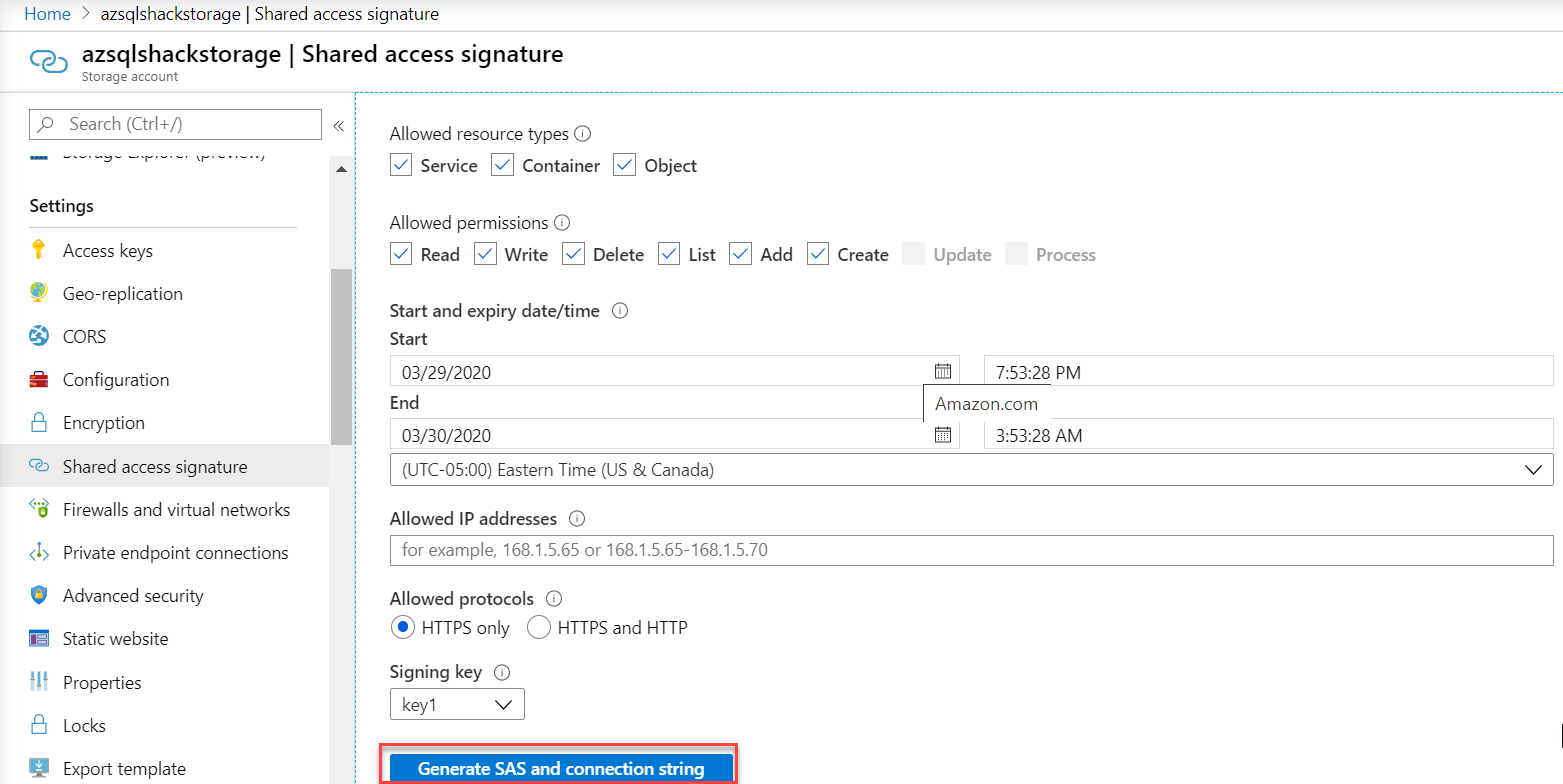
To get started, you will need to know the name of your container, storage account and sas (Shared access signature). This sas is granted by Microsoft to access Azure Storage resources. To generate a sas, navigate to your Storage Account, and click Shared access signature under the Settings blade. Check the appropriate values; you can generate the sas for a particular time frame as well. Finally, click on Generate SAS and connection string button to generate and copy the SAS token.
Type the below code in the Scala notebook and press “Ctrl + Enter” to execute it.
|
1 2 3 4 |
val containerName = "azsqlshackcontainer" val storageAccountName = "azsqlshackstorage" val sas = "?sv=2019-02-02&ss=b&srt=sco&sp=rwdlac&se=2020-03-30T07:53:28Z&st=2020-03-29T23:53:28Z&spr=https&sig=5vK%2FKEgTJVLoF4SX08IvwK7Tff2x42TNwtb%2B9eWzSFI%3D" val config = "fs.azure.sas." + containerName+ "." + storageAccountName + ".blob.core.windows.net" |
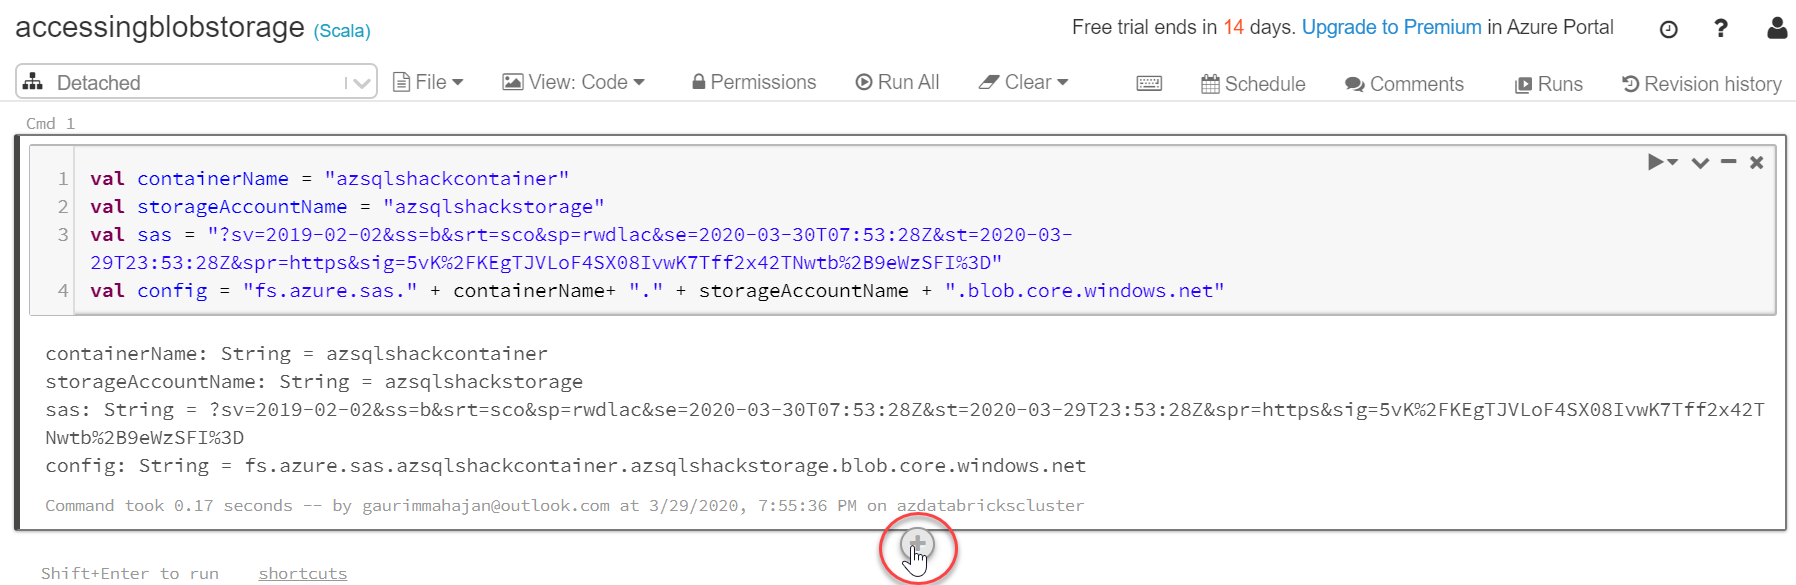
Don’t forget to change the values for your containerName, storageAccountName and sas accordingly.
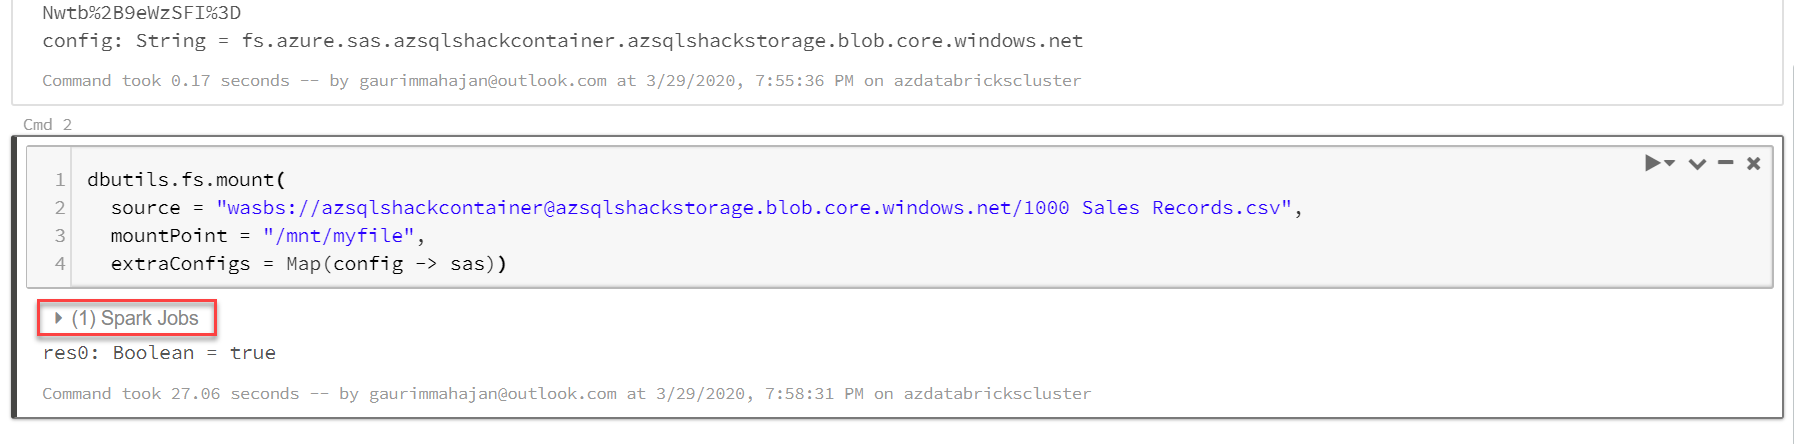
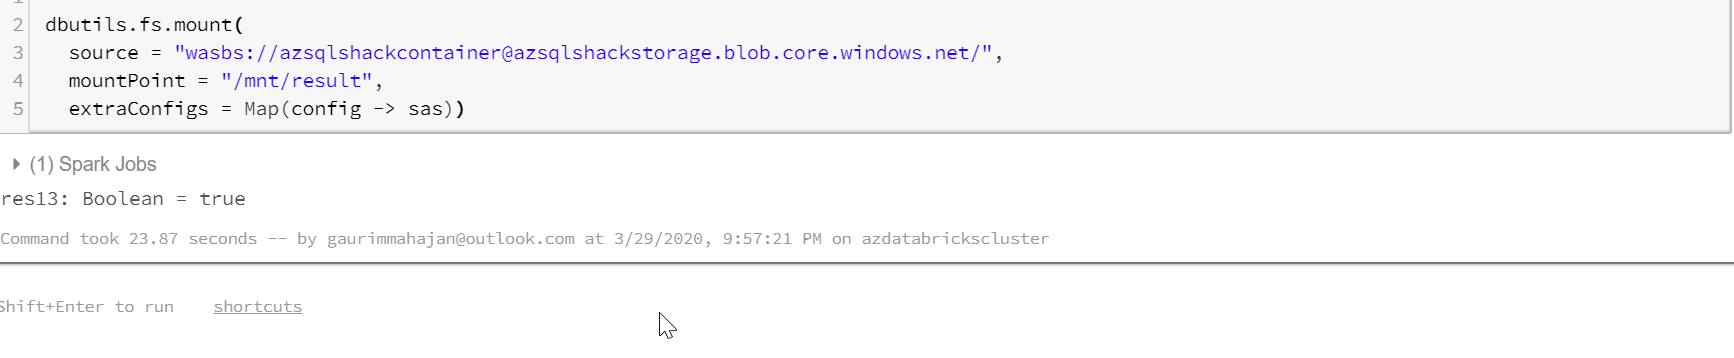
Once executed, click on the + sign (marked above in a red circle) to continue with your coding. Execute the following code snippet that uses Databricks utility to mount the Azure Storage.
|
1 2 3 4 |
dbutils.fs.mount( source = "wasbs://azsqlshackcontainer@azsqlshackstorage.blob.core.windows.net/1000 Sales Records.csv", mountPoint = "/mnt/myfile", extraConfigs = Map(config -> sas)) |
A few points to note here:
- Databricks Utilities (dbutils) offers utilities with FileSystems. This mounting sets up the connection between Azure Databricks and Azure Blob Storage
- myfile(<mount-name>) is a DBFS path and represents what container/folder will be mounted in DBFS as specified in “source”. You can type in your <mount-name>
- config is the <conf-key> which is this “fs.azure.sas.<container-name>.<storage-account-name>.blob.core.windows.net” in our case
Step 2: Read the data
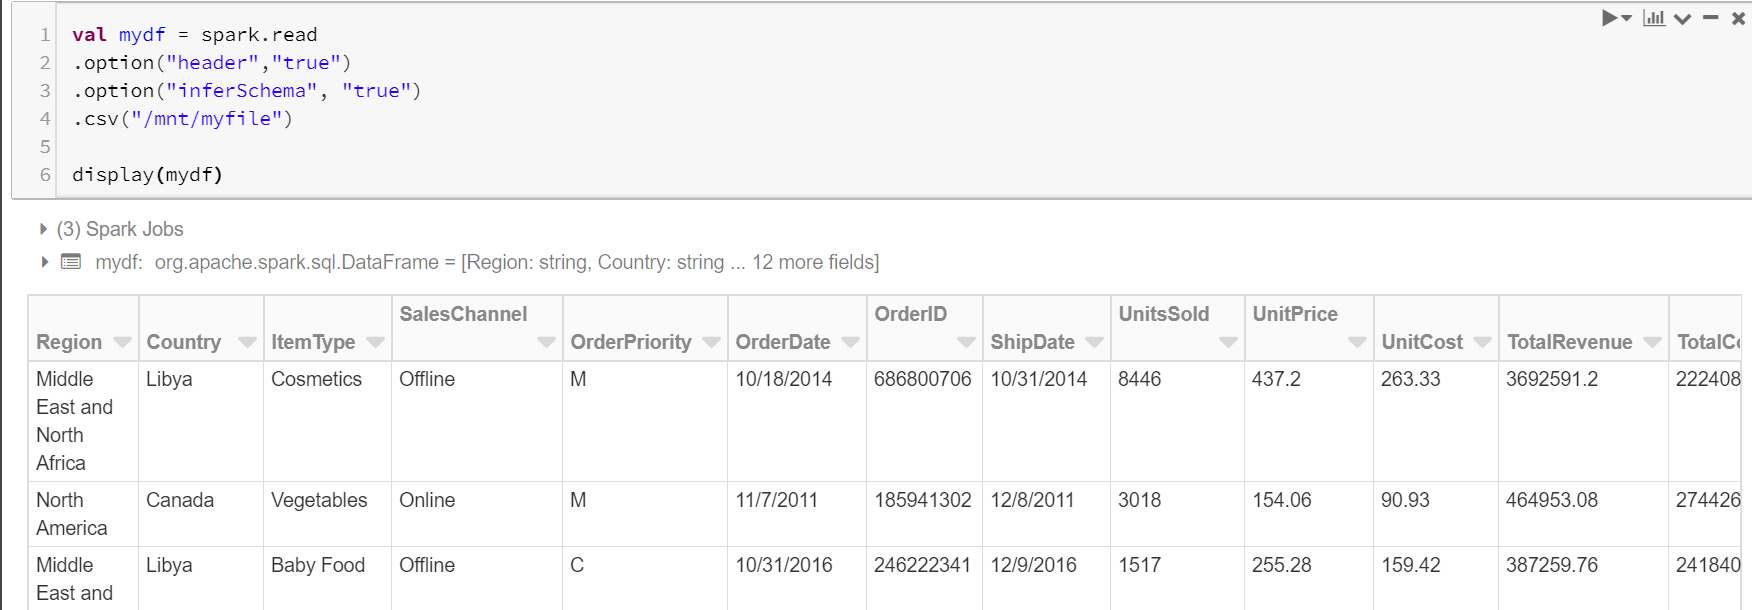
Run the following command to read the .csv file in your blob storage container.
- We will use a spark.read command to read the file and store it in a dataframe, mydf
- With header= true option, we are telling it to use the first line of the file as a header
- The default option for inferSchema is false, so by setting it to true, Spark will infer the schema of each column automatically
- /mnt/myfile will allow you to read from the mount, you will access files in your container as if they were local files
- And finally, use the display function to display the records of the data frame
- Do change the values in the command below for your mount name and file format, which is myfile and .csv, respectively, in our case
|
1 2 3 4 5 |
val mydf = spark.read .option("header","true") .option("inferSchema", "true") .csv("/mnt/myfile") display(mydf) |
Step 3: Transform the data
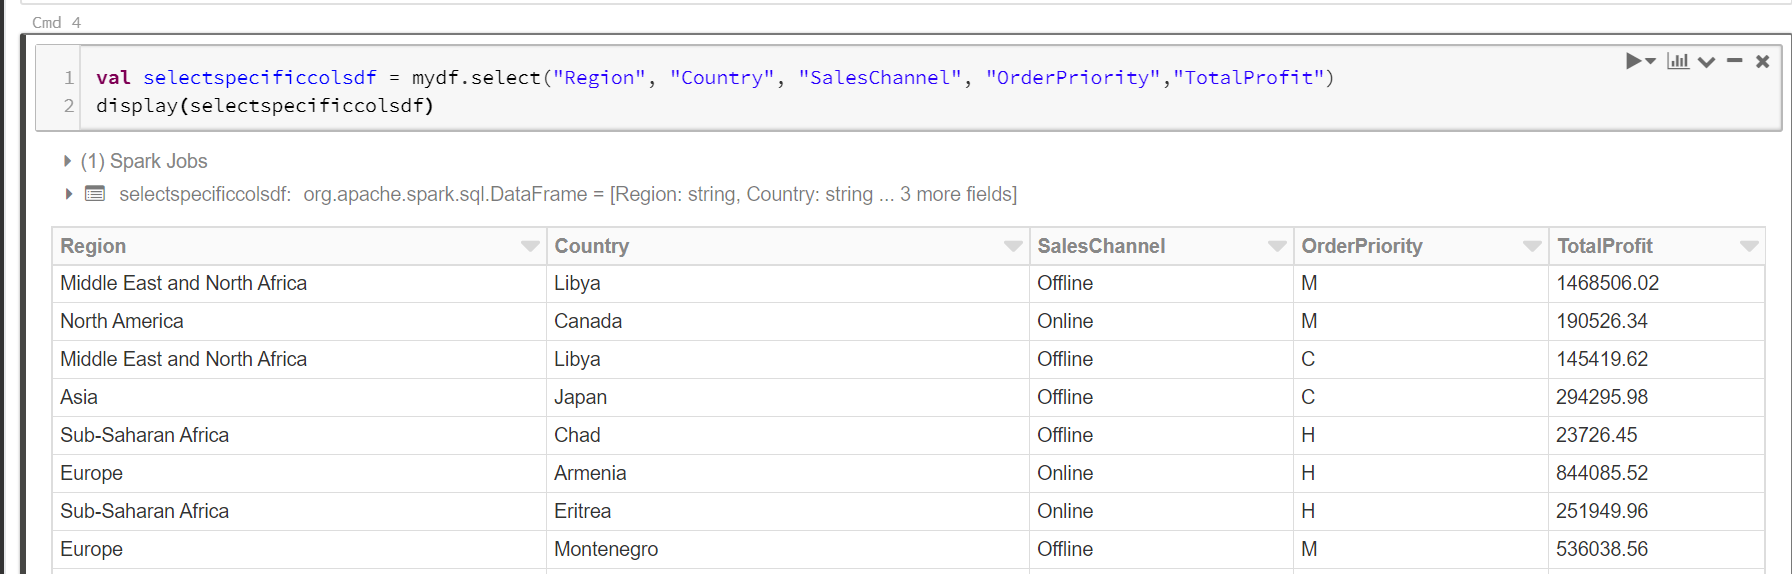
To select a few columns in the result set, execute the below command.
|
1 2 |
val selectspecificcolsdf = mydf.select("Region", "Country", "SalesChannel", "OrderPriority","TotalProfit") display(selectspecificcolsdf) |
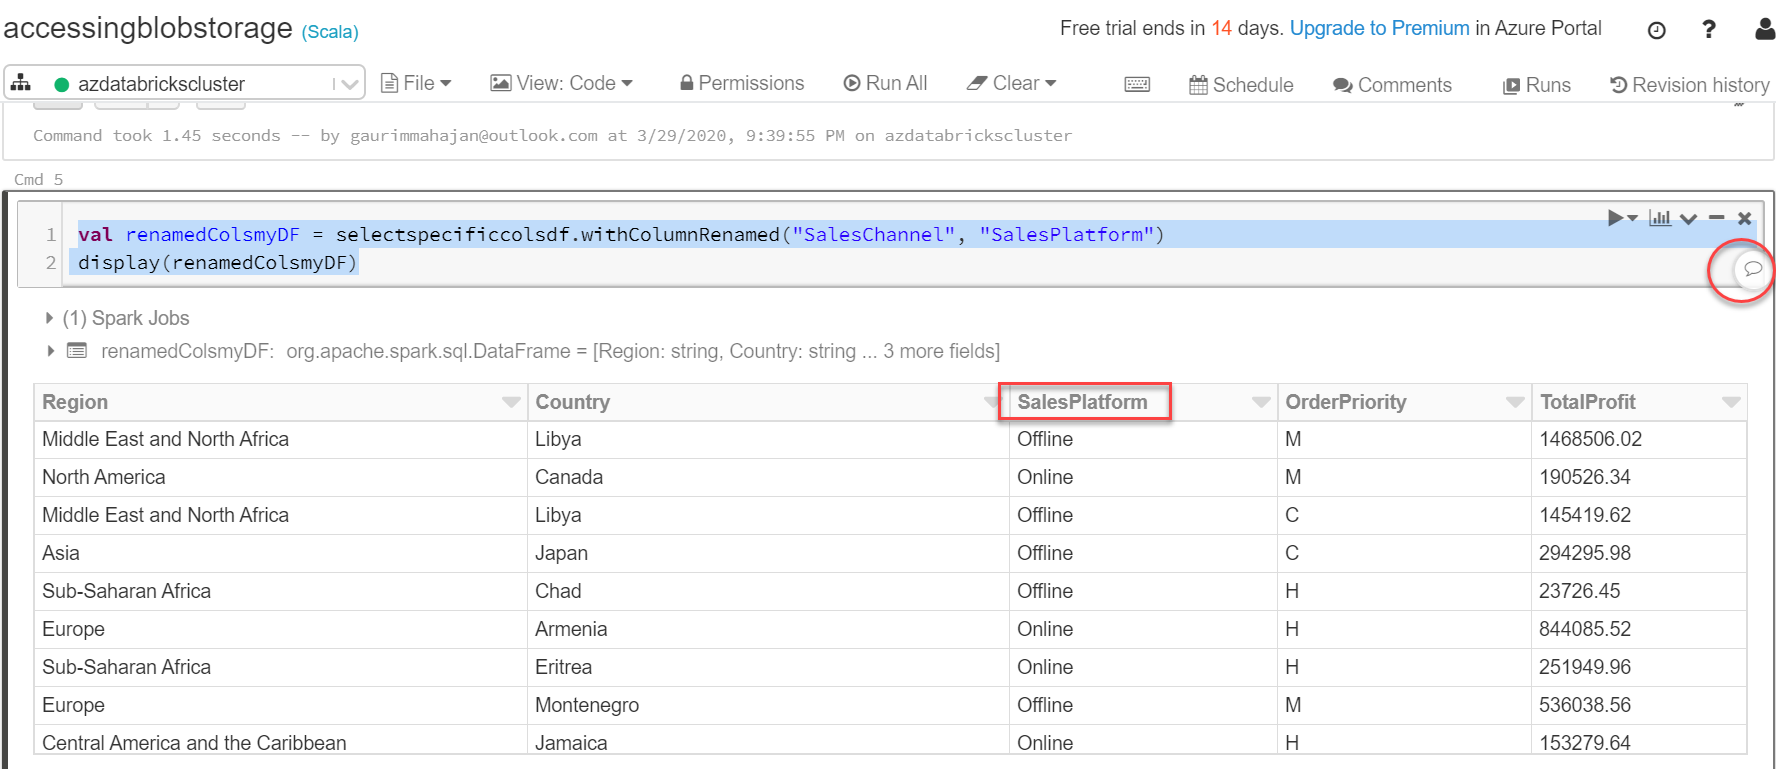
Let’s execute the code below to rename the column from SalesChannel to SalesPlatform.
|
1 2 |
val renamedColsmyDF = selectspecificcolsdf.withColumnRenamed("SalesChannel", "SalesPlatform") display(renamedColsmyDF) |
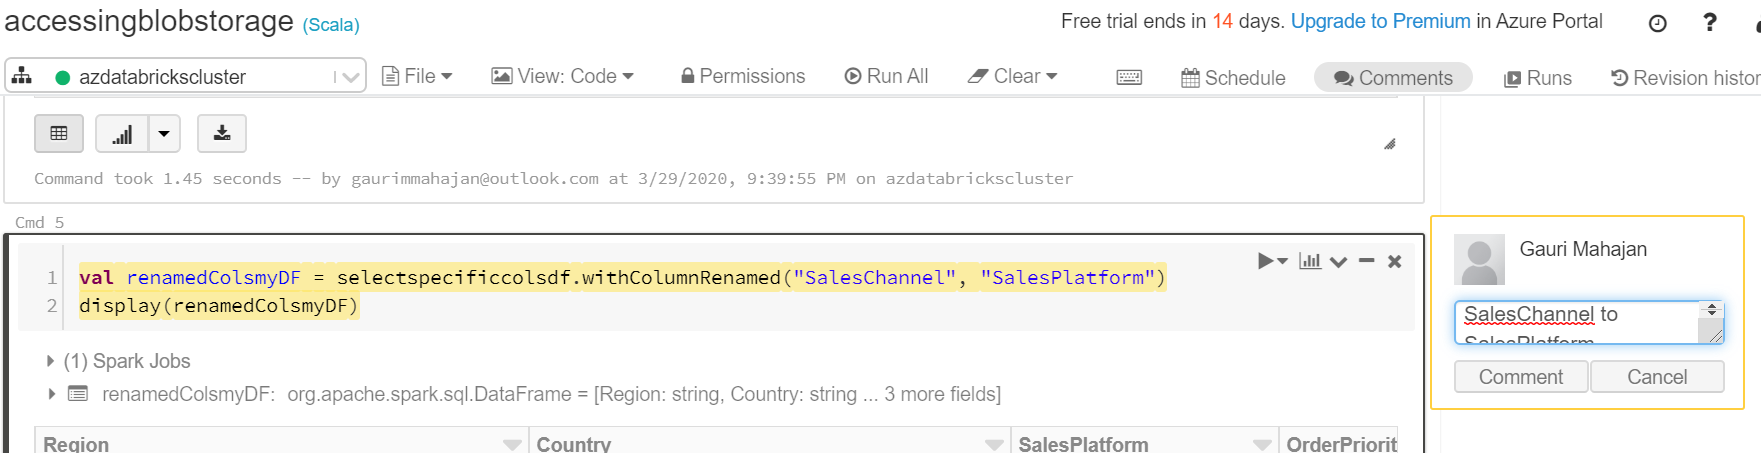
Databricks notebooks offer a great collaborative environment for its users. Click on the comment icon above (circled in red), add your comment, and click on Comment.
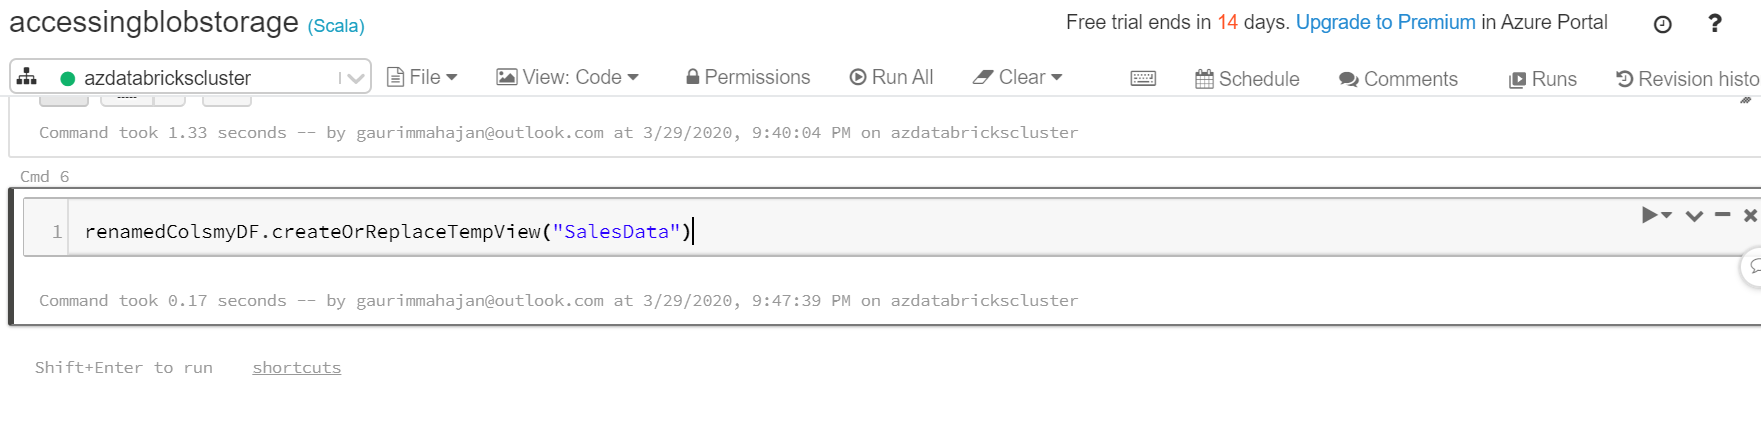
Create a view or a table to query this data. You can provide any temporary view name. This is treated as a local table and will be available only to this Notebook.
|
1 |
renamedColsmyDF.createOrReplaceTempView(“SalesData”) |
Now comes the interesting part of notebooks, you can override the default language, Scala, by specifying language magic command, %<language>. Therefore, using %sql on the top, you can switch the language from Scala to Spark SQL. The below code retrieves all results from the temporary view, SalesData.
|
1 2 |
%sql SELECT * FROM SalesData |
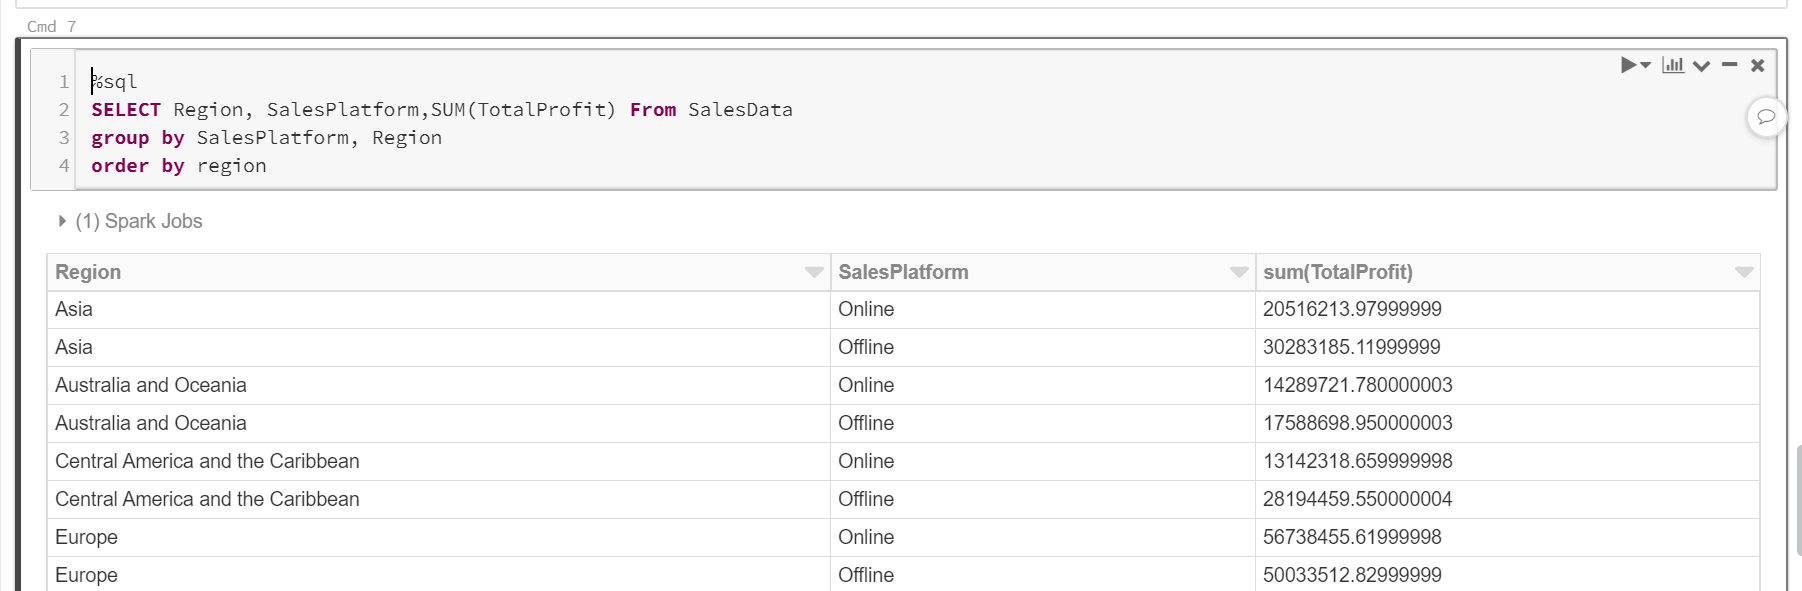
Let’s perform a simple aggregation to calculate the total profit for each region for both Online and Offline channels.
|
1 2 3 4 |
%sql SELECT Region, SalesPlatform,SUM(TotalProfit) From SalesData group by SalesPlatform, Region order by region |
Step 4: Write processed data from an Azure Databricks notebook to the Blob Storage container
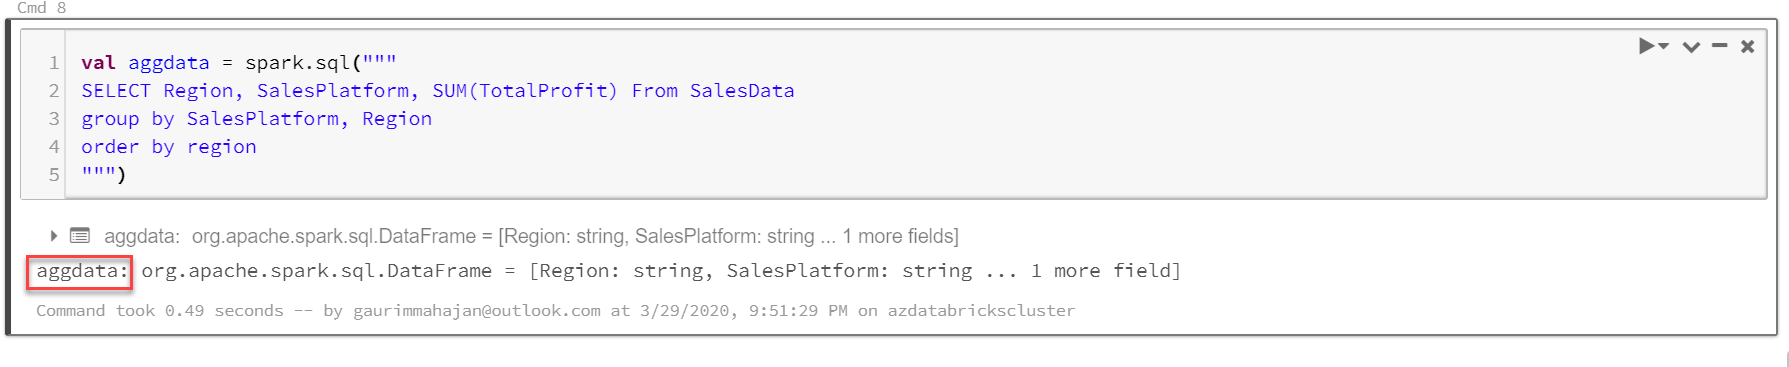
Let’s encapsulate this SELECT statement in Spark SQL to save the aggregated results in a data frame.
|
1 2 3 4 5 |
val aggdata = spark.sql(""" SELECT Region, SalesPlatform,SUM(TotalProfit) From SalesData group by SalesPlatform, Region order by region """) |
Below is the code snippet to write transformed and aggregated .csv data to an Azure Blob Storage container using Scala API. If, for some reason, you have to restart/pause your cluster, then make sure to execute the command set, cmd 1, mentioned at the very top of this article.
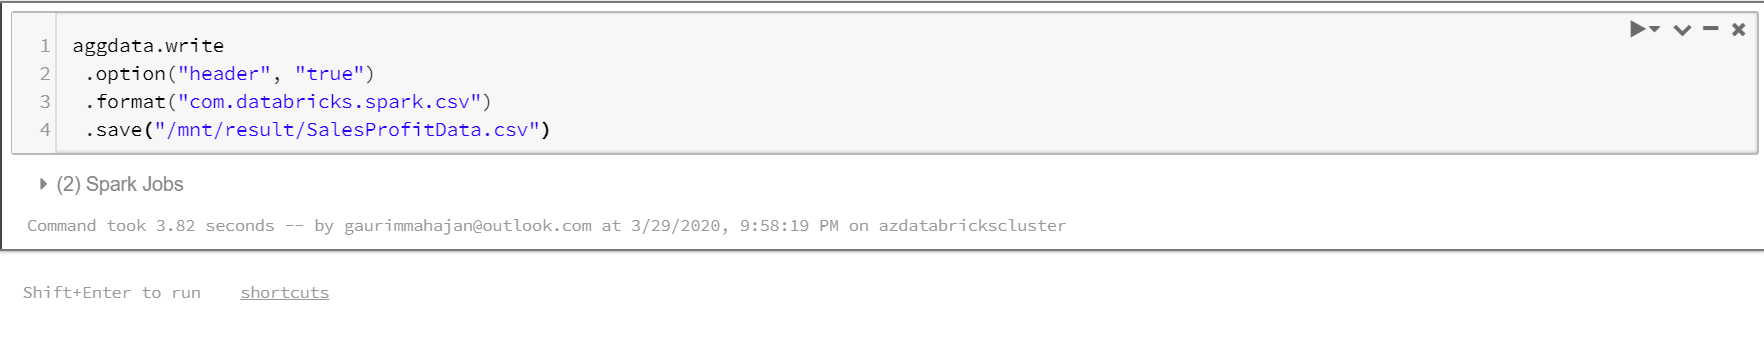
The below code will save the results stored in aggdata into “SalesProfitData” folder on the Blob Storage.
|
1 2 3 4 |
aggdata.write .option("header", "true") .format("com.databricks.spark.csv") .save("/mnt/result/SalesProfitData.csv") |
Go to your Azure Blob Storage and you will find the SalesProfitData folder created. There is a metadata file also created.
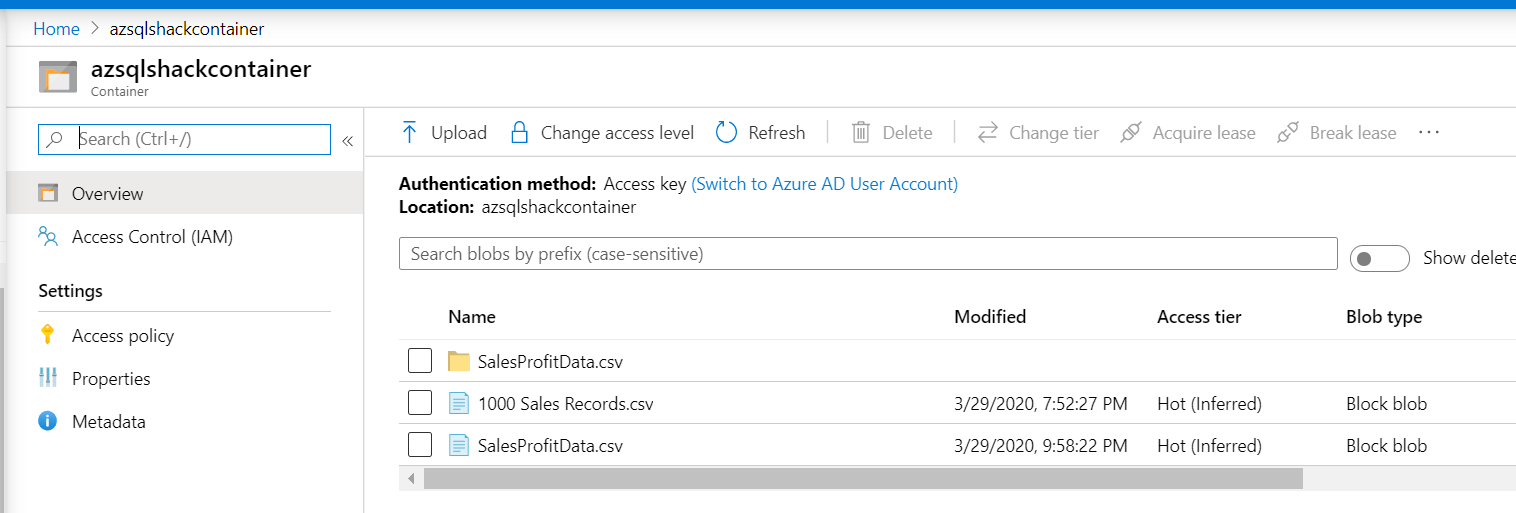
Click on this newly created folder. You will see the following files:
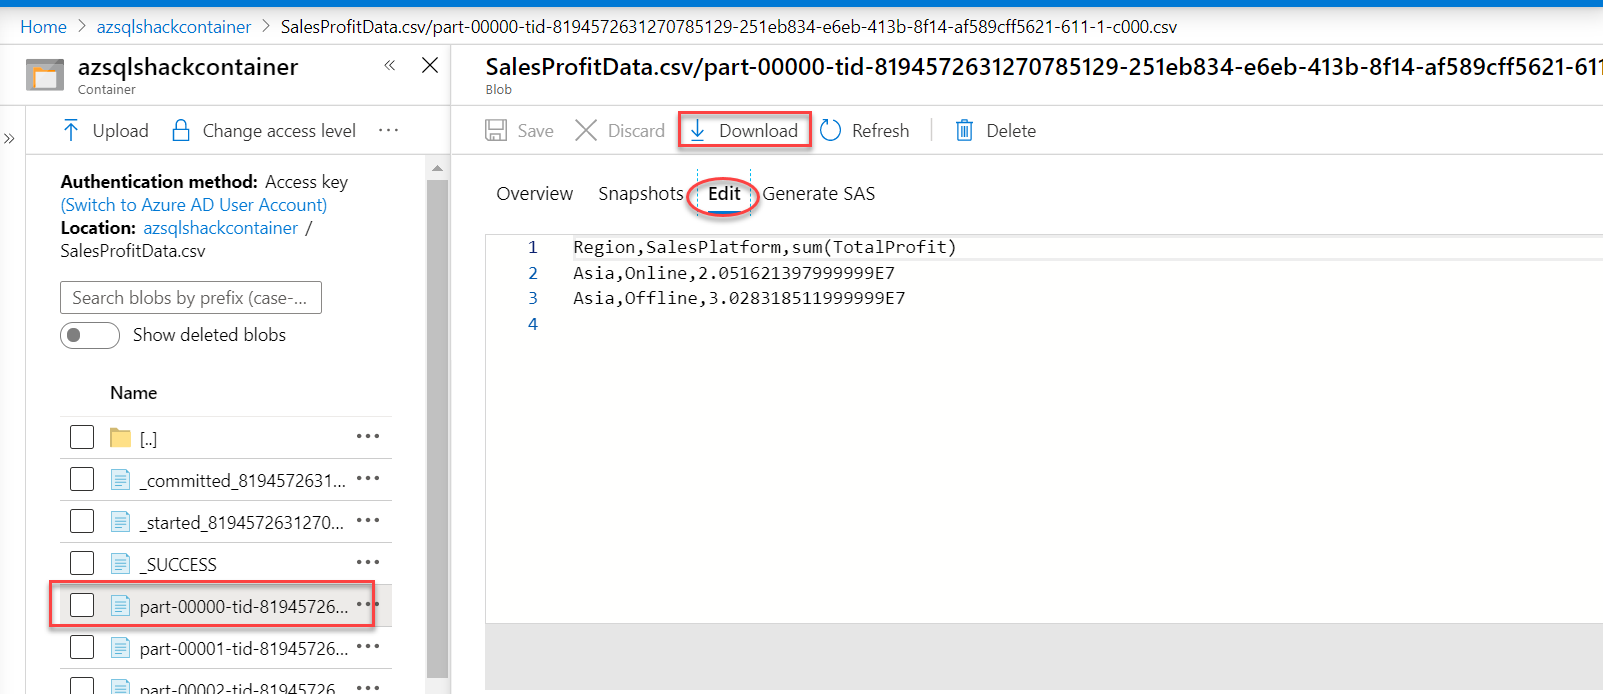
- _started_… -> It indicates when the process was started
- _committed_… -> It depicts how many files were created
- _SUCCESS -> It tells the status of the processing
Also, you will find several split .csv files. Spark engine splits data into partitions for effective and fast data processing. Click on one of the files, and you can edit it, as shown below.
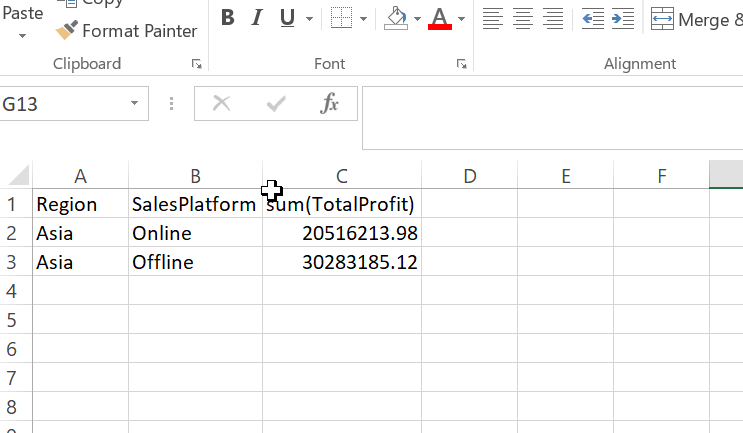
The below screenshot shows a sample of the same file downloaded and opened as a .csv file.
Note: Azure Databricks with Apache Spark’s fast cluster computing framework is built to work with extremely large datasets and guarantees boosted performance, however, for a demo, we have used a .csv with just 1000 records in it. In practical scenarios, Azure Databricks processes petabytes of data in a few seconds.
Conclusion
In this post, we learned to access Blob Storage from Azure Databricks and also demonstrated how to write wrangled data back in an Azure Blob Storage container using Azure Databricks. Along the way, we also did some hands-on coding in the Scala notebook in the Spark cluster.

She has a deep experience in designing data and analytics solutions and ensuring its stability, reliability, and performance. She is also certified in SQL Server and have passed certifications like 70-463: Implementing Data Warehouses with Microsoft SQL Server.
View all posts by Gauri Mahajan
- Oracle Substring function overview with examples - June 19, 2024
- Introduction to the SQL Standard Deviation function - April 21, 2023
- A quick overview of MySQL foreign key with examples - February 7, 2023