
PowerShell becomes a de facto toolset in the arsenal of Azure automation. PowerShell provides a platform and a friendly way of automating many repeated tasks, which in turn minimize the time-and-cost. PowerShell always comes to the rescue when there is a need for automation, and it is no different for Azure. If you are already familiar with PowerShell cmdlets, then it will be easy to be acquainted with Azure PowerShell modules. For Azure automation, Microsoft provided a set of Azure PowerShell Modules that can be leverage to manage the Azure Cloud platform.
In this article, you will see different ways to connect to Azure. I will discuss the following ways to connect to Azure using PowerShell.
- Introduction to Connect-AzAccount cmdlet
- Login using Connect-AzAccount
- Connect using credentials
- How to encrypt the credentials
- Interactive sign-in using Azure portal
- How to create a profile
- Use profile to login to Azure console
- And more…
Introduction
Before we write PowerShell script for Azure, you must sign into the Azure portal and then build the automation. We login to the portal by type in the user-id and password and set the session to appropriate the subscription context.
- Note: In the Azure automation script, sometimes you may see the use of Login-AzAccount; you can also see Add-AzAccount; and some may use Connect-AzAccount. The basic question is which one is correct and why?. To answer all three cmdlets holds well in all the scenarios. Any of the three cmdlets can log in to Azure—It looks different but all three commands can be used to authenticate Azure using PowerShell.Connect-AzAccount is the command and Login-AzAccount and Add-AzAccount are the aliases build around the Connect-AzAccount cmdlet
PS:\> Get-command *AzAccount* -Module *Az*

Prepare the Azure Automation script
The first step in the exercise, login to the Azure subscription. In this example, we will explore the different ways to login into the portal.
Using Login-AzAccount
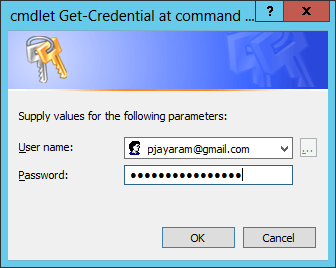
In this section, we will learn how to use the credential parameter to login and setup azure automation. In this case, login-AzAccount cmdlet accepts the credentials to run the session with the context of the specified user. In order to do that declare the variables to hold the values of username and password. You can directly feed values to the cmdlets as well. When you interactively run the script, you can feed the credentials. The real challenge comes when you want to immerse the credentials in your automation.
# Open the PowerShell ISE and type in the following commands :
Login-AzAccount -Credential (Get-Credential)
- Note: In the aforementioned method, we cannot run the script unattended. But we can instantiate the credential object using the New-Object System.Management.Automation.PSCredential namespace accepts the username and password parameters. The username is plain text and the password is a secure string that serves as the password
To convert SecureString run the password along with the ConvertTo-SecureString cmdlet. Let us go ahead and define the username and password in clear texts.
$username = “pjayaram@gmail.com”
$password=”abcd#$@#$@!@#1234″
To convert the password into a secure string, run the following ConvertTo-SecureString cmdlet.
$SecurePassword = ConvertTo-SecureString “$password” -AsPlainText -Force
Next, we need to pass the parameters to the PSCredential object to prepare the credentials.
$credentials = New-Object System.Management.Automation.PSCredential($username, $SecurePassword)
- Note: The $credentials(PSCredential) object can be fed to any cmdlet accepting the -PSCredential parameter. In the following example, you can see the use of –Credential parameter:
\>Get-WmiObject -class Win32_Service –Computer <ServerName> -Credential $credentials
Run the below command to login to the Azure Portal:
Login-AzAccount -Credential $credentials
How to encrypt the credentials
We understand from the above step that we can execute the Azure automation script unattended, but what about security? Anyone who have the access to the file location can open and read the password. Let us deep dive more into the other option to find out secured options. Let us convert the clear texts into a security string and save the content in the specified location. In this case, convert the password “asbcd#@#$%%!” and store it in a d:\password\password.txt.
(Get-Credential).password | ConvertFrom-SecureString | set-content “D:\Password\password.txt”
The password in the D:\password\password.txt is encrypted. In this way, we are providing another layer of security.
$file = “D:\Password\password.txt”
$UserName = “prashanth@abc.com”
$Password = Get-Content $file | ConvertTo-SecureString
$credential = New-Object System.Management.Automation.PsCredential($UserName, $Password)
# Login to the Azure console
Login-AzAccount -Credential $credential
Interactive sign-in
In this section, you will see the interactively type in the username and password.

Let us save the credentials by tying the username and password

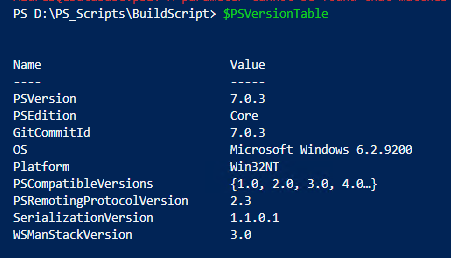
On PowerShell Core version, username and password authentication is not supported.
PS D:\ > $cred = New-Object System.Management.Automation.PSCredential($username, $SecurePassword)
PS D:\PS_Scripts\BuildScript> Login-AzAccount -Credential $cred
Error:
- Connect-AzAccount: Username + Password authentication is not supported in PowerShell Core. Please use device code authentication for interactive log in, or Service Principal Authentication for script log in.
You can query the $PSVersionTable environment variable to see the PowerShell version to ensure that we are getting the error in the PowerShell core version.

- Note: To list all the environment variables, run Get-ChildItem or Get-Item along with ENV: variable:Get-ChildItem Env: or Get-Item ENV:
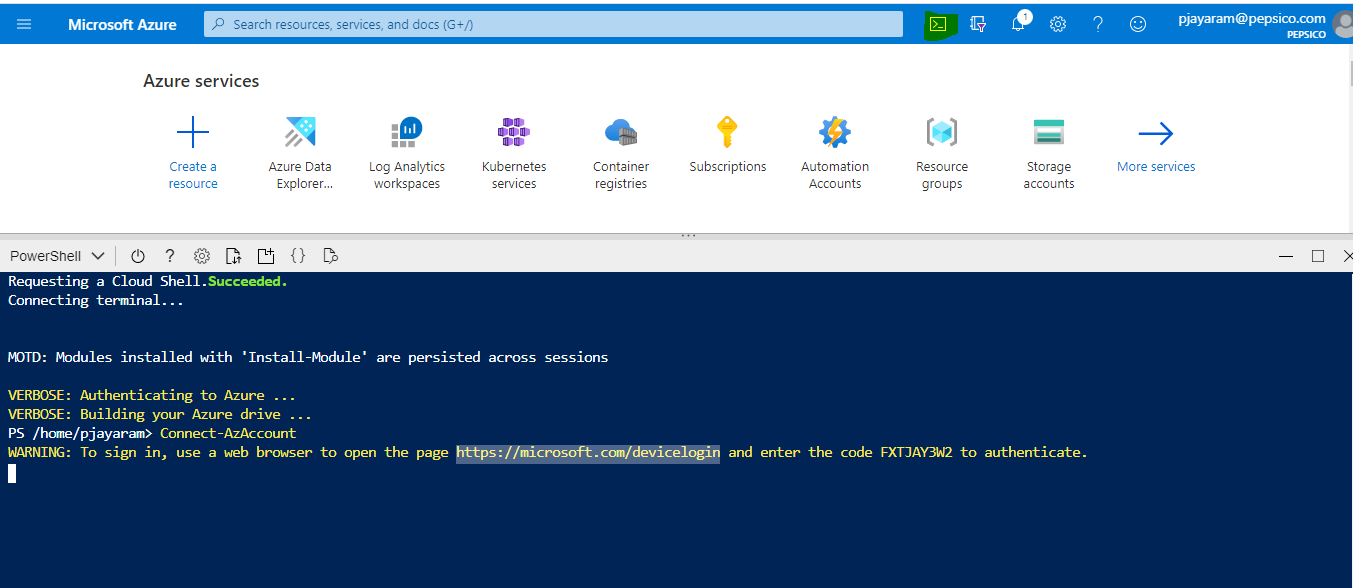
Interactive sign-in using Azure portal
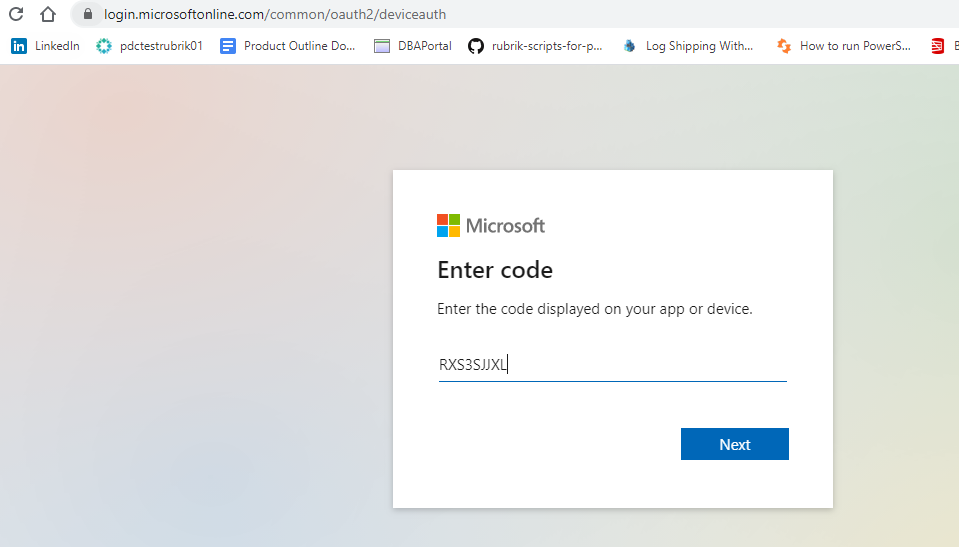
The Connect-AzAccount uses the default authentication of the device used to interactively connecting to Azure using PowerShell.
PS D:\PS_Scripts\BuildScript> Login-AzAccount
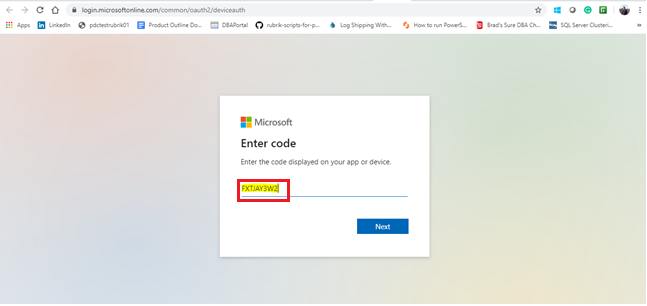
- WARNING: To sign in, use a web browser to open the page https://microsoft.com/devicelogin and enter the code RXS3SJJXL to authenticate
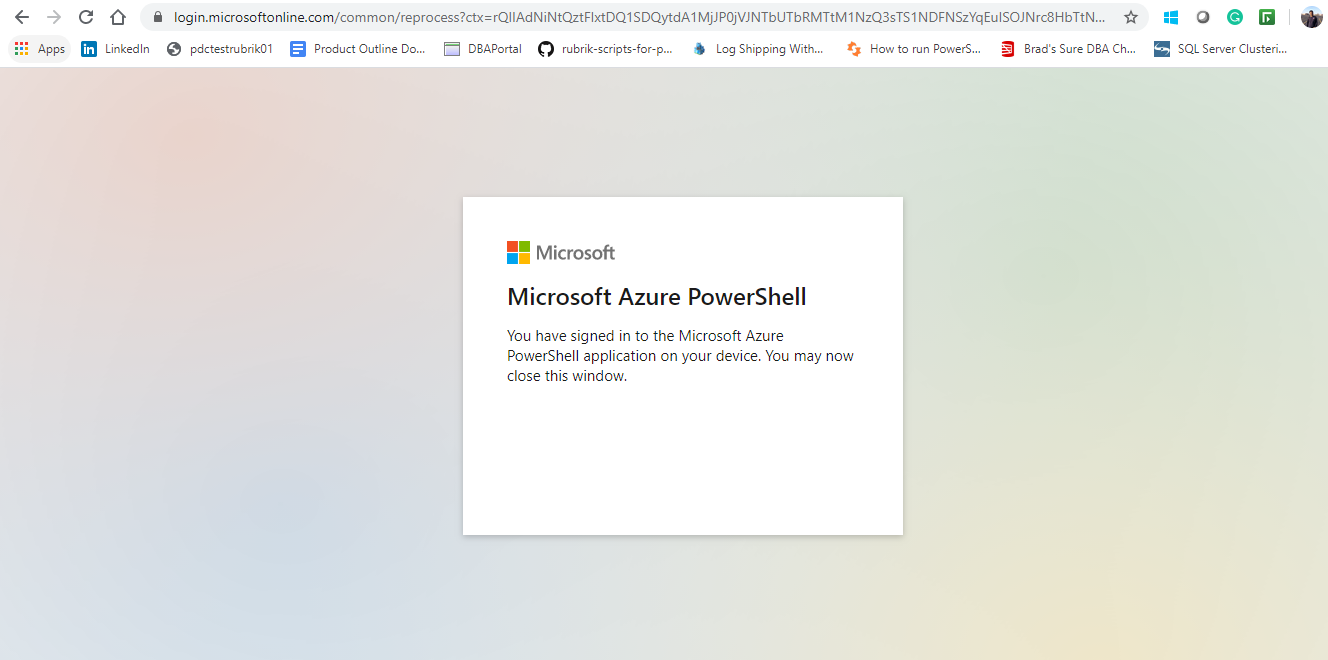
PowerShell directs to a GUI to type in the device code and then redirect you to type in username and password

You can see the connection is successful.
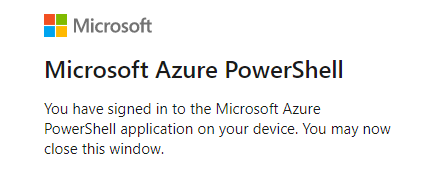
After that, you can see the PowerShell prompt available for use.

You can see that you are established in the session.
Using profile to connect to Azure
In the next example, we will see how to create the profile and use the profile in the Azure automation. There are different ways to save the Azure profile. We save the profile in a file using Windows PowerShell console or Cloud Shell. Make sure on the Windows PowerShell you loaded have the Az module installed and imported, and it is ready to use.
The steps and commands remain the same for both the options, but if you choose Cloud Shell, you may need to download and copy them to the target server where you want to run the automation.
Open the PowerShell console. Run Add-AzAccount or Connect-AzAccount or Login-AzAccount command.
You must authenticate the device and type in Azure credentials in the pop-up dialog box
After the successful authentication validation, it will direct you to the PowerShell console.
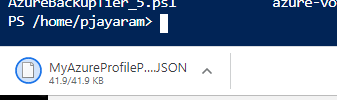
To create a profile, run the following command
|
1 |
Save-AzProfile -Path MyAzureDemoProfile.JSON |
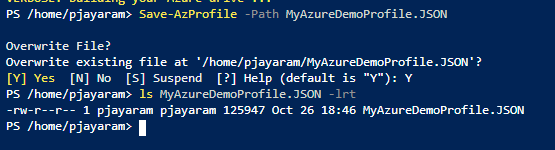
To see the profile file details, you can run the ls -lrt command to view the time and other details of JSON.
|
1 |
ls -lrt |
To download the file in Cloud Shell, use the download icon and type the filename and Click Download

Next, you can copy the file on the target server where you run the automation script.
- Note: I will save the Azure subscription details in the MyAzureDemoProfile.JSON. The profile is saved in JSON format. It is easy to explore the data in the JSON file just using a text pad or notepad or any editor of your choice. The advantage is that you can refer to the JSON tags in PowerShell automation scripts without typing the credentials of Azure account all the time when you want to run the Azure automation scripts in within the scope of another session context
The PowerShell code to log in to Azure account using a profile.
|
1 |
$profile = Import-AzContext-Path $profilePath |
- Note: $profilePath is the path of the profile
|
1 2 |
$SubscriptionID = $profile.Context.Subscription.SubscriptionId Set-AzContext -SubscriptionId $SubscriptionID |
The Set-AzContext checks the profile details using the Azure profile file. If discovered, it retrieves the subscription ID of the profile and sets the context of the current scope of the specified subscription.
Summary
Azure PowerShell supports different authentication methods to develop Azure automation scripts. The easiest among them is to get started with Cloud Shell. It automatically loads the Azure modules. In addition, it allows you to interactively sign in through the browser to perform the required authentication to get into Azure. The recommended way to write an automation script is by using the Service principal with the required privileges. In addition, you can also try to use encrypted credentials. By default, Azure runs cmdlets against the first subscription. If your account is part of multiple subscriptions and you need to change the active subscription run the Set-AzContext cmdlet along with subscriptionId.
That is all for now….
Table of contents

My specialty lies in designing & implementing High availability solutions and cross-platform DB Migration. The technologies currently working on are SQL Server, PowerShell, Oracle and MongoDB.
View all posts by Prashanth Jayaram
- Stairway to SQL essentials - April 7, 2021
- A quick overview of database audit in SQL - January 28, 2021
- How to set up Azure Data Sync between Azure SQL databases and on-premises SQL Server - January 20, 2021