
There are plenty of tools out in the market to manage Azure Cloud platform— Azure Management Web portal, Visual Studio, Visual Studio Code with Azure Studio SDK, Azure PowerShell, Azure CLI, and Azure Cloud Shell.
This quick-start article will show you how to use the Azure CLI commands in Azure Cloud Shell to create an Azure SQL Database. In this article, we will explore the benefits of automation along with the prominent automation tools that we can use to design and deploy Azure Cloud environments.
We can automate various activities, processes, and tasks in the SDLC (Software Development Life Cycle and service operations delivery models. Automation is the key to adopt and realize the impact on hybrid DevOps models. There is a whole lot of benefits that we can realize with automation adoption.
In this article, you will see how to use Azure CLI tools to set up the Azure SQL database. I will walk through the following topics:
- Introduction to Azure CLI
- Explain Azure CLI command line structure
- Discuss command output preferences
- Setup Azure SQL Database and more…
Getting Started with Azure CLI
The Azure CLI used to create and manage Azure resources from the command-line or in scripts (PowerShell or BASH). The Azure CLI is the defacto tool for cross-platform and command-line tools for building and managing Azure resources. Azure CLI’s first version was written using node.js. It provides an interface to manage Azure services and resources from Windows, Linux, and macOS. The next version of Azure CLI re-written in python for better cross-platform compatibility. It is recommended to use the latest available Azure CLI modules wherever possible.
If you do not have the Azure subscription, it is recommended to create a free Azure subscription before you begin using the commands.
You can refer to the article “IT Cloud Automation using PowerShell” to set up a free tier subscription. It requires that you are running the Azure CLI version 2.0 or later.
To see the version installed, run the below command:
|
1 |
az --version |
By default, Azure CLI output is JSON, however, Azure CLI supports several other output formats that are listed below:
Azure CLI Output Format | Description |
JSON | Default |
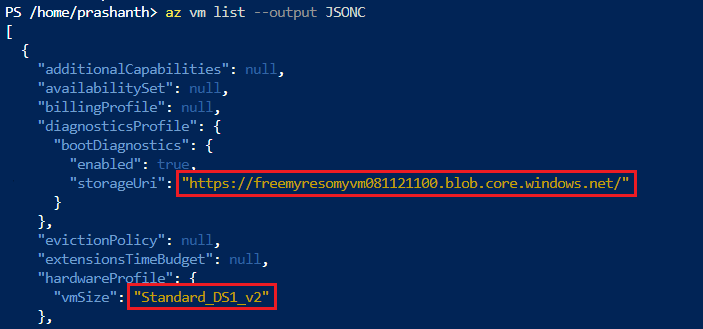
JSONC | Colorized JSON. |
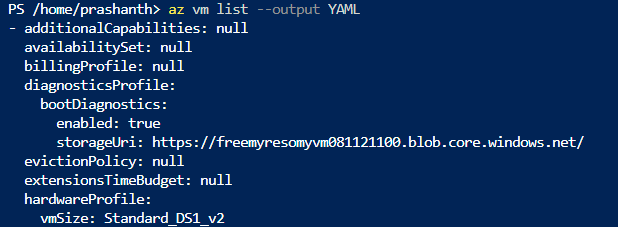
YAML | YAML—alternative JSON script |
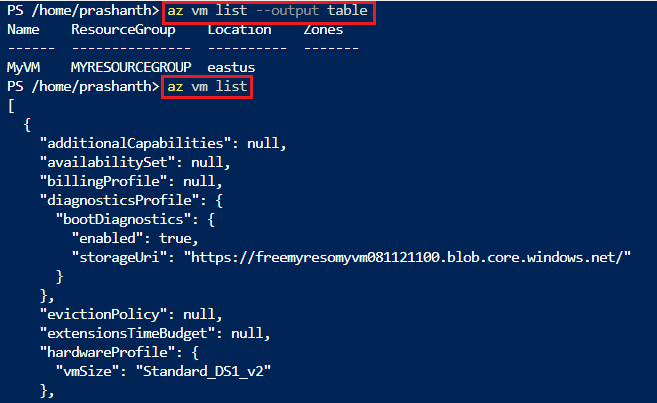
table | ASCII table displays the key values in the column headings |
tsv | tab-separated-values |
Let me take my own usage scenario. I can call myself an expert, as I am good at using Azure PowerShell. I will also discuss the downside of using it in the later sections. When I start using the Azure CLI commands it was fairly simple and easy to use because you write a short code and that is it. The next stage, when there is something other than the standard requirement—you tend to start using a variable and piping the output then it becomes a bit tedious. Then you need to understand the JMESPath and this may set you a little longer to design the code.
You can run the az cli commands in the Integrated PowerShell or BASH Shell:
The syntax:
|
1 2 3 4 5 |
AzCLI invocation command (az) _ _ Group( vm) _ _ _ Command( list) _ _ _ _ Parameter ( --output) _ _ _ _ _ Argument (Table/TSV/JSON/JSONC/YAML) |
For example, in the following command list VM details using az cli commands. In addition, we will see passing a different argument to az vm list command.
|
1 2 |
$ az vm list --output table $ az vm list |
|
1 |
$az vm list --output tsv |

|
1 |
$ az vm list --output JSONC |
|
1 |
$ az vm list --output YAML |

Setup Azure SQL Database using Azure CLI
In this section, you will see systematic details to setup Azure SQL databases using Azure CLI commands. Before we start, you will need to log in to the account using the az login command and az account is used to manage Azure subscription information. The following command is used to get a list of subscriptions for the logged-in account.
|
1 |
>az account list --output table --all --refresh |
- –all : It lists all subscriptions
- –refresh : refresh the up-to-date subscriptions from the server

Let us store the credential in a variable and use the variable at the latter part in the script.
|
1 2 |
$AzCred = Get-Credential -UserName powershellsql@gmail.com az login -u $AzCred.UserName -p $AzCred.GetNetworkCredential().Password |
To list all subscription using Azure CLI command, run az account list command
|
1 |
az account list --query "[].{name:name,SubscriptionId:SubscriptionId}" --output json |

To list the specific subscription, you need to query the JMES query.
|
1 |
az account list --query "[?name==’Free Trial'].{Name:name}" --output table |

|
1 |
az account list --query "[?name==’Free Trial'].{Name:name}" --output json |

- Note: To get data from an array you need to use filtering. Filtering is done with the [?…] JMESPath operator. The operator accepts a predicate and the content is evaluated to either true or false. Expressions are the conditional clause on the other hand evaluate the predicate content to true and are included in the output. The JMESPath offers standard comparison and logical operators. The comparison operators includes <, <=, >, >=, ==, and !=. In addition, the logical operations include (&&), or (||), and not (!). Expressions are grouped in the parenthesis and allow us to define more complex predicate expressions
The idea behind the implementation is to get the output of all the subscription names, resources using the list command from the account group using az command along with the tsv output type.
In the following Azure CLI command, you can see that the formatted output is passed as a parameter to set the azure account.
|
1 2 |
az account set --subscription $(az account list --query "[?name=='Free Trial'].{Name:name}" -o tsv) az account show |
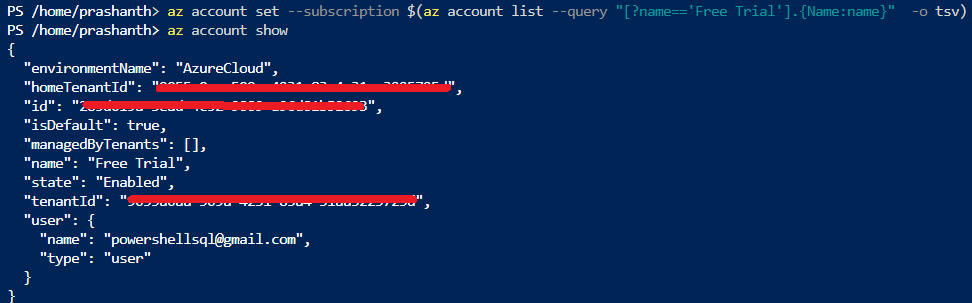
- Note: All the Azure CLI commands have the list option, so that any call will list the output of the related resources. The output is then further simplified for PowerShell script or Bash script
The following command is used to clear all subscriptions from the Azure Cli’s local cache:
|
1 |
az account clear |
Below are the steps that we will follow to create an Azure SQL Database using Azure CLI:
- Declare the variables
- Create a Resource Group
- Create SQL Server logical host
- Create Azure SQL Database
- Add firewall rules to access Azure Services
- Test database connectivity using CloudShell
Let us build the code to set up Azure SQL Databases using Azure CLI commands. We will declare the variables using the following commands:
|
1 2 3 4 5 6 7 8 9 |
$sub="Free Trial" $RESOURCEGROUPNAME="MyResourceGroup" $Location="EastUS" $SQLSERVERNAME="azuresqldemo1234567" $SQLADMINUSERNAME="Prashanth " $SQLADMINPASSWORD="thanVitha@20200107" $SQLDATABASENAME="proddb" $SQLEDITION="Standard" $SQLSERVICEOBJECTIVE="S1" |
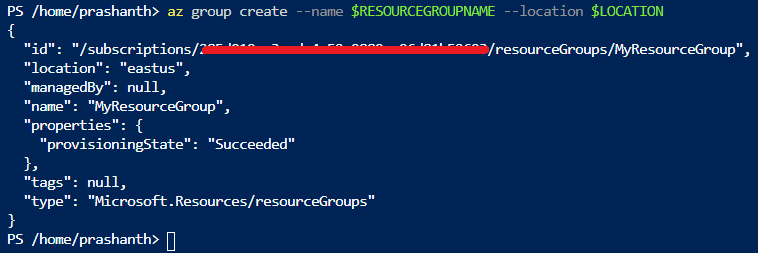
To create the resource group, run the following command
|
1 |
>az group create --name $RESOURCEGROUPNAME --location $LOCATION |
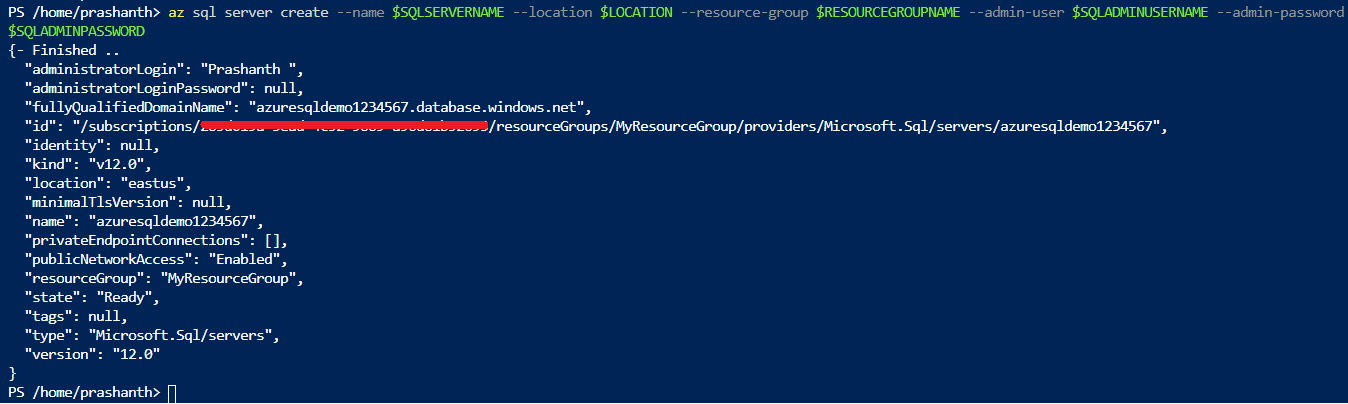
To create SQL Server logical instance run the following command along with the aforementioned parameters:
|
1 |
az sql server create --name $SQLSERVERNAME --location $LOCATION --resource-group $RESOURCEGROUPNAME --admin-user $SQLADMINUSERNAME --admin-password $SQLADMINPASSWORD |
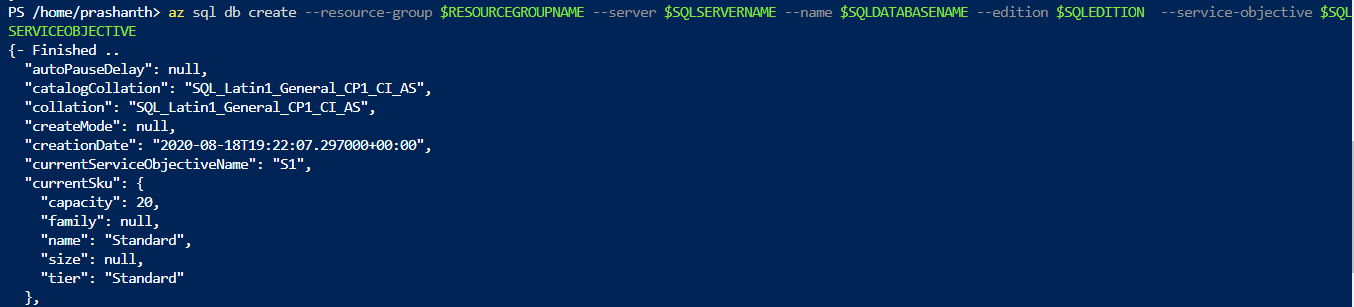
To create a Azure SQL database named “proddb”, run the following command:
|
1 |
az sql db create --resource-group $RESOURCEGROUPNAME --server $SQLSERVERNAME --name $SQLDATABASENAME --edition $SQLEDITION --service-objective $SQLSERVICEOBJECTIVE |
To configure the firewall rules “MyExpressRoute”, run the following command:
|
1 |
az sql server firewall-rule create --resource-group $RESOURCEGROUPNAME --server $SQLSERVERNAME -n "MyExpressRoute" --start-ip-address 165.197.220.224 --end-ip-address 165.197.220.255 |
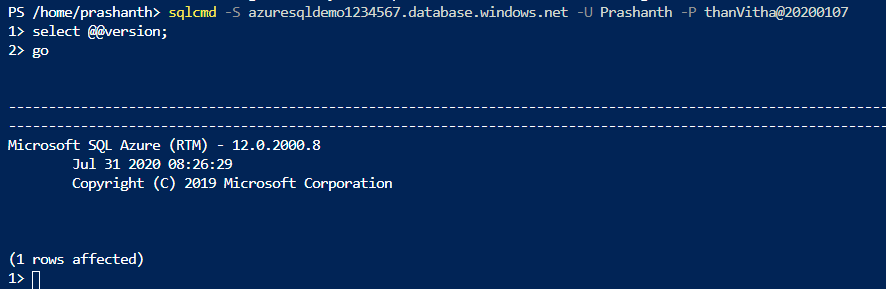
Let us test Azure SQL database connectivity using Cloudshell
|
1 2 |
sqlcmd -S azuresqldemo1234567.database.windows.net -U Prashanth -P thanVitha@20200107 select @@version |
Conclusion
Most of the Cloud platform is feasible to support and start with the tools of your choice and skillset. It is always a preferred choice to administrate cloud services using the existing knowledge and skillset along with the available tools. When comes to tools preferences, It is hard to choose the one over the other due to the features and knowledge, and skillset.
It is best to use the Azure Management Portal if you’re a first-time user to understand the available options and available services on the Cloud. The portal is always a self-institute and easy to use and browse the Azure market place offerings—creating Azure SQL databases, Azure SQL Analytics, Azure Elastic jobs, and getting a nice overview or management of Azure Resource Groups and other related Azure resources. Now, Azure PowerShell is the best toolset to manage Azure Cloud services. You can administrate —create VMs, Azure SQL databases, manage storage, automation, registry management, containers, deployment and orchestration in a simple way. The other important toolset is the Azure CLI command. If you’re a non-windows developer or administrator manage Azure Cloud and involved in Azure DevOps then Azure CLI is the right choice. It is very difficult to choose the right-toolset because in some cases it’s a mix and match. I will leave it up to you to choose the toolset based on the need and your comfort level.
I will discuss more about Azure PowerShell in the next article. Stay tuned for more updates.
That’s all for now…
Table of contents

My specialty lies in designing & implementing High availability solutions and cross-platform DB Migration. The technologies currently working on are SQL Server, PowerShell, Oracle and MongoDB.
View all posts by Prashanth Jayaram
- Stairway to SQL essentials - April 7, 2021
- A quick overview of database audit in SQL - January 28, 2021
- How to set up Azure Data Sync between Azure SQL databases and on-premises SQL Server - January 20, 2021