
SQL Data Sync allows you to synchronize data across multiple Azure SQL databases and on-premises SQL Server databases.
In this article, how to synchronize Azure SQL database with on-premises SQL Server database will be shown.
More about SQL Data Sync can be found on the What is SQL Data Sync page.
In the browser, navigate to Azure portal, and locate the SQL databases tab:
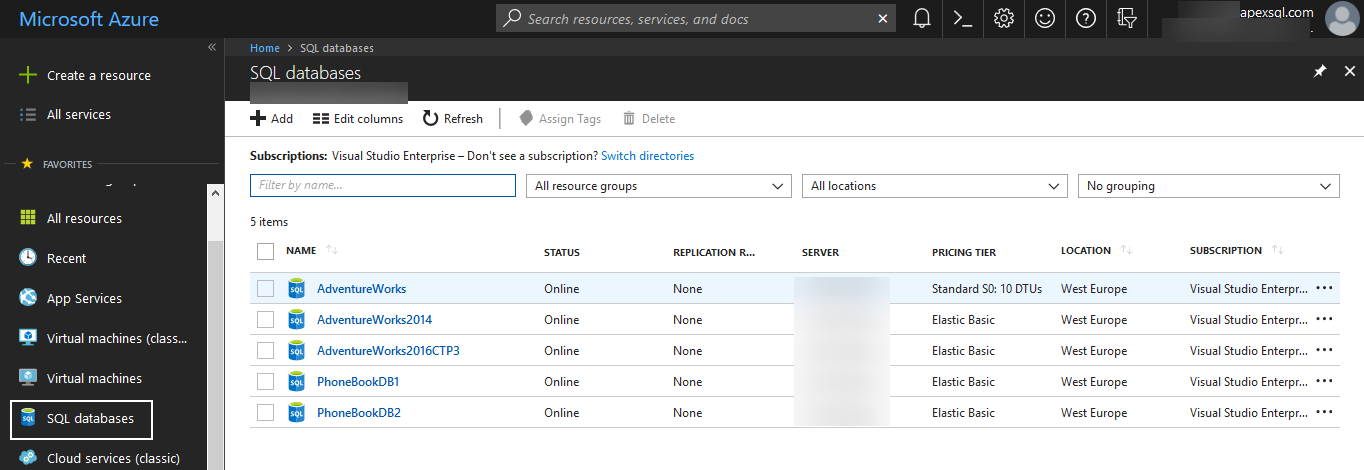
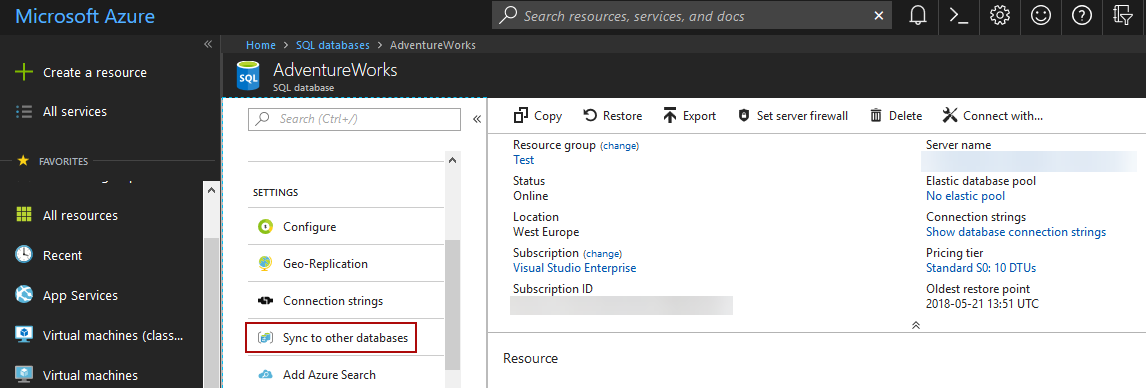
On the SQL databases page, select the hub database for Data Sync; in this case, the AdventureWorks database will be used. Once the database is selected on the right side under the SETTINGS list, find the Sync to other databases command:
Click on the Sync to other databases command and the Data Sync page will open in which the configuration of data synchronization will be started:
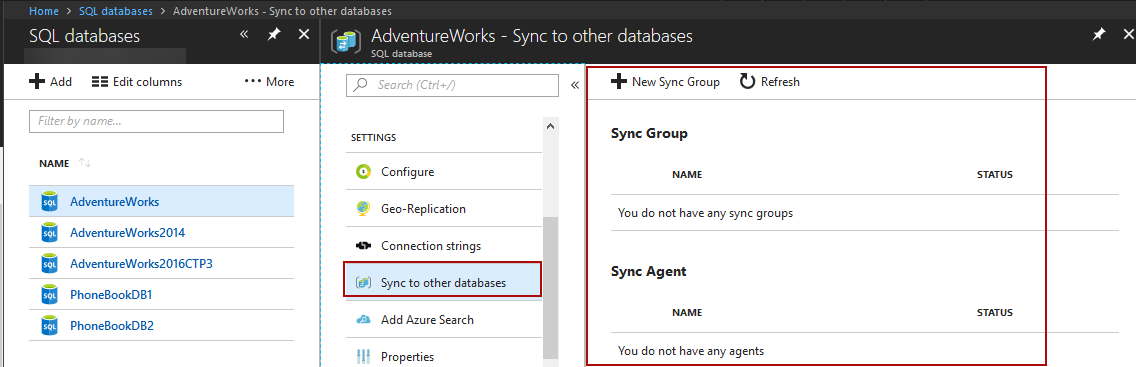
As it can be seen on this page, currently there is no any sync group and any sync agent. The sync agent needs to be installed on-premises database server. More about sync agent will be discussed later in this article.
To start configuration, click the New Sync Group button and the New sync group page opens:
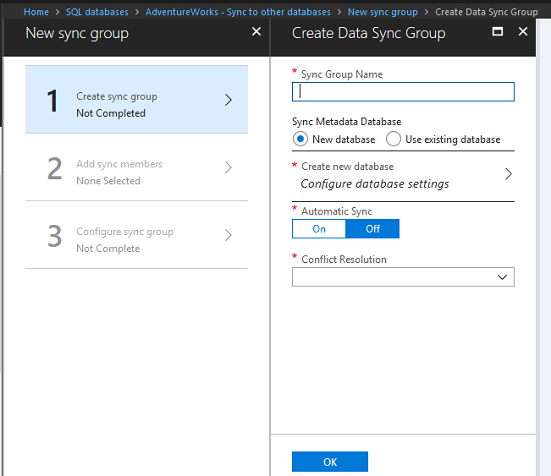
In the Sync Group Name box, enter the name for the new sync group (e.g. SyncAzureDatabaseToOnPremisesDatabase).
Under the Sync Metadata Database group, choose the New database or Using existing database radio button.
For this example, the New database radio button will be used to create a new database in which will be placed sync metadata and logs.
Select (click) Create new database, the SQL Database tab will open:
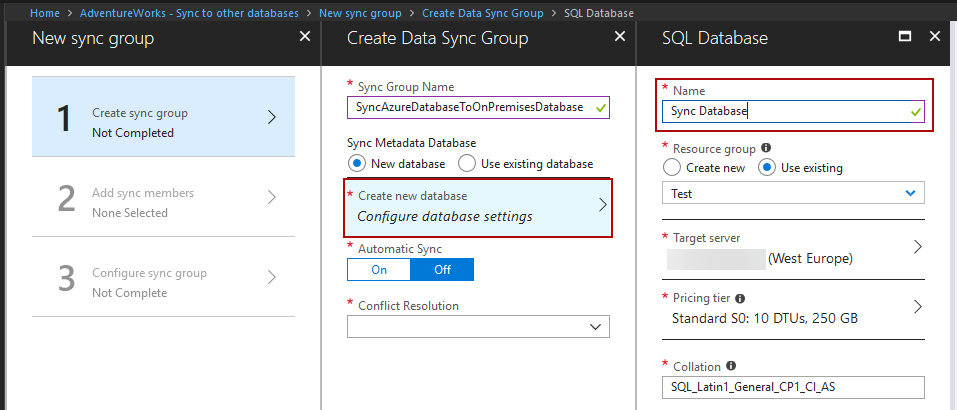
In the Name box, enter a new name (Sync Database) for the sync metadata database, configure the other options on this page and press the OK button.
Under the Automatic Sync section, choose whether the data synchronization should be automatic – by pressing the On button or manually – by pressing the Off button.
If the On button is pressed, the Sync Frequency section will appear. Here can be set how frequent the data synchronization will occur:
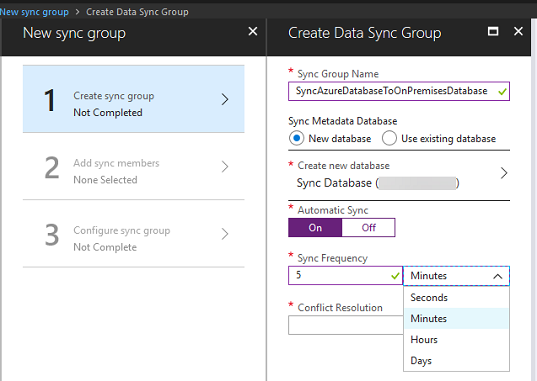
For the example purpose, 5 Minutes will be set.
Under the Conflict Resolution, one of two options can be chosen in case a conflict occurs:
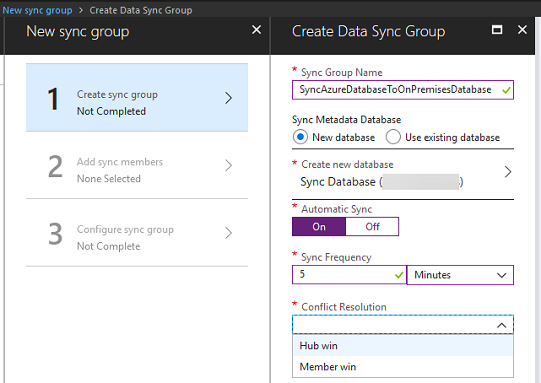
The first option is the Hub win. If this option is chosen and the confits occur, the data in the hub database overwrite the conflicting data in the member database.
The second option is Member win. In a conflict situation, the data in the member database will overwrite the data in the hub database.
As an example, in the Conflict Resolution, drop down box the Hub win option will be chosen.
After pressing the OK button, the new sync group will start creating.
After creating sync group, the Add sync members section will be enabled for configuration. Under Hub Database, enter the existing username and password for the SQL Database server on which the Hub database is created:
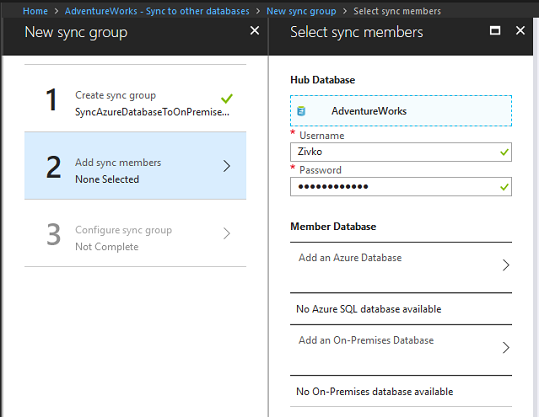
Under the Member Database section, an azure database can be added as a member by selecting Add an Azure Database or a on-premises SQL Server database can be added by selecting Add an On-Premises Database. Since we want to sync data with a on-premises SQL Server database, under the Member Database section, select Add an On-Premises Database, the Configure On-Premises tab will appear:
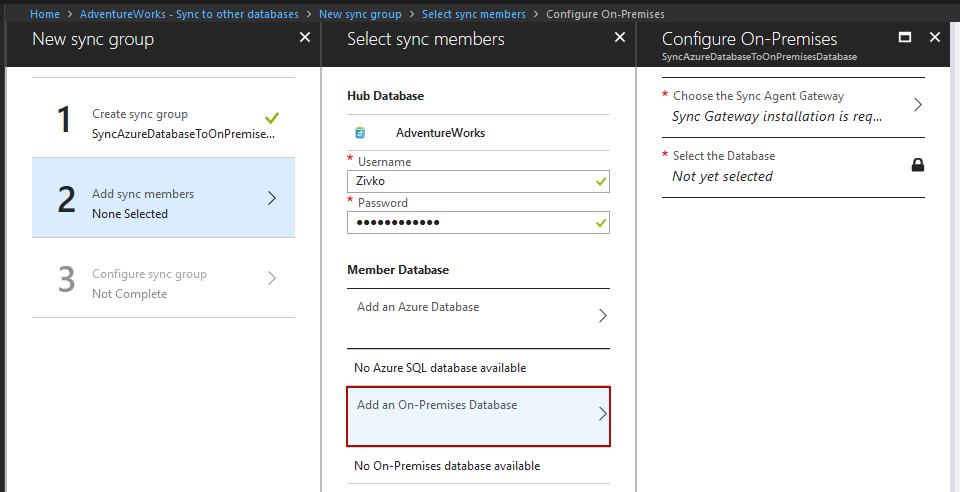
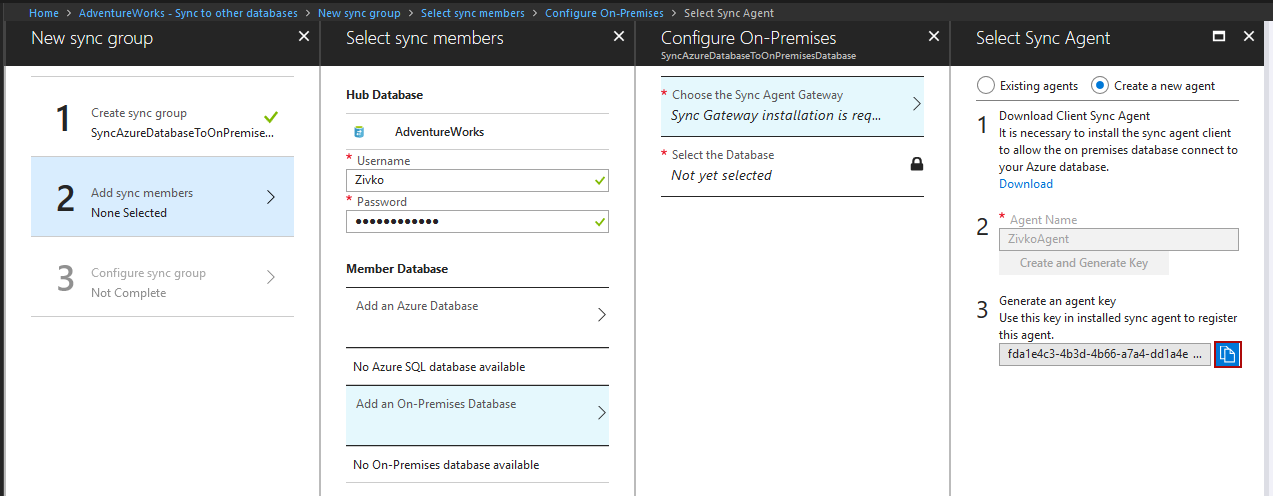
To start configuration synchronization between the Hub database and on-premises SQL database, select Choose the Sync Agent Gateway; the Select Sync Agent tab will appear:
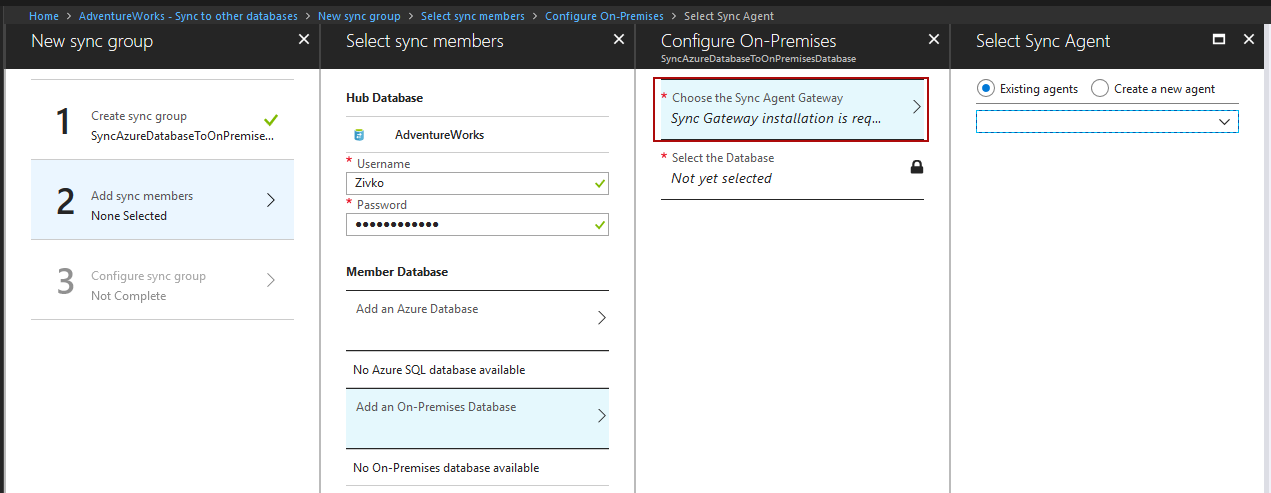
If the local sync agent is already installed and set on the machine, on the Select Sync Agent tab, pick the Existing agents radio button and from the combo box choose the agent.
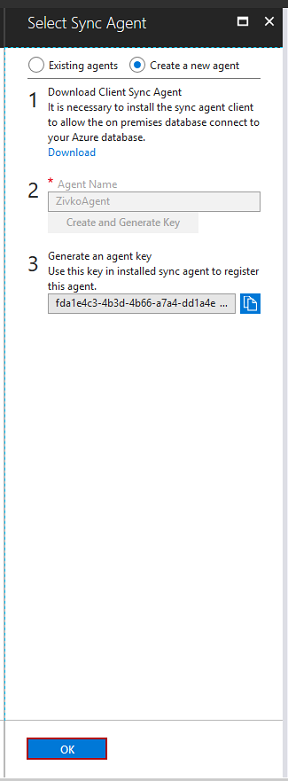
In case where the sync agent is not set, choose the Create a new agent radio button. Additional three steps under the Select Sync Agent tab will appear:
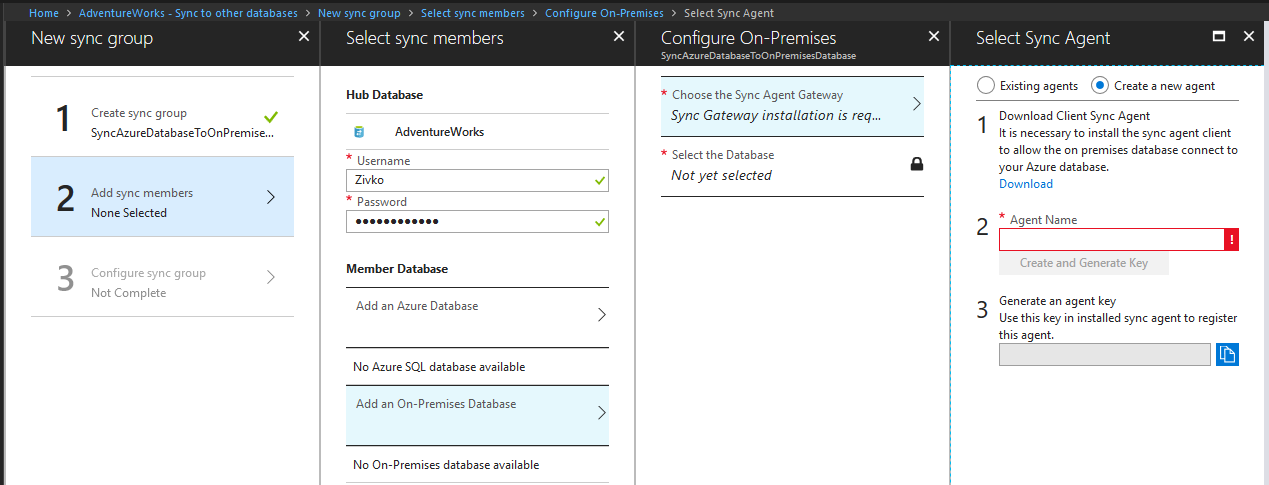
In the first step, the Client Sync Agent needs to be installed on the machine where the on-premises SQL Server is located. Sync Agent is used to communicate between Hub and on-premises SQL Server database.
Set up the SQL Azure Data Sync Agent
Click the Download link to download the SQL Azure Data Sync Agent:


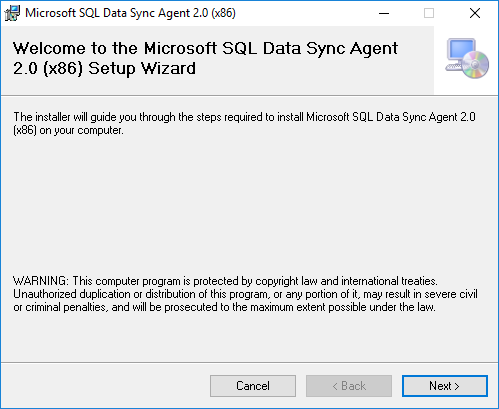
The installing (configuring) process will start:
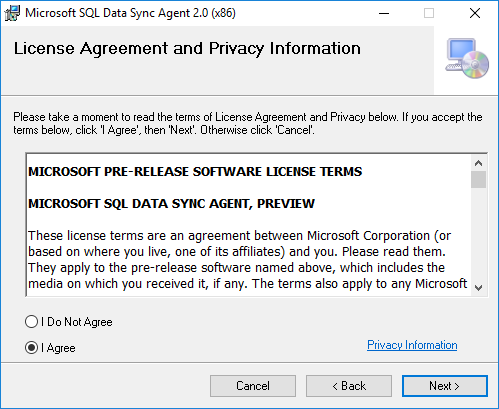
Press the Next button to continue. On the License Agreement and Privacy Information window, read the agreement and if you agree, select the I Agree radio button and press the Next button:
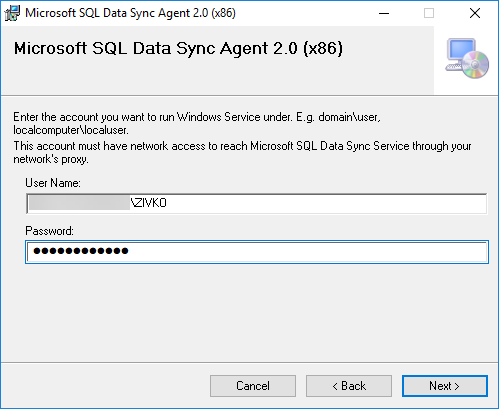
On this page, enter the Windows credentials and press the Next button:
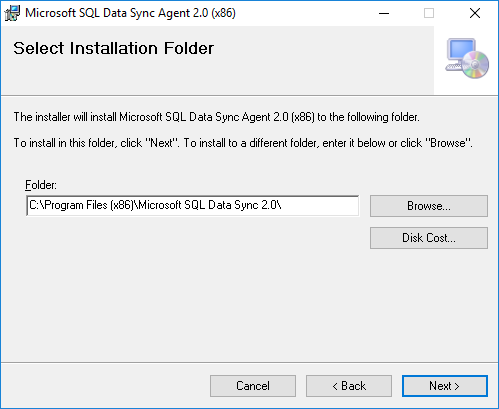
In the Folder box, enter the location where the Microsoft SQL Data Sync Agent will be installed and press the Next button to continue:
This page indicates that the installation packed is ready to be installed, press the Next button to install the sync agent:

The last page indicates that the installation process is successfully finished:
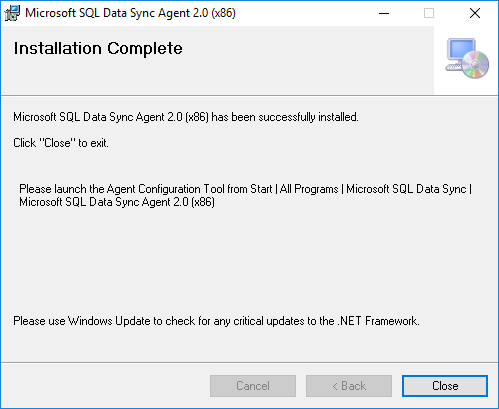
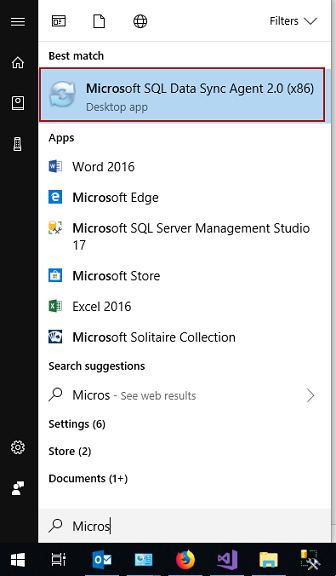
Press the Close button to close the installation window and, in the Start menu, find and launch the Microsoft SQL Data Sync Agent:
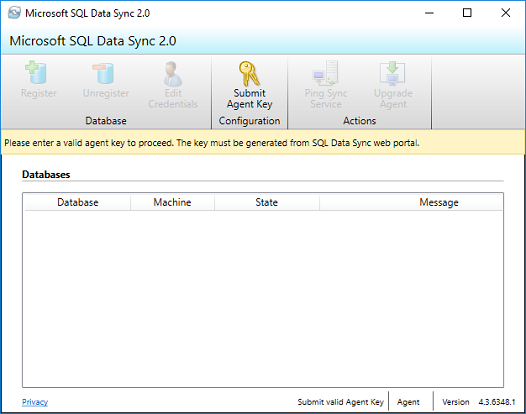
The Microsoft SQL Data Sync window will appear:
Now, back to the Azure portal and, in the Agent Name box, enter the name for the sync agent and press the Create and Generate Key button:
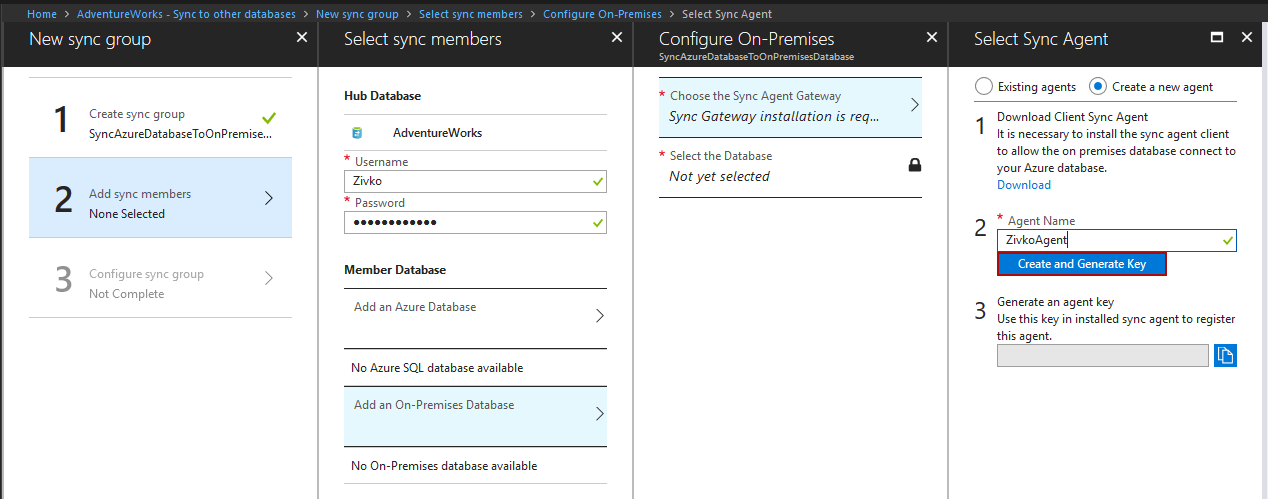
After a while, the agent key will be generated in the Generate an agent key box:
Copy that key and go to the Microsoft SQL Data Sync window and press the Submit Agent Key button. The Sync Metadata Database Configuration window will appear:
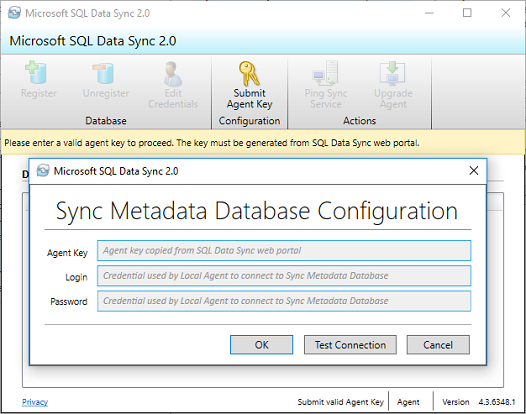
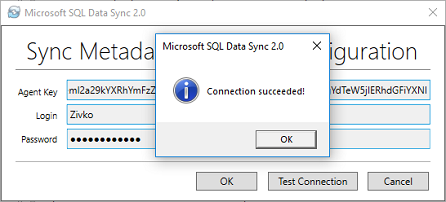
In the Agent Key field, paste the copied agent key and in the Login and Password fields, enter the existing credentials for the Azure SQL Database server where the Hub database is located:
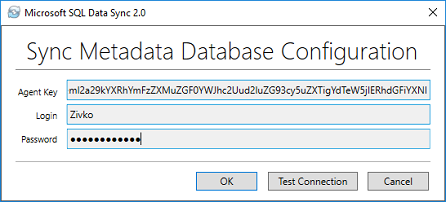
To test if everything is ok, press the Test Connection button. If everything is ok, the following message will appear:

Please note, when doing sync with on-premises SQL Server member database with the hub database, in the firewall settings, the outbound TCP rule with 1433 port needs to be added in order to allow communication between them:
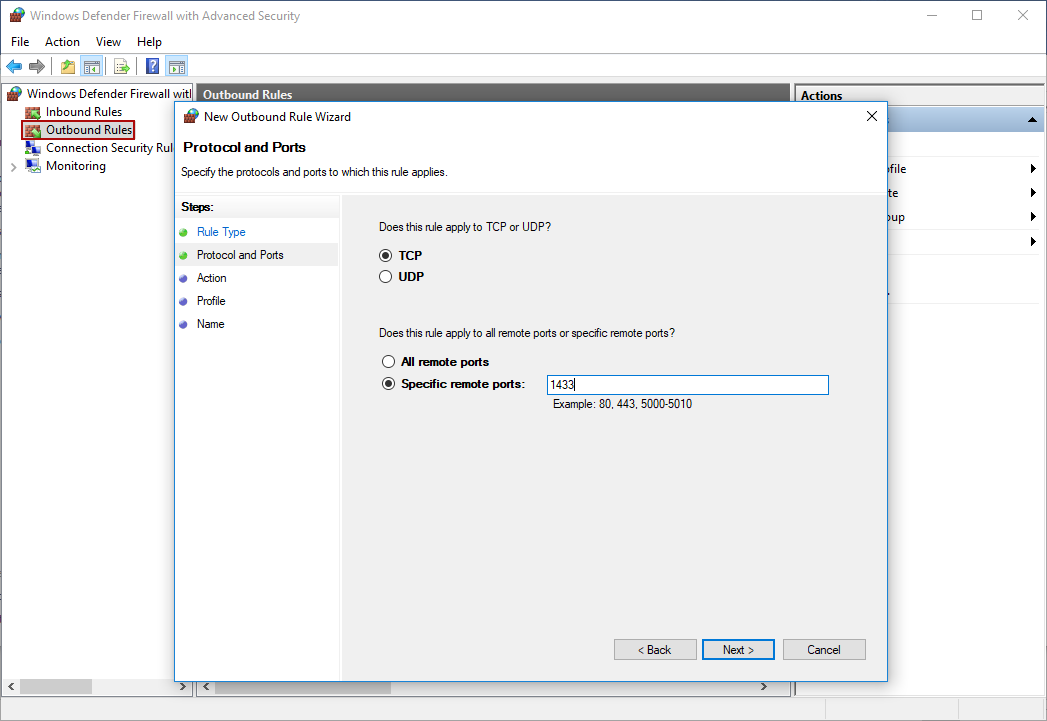
Otherwise, the following error message box may appear:
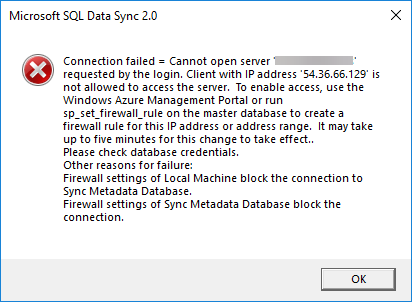
More about setting Inbound and Outbound rules can be found on the How to connect to a remote SQL Server page.
Also, this error may appear when the Azure firewall is not set. To resolve this, go to Azure portal and, under SQL servers, find the Firewalls and virtual networks option and, from there, add IP address that is shown in the error message box:

Once these rules are set on the Microsoft SQL Data Sync window, press the OK button to continue.
Now, on the Microsoft SQL Data Sync window, click the Register button, the SQL Server Configuration window will appear:
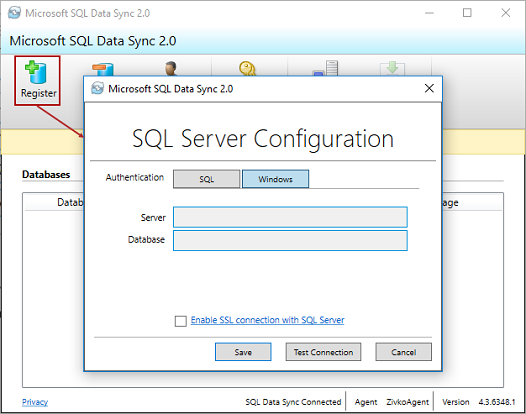
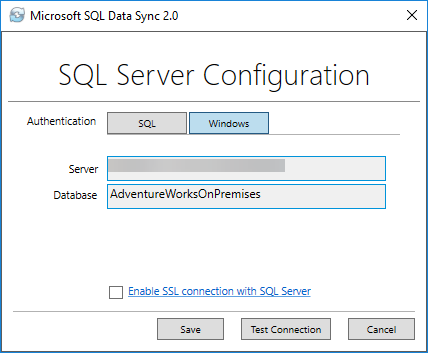
In this window, how the connection with the SQL Server will be established can be chosen by using SQL or Windows authentication. As an example, the Windows authentication is chosen. In the Server fields, type the name of SQL Server on which is located a database that is chosen to be synchronized with Azure hub database and, in the Database field, enter the name of the database.
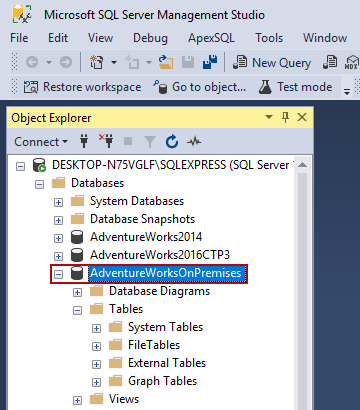
For example, the AdventureWorksOnPremises empty database is chosen:
When the fields under the SQL Server Configuration window are filed in, click the Test Connection button to verify that the connection is successful. After verifying the connection, click the Save button:
The AdventureWorksOnPremises database will appear in the Databases list of the Microsoft SQL Data Sync window:
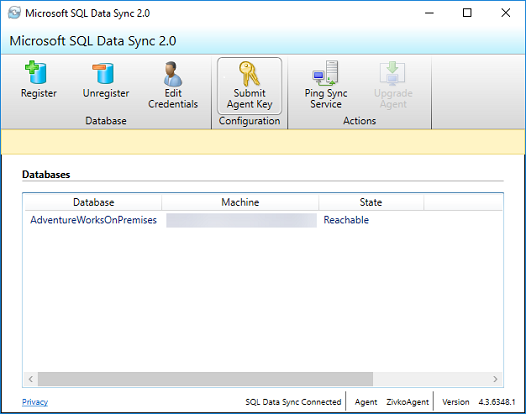
Now, the Microsoft SQL Data Sync window can be closed.
Again, go back to Azure portal and, on the Select Sync Agent tab, press the OK button:
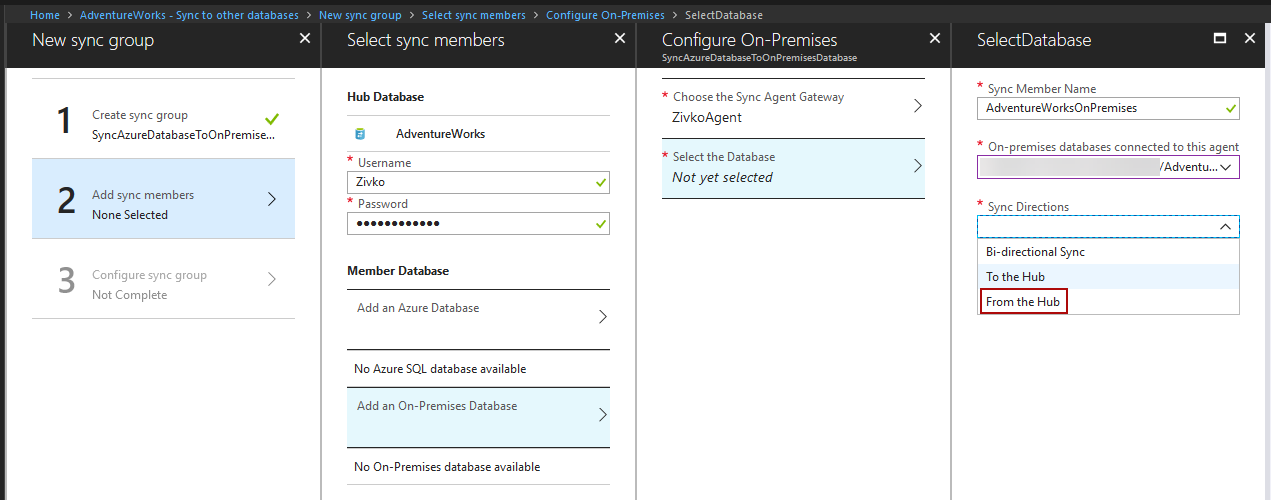
Now, under the Configure On-Premises tab, select Select the Database, the SelectDatabase tab will appear. On the Sync Member Name box, enter the name for the new sync member. Under the On-premises databases connected to this agent combo box, select the SQL Server database (AdventureWorksOnPremises) and, under the Sync Directions combo box, choose how the data synchronization will be performed.
One of the following options can be selected:
- Bi-directional Sync: data changes in either on-premises SQL Server database or the hub database are written to the other database.
- To the Hub: data changes in the on-premises SQL Server database are written to the hub database, but changes in the hub database are not written to on-premises SQL Server
- From the Hub: data changes in the hub database are written to the on-premises SQL Server, but changes from the on-premises SQL Server are not written to the hub database.
In this example, the data synchronization will be performed from the hub database to the on-premises database, which means that the From the Hub option will be chosen in the Sync Directions combo box:
Press the OK button on the SelectDatabase and Configure On-Premises tabs and wait a couple of seconds for the new member to be crated:
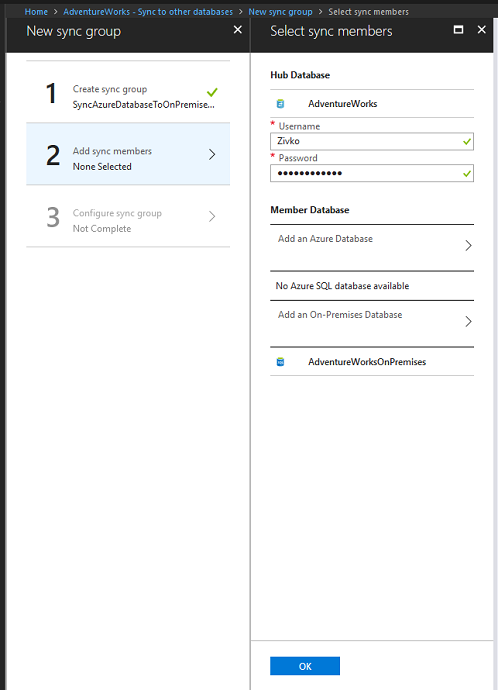
On the Select sync members tab, press the OK button to close this tab. After a couple of seconds, the Configure sync group will be highlighted:
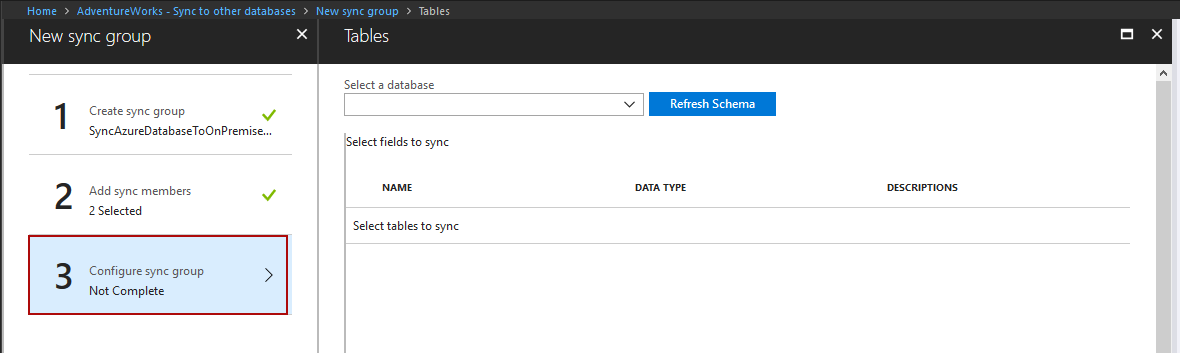
Under the Tables tab in the Select a database combo box, choose the database and press the Refresh Shema button. After a while, under the Select tables to sync list, the tables will appear. Select the tables that want to synchronize. In the Select fields to sync list, all columns from the tables that are selected in the Select tables to sync list will be listed. By default, all available columns under the Select fields to sync list are selected. The columns that don’t want to be synchronized can be uncheck, but make sure that the columns with Primary Key stay checked:

After everything is set, press the Save button.
Now, all that can be done is to wait 5 minutes which is set in the Sync Frequency section to trigger synchronization or by clicking the Sync button to trigger synchronization immediately:

In the Logs list, it can be checked if synchronization goes well or with errors. To check if the data appear in the on-premises SQL Server database, connect to SQL Server where is located the sync member database and, in Object Explorer, check if the desired tables appear in the list under the Tables folder:

In case some other problems with SQL Data Sync happen, please visit the Troubleshoot issues with SQL Data Sync page

He is a prolific author of authoritative content related to SQL Server including a number of “platinum” articles (top 1% in terms of popularity and engagement). His writing covers a range of topics on MySQL and SQL Server including remote/linked servers, import/export, LocalDB, SSMS, and more.
In his part-time, Zivko likes basketball, foosball (table-soccer), and rock music.
See more about Marko at LinkedIn
View all posts by Marko Zivkovic
- How to connect to a remote MySQL server using SSL on Ubuntu - April 28, 2020
- How to install MySQL on Ubuntu - March 10, 2020
- Using SSH keys to connect to a remote MySQL Server - November 28, 2019