
Microsoft Azure Automation service provides a framework to create and schedule workflows to simplify the repetitive and mundane tasks that Cloud administrators perform with Azure. The workflows are commonly known as run-books.
In this article, we will explore the Microsoft Azure Automation service. In addition, we will walk through the steps for creating and managing run-books.
- Discuss Azure Automation
- Understand runbook in general
- Explain runbook
- Create a PowerShell runbook
- Discuss the option to set up a runbook
- Test and publish the sample runbook code
- Run the runbook job and more…
Introduction
We will create a new automation account and a set of credentials to access the automation service. Storing credentials in Azure Automation allows workflows to connect to Azure as the account provided.
To use the Automation feature, Type in the keyword “automation” in the Azure Market place option in the Azure portal.
Pre-requisite:
- To do that, you need an Azure subscription
- You can set up a subscription with a one-month free trial period. Using the free subscription, you get up to $200 in credits to access most of the Azure services that can be used during the trial period
- To set up a free-trial Microsoft subscription account, you need a phone number, and a credit card. After that trial subscription expired, you are still able to access the subscription. However, if you decide to keep the subscription, you can upgrade the subscription and go with a pay-as-you-go subscription
Enable Azure Automation
Let us follow the steps to enable automation service.
- I assume that you have set up a subscription
- Browse Azure Management Portal: portal.azure.com
- Type in the credentials to log in to your subscription
- In the search bar, type in the keyword “Automation” and click enter. You can see that the automation accounts services are listed
-
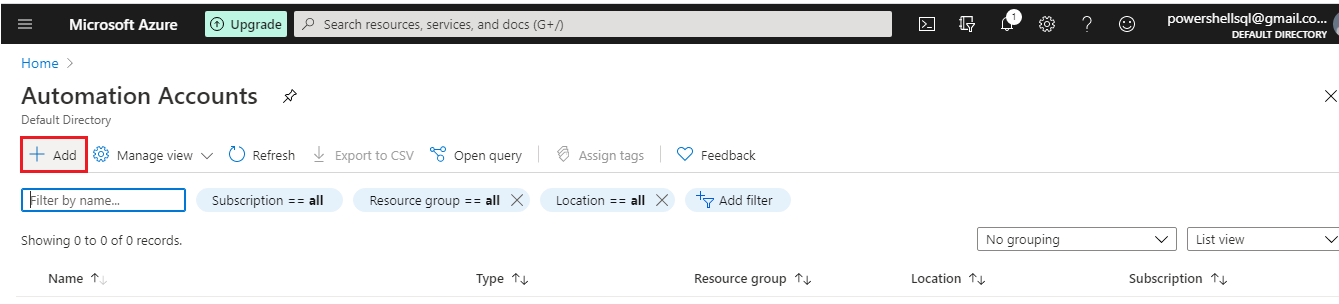
Select the Automation Accounts option

-
Click the Add icon
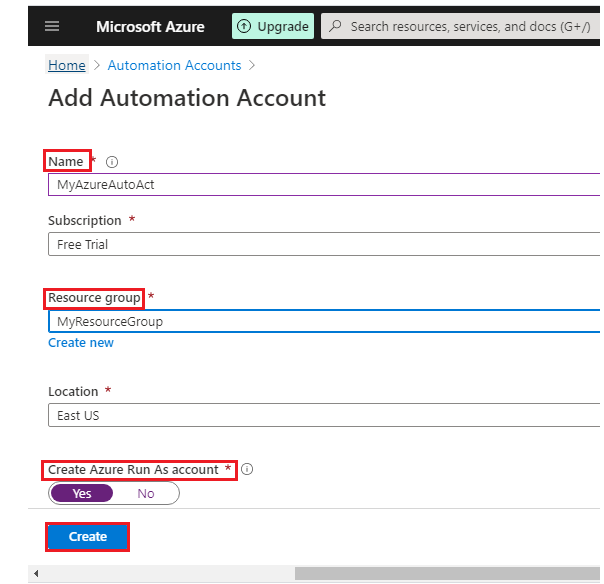
- Type in the Name, select the Azure subscription for which you want to enable Azure Automation. In addition, select Create Azure Run As account. and then click Create
-
After completion of the registration process, you will see the automation icon displayed on the left side of the portal
- Click Learn More in the Azure automation section to find information to help you get started. You can find the latest documentation on Automation, run a simple tutorial, jump to the Runbook Authoring Guide, and access the Azure forums to discuss and get answers from others about automation

What is the runbook?
Runbooks generally contain step-by-step procedures that define where to start-and-stop, handle requests, contingency plans, and helps to debug the process.
What is an Azure Automation runbook?
Azure Automation runbook encompasses a set of processes and step-by-step procedures that you execute repetitively to support various enterprise tasks. The tasks can include application deployment, resource management, database maintenance, server patching, upgrade, backup management, log management, storage management, user management, and security management.
A runbook allows you to build processes using Windows PowerShell Workflow script. The methodology is now part of the automation runbooks. A runbook is one of the core components for automation that can be used to automate and orchestrate any simple or complex requirement.
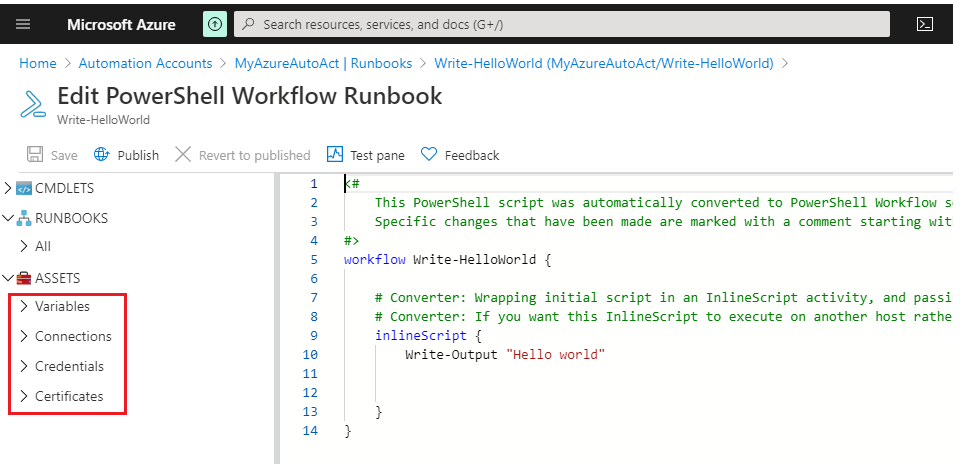
The Windows PowerShell Workflow code can be used in runbooks typically leverages automation assets. The other important components of automation include schedules—to schedule the runbooks, variables—to define variables, connections to databases and resources, and authentication components include certificates and credentials.
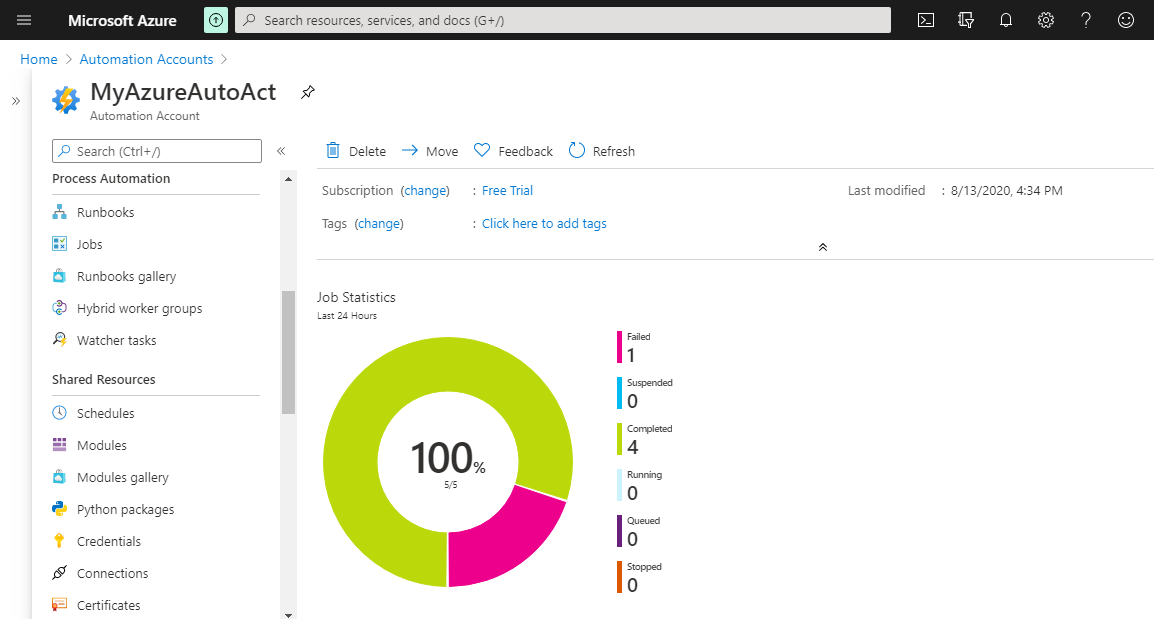
Automation Dashboard
The Automation Dashboard tab shows diagnostic, job, and usage information for the Automation jobs that have run. It indicates the different status of the jobs (queued, failed, stopped, suspended, completed, and running) with a granularity of one hour to 30 days. You can see the number of runbooks you have, assets (variables, connections, credentials, schedules), and more summary information.
The Runbooks tab provides a list of runbooks and their current view. You can also see a search tab to filter the job status by specific dates and times.
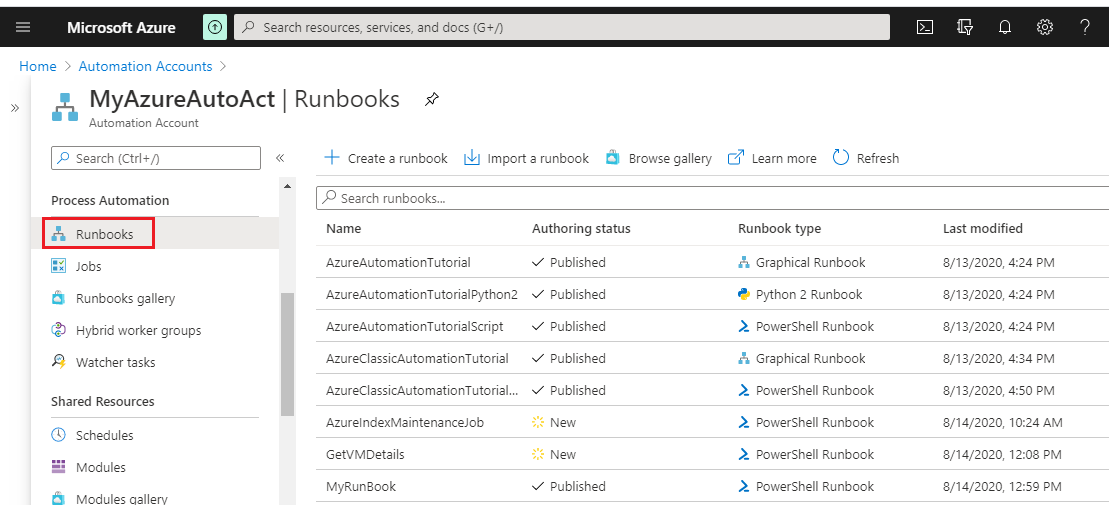
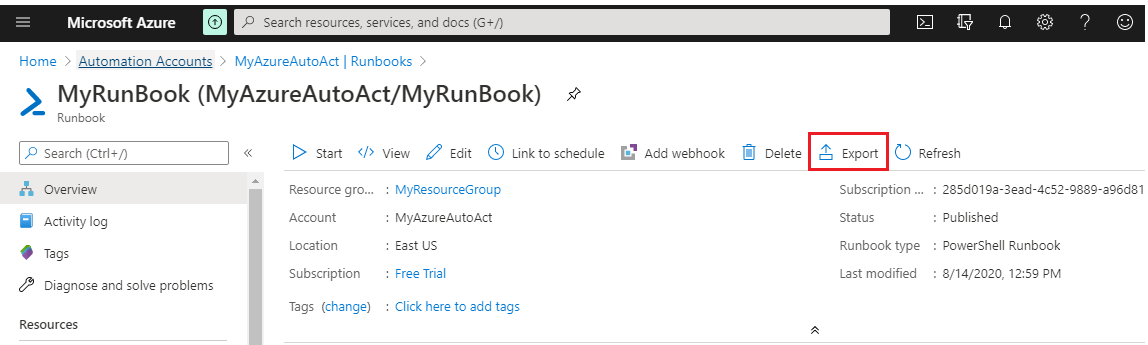
In addition, you can also import the runbook and export the runbook to a file.
Assets tab you can modify and create variables, connections, and credentials. You can also import additional modules that contain Windows PowerShell workflows to use in your runbooks.
Automation & Configuration
Azure Automation services provide a central repository to administrate and manage all automation work-flows and assets effectively and efficiently. In addition, it also provides granular access control to the repository. The automated process can be handled in the Azure portal or locally from an on-premises server where you install the AzureAutomationauthoringToolKit module.
Create a runbook
To create a runbook, follow the below steps:
- Sign in to the Azure Management Portal
- Click the Automation account
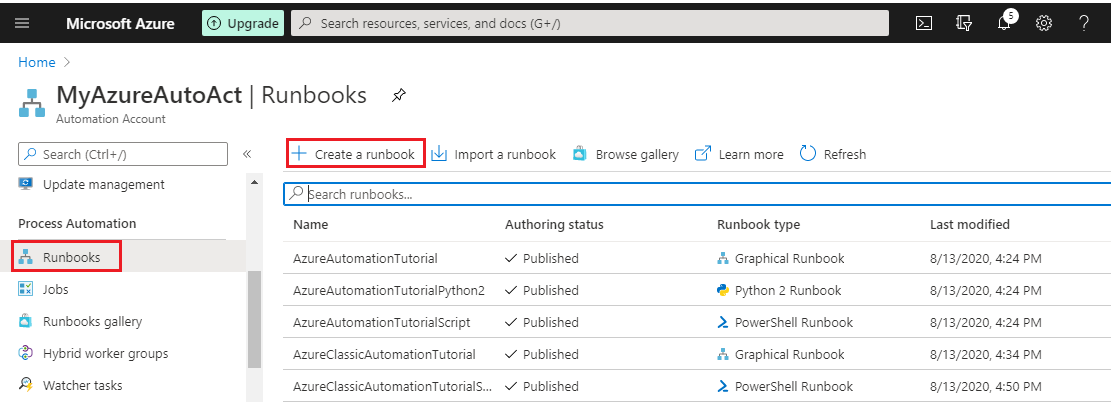
- Locate the Runbooks on the left blade
-
Click “Create a runbook”
-
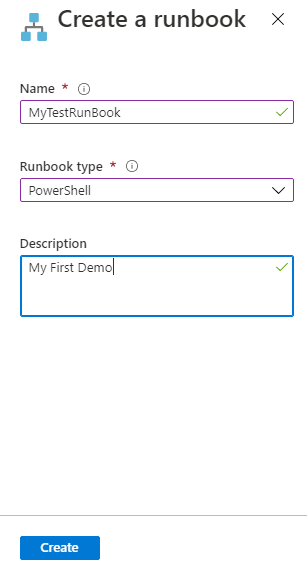
Type in the following information:
- Runbook Name: Enter the name of the runbook.
- Runbook Type: Choose PowerShell
-
Description: Type in the additional details about the purpose of the runbook
- Click the Create button to create the runbook
-
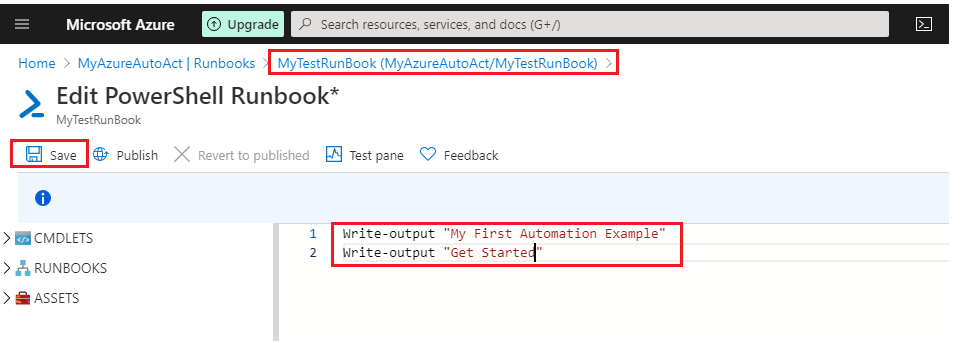
Let us add the code to the empty runbook
12Write-output "My First Automation Example"Write-output "Get Started" - Click Save
-
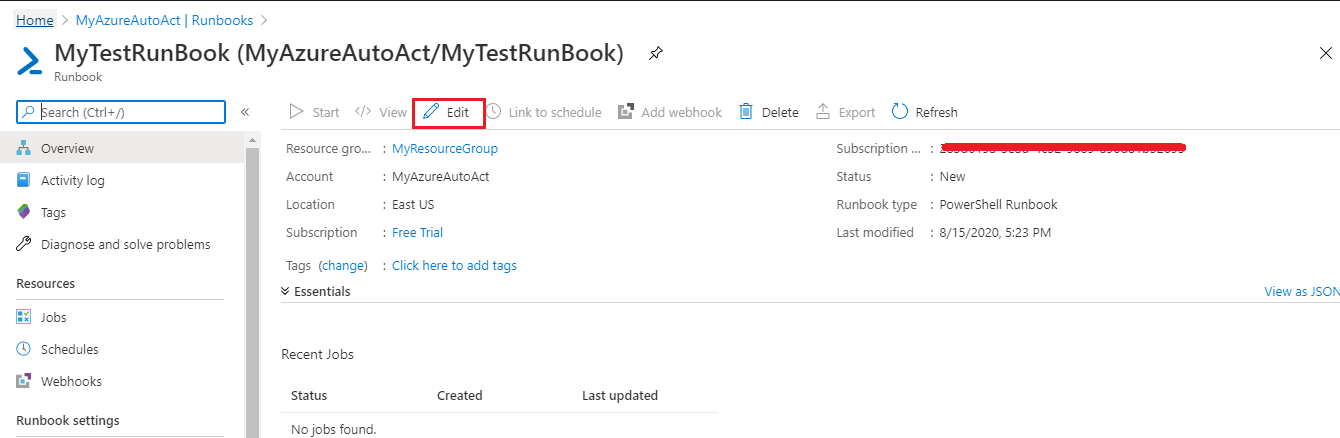
Now, the runbook job is ready to test
- Click the Edit button to test the Runbook
-
Select the Test pane to test the code
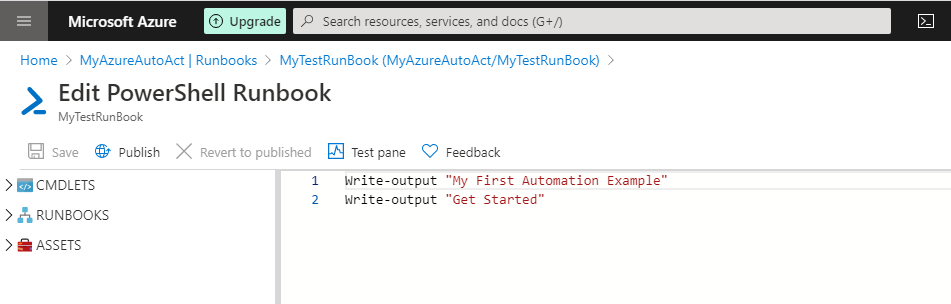
Let us publish the runbook. Before it is ready to use, let’s test it to ensure it runs as per the need. Testing and validating the output becomes easier using intuitive options.
- Click Test pane
- Click the Start button to initiate the test. This is the only enabled option to run the runbook
- The Runbook job is created
- The status or output is displayed in the result pane
Publish the runbook
We have tested the runbook and validated the output in the last section.
In this section, you will see the steps to commit or publish the draft version of the runbook. In this case, no published version of the runbook is created so when you publish the runbook, it just creates the runbook. In other cases, it overwrites the published runbook with the draft version.
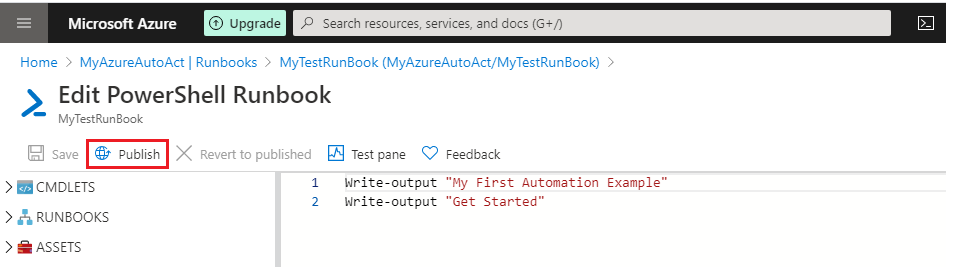
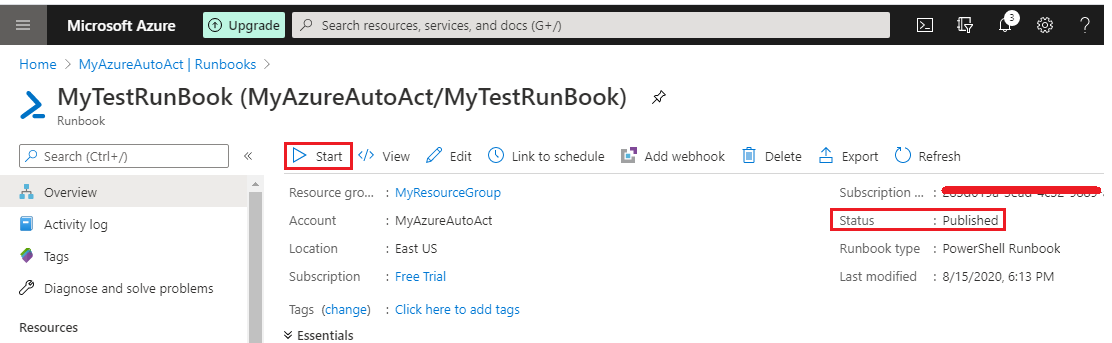
- Click on the Publish icon to publish the runbook
- Choose “Yes” when prompted with an option “Yes” or “No”
- Now, you will be redirected to the runbooks page and you can see that the status is set to Published
-
Next, Click the Start button to run the runbook. You will be prompted again, choose “Yes” to start the runbook
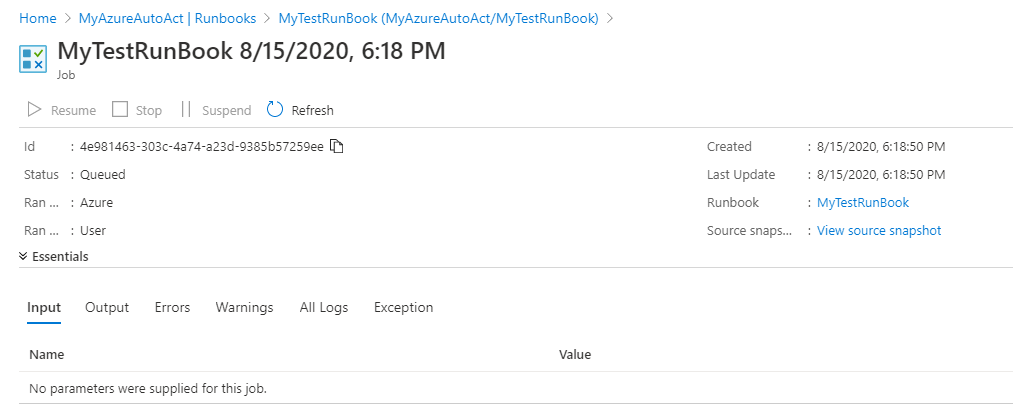
-
Now, you will be redirected to a Job pane to view the job status. The runbook status is shown in detail. To check the status, you can keep refreshing the Refresh icon to view the possible statuses
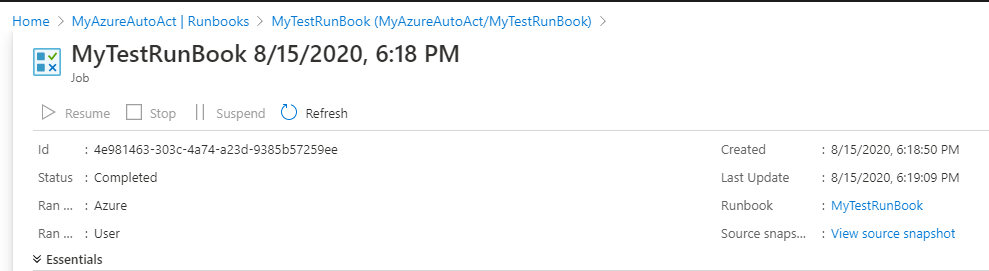
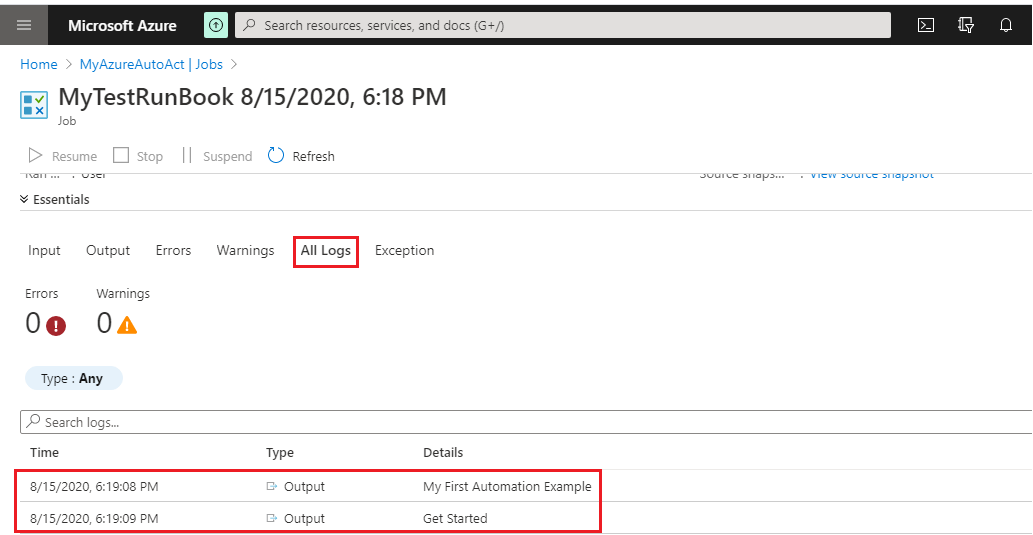
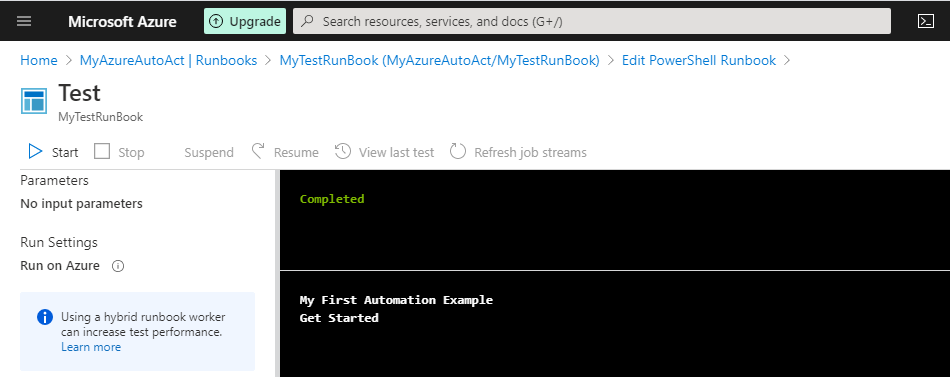
The runbook status is changed to Completed, click Output to see the result
-
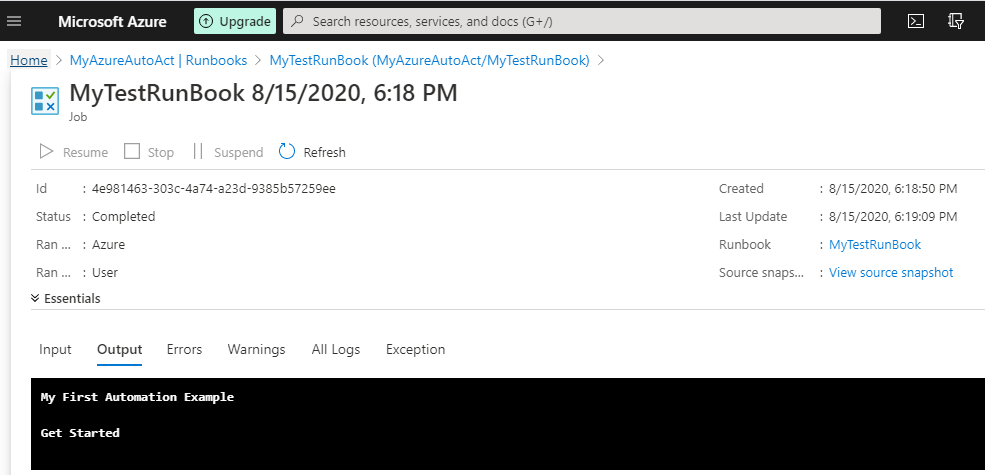
To view the result, select the output to view the summary. In this case, the following output is shown in the output pane
12My First Automation ExampleGet Started -
Next, Click “All Logs” to see the output streams of the runbook “MyTestRunBook” job. It will display the output stream along with the date-time of its generation
You can induce an exception and error using the following sample script:
1234567891011Write-output "My First Automation Example"Write-output "Get Started"try {[int]$a = 1/0}catch [System.Exception] {write-output "$_.Exception.Message"}finally {write-output "2"}Summary
This article is an effort to gather the details of Azure Automation services. In addition, if you are new to PowerShell automation, one can jump start and start working with Azure automation. I have also covered automation service components that are explored in detail to provide insights on their functionalities. I will discuss more about this feature in the upcoming articles.
That’s all for now…
Table of contents
I’m a Database technologist having 11+ years of rich, hands-on experience on Database technologies. I am Microsoft Certified Professional and backed with a Degree in Master of Computer Application.
My specialty lies in designing & implementing High availability solutions and cross-platform DB Migration. The technologies currently working on are SQL Server, PowerShell, Oracle and MongoDB.
View all posts by Prashanth JayaramLatest posts by Prashanth Jayaram (see all)- Stairway to SQL essentials - April 7, 2021
- A quick overview of database audit in SQL - January 28, 2021
- How to set up Azure Data Sync between Azure SQL databases and on-premises SQL Server - January 20, 2021