

Azure Data Studio is a new GUI based tool that works on Windows, Mac OS and Linux operating systems. It connects to SQL Server, Azure database, and SQL DW.
Database administrators and developers use SQL Server Management Studio to import the data into SQL Server. Is there any way to do so in Azure Data Studio? Let us explore this in further sections of the article.
Prerequisite:
Before we move further, you can go through below articles to get an overview of Azure Data Studio.
Getting started with Azure Data Studio; initial installation and configuration
In this article, we are going to explore the below points
- Extensions in Azure Data Studio
- Importing data into SQL database using Azure Data Studio
- Common errors
Azure Data Studio release versions information
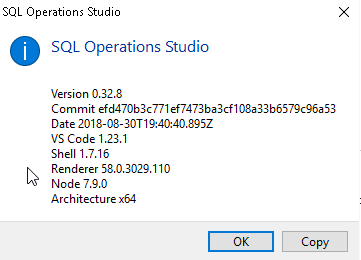
If you want to know about installed Azure Data Studio version, click on Help ->about
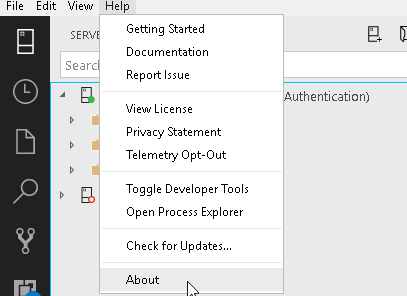
We can see detailed information about Azure Data Studio release version.
Azure Data Studio provides new functionality through the Extensions. Extensions provide a nice way to add more functionality to the base Azure Data Studio product.
Some of the important extensions available in the Azure Data Studio are as below:
Extension | Comment |
Redgate SQL Search | SQL Search is a free add-in that lets quickly search for SQL across databases |
Server Reports | This gives information about server performance with below reports
|
SQL Server Profiler | We can use this extension to trace SQL similar to SSMS Profiler. |
SQL Server Agent | SQL Server Agent extension gives the ability to manage and troubleshoot SQL Server Agent jobs, alerts, operators, proxy etc. |
SSMS Keymap | We can get SSMS keyboard shortcuts using this extension. |
SQL Server Import | It allows importing flat files (.csv, .txt) or JSON files into SQL Server database. |
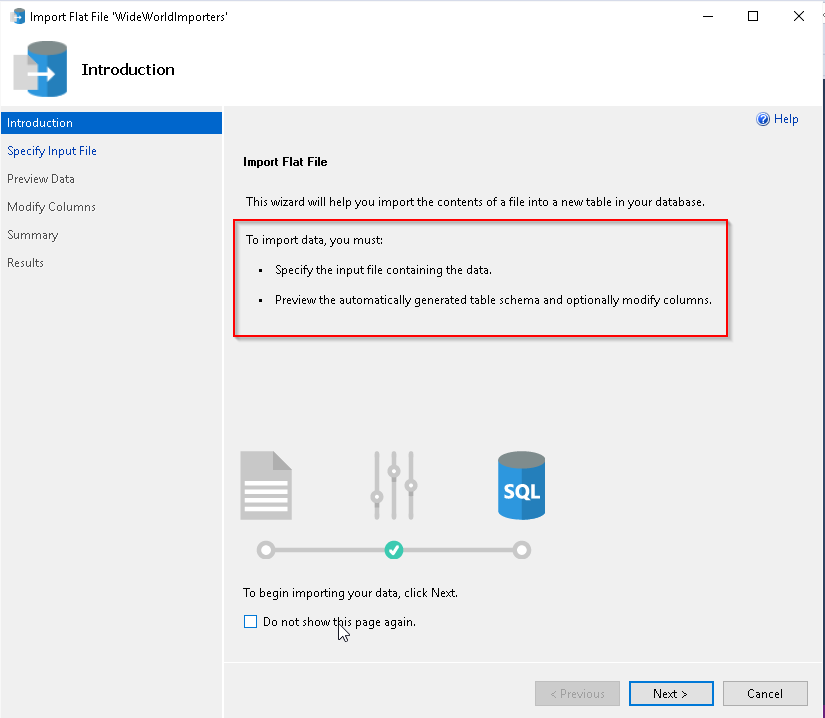
SQL Server Management Studio (SSMS) is one of the most important tools for SQL Server DBA’s and Developers to complete their work on a daily basis. In my previous tip, SQL Server management studio import wizard, we learned that SQL Server Management Studio Flat File Import Wizard simplifies importing the data from the flat files to SQL Server tables with an intelligent process. This process is good enough to predict the incoming data, identify patterns, types, delimiters etc.
Below is the screenshot of the Import Flat File Wizard in SQL Server Management Studio 17.x
The Azure Data Studio August-2018 release provides the functionality of data import using flat files with Import Wizard.
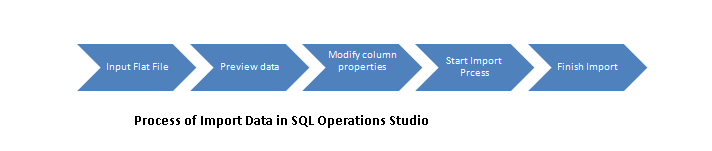
The overall process for the data import in Azure Data Studio is as follows:
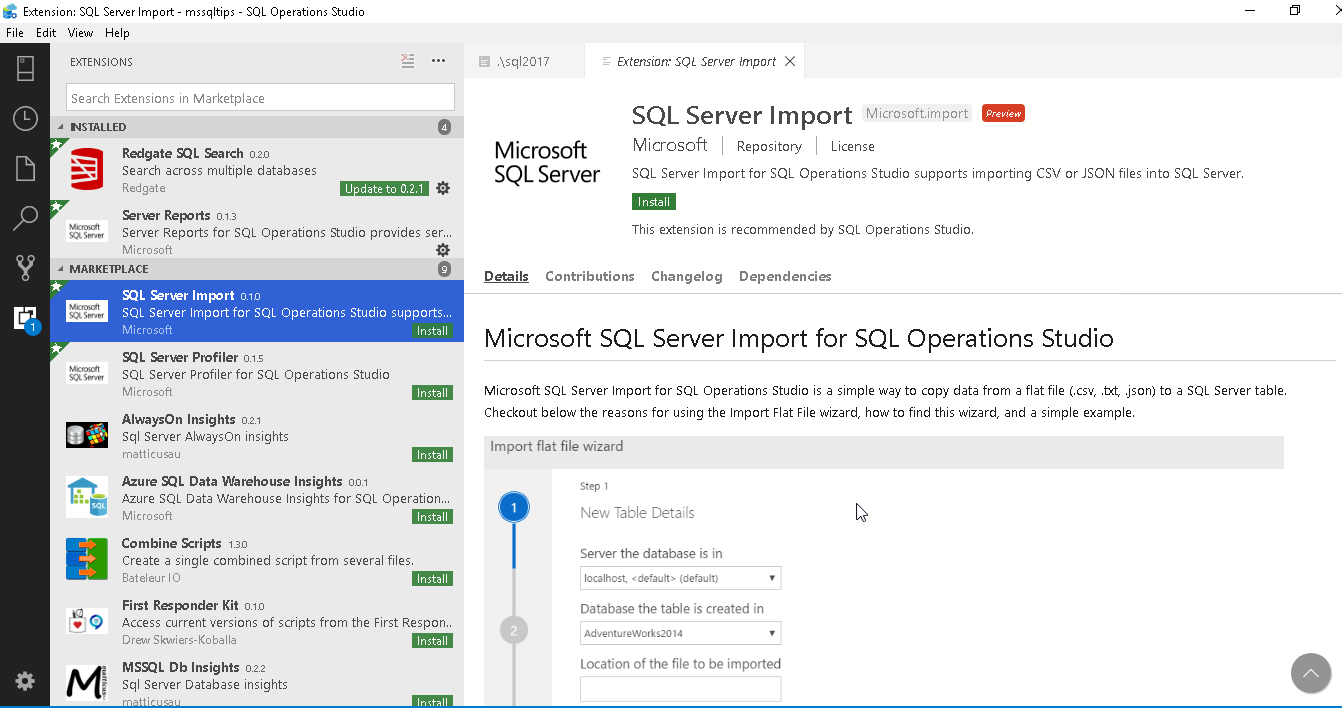
In order to use SQL Server import in Azure Data Studio, we need to install it from the Marketplace. Click on the ‘SQL Server Import’ Extension from the marketplace and it opens up the web page on the right side of the Azure Data Studio.
We can also note here that Azure Data Studio recommends this extension.
Click on install (Green button) to download and install it.
Once we click on Install, we can see in the Output window, it downloads the extension file from the link.
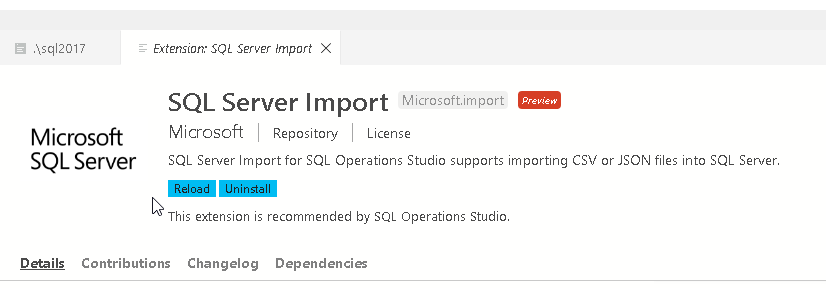
Once the download is complete (approx size 35 MB), it installs Flat file import service to the Azure Data Studio. Click on the reload to activate this extension.

Import data using Import File Wizard
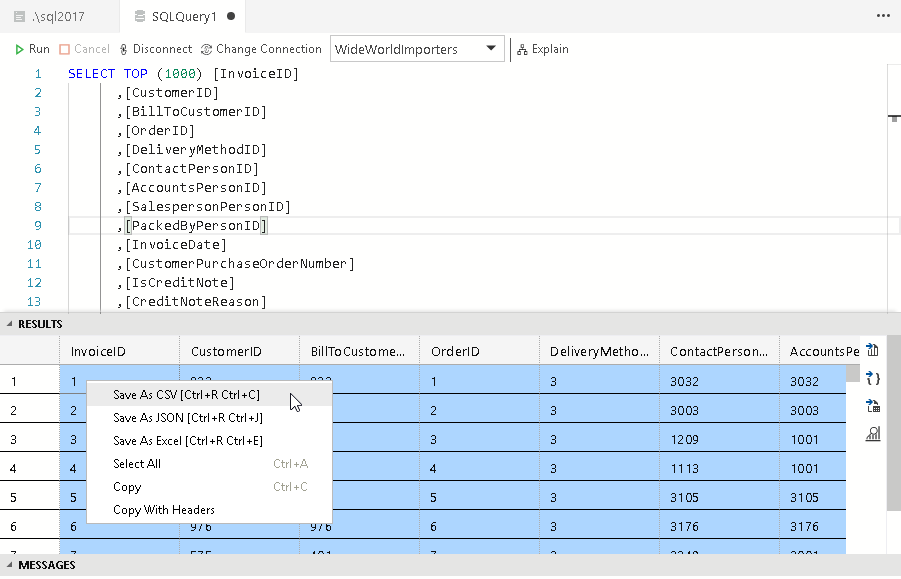
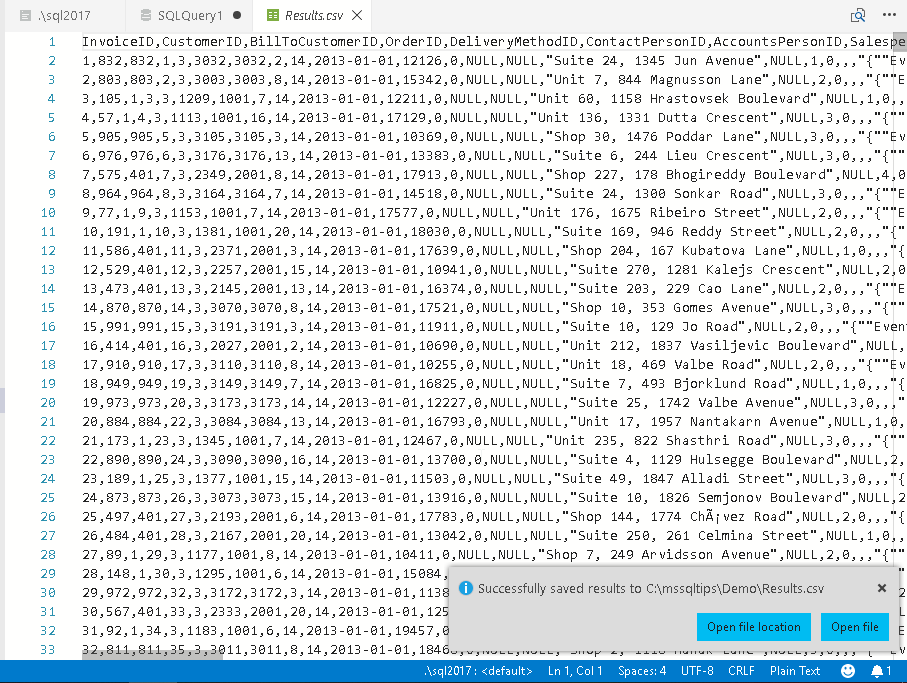
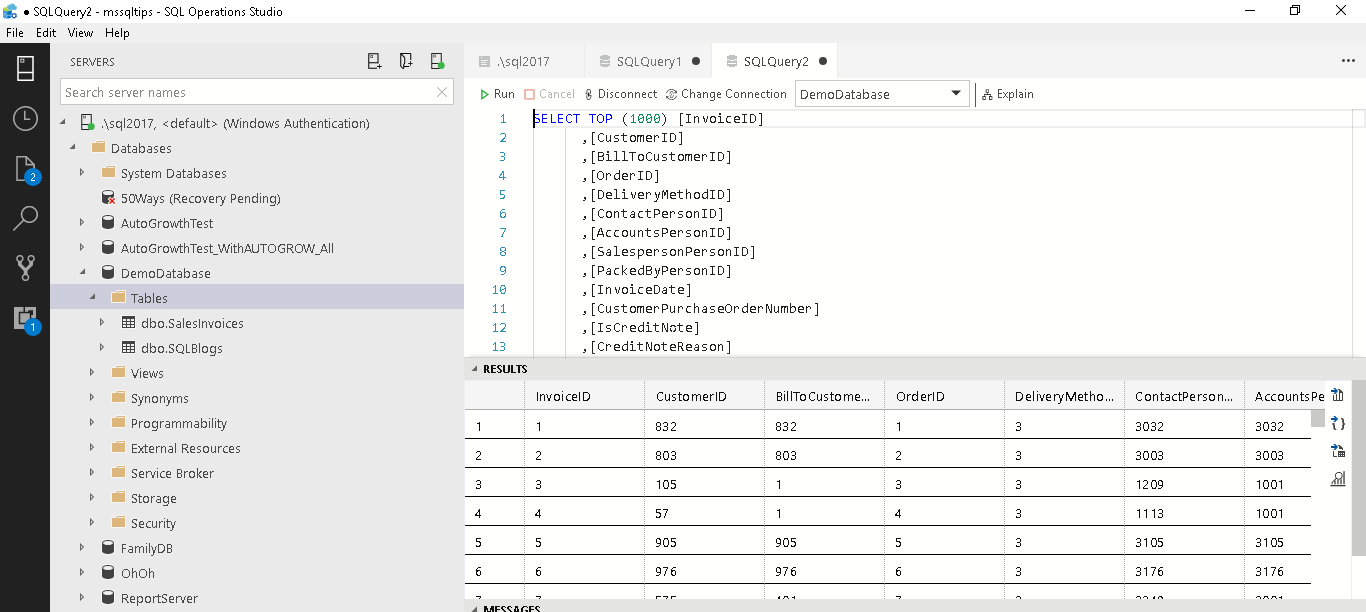
First, let us prepare data to import. I am going to use top 100 records from the Sales. Invoices table of WideWorldImporters database.
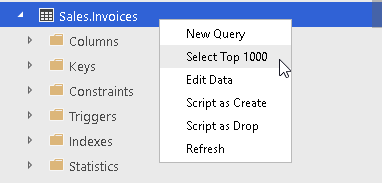
Select the data and save it as. CSV format. We can also use shortcut [Ctrl+R Ctrl+C] to save data as.CSV file.
Save the.CSV file at the desired location.
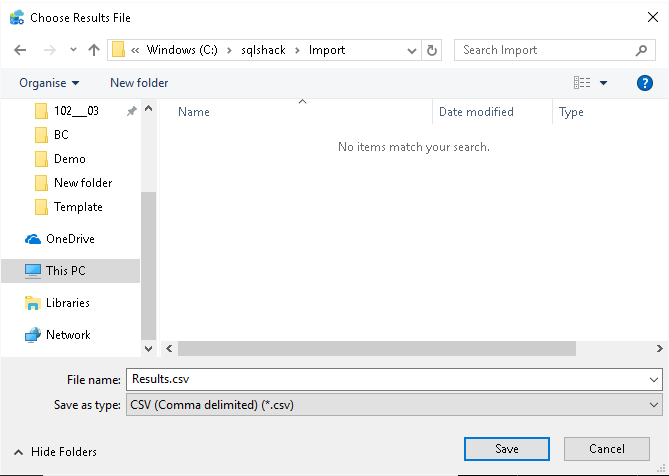
Finally, click on Save. We get the pop-up message to indicate that the file saved successfully. It also opens up the.CSV file in the new query window.
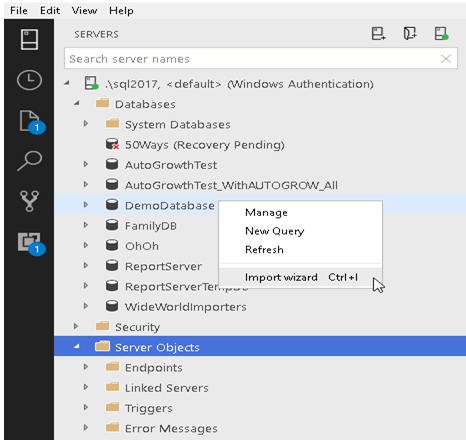
Now in order to import the data, Right click on the destination database (we can change it later in wizard too) and click on Import wizard or press the shortcut key Ctrl+I
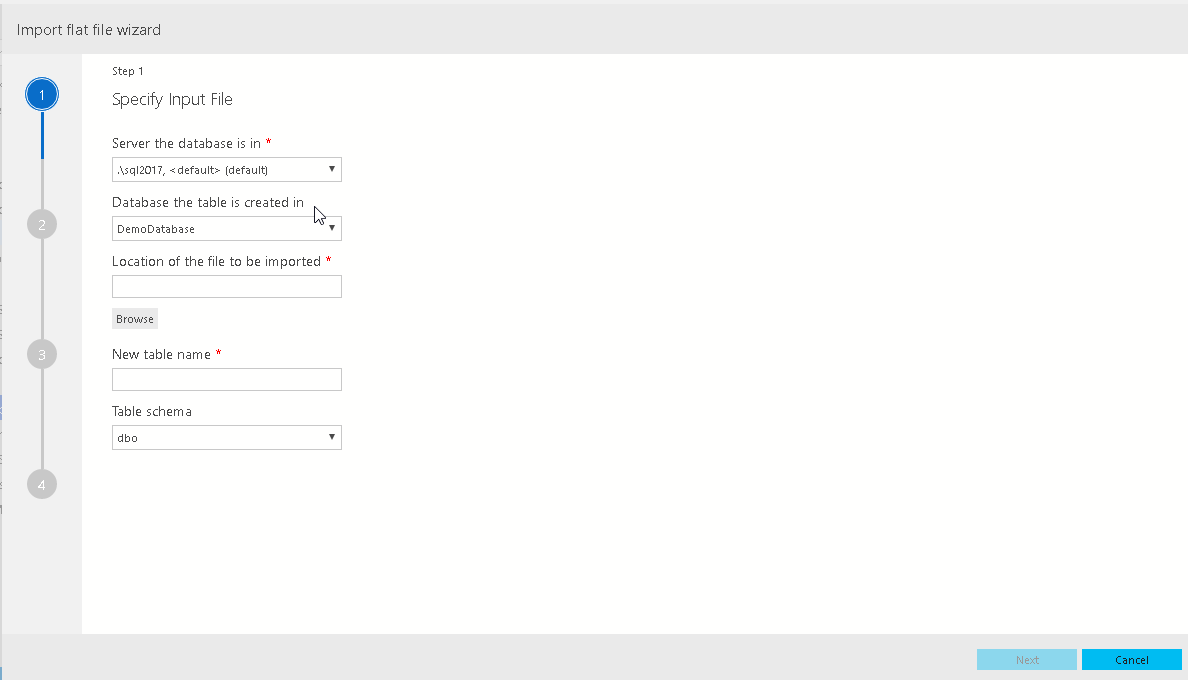
Below is the Import flat file wizard.
Steps to import data using the Import flat file wizard are as follows:
Step1: Specify Input File:
In the first step, we need to specify the input file, table name (default table name is same as the flat file name), table schema. We can also select the database name later from the drop-down databases list.
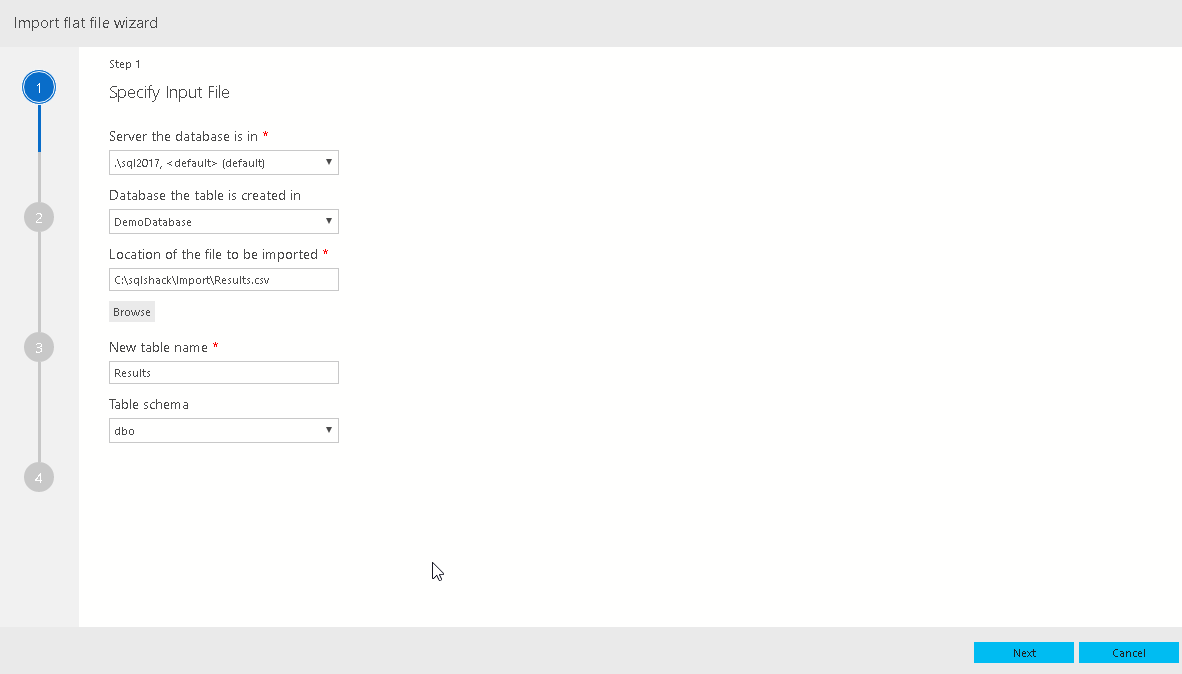
We can also select the table schema from the drop-down list. Click on Next to move to next step

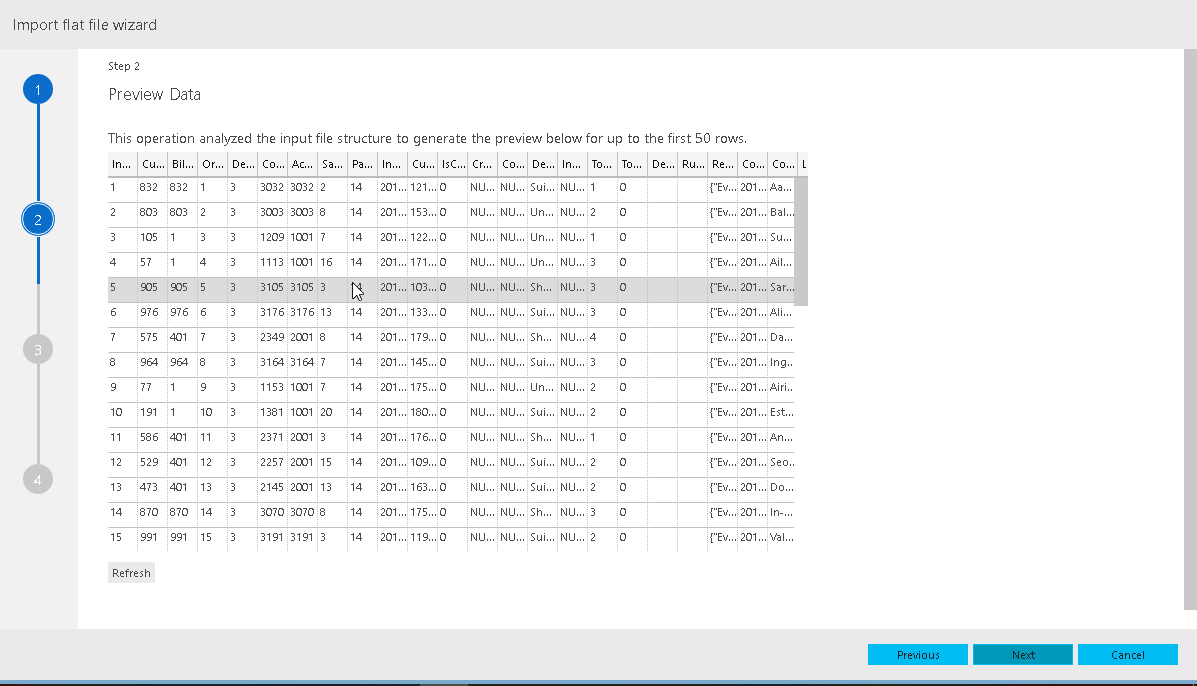
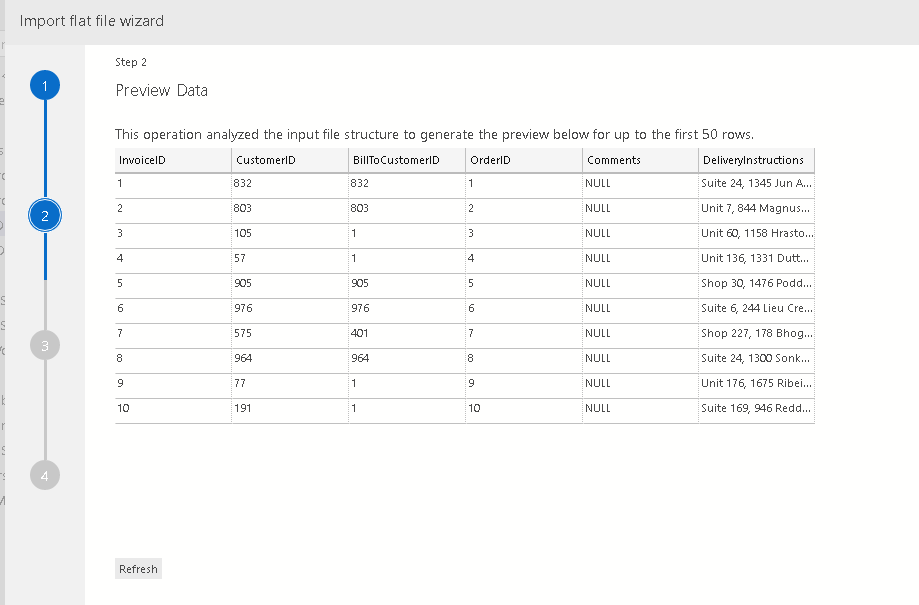
Step 2: Preview Data
In the next step, we can see the data preview from the flat file. Review the data and click on Next
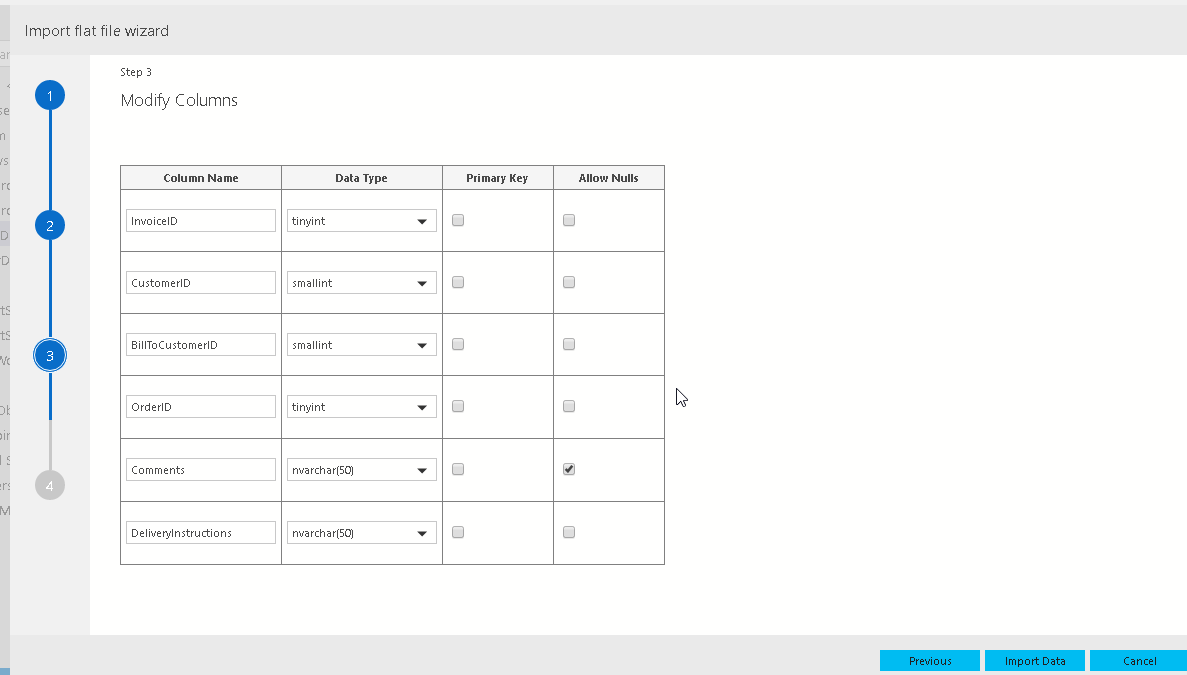
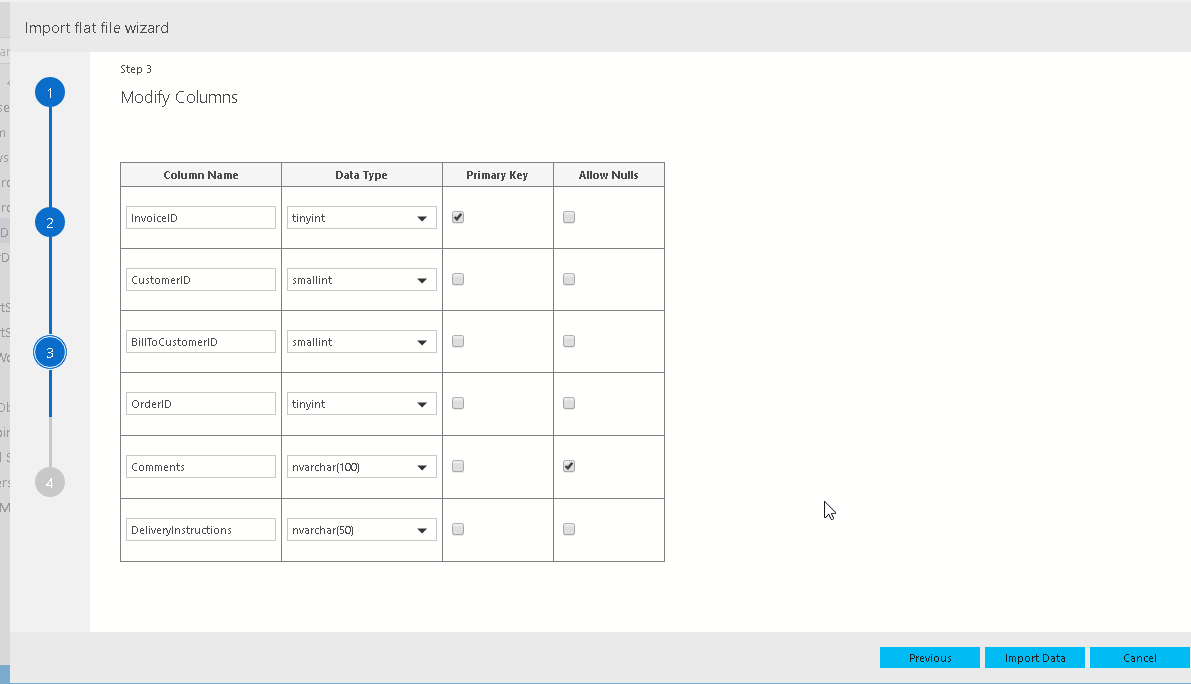
Step 3: Modify Columns
Import flat file wizard decides the appropriate data types for each column.
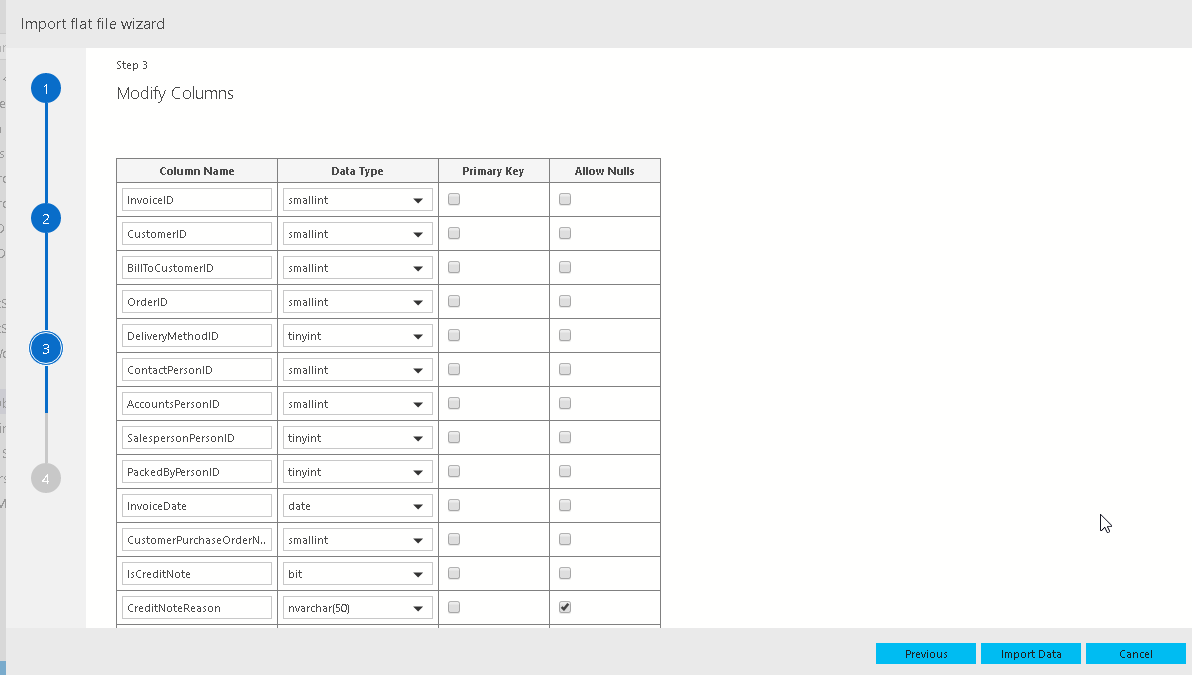
We can modify column names, data type, and primary key column. We can also see whether a null value is allowed or not in the column.
Let us go with the default values this time. Click on Import data to proceed.
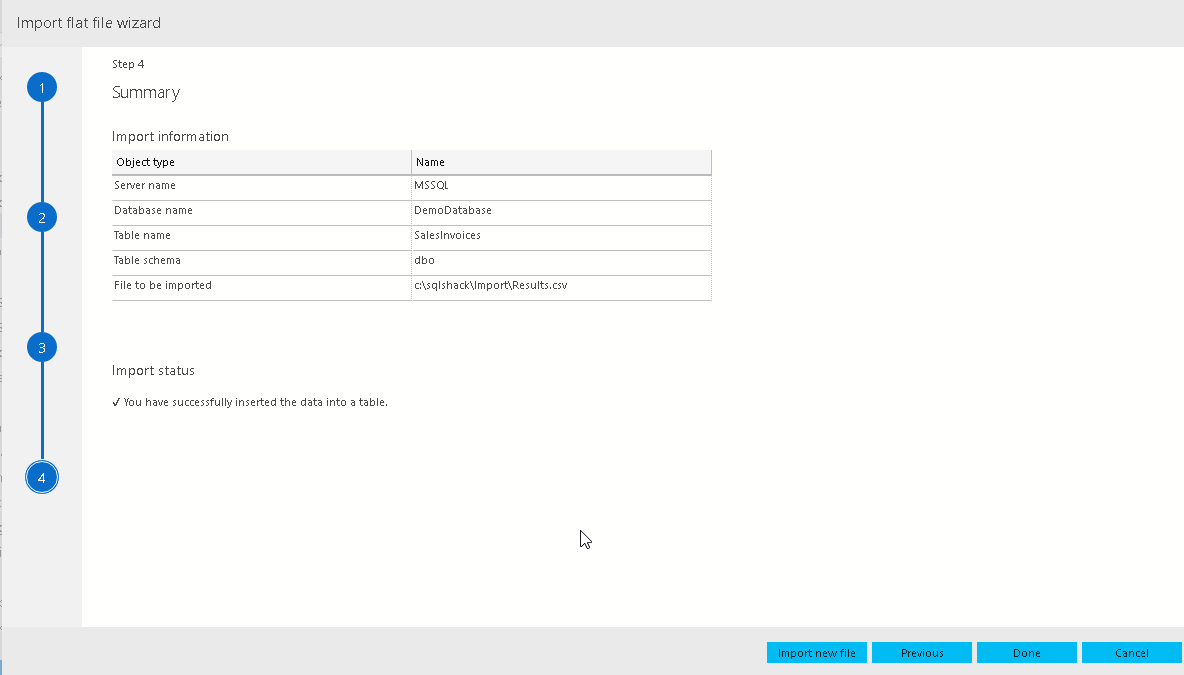
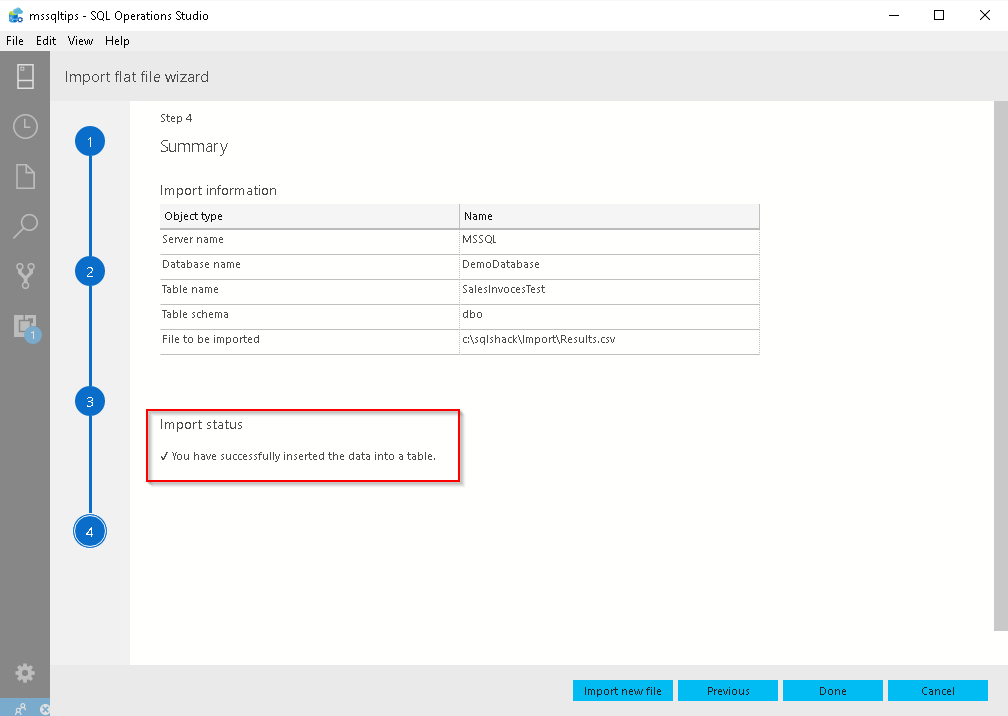
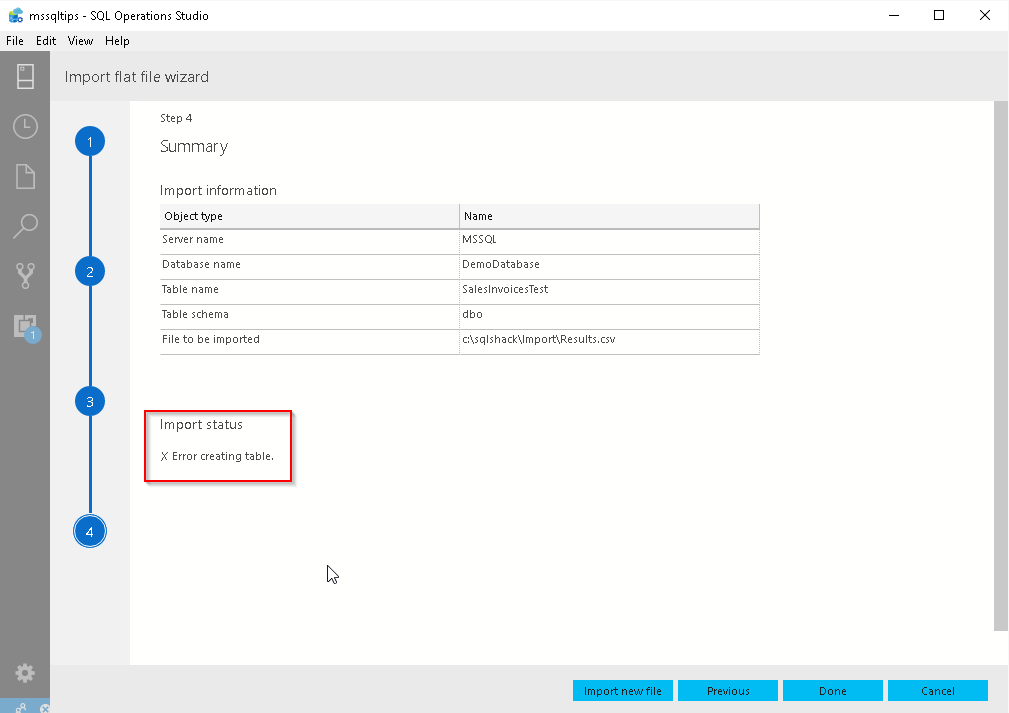
Step 4: Summary
In the next step, it shows a summary of the information such as server name, database name, table, schema, table name and the file to be imported.
It also shows the import status, whether it is successful or not. Below we can see that import is successful.
We can verify the table and data into the destination database.
Import data using modify columns
In the previous section above, we have not modified any property in the column such as data type. We did not define a primary key on the table.
To make the process simpler, I have only taken 10 records in the flat file with few columns to import into table now.
Follow the wizard as shown in the steps above.

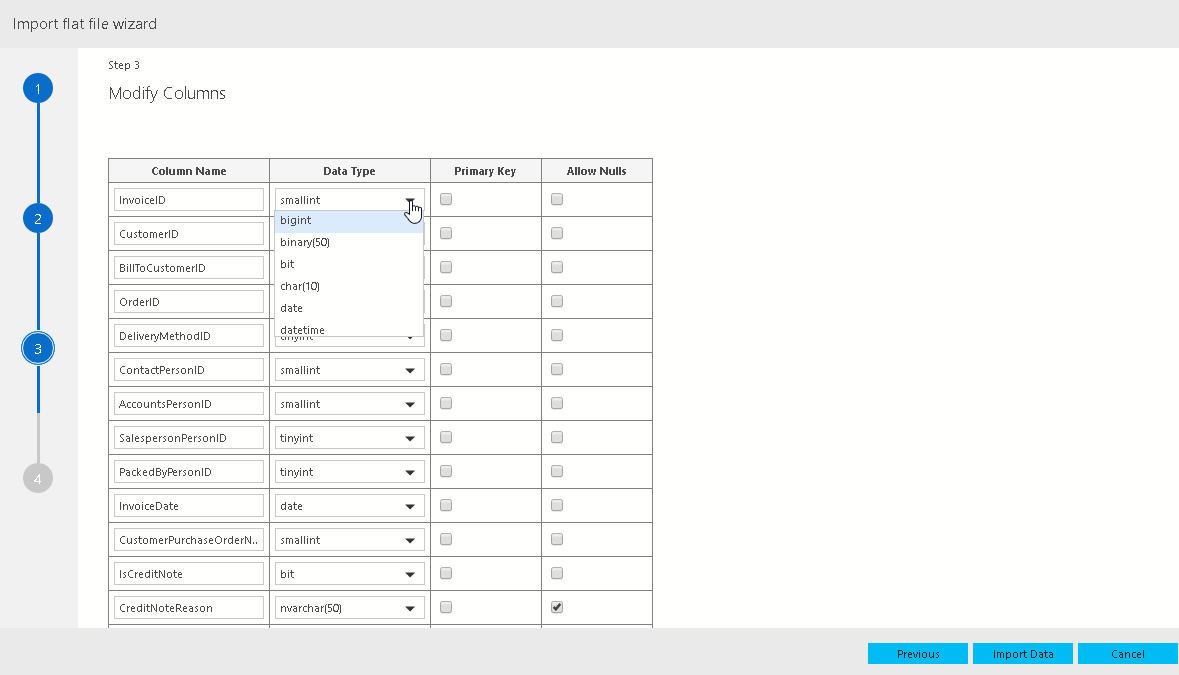
Now let us change the following things:
InvoiceID: Define Primary key on this.
Comments: Change data type from nvarchar(50) to nvarchar(100).
Click on Import data to start data import.
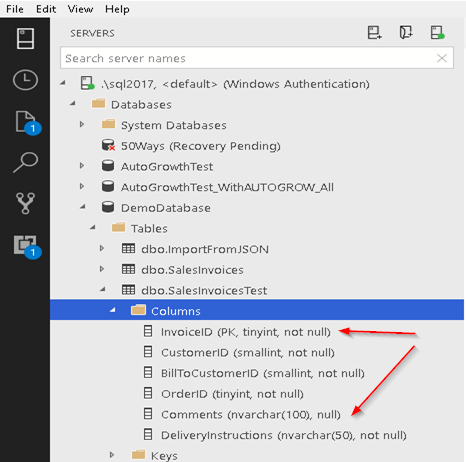
Now let us view the table properties to verify the changes. We can see below the changes we defined during the import process.
InvoiceID: Primary key exist in this column
Comments: data type is nvarchar(100) now.
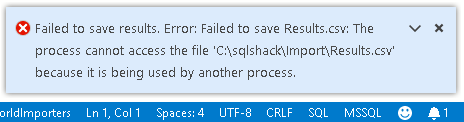
Common Errors in Import Flat file Wizard:
- If we are performing export results to CSV from any databases, the file should be unique in the destination folder and should not be open by any process. Otherwise, we get below error message
- We might receive Import status as Error creating table.
- Destination table already exists: Destination table name should be unique else, it might give the below error message.
- You do not have adequate permissions in the database to insert data.
- If someone has opened up the flat file, which we need to use the import operation, Preview data wizard, just shows up small progress circle and does not give any error message.
This is general error and it might be due to

Conclusion
Importing flat files using Azure Data Studio is an important feature for both SQL developers and DBAs as it is a common requirement to import data.
Azure Data Studio contains many important extensions. We will review more on this in future articles.

I am the author of the book "DP-300 Administering Relational Database on Microsoft Azure". I published more than 650 technical articles on MSSQLTips, SQLShack, Quest, CodingSight, and SeveralNines.
I am the creator of one of the biggest free online collections of articles on a single topic, with his 50-part series on SQL Server Always On Availability Groups.
Based on my contribution to the SQL Server community, I have been recognized as the prestigious Best Author of the Year continuously in 2019, 2020, and 2021 (2nd Rank) at SQLShack and the MSSQLTIPS champions award in 2020.
Personal Blog: https://www.dbblogger.com
I am always interested in new challenges so if you need consulting help, reach me at rajendra.gupta16@gmail.com
View all posts by Rajendra Gupta
- Understanding PostgreSQL SUBSTRING function - September 21, 2024
- How to install PostgreSQL on Ubuntu - July 13, 2023
- How to use the CROSSTAB function in PostgreSQL - February 17, 2023