
This article gives you an overview of BACPAC package and its usage in SQL Database data refresh (data import and export) using SQL Server management studio.
Introduction
Sometimes we get the requirement of refreshing few tales from other copies of the SQL Database. You can use various methods for this task as following:
- Generate data script
- Data import and export wizard
SQL Server does not support restoring individual tables from database backups. You can restore database backup with another database and import data from that database. For large databases, we cannot use this approach due to space and time constraints. You require space for storing the backup file as well as data and log files.
Another problem is the firewall issues. Many times, organizations do not allow firewalls between production and test environment. In this case, it becomes difficult to copy production data to lower the environment using a jump server using import and export wizards and backup methods as well. In this article, we will look at an alternative method of using a BACPAC package for refreshing tables.
Overview of a DACPAC and BACPAC package
DACPAC is an acronym of Data-Tier Application Package. It is a logical database entity defining all database objects such as tables, views, users and logins. It enables developers and database administrators to create a single package file consisting of database objects. We call this package a DACPAC package.
Usually, developers use SQL Server Data Tools (SSDT) for writing t-SQL scripts and making changes as per the requirement. They can generate a DACPAC package and send it to DBAs for deploying in multiple environments. Similarly, DBA can give the DACPAC copy of a production database to developers for their development purpose.
We can also use DACPAC packages for schema comparison as well between different copies of it. You can use the Azure Data Studio SQL Server Schema Compare extension for this.
Similarly, BACPAC ( Backup package) consists of schema and data for SQL Server tables. We can export database tables in a BACPAC package and give it to developers for refreshing data per their convenience.
We get options for DACPAC and BACPAC package in SSMS.
Note: I would recommend always using the latest version of SQL Server Management Studio. The latest version is SSMS 18.4.
Connect to a SQL instance and expand databases in the object explorer. Right-click on a database in SSMS and you get data-tier application options as shown below.
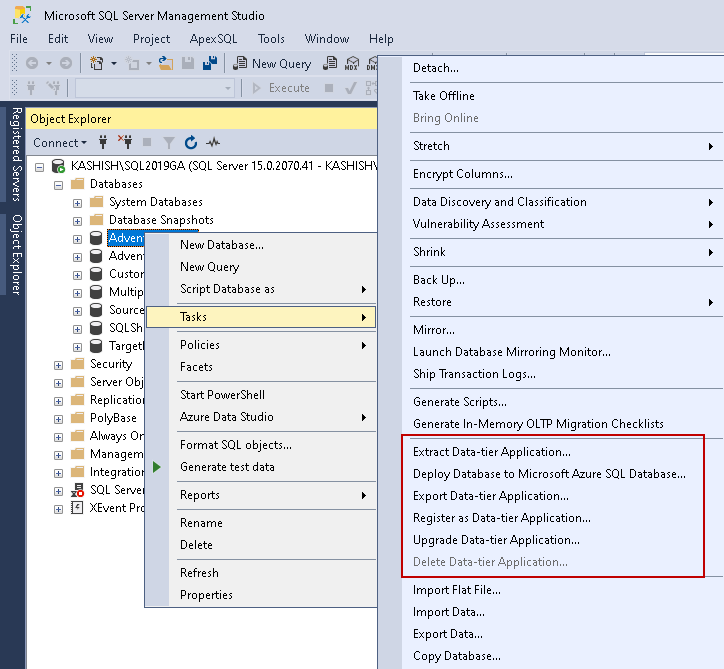
- Export Data-tier application: We can extract schema and data as well in a BACPAC file using this option
- Extract Data-tier application: We use this wizard for extracting a database in a DACPAC package. This DACPAC package does not contain data
- Upgrade Data-tier application: We can upgrade a previously deployed database using this upgrade data tier option
Export Data-tier application wizard for BACPAC package
Let’s export data and schema for a database and create another copy of a database in the same instance for this demonstration.
We use the following steps for doing this task.
Right-click on the source SQL Database and click on Export Data-tier application. It launches an introduction page. This introduction page defies the summary and high-level steps for this wizard. The high-level steps are as follows:
- Specify export settings
- Review the export summary
- Check the result of the operation
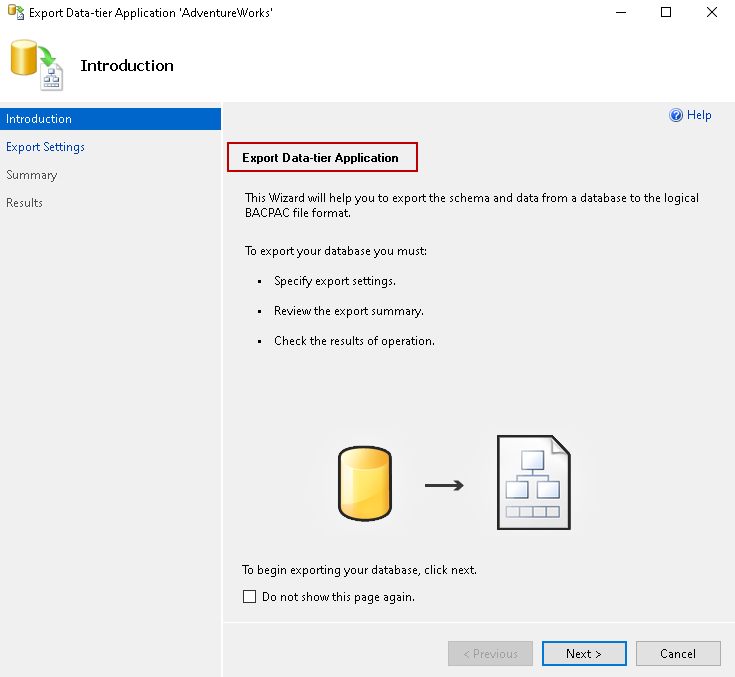
If we do not require this introduction page from now onwards, we can check Do not show this page again option.
Click next, and it takes you to the Export setting page.
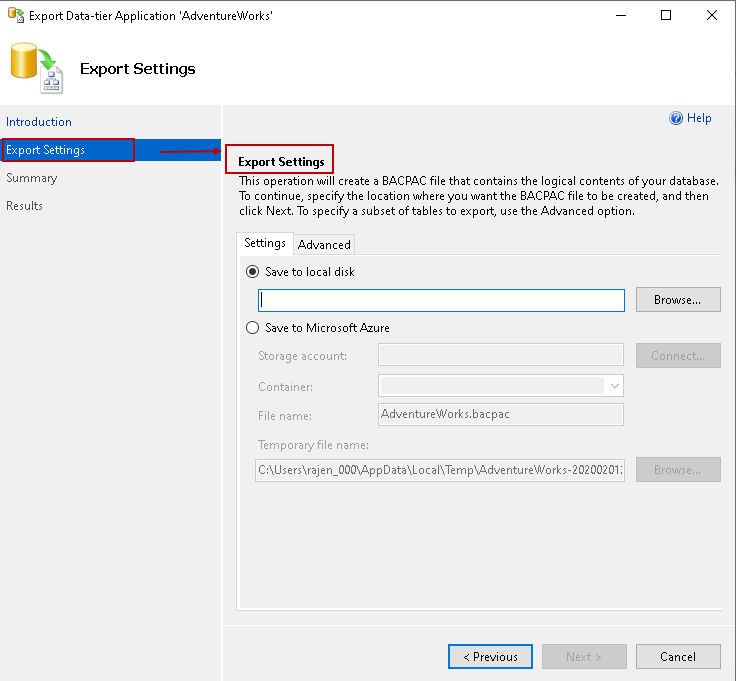
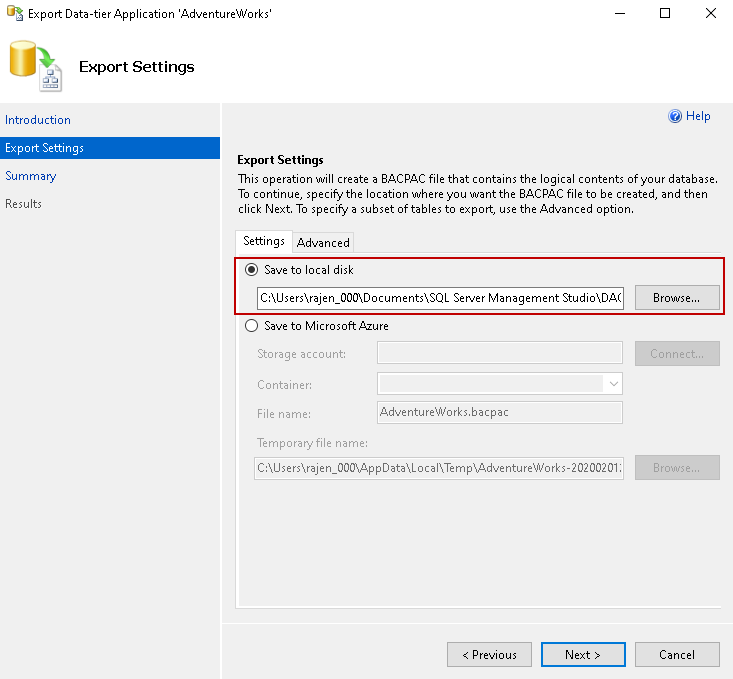
The export setting page allows us to configure either a local disk directory or Microsoft Azure storage container. For Microsoft Azure, you should have a valid storage account and container for storing the BACPAC file.
Let’s use a local disk directory, as shown below.
By default, it extracts all schema, tables (with data)available in the database. We can also filter selected objects in the advanced page select all database schema, tables in the advanced tab of this page.
Click on the advanced tab and review the objects. It groups objects per schema such as dbo.
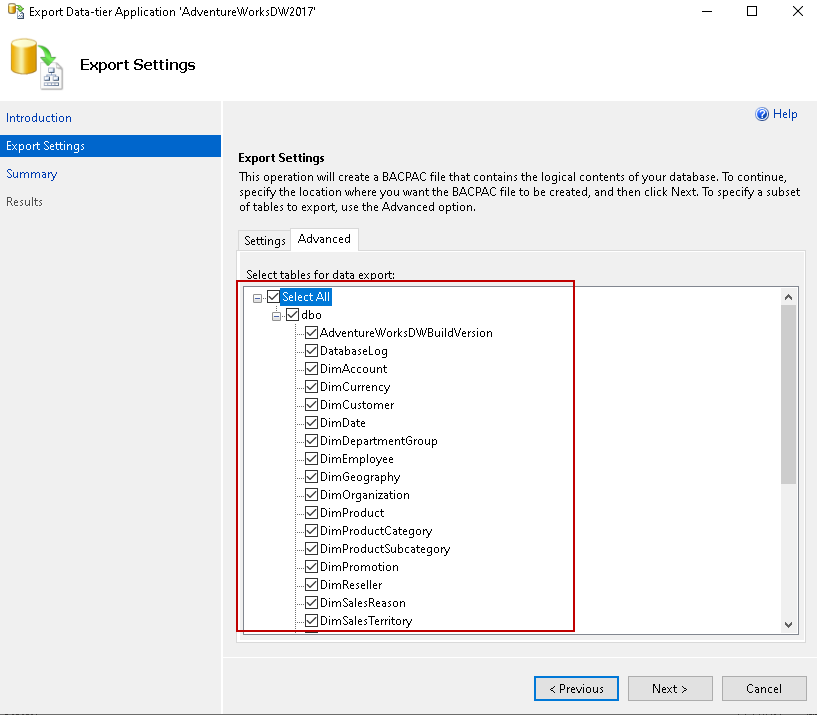
We are not using any object filtering in BACPAC export. It will create an export for all tables in the database. Click on Next and review the configurations.
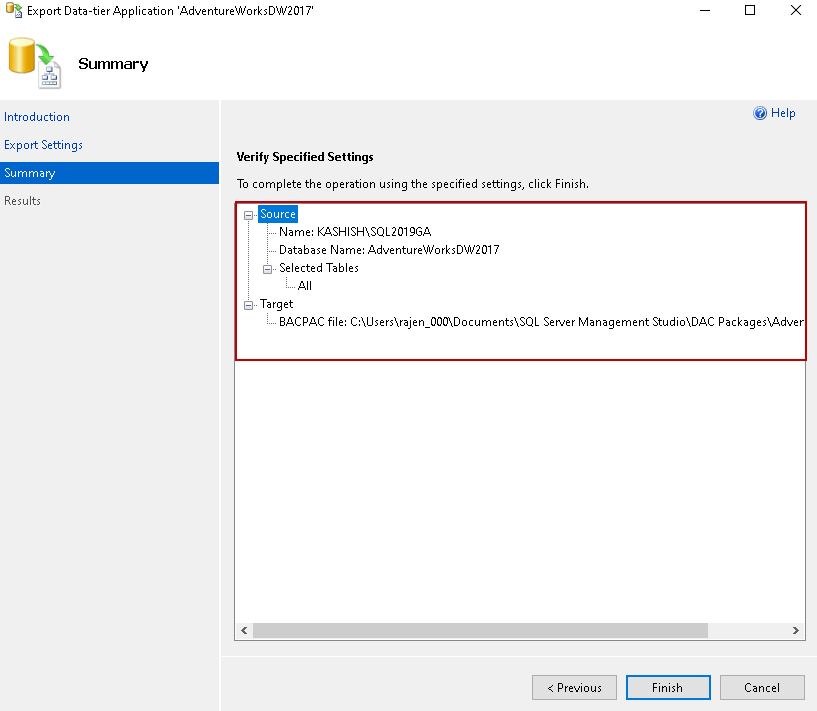
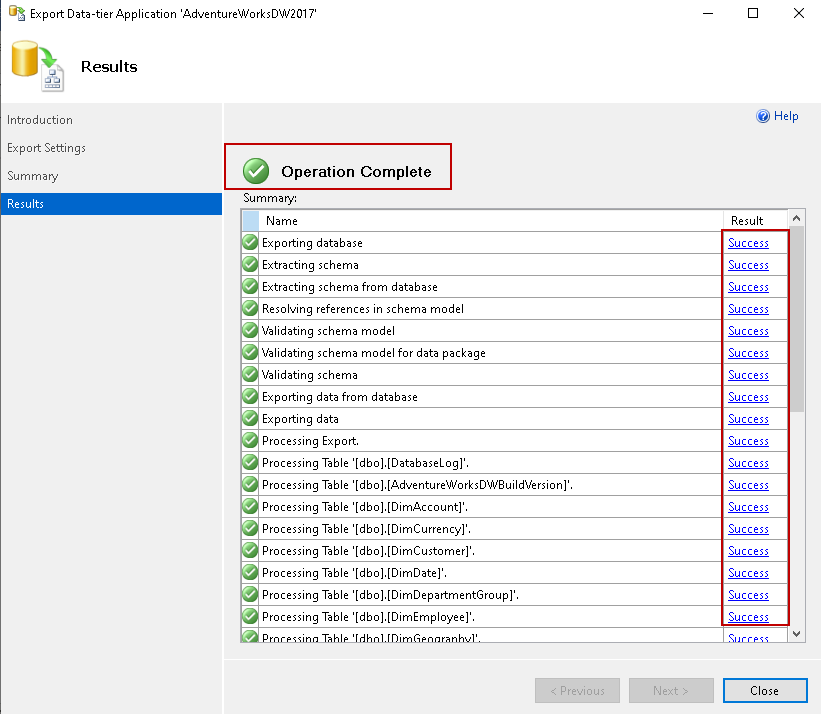
Click Finish, and it starts the export of the database. You can see the success message for each step.
We can browse to the directory and verify a BACPAC extension file exists.

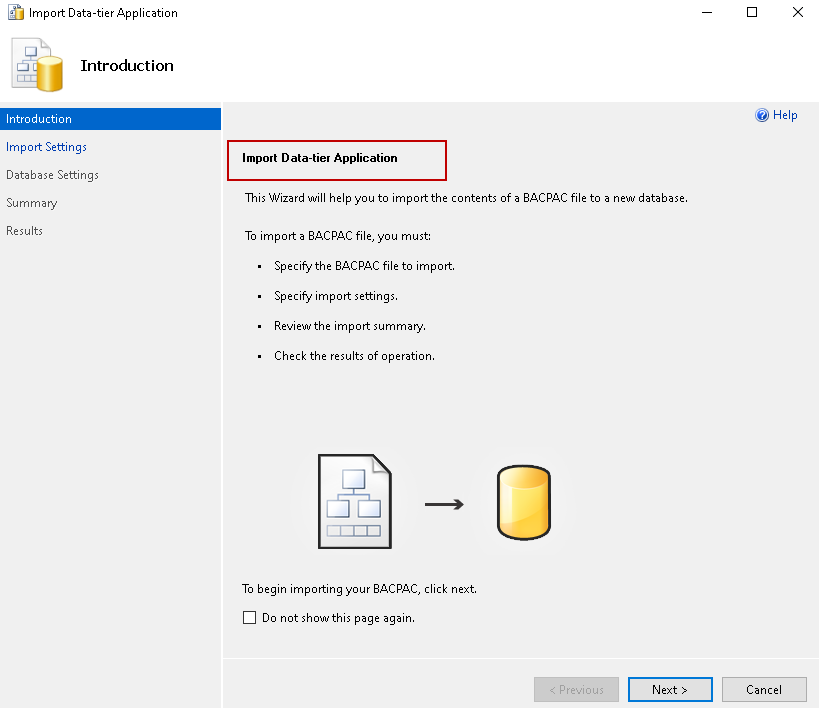
Import a BACPAC file using SSMS Import Data-tier Application wizard
We can copy this BACPAC file to destination SQL instance having either on-premise or Azure SQL Database. Right-click on the connected destination instance and launch Import Data-tier applications wizard.
The high-level steps for importing a BACPAC package are:
- Specify the BACPAC import file
- Import Configuration
- Import and verify data
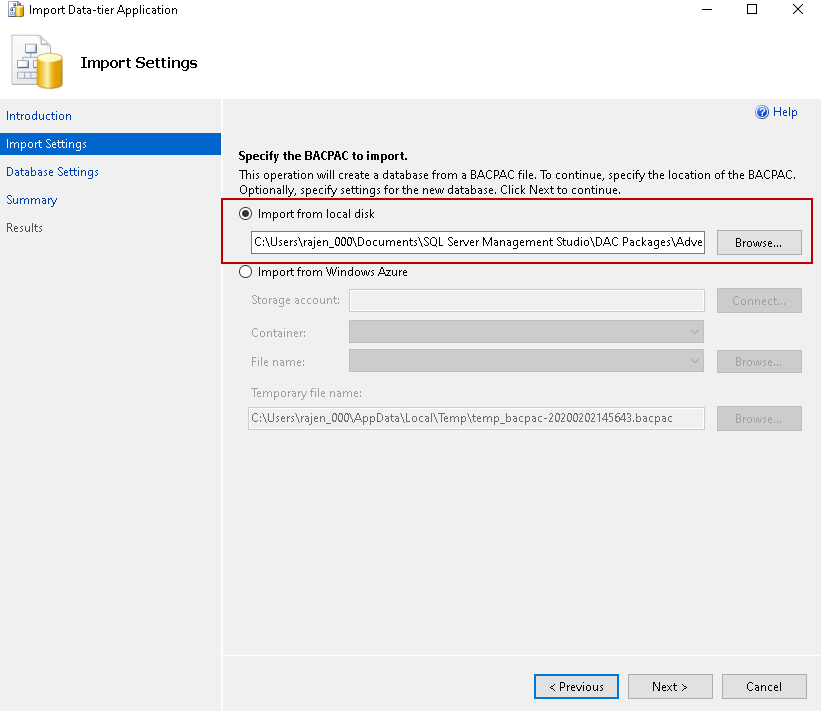
Click next, and it takes you to the import settings page. Here, we specify the path of a BACPAC file either from the local disk or Microsoft Azure Storage container. We used local disk storage during the import process so, select the local disk option and browse to the directory containing required BACPAC package.
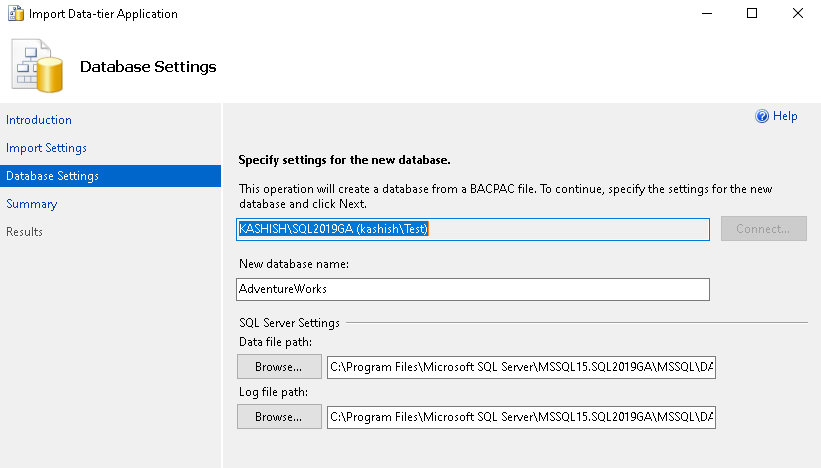
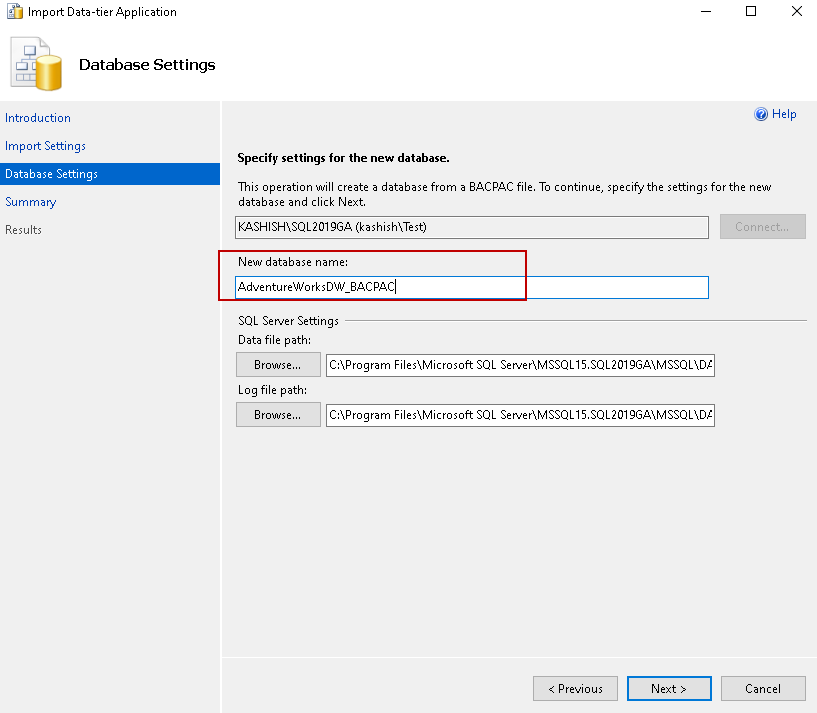
In the next page, we specify a setting for the new database. We cannot use an existing SQL Database for importing a BACPAC package.
It also requires input for the data and log file of this new database. By default, it shows you default data and log file location of connected SQL instance. We can change it per requirement.
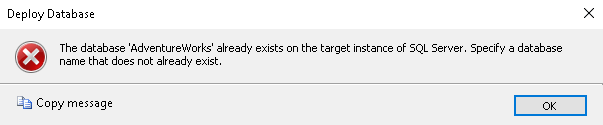
As highlighted earlier, we cannot use an existing database for BACPAC file import. We get the following error message if the database already exists.
Modify the new database name. In my demonstration, I specified AdventureWorksDW_BACPAC name for SQL Database. Click next and view summary.
The next page is a summary page showcasing your configurations. I recommend you always review it before proceeding. You can easily navigate back and make the required changes.
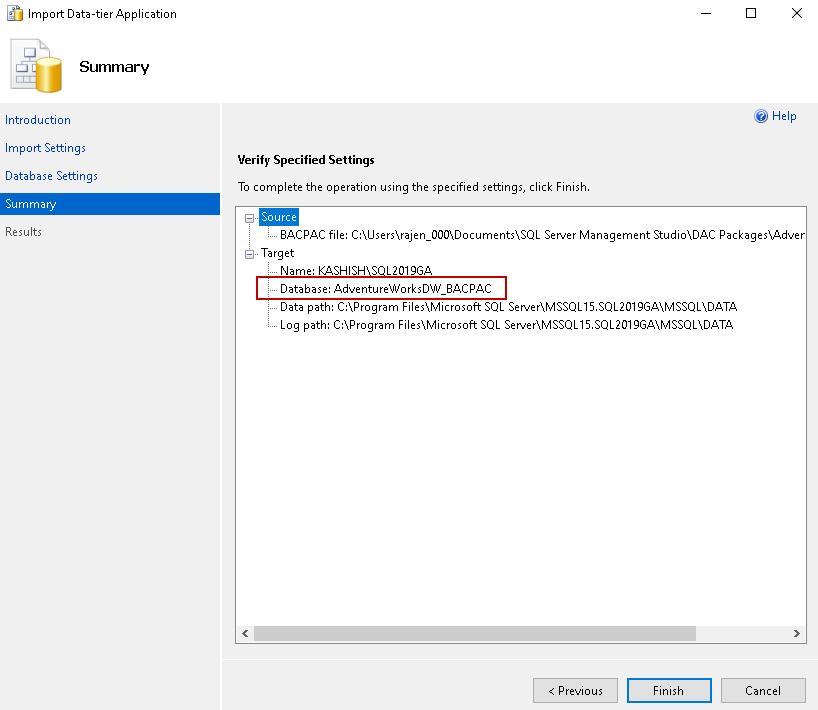
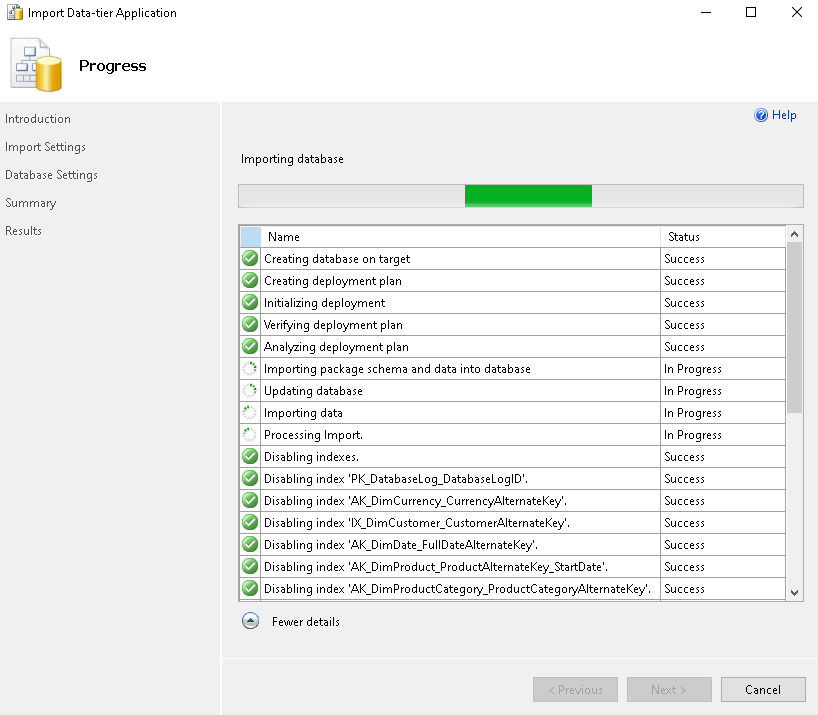
Click Finish, and you can see the following steps.
- Creates a new database
- Imports schema and data into this new database
- Disables indexes
- Inserts data into tables
- Enable indexes
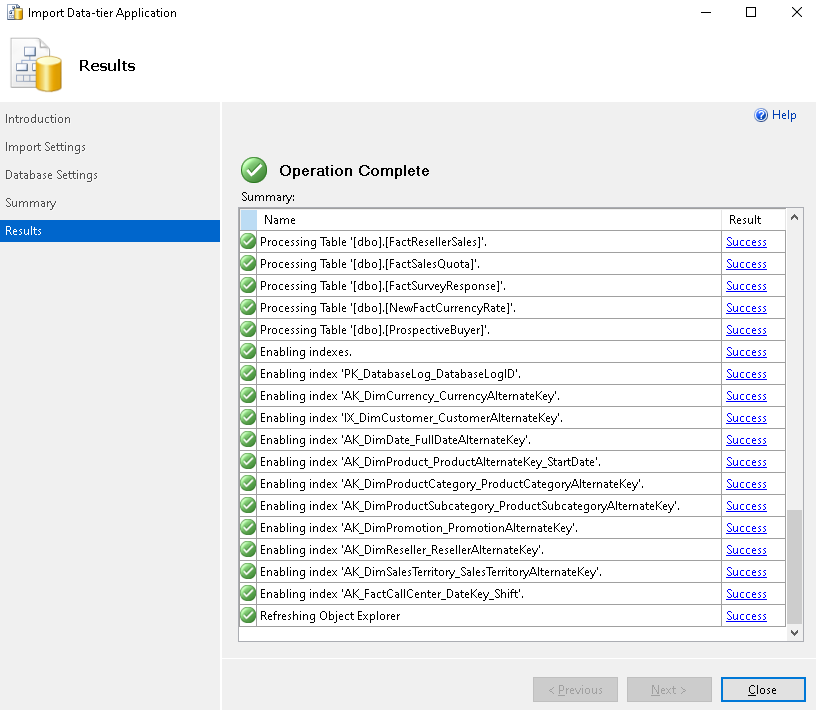
Refresh the object explorer, and you see the newly restored database.

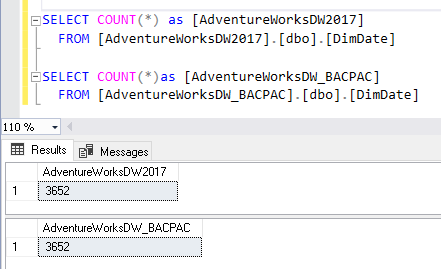
Let’s compare the record counts for [dbo].[DimDate] tables in both AdventureWorksDW2017 and AdventureWorksDW_BACPAC databases.
In the following screenshot, verify that it contains the same record count in both the SQL Databases.
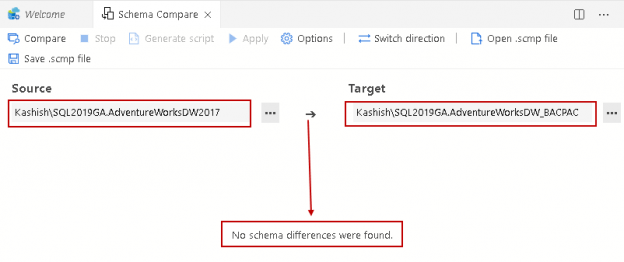
Validating schema of the database imported from a BACPAC package
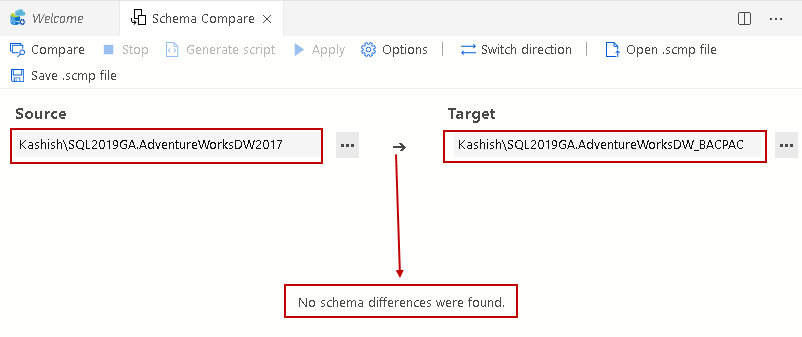
Let’s take a step further and compare the schema in both the databases using schema compare extension of Azure Data Studio. I am not elaborating the steps here for this. You can refer to this article Schema Compare extension for a detailed explanation.
As you can see, there is no schema difference between the source (AdventureWorksDW2017), and the target database restored from BACPAC (AdventureWorksDW2017_ BACPAC).
You have data in a new database. Now, you can use import and export wizard as explained in this article How to import/export data to SQL Server using the SQL Server Import and Export Wizard.
For example, let’s say we require a refresh of[dbo].[ProspectiveBuyer] the table in the AdventureWorks2017DW database. We can use the following steps for it.
- Create a BACPAC file from the source AdventureWorks2017DW database for the [dbo].[ProspectiveBuyer] table as steps shown above
- Copy this BACPAC file from the source server to the destination server
- Import this BACPAC file and create a new SQL Database on the destination instance
- Use Import and export wizard in copying data from a new database to source database
Conclusion
In this article, we explored the usage of a BACPAC package for export and import of SQL database tables data. It is an alternate method for data refresh; however, you should review the possible approaches and choose what fits best for your requirements.

I am the author of the book "DP-300 Administering Relational Database on Microsoft Azure". I published more than 650 technical articles on MSSQLTips, SQLShack, Quest, CodingSight, and SeveralNines.
I am the creator of one of the biggest free online collections of articles on a single topic, with his 50-part series on SQL Server Always On Availability Groups.
Based on my contribution to the SQL Server community, I have been recognized as the prestigious Best Author of the Year continuously in 2019, 2020, and 2021 (2nd Rank) at SQLShack and the MSSQLTIPS champions award in 2020.
Personal Blog: https://www.dbblogger.com
I am always interested in new challenges so if you need consulting help, reach me at rajendra.gupta16@gmail.com
View all posts by Rajendra Gupta
- Understanding PostgreSQL SUBSTRING function - September 21, 2024
- How to install PostgreSQL on Ubuntu - July 13, 2023
- How to use the CROSSTAB function in PostgreSQL - February 17, 2023