

This article explores the configuration of the Red hat Amazon EC2 instance for SQL Server installation.
Introduction
Microsoft SQL Server 2017 and 2019 are available on the cross-platform operation system. We can install SQL Server on Red Hat, Ubuntu and SUSE Linux servers. Once you go on Microsoft web page for downloading SQL Server 2017, you get the following options for Linux:

SQL Server also supports on-premise and cloud infrastructures such as Microsoft Azure, Amazon Web Service, and Google cloud. You can refer to SQL Server on Linux articles on SQL Shack for more information.
We will explore SQL Server 2017 Linux installation on Amazon Web Service for Red Hat Linux in two articles.
- Part 1: Configuration of an Amazon EC2 instance for RHEL OS
- Part 2: SQL Server 2017 installation on AWS EC2 instance
Overview of Amazon Elastic Compute storage (EC2)
You might be familiar with virtual machines (VM) in on-premise infrastructure. Amazon EC2 is a service that provides compute instances on Cloud similar to an on-premise virtual machine. It is a flexible compute solution, and we can scale up, down the resources based on the requirement.
- It is available across all AWS regions and zones
- You can install a variety of operating systems and different versions using the pre-defined templates provided by Amazon
- We can build customize the image and deploy it on N number of instances
- You do not make any commitments for the resources. You only pay for your use
- It is a very secure and stable environment
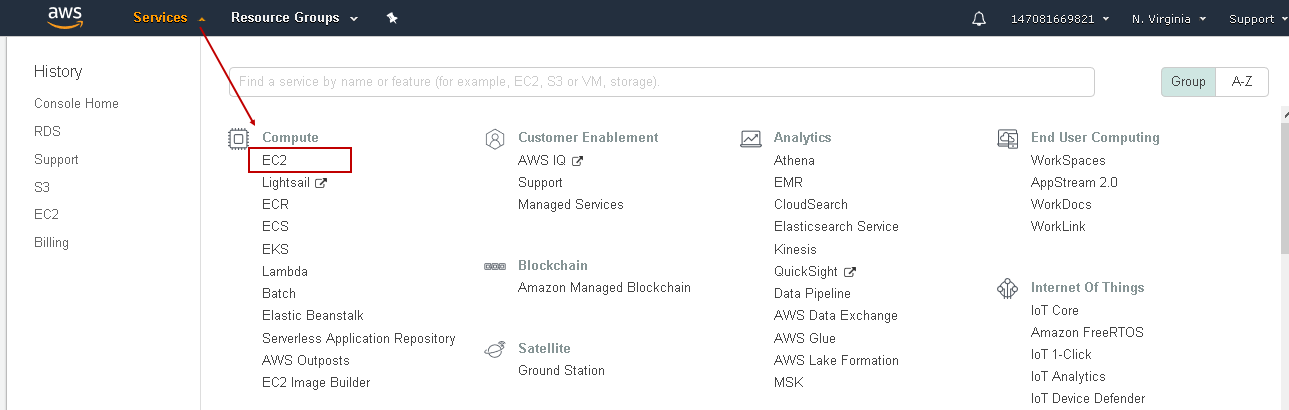
Login to AWS console and navigate to Services. In the Compute section, you can click on EC2:
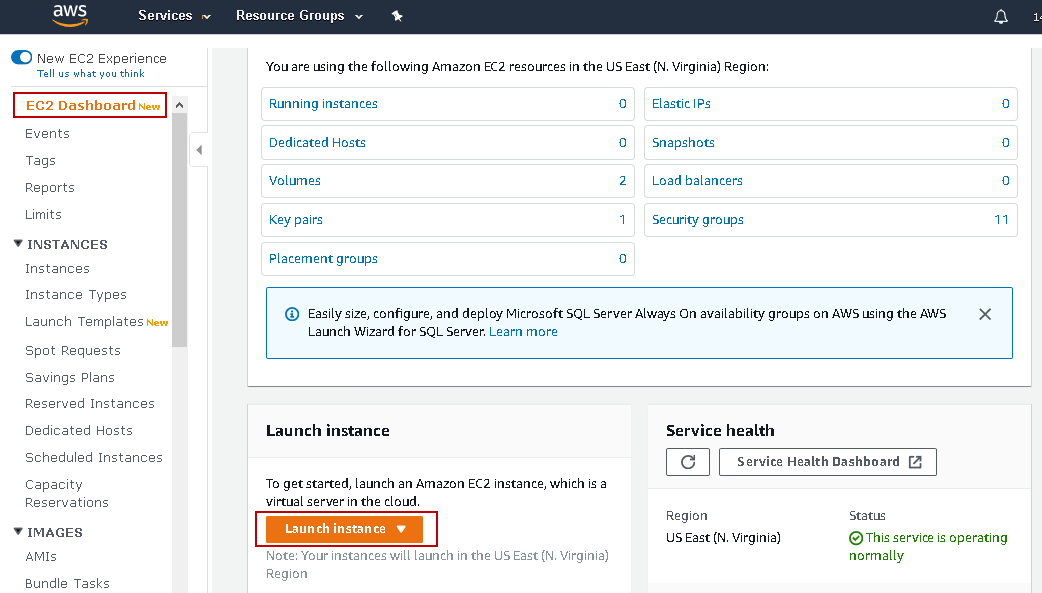
It launches Amazon EC2 dashboard where you can navigate to instance properties, configuration options. AWS EC2 is a region-specific service. In the following screenshot, it shows the EC2 service status in a specific region, for example, US East (N.Virginia) region.
We want to create a new Red Hat instance for SQL Server. Click on the Launch Instance:
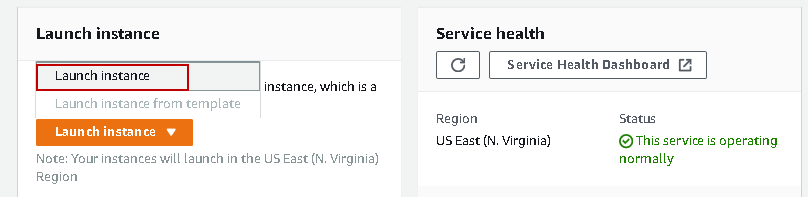
It gives you the following options:
- Launch instance: We use it for launching any instances from the AWS marketplace. The Amazon template is known as Amazon Machine Image (AMI)
- Launch instance from template: If you have defined any templates in your account, you can use it and create the EC2 instances
We do not have any predefined templates. Click on Launch instance again:
It is a seven-step process for creating an EC2 instance. Let’s walk you through these steps.
Step 1: Choose Amazon Machine Image (AMI)
In the first step, we choose an Amazon Machine Image (AMI) for Amazon EC2 according to the operating system requirements. We can also search for a specific image from the search box. In the following screenshot, we filtered the AMI for Red Hat:
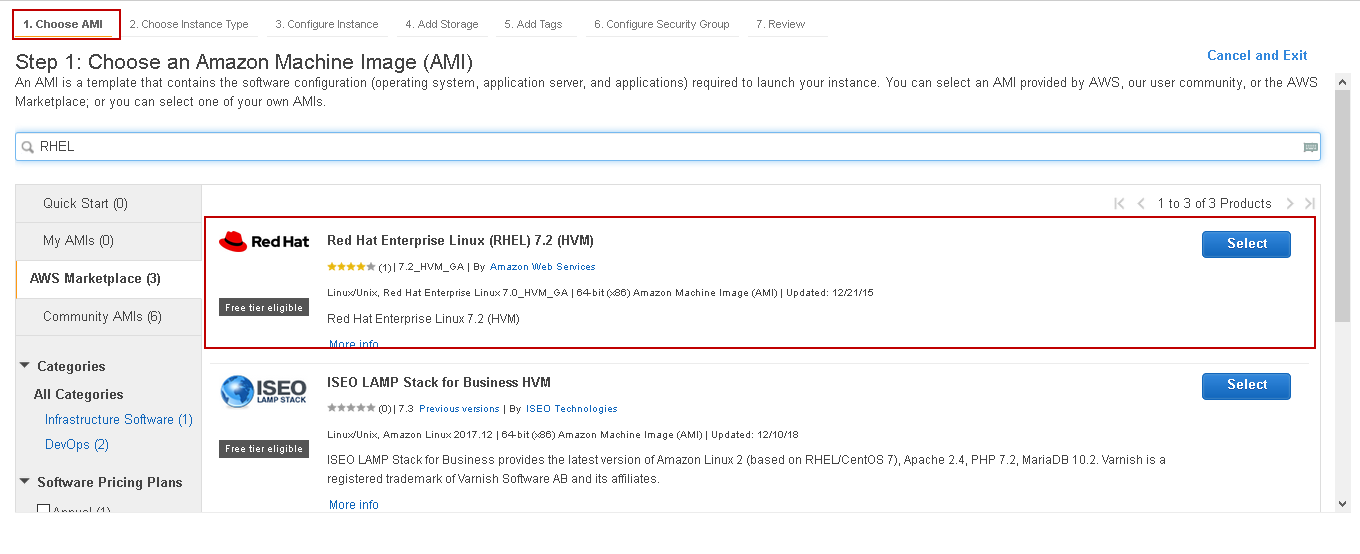
In this article, we will use Red Hat Enterprise Linux (RHEL) 7.2 AMI for EC2 instance. Click on Select, and it shows you the instance type and per hour usage cost for the EC2 instance. In Amazon, instance type refers to EC2 instance according to compute requirements such as CPU, RAM:
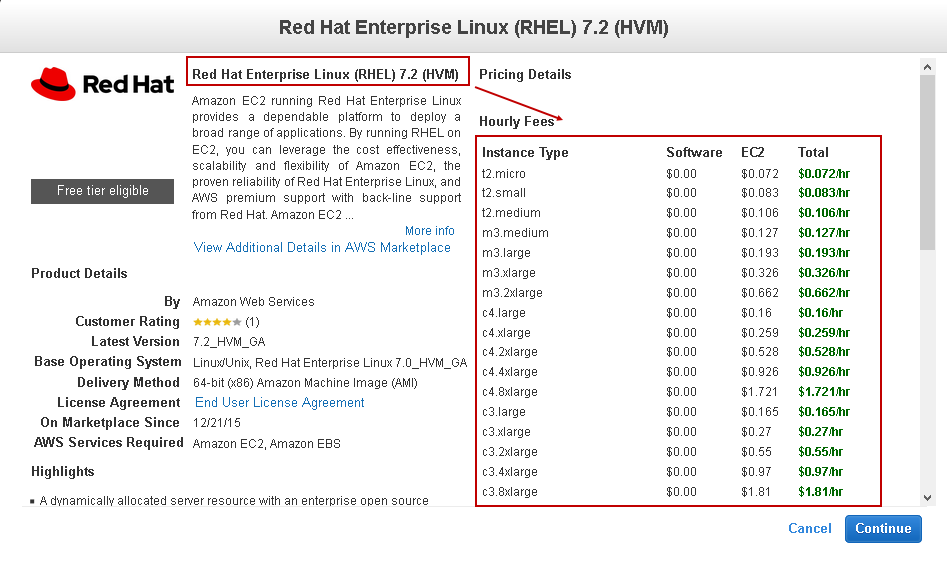
Click on Continue.
Step 2: Choose Instance Type
Choose the appropriate instance type. Here, you can see vCPU, Memory, network performance for each instance type as well.
For this article, I choose t2.medium instance type:
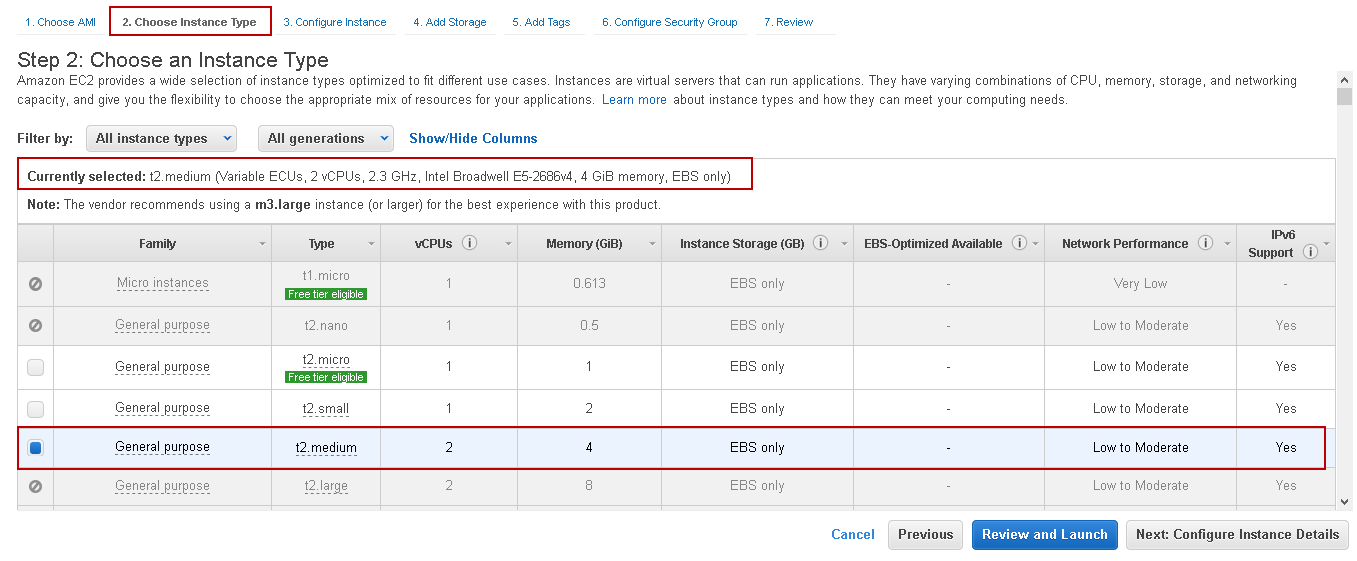
You can directly launch the EC2 instance with default options using the Review and Launch option. Click on Next: Configure Instance Details for further configuration options.
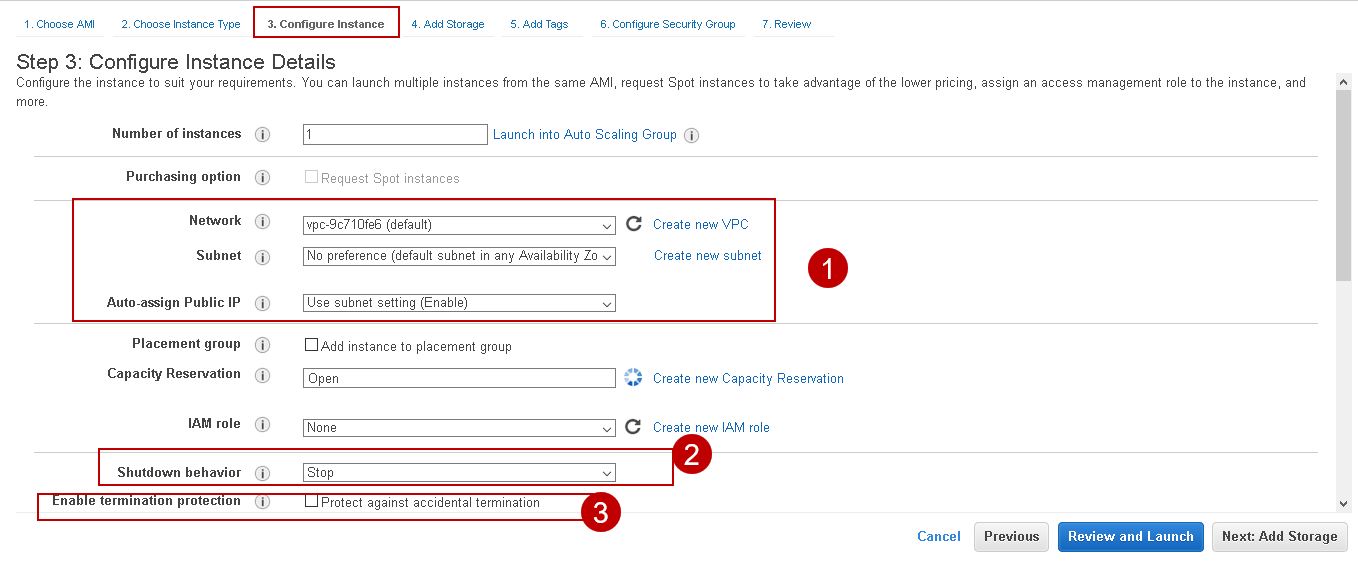
Step 3: Configure Instance
In this step, EC2 provides several essential configuration options. We will look at a few configurations in brief.
- Number of instances: We can launch multiple instances altogether with similar configurations. By default, it launches one instance
- Network: It is an essential configuration. It is a networking component of an Amazon EC2 instance. You might not need a configuration of a VPC being a DBA. However, you should be aware of the basics of a VPC. VPC is an acronym of Virtual Private Cloud. Imagine VPC as a virtual data center. We define subnets, private IP addresses, network gateway, route tables. We also configure the firewall rules for inbound and outbound rules
By default, Amazon creates a default VPC for you; however, it is recommended defining a VPC as per your infrastructure requirements. In this article, let’s go with default VPC and subnet configuration in an availability zone.
Apart from the VPC, look at the following useful configuration as well:
- Shutdown behavior: As specified earlier, you pay only for the usage of AWS resources. We can define shutdown behavior for an Amazon EC2 instance. By default, if we stop the EC2 instance once we click on shutdown. We can restart it later and use it as per requirement. We can modify this setting to terminate the instance on the shutdown of the EC2 instance
- Enable termination protection: We can protect the EC2 instance against accidental termination using this configuration. We should use this for critical and production instances
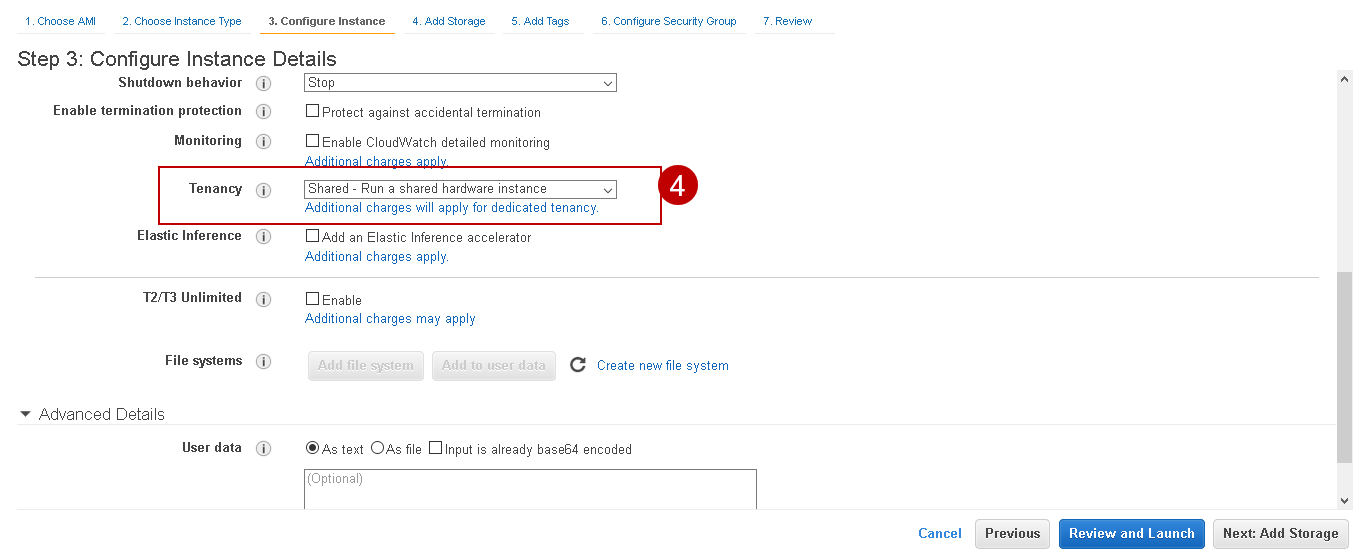
Another configuration option is Tenancy. By default, all EC2 instances are in shared tenancy. Shared tenancy means EC2 instance is in shared hardware. We can use a dedicated tenancy as well, but you have to pay a higher cost for it:
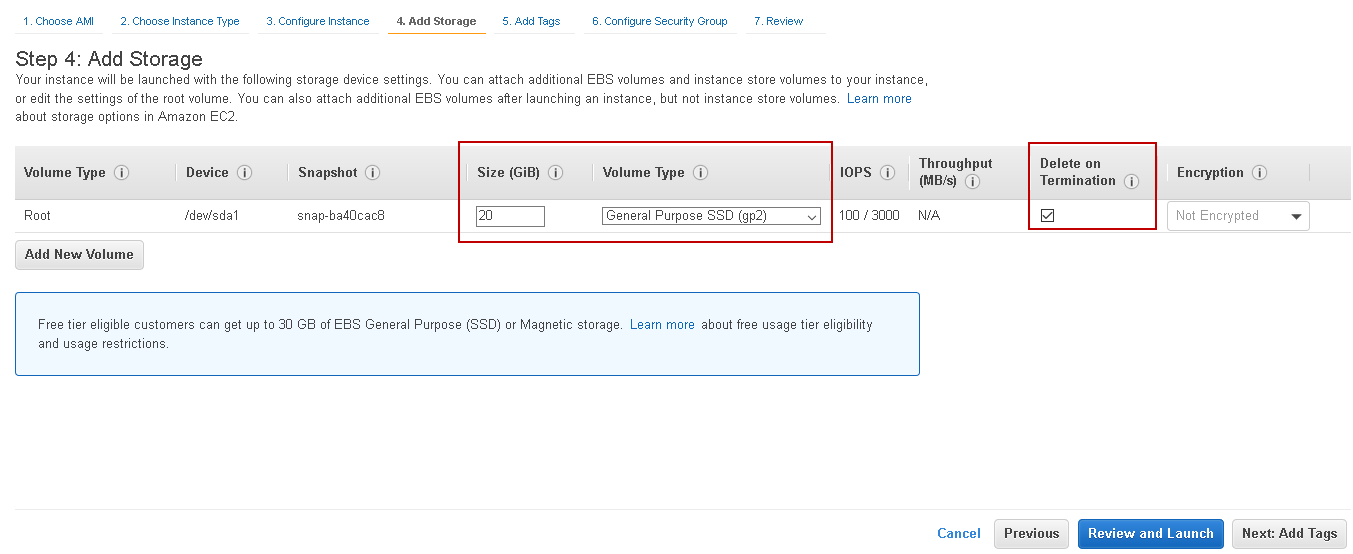
Step 4: Add Storage
In the next step, define the volume type and size. In a free tier account, we get up to 30 GB of EBS general-purpose volume. Define an appropriate storage size for your Amazon EC2 instance.
By default, AWS deletes the storage volume on termination of EC2 instance. You can see checkmark on Delete on Termination in the below screenshot. If you want to retain storage after EC2 termination as well, we can remove the check from this option:
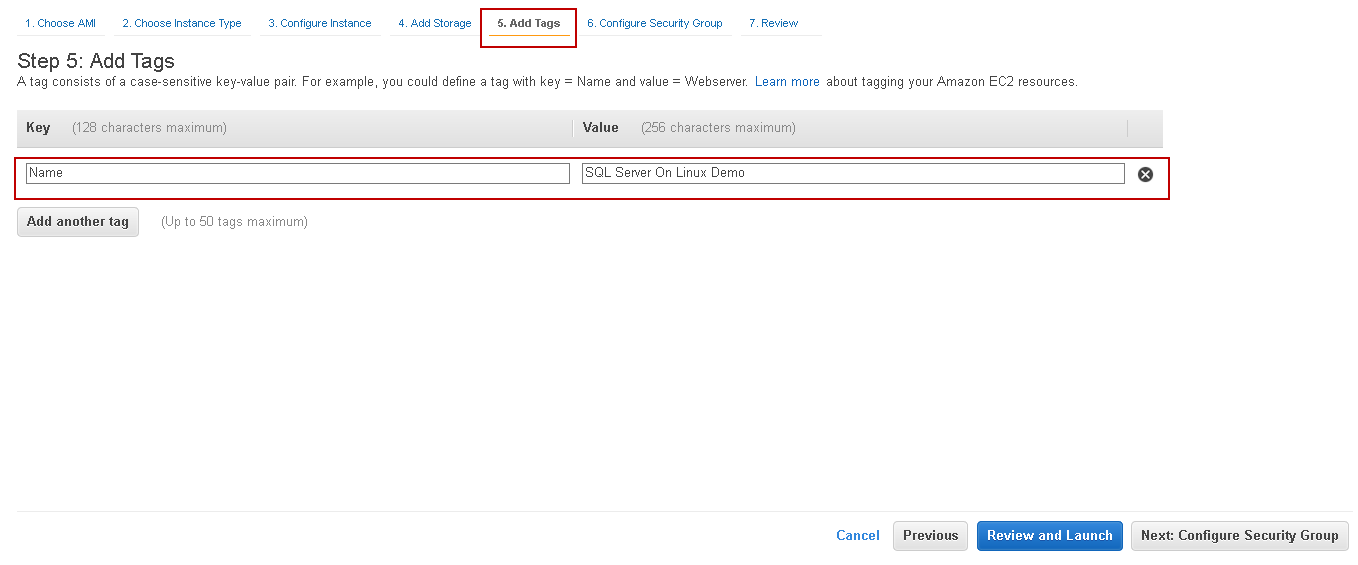
Step 5: Add Tags
We define tag as a label for the AWS resources. We can use a tag for organizing resources, cost allocation for the respective tags. It is an optional step but recommended if you manage many resources in AWS.
In this article, we define the following tag for an EC2 instance:
- Key: Name
- Value: SQL Server On Linux Demo
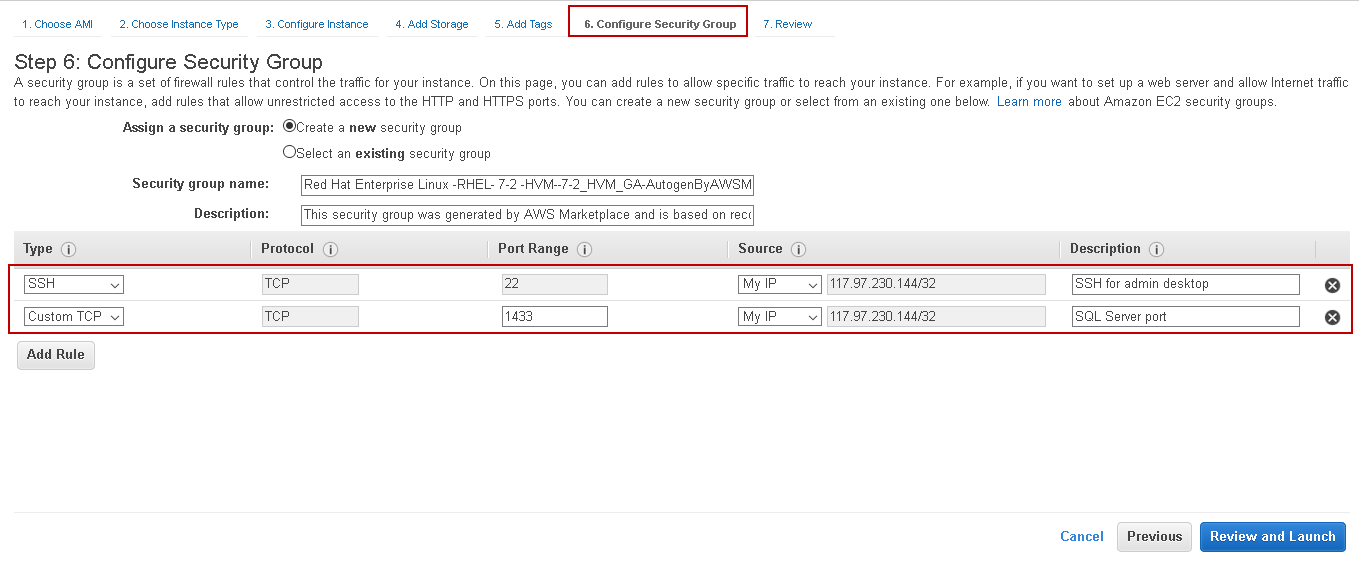
Step 6: Configure Security Group
Security groups are firewall rules for the AWS EC2 instance. We can create a new security group or use an existing security group as well.
For this article, we define the following security group rules for TCP protocol:
- Port 22 for SSH connection from MyIP. If you select My IP in the source, it automatically populates your IP address. We can define a custom IP address range as well for the firewall rule
- SQL Server default port is 1433. We define 1433 TCP port so that we can connect to EC2 instance from our local system
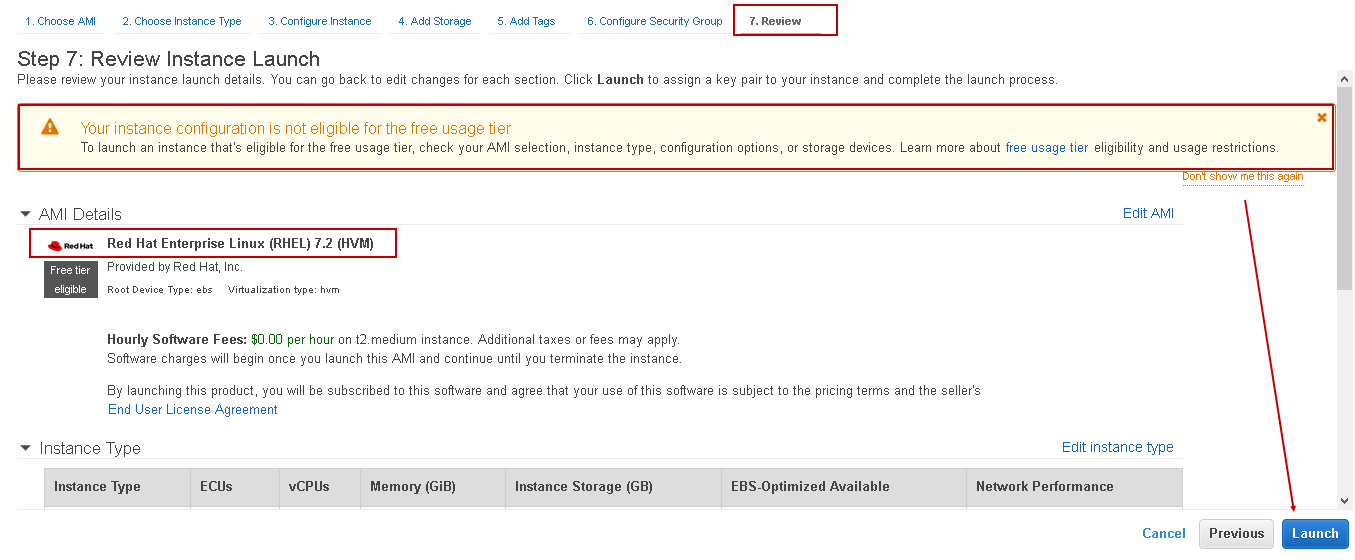
Step 7: Review instance launch
In this step, we can review all previous configurations. If we want to change any configuration, go back and make the appropriate changes. Click on Launch to start EC2 instance launch process:
Once you click on the launch, it asks you to select an existing key pair or create a new key pair. We use a key pair to connect an Amazon EC2 instance. It is a combination of private and public keys. AWS stores the public key and you download the private key.
We do not have any existing key pair, therefore, specify a key pair name and download it.
- Note: You should store the key pair at a safe and secure location. AWS does not allow downloading this key pair at the later stage.
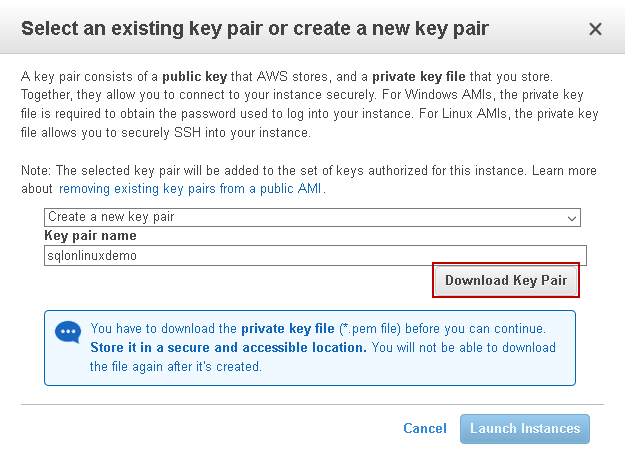
Once you download the key pair, it enables the Launch Instances option:
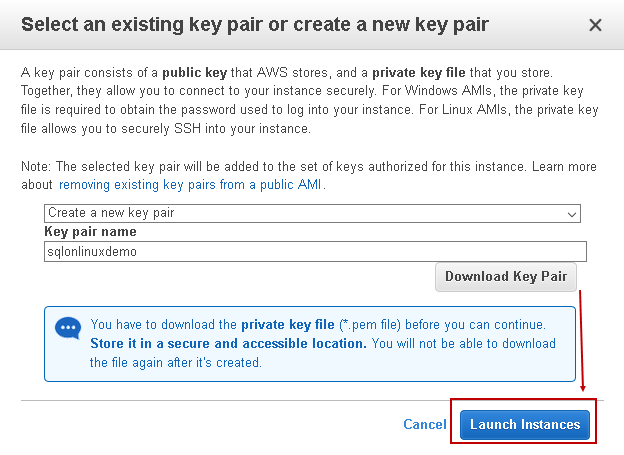
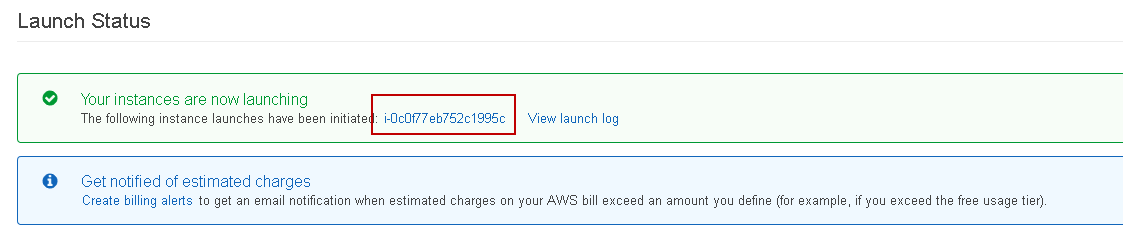
Click on Launch Instances, and it initiates the configuration of the security group, EC2 instance:

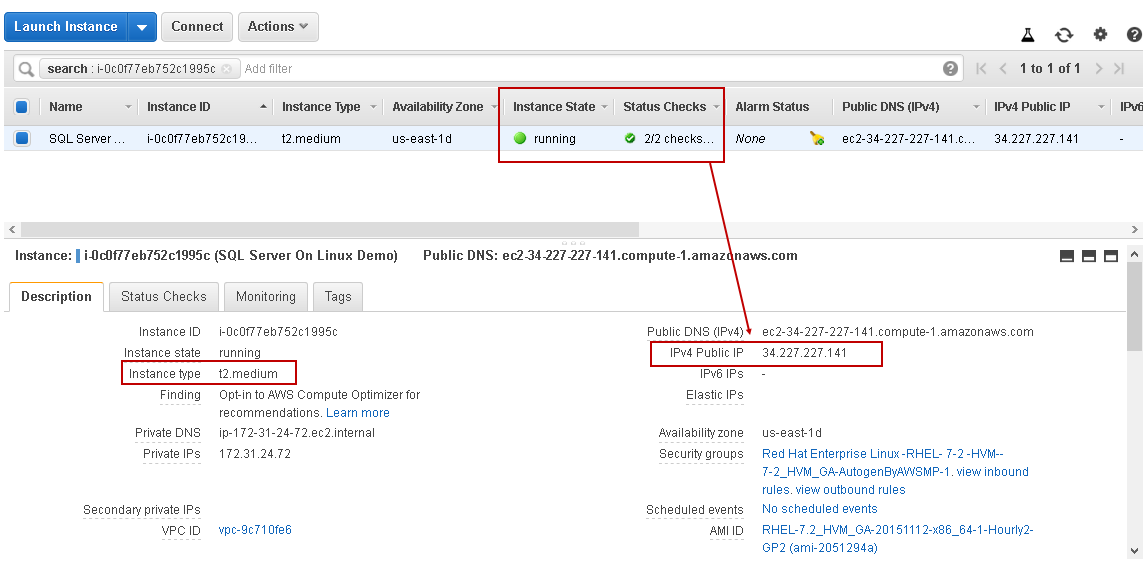
Click on the instance ID, and it gives the below summary of the Amazon EC2 instance:
For a healthy EC2 instance, it should have the following configuration:
- Instance Status: running
-
Status check: AWS performs two checks after launching an EC2 instance
- System Status Checks
- Instance Status Checks
Read more about the status checks on the AWS documentation.

In the following screenshot, we can see our EC2 instance passed 2/2 status check. You can also view the public IP address and public DNS for my EC2 instance:
Connect Red Hat Amazon EC2 Instance
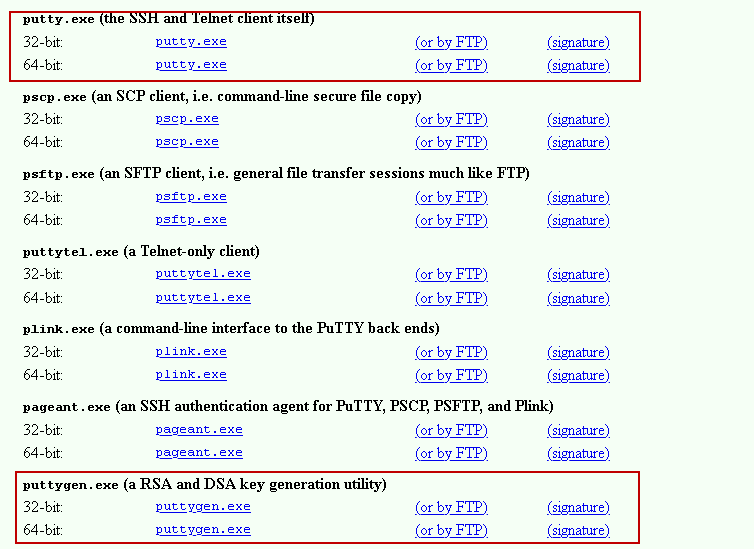
We require SSH and telnet client tools for connecting to an AWS EC2 instance. Go to URL and download the following software:
- PuTTy
- puttygen
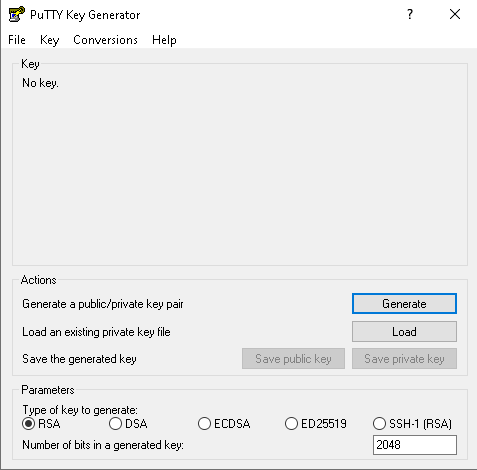
In the previous step, we downloaded a key pair file (PEM). Launch Puttygen and click on Load:
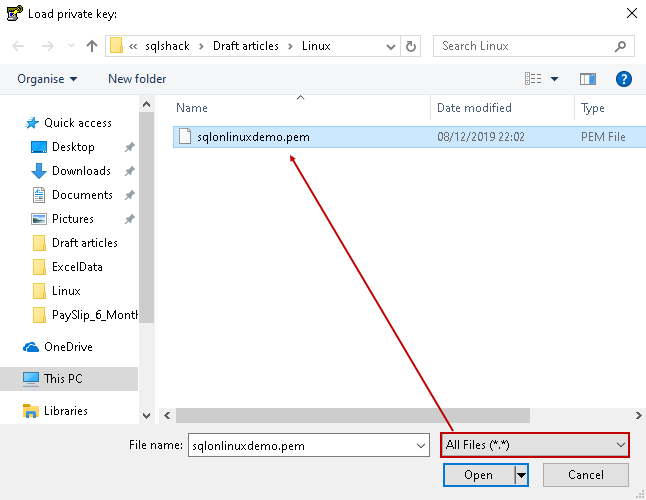
We need to browse to the directory where you stored the PEM file and select the downloaded key pair file:
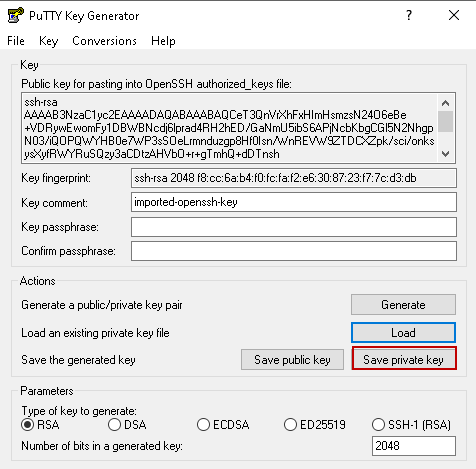
Click on Open, and it imports the PEM file and converts into PPK file:
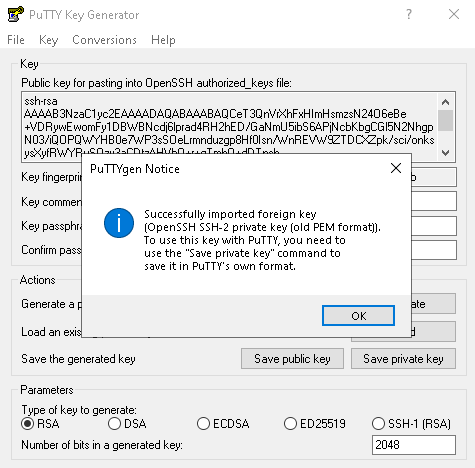
Click OK to save the private key, and then Save private key:
It throws the following warning message:
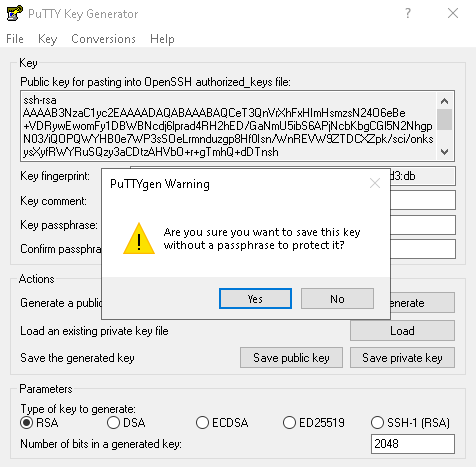
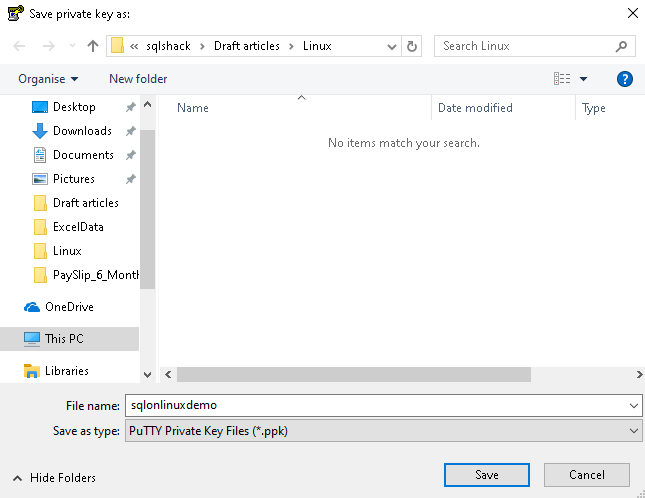
Click Yes and save PPK file into an appropriate secure location:
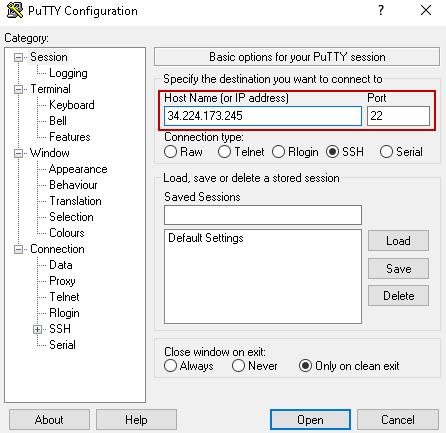
Now, launch the Putty software and provide the public IP address. We can copy the public IP address from the instance property:

Now, expand the SSH category using the plus sign, and it gives you a list of options. Click on Auth:
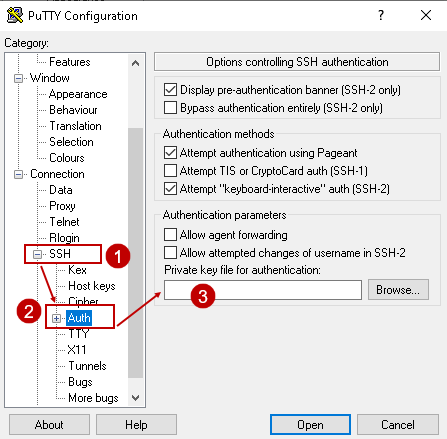
Browse to the PPK file location, as shown below:
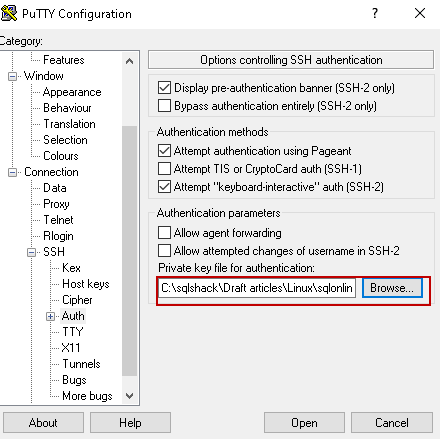
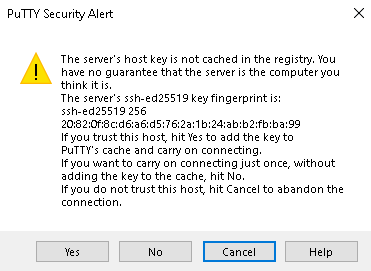
Click on Open, and it connects to the Amazon EC2 instance. It gives the following security alert for the first-time connection. Click on Yes to add the key to Putty’s cache:
Amazon provides a default user EC2-user for a first-time connection. We do not require a password for this user. It automatically authenticates using the public and private key:

Next step
In the next article, we install SQL Server 2017 on this Amazon EC2 instance. We will also connect the SQL Server instance and perform specific operations for validation purposes.
Conclusion
In this article, we explored the Amazon EC2 instance, its configuration using AMI through specific steps. We also learned the basics of individual AWS components such as VPN, security group, key pairs. You should prepare the environment using this article before proceeding for the next article.

I am the author of the book "DP-300 Administering Relational Database on Microsoft Azure". I published more than 650 technical articles on MSSQLTips, SQLShack, Quest, CodingSight, and SeveralNines.
I am the creator of one of the biggest free online collections of articles on a single topic, with his 50-part series on SQL Server Always On Availability Groups.
Based on my contribution to the SQL Server community, I have been recognized as the prestigious Best Author of the Year continuously in 2019, 2020, and 2021 (2nd Rank) at SQLShack and the MSSQLTIPS champions award in 2020.
Personal Blog: https://www.dbblogger.com
I am always interested in new challenges so if you need consulting help, reach me at rajendra.gupta16@gmail.com
View all posts by Rajendra Gupta
- Understanding PostgreSQL SUBSTRING function - September 21, 2024
- How to install PostgreSQL on Ubuntu - July 13, 2023
- How to use the CROSSTAB function in PostgreSQL - February 17, 2023