This article introduces and explores the Jupyter books in the Azure Data Studio.
Introduction
The Jupyter notebooks are a popular tool among data scientists and architects for writing and sharing the code and results. It is an interactive web tool that you can use to write live code, including execution results and narrative texts. Microsoft’s Azure Data Studio, a cross-platform development tool, uses the Jupyter notebook concepts and builds SQL notebooks with a rich graphical interface.
To be familiar with the SQL Notebook, you should refer to the following articles.
- SQL Notebook in SQL Notebooks introduction and overview
- A handy SQL Notebook for troubleshooting in Azure Data Studio
- Use Python SQL scripts in SQL Notebooks of Azure Data Studio
- Learn Jupyter Notebooks for SQL Server
Requirements
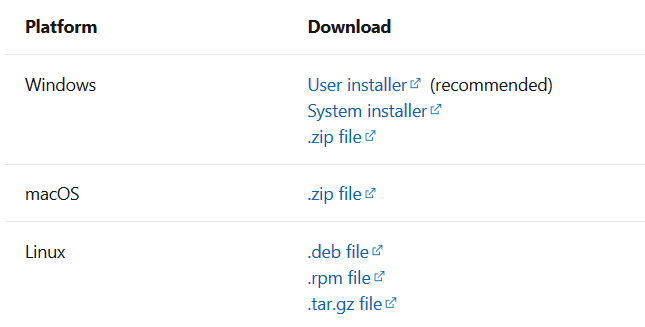
To begin with this article, you should download and install the latest Azure Data Studio. You can install it on Windows, Linux (Ubuntu, RHEL, SUSE), and macOS.
Note: I am using the Azure Data Studio Release number: 1.32.0, published on 18th August 2021.
The valuable features of the SQL Notebooks are as below.
- Live presentations: You can use the SQL notebooks to write content, T-SQL scripts, and results. Usually, we look for PowerPoint presentations for any presentation and then switch to SQL Server Management Studio to execute the codes. The ADS notebooks combine both texts, code blocks, and their execution in a single place that makes them suitable for live presentations
- Documentation: Usually, we store the scripts in a folder, and instructions might be stored in a separate text file. These books (Jupyter) help document code flexibly, and you can share it with team members with the execution results
- Integrated query environments: The notebook can have SQL, PowerShell, Python, PySpark codes for executing in a single console. Therefore, you use these languages or kernels, and you can write the codes and execute them without installing or switching to a separate application
- Markdown language: These notebooks use the markdown language. The initial releases of Notebooks in ADS require you to use markdown language for all tasks. However, you can choose graphical options for formatting your texts, font, code, adding images, bullets, numbers in the latest ADS. It makes it comfortable for new users to adopt Jupyter notebooks in Azure Data Studio. You should use the latest ADS version for graphical improvements in writing markdown code
Jupyter Book overview
We are all familiar with the term – Book from our school days. A book is an organized collection of different chapters, and each chapter contains relevant material.
Similar to a book, Azure Data Studio contains a Jupyter book that is a collection of executable notebooks, code. The book has a proper structure and table of contents. Think of it as an interactive collection of Jupyter notebooks. Each chapter in Jupyter’s book can be considered as a chapter in the book. This notebook has executable code, text blocks, graphs, image support and is written using the markdown language.
Underlying files for the Jupyter book in Azure Data Studio
Each Jupyter notebook consists of the following folder and file structures:
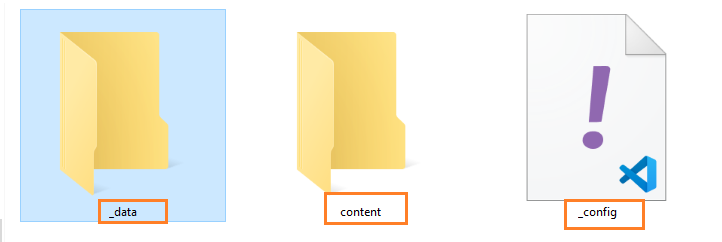
- _config.yml: It is a YAML (Yet-Another-Markup-Language) file that defines the book root folder. The YAML is a data serialization language commonly used for defining configuration files
- Content folder: The content folder consists of SQL Notebooks, PowerShell notebooks, markdown files and images. You can have subfolders in the content folders
- _data folder: This folder has a toc.yml file that defines the structure of the Jupyter nook in the Azure Data Studio sidebar. It is a book primary configuration file that defines the chapter and its topics. It is also written in the YAML language
Note: You can refer to Wikipedia to get knowledge of YAML.
Exploring sample SQL Server2019 book (Jupyter)
Azure Data Studio has a sample Jupyter notebook for you to explore. Launch ADS, and in the command palette, search for Jupyter Books: SQL Server 2019 guide.
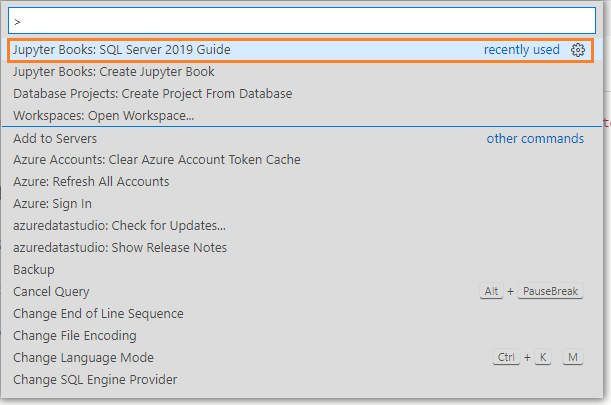
It opens the book in the provide Jupyter book section, as shown below. This book has several chapters such as Troubleshooters, Log analyzers, Diagnose, repair.
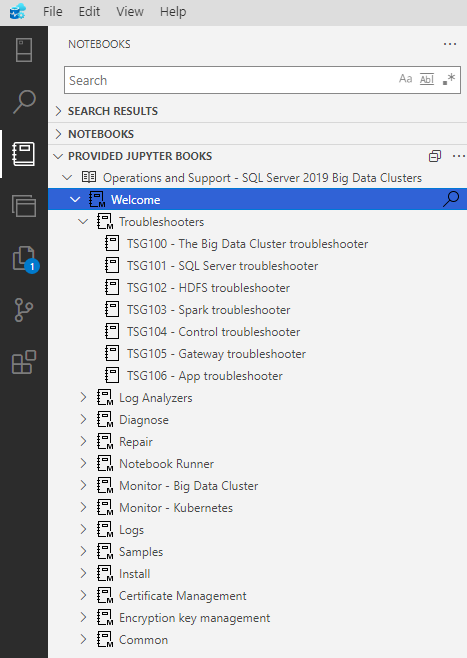
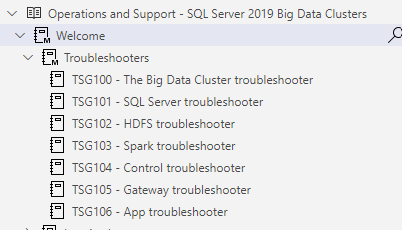
Each chapter can have subtopics, as shown below.
It also contains all its dependencies for executing the script, code. For example, it automatically pop-ups for configuring Python runtime in my case.
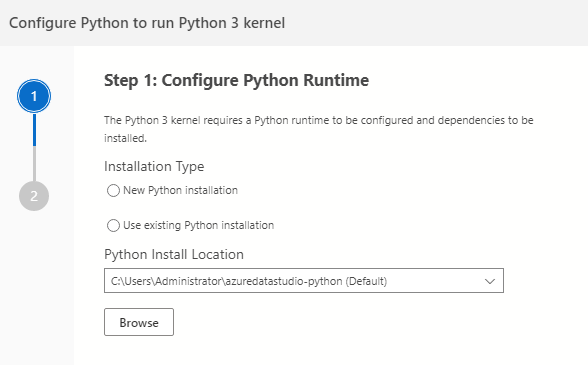
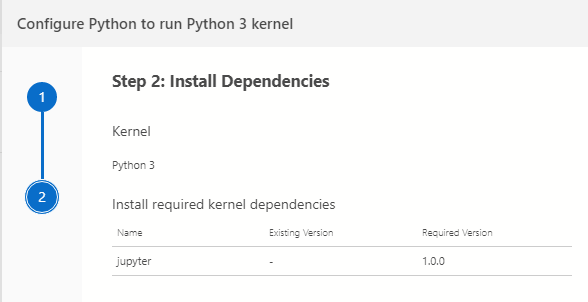
In the output, we got a message – notebook dependencies installation is complete. Jupyter is running at http://localhost:8888.
Let’s explore the contents of the sample SQL Server2019 Jupyter book.
- Notebook folder: To find out notebook files and directory location, hover your mouse pointer over the name of the Jupyter (book). It gives directory information, as shown below
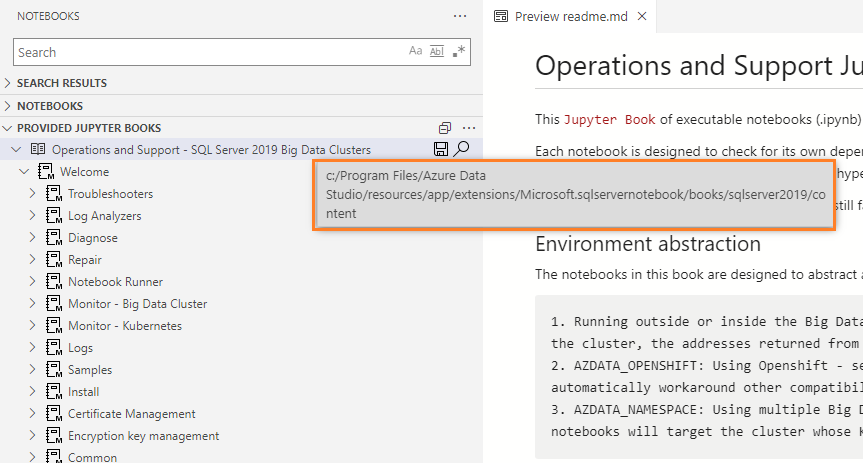
- _config file: Open the _config file from the directory specified above and notice that it contains the book header (title) appearing once you launch Jupyter notebook
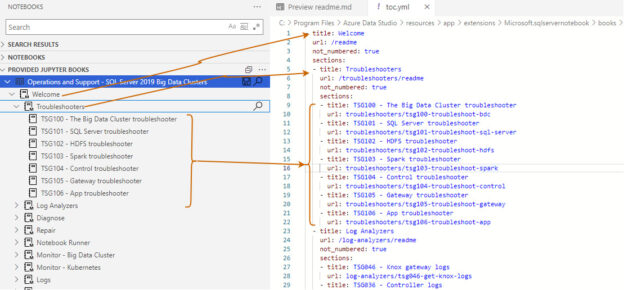
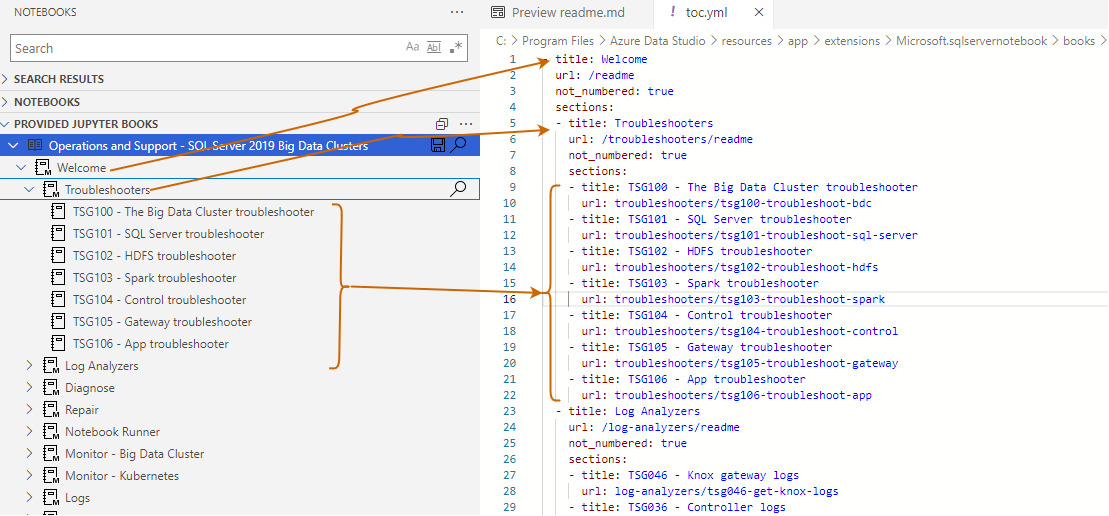
- toc.yml: Open the data folder and toc.yml file. As shown below, it defines the headings (chapters) and URL that points to the folder in the Jupyter notebook directory
For example, in the Troubleshooters section, we have the following subtopics, and each refers to a separate Jupyter source file.
The Jupyter source file can refer to another Azure SQL notebook. For example, once you hover the mouse on the link give in the Jupyter source file, it shows the notebook directory.
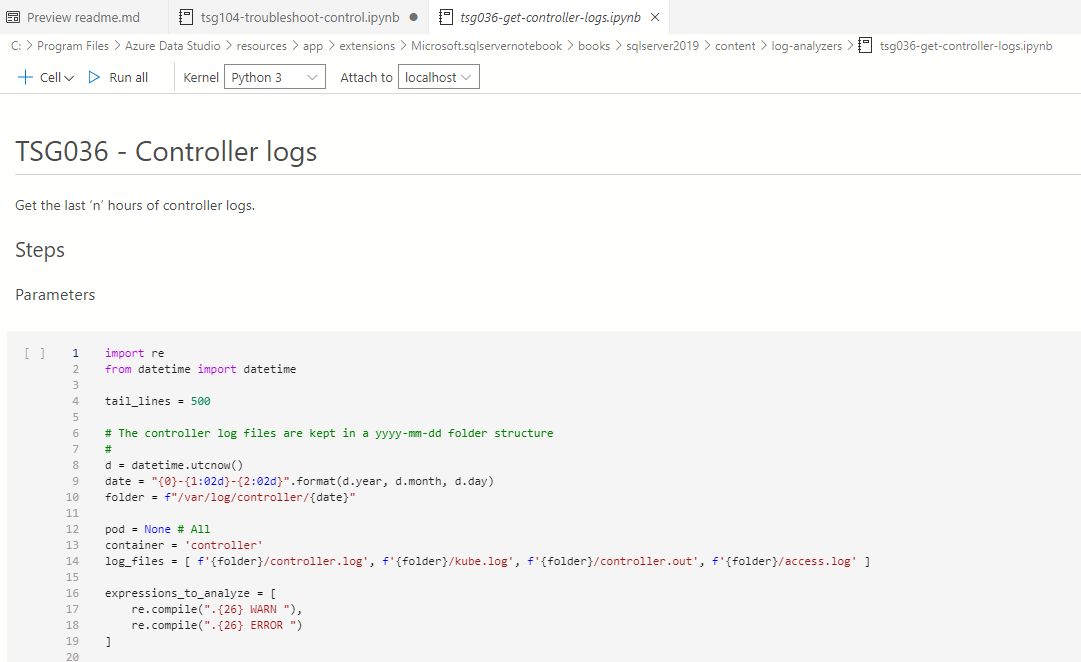
Click on the link, and you can view notebook contents, scripts for execution.
Create a Jupyter Book
Azure Data Studio allows creating and accessing the Jupyter notebooks. In the command palette, search for Jupyter Books: Create Jupyter Book.

It gives you a prompt to provide a name, directory (save location) for a new Jupyter book.
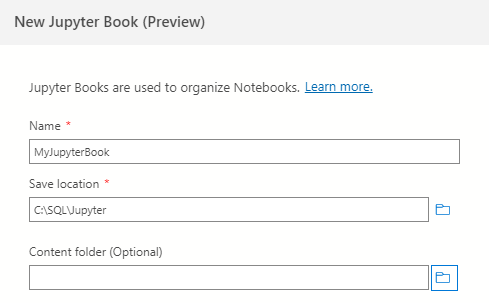
Click on create, and it creates the notebook as shown below.
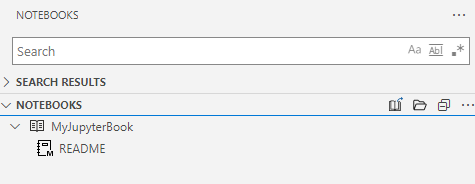
In the saved location, it creates the _config.yaml, _toc.yaml and README.md markdown source file.

Remote Jupyter Books
If you look at the options in the notebook section in Azure Data Studio, you get the option – Add Remote Jupyter Book.

To access the Jupyter notebook from the GitHub repository, you must save the notebook in both the .zip archive and .tar.gz archive for cross-platform compatibility. ADS automatically fetches the book name, version, language from the GitHub Releases title and compressed book.
- Location: GitHub
- Repository URL: It is the GitHub repository URL
It is crucial to give a proper name for the archive files, and the name should be in the following format.
[Book Name] – [Version] – [Language]
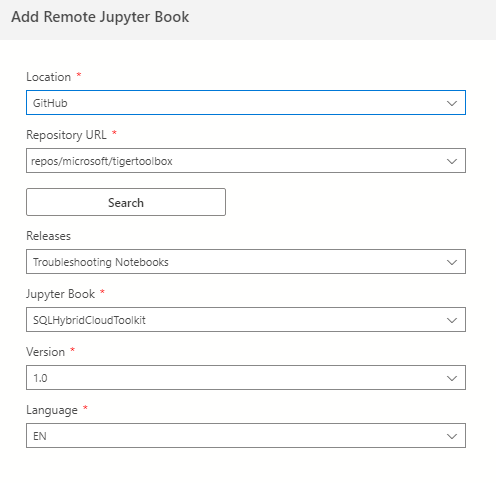
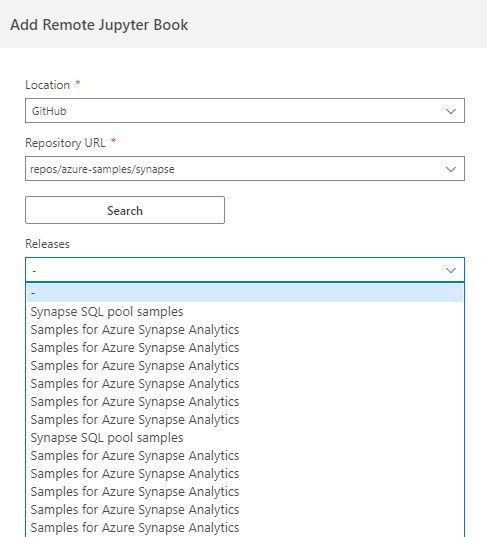
If there are multiple notebooks and their releases, you can choose the required Jupyter book, release, version, and release from the drop-down.
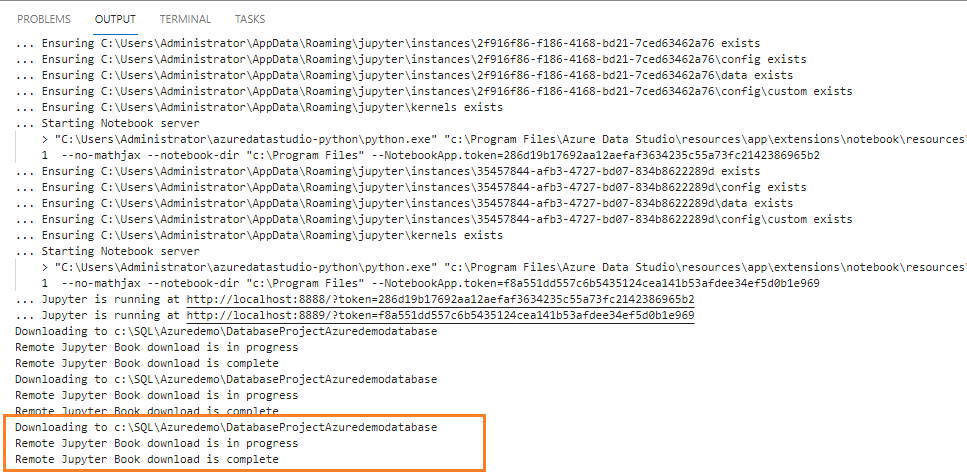
Click on Add after filling out the information on the remote book (Jupyter) page. On the output page, you get the message that it downloads the book (Jupyter) to local storage.
In the notebook section, you can view the remote Jupyter notebook stored in GitHub.
Automating a Remote Jupyter Book Release
To streamline the release process of remote Jupyter book, you can use the GitHub actions. The GitHub actions are workflow runners that can help you automate the development process directly from the GitHub repository. You can use the prepackaged actions from the GitHub marketplace and use them for custom workflows.
The GitHub actions use the similar interface of an Azure Data studio for creating the GitHub release to publish a remote book (Jupyter). These GitHub actions are managed using YAML file definitions stored in your repository’s/github/workflows directory. You can use a manual trigger or automatic triggers using the remote book (Jupyter) publish action.
In the following image, we can provide GitHub actions input.
- Jupyter book to release (default to the whole repository)
- Release name
- Book name
- Version number
- Language ID
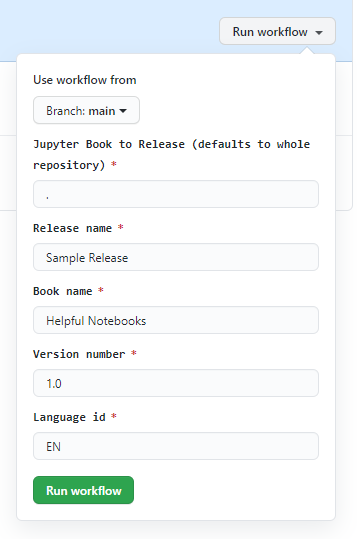
Reference Image and code: GitHub
For the manual trigger workflow, you can create a GitHub action with the following code:
|
1 2 3 4 5 6 7 8 9 10 11 12 13 14 15 16 17 18 19 20 21 22 23 24 25 26 27 28 29 30 31 32 33 34 35 36 37 |
on: workflow_dispatch: # Inputs the workflow accepts. inputs: directory: description: 'Jupyter Book to Release (defaults to whole repository)' default: '.' required: true releasename: description: 'Release name' required: true bookname: description: 'Book name' required: true versionnumber: description: 'Version number' required: true languageid: description: 'Language id' default: 'EN' required: true jobs: RemoteBook: runs-on: ubuntu-latest steps: - name: Checkout code uses: actions/checkout@v2 - name: Publish book uses: dzsquared/jupyter-publish-action@v0.1.0 with: directory: ${{ github.event.inputs.directory }} releasename: ${{ github.event.inputs.releasename }} bookname: ${{ github.event.inputs.bookname }} versionnumber: ${{ github.event.inputs.versionnumber }} languageid: ${{ github.event.inputs.languageid }} githubtoken: ${{ secrets.GITHUB_TOKEN }} |
Conclusion
We explored Jupyter Books in Azure Data Studio that allows creating an interactive, executable collection of SQL Notebooks. This feature enables you to collect all notebooks at a single place similar to a book.
- Understanding PostgreSQL SUBSTRING function - September 21, 2024
- How to install PostgreSQL on Ubuntu - July 13, 2023
- How to use the CROSSTAB function in PostgreSQL - February 17, 2023

