

This article explores the Python SQL scripts in SQL Notebook of Azure Data Studio.
Introduction
SQL Notebook is an exciting feature of Azure Data Studio. It is gaining popularity among database administrators and developers. You should explore the following articles before going through this article:
- SQL Notebook in SQL Notebooks introduction and overview
- A handy SQL Notebook for the purposes of troubleshooting in Azure Data Studio
Let’s create a new notebook for this article. Connect to a SQL instance in Azure Data Studio.
Right-click on a SQL instance and from the context menu choose New Notebook:
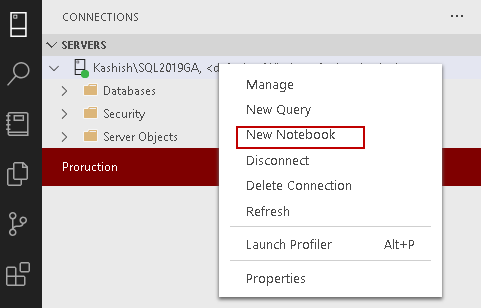
It launches SQL Notebook, as shown below. By default, it launches SQL kernel for executing T-SQL queries for SQL Server.

In the kernel list, we see following kernels apart from SQL:
- PySpark: We can use this for writing Python code using spark compute from a cluster
- Spark Scala and Spark R: We can use scala code using spark compute from a cluster
- Python 3: We can use Python code for connecting with SQL Server and execute queries
- PowerShell: We can write PowerShell code using PowerShell kernel
You might think – Why should we worry about the Python programming language? If yes, go through this article: Why would a SQL Server DBA be interested in Python?

You should also explore the Python articles and be familiar with the Python queries.
Let’s change the kernel from SQL to Python 3 in SQL Notebook. Once we change the selection to Python 3, it gives the following option for configuring Python for Notebooks:
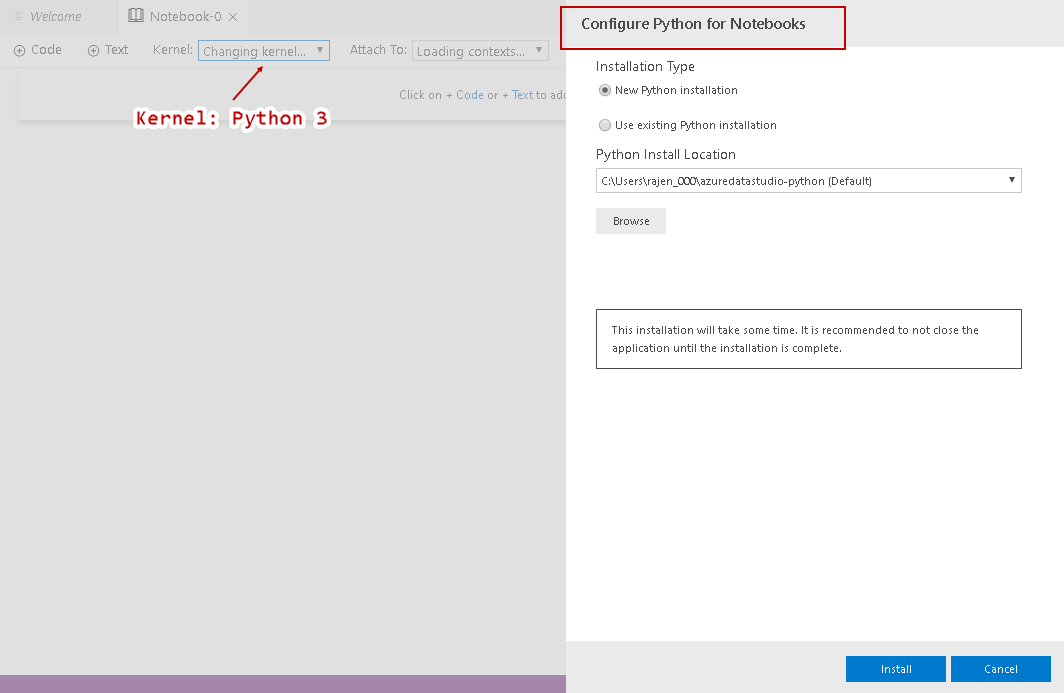
We get two options for Python installation:
- New Python installation: If we do not have an existing Python installation, we can choose this option, and Azure Data Studio does Python installation for us. It takes some time for downloading and installs Python. You can see an information message as well in the middle of the Python configuration page
- Use existing Python installation: If we have an existing Python on the server, we can browse to Python directory and use existing installation
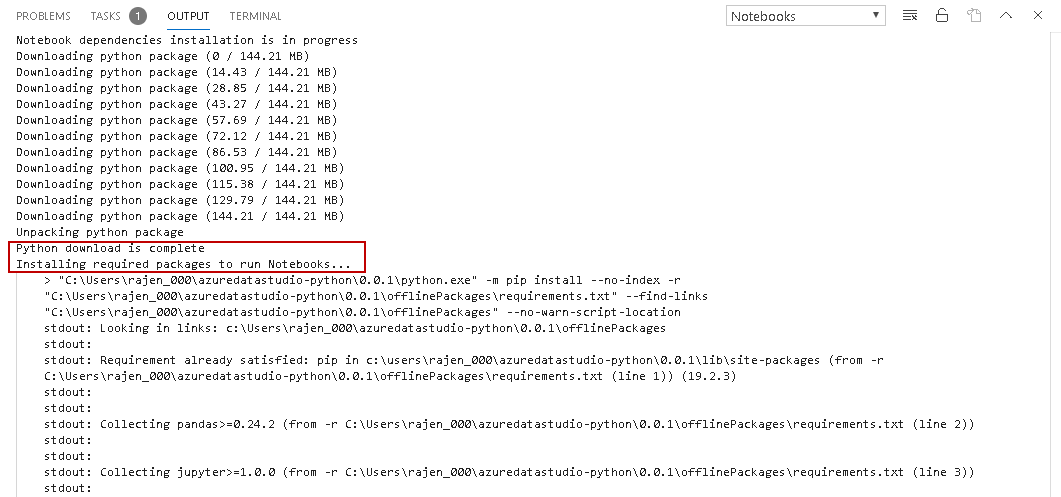
Let’s choose the default option New Python installation and click on the Install button at the bottom. It logs the installation in the task window on Azure Data Studio. We can see that the Python installer size is 144.21 MB. You should have an active internet connection for downloading the software:

It downloads the required package and starts the installation for Notebooks. It also shows the commands for installation of Python kernel:
It installs the Python and starts notebook Python kernel:
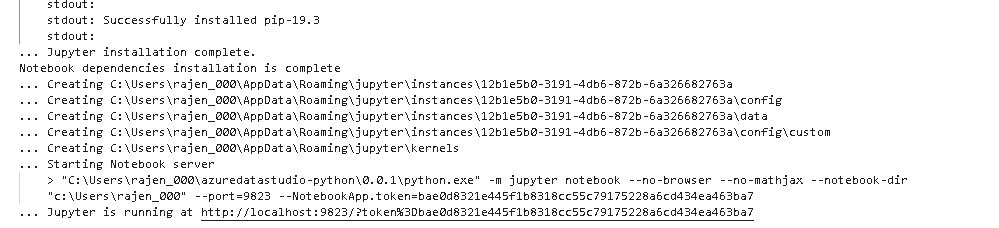
You can see kernel: Python 3 in SQL Notebook after installation:

We can also see Attach to is localhost for the Python3 kernel. We use this for local Python development:

Click on Manage Packages, and you can see a list of installed Pip packages:

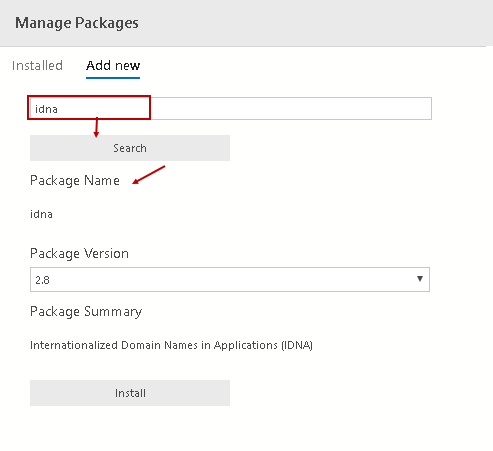
We can search for any specific Pip package as well. Click on Add new and search for specific Pip module:
In the following screenshot, we search for “idna” Pip package. In the result, it gives the package summary and version information:
Let’s search for Python SQL driver (pyodbc) module and install it for the Notebook:
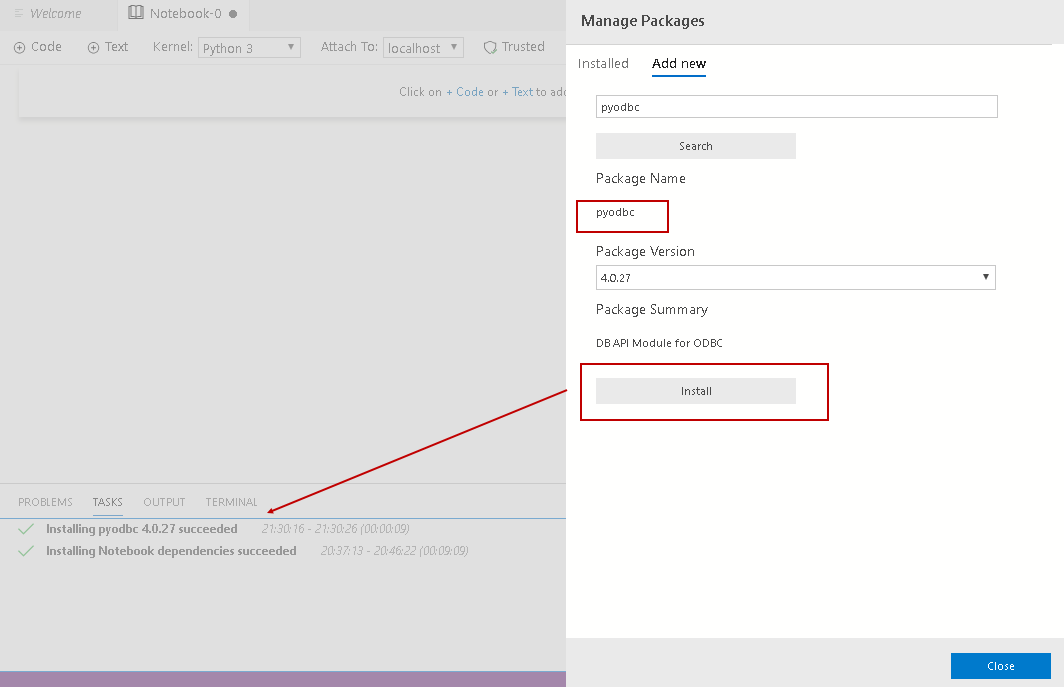
Now, we will use Python ODBC for connecting to SQL Server and query tables.
Execute SQL query using Python in SQL Notebook
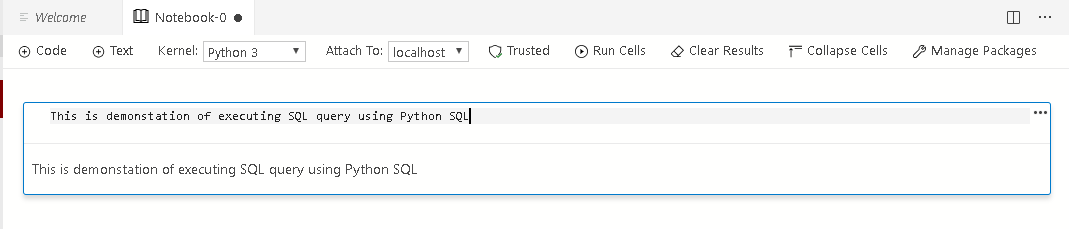
First, click on Text and write a heading for the query:

SQL Notebook uses Markdown language formatting. You also get a preview of the text, as shown below.
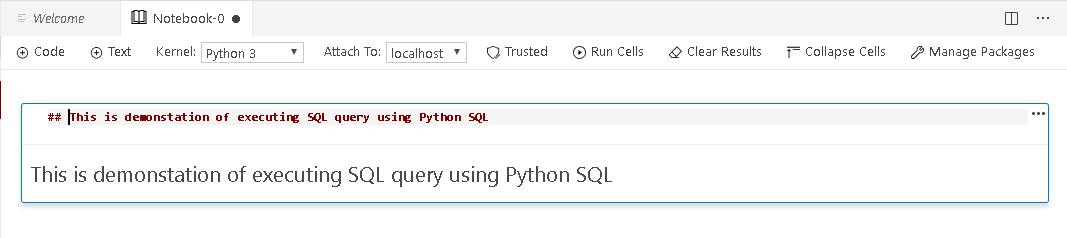
We can format the text in an h2 heading by adding the ## symbol in front of the text:
Now we will add Python code in this notebook. We require the following information to write the query:
- SQL instance details
- Database name
- T-SQL for retrieving records from a table
- ODBC driver information
Click on Windows Start and type “odbc”. Open ODBC data sources (64-bit):
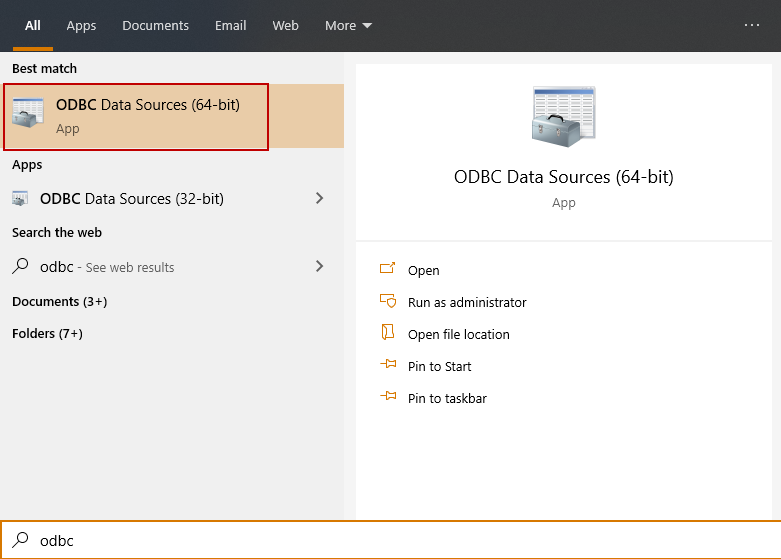
It opens the following ODBC Data Source Administrator (64-bit):
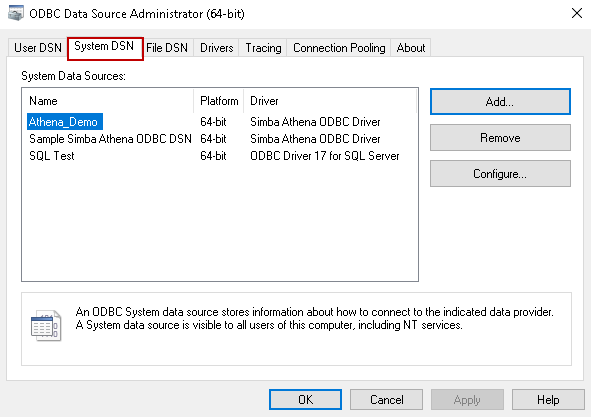
Under the System DSN tab, click on Add. It opens the available ODBC drivers. Note down the name of latest ODBC driver – ODBC Driver 17 for SQL Server:
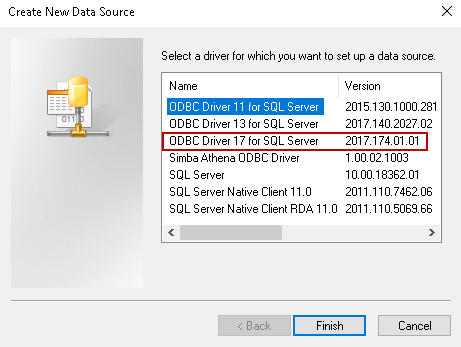
Cancel it, and it closes the ODBC data source window.
Step 1: Import pyodbc Python module
|
1 |
import pyodbc |
Step 2: Establish a database connection using windows authentication
|
1 |
cstring = 'DRIVER=ODBC Driver 17 For SQL Server;Server=Kashish\SQL2019GA;DATABASE=AdventureWorks;Trusted_Connection=yes' |
Step 3: Create a T-SQL string
|
1 |
tsql ='SELECT top 10 [PersonType],[Title],[FirstName],[MiddleName],[LastName],[Suffix] from Person.person' |
Step 4: Make a connection using the string from step 1 with Pyodbc
|
1 |
conn = pyodbc.connect(cstring) |
Step 5: Open cursor and execute SQL script
|
1 2 |
cursor = conn.cursor() cursor.execute(tsql) |
Step 6: Print results in comma-separated format
|
1 2 3 |
rows = cursor.fetchall() for row in rows: print(row, end='\n') |
Let’s combine all pieces together and paste into SQL Notebook. To add the code, after the text, click on Add code:

In the code area, paste the following Python SQL script:
|
1 2 3 4 5 6 7 8 9 |
import pyodbc cstring = 'DRIVER=ODBC Driver 17 For SQL Server;Server=Kashish\SQL2019GA;DATABASE=AdventureWorks;Trusted_Connection=yes' tsql ='SELECT top 10 [PersonType],[Title],[FirstName],[MiddleName],[LastName],[Suffix] from Person.person' conn = pyodbc.connect(cstring) cursor = conn.cursor() cursor.execute(tsql) rows = cursor.fetchall() for row in rows: print(row, end='\n') |
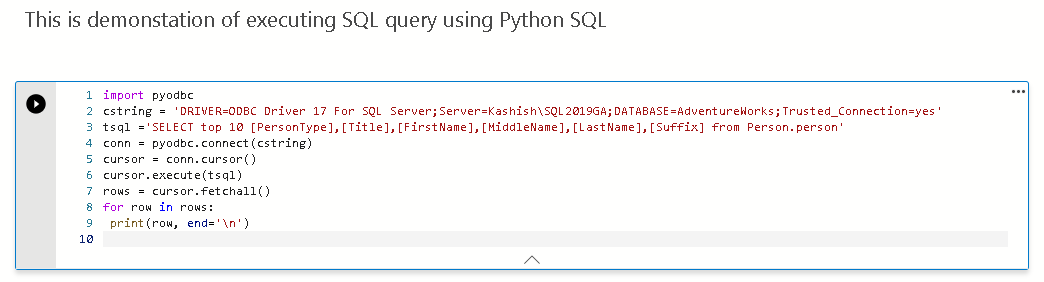
Click on the play icon for executing this Python code and view the results:
![]()
Executing a long query (multiline) using Python SQL script in Azure Data Studio
In the previous section, we used a single line query in a single quote. We cannot execute the long query in the single quotes.
We get the following error message if we use a long query in a single quote:
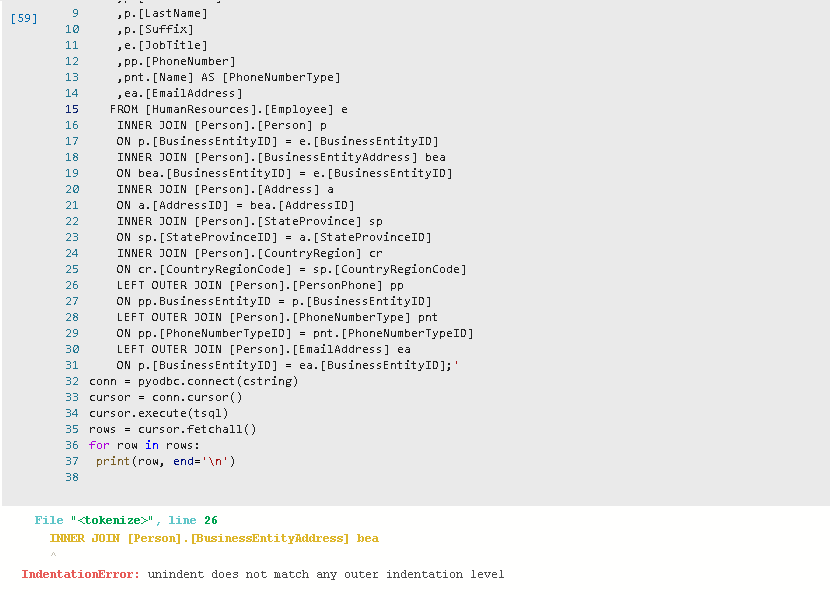
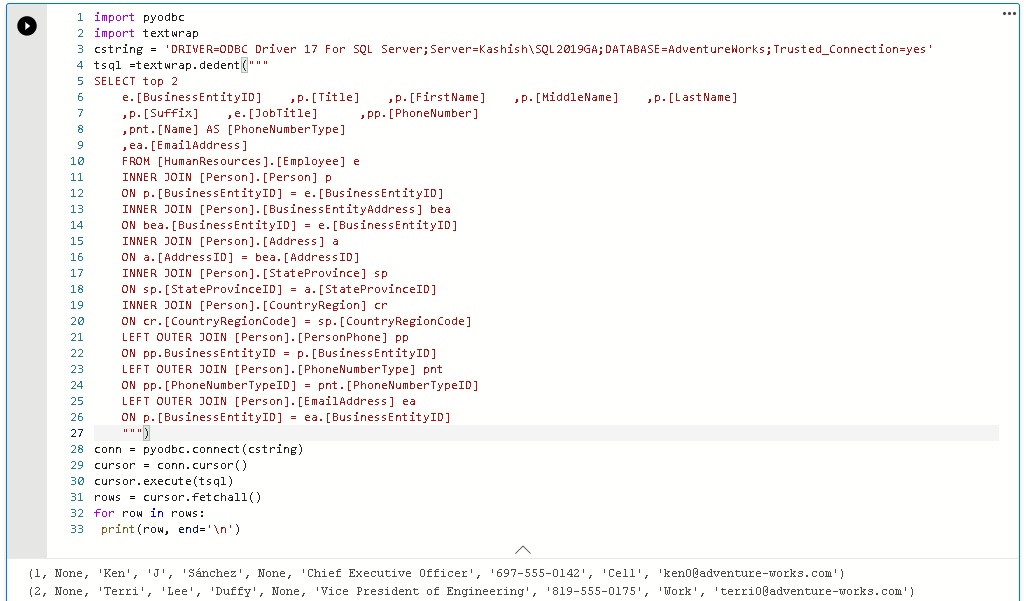
We can use the long SQL statement using the triple-quote string format. We require textwrap module for using triple-quote. SQL Server ignores all-white spaces along with tab and newlines:
|
1 2 3 4 5 6 7 8 9 10 11 12 13 14 15 16 17 18 19 20 21 22 23 24 25 26 27 28 29 30 31 32 33 |
import pyodbc import textwrap cstring = 'DRIVER=ODBC Driver 17 For SQL Server;Server=Kashish\SQL2019GA;DATABASE=AdventureWorks;Trusted_Connection=yes' tsql =textwrap.dedent(""" SELECT top 2 e.[BusinessEntityID] ,p.[Title] ,p.[FirstName] ,p.[MiddleName] ,p.[LastName] ,p.[Suffix] ,e.[JobTitle] ,pp.[PhoneNumber] ,pnt.[Name] AS [PhoneNumberType] ,ea.[EmailAddress] FROM [HumanResources].[Employee] e INNER JOIN [Person].[Person] p ON p.[BusinessEntityID] = e.[BusinessEntityID] INNER JOIN [Person].[BusinessEntityAddress] bea ON bea.[BusinessEntityID] = e.[BusinessEntityID] INNER JOIN [Person].[Address] a ON a.[AddressID] = bea.[AddressID] INNER JOIN [Person].[StateProvince] sp ON sp.[StateProvinceID] = a.[StateProvinceID] INNER JOIN [Person].[CountryRegion] cr ON cr.[CountryRegionCode] = sp.[CountryRegionCode] LEFT OUTER JOIN [Person].[PersonPhone] pp ON pp.BusinessEntityID = p.[BusinessEntityID] LEFT OUTER JOIN [Person].[PhoneNumberType] pnt ON pp.[PhoneNumberTypeID] = pnt.[PhoneNumberTypeID] LEFT OUTER JOIN [Person].[EmailAddress] ea ON p.[BusinessEntityID] = ea.[BusinessEntityID] """) conn = pyodbc.connect(cstring) cursor = conn.cursor() cursor.execute(tsql) rows = cursor.fetchall() for row in rows: print(row, end='\n') |
Insert data into SQL tables with Python SQL script for SQL Notebook
Suppose we have the following test table and we want to insert data using Python SQL:
|
1 2 3 4 5 |
Create table Tempdata ( ID int, Name varchar(50) ) |
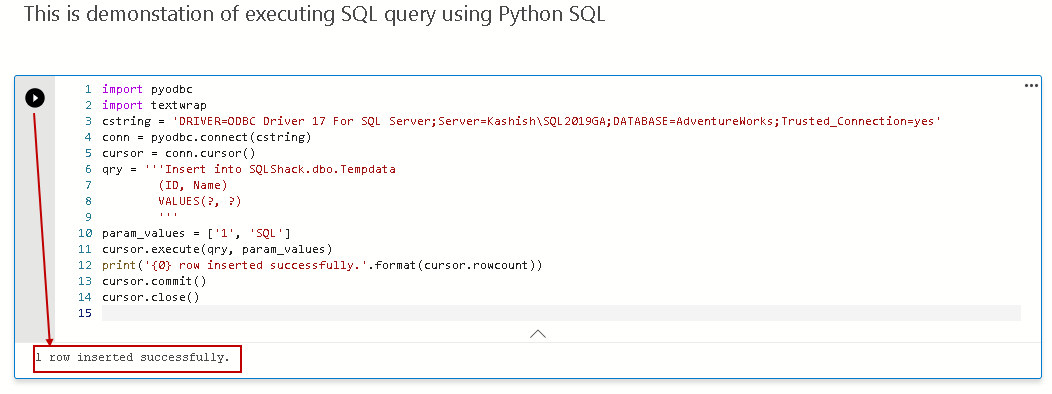
Let’s copy and paste the following code in the Notebook for inserting one record:
|
1 2 3 4 5 6 7 8 9 10 11 12 13 14 |
import pyodbc import textwrap cstring = 'DRIVER=ODBC Driver 17 For SQL Server;Server=Kashish\SQL2019GA;DATABASE=AdventureWorks;Trusted_Connection=yes' conn = pyodbc.connect(cstring) cursor = conn.cursor() qry = '''Insert into SQLShack.dbo.Tempdata (ID, Name) VALUES(?, ?) ''' param_values = ['1', 'SQL'] cursor.execute(qry, param_values) print('{0} row inserted successfully.'.format(cursor.rowcount)) cursor.commit() cursor.close() |
Execute this code, and it returns the number of rows inserted into the table:
In this query, we followed the below steps:
Step 1: Import pyodbc Python module
|
1 |
import pyodbc |
Step 2: Establish a database connection using windows authentication
|
1 |
cstring = 'DRIVER=ODBC Driver 17 For SQL Server;Server=Kashish\SQL2019GA;DATABASE=AdventureWorks;Trusted_Connection=yes' |
Step 3: Open the cursor
|
1 |
cursor = conn.cursor() |
Step 4: Specify the insert statement with wildcard operators and specified values using param_values.
|
1 2 3 4 5 |
qry = '''Insert into SQLShack.dbo.Tempdata (ID, Name) VALUES(?, ?) ''' param_values = ['1', 'SQL'] |
Step 5: Execute the insert statement with parameters specified
|
1 |
cursor.execute(qry, param_values) |
Step 6: Print a message for the number of rows inserted using cursor.rowcount and print function.
|
1 |
print('{0} row inserted successfully.'.format(cursor.rowcount)) |
Step 6: Commit the insert statement and close the cursor
We need to commit the record that we inserted in an earlier step. We should not skip this step else, SQL Server will block the other sessions trying to retrieve records from this table. It is similar to a commit transaction statement in SQL Server.
|
1 2 |
cursor.commit() cursor.close() |
We inserted single records in the above query. We might want to insert multiple records at a time. We can use the above query with some changes. Previously we use cursor.execute the function for data insertion. We use a cursor.executemany function for inserting multiple records.
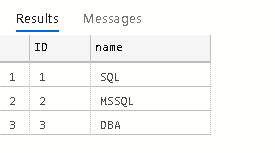
In the below query, we insert three records in the tempdata table:
|
1 2 3 4 5 6 7 8 9 10 11 12 13 14 15 16 |
import pyodbc import textwrap cstring = 'DRIVER=ODBC Driver 17 For SQL Server;Server=Kashish\SQL2019GA;DATABASE=AdventureWorks;Trusted_Connection=yes' conn = pyodbc.connect(cstring) cursor = conn.cursor() qry = '''Insert into SQLShack.dbo.Tempdata (ID, Name) VALUES(?, ?) ''' param_values = [('1', 'SQL'), ('2','MSSQL'), ('3','DBA') ] cursor.executemany(qry, param_values) cursor.commit() cursor.close() |
We can see the data in the tempdata table, as shown below:
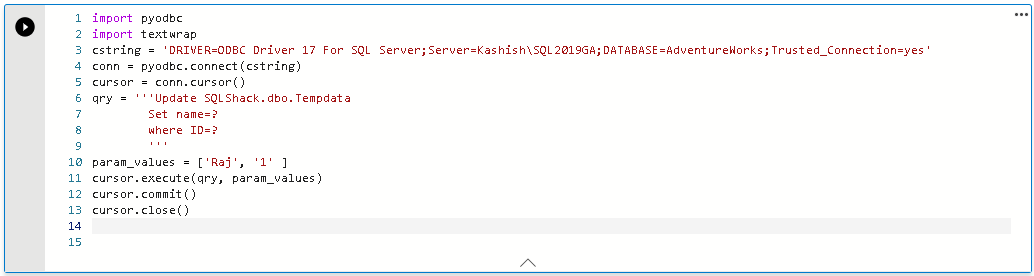
Update records using Python SQL script in SQL table
In this section, we will use an update statement in the Azure Data Studio Notebook using the Python SQL.
We can specify an update statement similar to an insert statement:
|
1 2 3 4 5 6 7 8 9 10 11 12 13 |
import pyodbc import textwrap cstring = 'DRIVER=ODBC Driver 17 For SQL Server;Server=Kashish\SQL2019GA;DATABASE=AdventureWorks;Trusted_Connection=yes' conn = pyodbc.connect(cstring) cursor = conn.cursor() qry = '''Update SQLShack.dbo.Tempdata Set name=? where ID=? ''' param_values = ['Raj', '1' ] cursor.execute(qry, param_values) cursor.commit() cursor.close() |
Let me highlight the changes in the following query compared to an insert query.
Specify the update statement with requirement parameters using a wildcard operator (?):
|
1 2 3 4 |
qry = '''Update SQLShack.dbo.Tempdata Set name=? where ID=? ''' |
In the param_value, we must specify the values for the wildcard operator(?) in the correct order:
|
1 |
param_values = ['Raj', '1' ] |
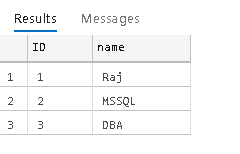
Execute the Python SQL script in Notebook and verify the changes:
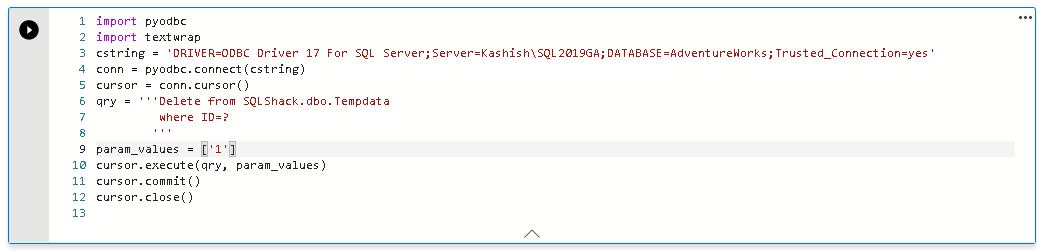
Delete records using Python SQL script in SQL table
Let’s delete a record from the SQL table in the Notebook of Azure Data Studio. You can easily understand the following code as it looks similar to an update statement. We replaced the update with a delete statement. We use the wildcard operator in the where condition:
|
1 2 3 4 5 6 7 8 9 10 11 12 |
import pyodbc import textwrap cstring = 'DRIVER=ODBC Driver 17 For SQL Server;Server=Kashish\SQL2019GA;DATABASE=AdventureWorks;Trusted_Connection=yes' conn = pyodbc.connect(cstring) cursor = conn.cursor() qry = '''Delete from SQLShack.dbo.Tempdata where ID=? ''' param_values = ['1'] cursor.execute(qry, param_values) cursor.commit() cursor.close() |
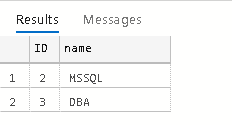
Verify that record with ID=1 does not exist in the tempdata table:
Conclusion
In this article, we explored Python SQL script in SQL Notebook of Azure Data Studio. We can use Python for Select, Insert, Update and Delete statements as well. You should explore Python language for SQL Server using the SQLShack articles.

I am the author of the book "DP-300 Administering Relational Database on Microsoft Azure". I published more than 650 technical articles on MSSQLTips, SQLShack, Quest, CodingSight, and SeveralNines.
I am the creator of one of the biggest free online collections of articles on a single topic, with his 50-part series on SQL Server Always On Availability Groups.
Based on my contribution to the SQL Server community, I have been recognized as the prestigious Best Author of the Year continuously in 2019, 2020, and 2021 (2nd Rank) at SQLShack and the MSSQLTIPS champions award in 2020.
Personal Blog: https://www.dbblogger.com
I am always interested in new challenges so if you need consulting help, reach me at rajendra.gupta16@gmail.com
View all posts by Rajendra Gupta
- Understanding PostgreSQL SUBSTRING function - September 21, 2024
- How to install PostgreSQL on Ubuntu - July 13, 2023
- How to use the CROSSTAB function in PostgreSQL - February 17, 2023