
This article uses Azure Automation techniques to import data into Azure SQL Database from Azure Storage container.
Introduction
In the first part of the article, Automate data loading from email attachments using Azure Logic Apps, we implemented the following tasks using the Azure Logic Apps.
- Upload the file into Azure Storage container once you get a new email having an Inbox attachment with a specific subject
- Sends a confirmation email once the file is uploaded to a storage container
- It marks an email as read
In the 2nd part of the article, we automatically upload this CSV file into Azure SQL Database. To integrate the Azure database with the storage container, we need to generate a shared access signature.
Configuration of Shared Access Signature
Shared Access Signature (SAS) is a way to grant limited access to resources in the Azure Storage account. You do not require to share the access keys with your client applications. You get the granular control such as
- Which Object?
- What permissions?
- How long?
You can also specify specific IP addresses, protocols, and permissions for the storage account resources. Azure supports the following types of shared access signatures.
- User delegation SAS
- Service SAS
- Account SAS
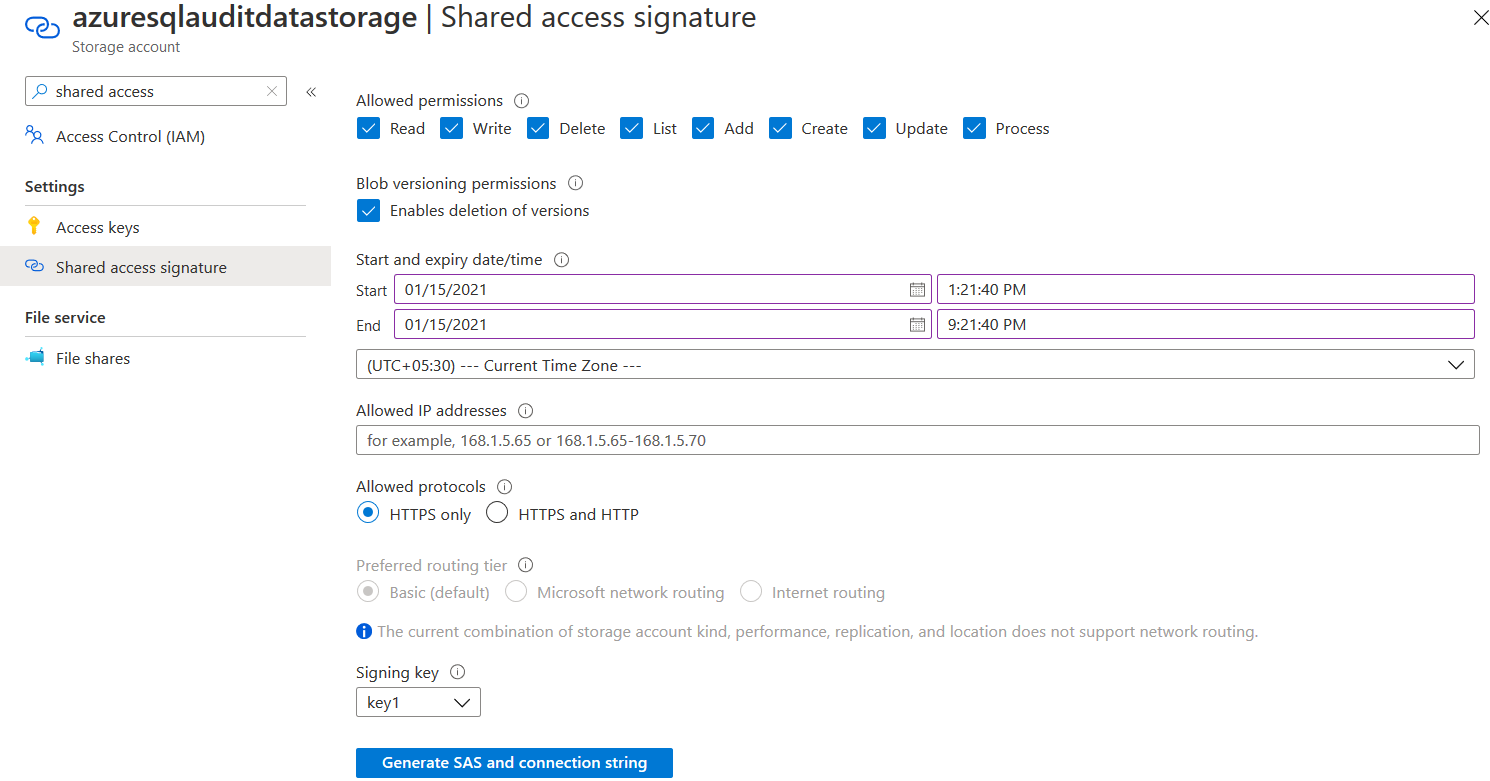
To configure the SAS, navigate to your storage account and search for Shared Access Signature. On this page, you have the following configurations.
- Allowed permissions: Available options are Read, Write, Delete, List, Add, Create, Update, Process
- Blob versioning permissions: You can give permissions to delete versions by selecting the option – Enable deletion of versions
- Start and expiry date/time: You can set the expiry date of the permissions. After the expiry date, you cannot access the storage container resources. You can also select your suitable time zone from the drop-down list
- Allowed IP address: If you want to restrict access to a specific IP address or address range, specify in the text box of the Allowed IP address
- Allowed protocols: By default, it allows only HTTPS protocol; however, you can allow HTTP and HTTPS traffic
Click on Generate SAS and connection string.
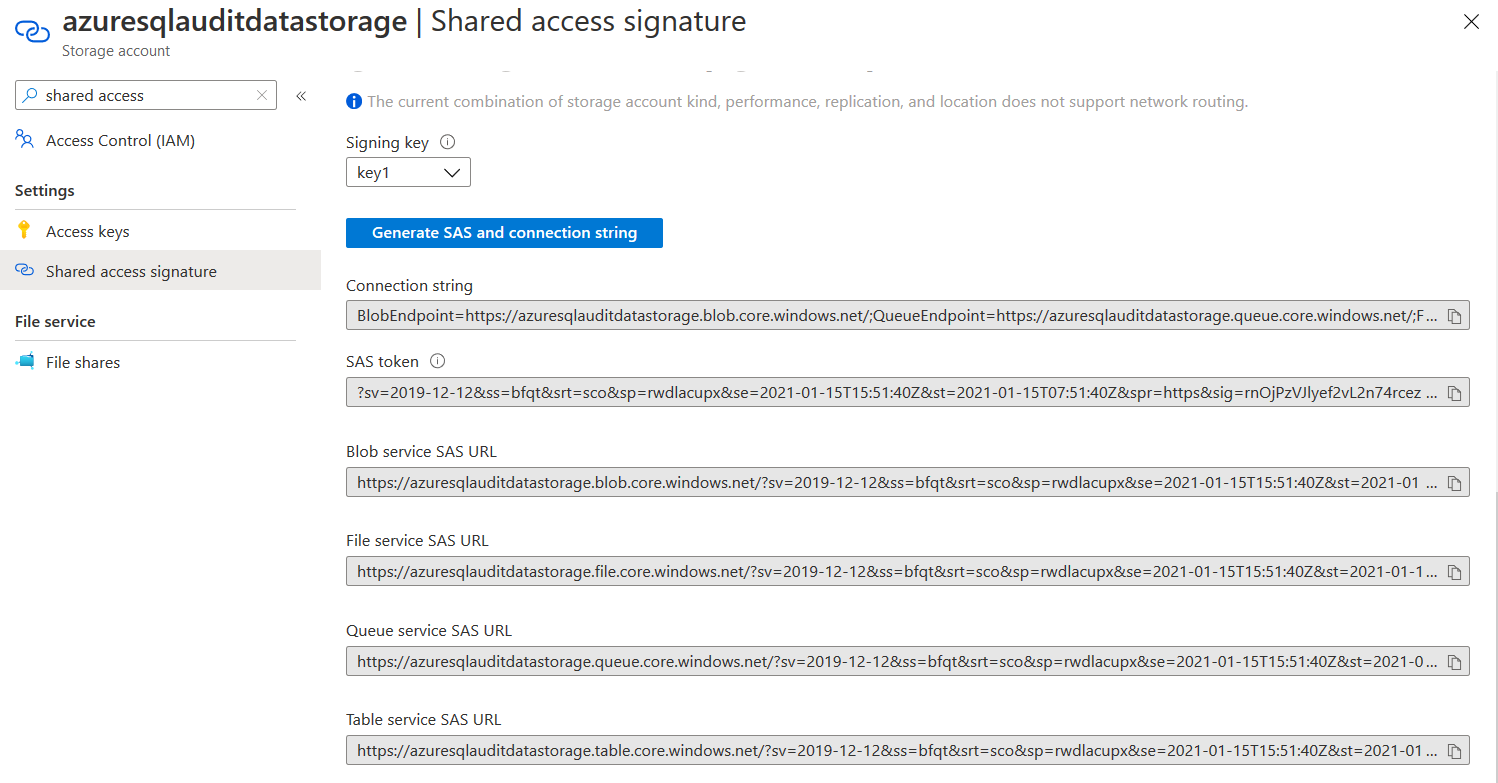
You get the SAS token and Blob service SAS. The Shared Access signature provides a signed URI (Uniform Resource Identifier) for your storage resources. The generated SAS token is constructed from the query parameters and signed with the key for SAS.
The generated SAS token has a leading question mark (?), we need to remove this question mark before using it further in the script.
?sv=2019-12-12&ss=bfqt&srt=sco&sp=rwdlacupx&se=2021-01-15T15:55:17Z&st=2021-01-15T07:55:17Z&spr=https&sig=%2Bx6C8XiiPoQx%2BODC2D%2BgSrHh5CCmVfkX2XrqS49X4%2F8%3D’
You can refer to Microsoft docs for more details on Shared Access Signature. To connect the Azure Storage Container with the azure database, we create the Azure SQL database with the following steps.
Database scoped credentials
Connect to your Azure SQL database, and create a database scoped credential using the shared access signature. In the below query, we specify the following parameters.
- Database scoped credential name – [https://azuresqlauditdatastorage.blob.core.windows.net/input]
- Identity: Shared access signature
- Secret: It is the SAS token generated from the shared access signature in the previous step. As stated above, remove the question mark before using it in the database scoped credentials query
|
1 2 3 |
CREATE DATABASE SCOPED CREDENTIAL [https://azuresqlauditdatastorage.blob.core.windows.net/input] WITH IDENTITY = 'SHARED ACCESS SIGNATURE', SECRET = 'sv=2019-12-12&ss=bfqt&srt=sco&sp=rwdlacupx&se=2021-01-18T17:47:13Z&st=2021-01-15T09:47:13Z&spr=https&sig=cF9GdCTCNCuU6EH88ls9DF293zaB3J%2F%2BXbcf74N09Ug%3D' |

Create an external data source
We create an external data source with azure container and credential as database scoped credential in the below query.
- Type: BLOB_STORAGE
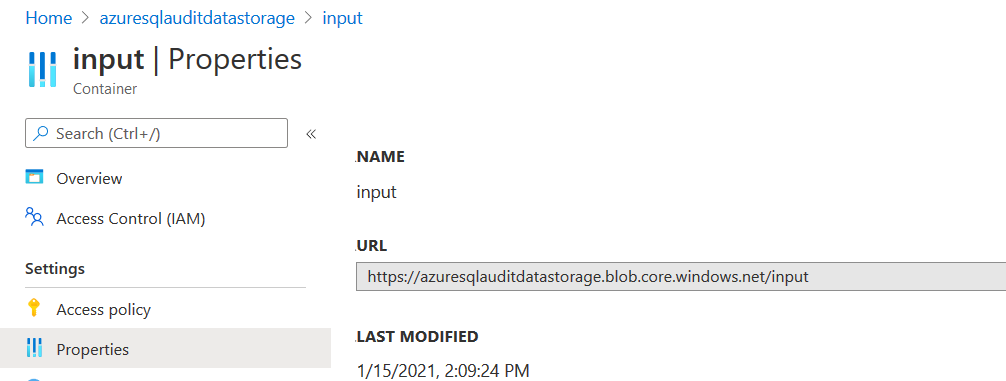
- Location: It is the storage container URL that you can get from the Azure portal. Navigate to Azure portal, open storage container and its properties. Here, you get the URL, as shown below.
- Credential: It is the database scoped credential name that we created earlier.
|
1 2 3 4 5 6 |
CREATE EXTERNAL DATA SOURCE dataset WITH ( TYPE = BLOB_STORAGE, LOCATION = 'https://azuresqlauditdatastorage.blob.core.windows.net/input', CREDENTIAL = [https://azuresqlauditdatastorage.blob.core.windows.net/input] ); |

Deploy a database table and stored procedure for BULK INSERT
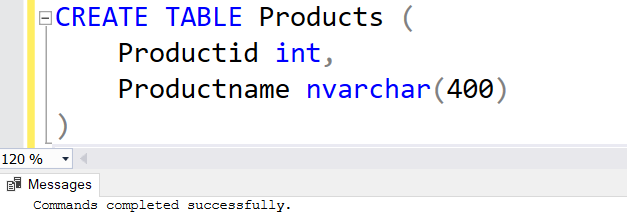
Before we move further, let’s create a database table. This table should match the content you expect to receive in a CSV file through email. Here, we create a Products table, as shown below.
|
1 2 3 4 |
CREATE TABLE Products ( Productid int, Productname nvarchar(400) ) |
In the below script, we create a stored procedure to load data from the CSV file to the Azure SQL database. The CSV file is stored in the storage container. To import data, here, we use the BULK INSERT command. In the command, you need to specify the following details.
- CSV file name stored in an azure storage container. For example, here, I specify the Products.csv file name
- Data_Source: It is the name of an external data source we created earlier
- FORMAT: It is the format of the input file. We specify CSV here as per our sample data file format
- FIRSTROW: In our CSV file, the data row starts from line 2 because the first row has a header
In this stored procedure, we do the following tasks:
- Firstly, truncate the existing table [dbo].[Products]
- Run a BULK INSERT statement for inserting data from CSV into the [dbo].[Products]
|
1 2 3 4 5 6 7 8 9 10 11 12 |
CREATE OR ALTER PROCEDURE LoadDataintoAzureSQL AS BEGIN TRUNCATE table [dbo].[Products]; BULK INSERT [dbo].[Products] FROM 'Products.csv' WITH ( DATA_SOURCE = 'dataset', FORMAT = 'CSV', FIRSTROW = 2 ); END |
Add a step in the logic app to execute the BULK INSERT stored procedure
Earlier, we configured a workflow to store email attachments to the Azure storage container in the logic app. We require an additional step to execute the BULK INSERT stored procedure and import data into Azure SQL Database.
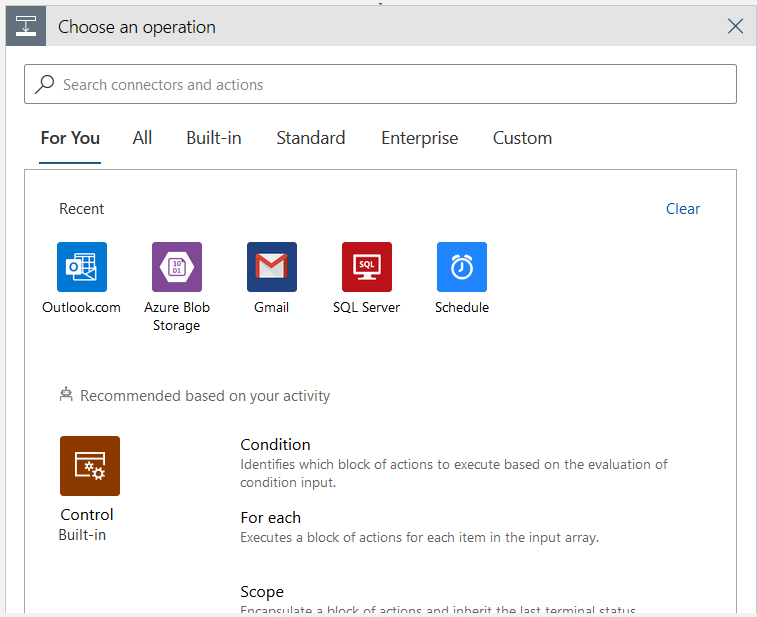
Open the Azure portal, navigate to logic apps and edit the existing logic app that we created in the first article. Click on New Step to add a step of executing SQL stored procedure. Here, search for SQL Server. If you have used it recently, you can get a list of operations from the current section.
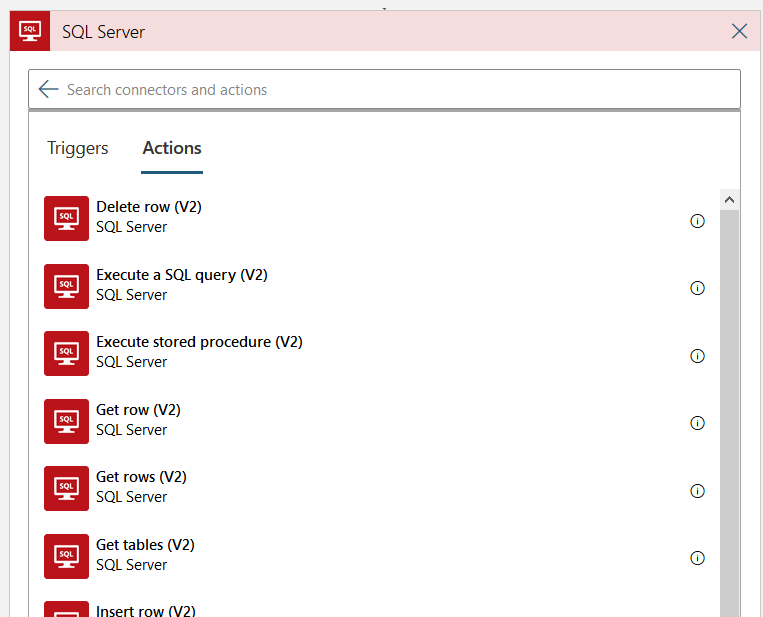
In the SQL Server, click on Execute stored procedure (V2). You can also execute a SQL query if you want to specify the query in it; however, it is good to use a stored procedure. If you directly specify SQL query, it has certain limitations such as you cannot use Go as a batch separator.
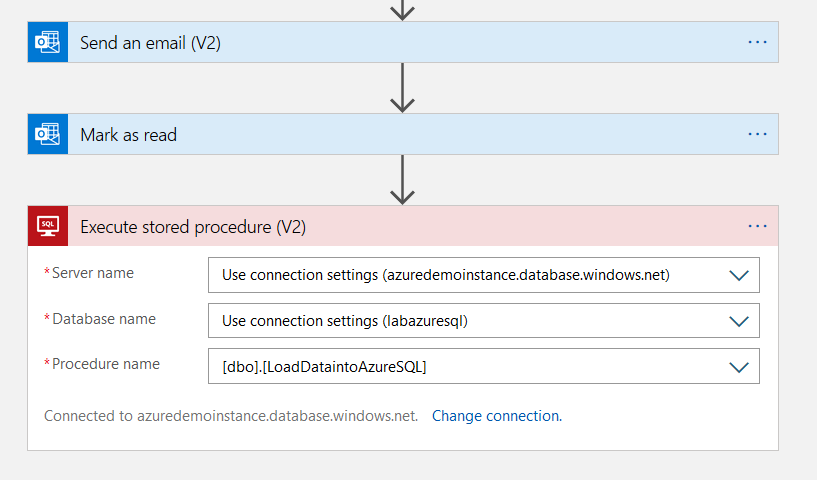
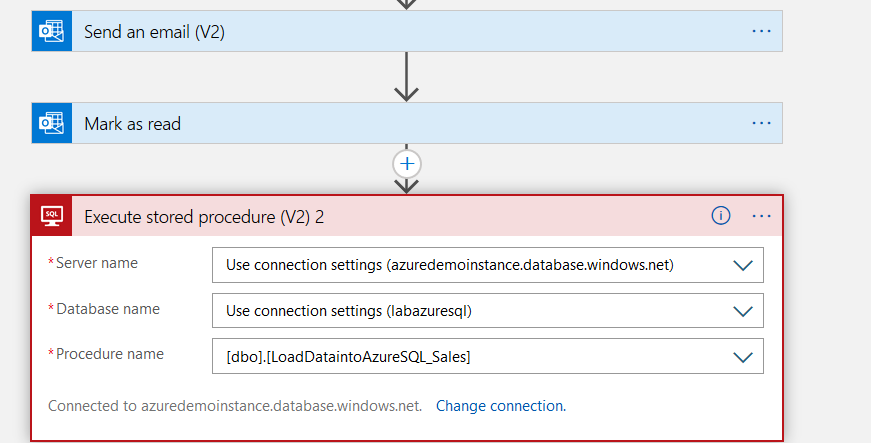
In the Execute stored procedure (v2) section, select your azure server name, database name and stored procure name from the drop-down values.
Validations
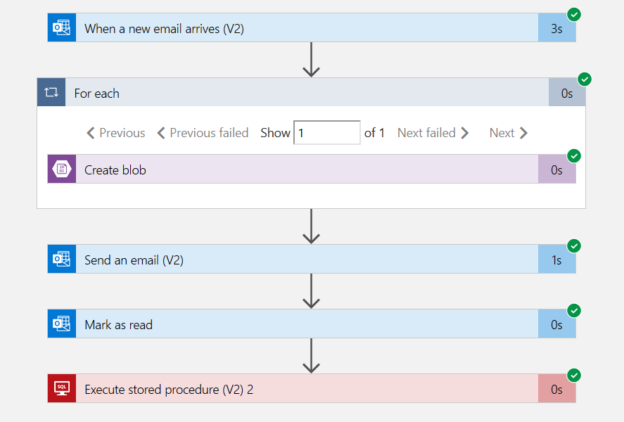
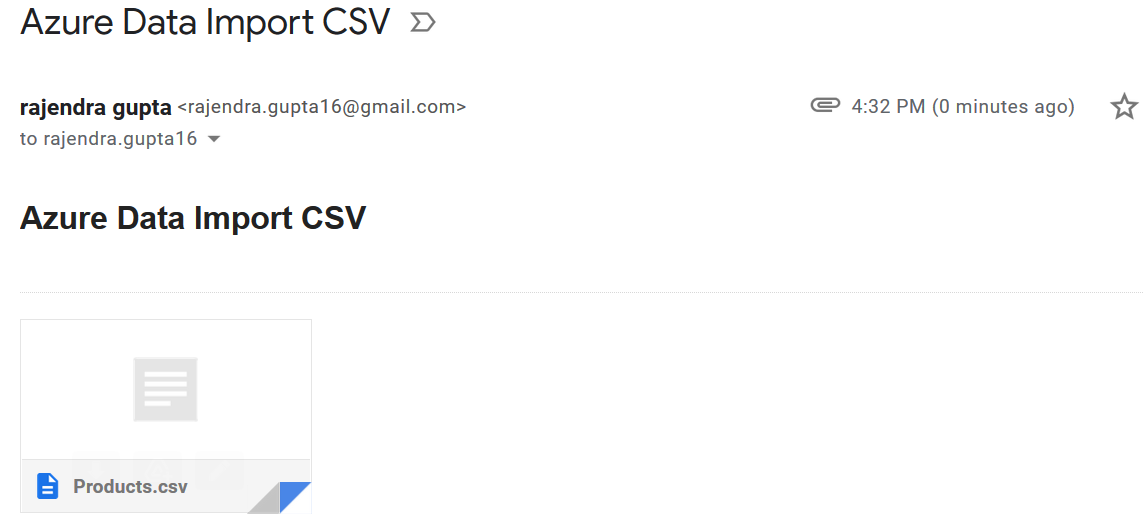
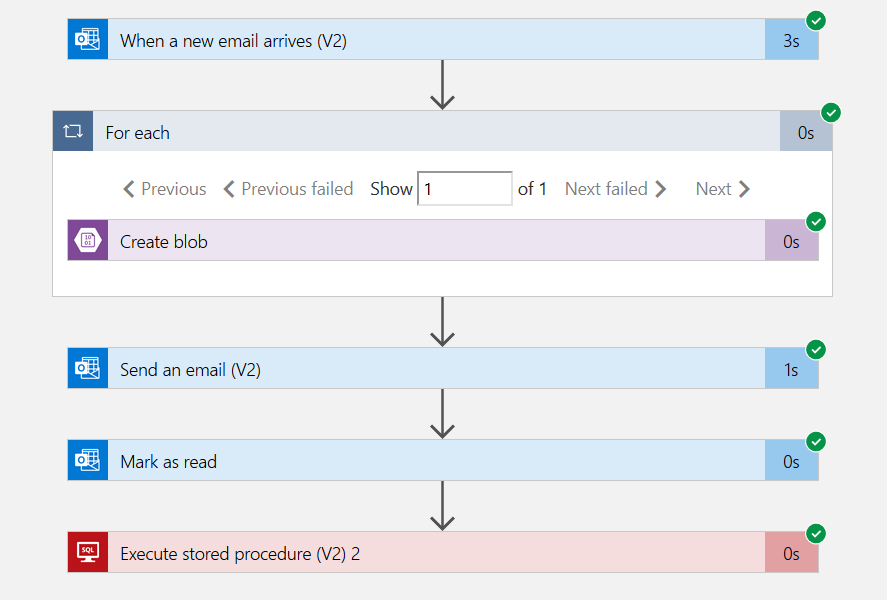
We have implemented the complete logic using Azure logic apps. It’s time to validate the overall workflow. Click on Run in logic apps and send an email with an attachment and a specific subject.
As shown below, all steps in logic apps executed successfully.
- Note: The container path to files on the blob is case sensitive. Therefore, if you receive an error such as file not found or don’t have access rights, verify your configurations. For example, if you have the file name as Products.csv, you cannot specify it as products.csv
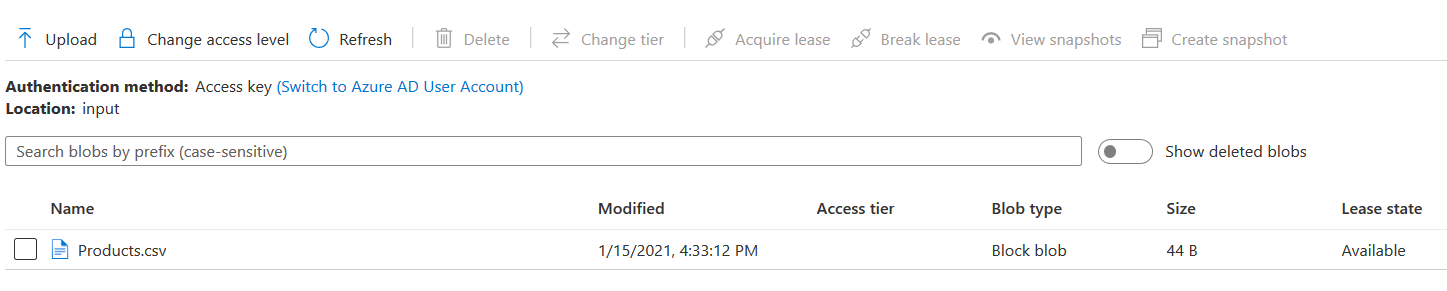
Go to an azure storage container and verify that you have received the file in an azure storage container as well.
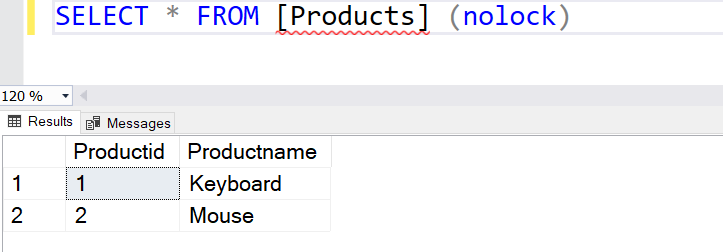
Execute a select statement in the azure SQL database, and it has two records similar to our sample CSV file.
In the above step, we uploaded a CSV file having two rows only. This time let’s perform another test with a slightly significant data import.
Perform another data import into Azure SQL database using Azure logic app workflow
Create the sales table with the required columns, their data type. Also, create a stored procedure for handling data import using the BULK INSERT command.
|
1 2 3 4 5 6 7 8 9 10 11 12 13 14 15 16 17 18 19 20 21 22 23 24 25 26 27 28 29 30 31 |
CREATE TABLE Sales ( [Region] varchar(200), [Country] varchar(200), [Item Type] varchar(100), [Sales Channel] varchar(40), [Order Priority] char(4), [Order Date] date, [Order ID] bigint, [Ship Date] date, [Units Sold] int, [Unit Price] numeric(2), [Unit Cost] numeric(2), [Total Revenue] numeric(2), [Total Cost] numeric(2), [Total Profit] numeric(2) ) Go CREATE OR ALTER PROCEDURE LoadDataintoAzureSQL_Sales AS BEGIN TRUNCATE table [dbo].Sales; BULK INSERT [dbo].Sales FROM 'Sales.csv' WITH ( DATA_SOURCE = 'dataset', FORMAT = 'CSV', FIRSTROW = 2 ); END |
Modify your logic app for executing the newly created stored procedure. Here, in my demo, I do not change contents related to the mail format.
Save the logic app and run it. It waits for a new email as a triggering point for workflow execution. As shown below, I send a mail with the Sales.csv file as an attachment.
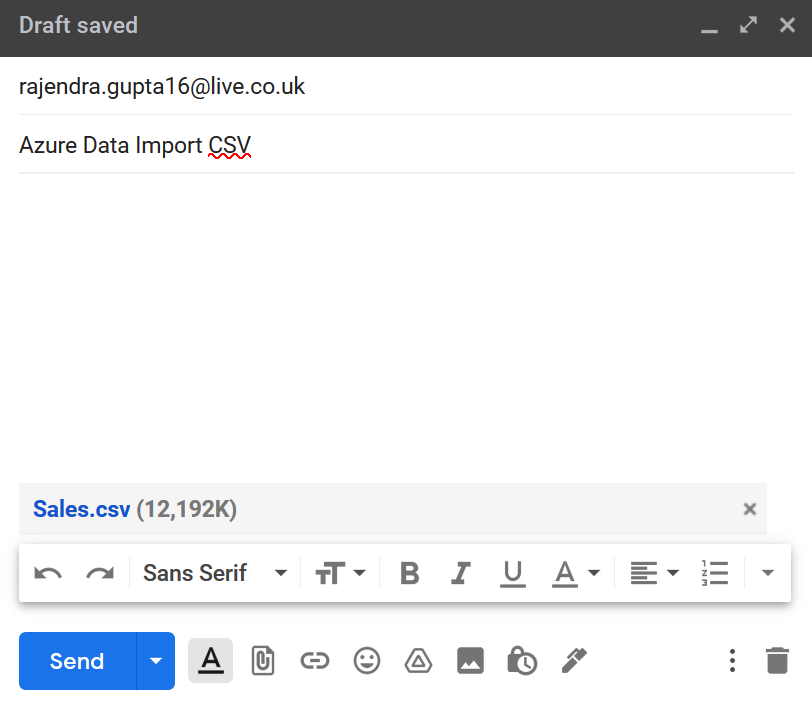
The logic app detects a new email and uploads the CSV file into a storage container.

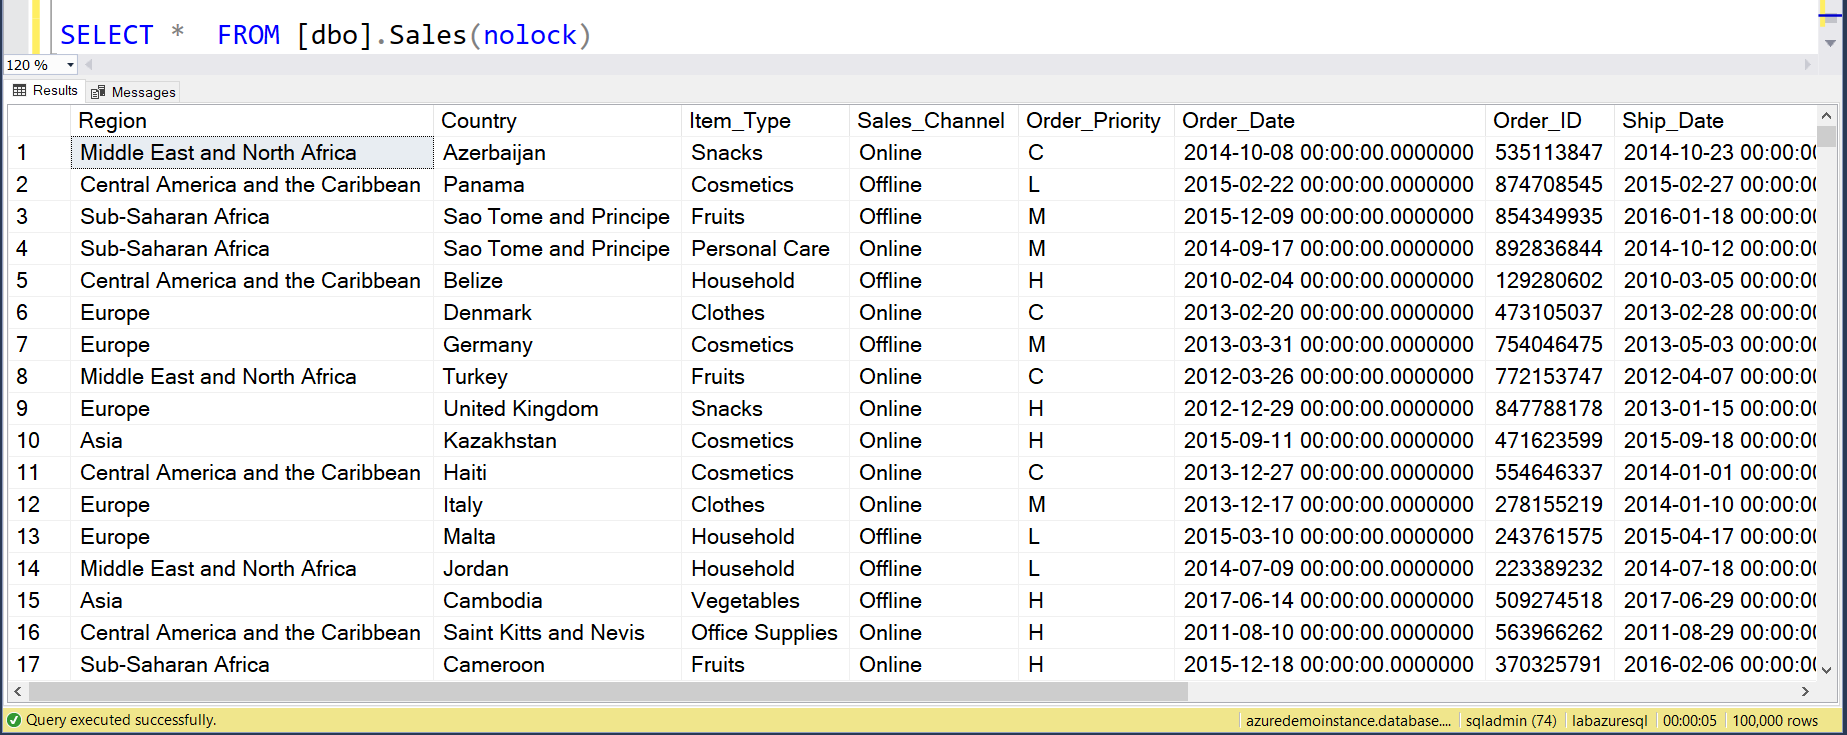
The BULK INSERT uploaded one hundred thousand records into the sales table of the Azure SQL database.

You can run a select * statement to view all imported records.
Conclusion
This article explored the azure logic app to automatically upload a file received as an email attachment using the BULK INSERT statement. You can further modify the logic app for implementing logic such as archiving the file or sending an email confirmation once data import using bulk insert is successful.
Table of contents

I am the author of the book "DP-300 Administering Relational Database on Microsoft Azure". I published more than 650 technical articles on MSSQLTips, SQLShack, Quest, CodingSight, and SeveralNines.
I am the creator of one of the biggest free online collections of articles on a single topic, with his 50-part series on SQL Server Always On Availability Groups.
Based on my contribution to the SQL Server community, I have been recognized as the prestigious Best Author of the Year continuously in 2019, 2020, and 2021 (2nd Rank) at SQLShack and the MSSQLTIPS champions award in 2020.
Personal Blog: https://www.dbblogger.com
I am always interested in new challenges so if you need consulting help, reach me at rajendra.gupta16@gmail.com
View all posts by Rajendra Gupta
- Understanding PostgreSQL SUBSTRING function - September 21, 2024
- How to install PostgreSQL on Ubuntu - July 13, 2023
- How to use the CROSSTAB function in PostgreSQL - February 17, 2023