

This article uses Azure automation techniques for sending query results as a CSV file attachment in Azure SQL Database by using Azure logic apps.
Introduction
In an on-premises SQL Server, we use SQL Server agent jobs for scheduling the task at a specific interval. For example, suppose you have a monitoring database, and you require the reports delivered to your email daily as per its defined schedule. For this purpose, you can use the database mail feature and schedule an agent job with the script to fetch query results, send it as an attachment using database mail and schedule it using SQL Server agent.
Azure SQL Database does not support the SQL Server agent and database mail feature. Therefore, if you have migrated to it, you need an alternative way of implementing your requirements.
The Azure Logic app is a serverless solution to define and implement business logic, conditions, triggers, workflows. In this series of Azure automation, we have implemented the following tasks using it:
- Automate data loading from email attachments using Azure Logic Apps
- Analyzing Twitter sentiments using Azure Logic Apps
- Publish LinkedIn posts and tweets automatically using Azure Logic Apps
This article uses Azure Logic apps to send a query result to the specified recipient automatically.
Note:
- I assume that you have a basic understanding of azure logic apps. You can refer to articles (Toc at the bottom) for reference purposes
- Create an Azure SQL Database with a sample database from the Azure portal
Implementation of logic to send query result as attachments in Azure SQL Database
To implement the workflow, we need to create a logic app in the Azure portal. Before we do that, let’s create a stored procure that fetches the top 10 records from a SQL table.
|
1 2 3 4 5 6 7 8 9 10 11 12 13 |
CREATE OR ALTER PROCEDURE GetmyResults AS BEGIN SELECT TOP 10 [ProductID] ,[Name] ,[ProductModel] ,[Culture] ,[Description] FROM [SalesLT].[vProductAndDescription] WHERE SalesLT.vProductAndDescription.Culture='en' END go |
If we run the stored procedure on the azure database, it returns results as shown below:
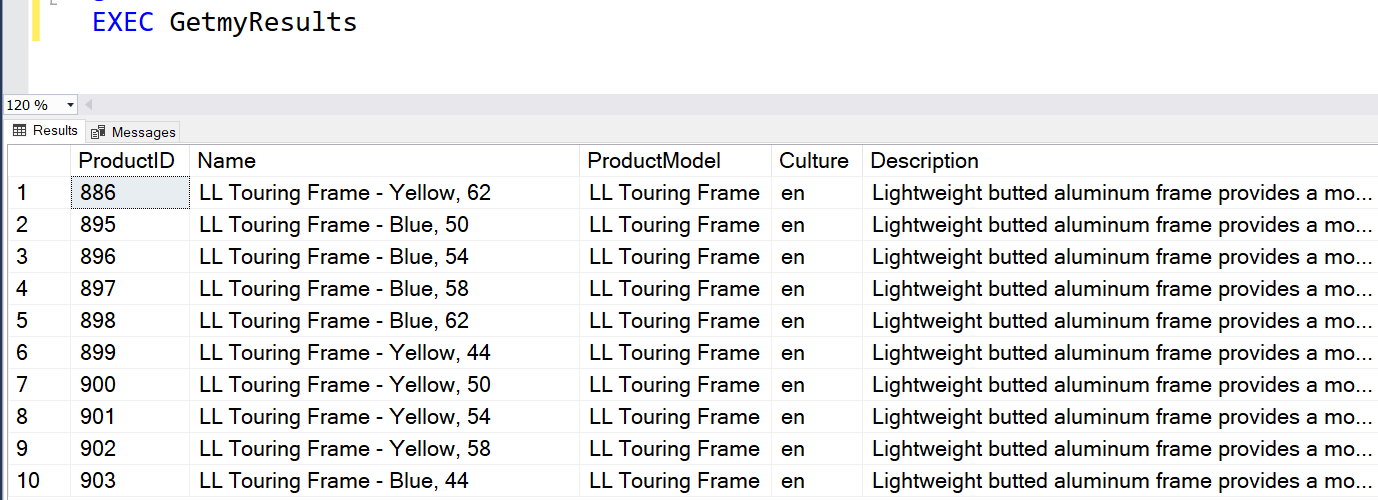
In this article, I require to create a CSV from the query result and send it over the email with a customized subject and body.
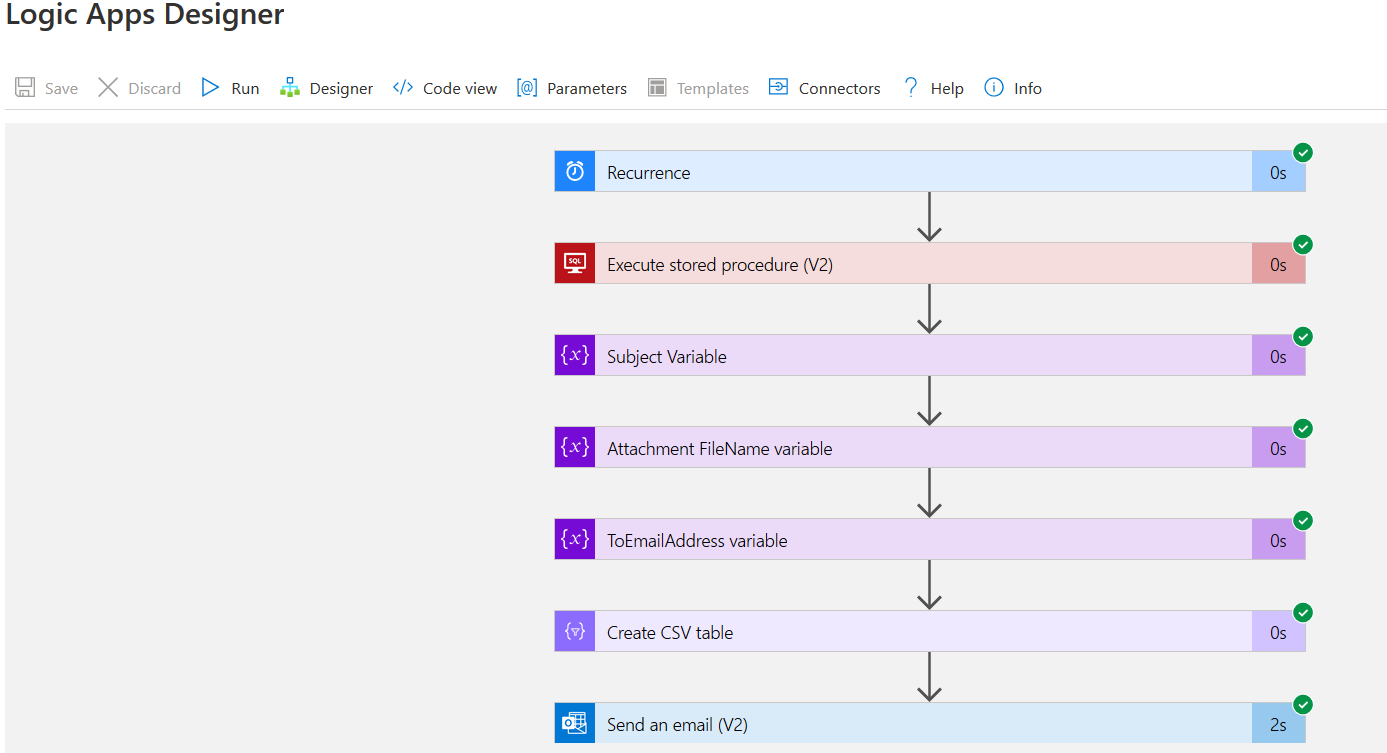
For this article, our final logic app workflow looks similar to the following screenshot.
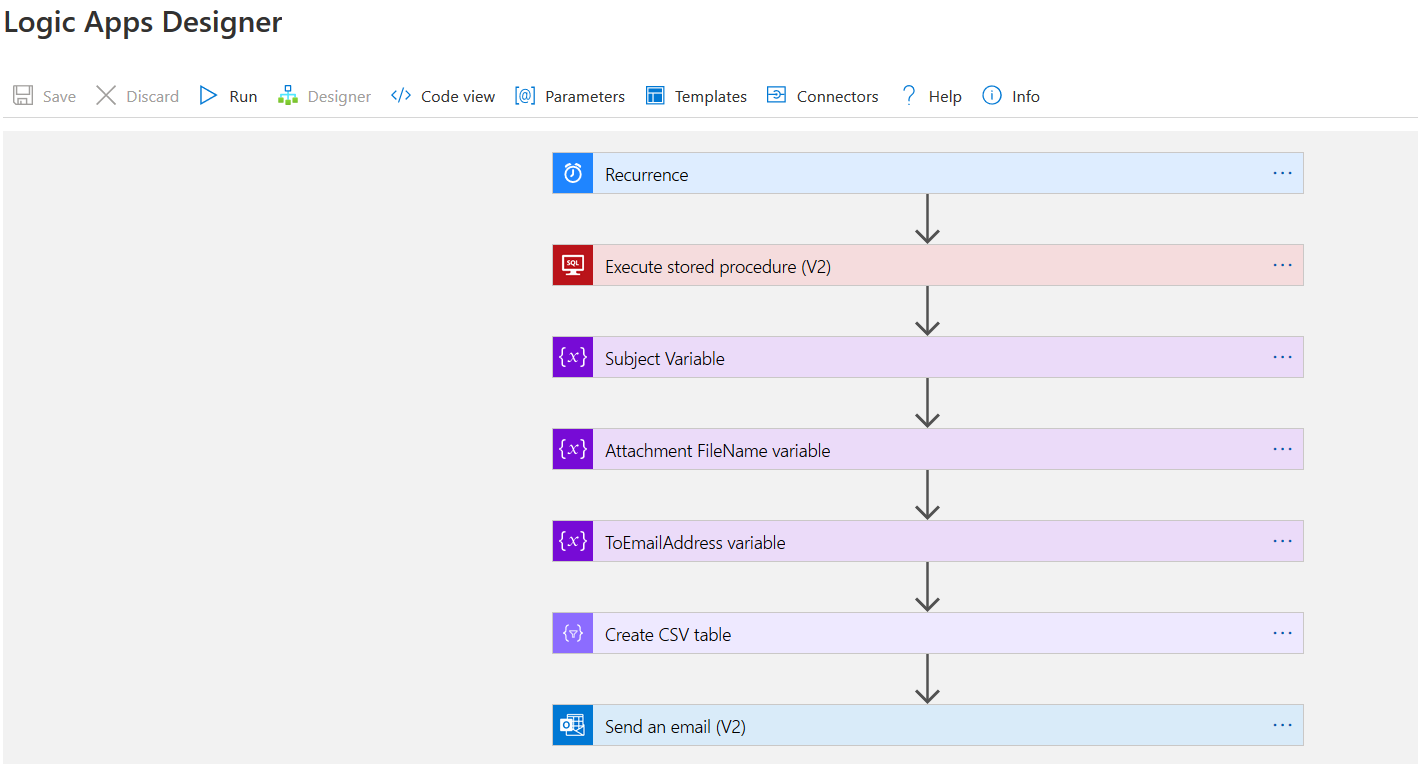
Let me explain each step for implementing the logic app.
Step 1: Recurrence
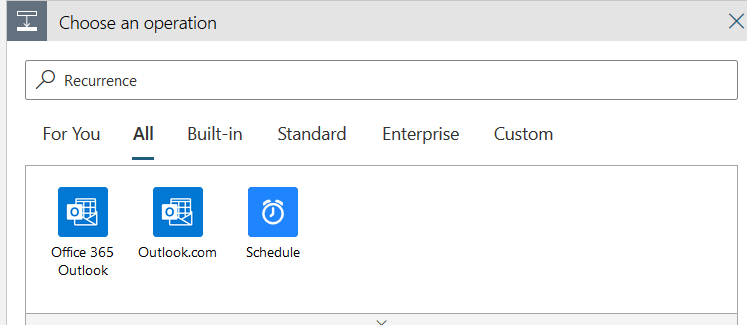
First, navigate to the Azure portal and create a new logic app. It lists a few useful templates. Select the blank logic app template and search for a schedule connector.
Now, we select Recurrence and specify the interval. Here, we specify the schedule. For example, below, we configure it to run daily at 11 AM.
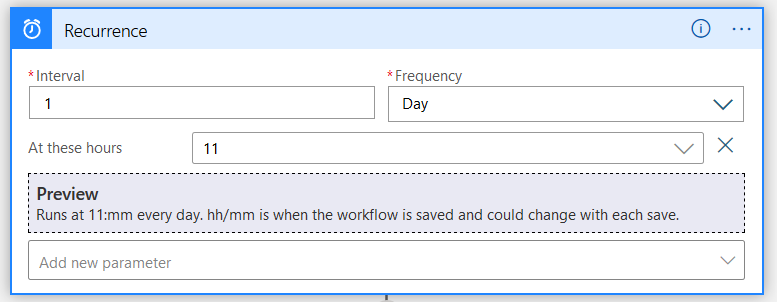
You can click on Add new parameter and configure additional parameters such as time zone, start time, or specific minutes.
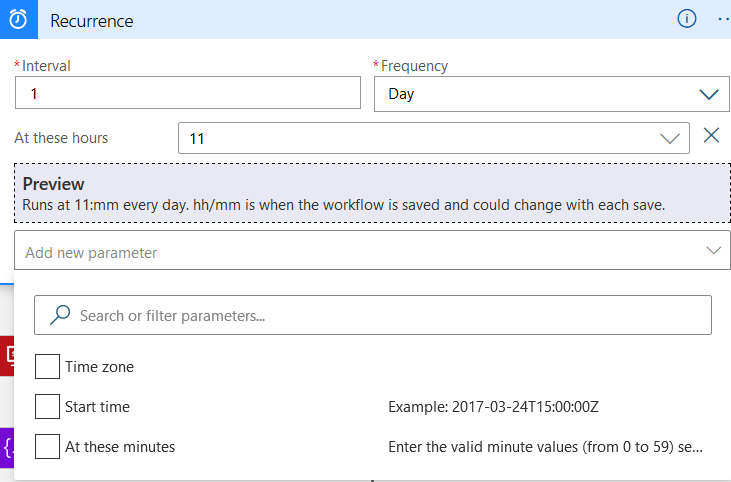
You can configure one-time or recurring execution of the logic app workflow using the scheduler.
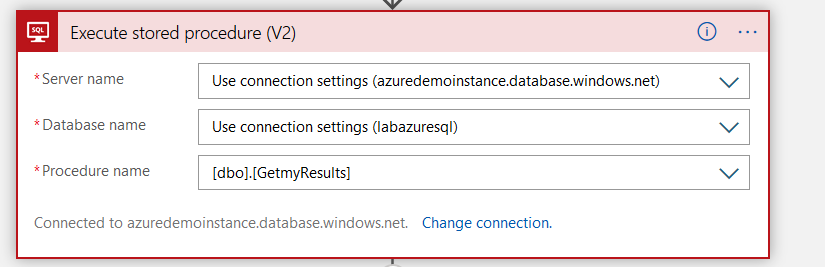
Step 2: Execute stored procedure (V2)
In this step, we want to execute a SQL stored procedure in the Azure database that retrieves results. Click on New Step and add SQL Connector. Provide the server, database name, and credentials for database authentication.
Once the connection details are specified, in the SQL Server connector action, add Execute stored procedure and select the procedure name from the drop-down. As stated earlier, my procedure name is [dbo].[GetmyResults].
If you use multiple SQL Server connections in a logic app, you can verify the current connection at the bottom of executing the stored procedure (V2).
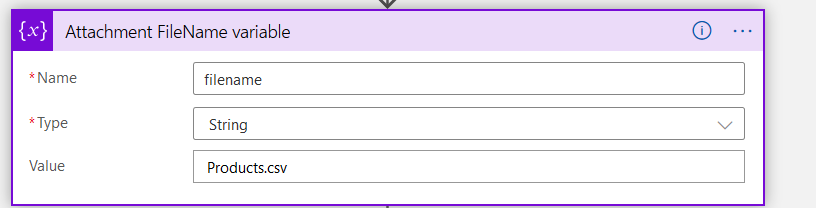
Step3: Define Variables
Here, we define a few variables that contain information for sending the email. Search for a variables connector and Initiate variable.
Filename Variable: In this variable, we store the CSV file attachment name. To define the variable, add the name, type as a string, and specify its value. Here, we give the variable value as Products.csv

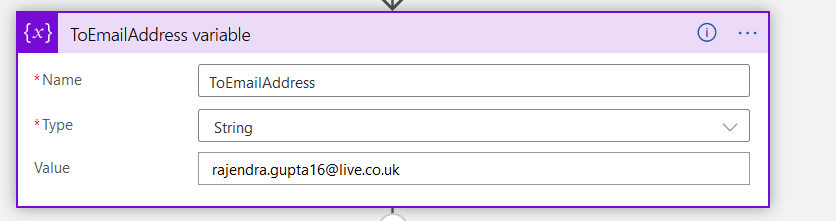
ToEmailAddress variable: Click on add new step, variables connector and Initialize variable. Here, define the recipient’s email address. We can directly specify an email address in the email configuration, but it is good to store them in a variable. If you use an email address multiple times in a logic flow app and modify it, you can quickly change the variable value without looking for each step
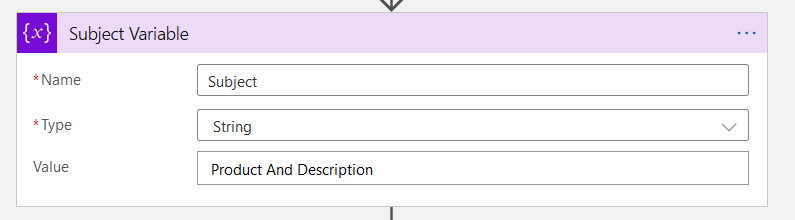
Subject variable: Similarly, add another variable to store the subject of your sent by the Azure Logic Apps
Step 4: Create a CSV table
In step 2, we specify a stored procedure for execution in an Azure SQL database. We do not want these results in the email body. It should come as a CSV file attachment. Therefore, in the new step, search for Data Operations and select Create CSV table Under Choose an action.
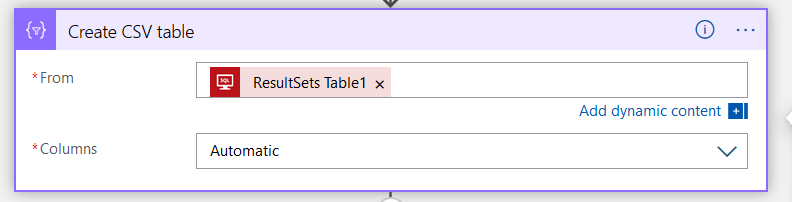
It has two configuration options.
-
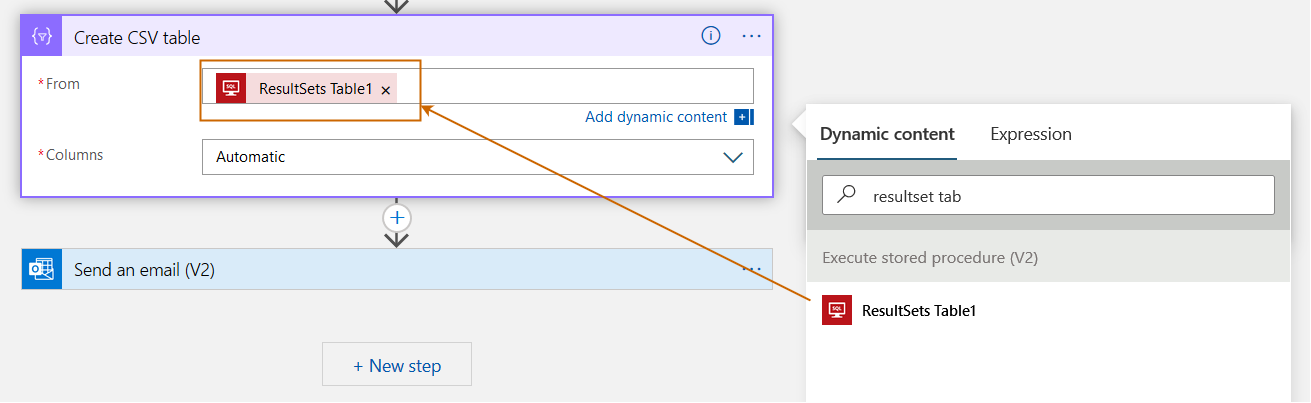
From: Here, specify the input that needs to be converted into a CSV file. Select the ResultSets Table1 from the dynamic content
- Columns: By default, its value is set to Automatic. It creates the CSV table columns automatically based on the input items. If you want to use custom headers and values, select custom from the drop-down and do the manual configurations.
Step 5: Send an email
The Azure Logic app supports various email clients such as O365, Outlook.com, Gmail. In this article, we configure the Outlook.com connector. Search for Outlook.com, enter your credentials, provide permissions to access the outlook.com profile by the azure logic apps.
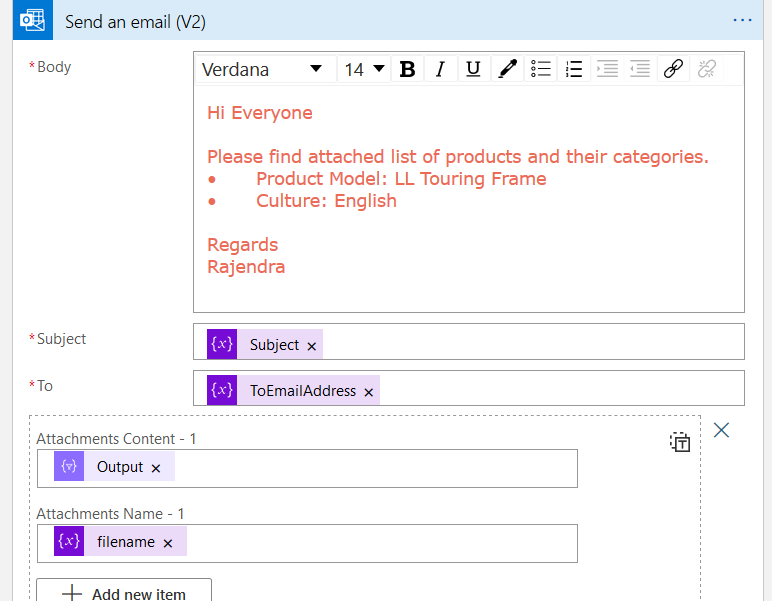
In the actions menu, click on Send an email (V2). In the Send an email (V2), do the following configurations:
-
Body: Enter the text you wish to appear in the email body. In the body, you have formatting options such as
- select font size and type
- Bold, Italic, or Underline text
- Bullet points or numbered list
- font color
- Link\Unlink
You cannot expand the mail body in the send an email (V2) configuration. Therefore, it is best to write the content in either email or Microsoft Word and paste it here.
- Subject: We already define a subject in a variable. Therefore, add the variable from the dynamic content
- To: Similarly, add the variable [ToEmailAddress] for the recipient’s email address
- Attachments Content -1: For the attachment, select the Output from the dynamic content
- Attachment Name -1: In this section, we define the email attachment file name. We already define an attachment file name; therefore, add the variable filename here
Step 6: Run the azure logic app and validate the email
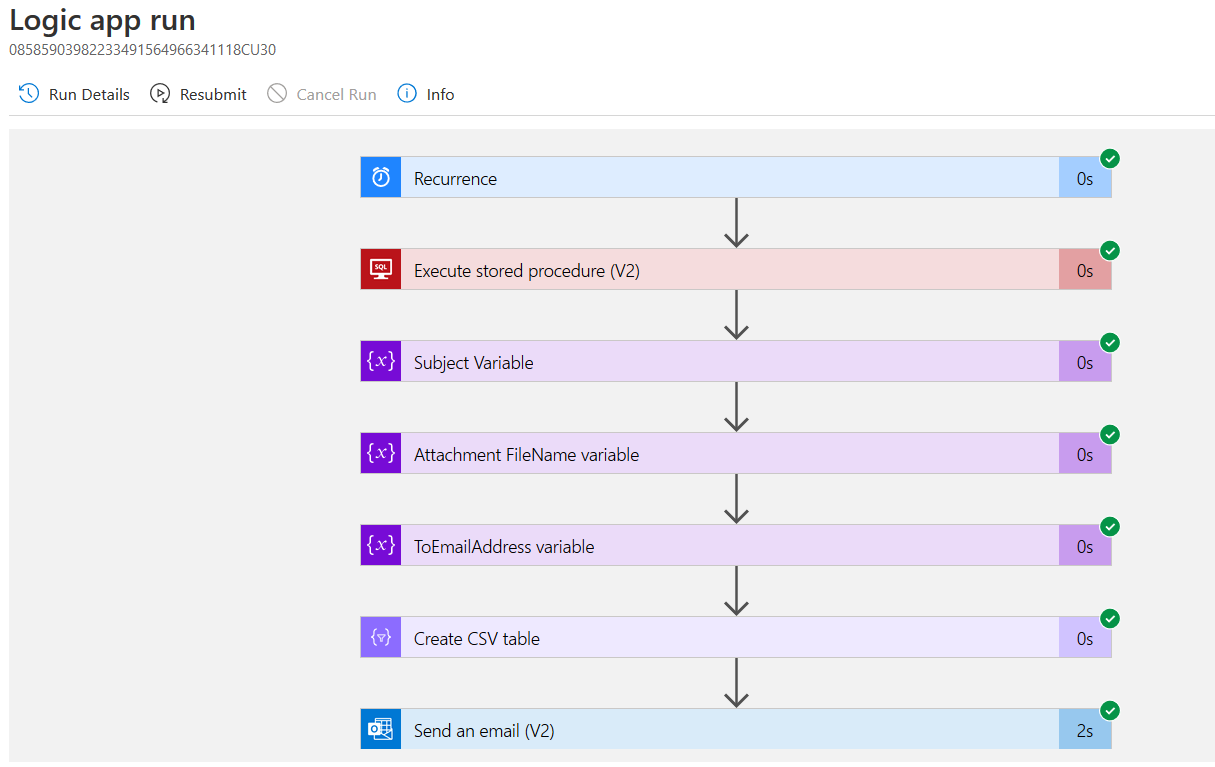
Save the logic app and click on Run to trigger an email with query output as a CSV attachment. As shown below, all steps are executed successfully for the logic app.
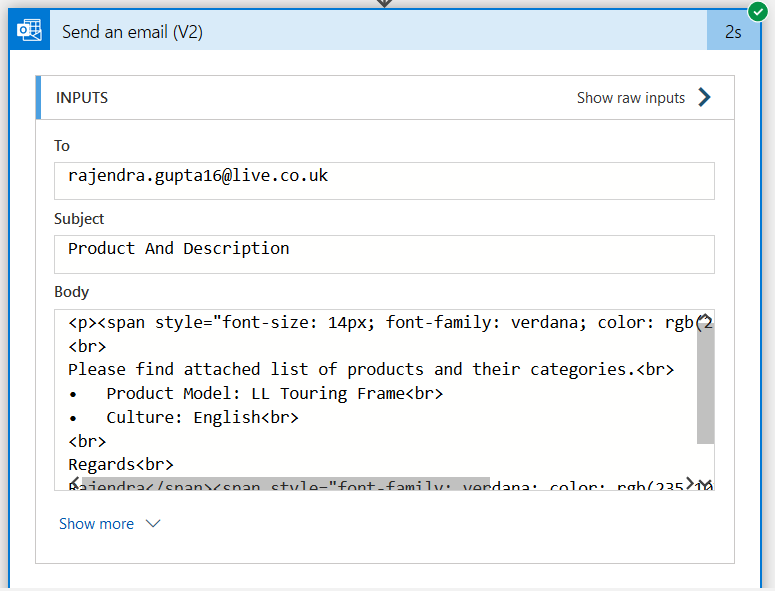
You can expand any step from the execution and retrieve the details. For example, expand the send an email(V2), and you can view email content such as Email address, subject and body.
Now, connect to your email inbox and verify the email subject, body content, format.
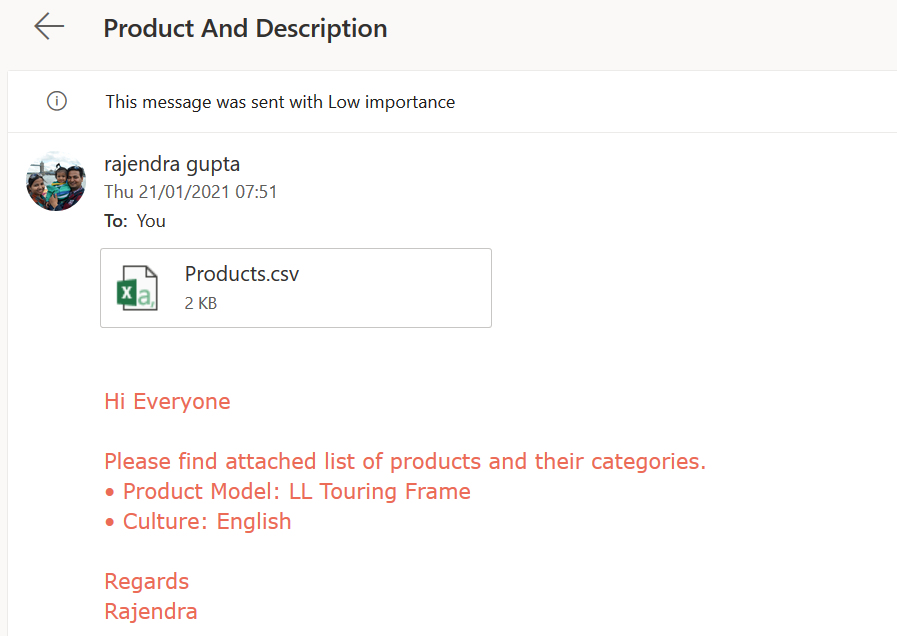
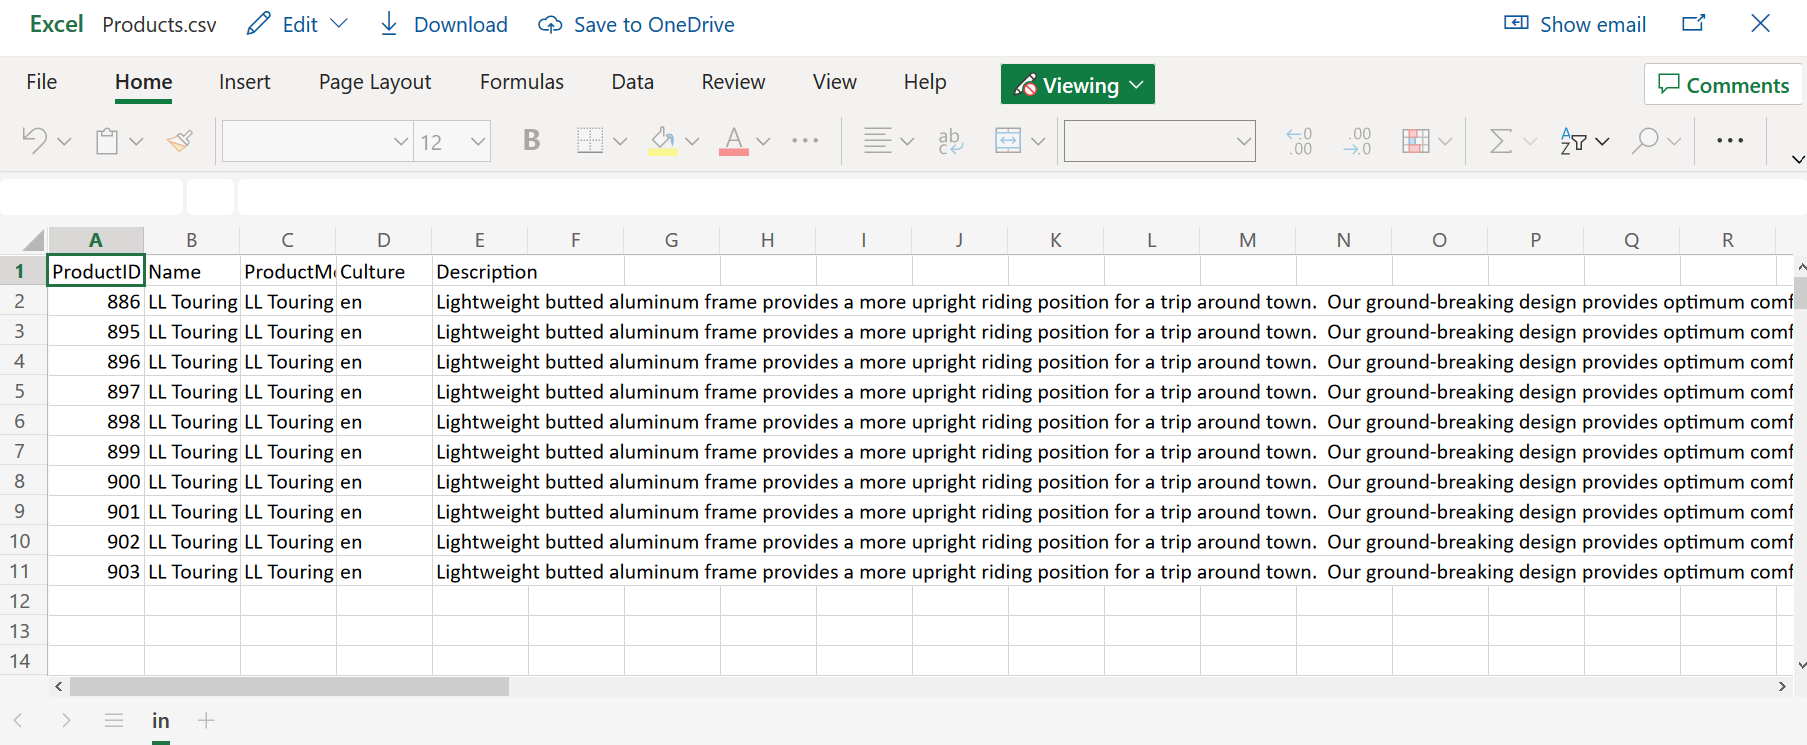
The email also has an attachment – Products.csv. View the attachment, and it has query execution results.
In the logic app dashboard, you can view the Run’s history.
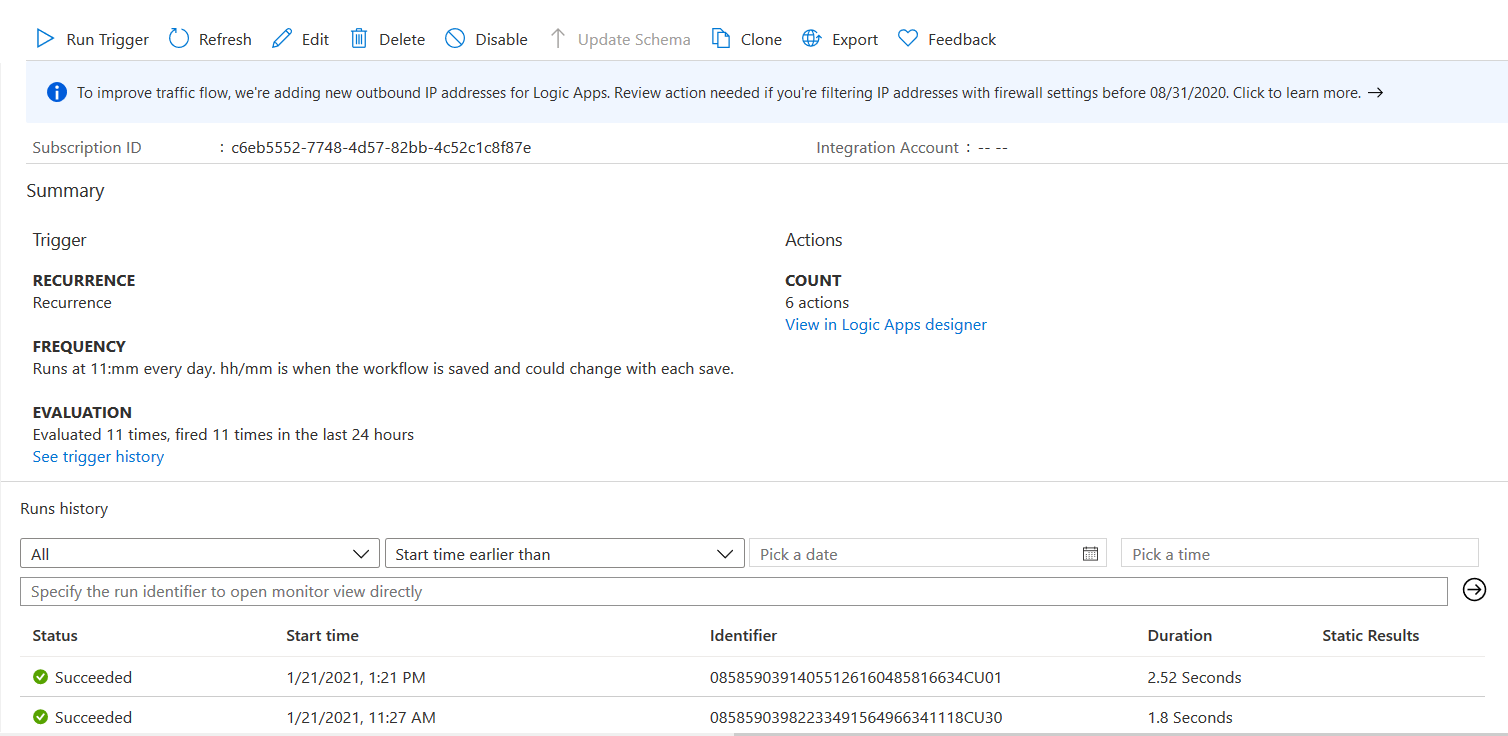
If you want to explore more on a particular run history, click on it and display workflow details for that specific Run. Suppose a few of your logic app execution takes longer so you can view its history and dig into each component to investigate the reason or delay or failure.
Conclusion
This article explored Azure logic apps for sending the email of Azure SQL Database query execution results through an email attachment. Similarly, you can configure your logic, query, or stored procedure outputs using a formatted email to the required recipients.
Table of contents

I am the author of the book "DP-300 Administering Relational Database on Microsoft Azure". I published more than 650 technical articles on MSSQLTips, SQLShack, Quest, CodingSight, and SeveralNines.
I am the creator of one of the biggest free online collections of articles on a single topic, with his 50-part series on SQL Server Always On Availability Groups.
Based on my contribution to the SQL Server community, I have been recognized as the prestigious Best Author of the Year continuously in 2019, 2020, and 2021 (2nd Rank) at SQLShack and the MSSQLTIPS champions award in 2020.
Personal Blog: https://www.dbblogger.com
I am always interested in new challenges so if you need consulting help, reach me at rajendra.gupta16@gmail.com
View all posts by Rajendra Gupta
- Understanding PostgreSQL SUBSTRING function - September 21, 2024
- How to install PostgreSQL on Ubuntu - July 13, 2023
- How to use the CROSSTAB function in PostgreSQL - February 17, 2023