
Today, we will implement an Azure Logic App for face recognition and insert its data into an Azure SQL database.
Introduction to face service
Face recognition is a modern way of implementing security measures. In general usage, most mobile phones come up with a face identification system for authorizing access. We get a CCTV camera across all public places such as Airports, social gathering places. Similarly, you get image detection techniques in Facebook where it lists out the photos similar to a person’s photo. You can use these techniques in many places such as Criminal Identification, Surveillance, Defense Services, online payment, Airport services.
Suppose you want to analyze the audience in a social gathering based on their gender, age, emotion, glasses, and facial attributes. In the below screenshot, we have two different persons. The face recognition service detects the person’s gender and age. Here, we see a rectangle for both faces detected in the image.
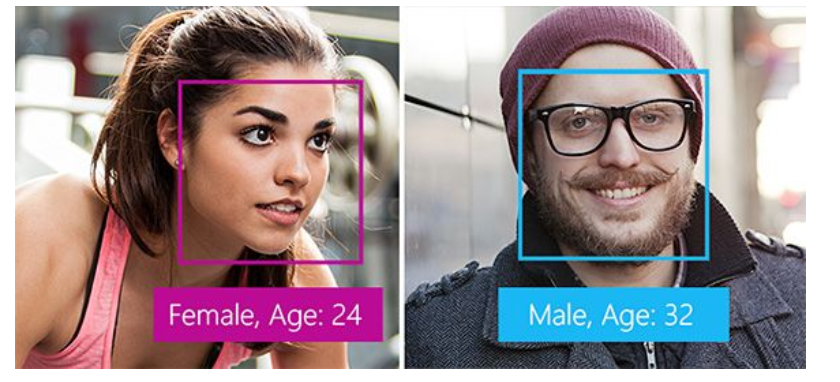
Image Reference: Microsoft docs
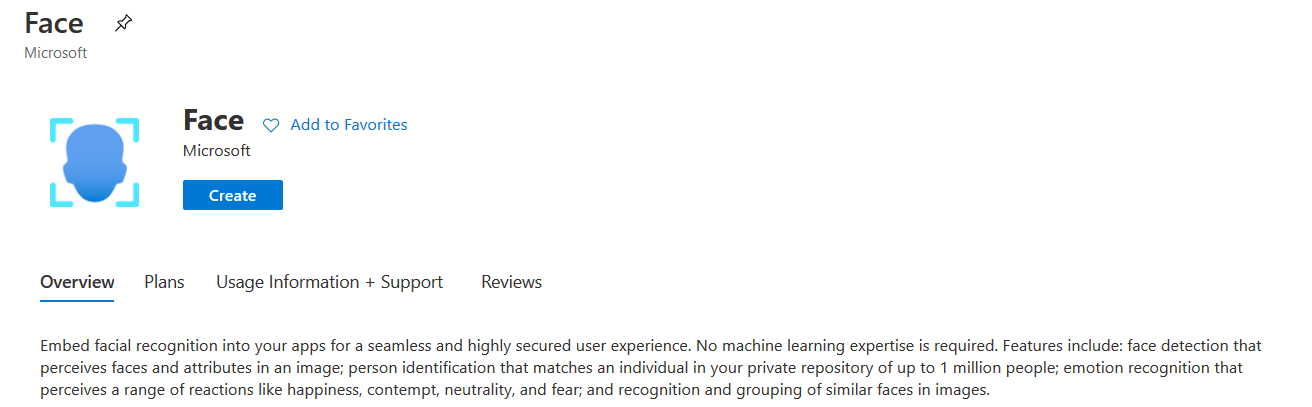
Azure provides cognitive services with embedded facial recognition in a seamless user experience. Usually, these image identification system requires you to have machine learning expertise. Azure image service provides features such as face detection, person identification, and capturing personal emotions such as sadness, happiness, facial attributes, and grouping images.
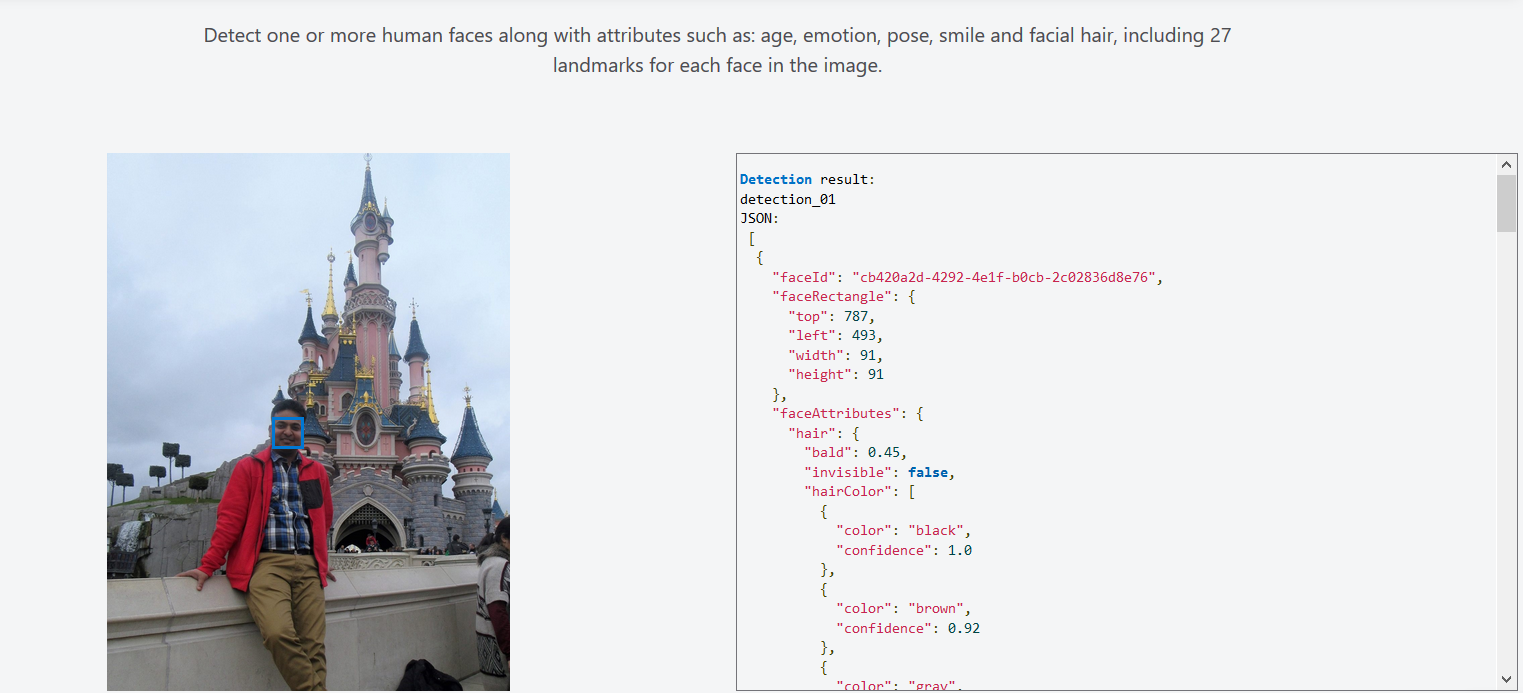
Before we implement the Azure logic apps for face recognition, browse to the Azure face service URL and upload an image. It detects the image (blue rectangle) and returns image attributes in JSON format.
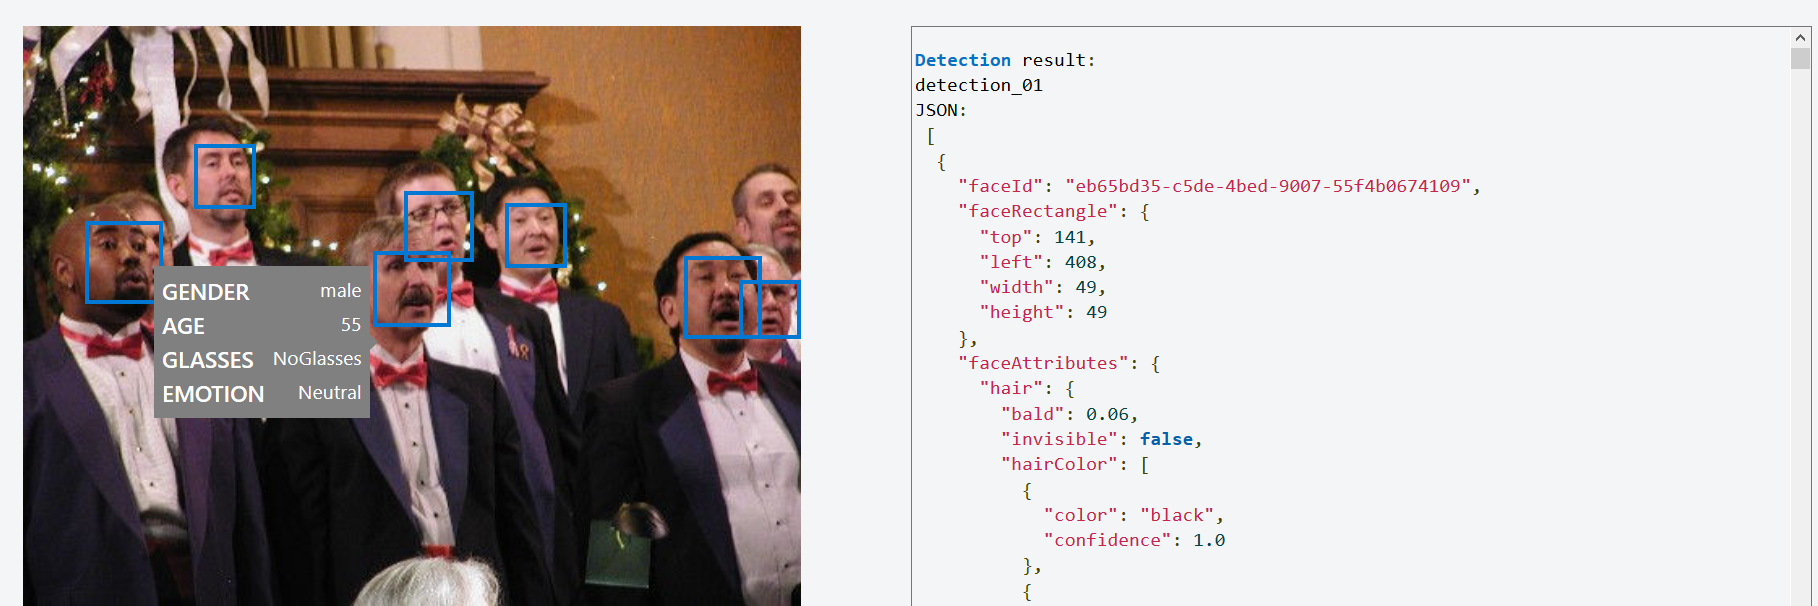
Similarly, in an image with multiple persons, it detects all possible faces with their attributes. You can hover the mouse over the image and in the tooltip, you get necessary details such as Gender, Age, Glasses, and Emotion.
In this article, we require to do the following tasks,
- Upload the image in the Azure Storage Container
- Use Azure Cognitive Services for face recognition
- Import image attribute data for each identified person using the face API of Azure cognitive service into the Azure SQL Database
- Validate image attributes using Azure face AI (web portal) and Azure database data
Steps to implement Azure Automation using an Azure Logic App for face recognition and to insert image data into Azure SQL Database
You can use the following steps for configuring the Azure logic app based on the scenario defined earlier.
Necessary information about Azure Logic App
We assume that you already have an understanding of Azure Logic Apps and workflow configuration. You can refer to the TOC at the bottom for reference purposes.
Azure Storage Container
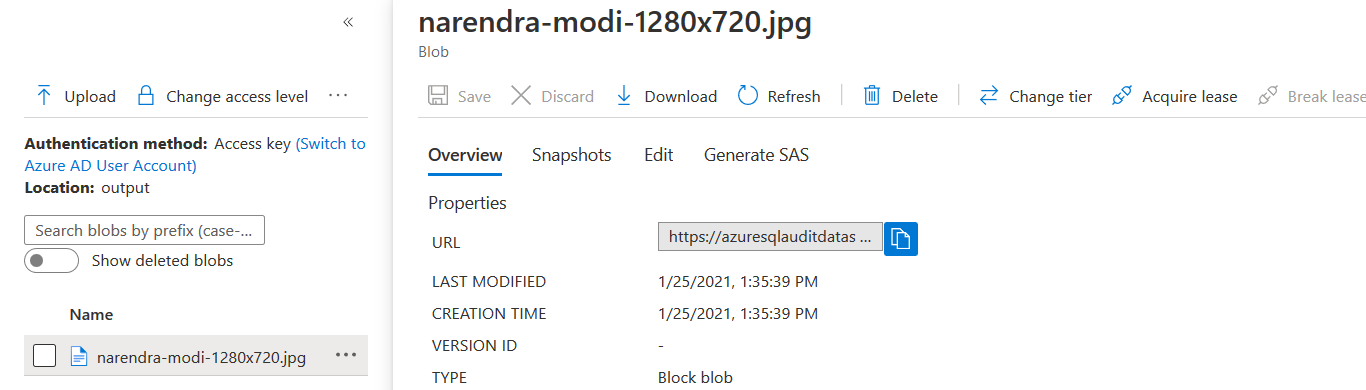
You have an Azure Storage container for storing the image blobs. I already have configured the storage containers. Here, we use the Output folder for storing our source image files.
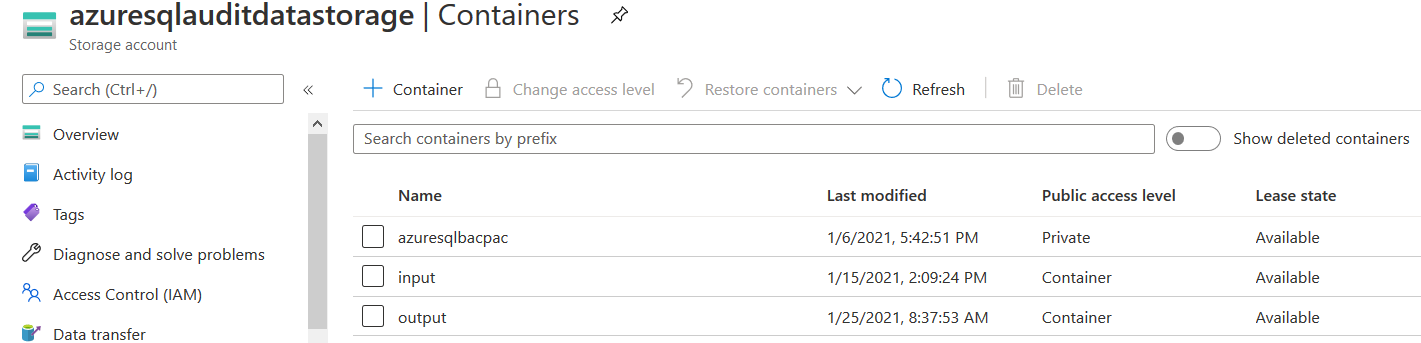
Open the container and upload an image from your local system. We will examine these image properties using the Azure Cognitive Service.

Azure Cognitive Service
To work with face analysis, we require to create an Azure Cognitive Service account. In the Azure portal, navigate to Cognitive Service and search for Face AI service in the marketplace.
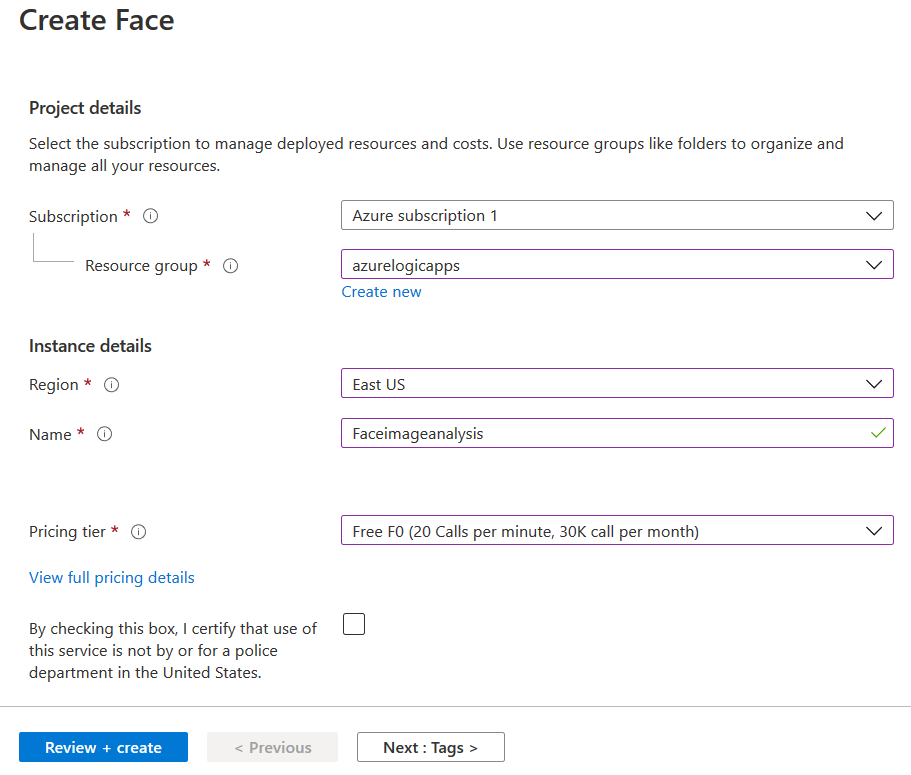
In the Create Face app, enter the subscription, resource groups, region, name and the pricing tier. In this article, I use Free F0 (20 calls per Minute, 30 k calls per Month) for illustration purposes.
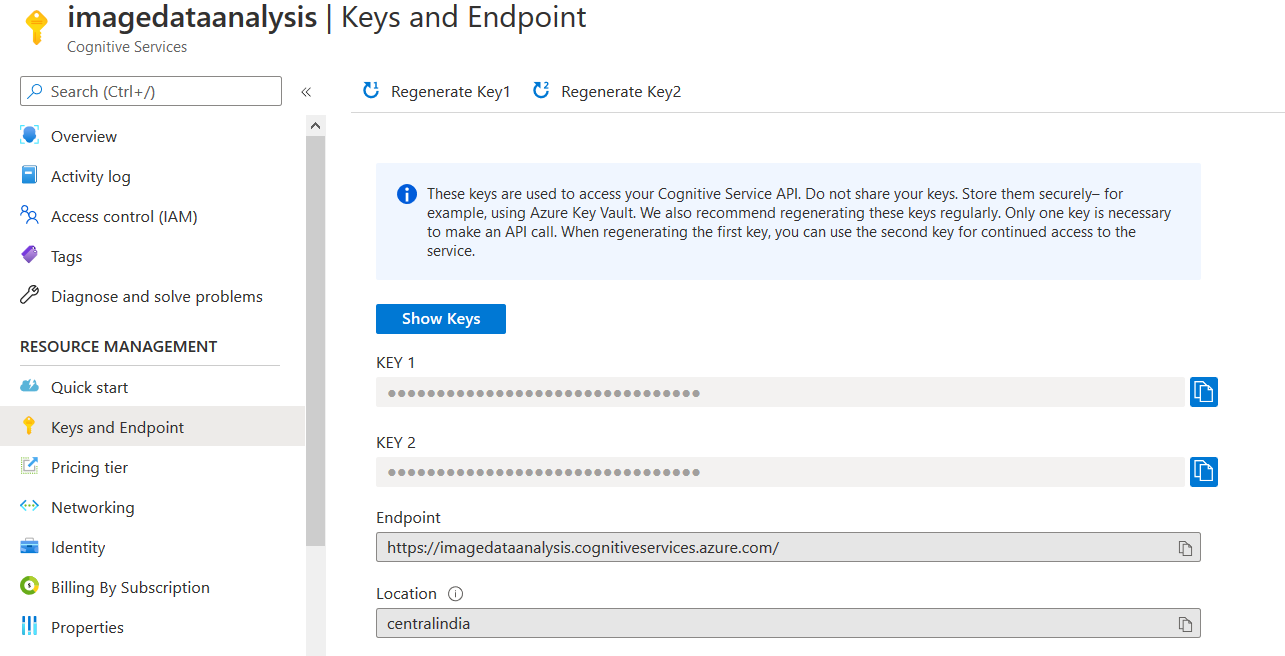
In the cognitive service app, note-down the access key and endpoint as shown below.
Create a table to store face attributes in the Azure SQL Database
In this article, we stored image analysis data in an Azure SQL Database table. We create [imagedata] table for storing the person Gender, Age, Beard, Glasses and Smile attribute in the below script.
If you do not have an Azure SQL Database, you can refer to the SQL Azure category for reference articles.
|
1 2 3 4 5 6 7 8 |
CREATE TABLE [dbo].[imagedata]( [Gender] [varchar](100) NULL, [Age] [int] NULL, [Beard] [varchar](100) NULL, [Glasses] [varchar](100) NULL, [Smile] [varchar](100) NULL ) ON [PRIMARY] GO |
Create a logic app with a blank template
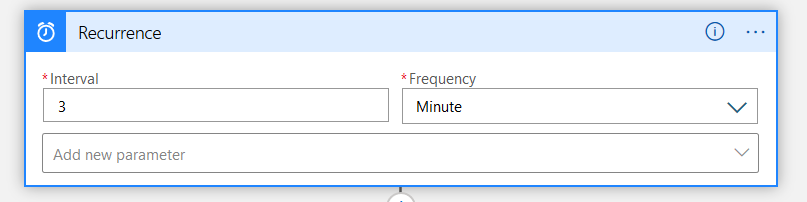
Logon to the Azure portal (https://portal.azure.com) with your credentials and create a logic app with a blank template. In the app designer, add a Recurrence trigger. As shown below, the trigger runs every 3 minutes.
Create variables
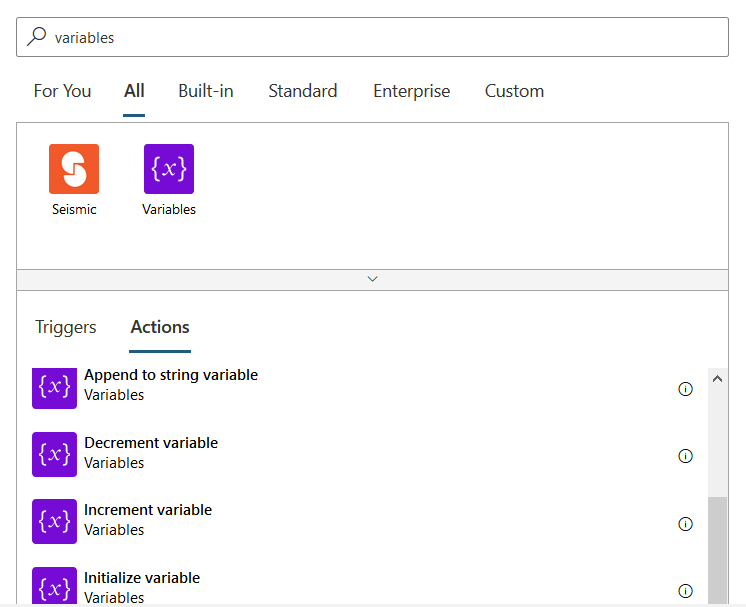
In the logic app, search for Variables connector and Initialize variable.
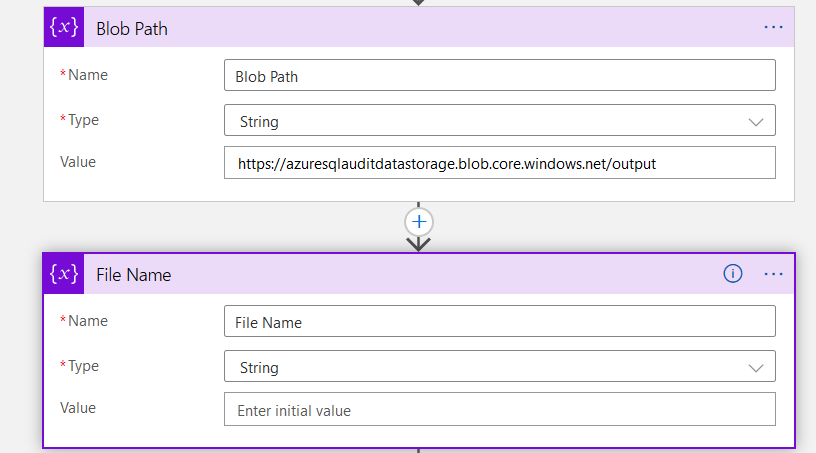
We initialize two variables in the logic app.
- Blob path: It is a string type and stores the blob container URL. I stored the endpoint URL in this variable
- File Name: In the file name variable, we do not store any values. Its values will be updated during runtime with the blob (image) display name
List Blobs
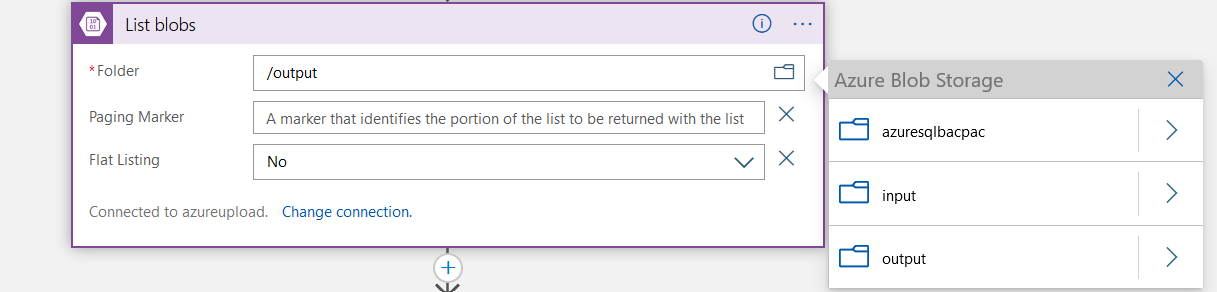
Create a new step and add the Azure Blob Storage connector. In the folder, enter your blob container path. You can browse to a storage container similar to the below image.
Insert a For each block for face detection and insert record into Azure database
This central part of the logic app adds a For each control block and renames it as Detect Face Block.
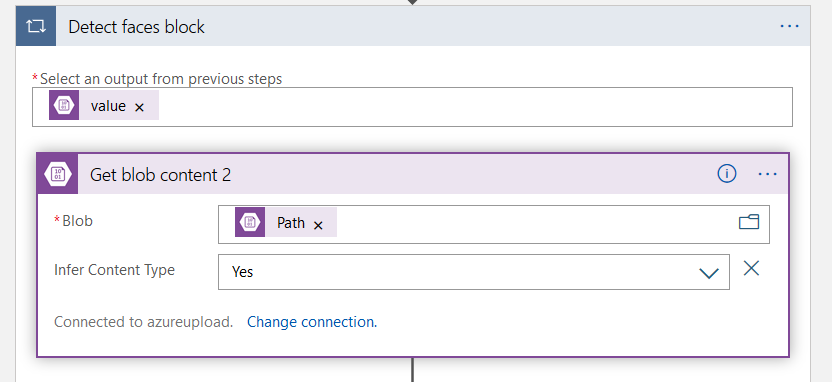
Get blob content
Inside the detect face block, add a get blob content and select the dynamic content – Path. It asks the output from the previous step- here, select the value from dynamic content.
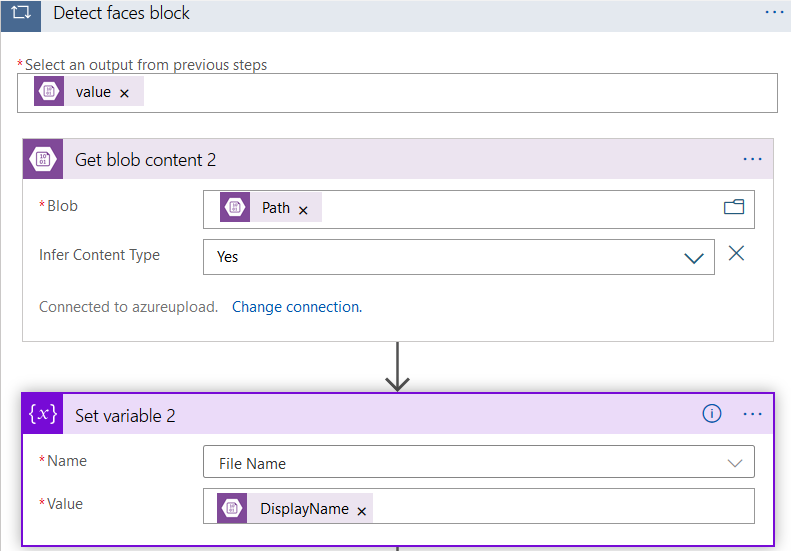
Set Variable
Click on Add an action inside the for each block and select Set Variables. Previously, we have set specified any value for the file name variable. Here, we set the blob’s display name in the file name variable, as shown below.
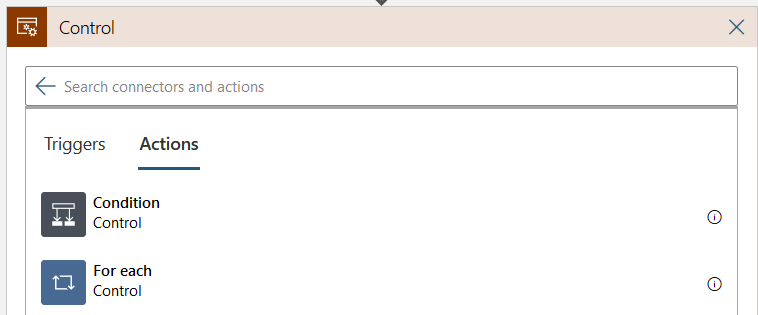
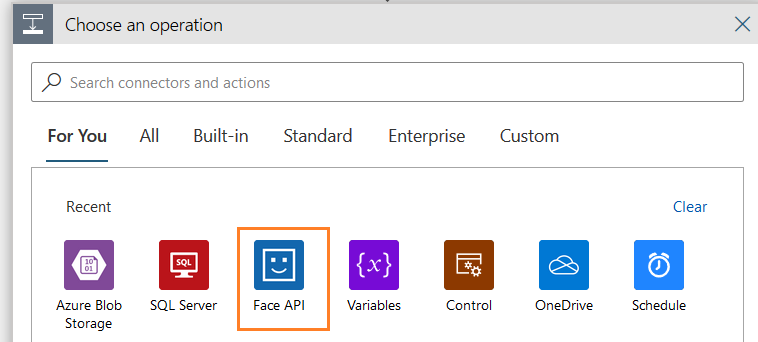
Detect faces (preview)
In the Choose an operation section, select the Face API.
In the actions list of Face API, set the expression for the image blob. We will generate the image URL similar to the URL obtained from the Azure Storage container blob.
In the detect faces, set an expression for the CONCAT function.
concat(variables(‘Blob Path’),’/’,variables(‘File Name’))

Add a SQL Connector for inserting a row into Azure SQL Database
In the previous step, detect faces (preview) captures image properties, metadata in the JSON format, as shown at the beginning of the article.
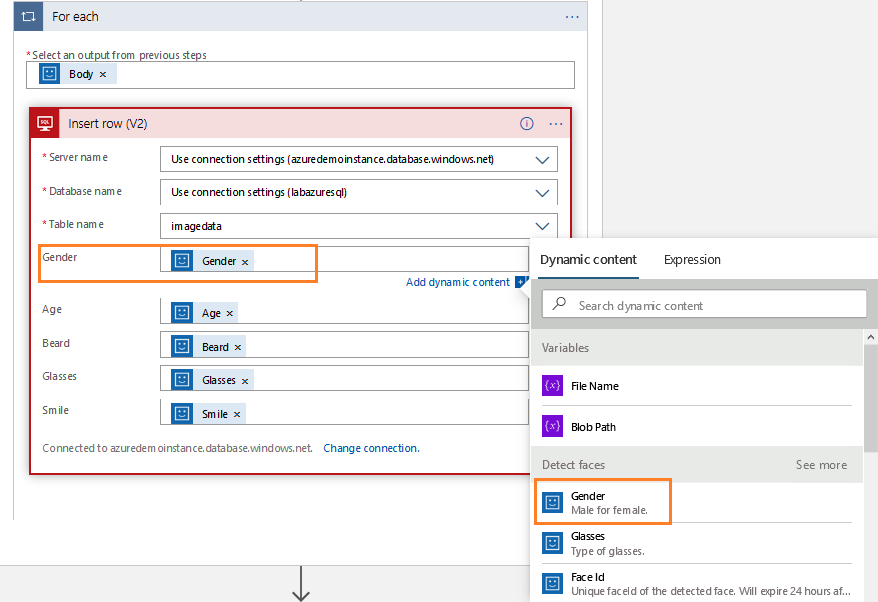
We already created a SQL table in the Azure database. Therefore, add a new action with the SQL connector and insert a new row. Here, we do the following configurations using the dynamic content.
- Select an output from previous steps: Body
- Gender: Dynamic content: Gender
- Age: Dynamic Content: Age
- Beard: Dynamic Content: Beard
- Glasses: Dynamic Content: Glasses
- Smile: Dynamic Content: Smile
Validations
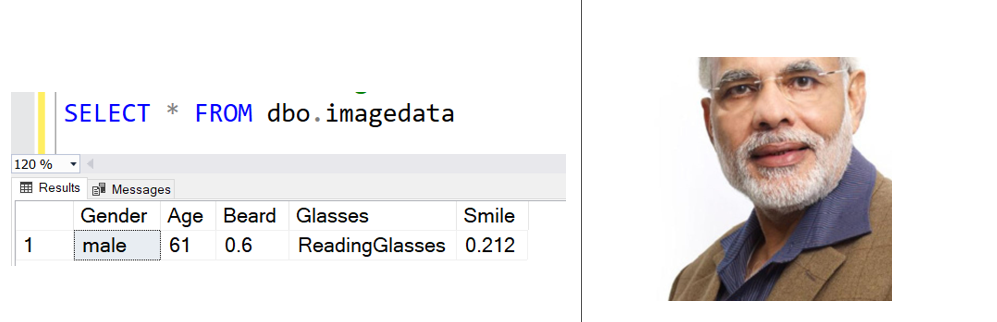
We have implemented the face detection for the image stored in the Azure Storage container. To validate the face detection, save and run the Azure logic app. All steps are completed successfully, as shown below.

It inserts a new row into the [imagedata] table. It has the person’s gender, age, glass property along with the smile and beard score.
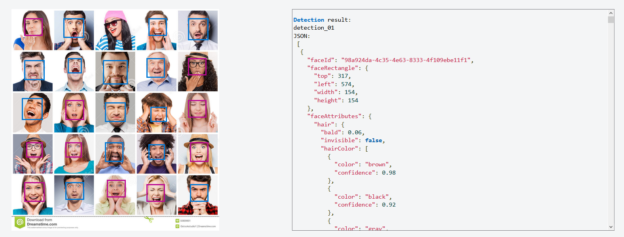
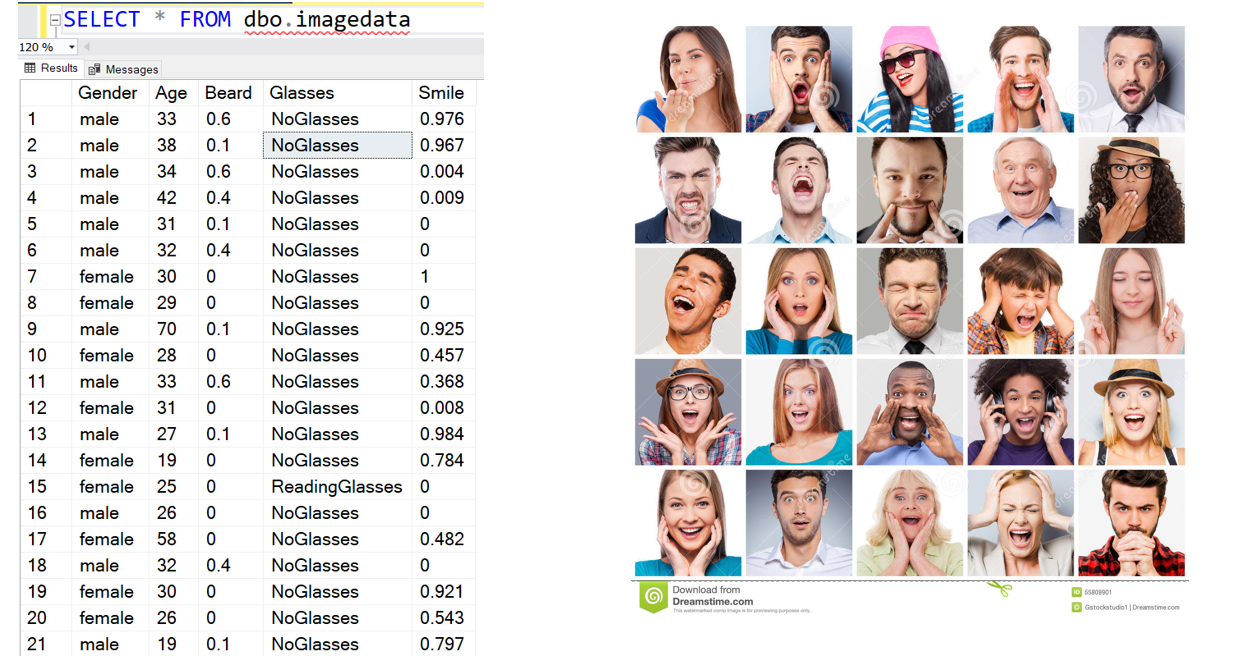
Let’s upload a new image into the blob container. For the demonstration, I download an image file having different persons with different emotions in a single image. You can download the image from Dreamstime.
Before we rerun the logic app, browse to Azure URL for face cognitive service, and it shows all detected faces in different color rectangles. You get face attributes in the JSON data shown below.

Now, let’s rerun the azure logic app, and it inserts data for all persons in the image, as shown below. It inserts all faces attributes in the [imagedata] table.
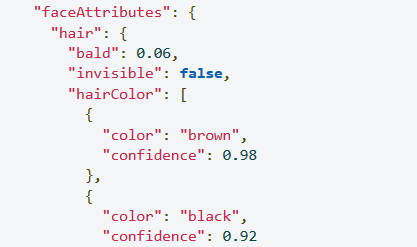
Similarly, you can configure the logic app to extract other attributes such as hair properties, color, and confidence.
Similarly, you can configure logic apps for face grouping, Person identification, finding similar faces and Face grouping using the face API of Azure cognitive services.
Conclusion
This article explored the Azure Automation with Azure Cognitive Service Face AI-based service for face recognition using the Azure Logic App and storing attributes into the Azure SQL database tables. Similarly, configure the image recognition system for your usage such as mask detection, interpreting facial attributes for your research work.
Table of contents

I am the author of the book "DP-300 Administering Relational Database on Microsoft Azure". I published more than 650 technical articles on MSSQLTips, SQLShack, Quest, CodingSight, and SeveralNines.
I am the creator of one of the biggest free online collections of articles on a single topic, with his 50-part series on SQL Server Always On Availability Groups.
Based on my contribution to the SQL Server community, I have been recognized as the prestigious Best Author of the Year continuously in 2019, 2020, and 2021 (2nd Rank) at SQLShack and the MSSQLTIPS champions award in 2020.
Personal Blog: https://www.dbblogger.com
I am always interested in new challenges so if you need consulting help, reach me at rajendra.gupta16@gmail.com
View all posts by Rajendra Gupta
- Understanding PostgreSQL SUBSTRING function - September 21, 2024
- How to install PostgreSQL on Ubuntu - July 13, 2023
- How to use the CROSSTAB function in PostgreSQL - February 17, 2023