
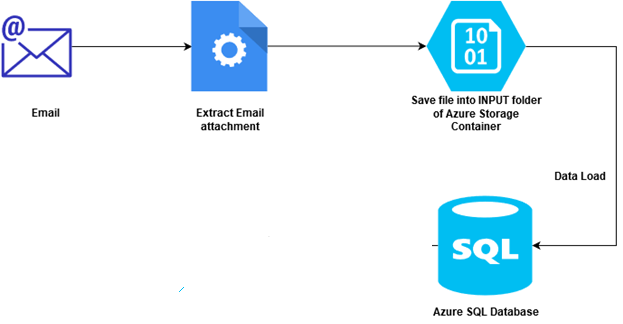
In the Azure Automation article, Azure Automation: Automate data loading from email attachments using Azure Logic Apps, we did the following tasks:
- Detect a new email having an attachment and a specific subject
- Extract email attachments and save them into the Azure storage container
- Automatically start a workflow to import data into an Azure SQL Database table
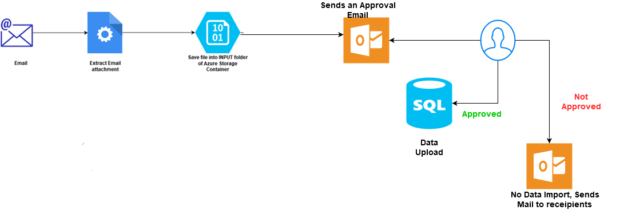
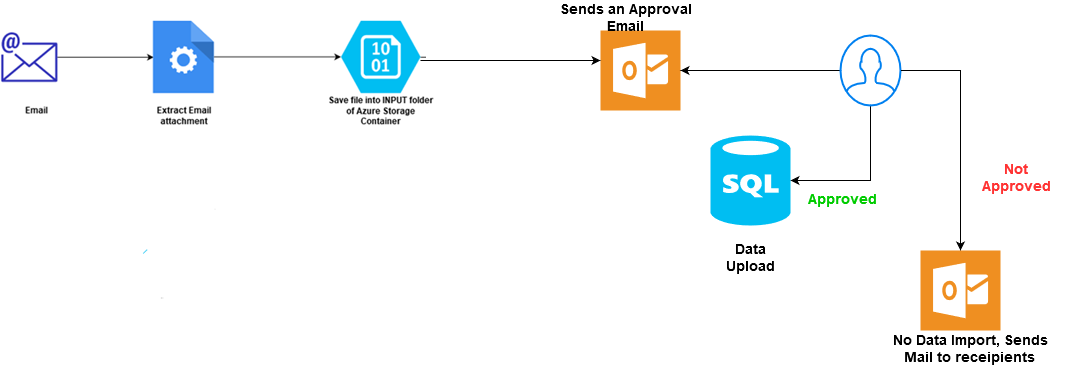
Now, let’s say we have got a new requirement. Once data is uploaded into the Azure storage account, the logic app should trigger an automated approval email.
If the email recipient clicks on approve, data uploads into the Azure SQL Database. However, if a user rejects the request, it does not upload data into a table. It sends a mail informing the user about failed data import due to the approver’s rejection. You can visualize the new requirement in the following email.
In this article, we explore the way to achieve that automated approval-based workflow using Azure logic apps.
Requirements
You need the following environment for working with this article.
-
Follow the articles and create an Azure logic app. It fulfills our initial requirement of automatic data load
into the Azure database from an email attachment
- Automate data loading from email attachments into Azure SQL Database using Azure Logic App
- Import data into an azure database from a storage container
Steps to configure Azure Automation Automated approval based workflows using Azure Logic apps
In this part, let’s explore the steps required to configure an approval-based workflow in the logic app.
Send Approval email
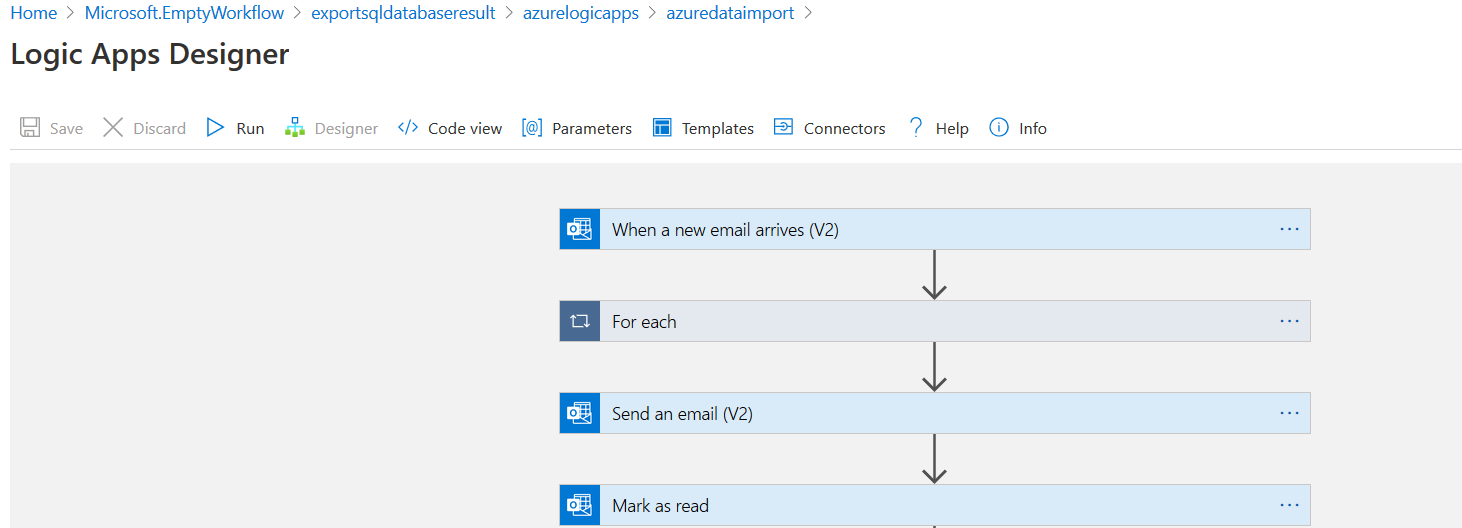
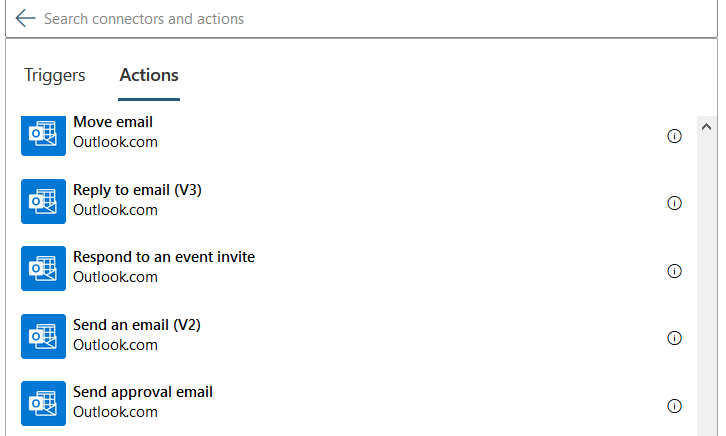
Open your existing logic app and click on New Step. For the new step, search for the Outlook.com connector.
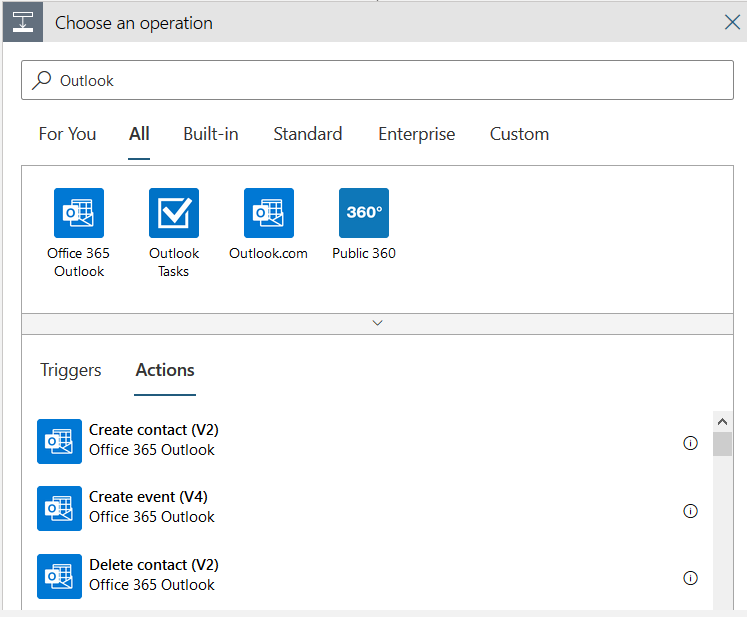
In the actions menu, click on Send approval email.
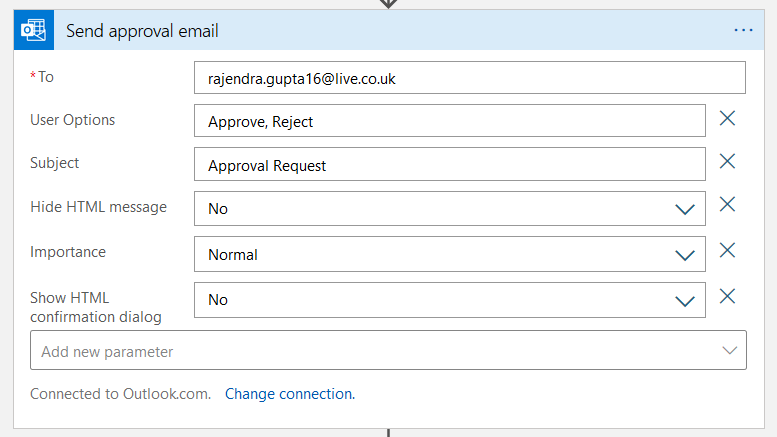
It opens the configuration window for send approval emails. In the list, enter the following information.
- To: Enter the approver email address
- User options: By default, you get two options – Approve and Reject in the email
- Subject: Specify a subject for your email approval. Here, I specify the subject – Approval Request for data import into Azure SQL Database in my demo
- Hide HTML message: No
- Importance: By default, the approval email is set with Normal priority. You can modify it to values Low, Normal and High
- Show HTML confirmation dialog: No
Suppose we want the approver to review the CSV file that we wish to upload into the Azure database. Therefore, click on Add new parameter and select Attachments. In the attachment section, specify the attachment file name and attachment content from the dynamic content. However, in this article, we will go with a simple approval email.
Check approval response
Once you run the azure logic app, users get an email to approve or reject the request. Now, we need to configure the logic for capturing the approval response. Based on the response, we would either import CSV into the SQL database or terminate the process.
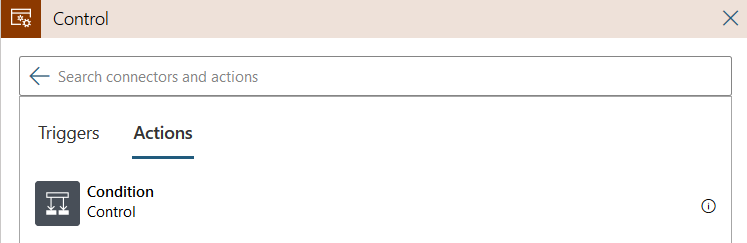
Click on New Step under the send approval email action. In the choose an operation section, select Built-in and select Condition.
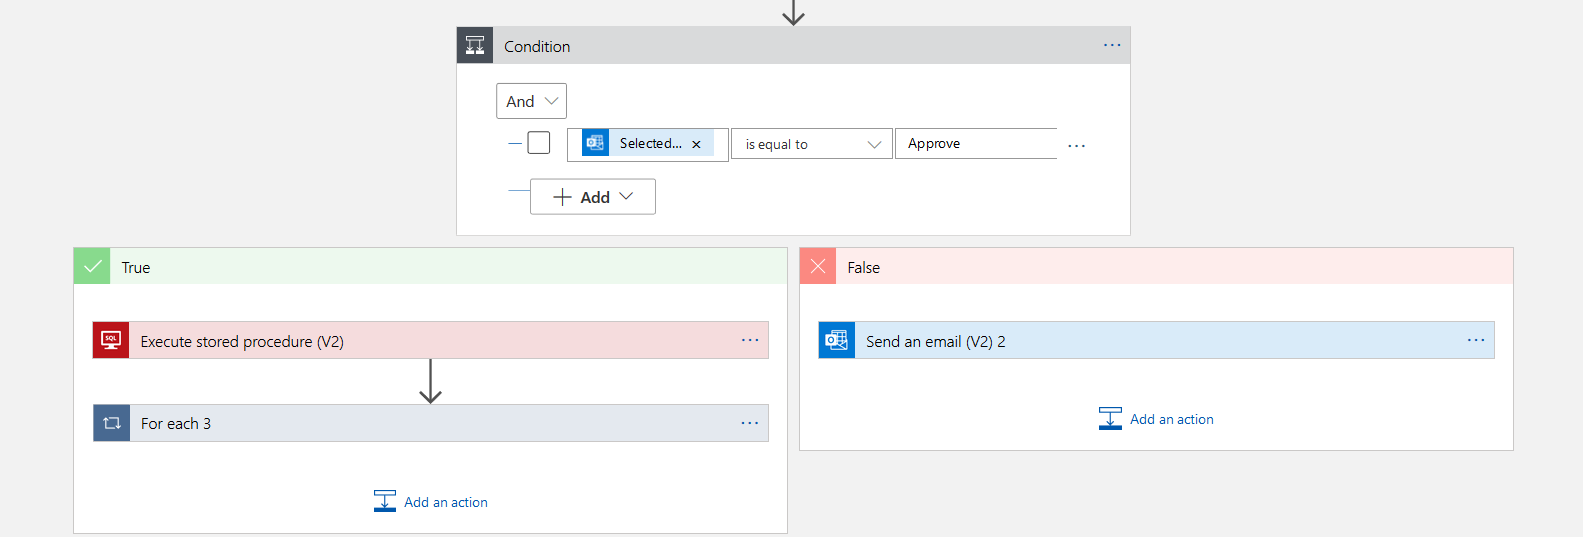
In the condition box, add the SelectedOption property under the send approval email dynamic content list. Configure the condition, as shown below:
- SelectedOption > is equal to > Approve
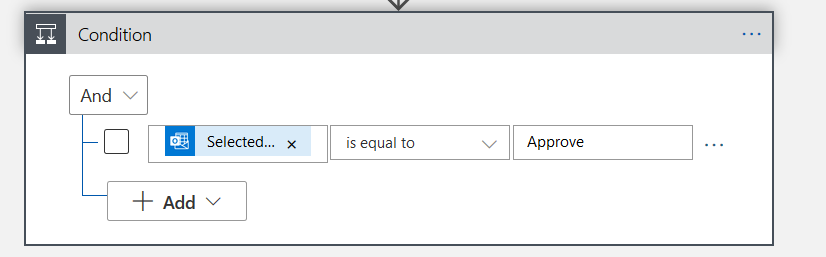
This condition is similar to an IF-ELSE function in the SQL. If the condition is true, it enters the workflow inside it else it executes the workflow false condition.
Configure the TRUE block condition
Once we add a condition block, you get two components for configuration – TRUE and FALSE.
In the True container, add an SQL connector and execute the Stored procedure(V2) action. We already defined the Azure SQL connection. Therefore, we do not require to configure a new connection by specifying the azure server name and database name.
In the Execute stored procedure (V2), select the server name, database name and stored procedure name from the drop-down menu as shown below.
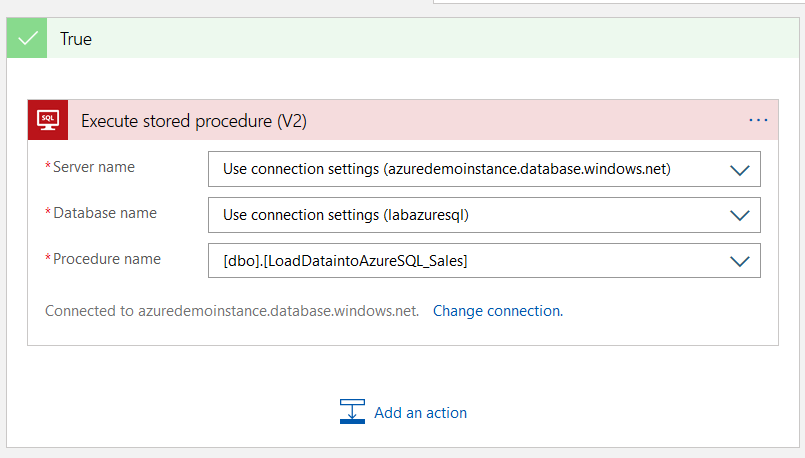
If you want a confirmation email for data import, click on Add an action and select Outlook.com followed by Send an email (V2).
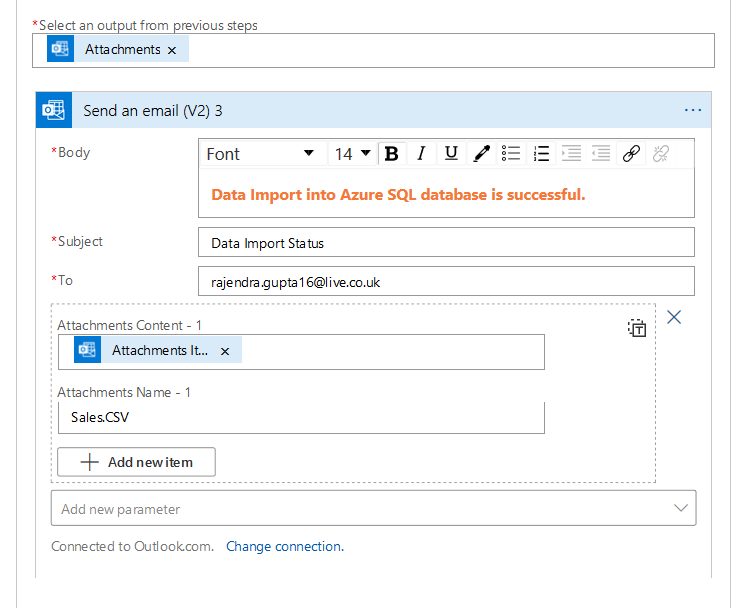
In the send an email(V2), enter the email body, subject, recipient email address. The email body can have a specified font type, size, and style similar to an outlook email. You can also attach the CSV file for confirmation purposes.
Configure the FALSE block condition
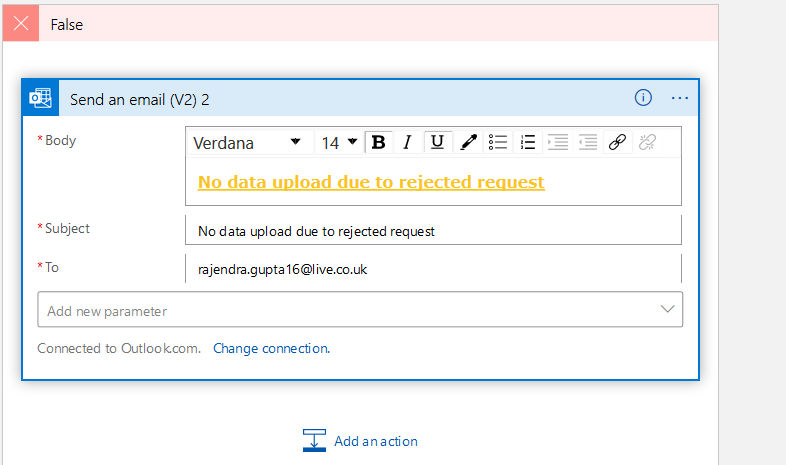
If the user Rejects the request in the approval email, we do not want data import into the Azure SQL database. However, we want to inform the user that data import is failed due to the rejected request to be aware of it.
Therefore, add an email (V2) from the Outlook.com connector and configure your email body, subject and recipient email address.
Validations of approval based workflow for Azure Automation
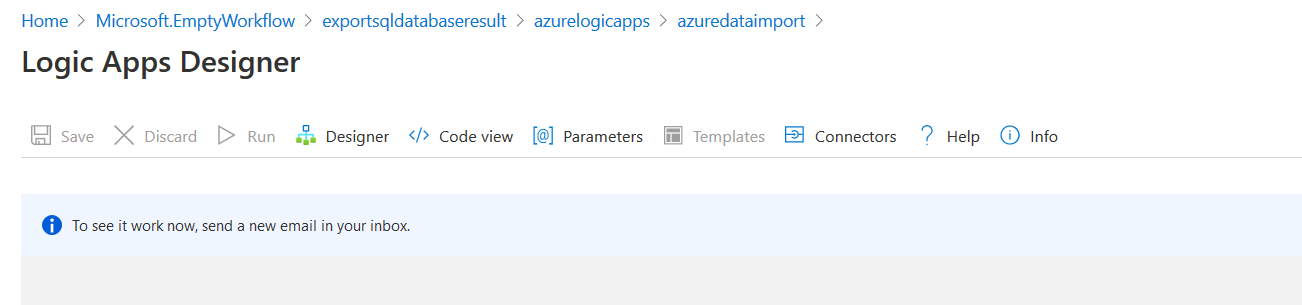
We have configured approval based workflow in the Azure Logic Apps. Therefore, click on the run, and it starts waiting for a new email in the Inbox with a specified subject – Azure Data Import CSV.
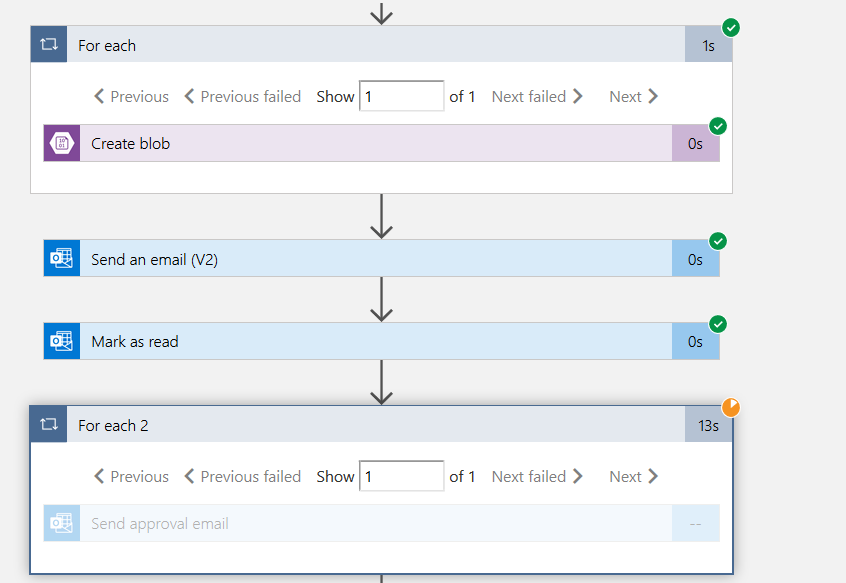
It starts the workflow execution, sends an approval email and waits for the response- Approve or Reject.
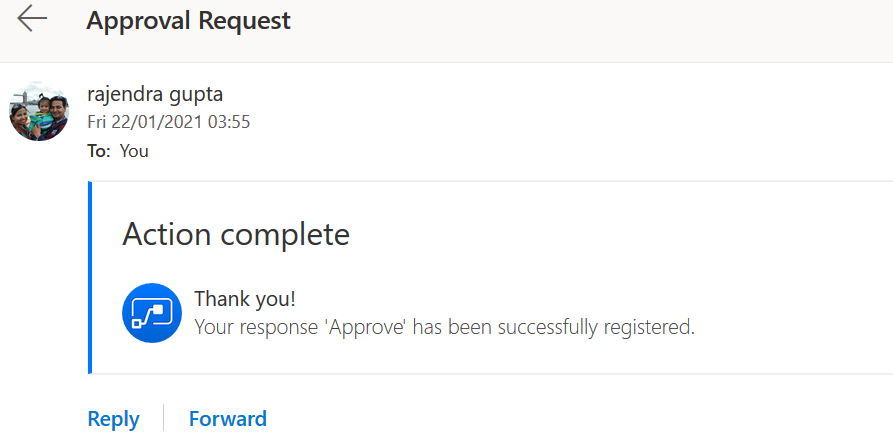
Go to your Inbox, and you get the following email from the send approval email task. In the email, you get two tasks for action – Approve, Reject.
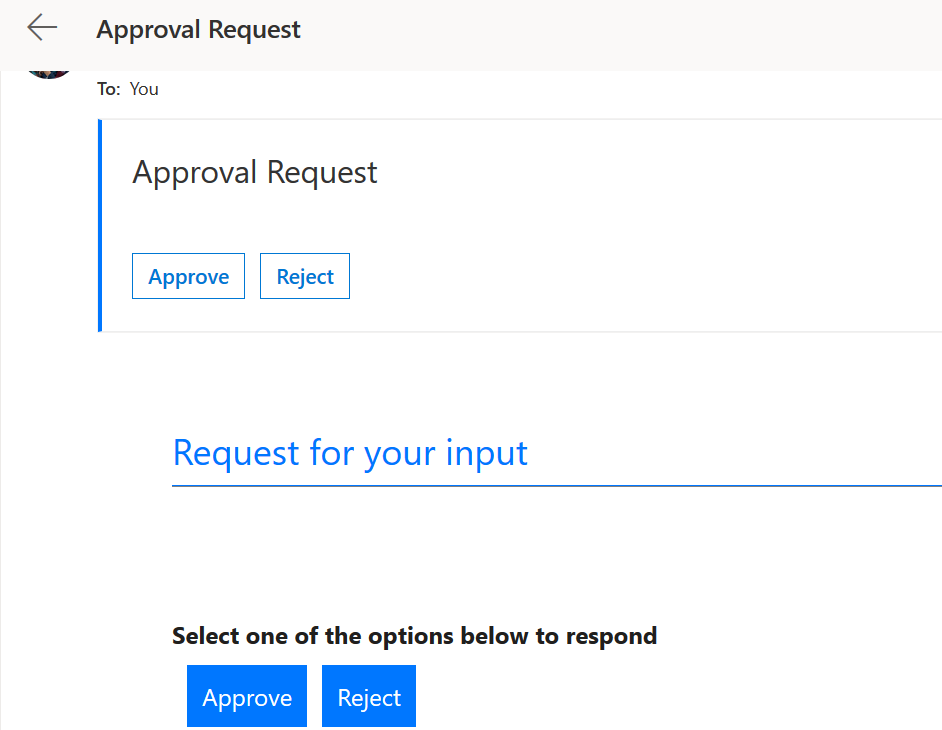
If you click on Approve, it satisfies our condition and workflow starts executing the TRUE block tasks. Therefore, click on Approve, and you get a message – Your response ‘Approve’ has been successfully registered.
Now, switch to azure logic apps. Workflow execution is completed. It executed SQL stored procedure in Azure SQL database that is embedded in the TRUE block.
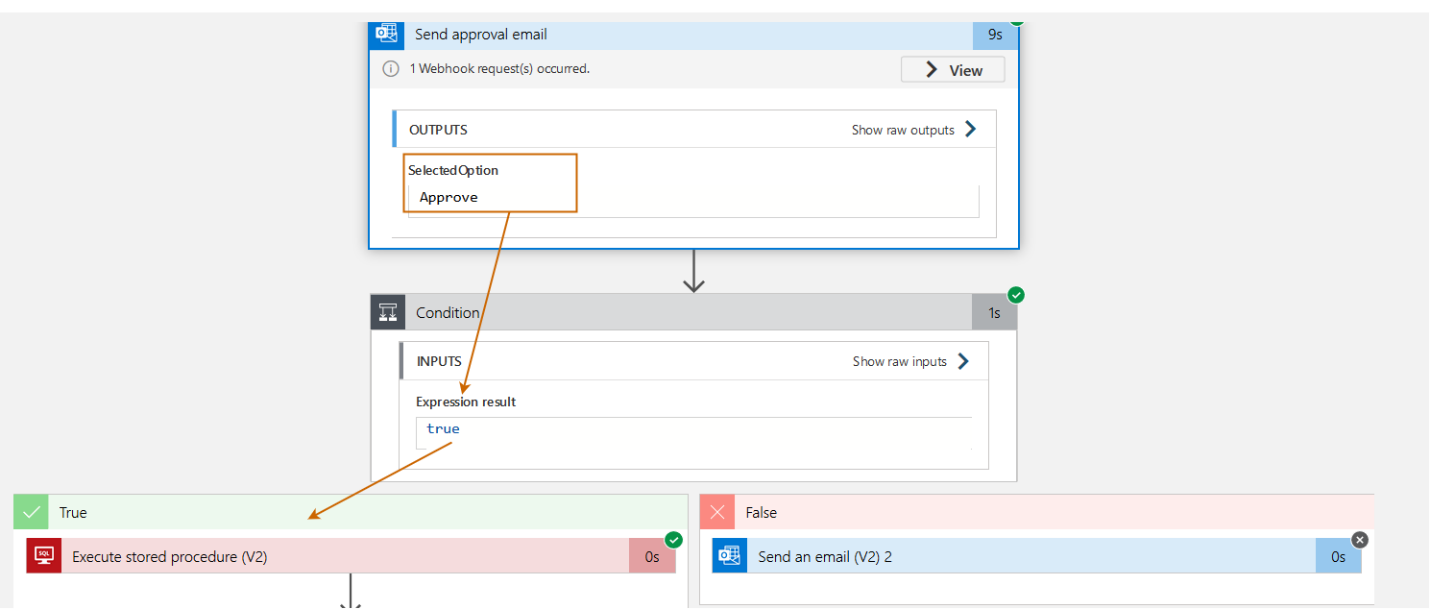
You can expand the individual tasks to check the outputs. For example, in the below screenshot, we can note the following:
- It has recorded an action – Approve from the user response on email
- Due to approval, the condition evaluates TRUE
- It executes tasks in the TRUE block
- No actions are performed on the tasks embedded into the FALSE block
We have configured an email task for informing the user about successful data upload into the Azure SQL database. The email also has a CSV file attachment that informs the user about the Azure database’s data. You get the mail in your Inbox, as shown below.

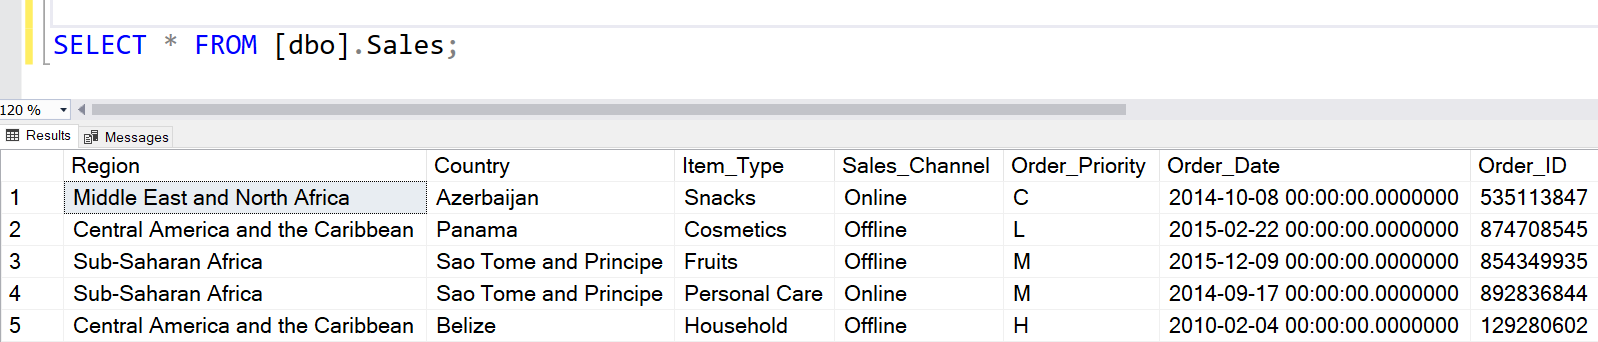
You can validate imported data in Azure SQL Database by querying the sales table using SSMS or Azure Data Studio.
In my example, I have 5 rows in the CSV file. We have a truncated table in the stored procedure and then imported sales data from an email attachment. That’s why you do not get old records in the sales table if any.
Validations of Reject based workflow
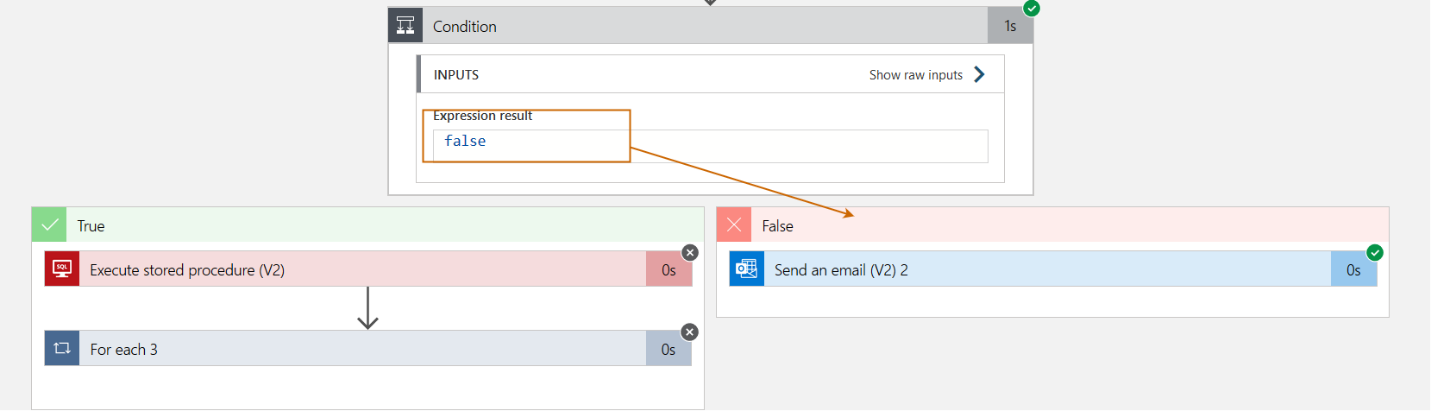
Now, let’s perform another run of the logic app and send a test email with a specified subject and attachment. You get another mail for either approving or rejecting the request. This time click on Reject, and it records the reject response as shown below.

Once we click on reject action, it evaluates our logic app condition as false, and it starts executing tasks in the false block. In the false block, we configured the send an email(V2) task to inform users that the approver has rejected data import requests.
You get the following email in your Inbox.
Conclusion
This article configured an Azure Automation logic app for handling approvals before importing data into the Azure SQL database. Similarly, you can configure your business logic based on approval-based workflows quickly and efficiently.
Table of contents

I am the author of the book "DP-300 Administering Relational Database on Microsoft Azure". I published more than 650 technical articles on MSSQLTips, SQLShack, Quest, CodingSight, and SeveralNines.
I am the creator of one of the biggest free online collections of articles on a single topic, with his 50-part series on SQL Server Always On Availability Groups.
Based on my contribution to the SQL Server community, I have been recognized as the prestigious Best Author of the Year continuously in 2019, 2020, and 2021 (2nd Rank) at SQLShack and the MSSQLTIPS champions award in 2020.
Personal Blog: https://www.dbblogger.com
I am always interested in new challenges so if you need consulting help, reach me at rajendra.gupta16@gmail.com
View all posts by Rajendra Gupta
- Understanding PostgreSQL SUBSTRING function - September 21, 2024
- How to install PostgreSQL on Ubuntu - July 13, 2023
- How to use the CROSSTAB function in PostgreSQL - February 17, 2023