

In this article, we will learn how to create a Spark pool in Azure Synapse Analytics and process the data using it.
Introduction
In the last part of the Azure Synapse Analytics article series, we learned how to create a dedicated SQL pool. Azure Synapse support three different types of pools – on-demand SQL pool, dedicated SQL pool and Spark pool. Spark provides an in-memory distributed processing framework for big data analytics, which suits many big data analytics use-cases. Azure Synapse Analytics provides mechanisms to use SQL on-demand pool to query data as a service, SQL dedicated pool for data warehousing using distributed data processing engine, and Spark pool for analytics using in-memory big data processing engine. This article shows how to create a Spark pool in Azure Synapse Analytics and further how to process the data using it.
Pre-requisites
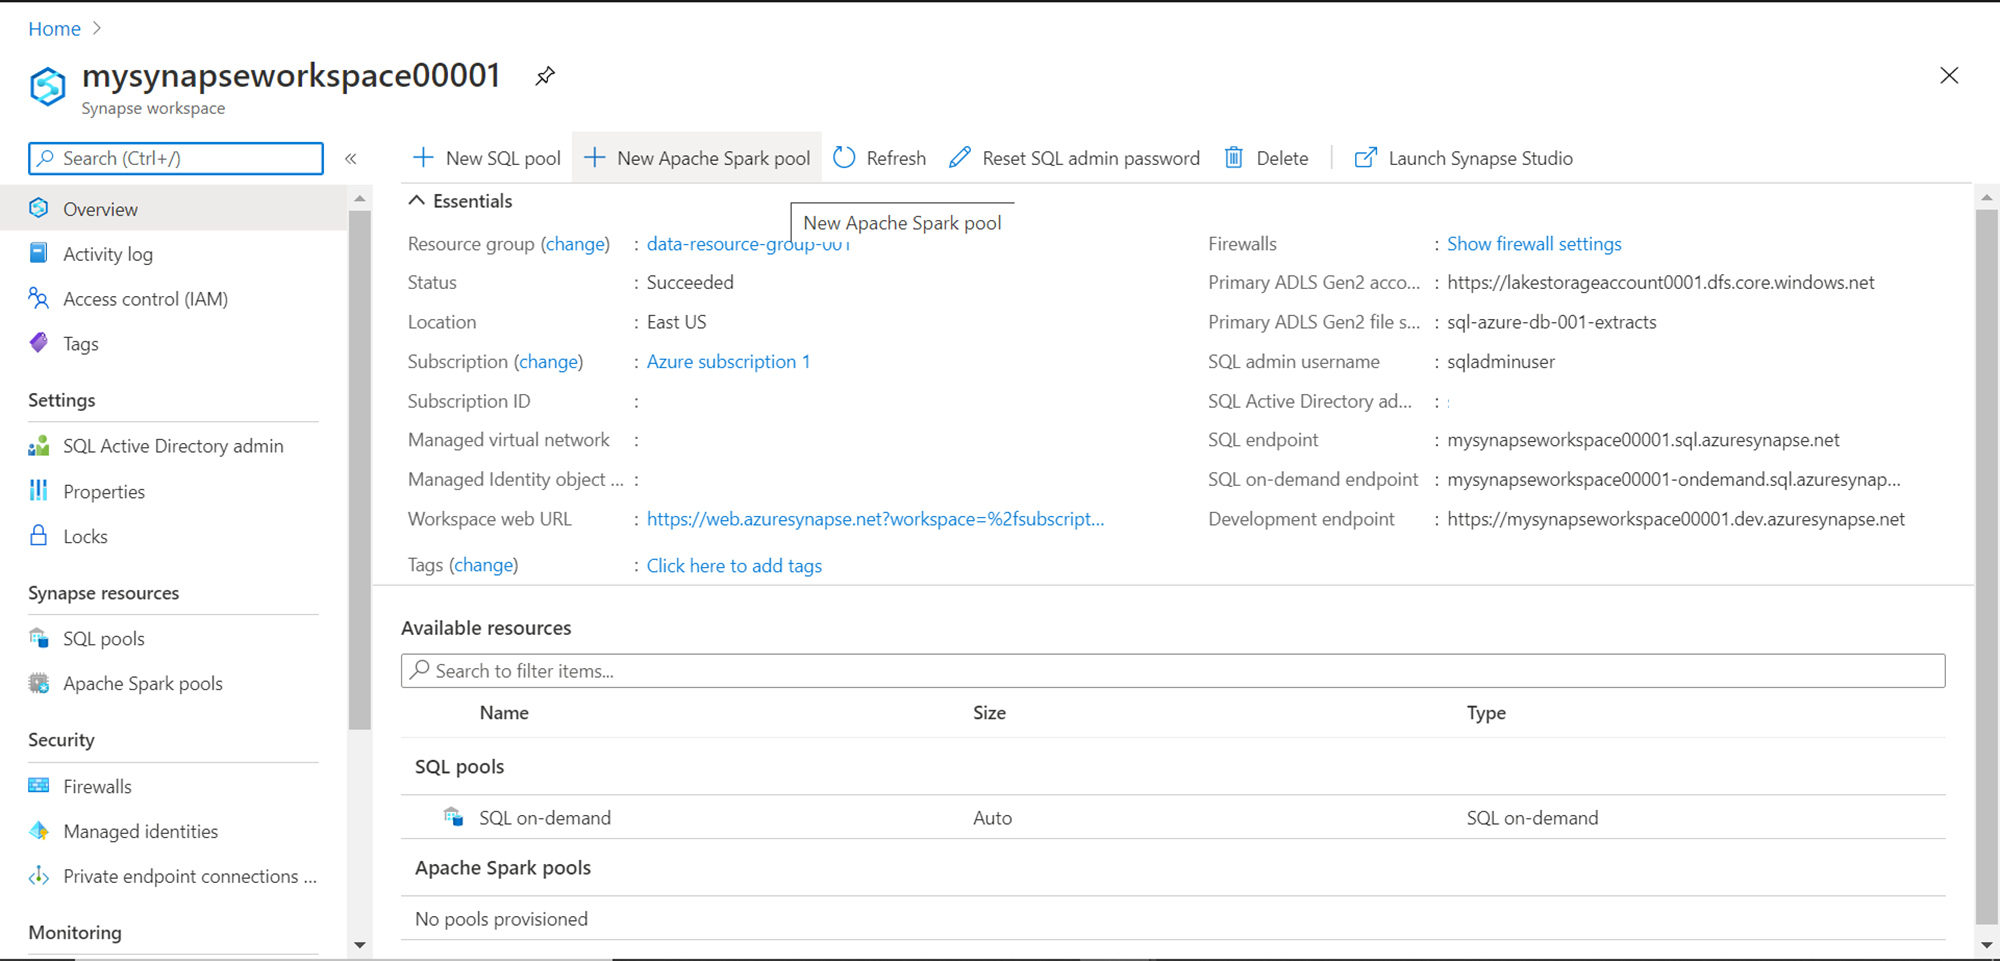
It is assumed that the Azure Synapse Analytics workspace is already in place. We also need some sample data in the Azure Data Lake Storage account. Navigate to the workspace and it would look as shown below. When the Synapse workspace is created, the SQL on-demand pool is provisioned by default, which is reflected in the SQL pools as shown below. As we have not created any Spark pool yet, so that list is empty. There are two ways of creating a spark pool. One by clicking on the New Apache Spark pool as shown below. Another is by clicking on the Apache Spark pools on the left-hand side of the pane and then clicking on the Create new pool button.
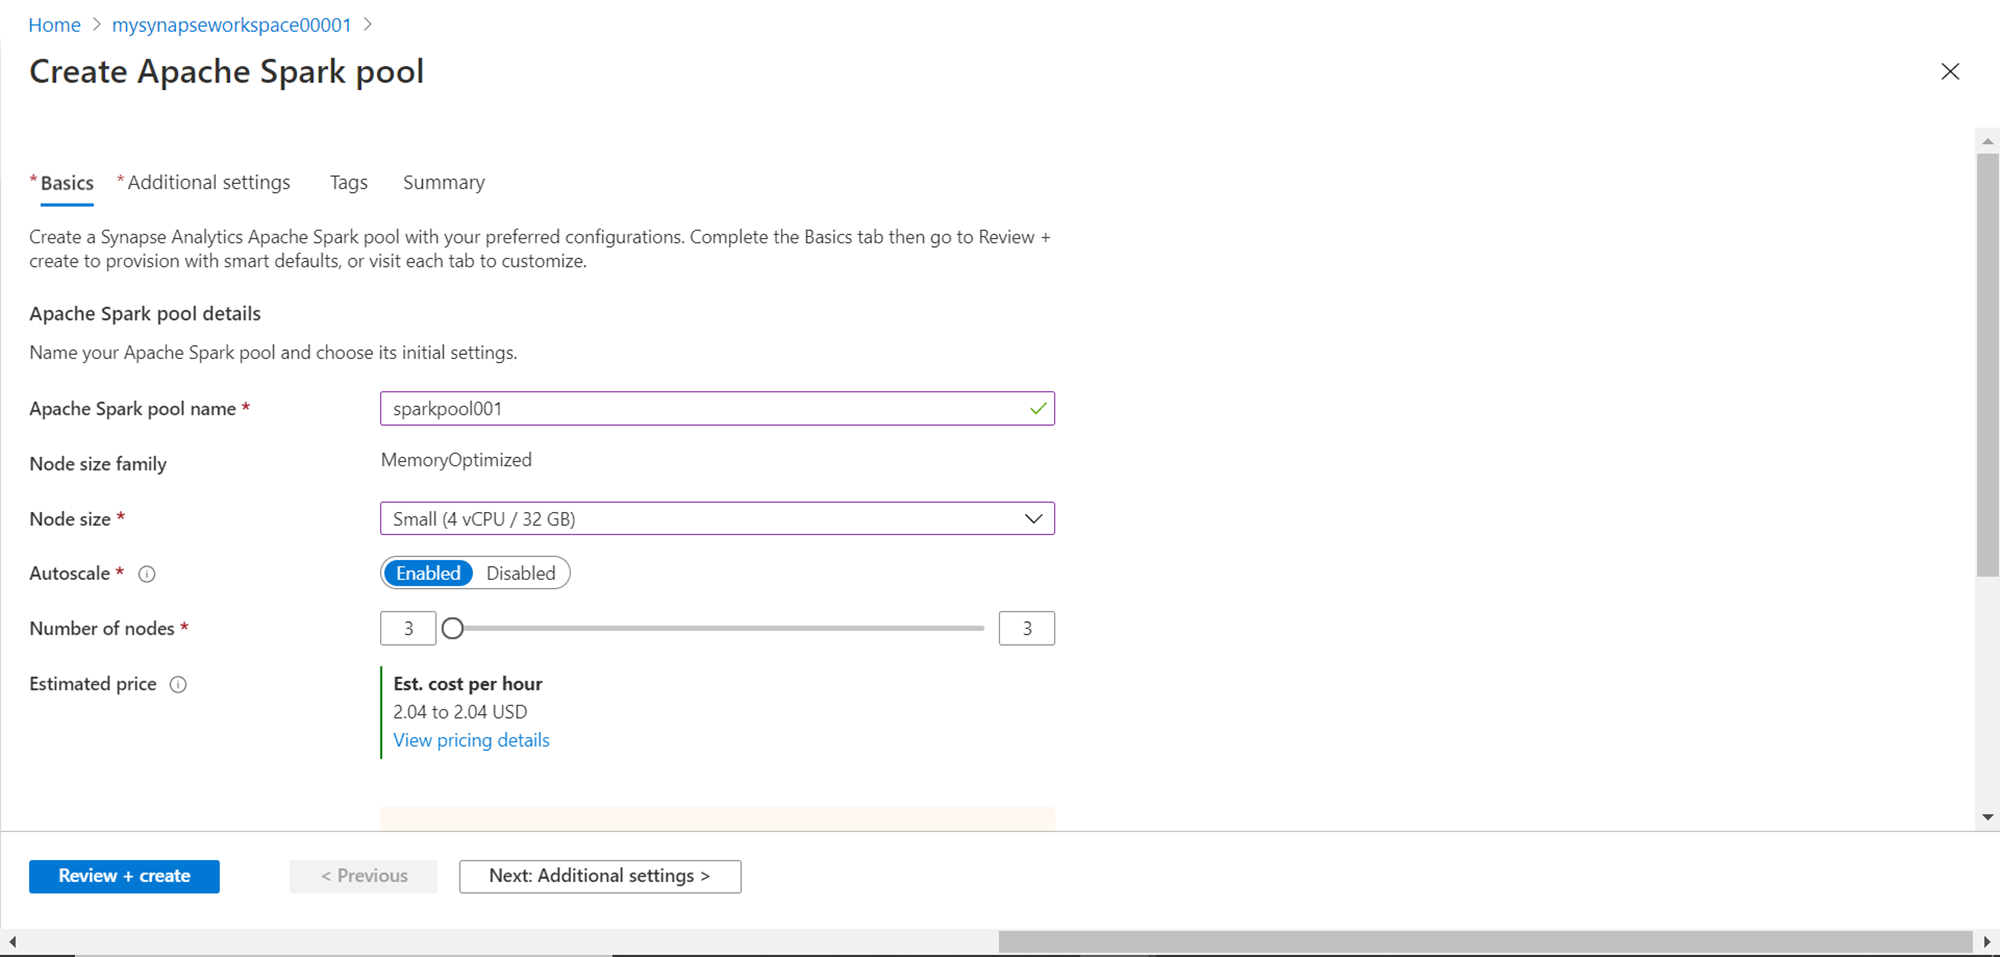
Once we click on the button to create a new spark pool, it would open the wizard as shown below. Provide a new name for the spark pool. The node size family does not need to be specified as in the case of spark it’s memory-optimized. The node size has three options – Small, Medium and Large as shown below. The default selection is Medium size and costs up to $13.60 per hour. One can select the size of the pool as per the performance and memory requirements.

We do not need to select a larger node size for our use-case at present. By default, it’s enabled, but if one does not intend to incur a cost beyond a fixed budget, then one can disable the auto scale option. In the small size configuration that we have selected, it comes with 3 nodes of the specified size. One can increase the number of nodes as per the performance requirements and each node will be of the size that we selected earlier. The estimated cost would be $2.04 per hour as shown below.
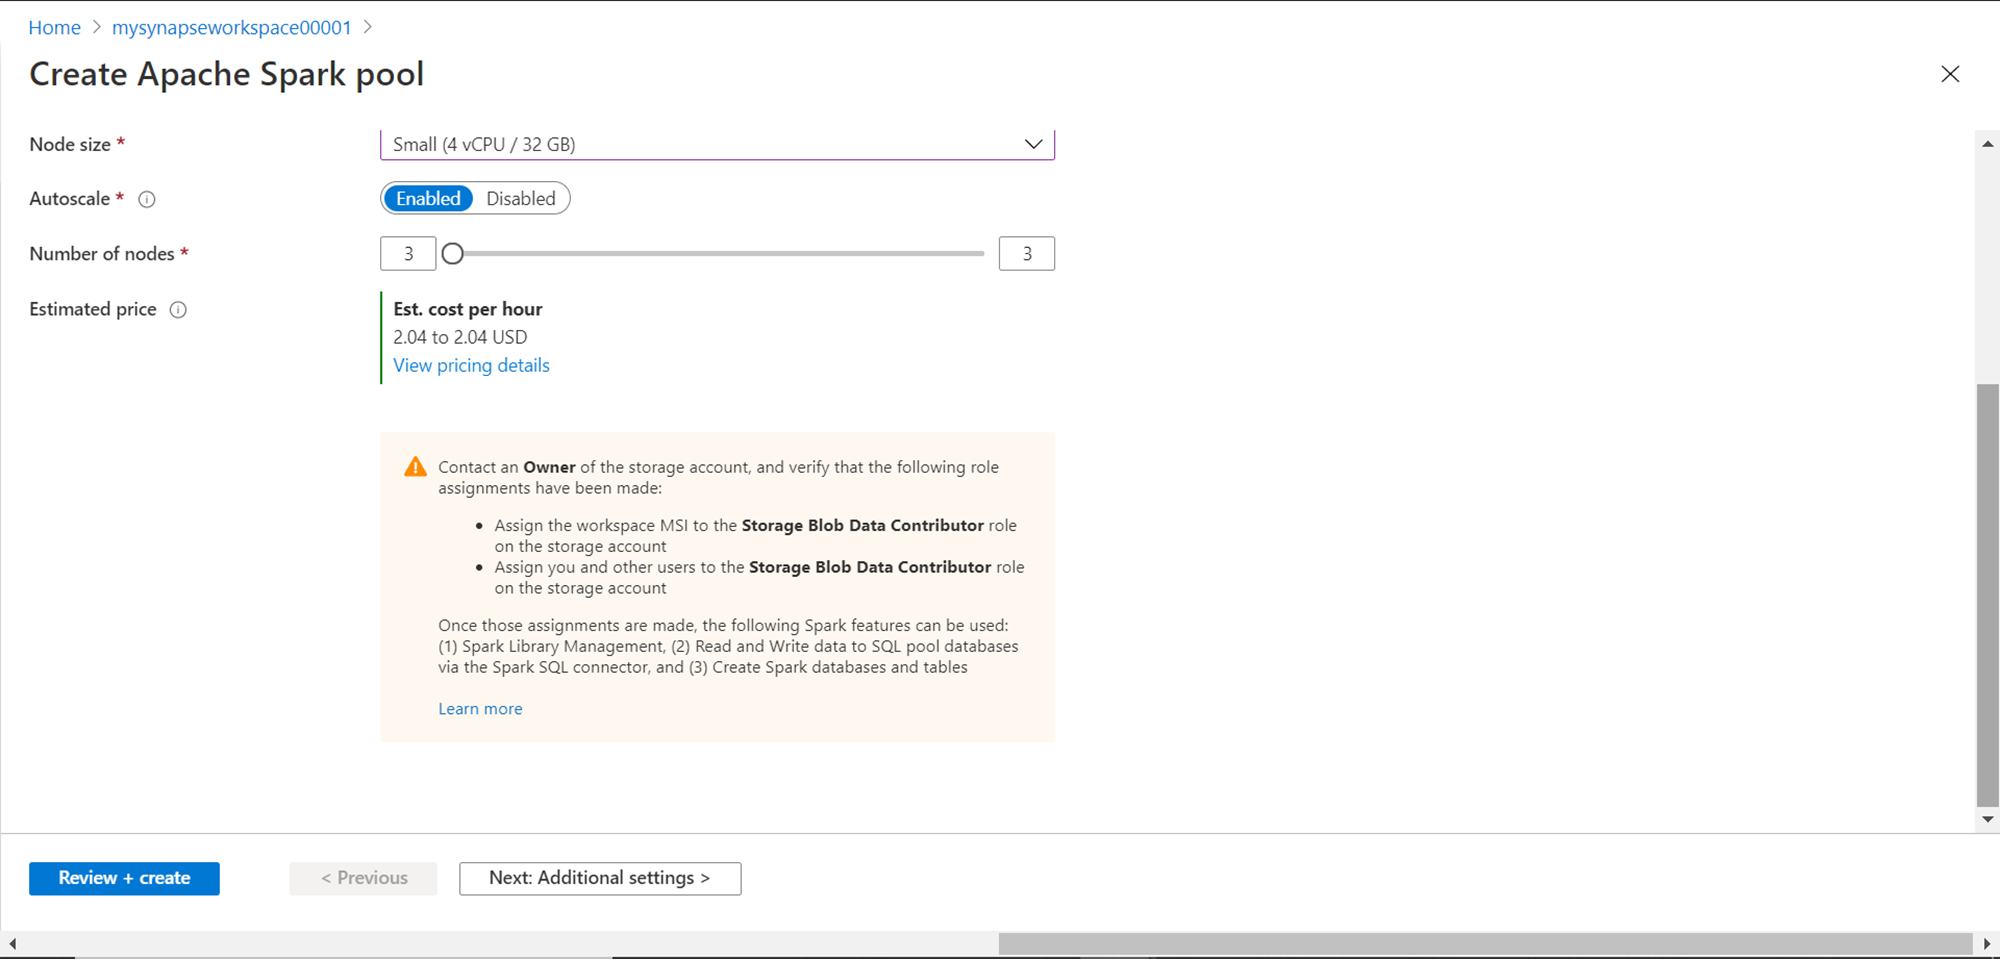
Scroll down and read the instructions mentioned below the pricing details. To use the features like Spark Library Management, accessing SQL pool databases and creating spark database and tables, one needs to perform a certain role assignments to the storage account as shown below. We do not need to perform these configurations as we just intend to create a spark pool that can access data stored in the Azure Data Lake Storage account. Once done, click on the Additional Settings button.
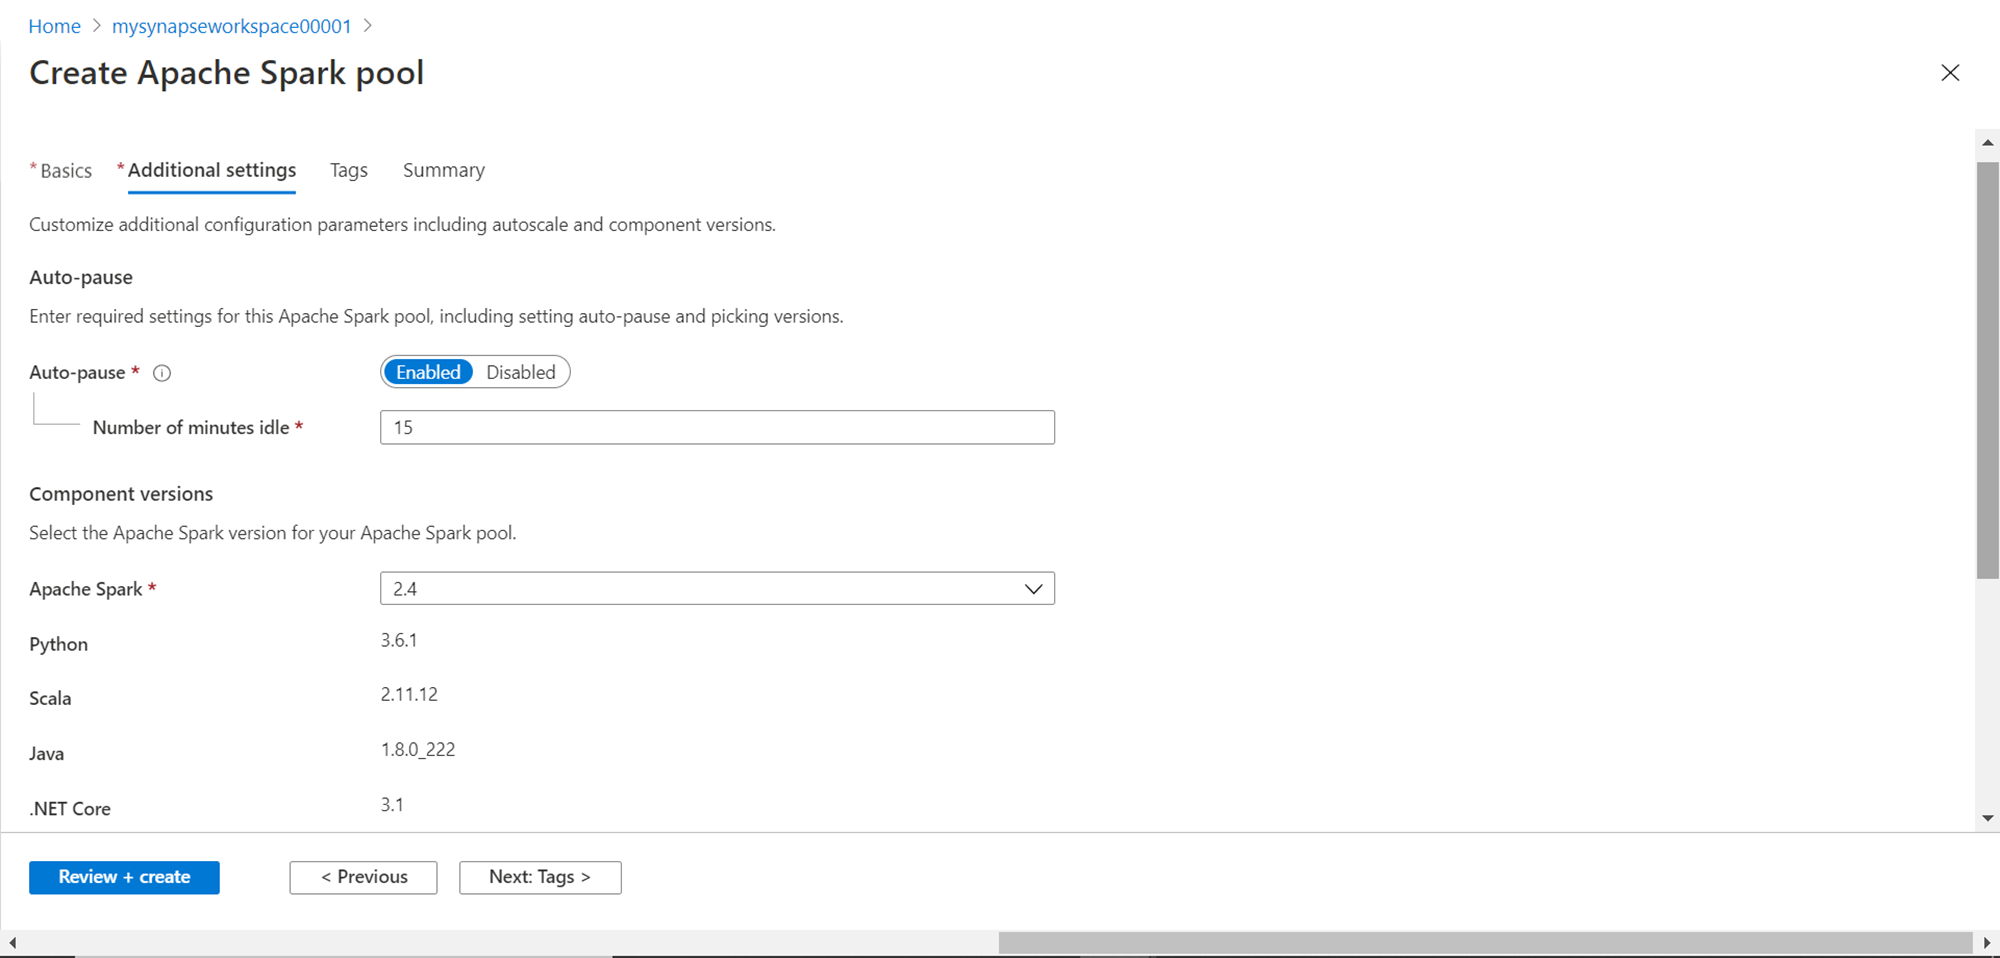
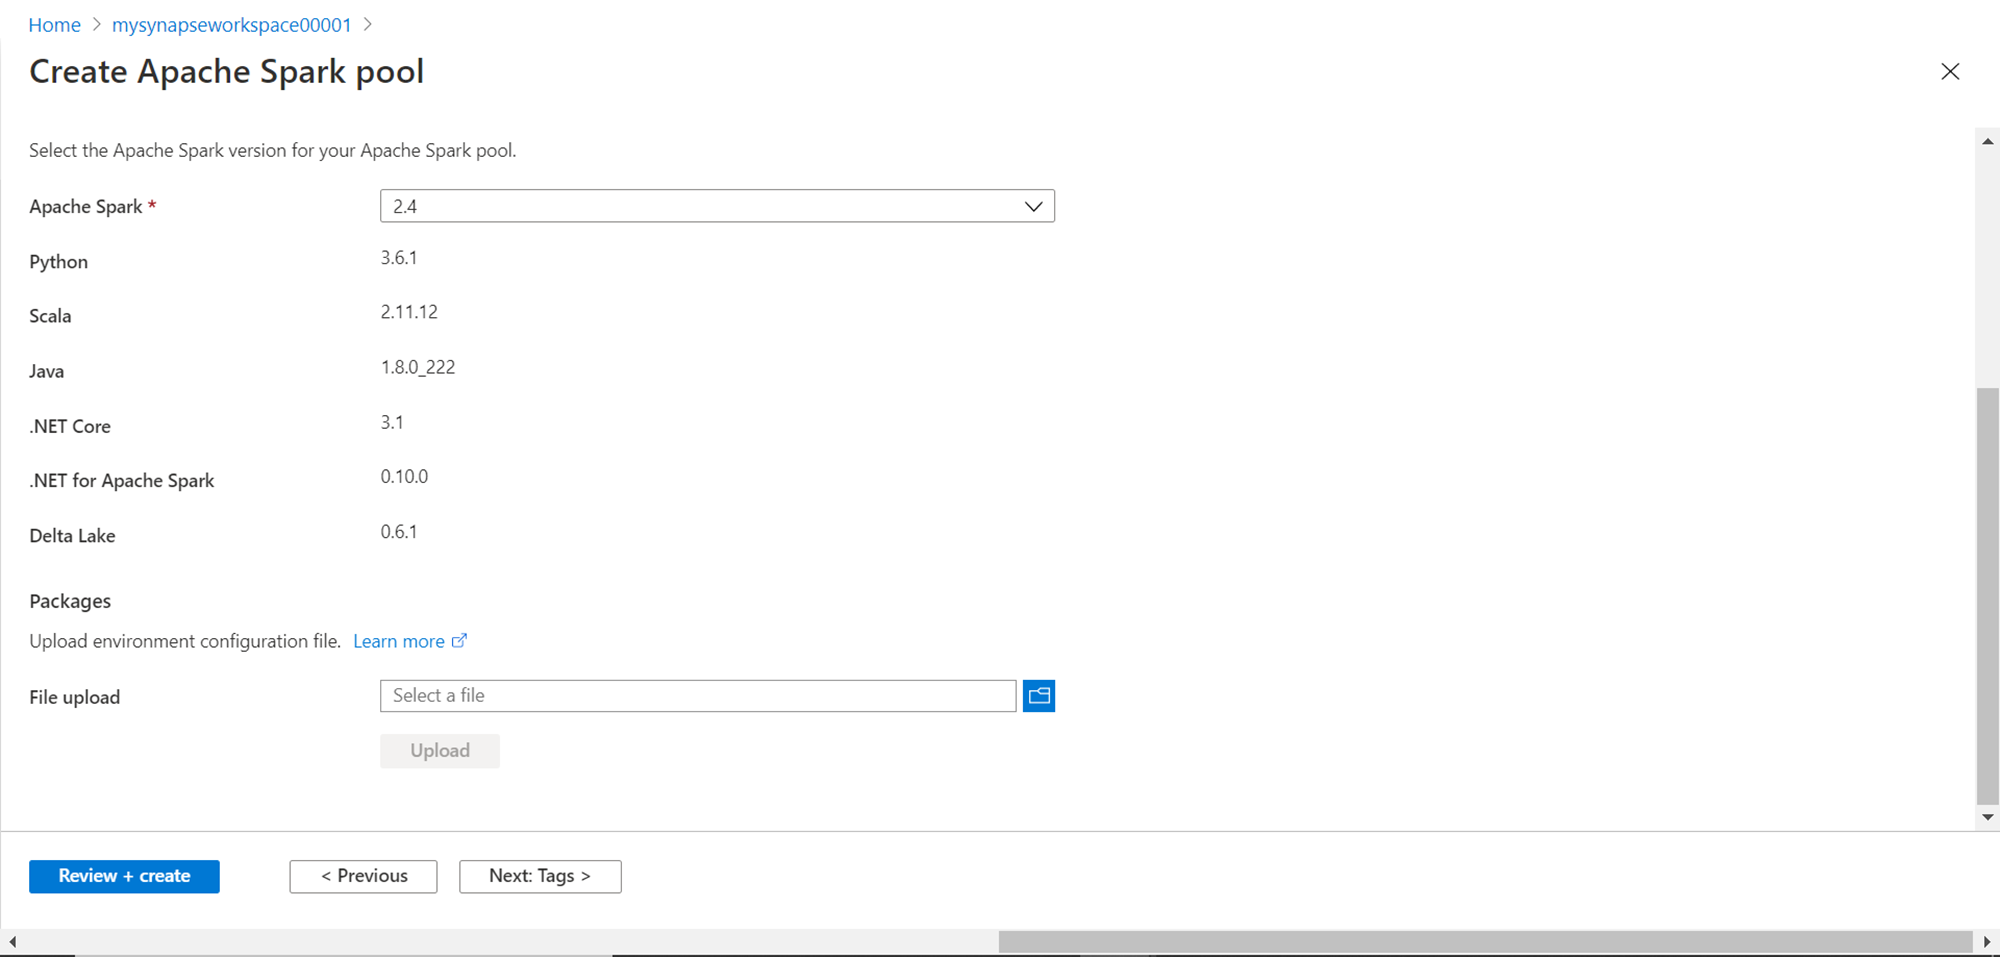
In this step, we need to provide additional configuration settings. The first setting to configure is pausing the cluster if the cluster has been idle beyond a certain time. The default setting is 15 minutes, which means the cluster will be paused after the cluster has been idle for that amount of time. One can also select the version of Spark to be used from the available list of versions. Python, Scala, Java and .NET core, .NET for Apache Spark and Delta Lake is already installed on the cluster and versions of these frameworks as shown below.
Scroll down and you would find options to upload environment configuration files. This is an optional step, so we would skip this for now. Once done, click on the Tags button.
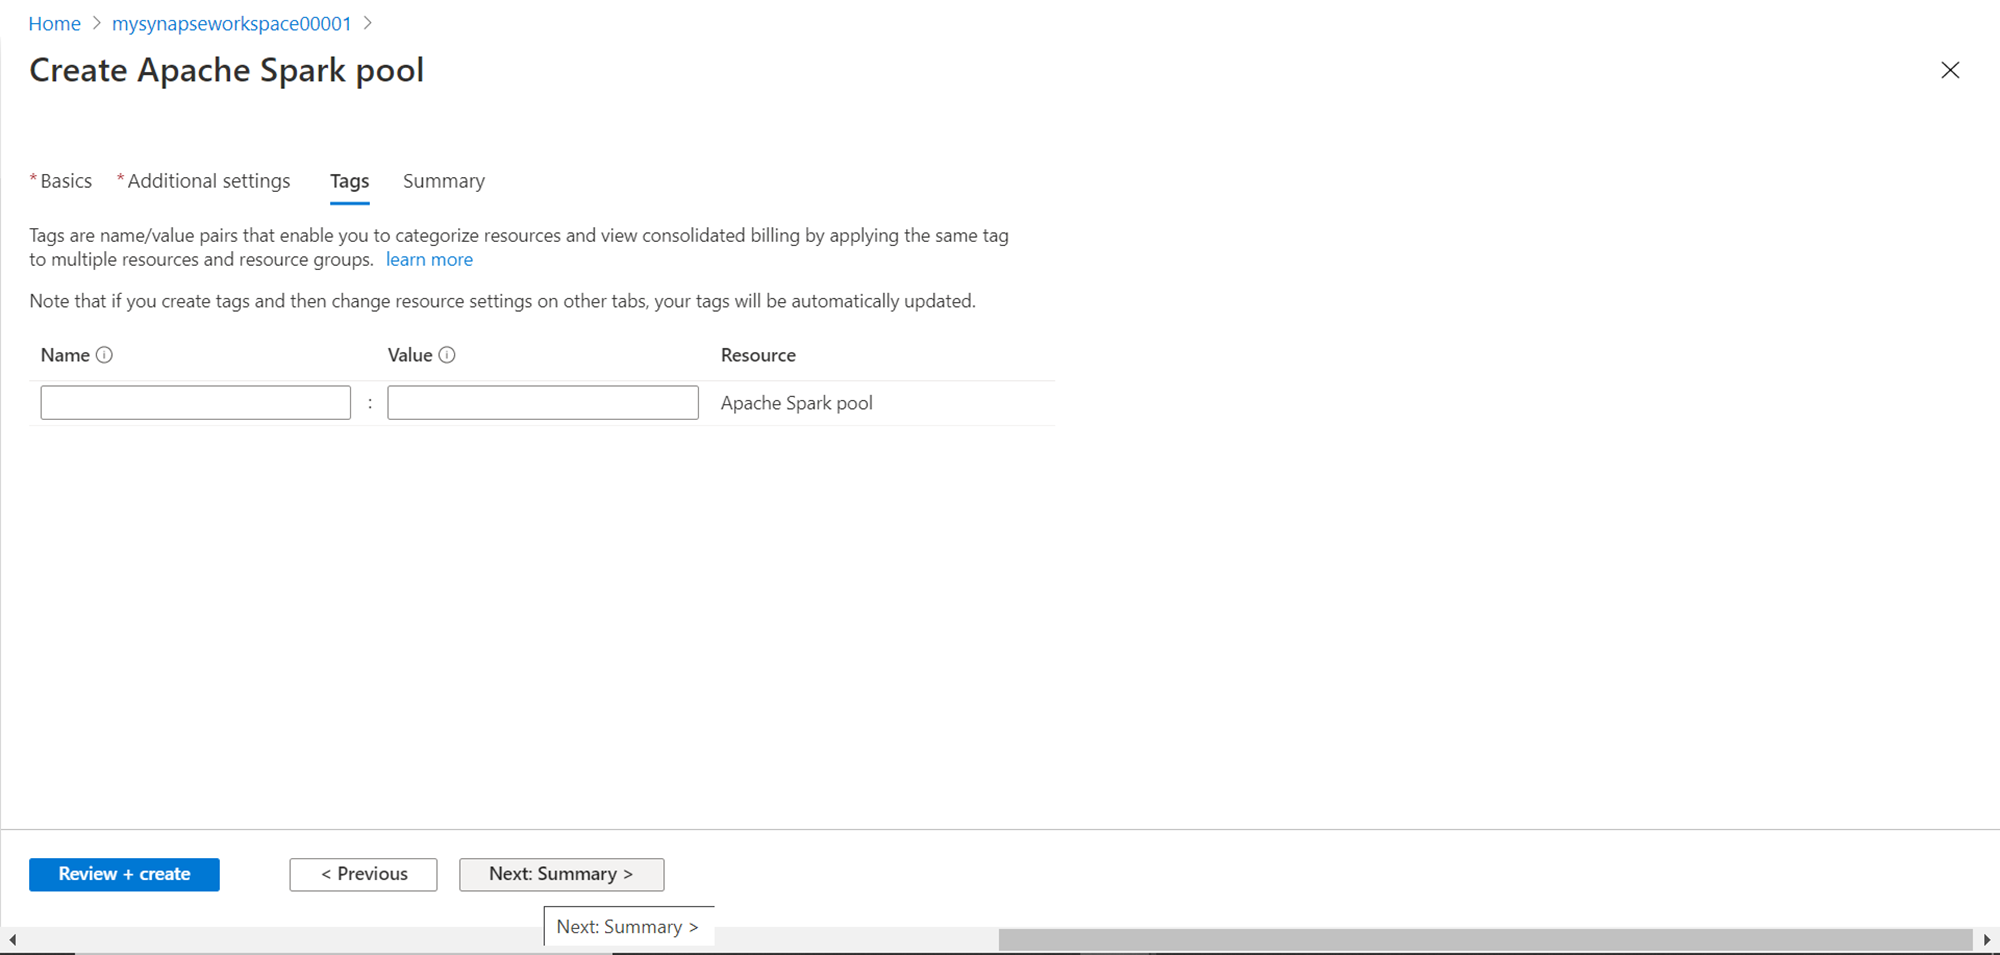
In this step, one can specify Tags as required. This too is an optional step, but it is recommended to specify tags like owner, purpose, environment, etc. For now, we would skip this step and click on the Summary button.
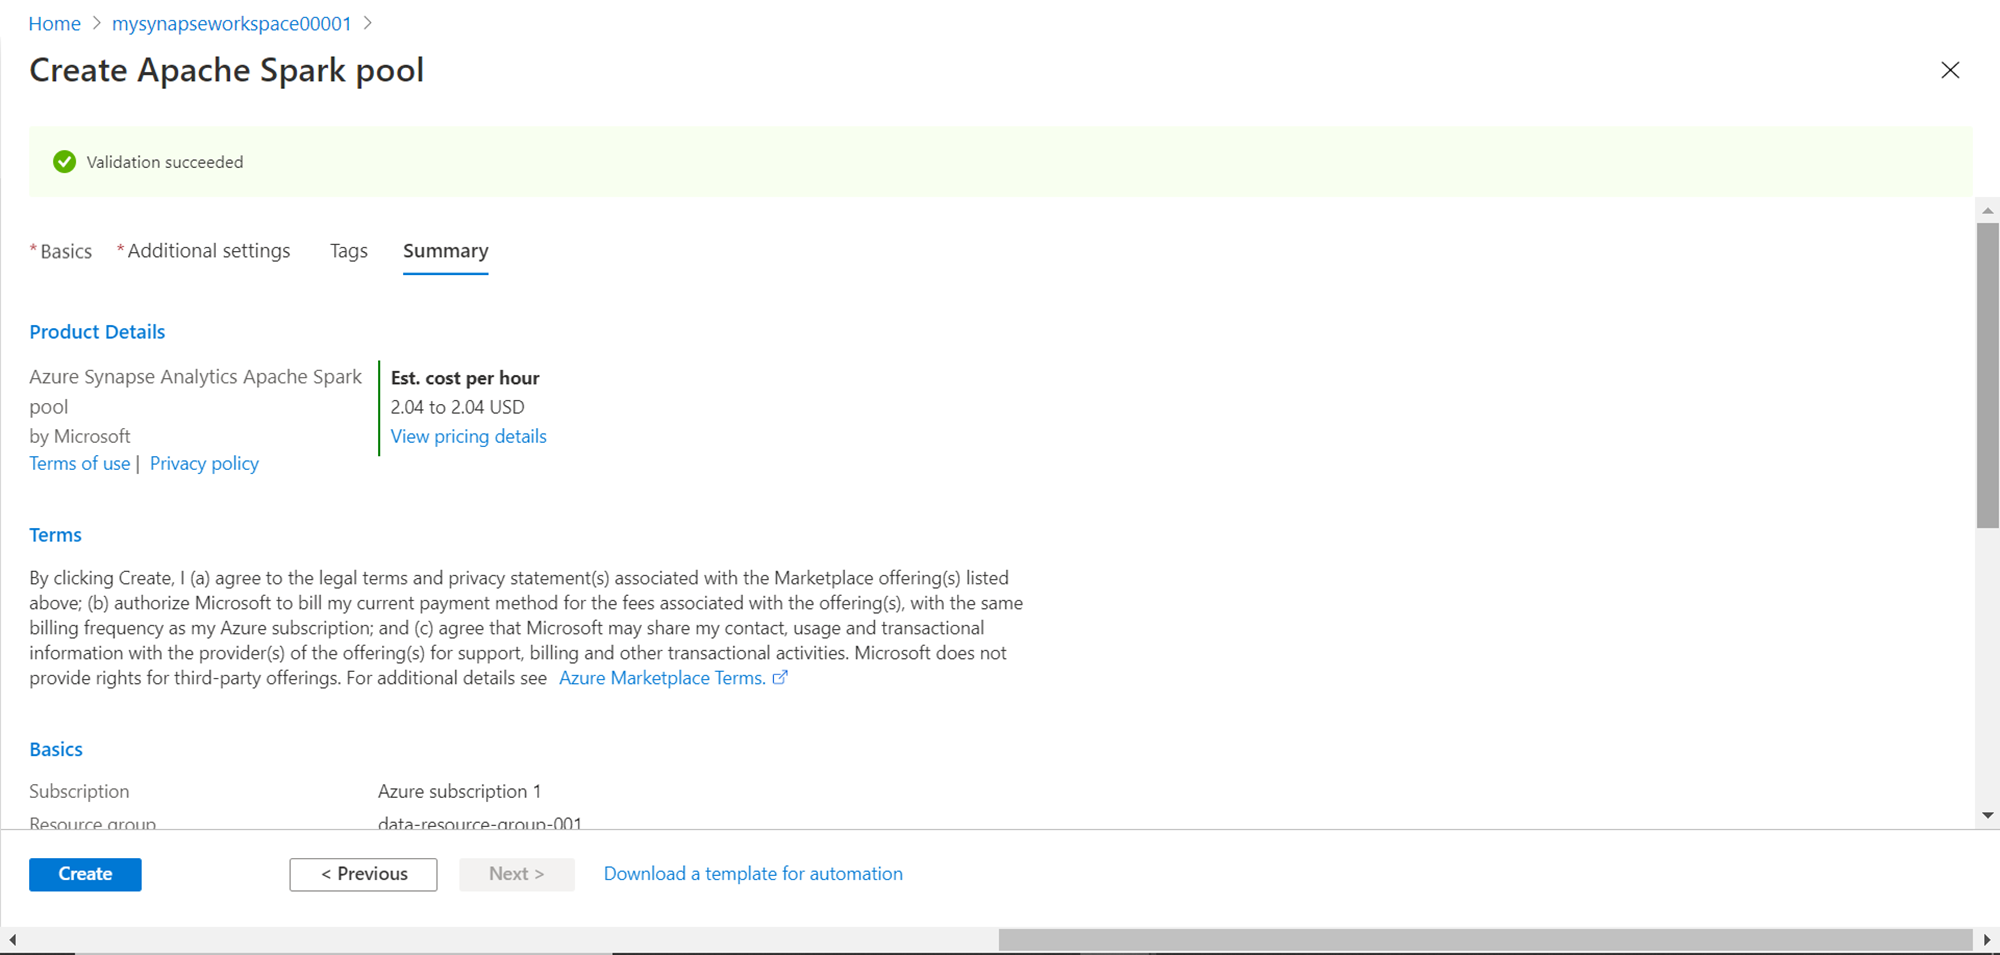
The summary page would look as shown below. Verify the cost and configuration details and click on the Create button. This would initiate the creating of the Spark pool in the Azure Synapse Analytics workspace. It can take a few mins for the pool to get created.
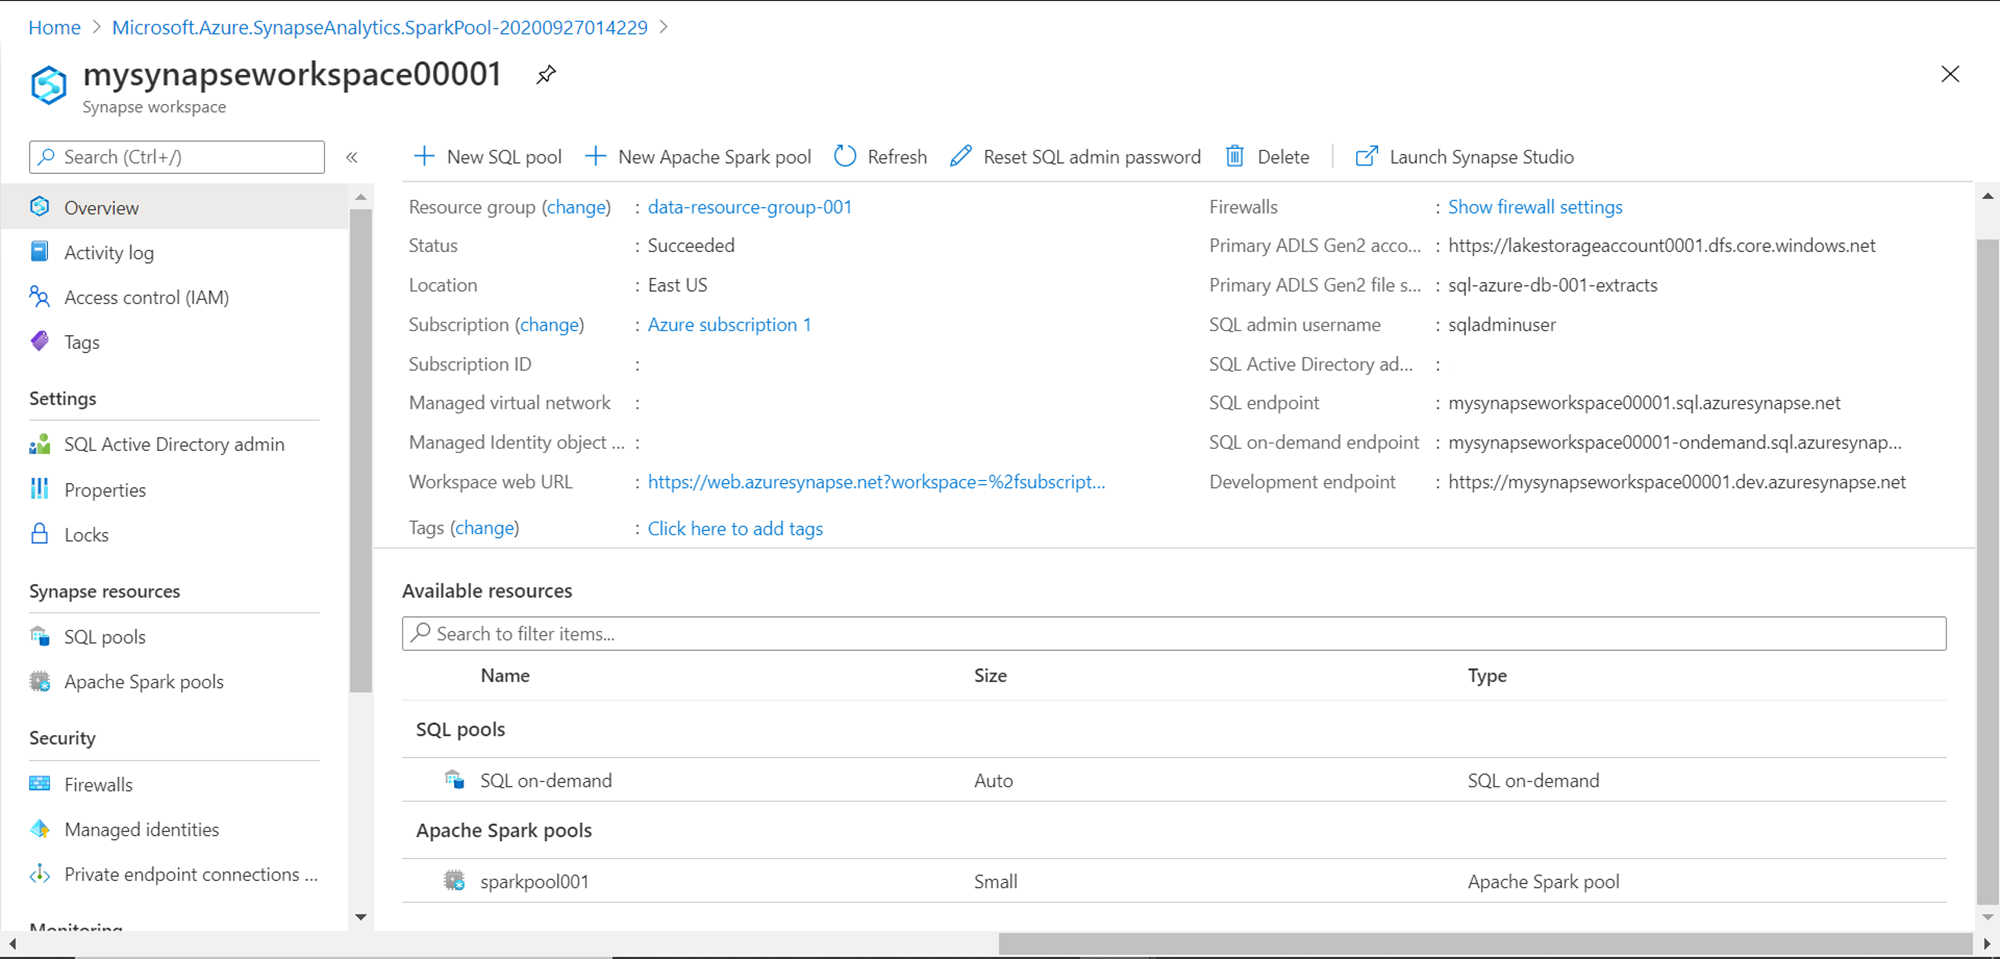
After the pool is created it would appear in the list of spark pools in the Azure Synapse Analytics workspace dashboard page as shown below. This would mean that the spark cluster got successfully created and provisioned. Now we are ready to use this pool. Click on the pool name listed under the Apache Spark pools section and explore the details of the spark pool to verify that it’s configured as we intended.
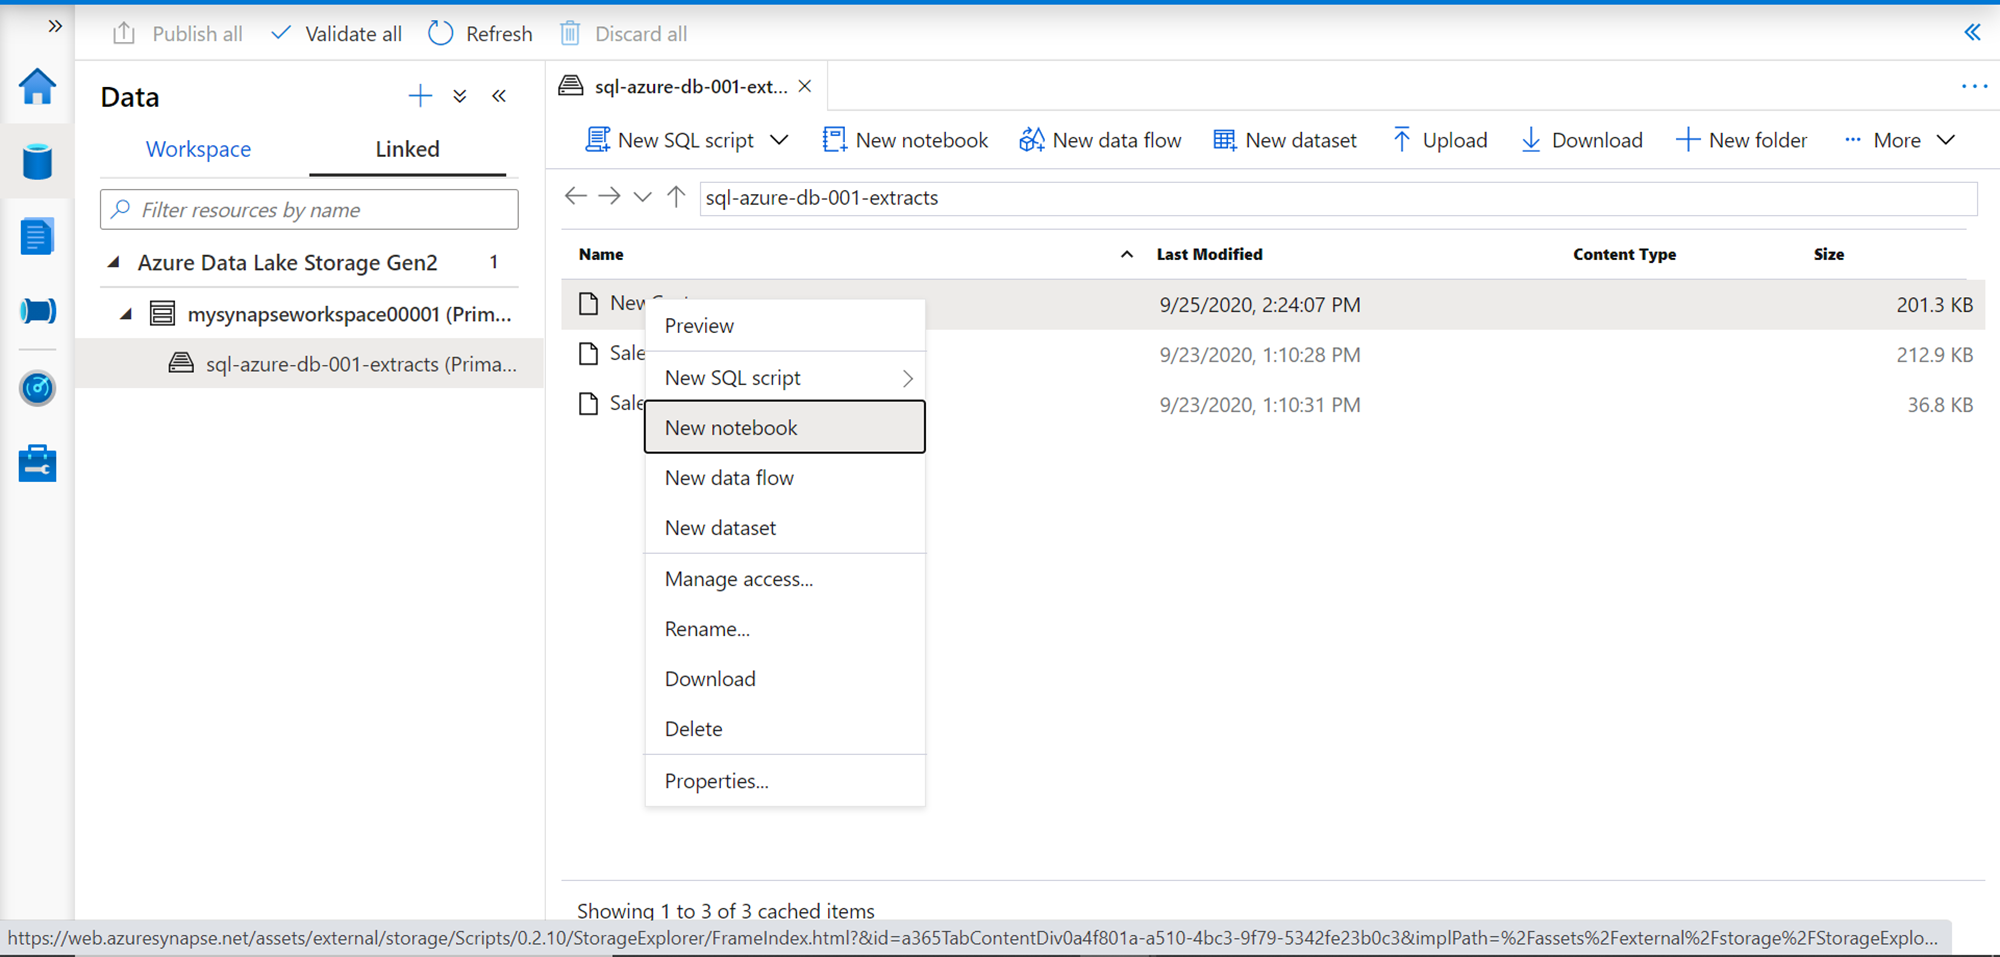
Now that the spark pool has been created, we need to test it by trying to access some sample data that we would have in the Azure Data Lake Storage account. For this, we need to navigate to the Azure Data Lake explorer. An easy way to do this is by open the Azure Synapse Analytics Studio. Click on the Launch Synapse Studio button from the toolbar pane. Once opened, click on the Data icon on the left pane. Click on the Linked tab, and it would show the associated Azure Data Lake Storage account that we would have specified while creating the Azure Synapse Analytics Workspace account. Expand this account, and you would be able to see all the files available in the Azure Data Lake Storage account as shown below. We operate a Spark pool using Jupyter style notebooks. An easy way to create a notebook with the script to access a given file is by selecting the file, right-click and click on the New Notebook menu option as shown below.
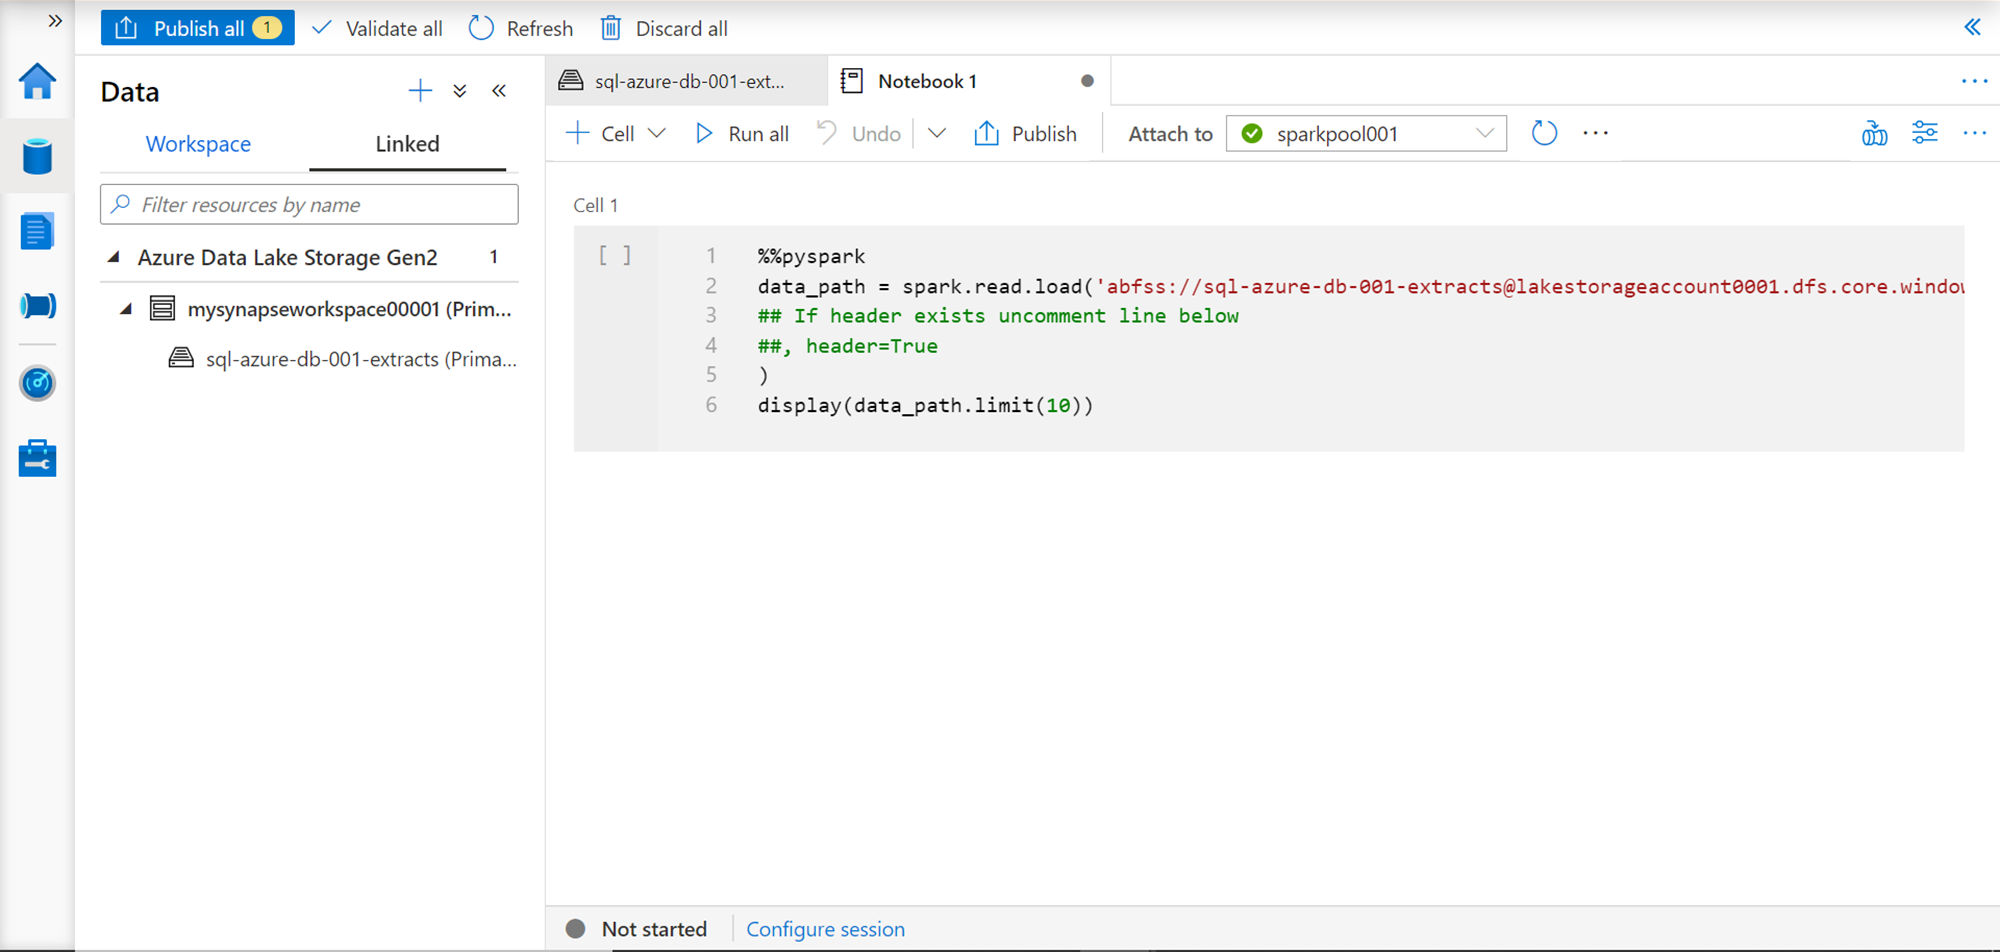
This would open a new tab in the explorer pane as shown below. If you look at the “Attach to” dropdown, you would find the name of the spark pool listed in it. Using the same notebook, one can also connect to a different pool. For now, we only have one spark pool, so we would be using the same. The script is created using Pyspark as shown below. The script just uses the spark framework and using the read.load function, it reads the data file from Azure Data Lake Storage account, and assigns the output to a variable named data_path. Once the data is read, it just displays the output with a limit of 10 records. This script can be modified as required before executing or publishing.
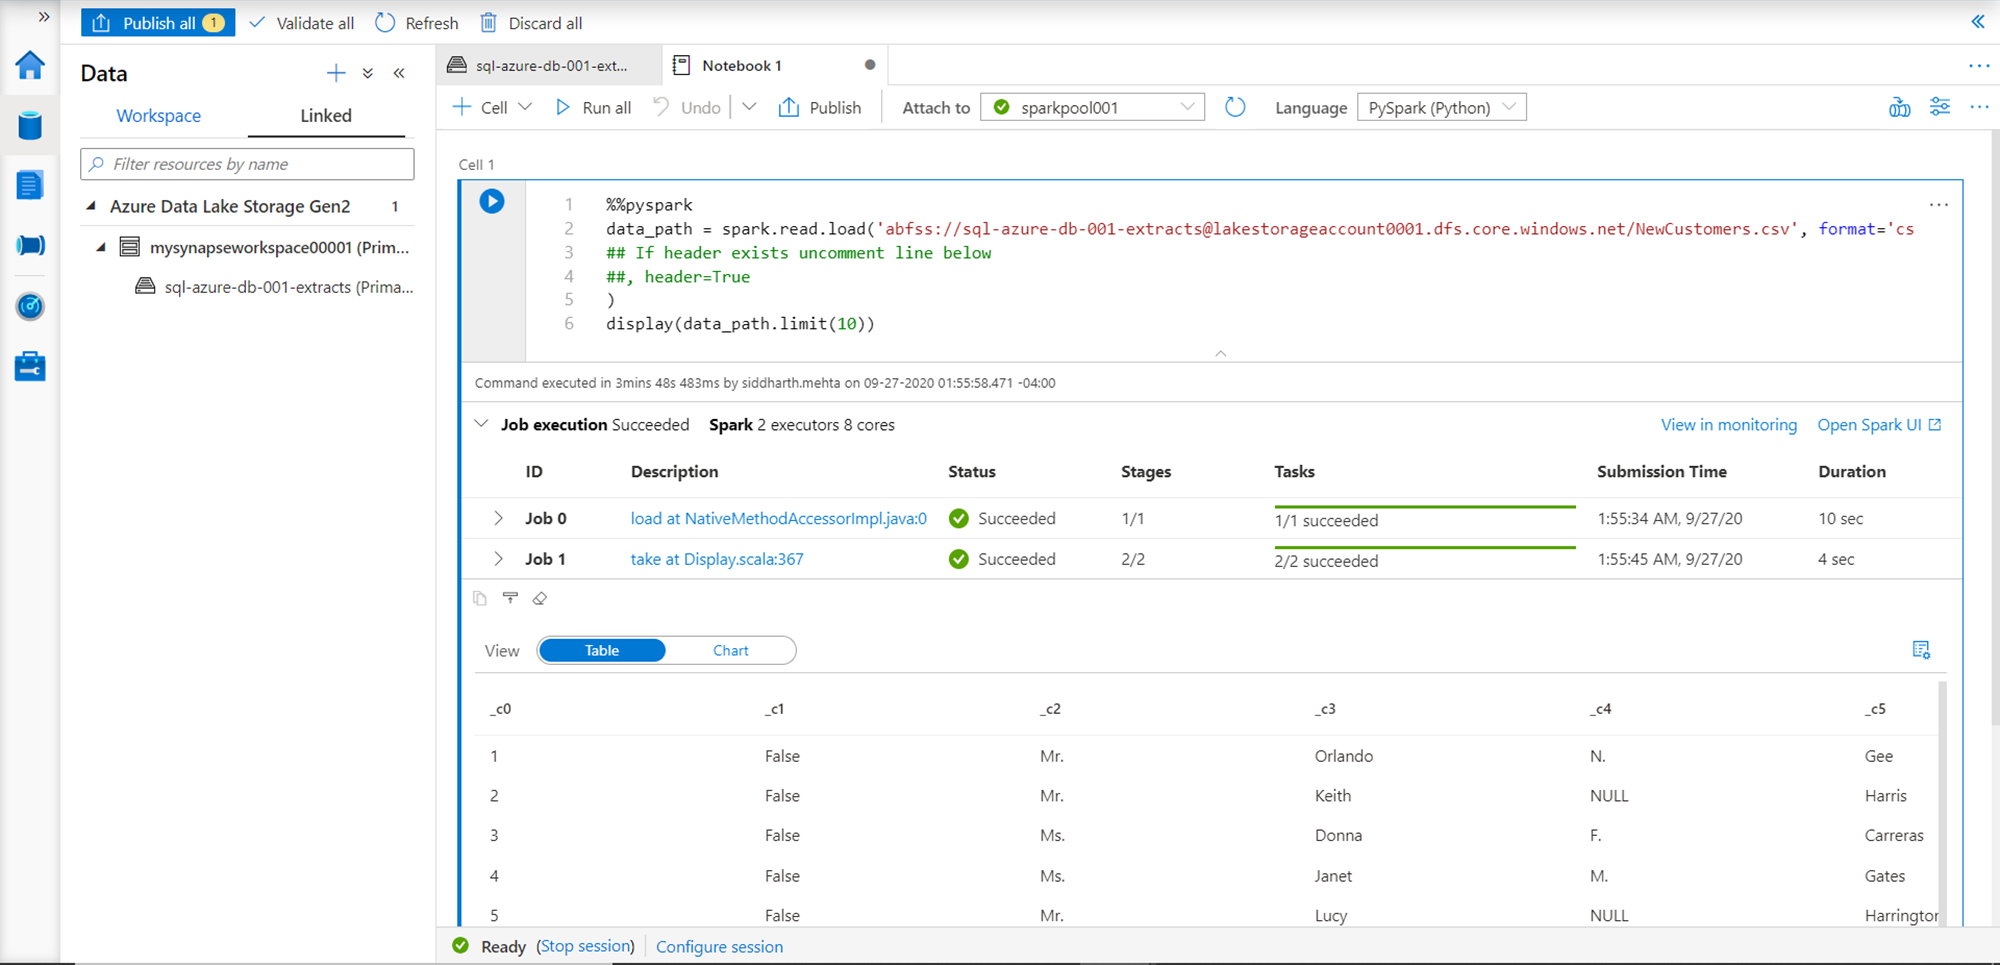
Click on the “Run All” button to start the execution of the script as a spark job. In a short time, you would find that the spark job execution would start, and the details of the execution would be visible as it progresses. Once the job execution completes successfully, the start of the job execution would change to Succeeded. It would also list the number of jobs and executors that were spawned and the number of cores that were used to execute the job. All the details can be seen in the Job section. The output of the script would be displayed below this section as shown below. This means that the spark pool is working fine and able to access the data from the Azure Data Lake Storage account as well.
In this way, we can create a spark pool in the Azure Synapse Analytics workspace and perform different types of analytics using the data from various data repositories supported by Azure Synapse and Synapse Spark pools.
Conclusion
In this article, we started with an existing Azure Synapse Analytics workspace account, and understood the different configuration settings to create a Spark pool.
Table of contents

He has worked internationally with Fortune 500 clients in various sectors and is a passionate author.
View all posts by Rahul Mehta
- Finding Duplicates in SQL - February 7, 2024
- MySQL substring uses with examples - October 14, 2023
- MySQL group_concat() function overview - March 28, 2023