

This article helps you create a dedicated SQL pool in Azure Synapse Analytics, which is the first step to set up a data warehousing environment in Synapse.
Introduction
In the previous parts of this article series of Azure Synapse Analytics, we learned how to work with Azure Synapse on-demand SQL pool, which is created by default while creating Azure Synapse Workspace. SQL on-demand pools are Query as a Service offering in the Azure Synapse Analytics ecosystem. It enables to access data from unstructured and structured data sources without the need to relocate the data in a centralized purpose-specific repository. While this may serve specific types of use-cases, there are use-cases that are not limited by the data processing limitations of the data hosting repositories like SQL Azure or SQL Data Lake Storage for example. SQL Dedicated pool provides a distributed query engine and the required feature and capabilities required for processing data warehouse types of workloads. Let’s go ahead and understand dedicated SQL pools in Azure Synapse Analytics.
Pre-requisites
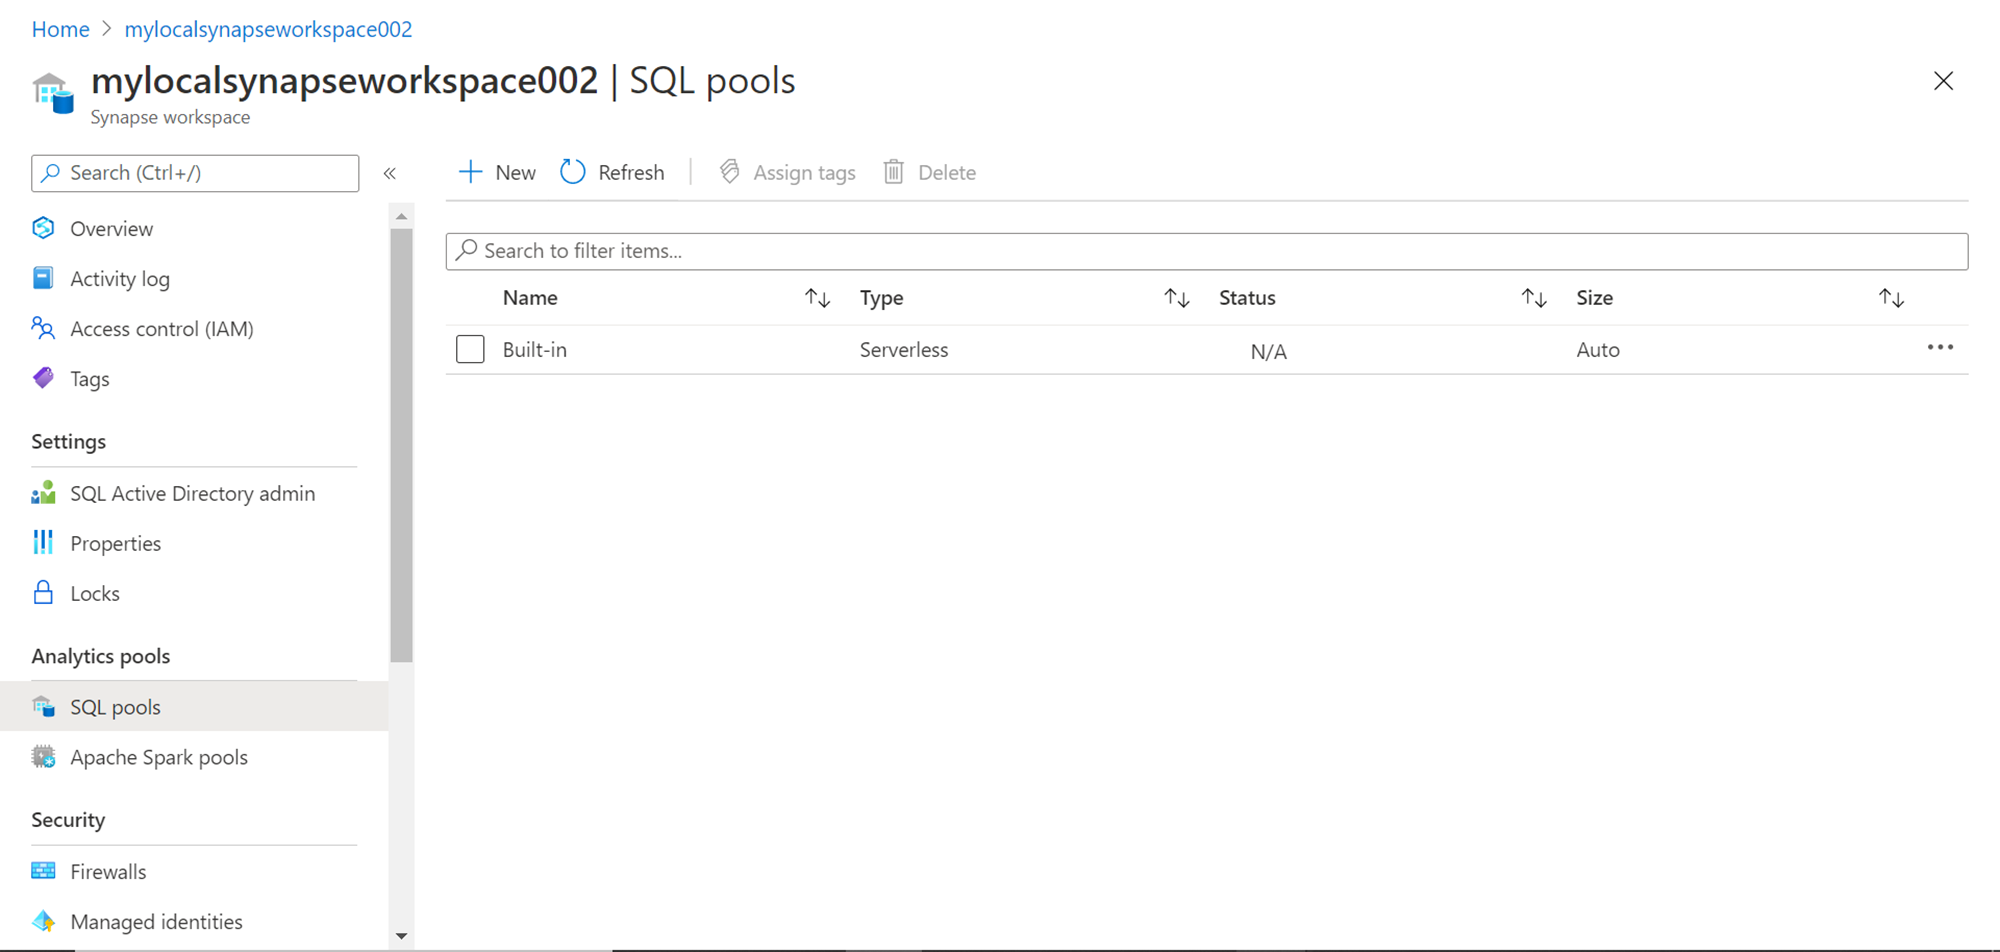
It is assumed that the Azure Synapse Analytics Workspace account has been created as explained in one of the previous parts of this series. If we have not created any dedicated SQL pools earlier, when we click on the SQL pools menu option under the Analytics section, it would look as shown below. The only SQL pool that would be available in the list is the serverless SQL on-demand pool.
Creating Dedicated SQL pools
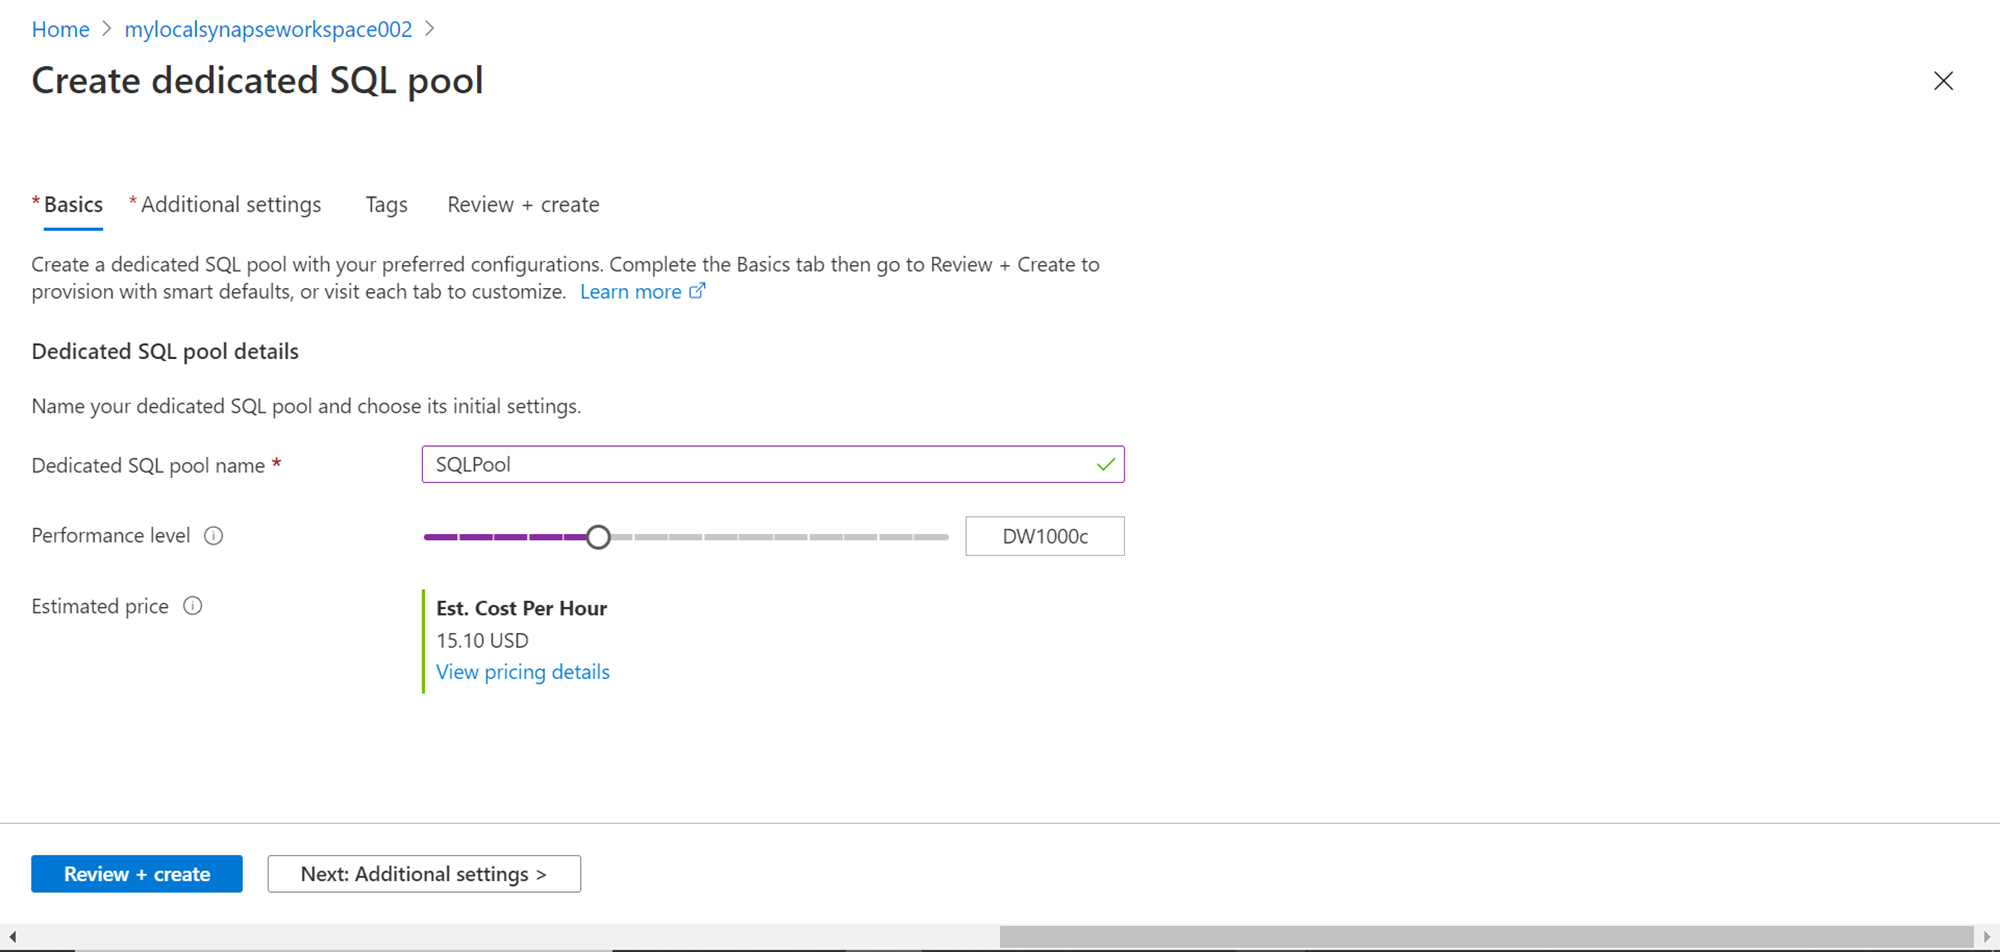
We intend to create a new dedicated SQL pool. For this purpose, click on the New button and it would open the “Create Dedicated SQL pool” wizard as shown below. The first detail that we need to provide is the name of the SQL pool. Provide an appropriate name as shown below. The next very important configuration is performance level selection. By default, the selection would be DW1000c, which means 1000 data warehouse compute units. The important point to take note of is the cost, which would be $15.10 per hour. If this pool is kept live throughout the month (30 days), this would cost $10,872. So, one needs to select the capacity based on cost budget vs performance requirements. To understand what scale of performance can be expected from DW units, one can refer to this link which explains the limits and performance levels translations of DWUs.
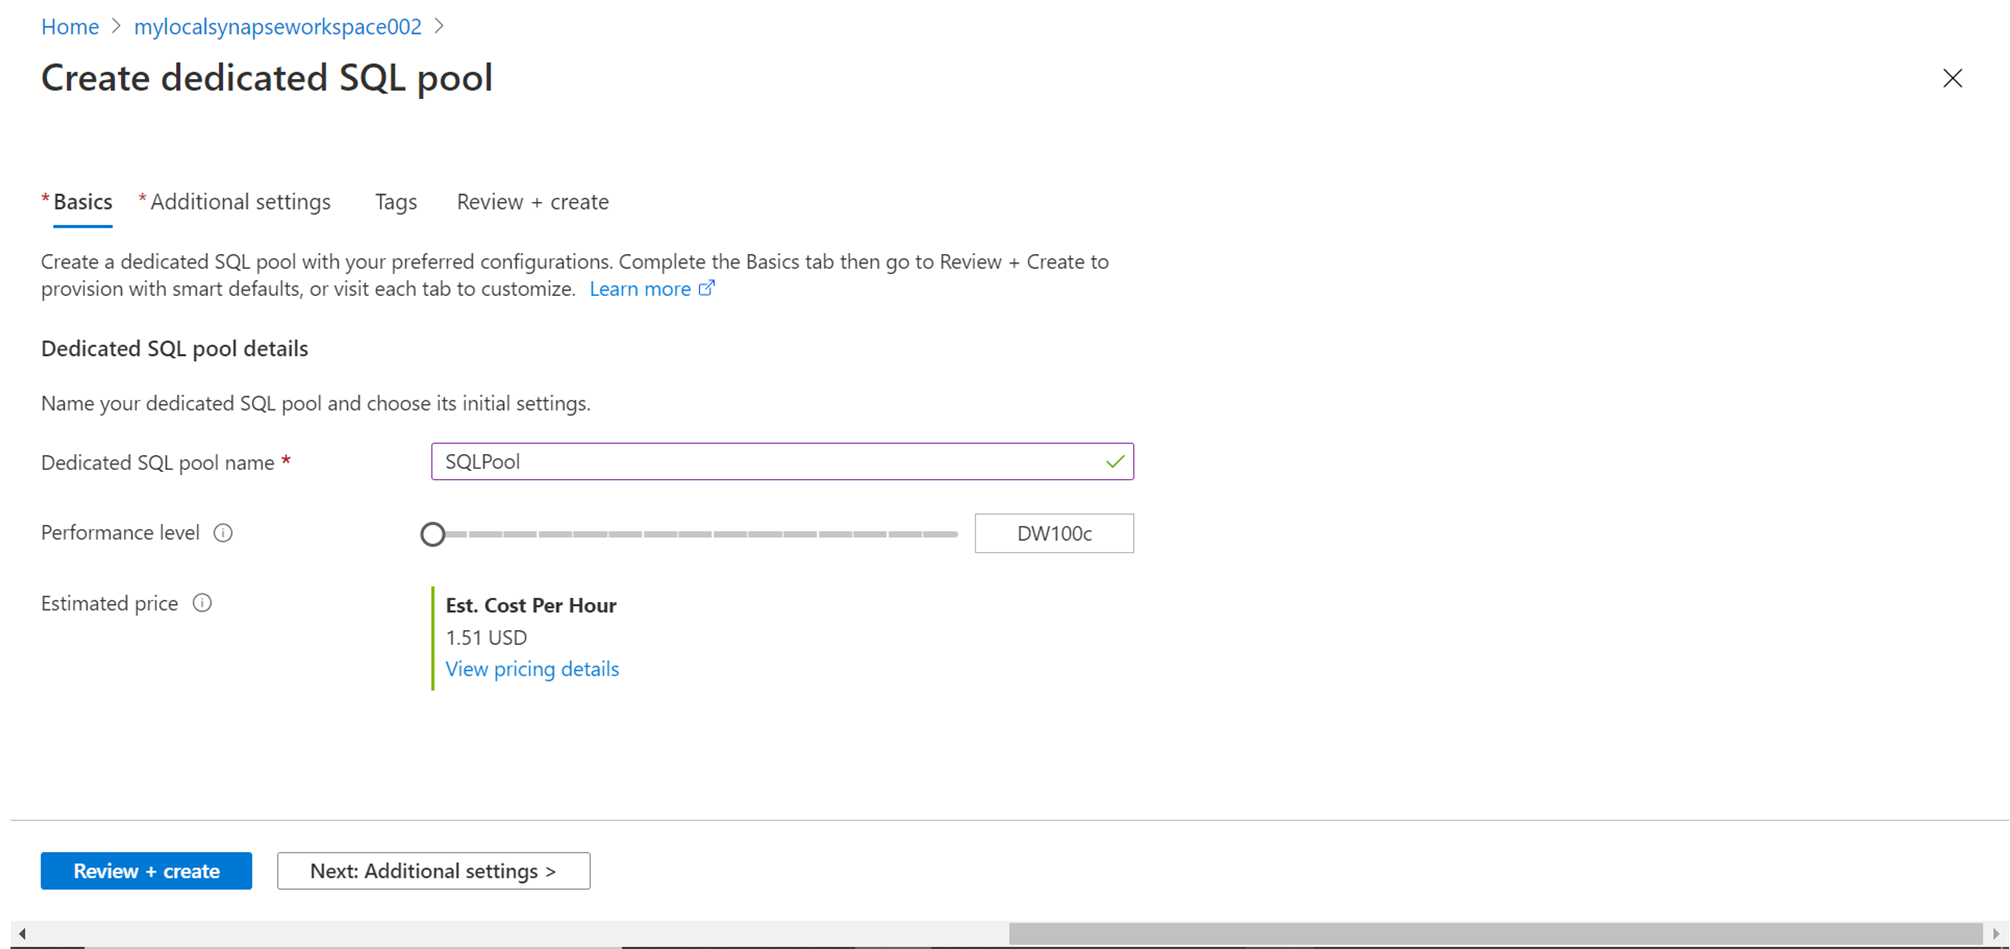
For demonstration purposes, we do not need such high capacity, so we can scale down to the lowest capacity unit, which is 100 units as shown below. This would incur a cost of $1.15 per hour which is much more reasonable for our use-case. After selecting the performance level, click on the Next button.
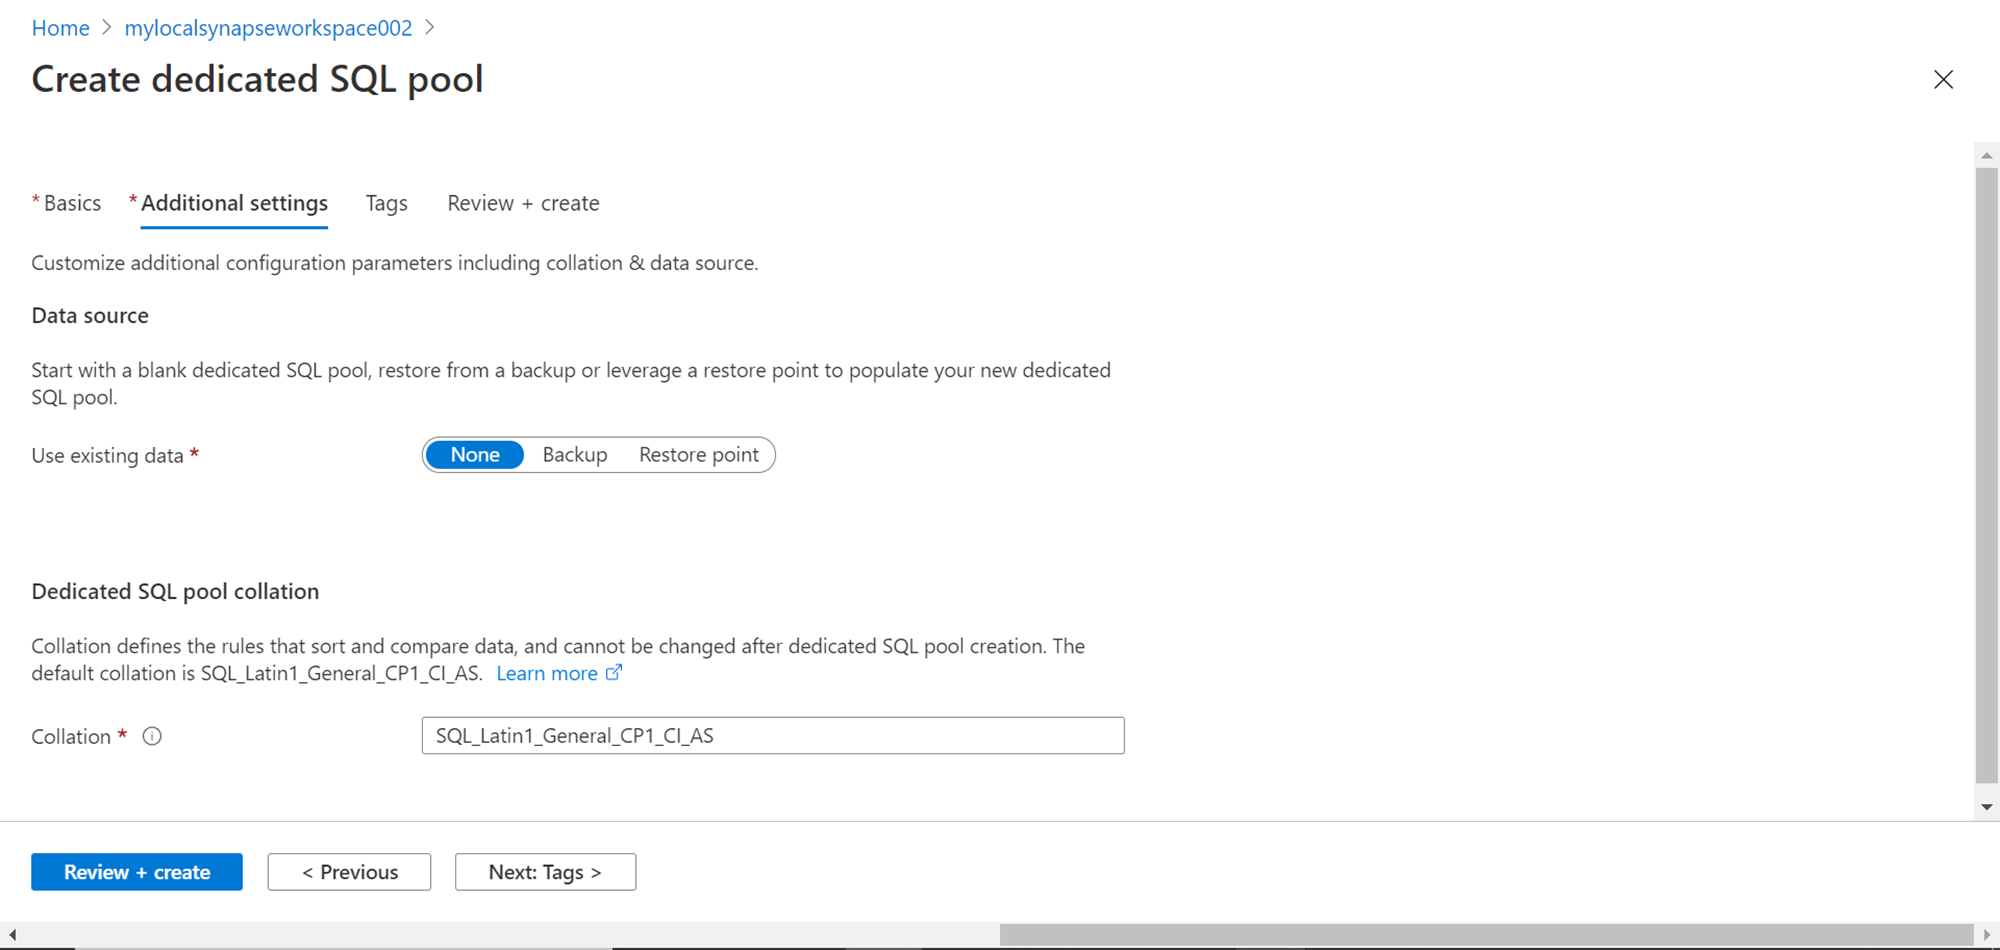
In this step, we have the option to use existing data or create an empty pool, which we can populate later. By default, the selection is None, which means it would create an empty pool. In case, one has a previous backup created, the same can be restored here to create a pool from the existing data. Also, the pool can be created from an existing restore point as well. For now, we will proceed with an empty pool and continue with the default setting. One can change the default collation of which is CP1 and case insensitive. We just intend to learn how to create the pool, so we continue with the default setting for now, and click on the Next button.
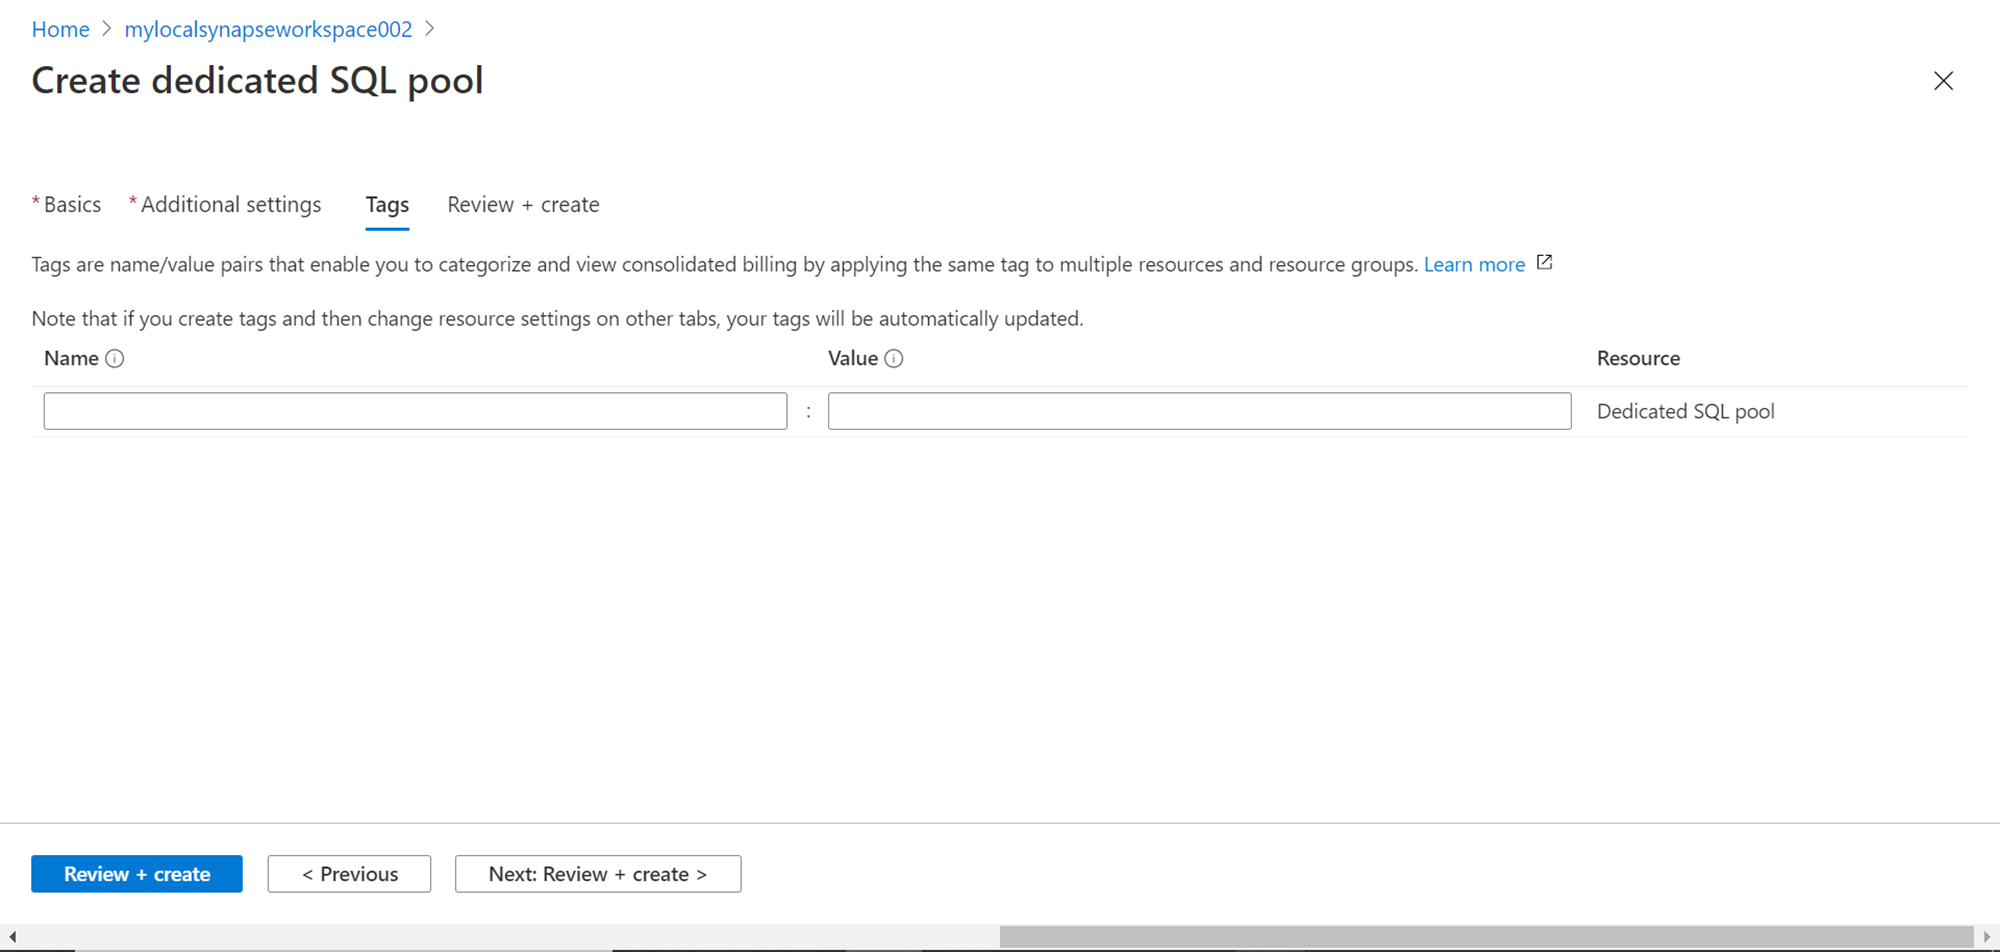
In this step, provide any tags for the pool to add metadata like the owner of the pool, environment of the pool, the purpose of the pool etc. This is an optional configuration, so we can leave it blank for now and proceed to the next step.
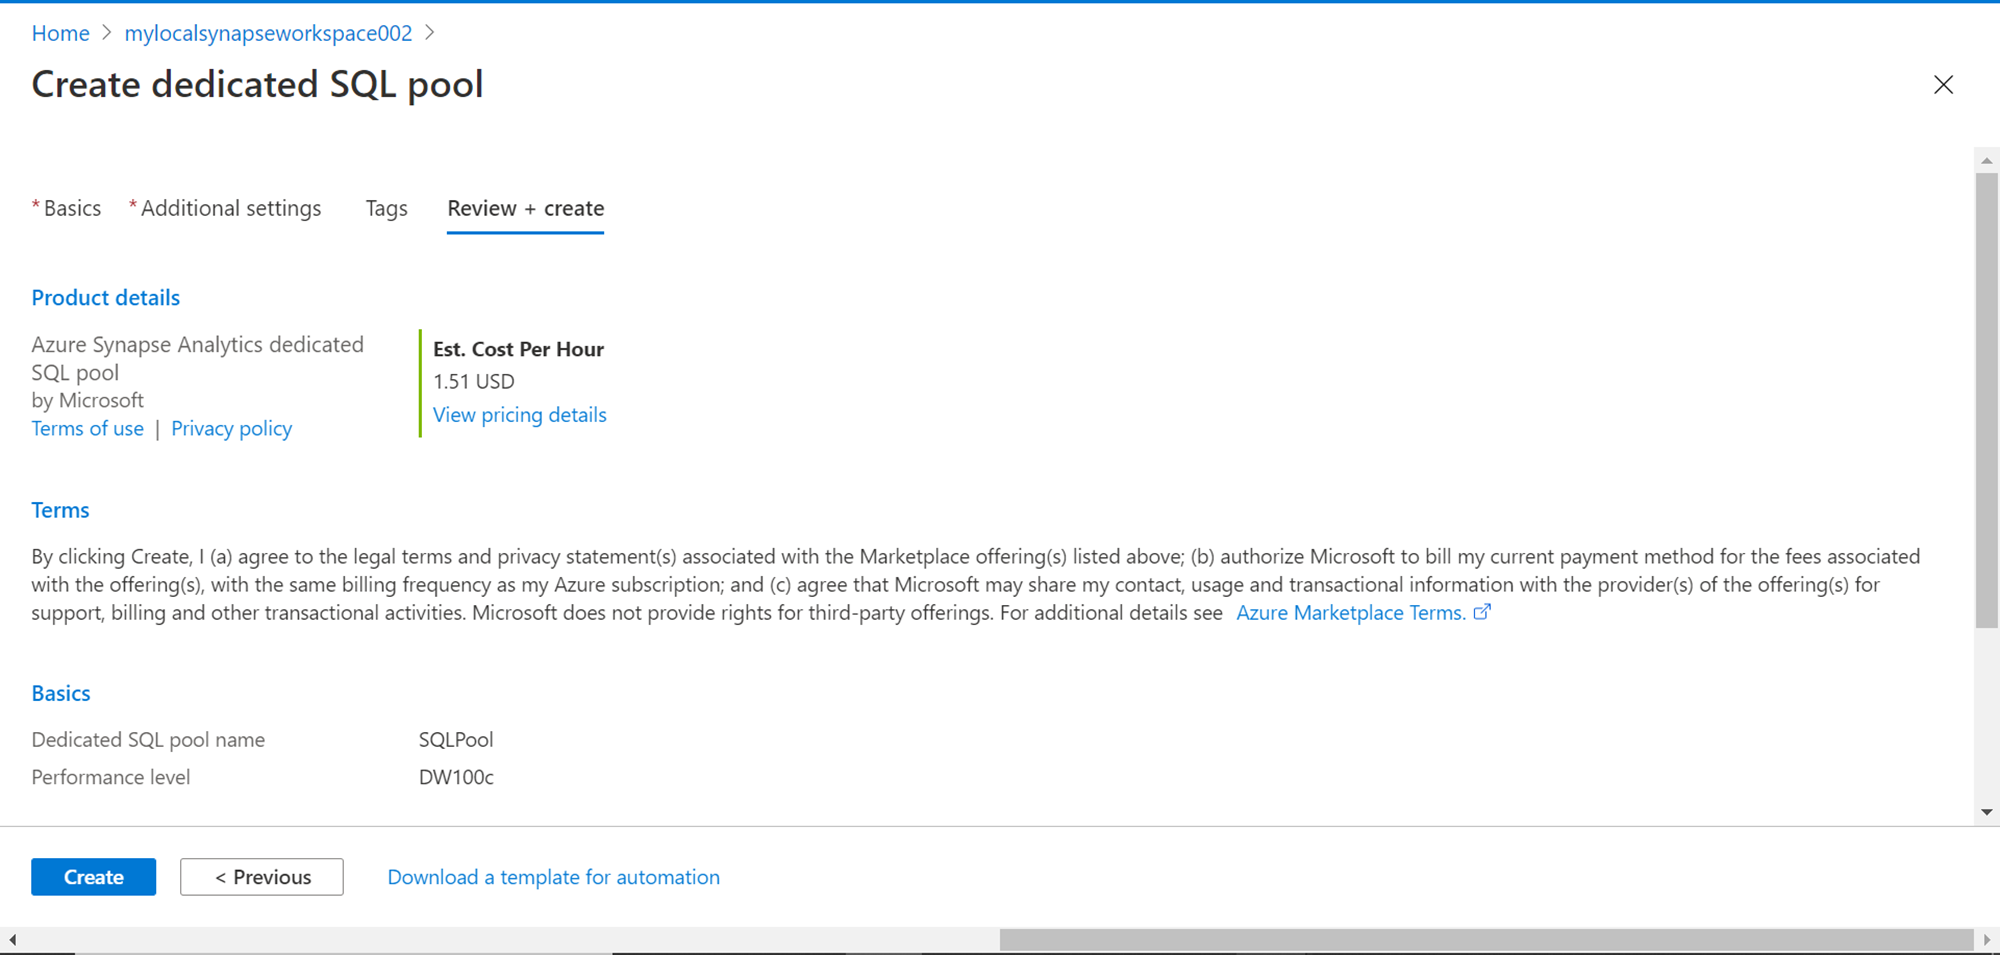
We are done with the configuration now. In this step, review the configuration settings, and click on the Create button to start the deployment and creation of the dedicated SQL pool. At times, you may encounter an internal server error when the pool deployment is in progress. This may be the case as the service is in preview as of the draft of this article. If you encounter such an error, delete the deployment, and follow the steps explained above and the deployment may go through fine.
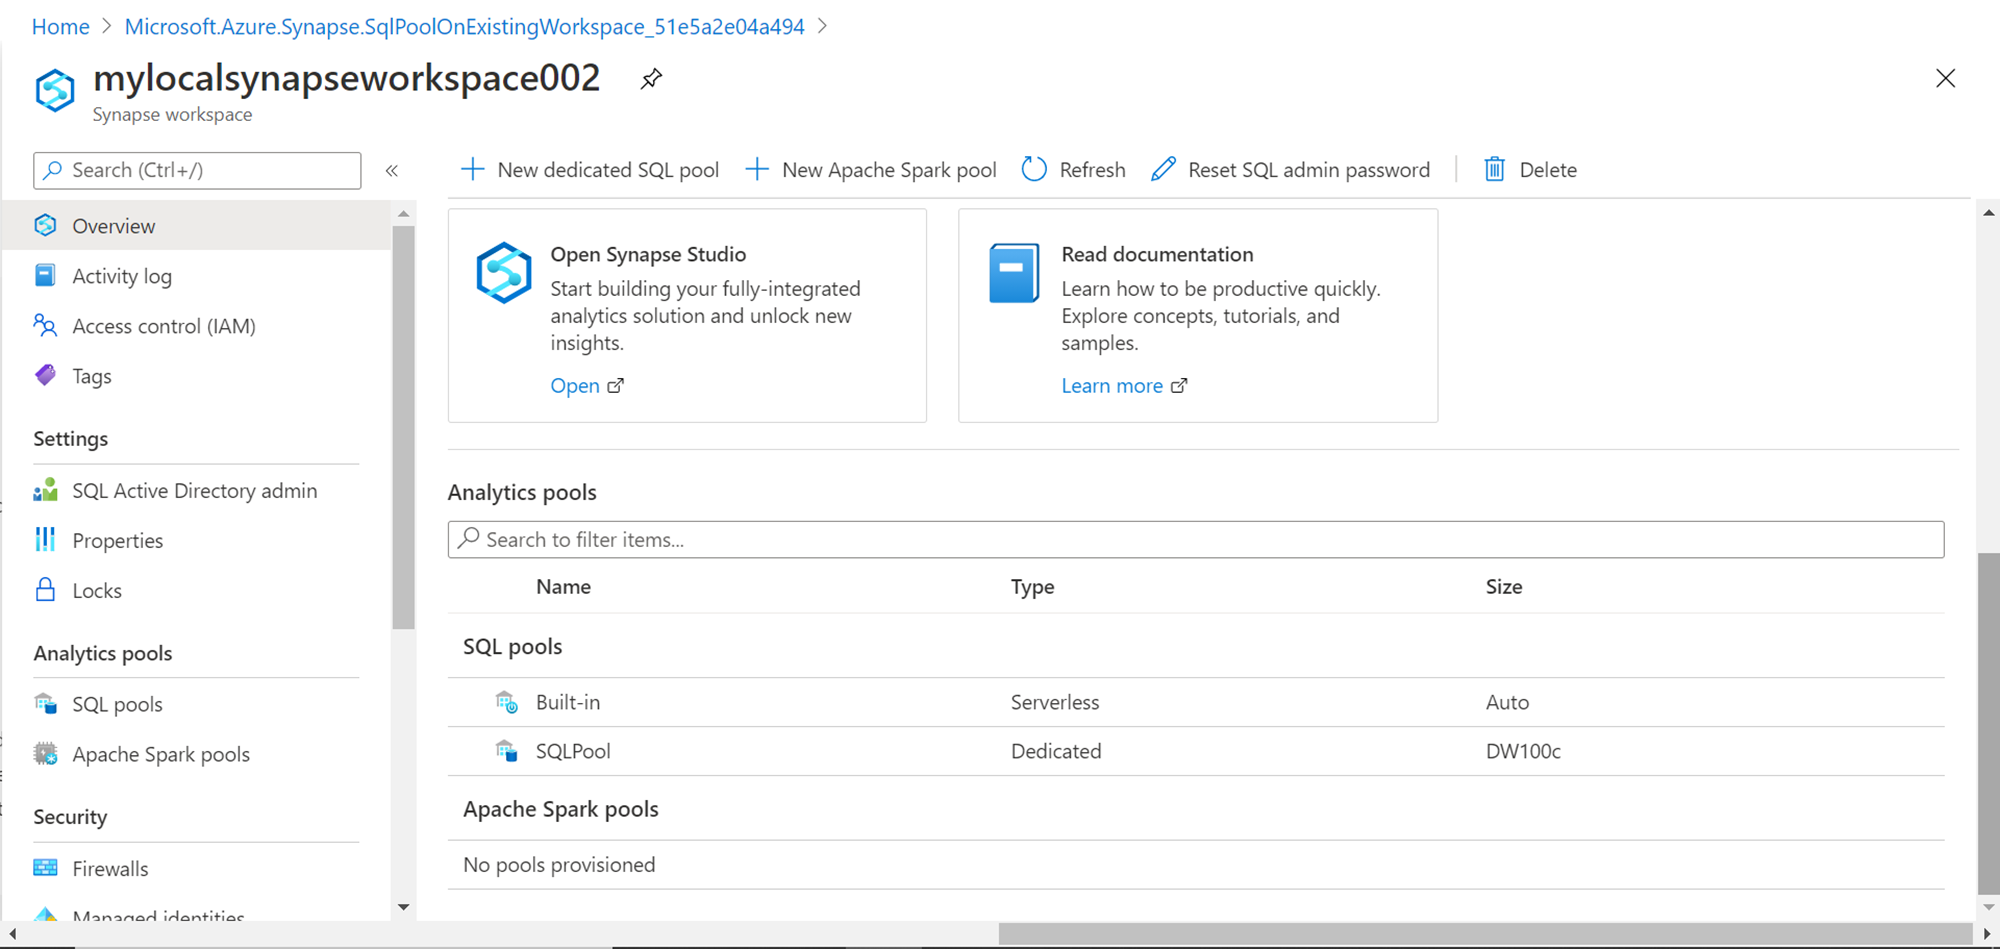
Once the deployment is successful, click on the open resource button. That would navigate us to the Azure Synapse Analytics workspace. Scroll down on the workspace page, and you would be able to find the newly created pool listed under the SQL pools section as shown below. If you carefully check the type of the newly created pool, you would find that it’s mentioned as “Dedicated”, and the size of the tool would also be listed as shown below.
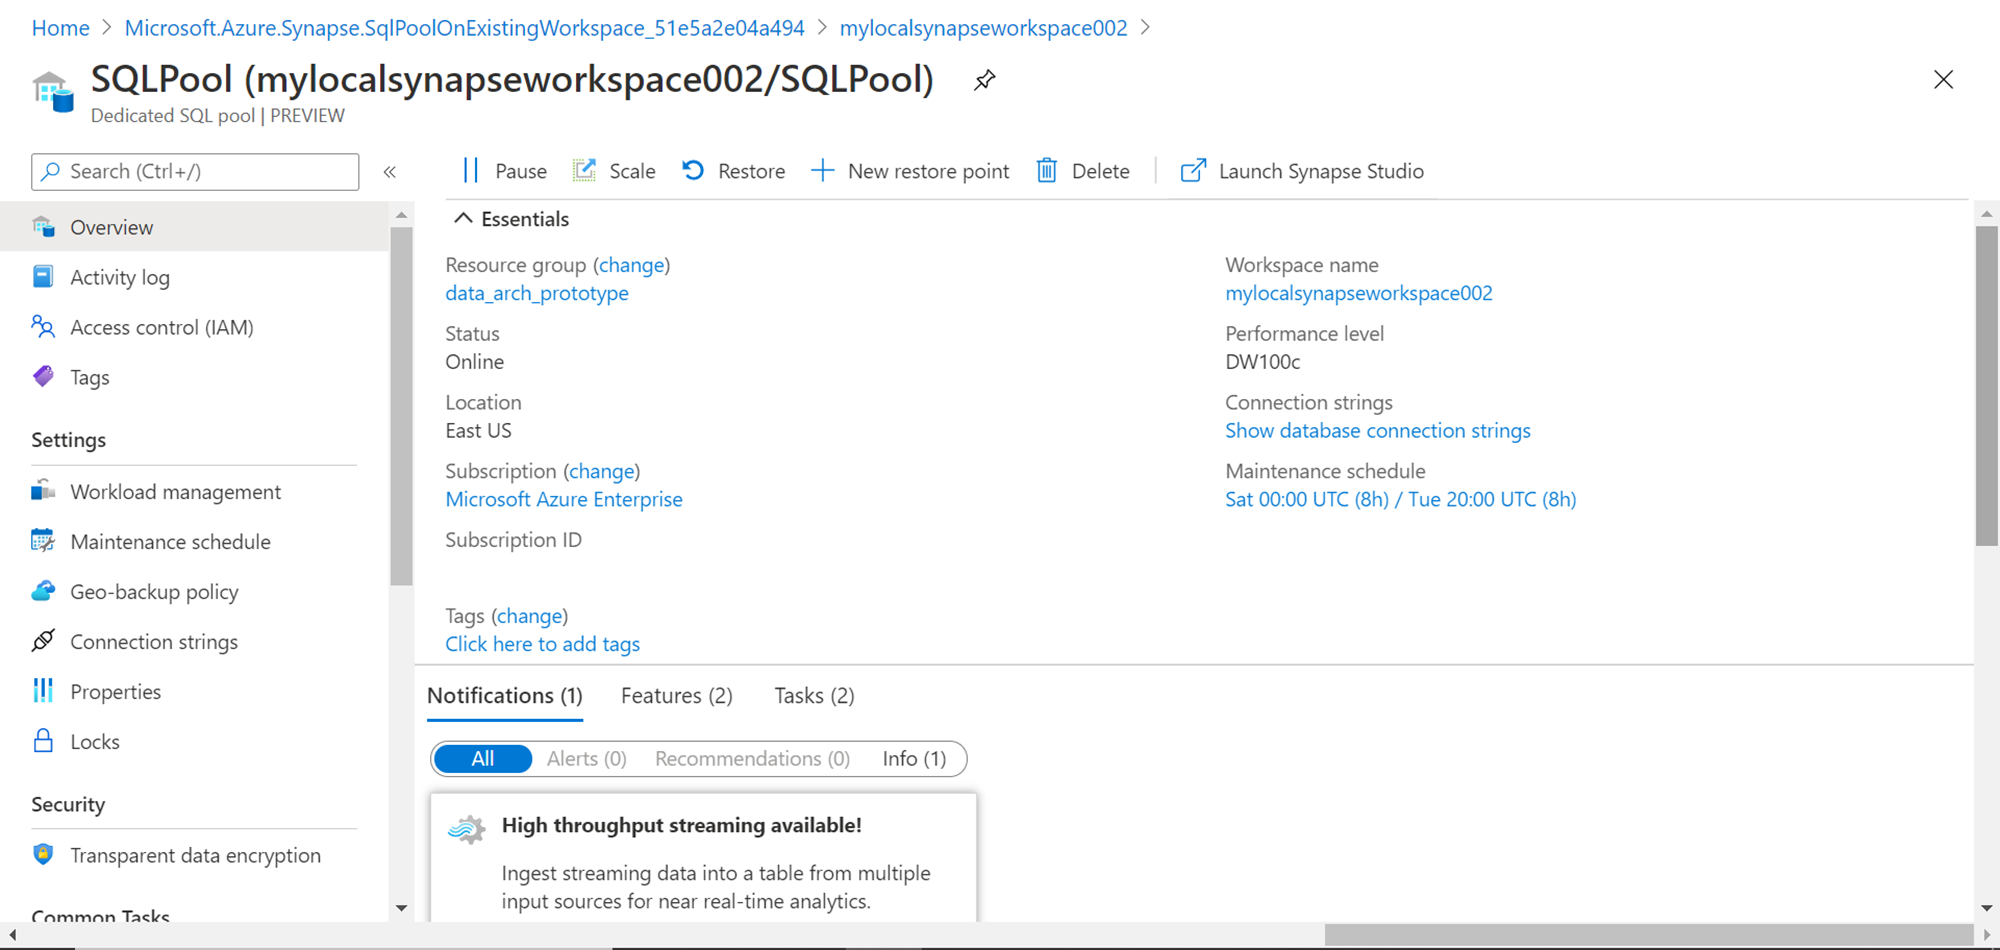
To start working with this pool, click on the pool name and it would open a screen as shown below. This is the dashboard page of the pool. If you read the name of the pool, it shows the name of the workspace followed by a “/” and then the name of the pool, which means that the pool is part of this workspace. The different features and configurations related to this pool like activity logs, access controls, tags, workload management, maintenance schedules, properties, encryption, etc. can be seen on the left-hand pane as shown below. On the toolbar, we can find options related to the administration of the pool like pausing the pool, scaling the pool, creating restore points, launching Synapse Studio to work with this pool, etc. The bottom pane shows monitoring related information like notifications, takes and features.
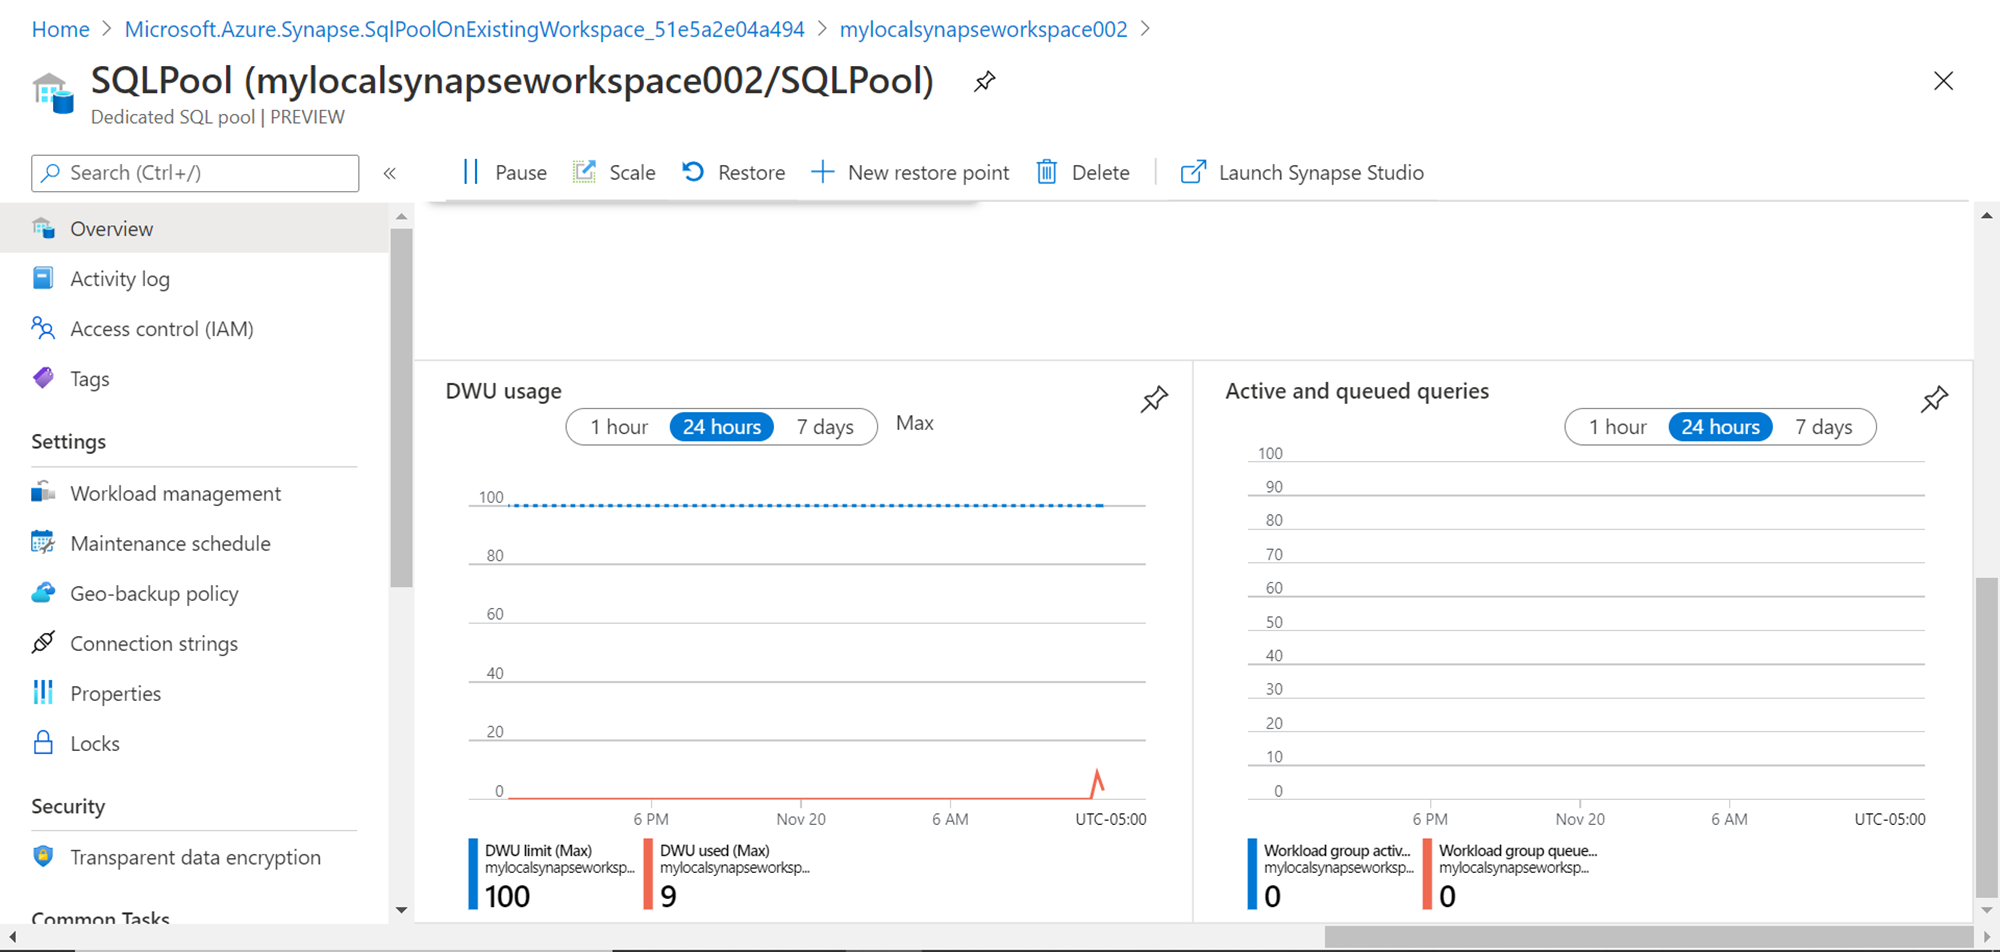
Scroll down and you would be able to see charts as shown below. In the DWU usage metrics chart, we can see that the maximum DW used is very low as we have not yet started using the pool. The active and queued queries reflect the same with zero queries. This can be a quick way for administrators to keep a check on the utilization of the pool.
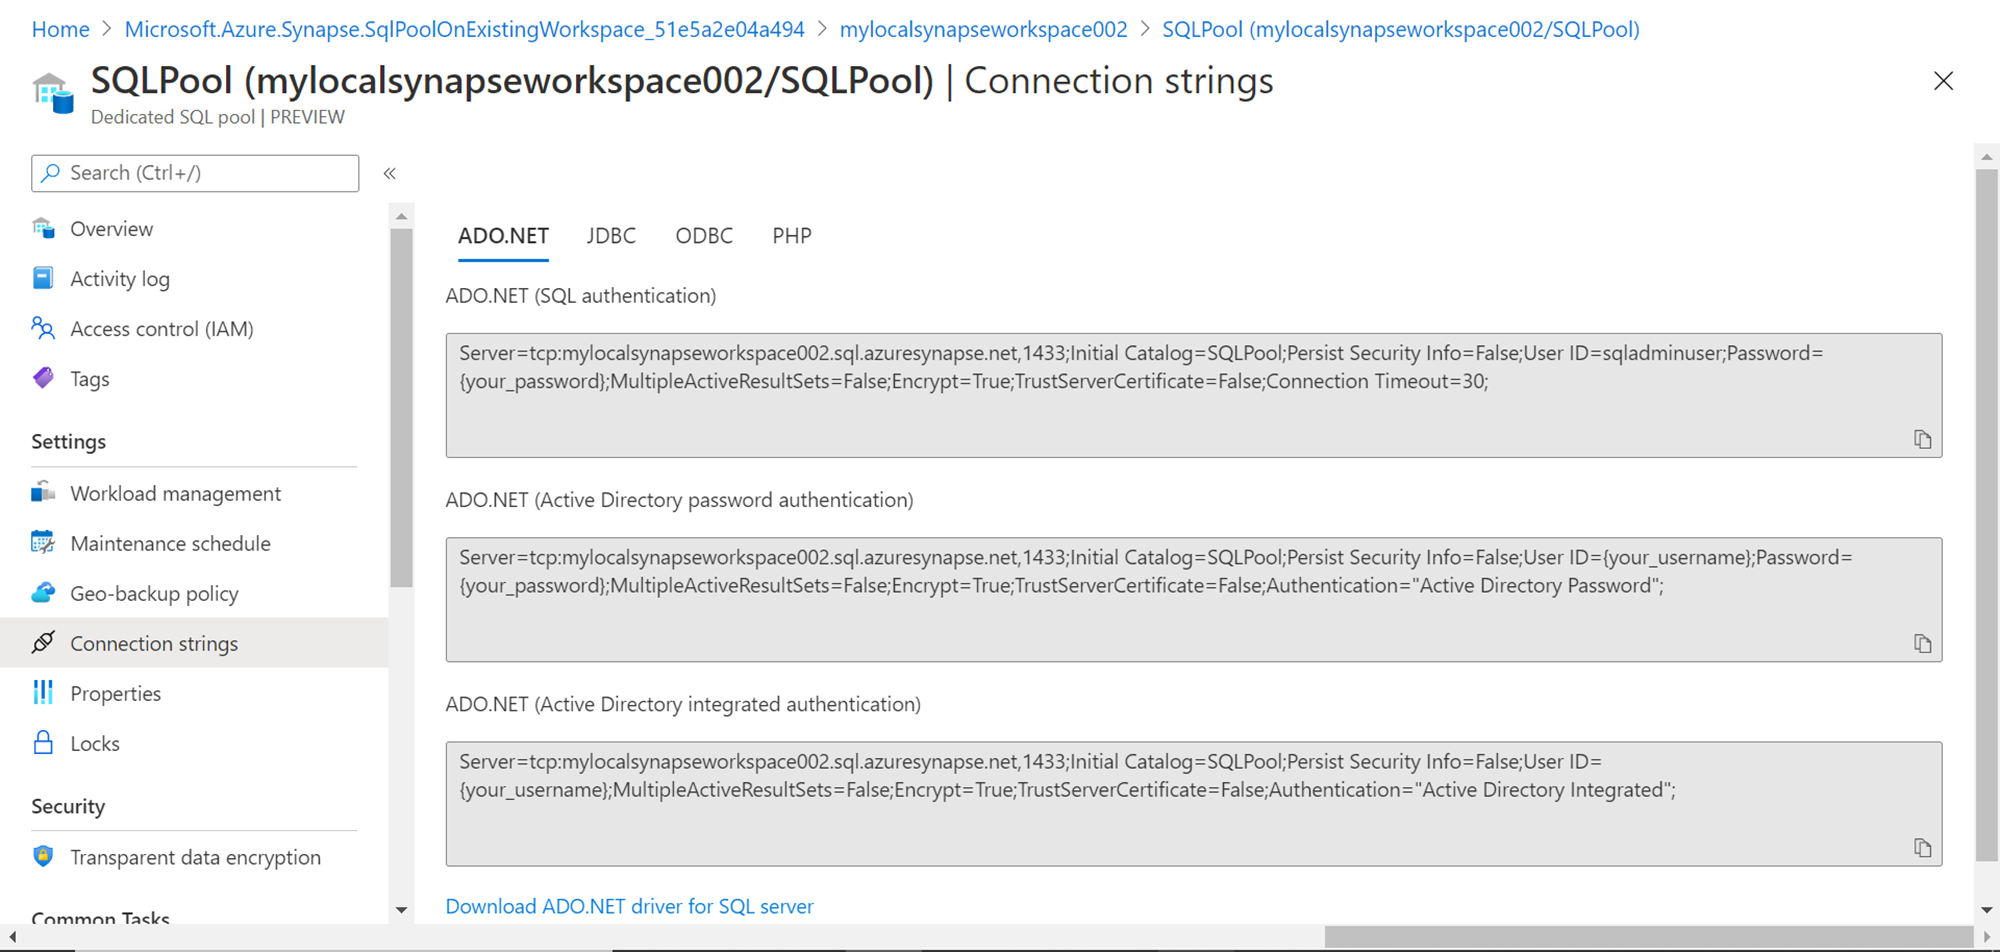
Once this pool is created, we may intend to use this pool from different tools, IDEs and applications. For this purpose, the first thing that we need is a connecting string using different protocols like JDBC, ODBC, ADO.Net. We may also need specific drivers based on these protocols that allow us to connect to the dedicated SQL pool. Scroll up the page and click on the Connection Strings link, which would open a page as shown below. This page lists all the supported types of connectivity, connecting string templates and links to download supported drivers as well.
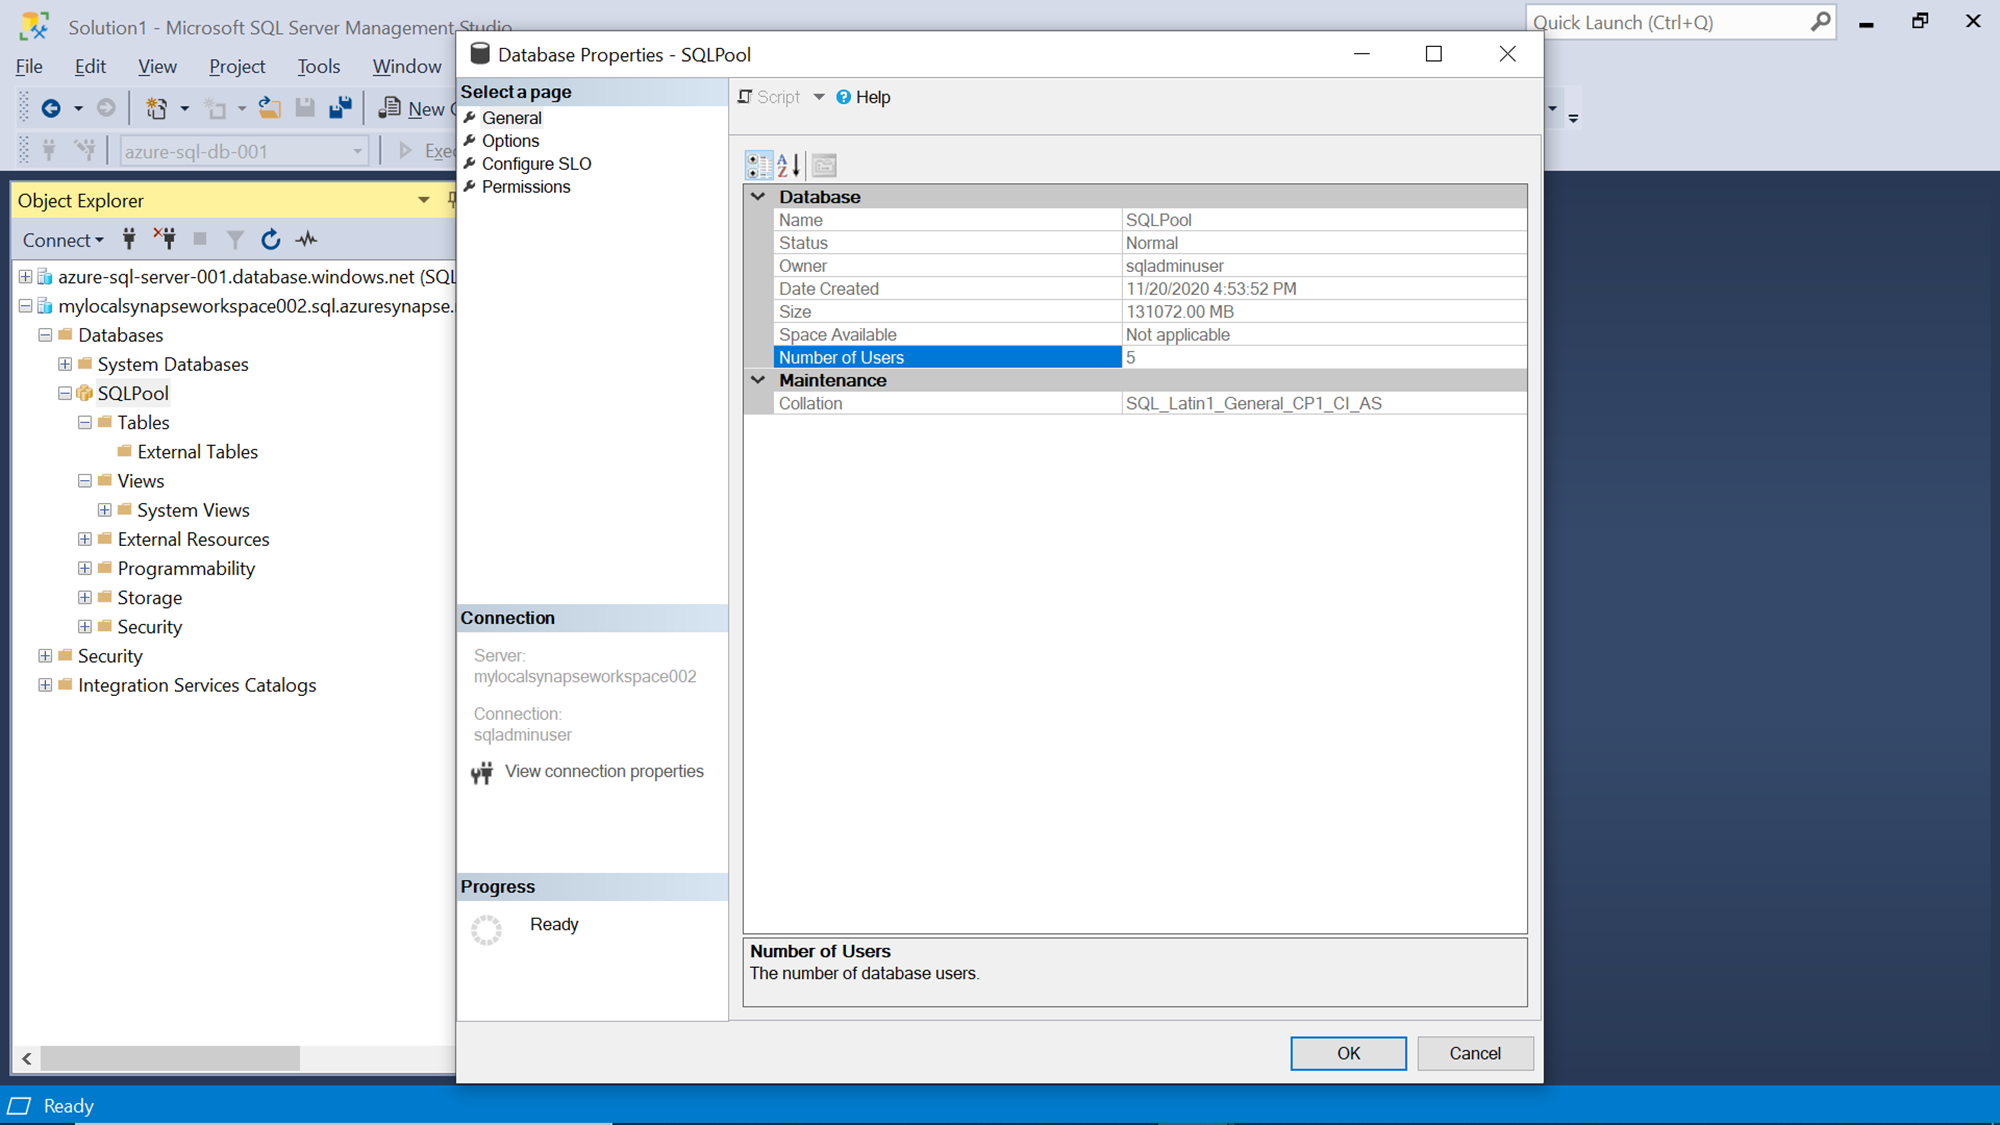
Developers, Admins, Analysts and other data engineering teams generally using SQL Server Management Studio as their primary tool to explore the database and related objects. To connect to the Azure Synapse Analytics dedicated SQL pool from SSMS, navigate to the Synapse workspace home page, use the endpoint as well as credentials and connect to the same. Once connected, you would be able to find the pool listed as shown below. If we expand the pool, we can see the object hierarchy supported by the pool like Tables, Views, Programmability, etc.

Right-click on the pool and click on the properties icon to check the different properties of the SQL pool as shown below. This would have four tabs – General properties, Options, Configure SLO (Service Level Object), and Permissions. Consider exploring these options and values to understand the configuration of the pool.
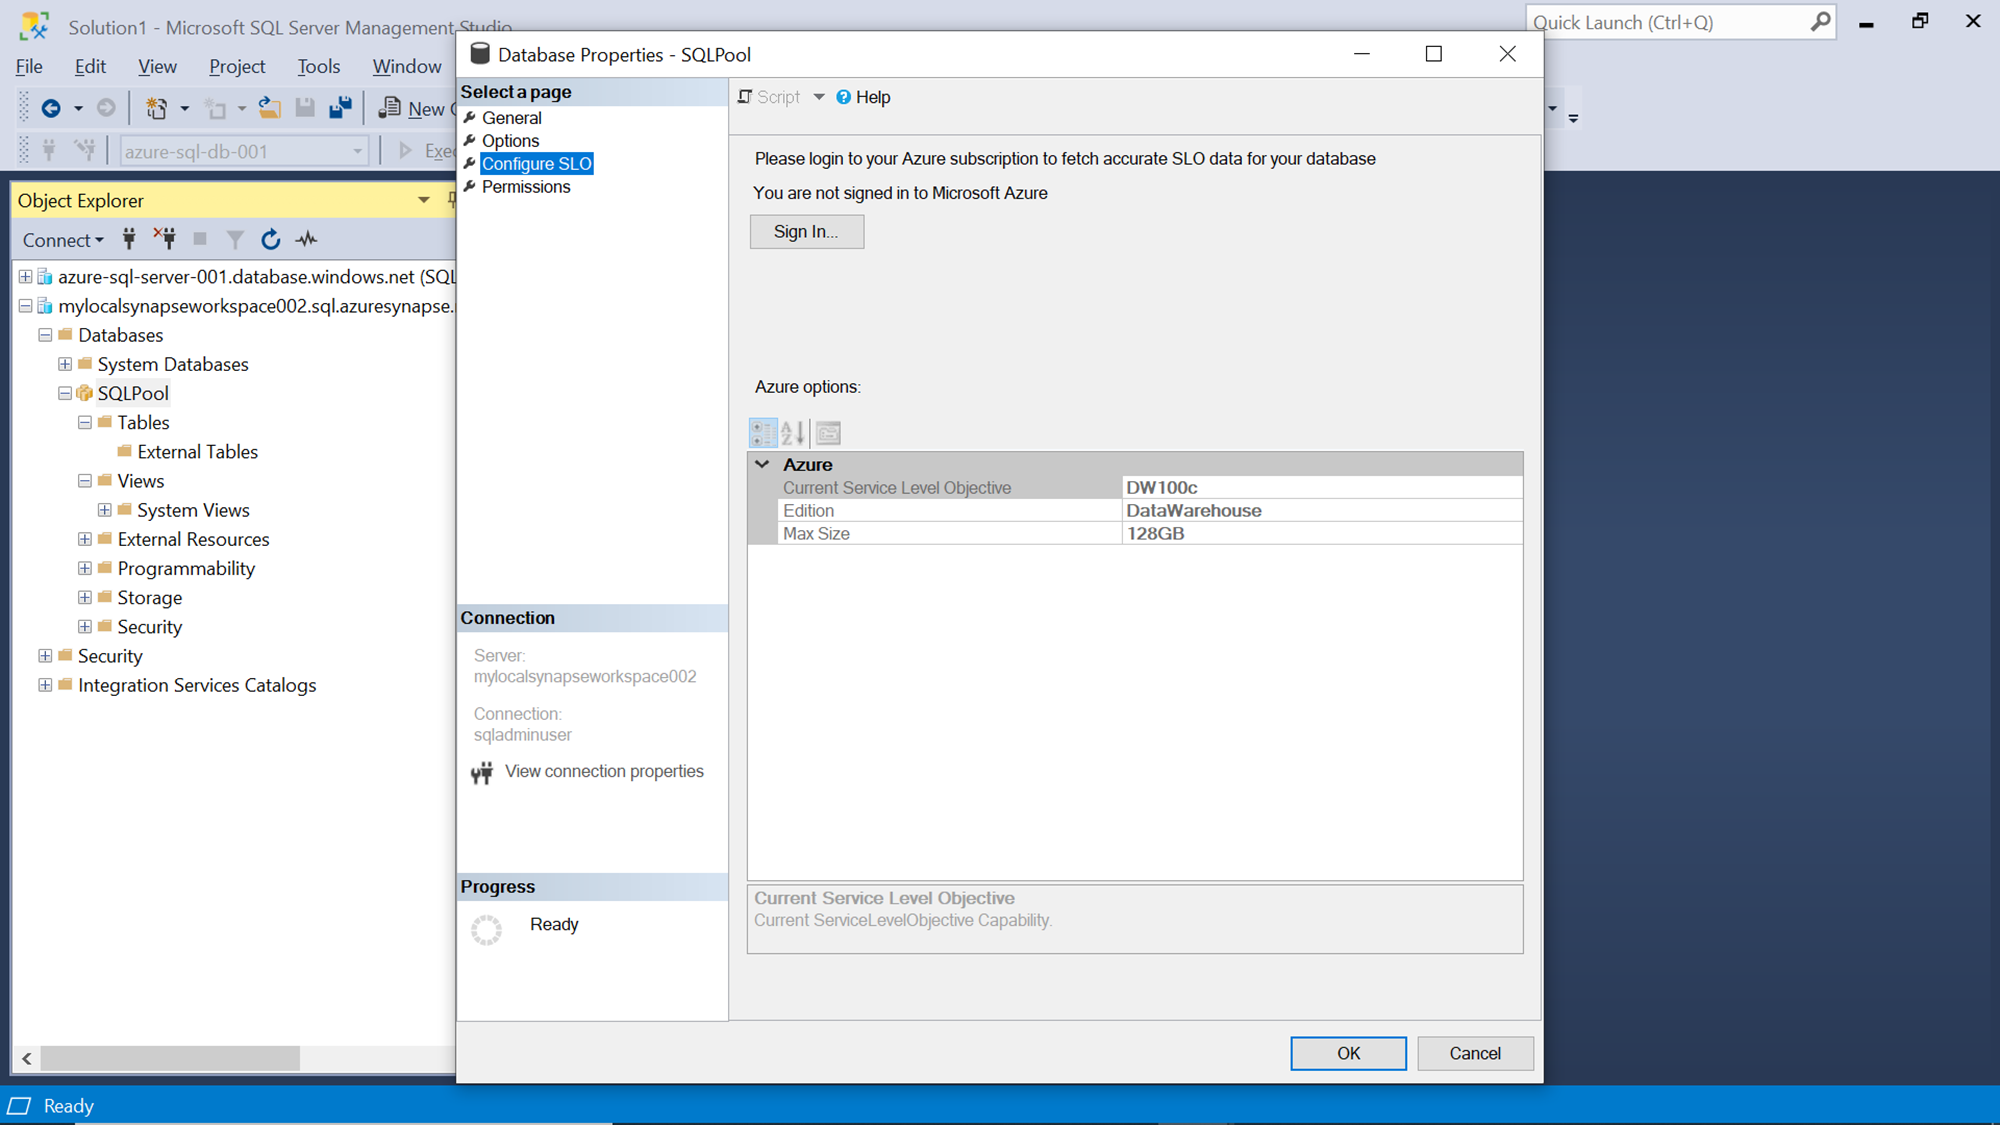
If you click on the Configure SLO tab, you would be able to find the sizing details of the pool as shown below.
In this way, we can create an Azure Synapse Analytics dedicate SQL pool, connect to it using Synapse Studio or SSMS, and get started with it.
Conclusion
We started with an existing setup of Azure Synapse workspace and learn the different configurations required to create a dedicated SQL pool in Azure Synapse Analytics. We explored the administration interface provided by the Azure console to operate this pool and learned how to connect to this pool using SSMS.
Table of contents

He has worked internationally with Fortune 500 clients in various sectors and is a passionate author.
View all posts by Rahul Mehta
- Finding Duplicates in SQL - February 7, 2024
- MySQL substring uses with examples - October 14, 2023
- MySQL group_concat() function overview - March 28, 2023