

In this article, we will learn how to populate data from the Azure SQL database into Azure Synapse Analytics using SQL Server Integration Services (SSIS).
Introduction
In the previous parts of the Azure Synapse Analytics article series, we learned how to create a SQL on-demand pool, dedicated SQL pool as well as Apache Spark pool. Once the pool gets created, we also learned earlier how to create tables in those pools. One can create external tables as well as native tables in those pools. There are different mechanisms to populate these tables from a variety of sources. One of the most basic use-cases is to populate Azure Synapse Analytics tables in dedicated SQL pools from data hosted in the Azure SQL database. This use-case is applicable when one intends to analyze large scale transactional data hosted in Azure SQL Database using the distributed, parallel processing, OLAP style engine of Azure Synapse Analytics with the dedicated SQL pool. In this article, we will load data from Azure SQL Database into Azure Synapse Analytics using SQL Server Integration Services (SSIS).
Pre-requisites
There are certain pre-requisites that need to be in place before we can focus on the actual task of using SSIS to populate data from source to destination. The first thing we need in place is the source and destination repositories. In this case, the source would be the Azure SQL database with some sample data in it. And destination would be Azure Synapse Analytics workspace with a dedicated SQL pool created in it. You may have an empty pool or a pool with data already in it. Either way, it would work. It is assumed these source and destination repositories are in place along with sample data in the Azure SQL Database instance.
Next, we need SQL Server Data Tools with the templates related to SSIS, so that we can create an SSIS package that can connect to Azure-based source and destination repositories. It is assumed that these tools and frameworks are already installed on the development machine where we would be creating our SSIS package.
Developing SSIS Package
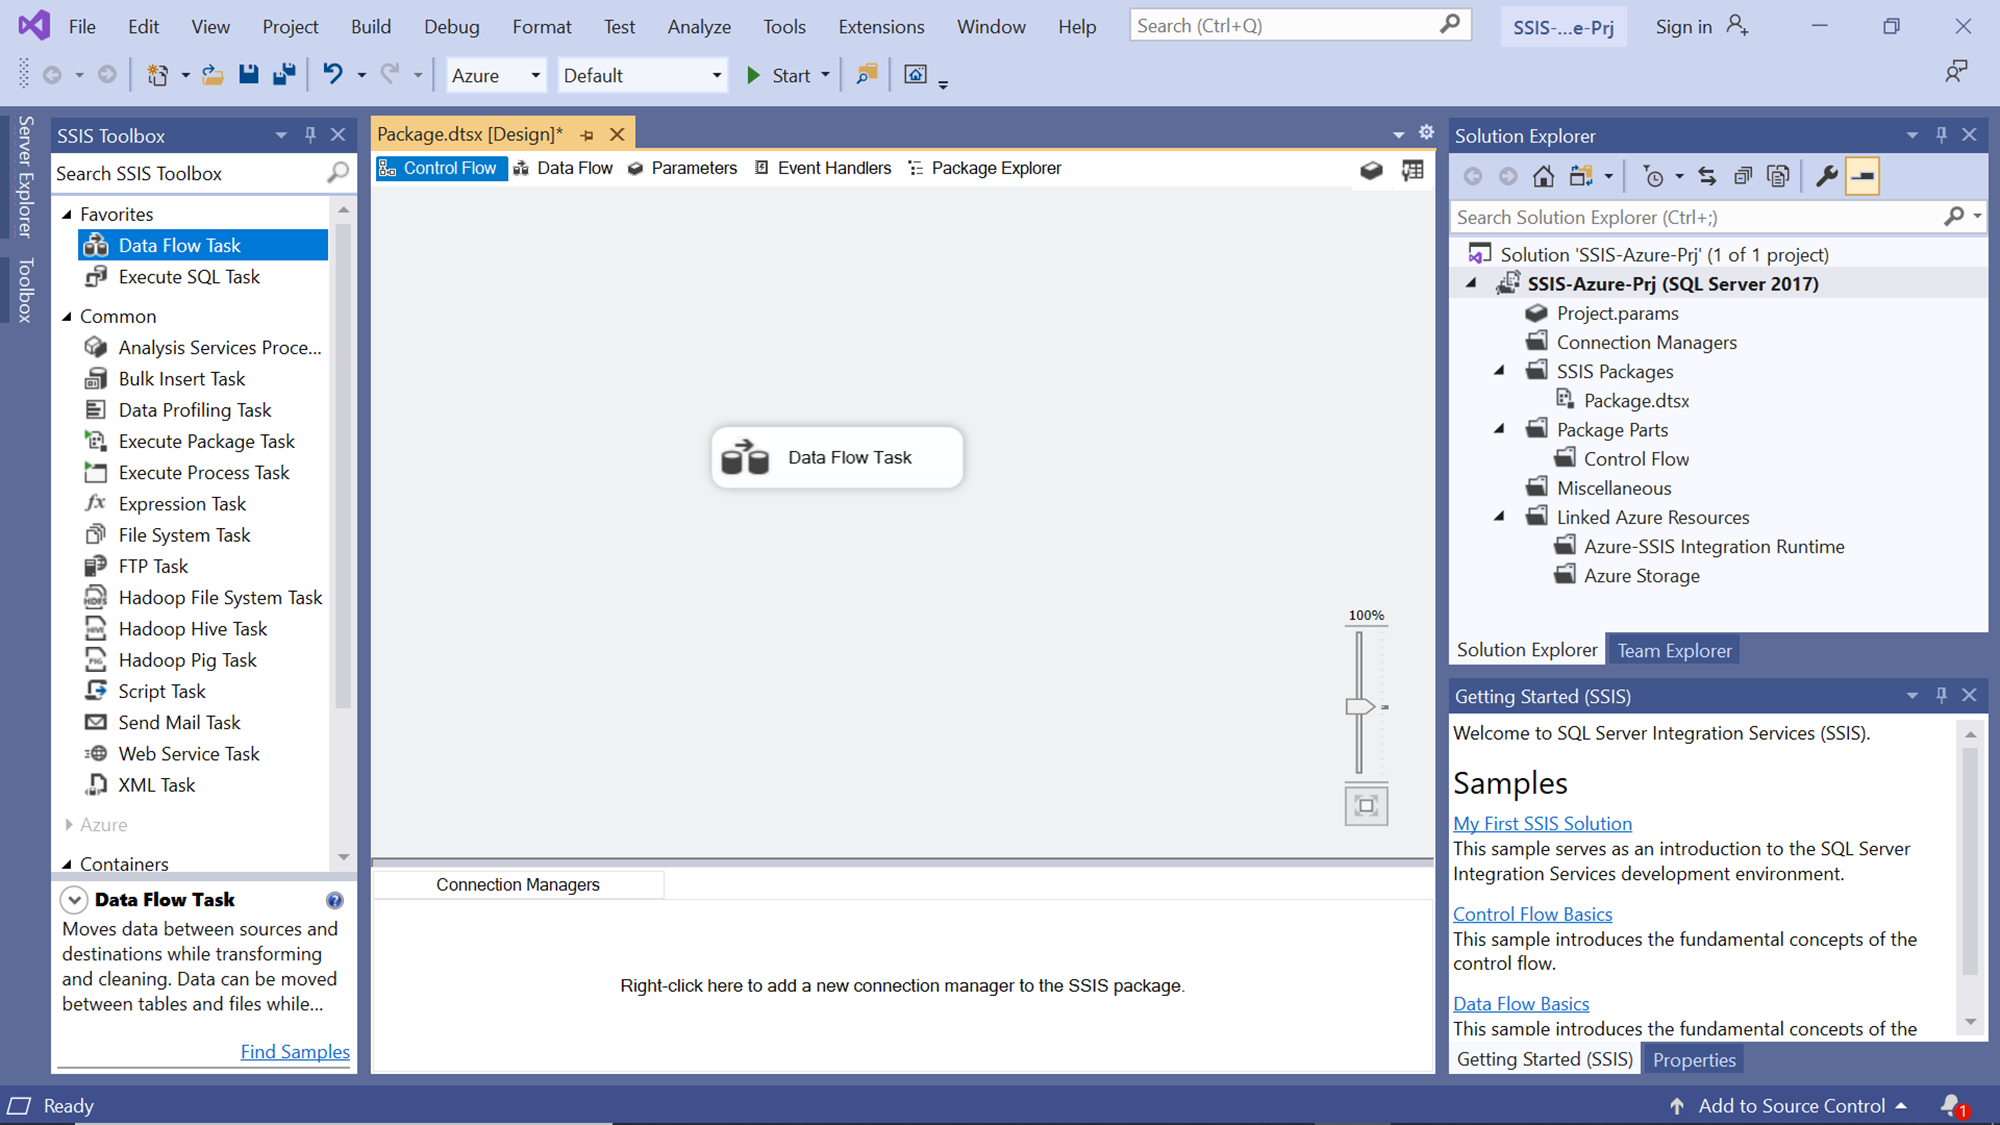
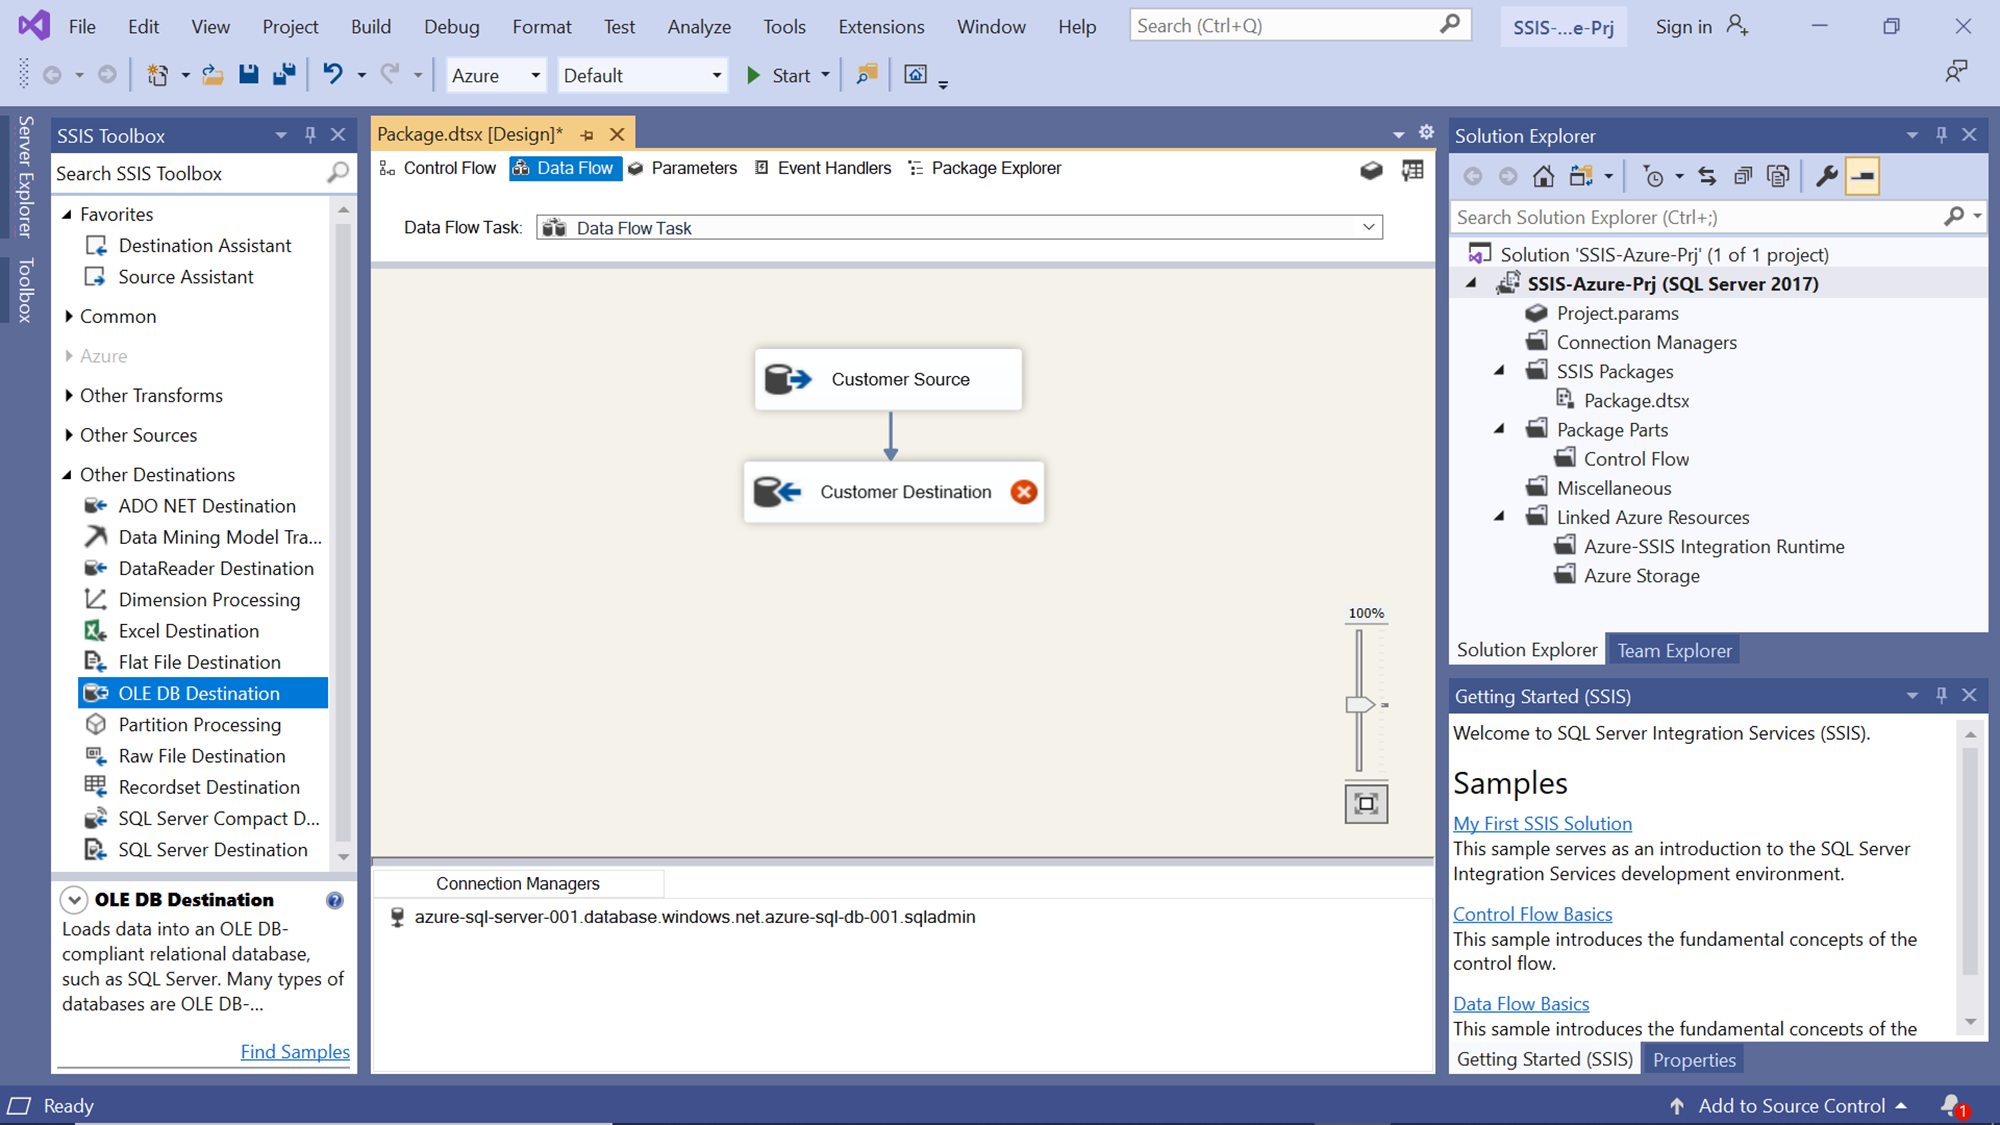
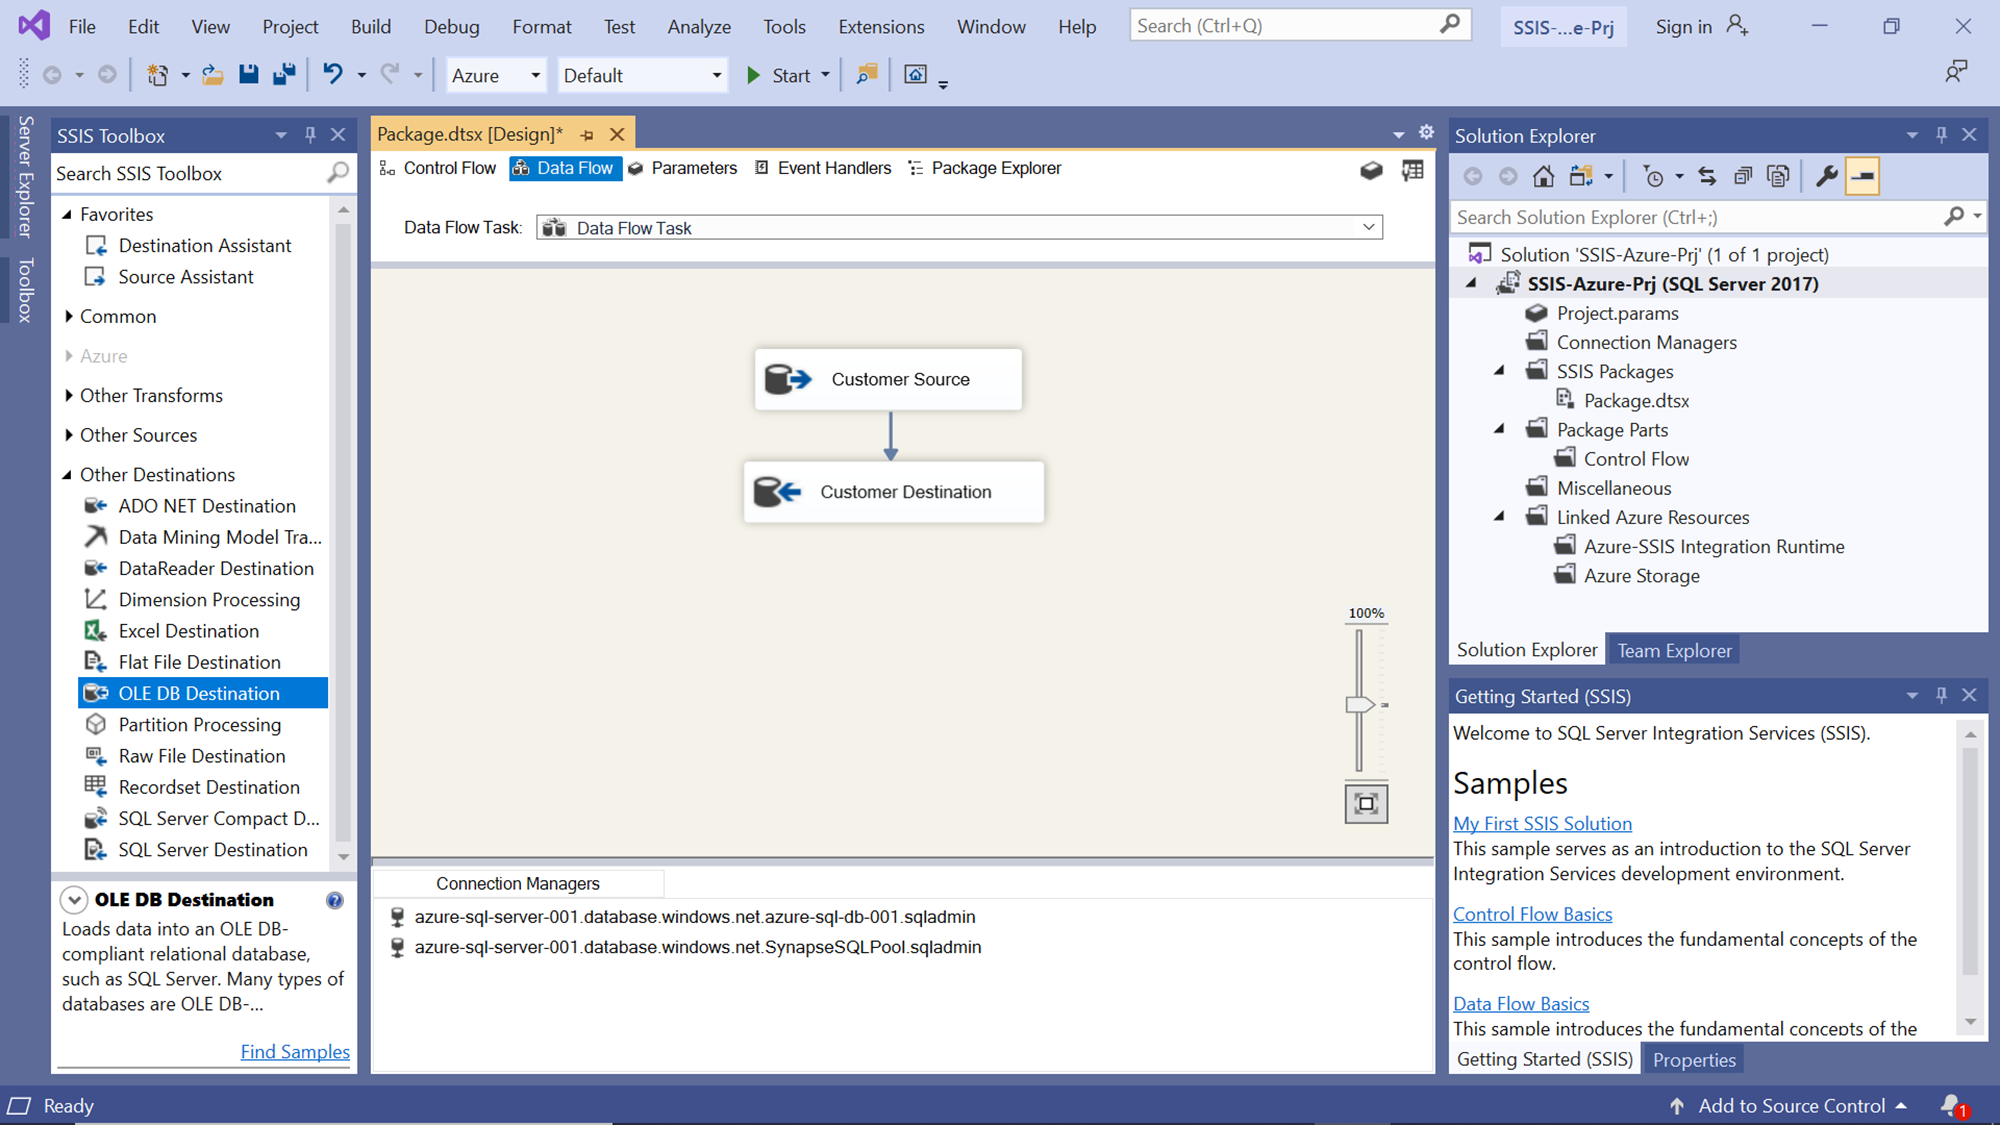
Open Visual Studio and from the File menu select the New Project menu option. Select the SSIS project type, provide a relevant name and create a new blank SSIS project. Our focus is to just populate data from source to destination. So, we would keep the workflow simple and focused to achieve this purpose. From the control flow pane, drag and drop Data Flow Task on the package layout. Once added, it would look as shown below.
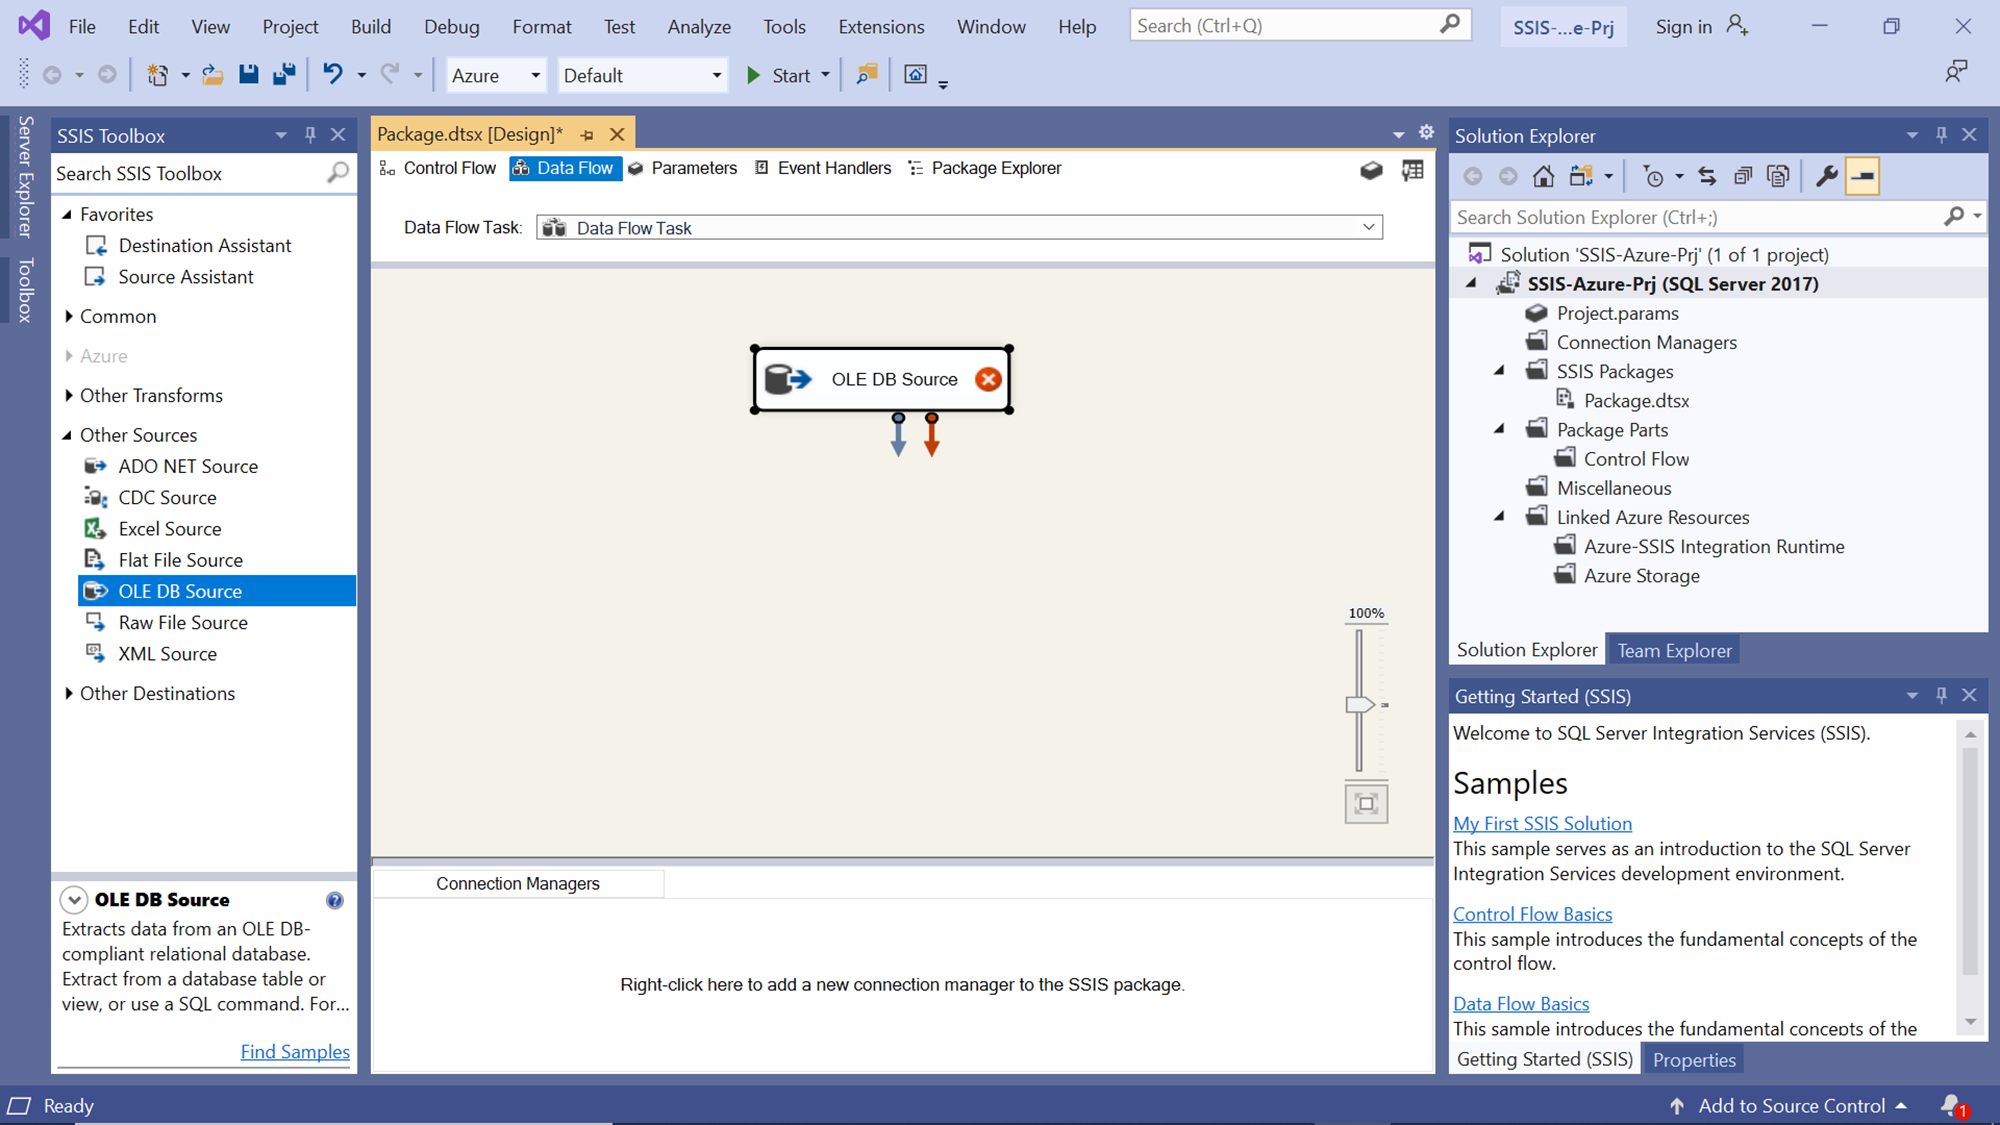
Double-click on the data flow task to open the data flow task layout. Our source in this case is Azure SQL Database, which is compliant with the OLE DB Source control available in SSIS. Navigate to the Other Sources section in the controls plane, select OLE DB source and add it to the layout. Once added it would look as shown below.
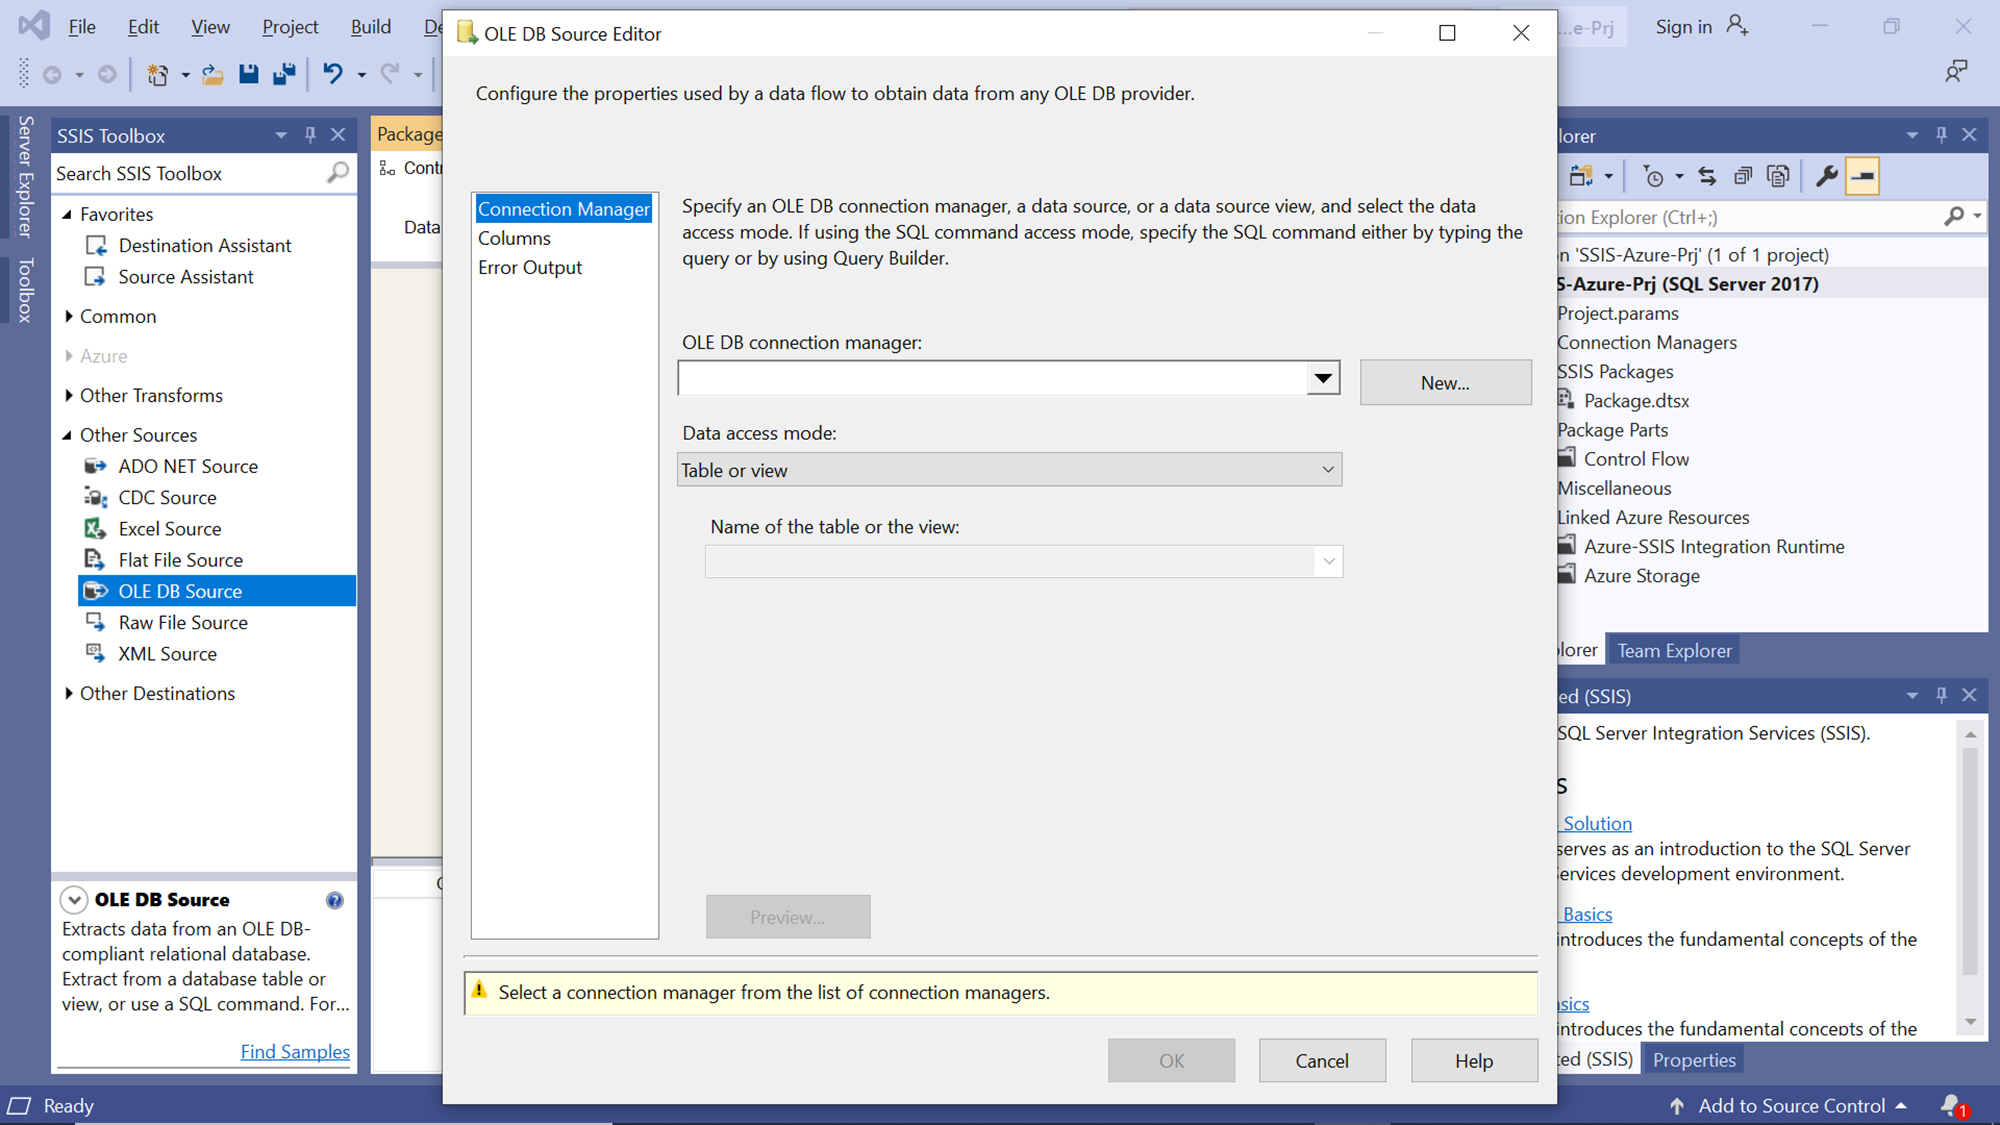
Double click this source and you should be able to see the source editor as shown below. Here we need to specify the connection for the source data repository. As we do not have any existing connection, we need to create a new one. Click on the New button to create a new connection.
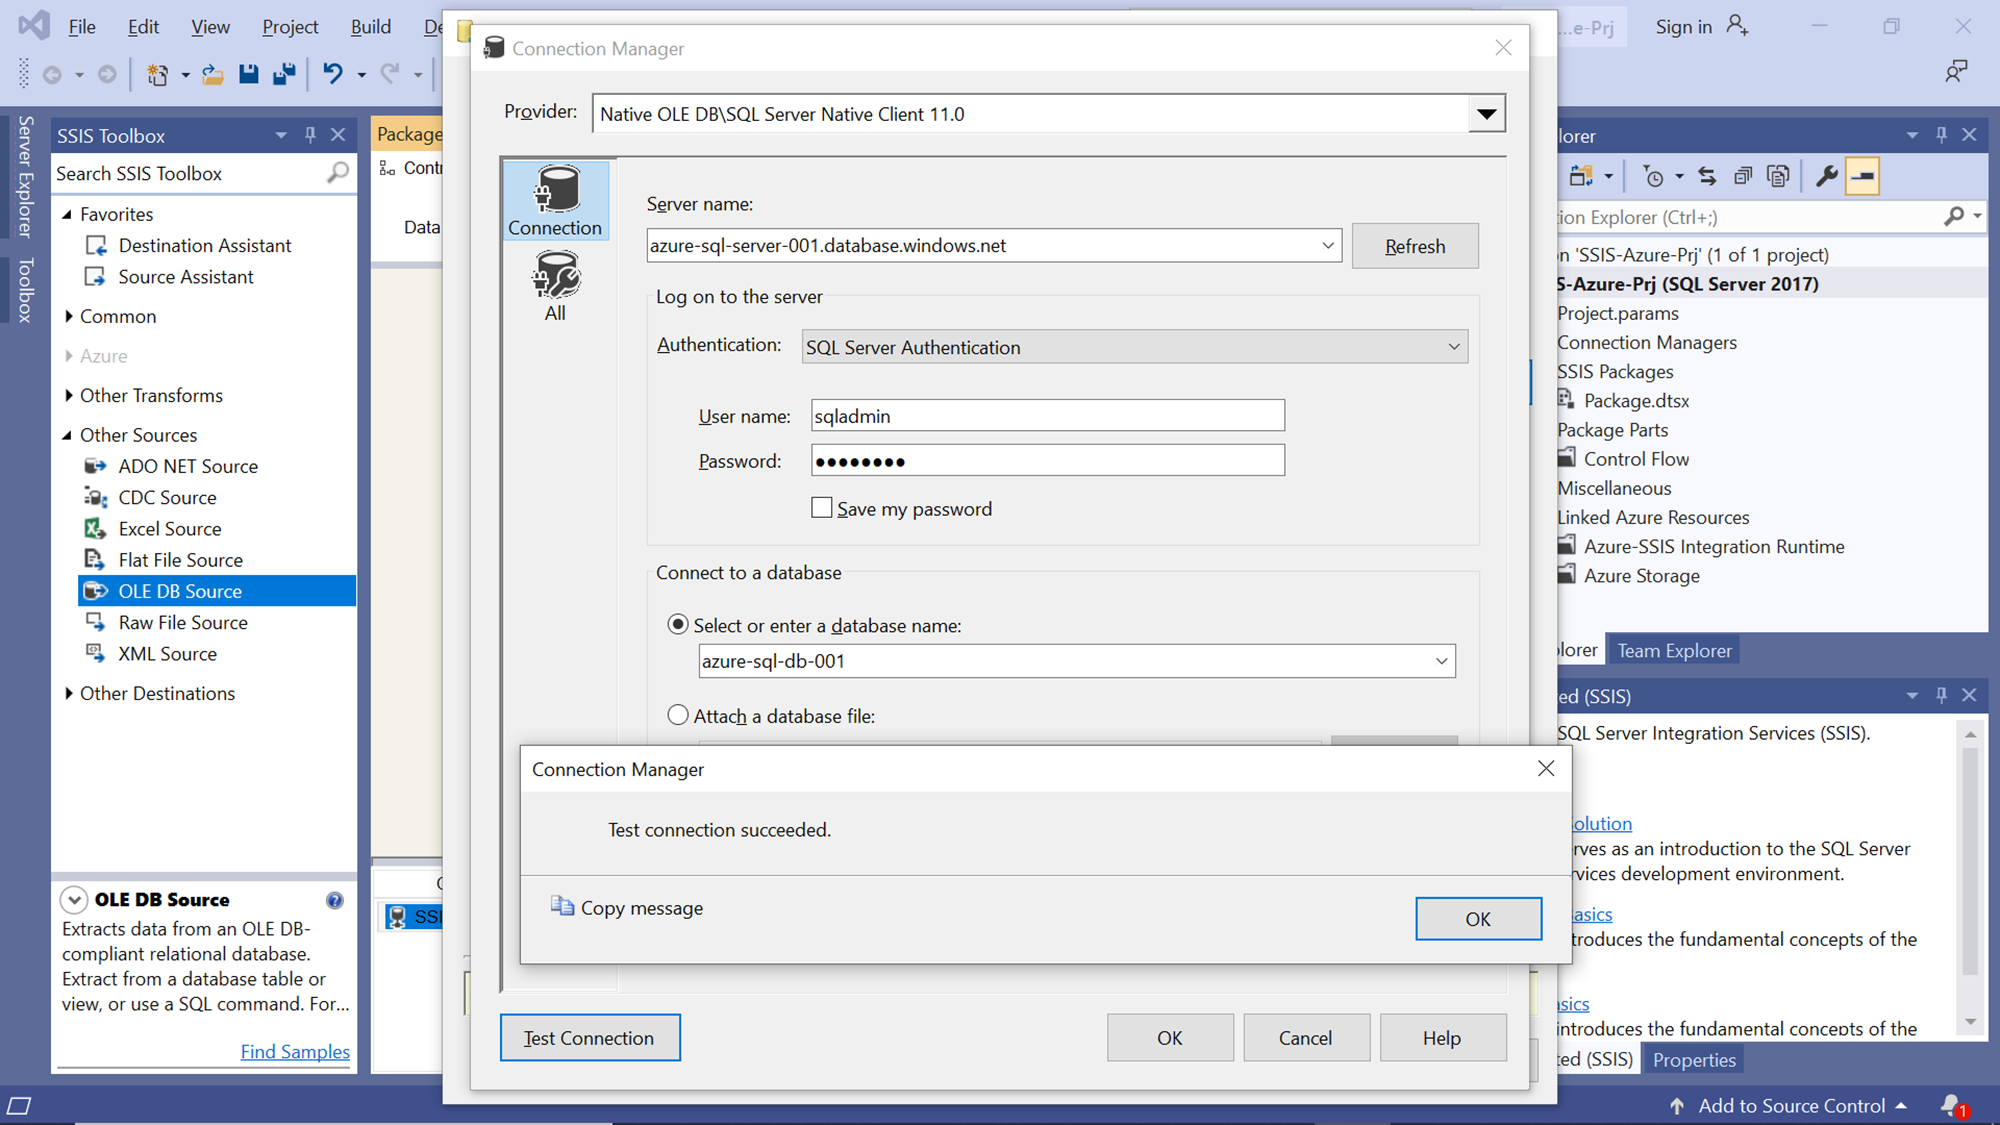
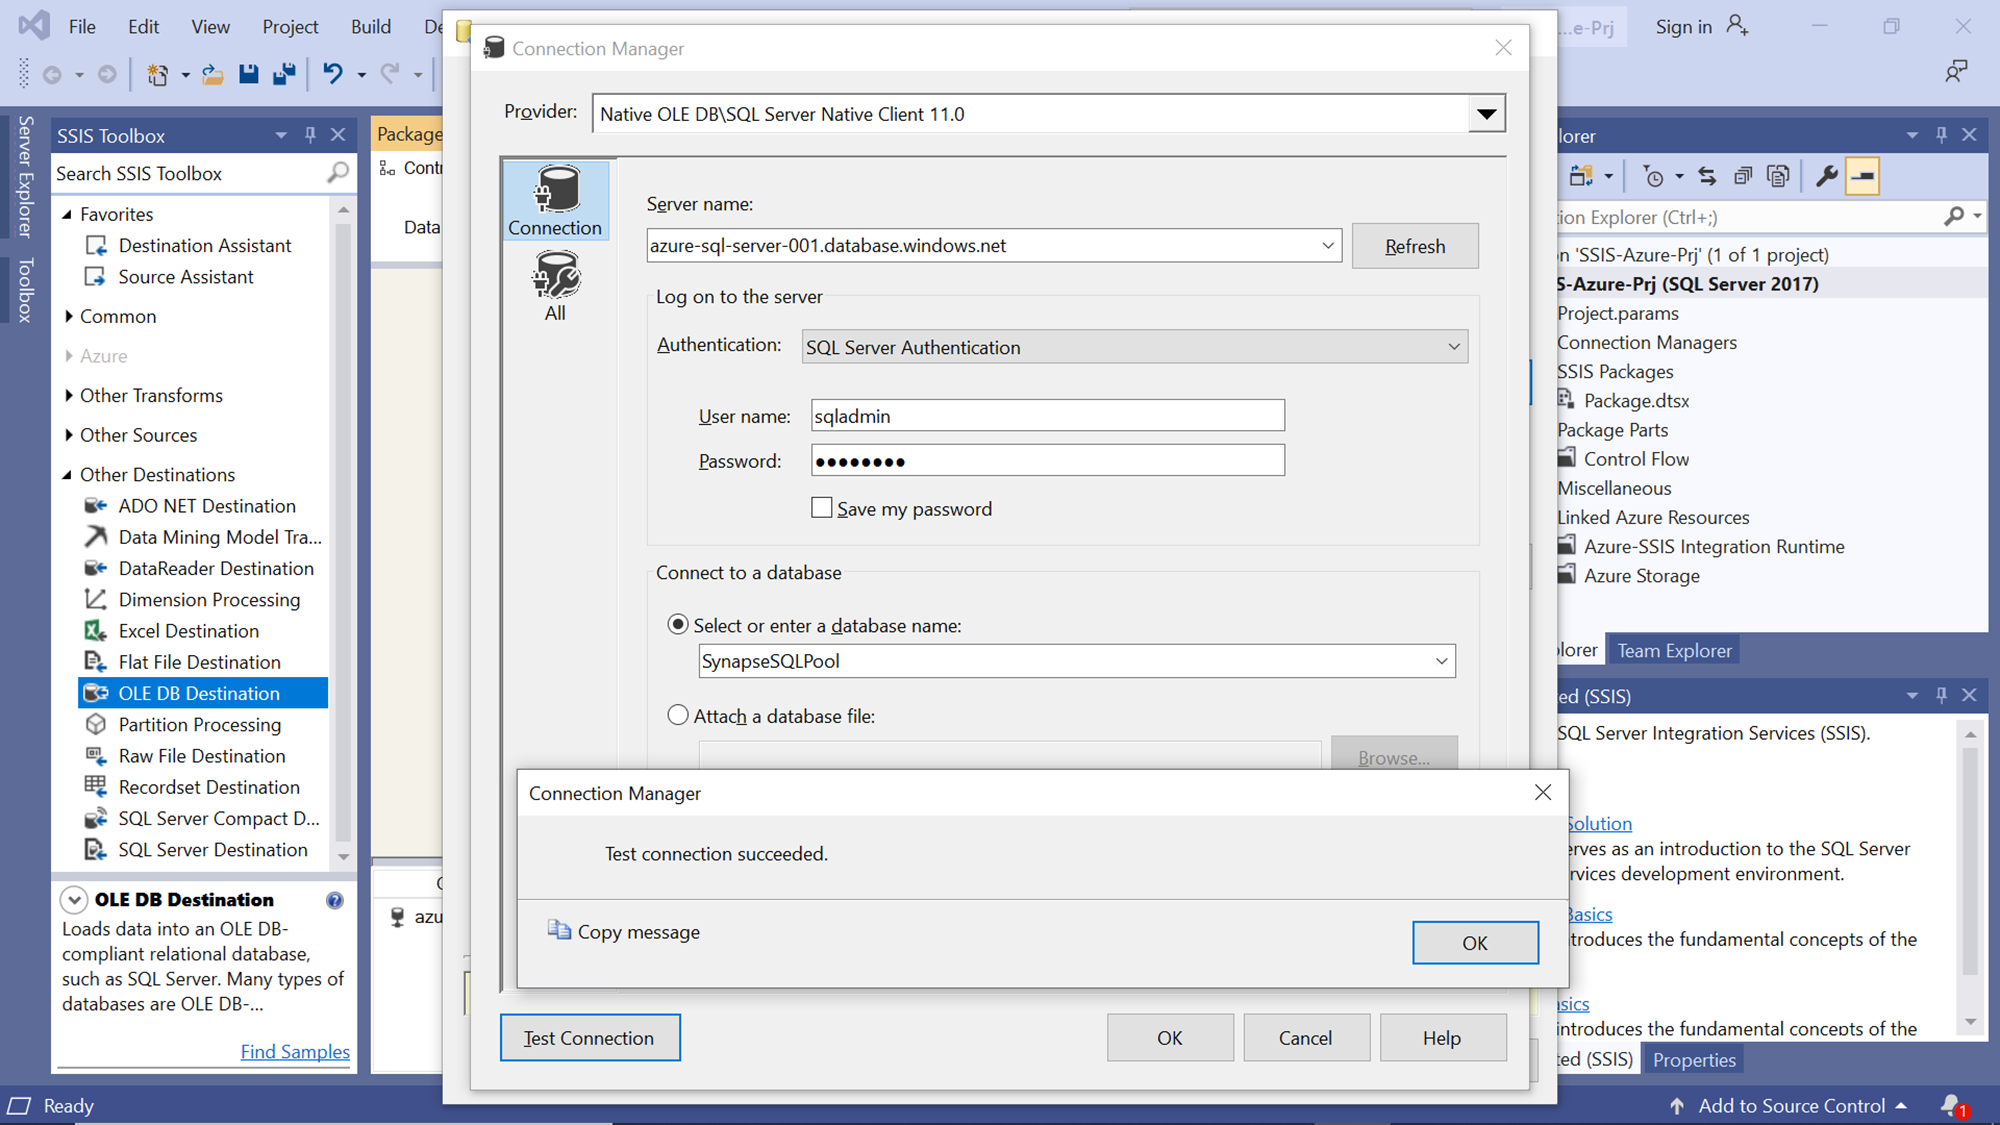
A new pop-up window would open as shown below. We need to provide the server name, which would be the Azure SQL Server endpoint as shown below. Use SQL Server Authentication as the authentication mechanism and provide the credentials to connect to the database. One can click on the Test connection button to test the connectivity. Upon successful testing, one would be able to see the confirmation prompt as shown below. Then from the Connect to a database section, select the database name from the drop-down, which hosts the table that we intend to populate in the Azure Synapse Analytics table.
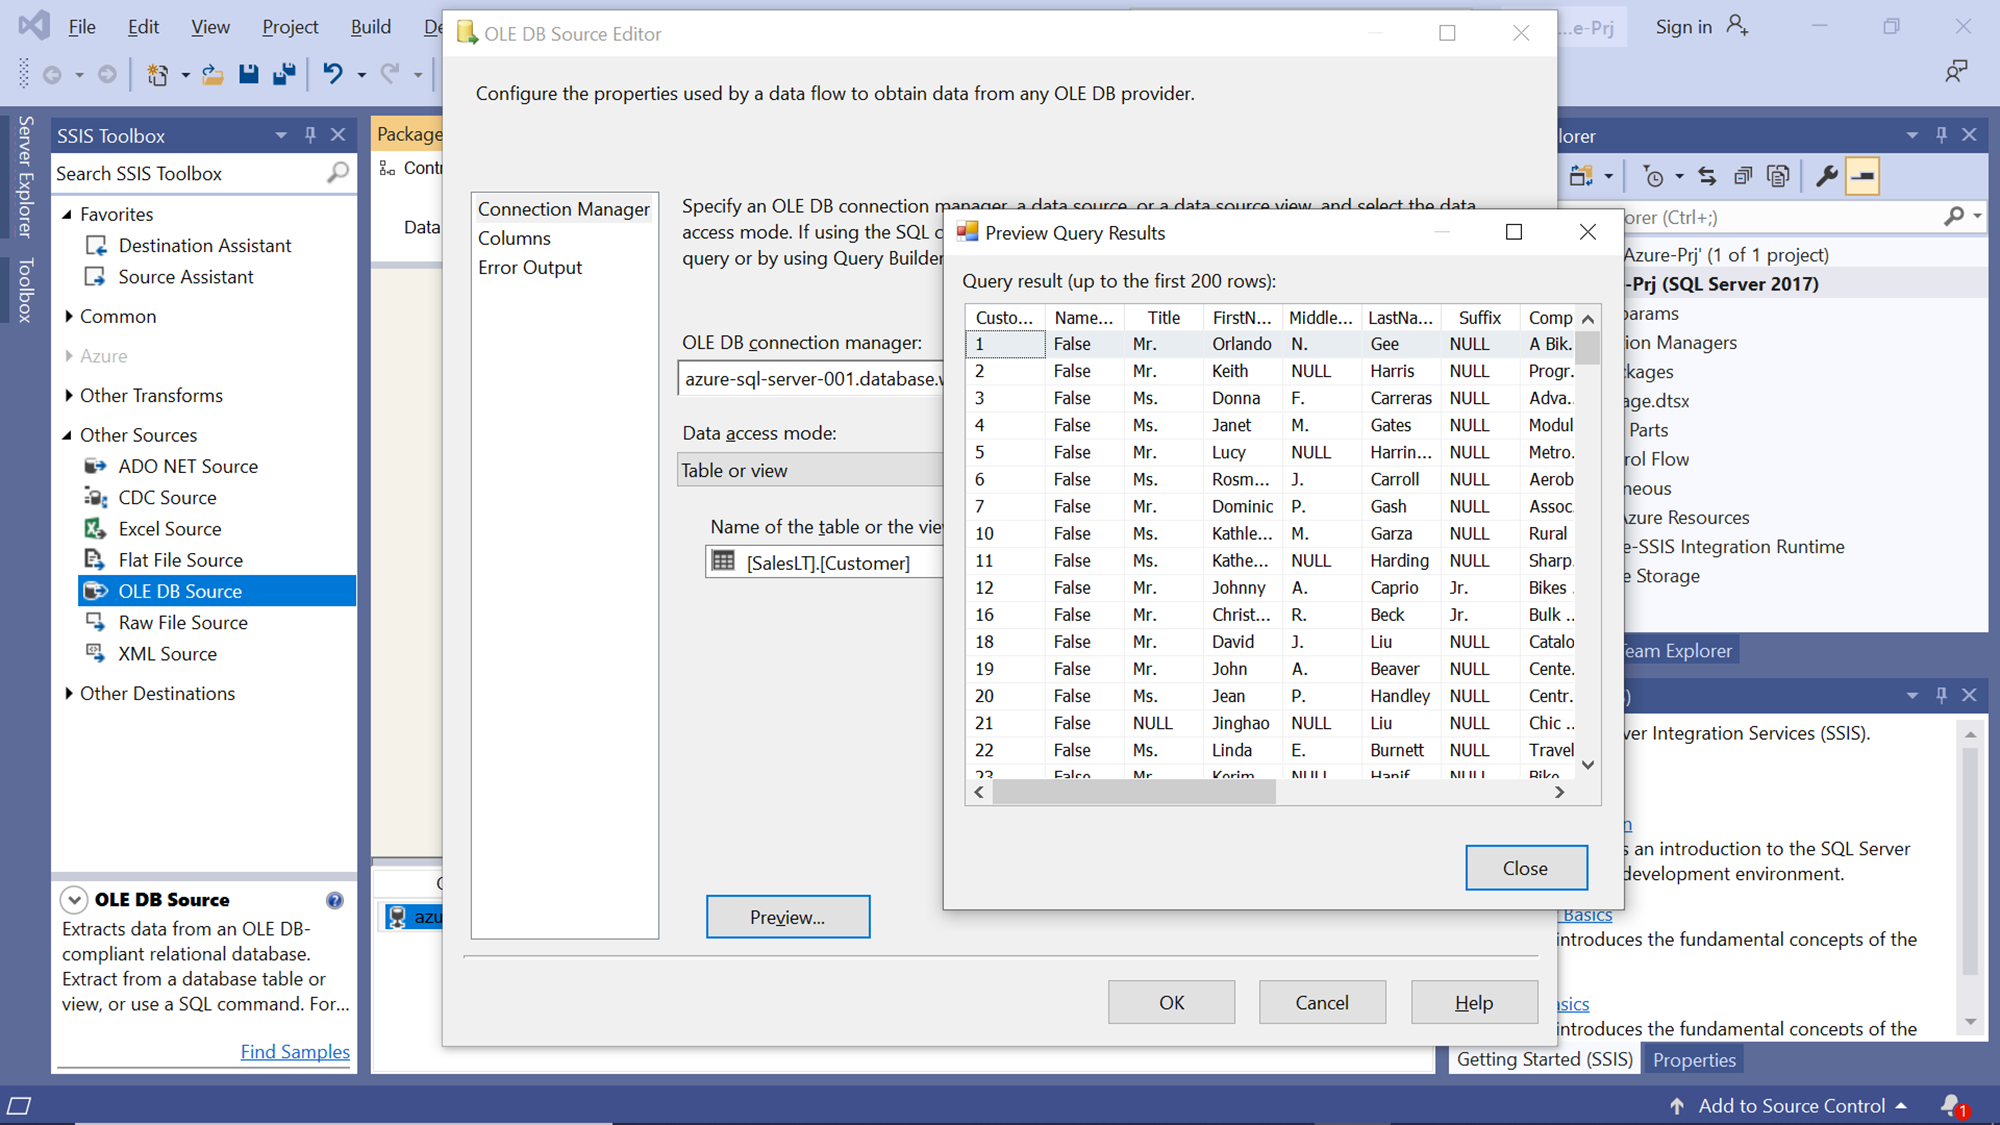
Click on the Ok button, and then select the table from the selected database which we intend to populate as shown below. In this case, we intend to populate the Customer table, so we will select the same.

After selecting the table, one can click on the Preview button to preview the schema and the data as shown below. Once you have ascertained that it’s the desired table, schema and data that we intend to populate, click on the Close button. Click on the OK button of the OLE DB Source editor to complete the configuration of the connection to the source repository.
Now it’s time to configure the connection to the destination repository. Add an OLE DB Destination from the Other Destinations section as shown below. We are going to use this control to connect to the SQL Dedicated pool table in Azure Synapse Analytics.
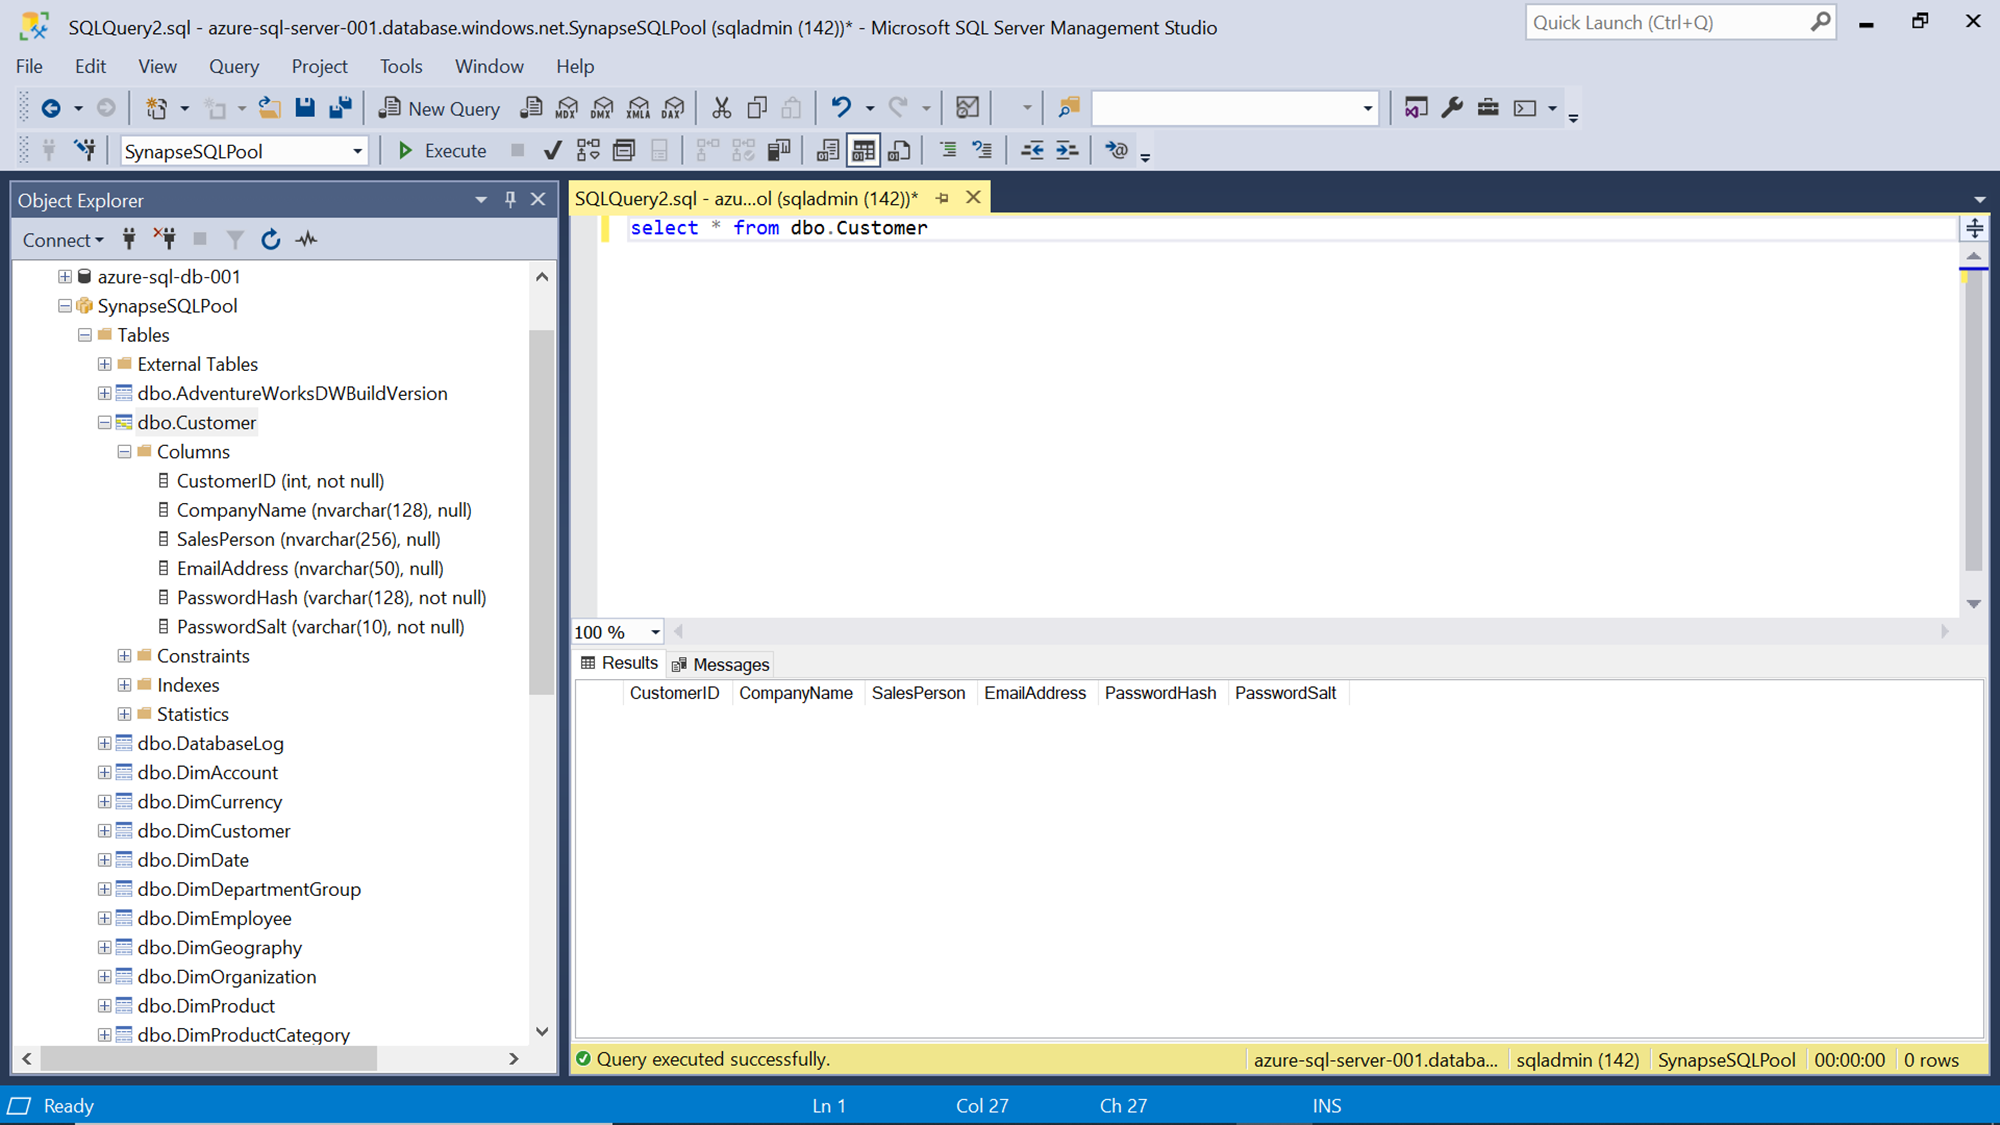
The cross icon indicates that the connection is not configured, so we will configure it now. Before we do it, we need to ensure that we have an existing table in the Azure Synapse Analytics SQL pool which we would populate. This table need not have an identical schema that we have in the Azure SQL Database, as the need may be to just populate selective fields which we intend to aggregate or process in the synapse. Show below is a Customers table in synapse SQL pool, with a subset of fields compared to the Customers table in SQL Database.
Navigate to SSIS package editor, and double click on the OLE DB Destination to start configuring it. Follow the same steps that we followed to create a new connection in the source control, provide the details and credentials of the server instance hosting Azure Synapse SQL pool, and test it. Once the connection is successful, you would receive a prompt as shown below. Here, in this case, the Azure SQL Database and the Azure Synapse Analytics SQL pool are in the same server, so the server details are exactly the same but in the database name section, we need to select the SQL pool name as shown below.
Once the connection is successful, we can select the newly created Customer table in the table selection dropdown as shown below.
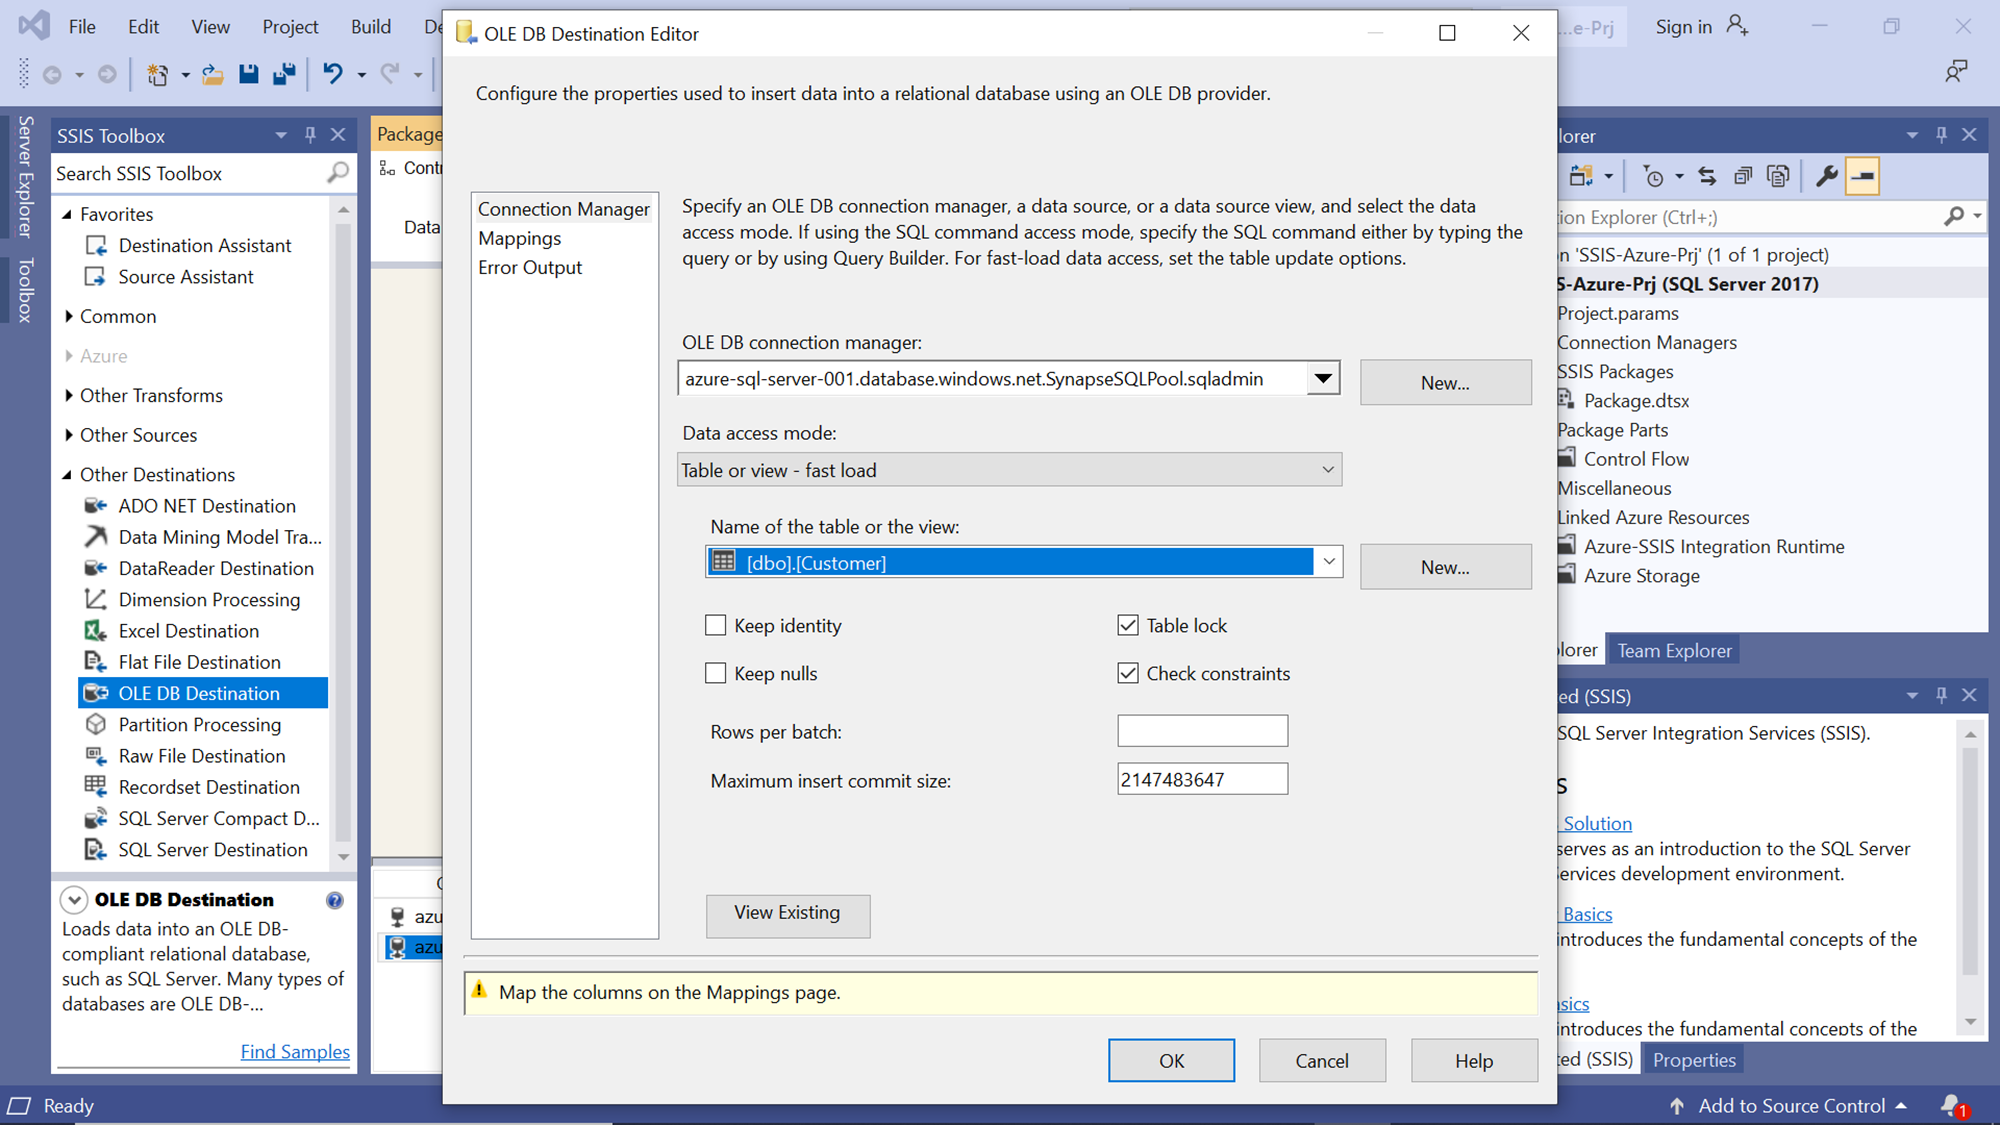
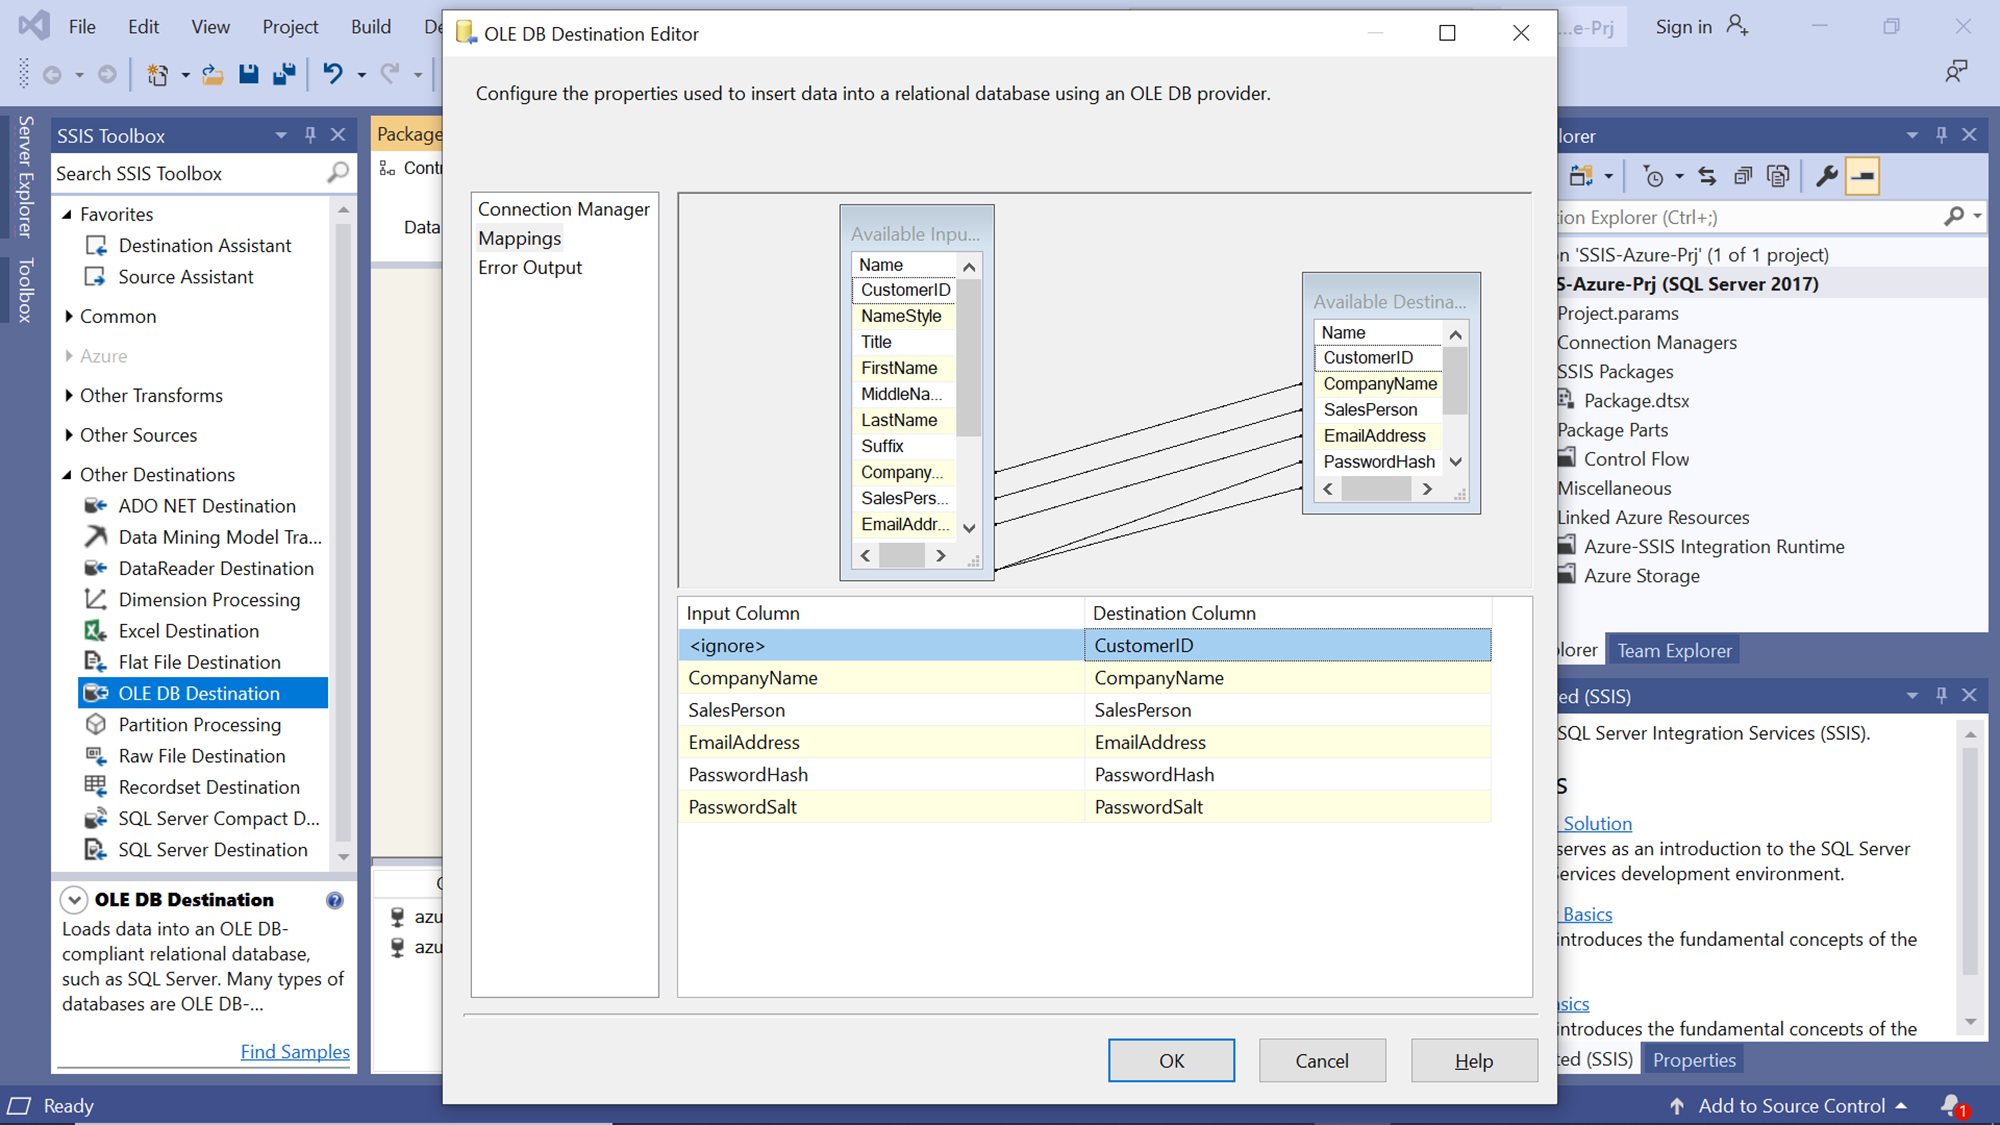
If you read the warning sign at the end of the above pop-up, you would find that it’s suggesting to map the columns in the mappings page as the number of columns and at times even the names of the columns are not the same. So, we need to configure and review the mappings before executing the package. Click on the Mappings tab, and it would look as shown below. Here we have a few columns that are identical, so they are auto mapped. In the SQL pool table, we have CustomerID auto-incrementing, so we are ignoring this field’s value from the source table. Once the mappings are configured as desired, click on the Ok button.
Now we are ready to execute the package, as the connections to the source and destination repositories are configured. Click on the “Start” button to start the package execution.
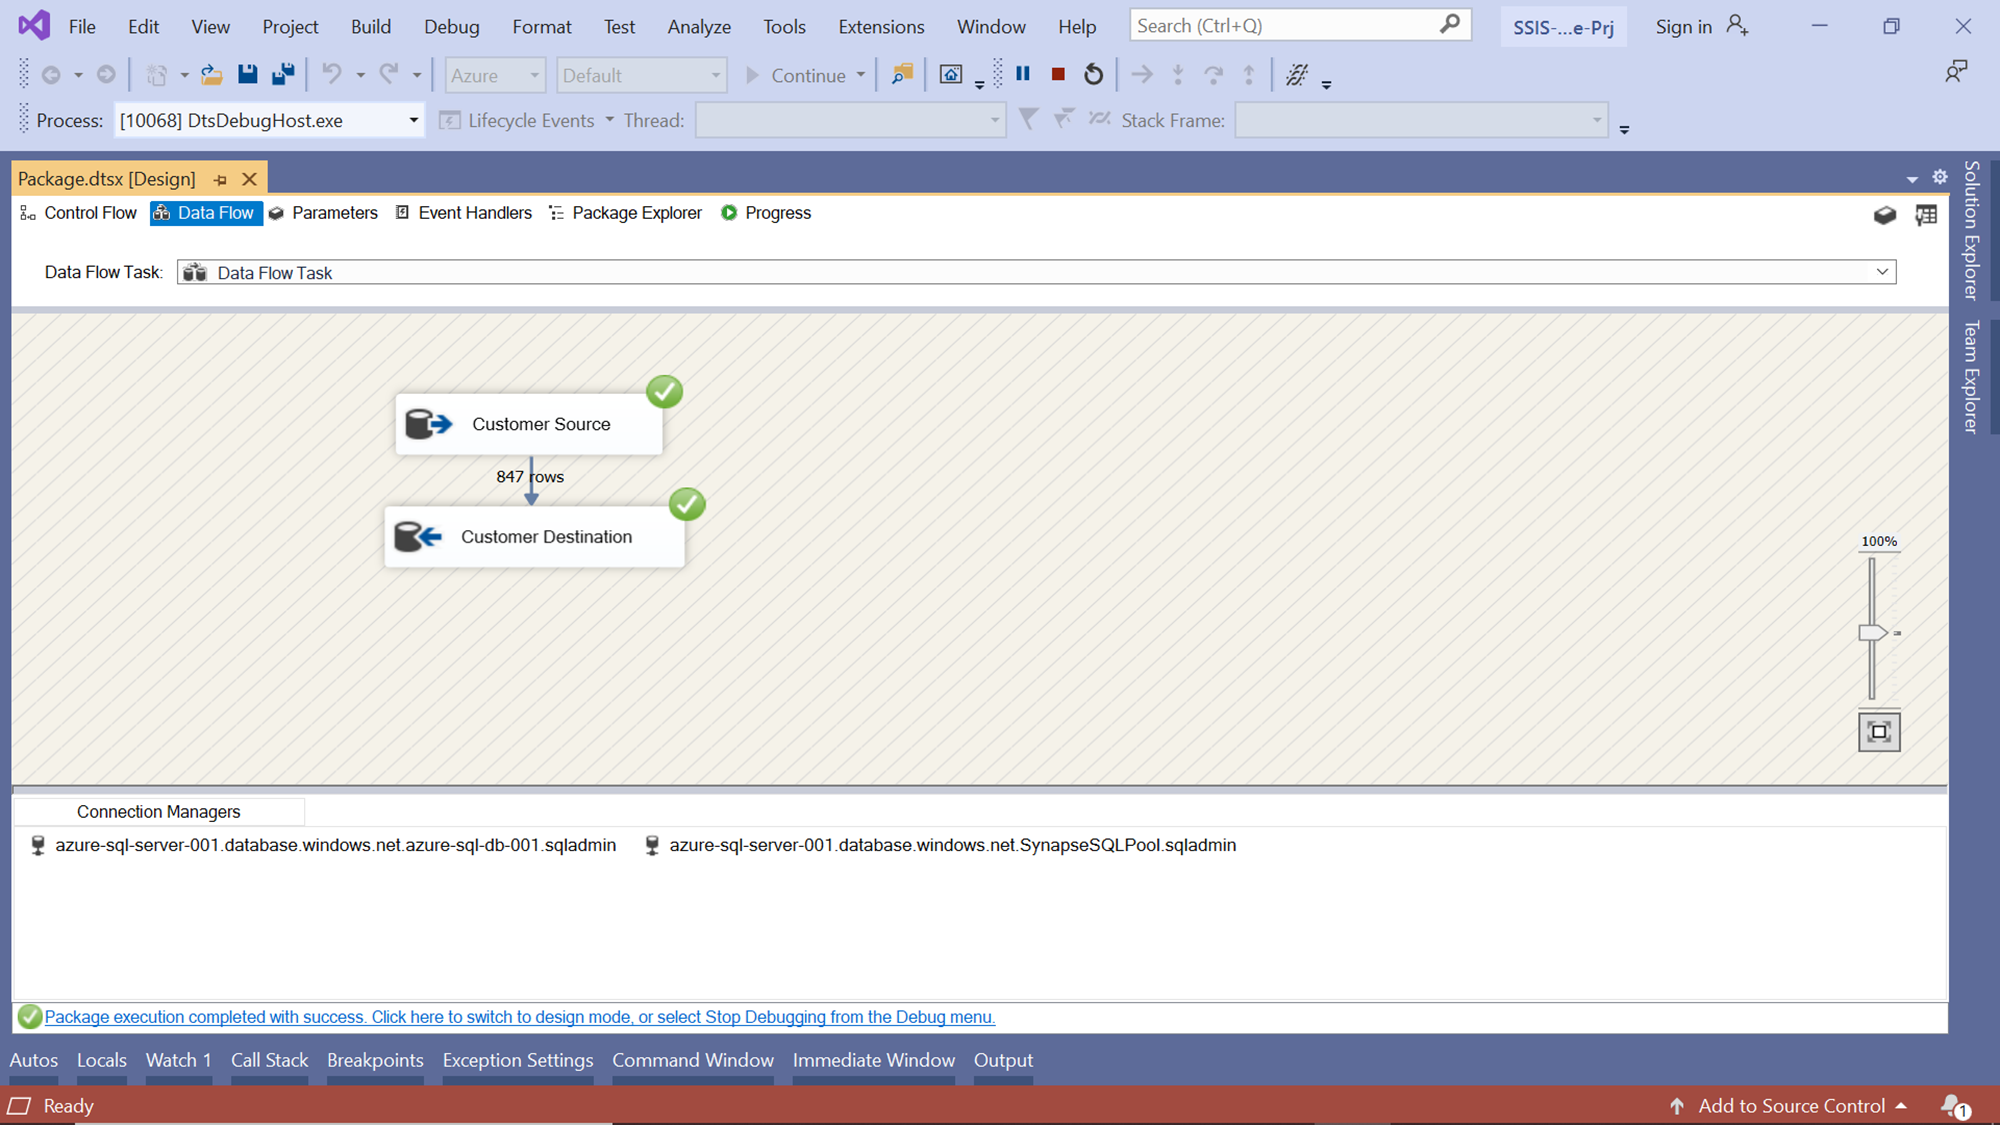
Once the package execution completes, we would be able to see a screen as shown below. Here we can see that 847 rows were read and written. Also, in the connection managers, we can see both the connections that we created earlier.
Finally, we need to verify if the Azure Synapse SQL pool table was populated and whether we can query the newly populated data successfully. Navigate to SQL Server Management Studio (SSMS), connect to the Azure Synapse Analytics SQL pool, and execute a select query on the Customer table as shown below. Earlier this table was empty, but now after population, we should be able to find data in this table as shown below.
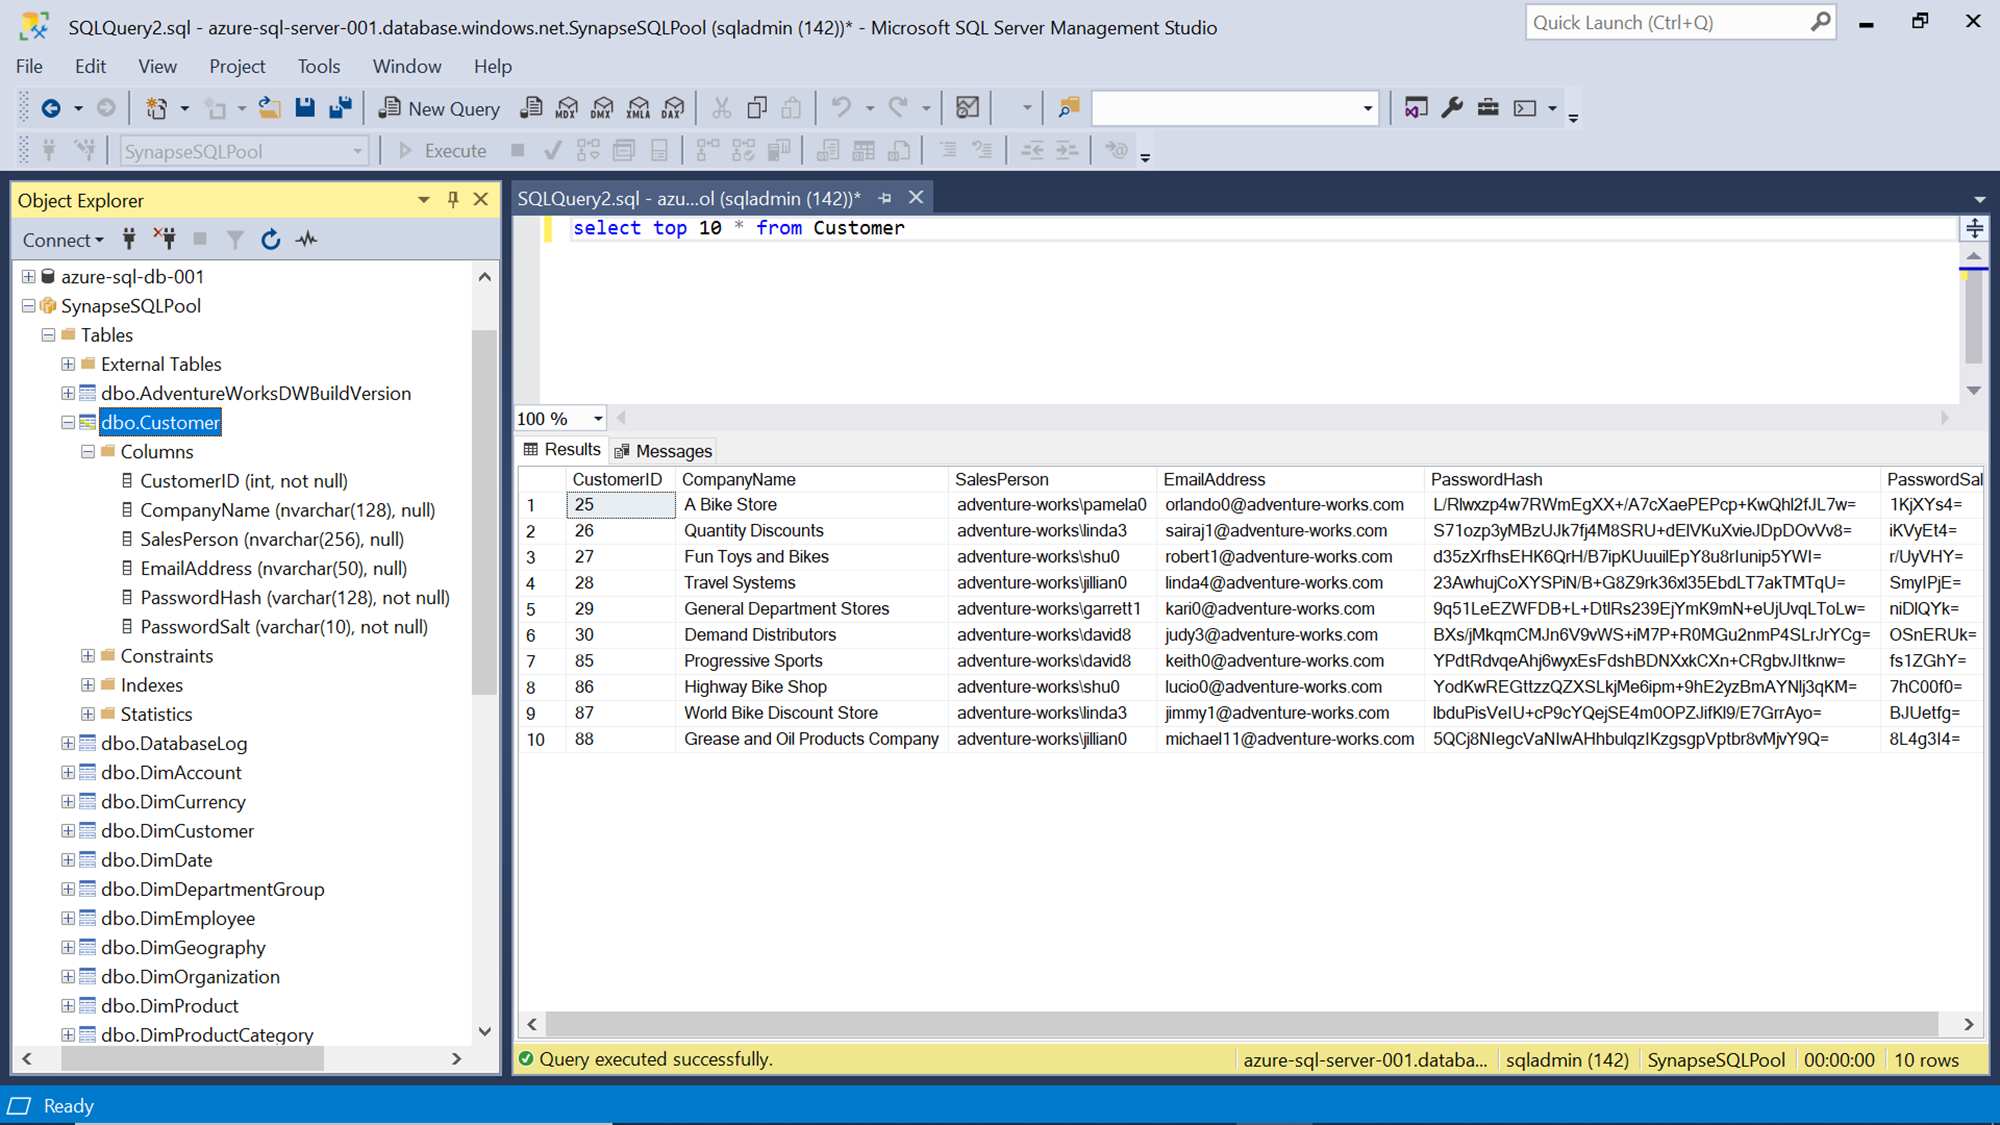
In this way, we can easily populate data in the Azure Synapse Analytics SQL pool table from Azure SQL Database using SSIS.
Conclusion
In this article, we started with an Azure SQL Database and a dedicated SQL pool in Azure Synapse Analytics. We had some sample data in the SQL Database and an empty table in the SQL pool. We learned how to create an SSIS package, configure connections to both the source and destination repositories, and populate the destination by executing the SSIS package.
Table of contents

He has worked internationally with Fortune 500 clients in various sectors and is a passionate author.
View all posts by Rahul Mehta
- Finding Duplicates in SQL - February 7, 2024
- MySQL substring uses with examples - October 14, 2023
- MySQL group_concat() function overview - March 28, 2023