
This article will help you get started with Azure Synapse Studio and its various features.
Introduction
In the previous article, Creating Azure Synapse Analytics Workspaces, we learned how to create Azure Synapse Analytics Workspace. Azure Synapse Studio is the core tool that is used to administer and operate different features of Azure SQL Analytics. It’s a very elaborate tool that supports many functions like data access, integration, and many other such features. To use this tool effectively, one needs to know all that this tool offers. In this article, we will understand the different features of Azure Synapse Studio.
Azure Synapse Analytics Workspace
In the last part of this Azure Synapse series, we created an Azure Synapse Workspace as shown below. It is assumed that this workspace is already in place. Click on the Open Synapse Studio link in the workspace to open this tool.
Once the Azure Synapse Studio is opened, it would look as shown below. The very first time this tool is opened, the Knowledge Center may open as shown below.
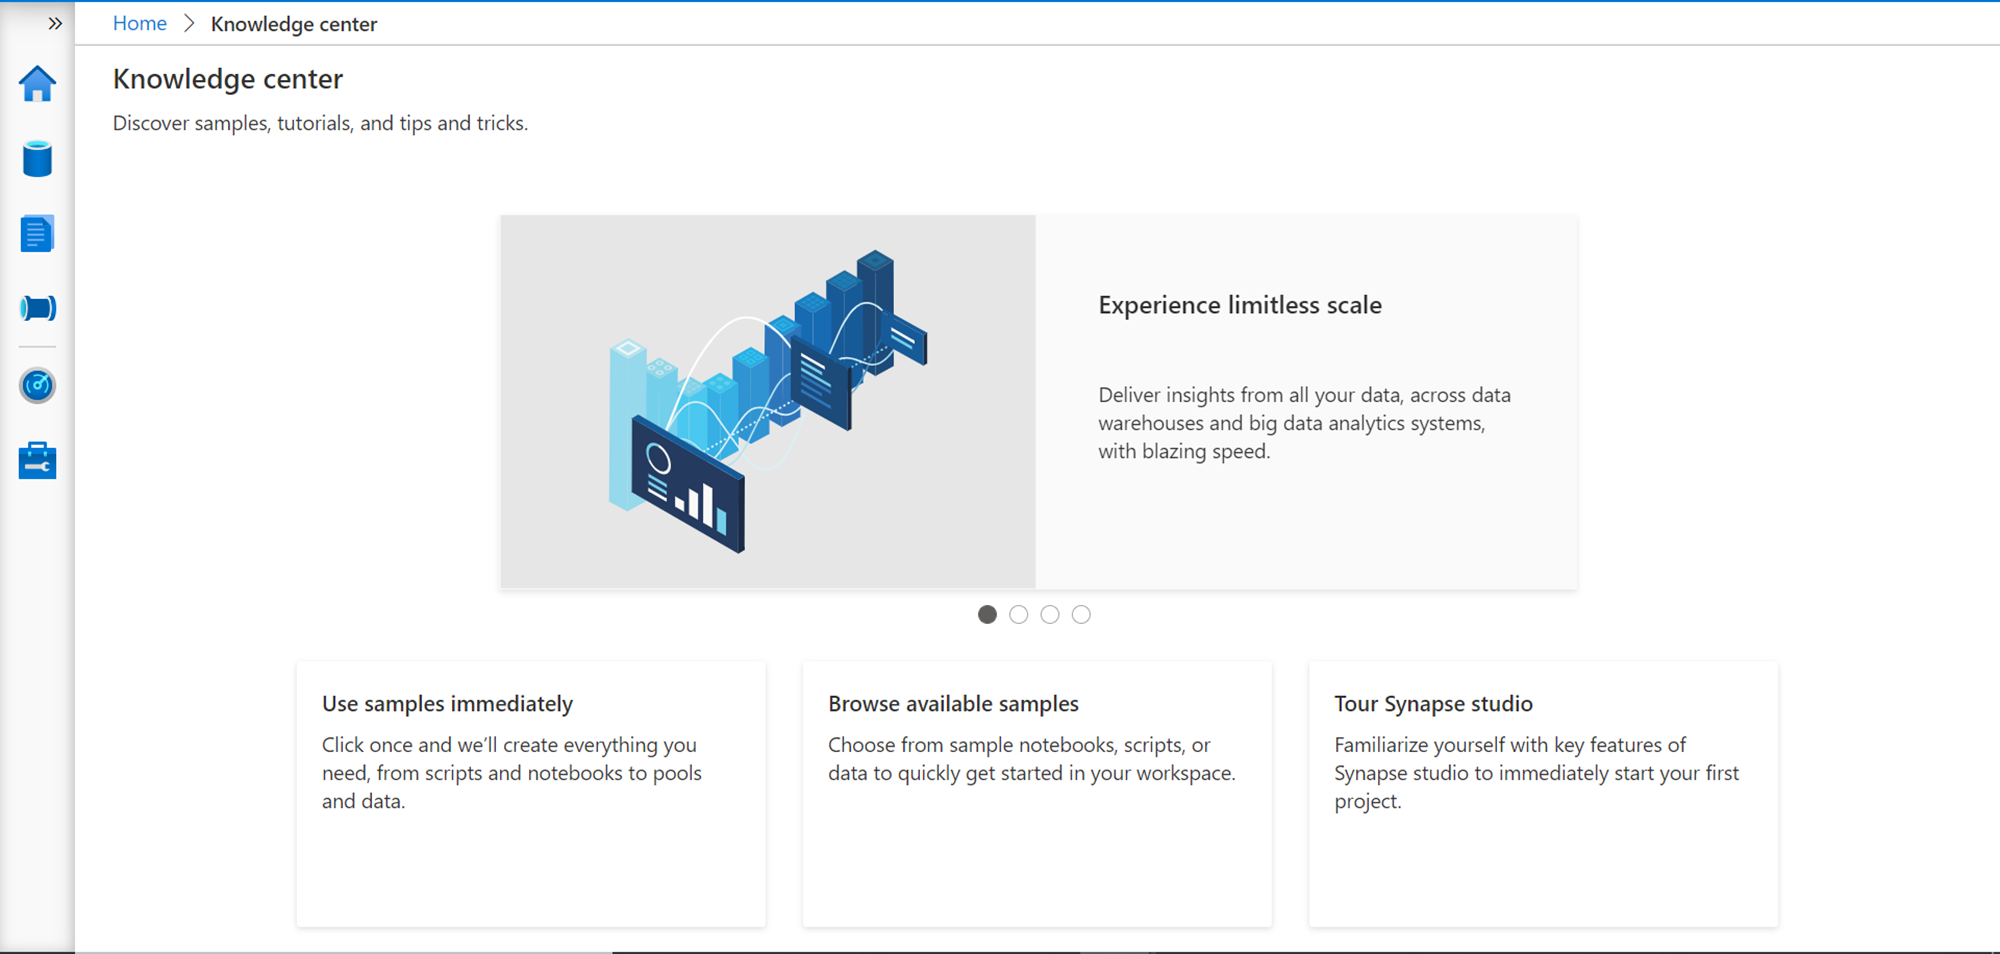
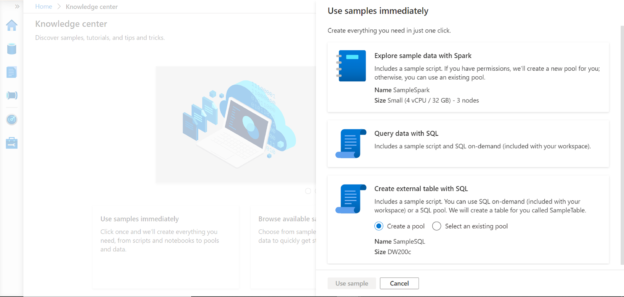
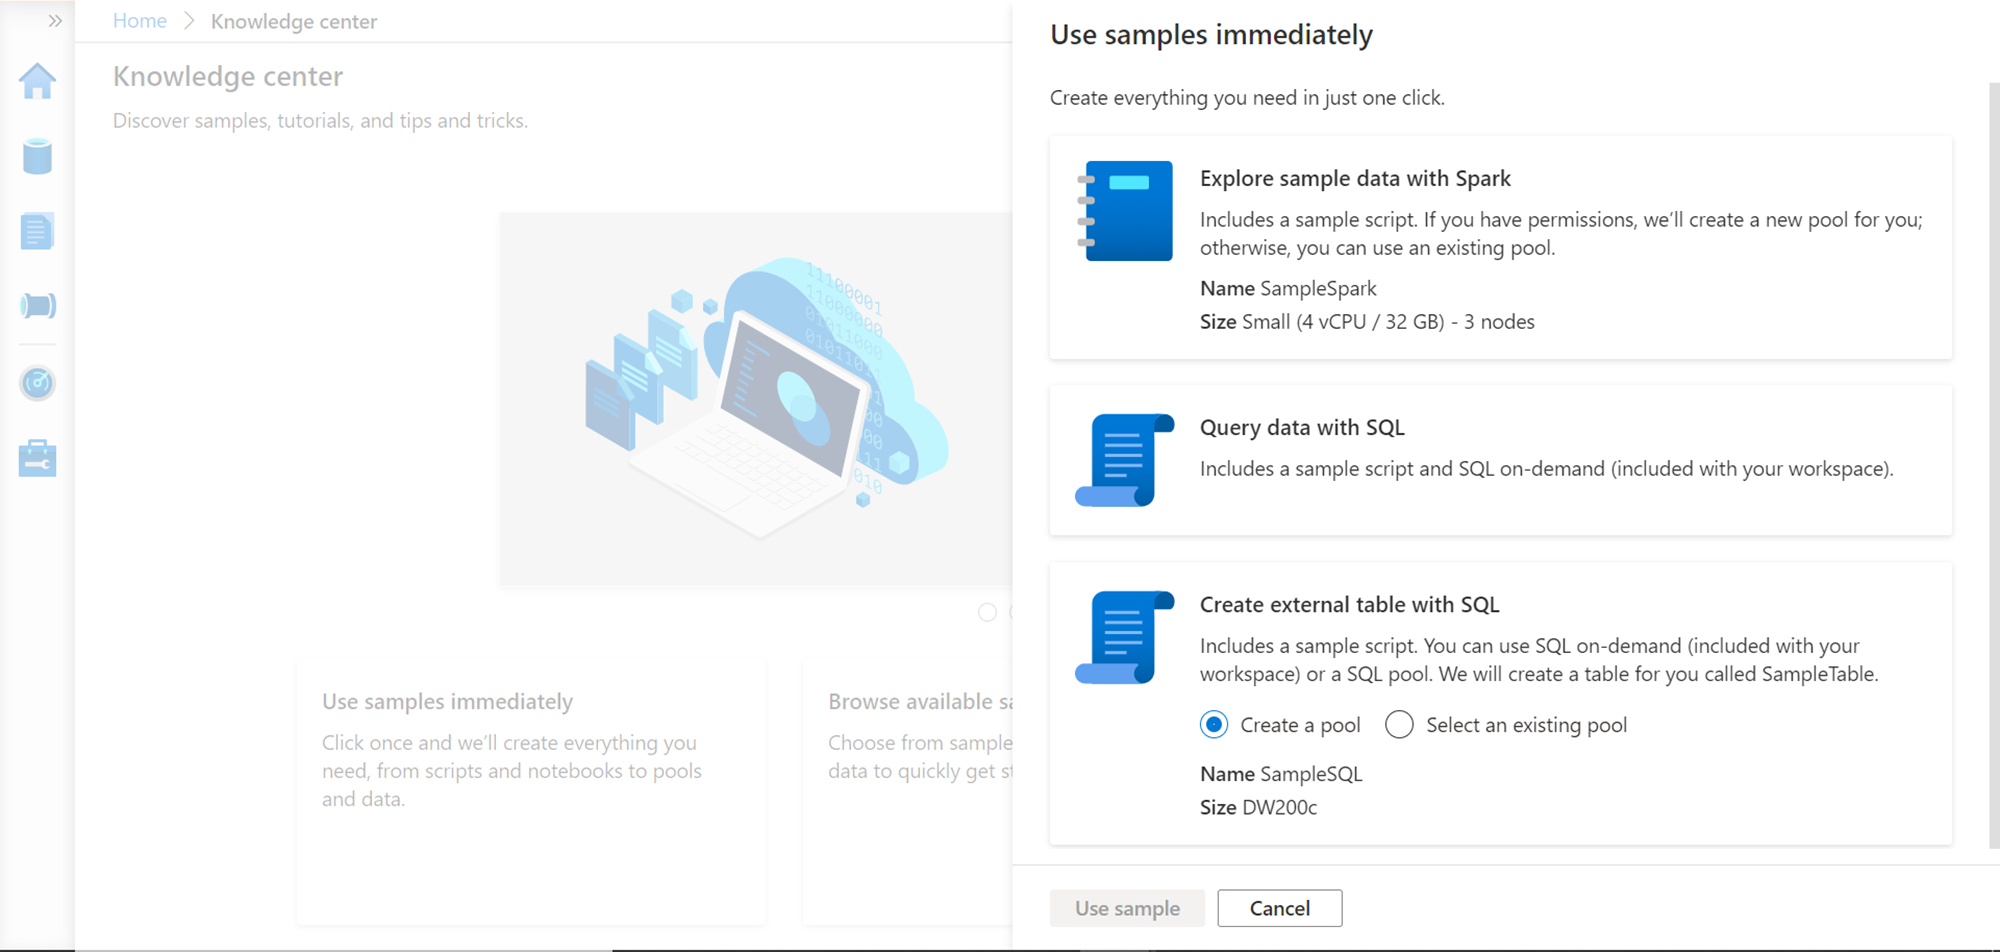
The Knowledge center is a collection of samples, tutorials and other objects that can help one to learn or readily use standard artifacts to kick start using Azure Synapse. There are three options that are presented on the Knowledge center – to use the samples immediately, to browse the available samples, and to get a guided tour of the Azure Synapse studio. We are going to explore every part of the Azure Synapse studio, so let’s first check what Use samples immediately offer. Click on “Use samples immediately”, and the below pop-up would appear as shown below. It would offer three different options.
- Explore sample data with Spark – This would create a sample script along with a new or existing spark pool, which one can start using with Synapse
- Query data with SQL – This creates a sample script to use with a SQL On-demand pool. Be default, when the workspace is created, a SQL On-demand pool is already provisioned, and the same would be used
- Create an external table with SQL – This option allows to create a standard SQL pool, and access the data stored in external data in that SQL pool
In summary, it provides three different options for three types of pools offered by Azure Synapse.
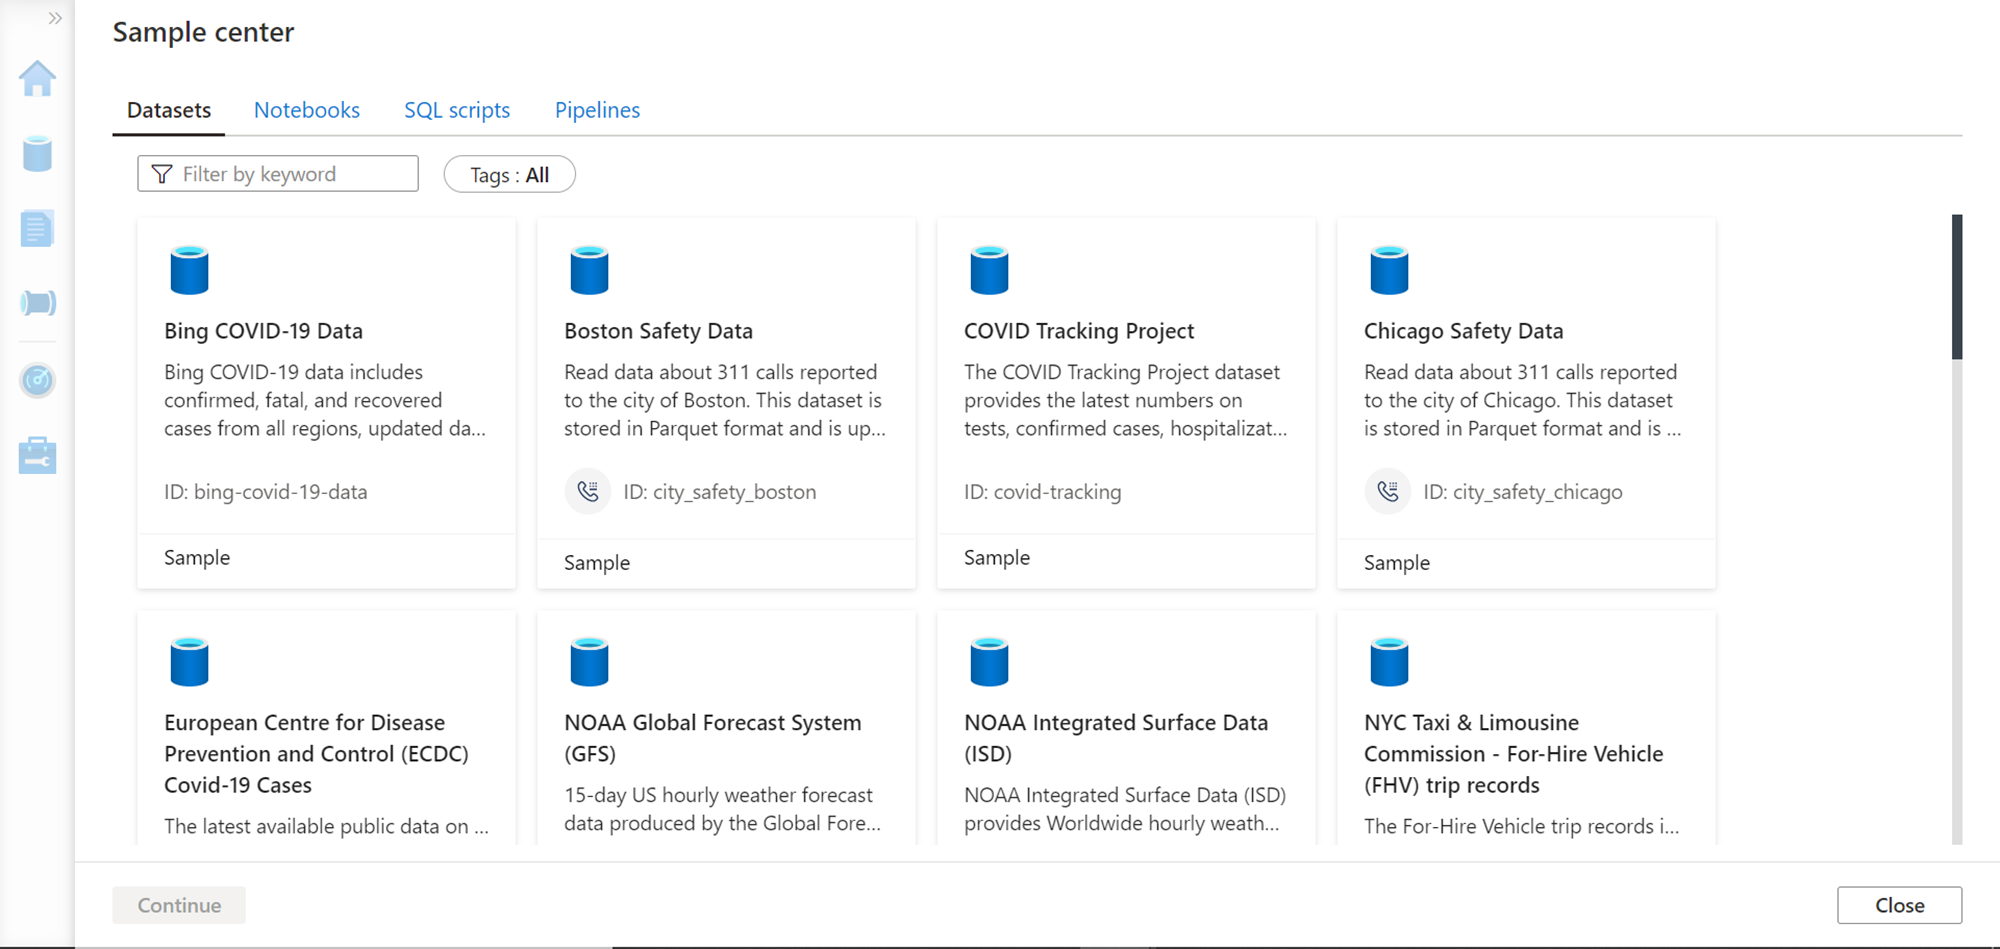
Now click on cancel and navigate back to the Knowledge center. Click on browse available samples to explore the samples included with the studio. Once the samples gallery opens, it would look as shown below. It would show four tabs – Datasets, Notebooks, SQL Scripts and Pipelines. The Datasets tab provides access to many sample datasets as shown below. One can select any sample and that dataset would get created.
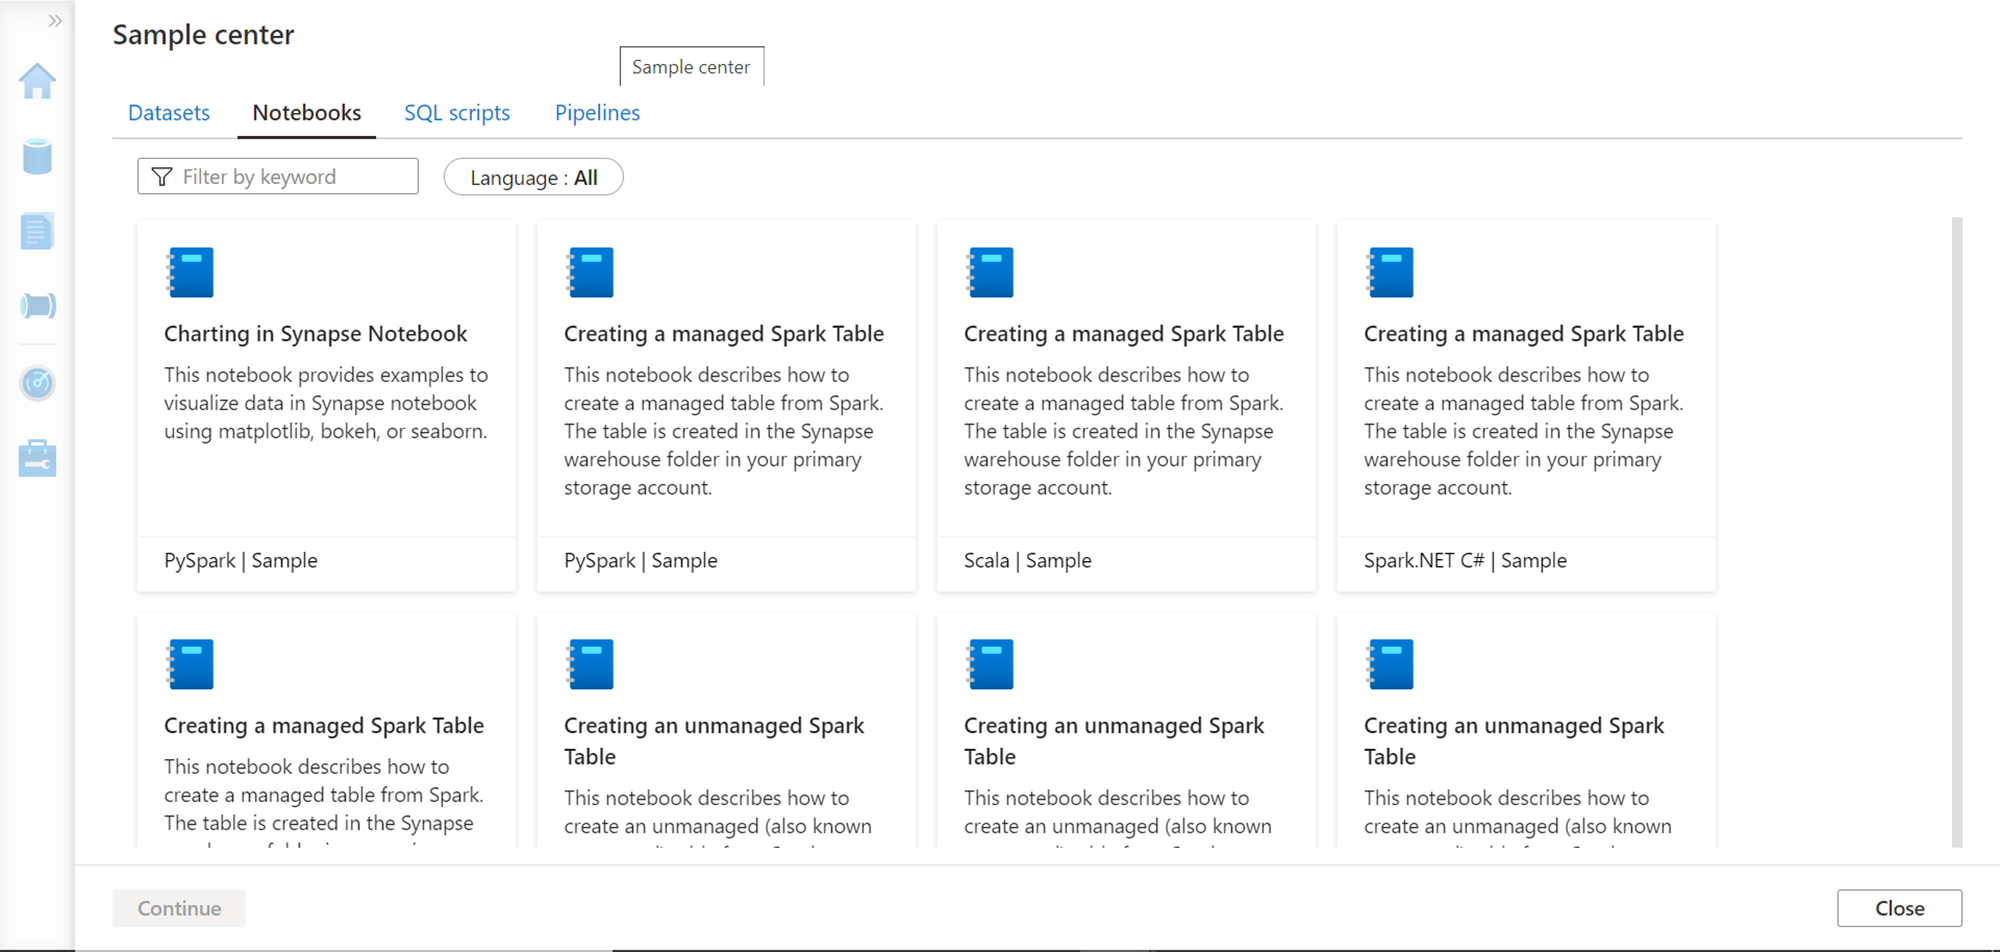
Click on the Notebooks tab and you would be able to see many sample notebooks as shown below. Juypter style notebooks are the standard mechanism to operate on Spark runtime as shown below. Different kernels and languages can be used with the notebooks to operate on Spark runtime or Spark pool which can process data stored in Azure Data Lake Storage or any data sources supported by Azure Synapse Analytics.
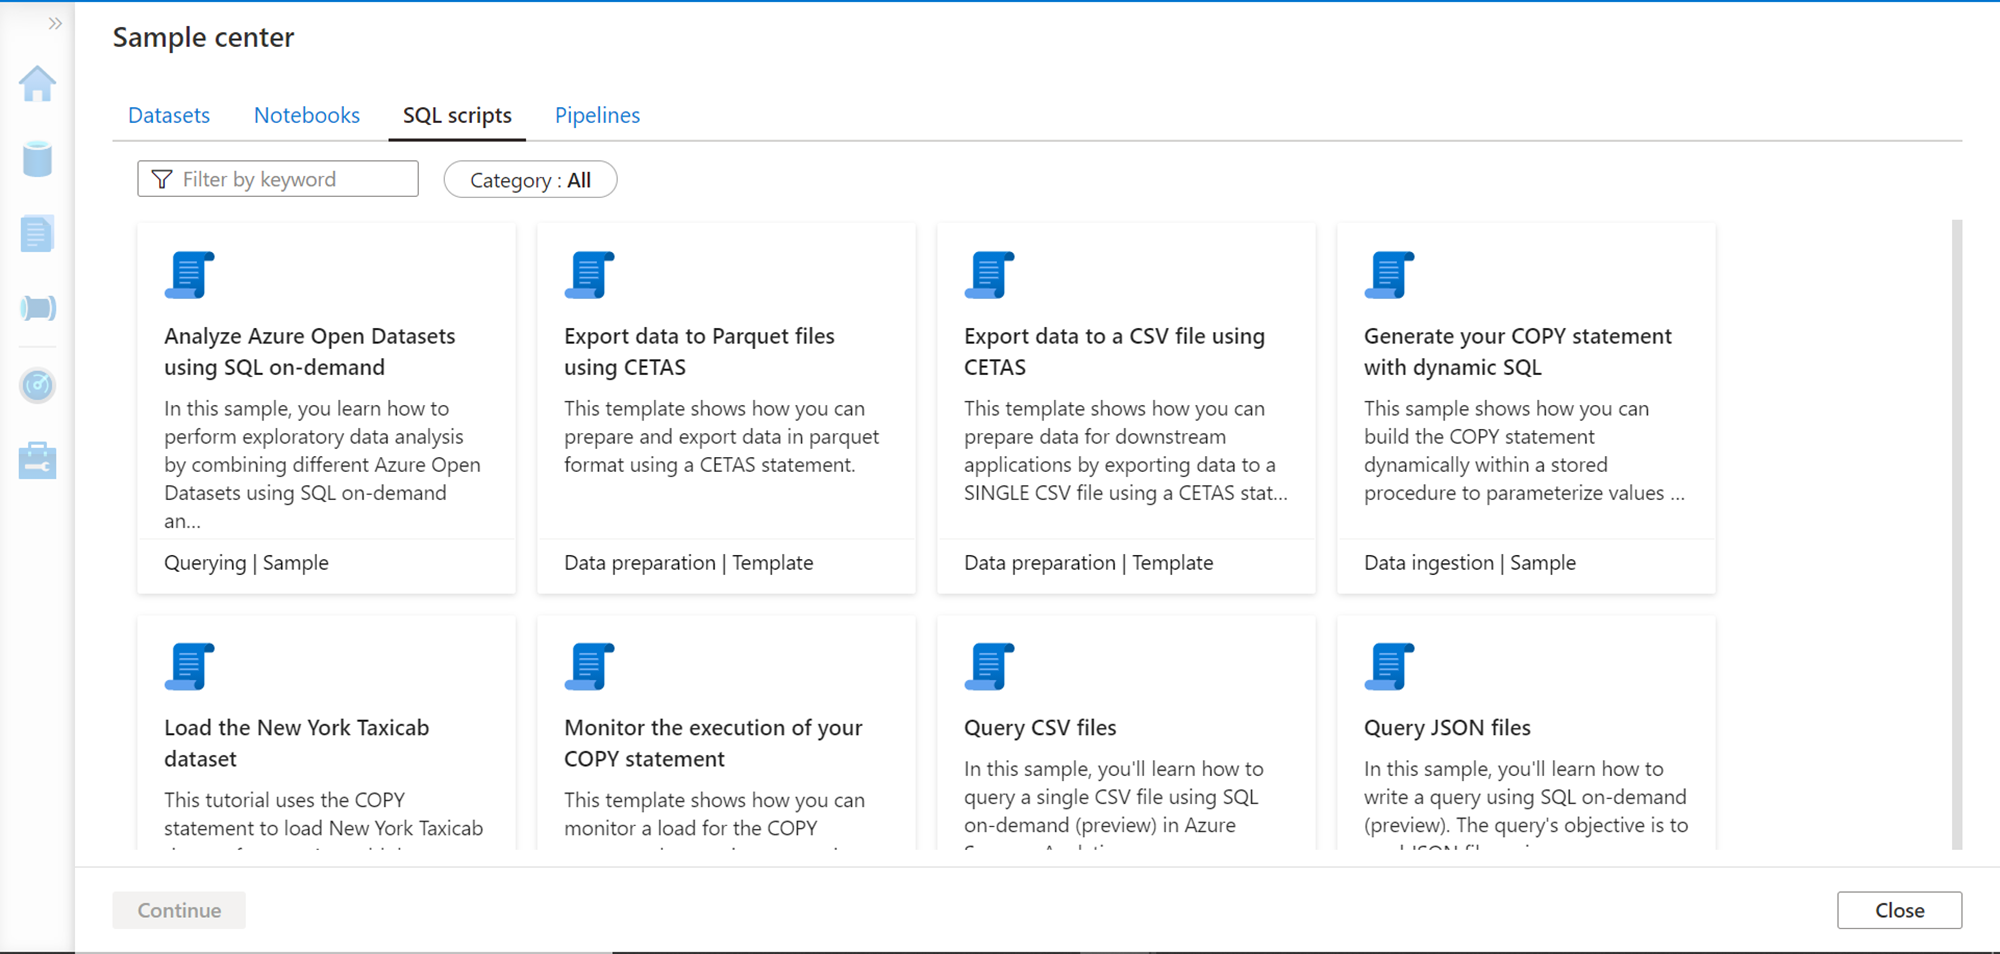
Click on the SQL scripts section to view the gallery of SQL scripts that can be used with SQL On-Demand pools or SQL Standard pools as shown below.
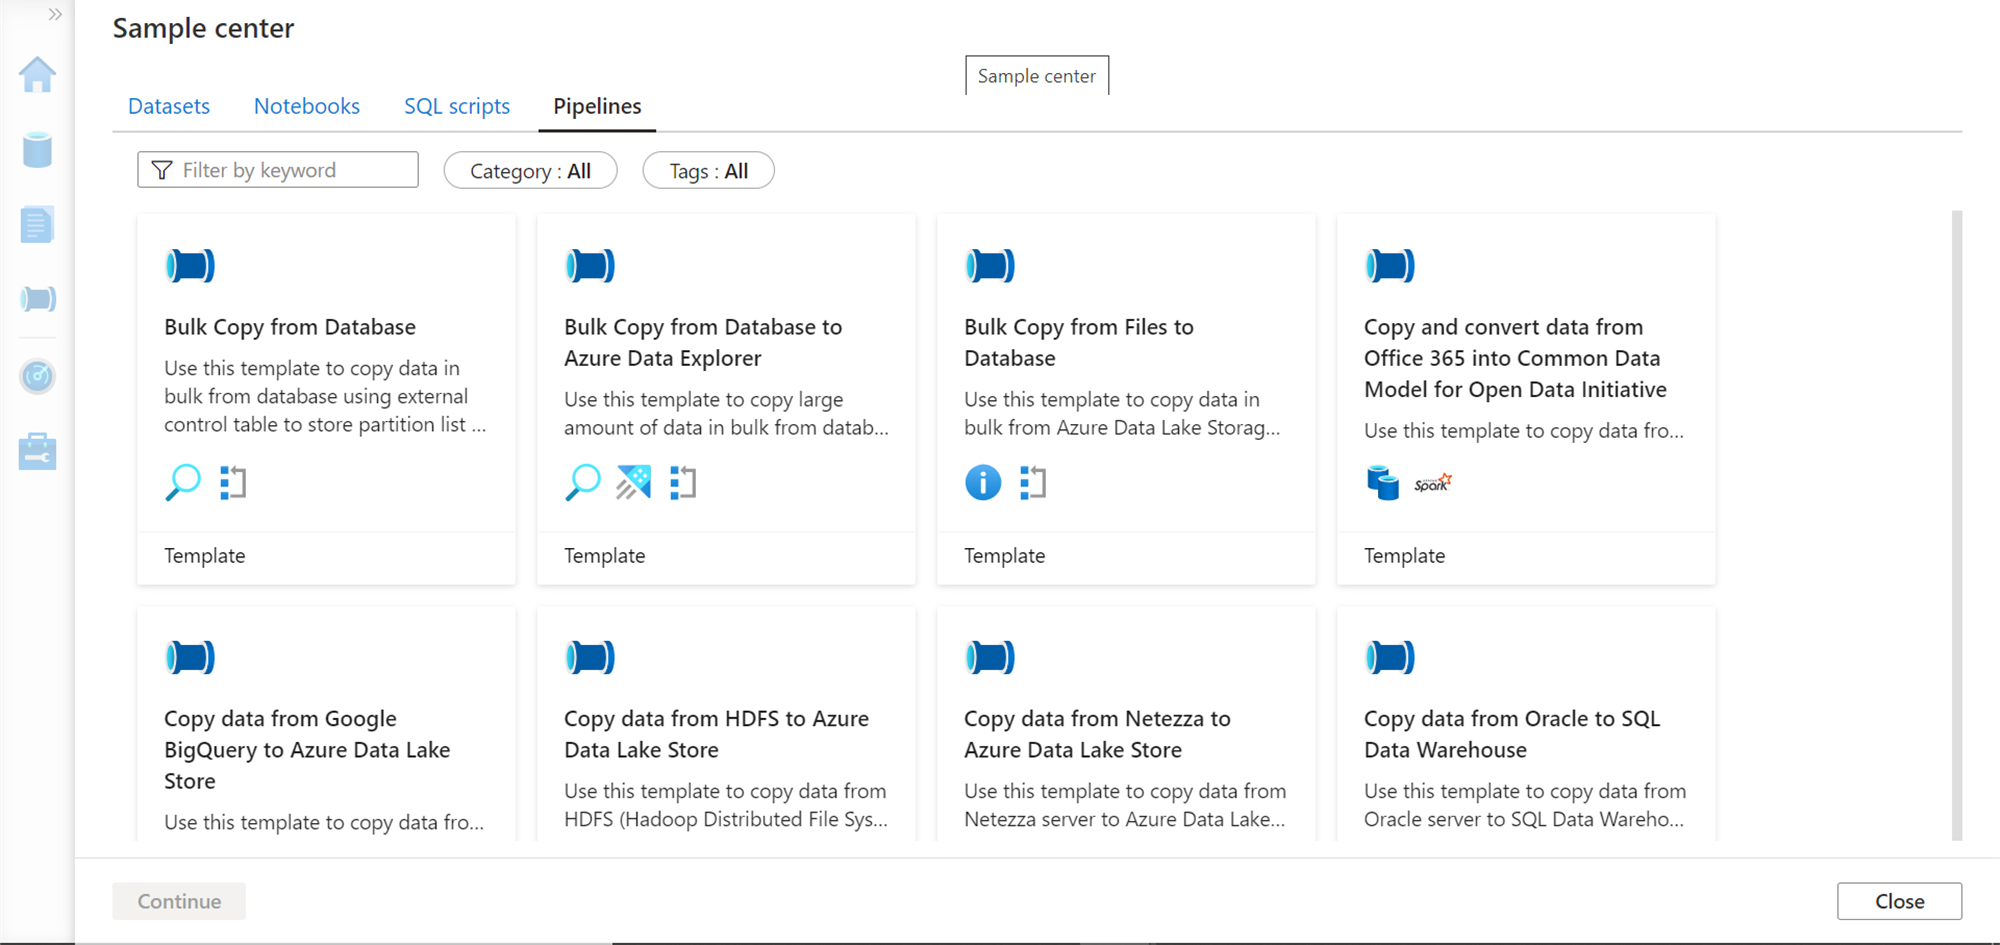
Click on the Pipelines tab next and it would look as shown below. This gallery provides templates that can be used to create Azure Data Factory style data pipelines to integrate data from various data sources into Azure Synapse. Copying or importing data from external data sources into Synapse is a very frequent and most addressed use-case, so you would find more samples for copying data.
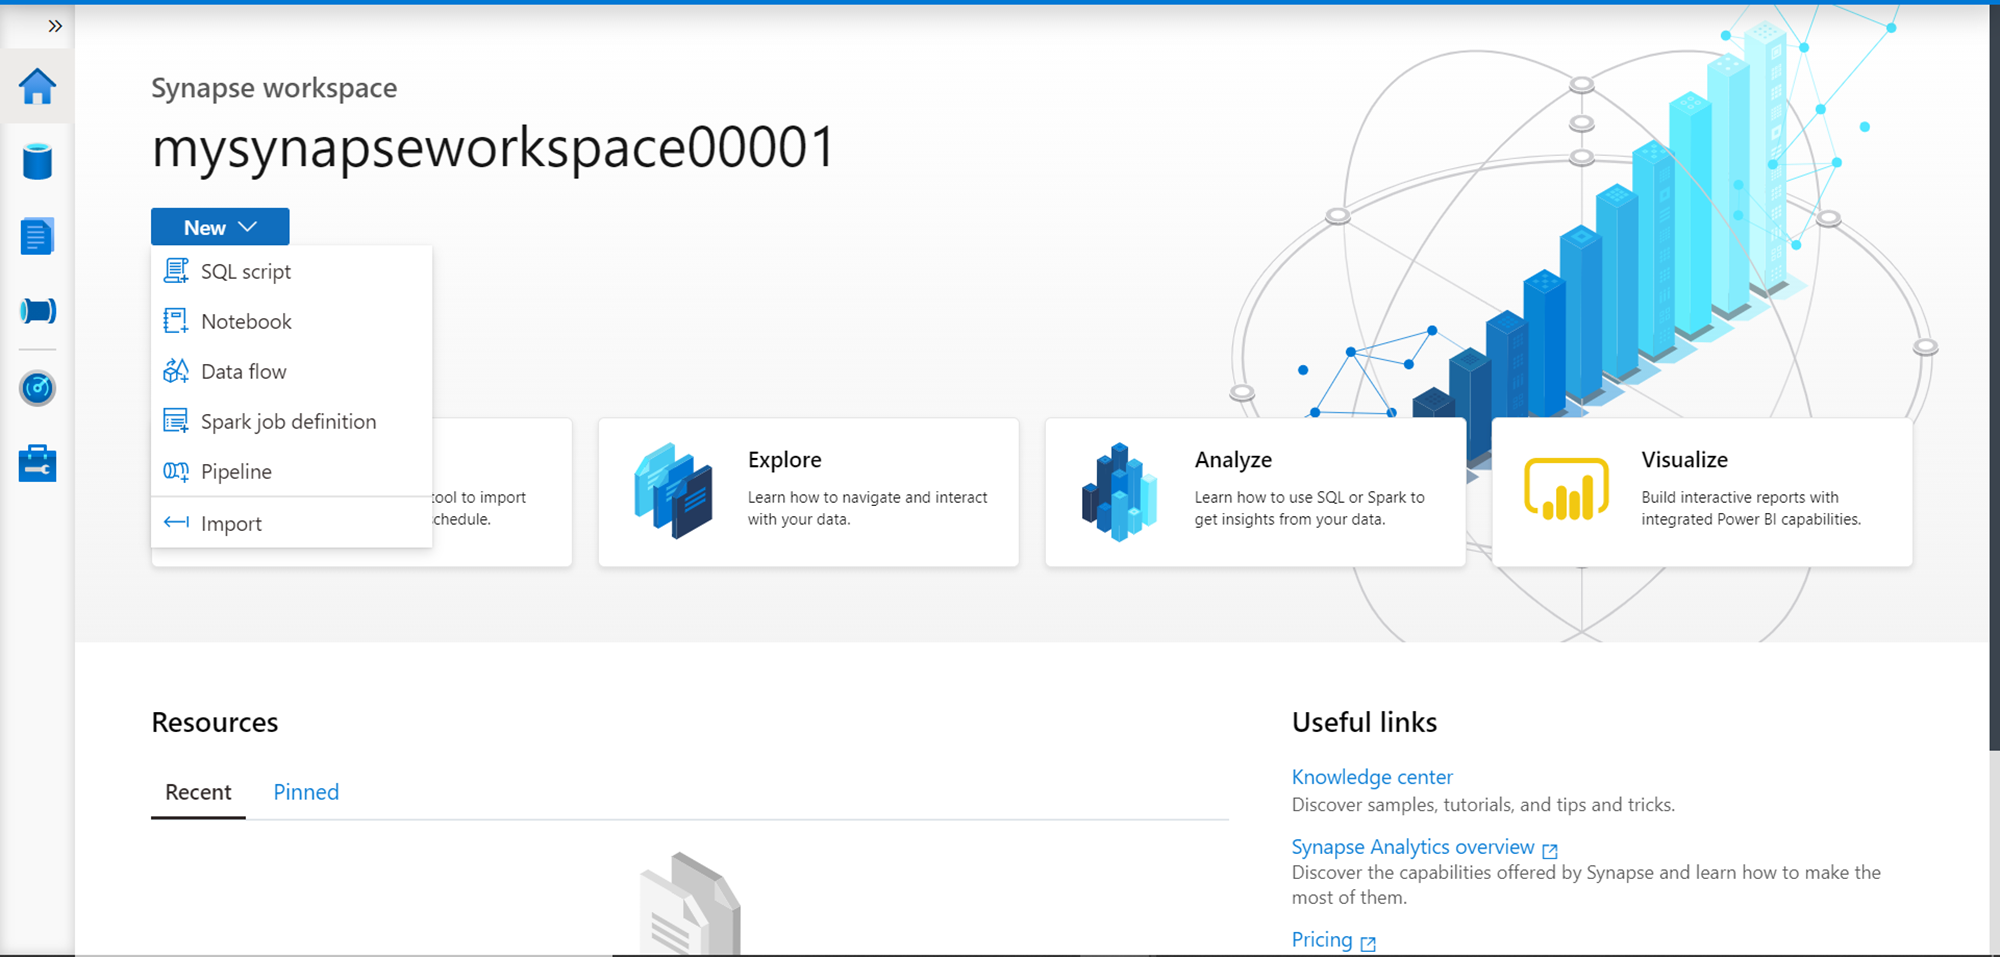
On the left-hand side of the page, you would be able to see a toolbar style panel. Click on the home page to check out the dashboard page as shown below. Ingest, Explore, Analyze and Visualize are the four core categories in Synapse Analytics. Click on the New dropdown as shown below, which will provide options to create various artifacts like SQL Scripts, Notebooks, Data Flow, Spark Job, and Data Pipelines. Also, you can use the import option to copy the data from external data repositories into Azure Synapse.
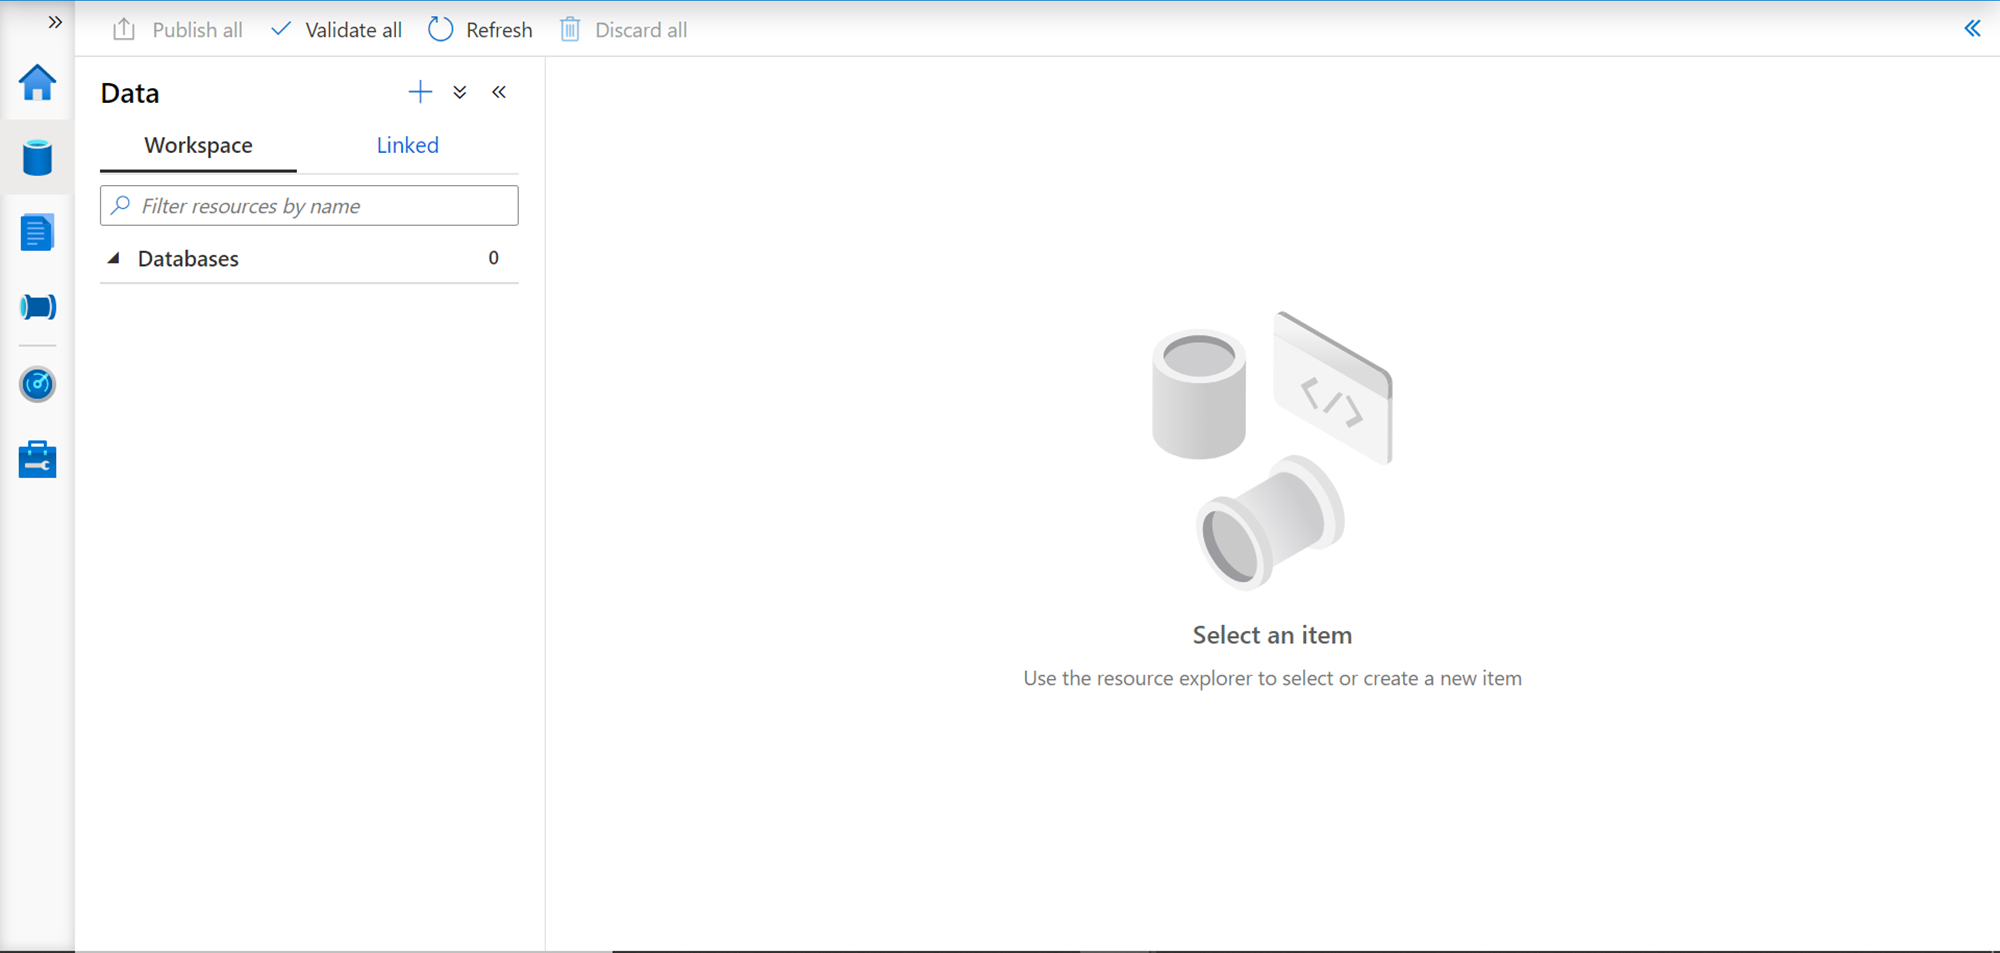
Click on the next icon after the Home icon which is the Data icon. This would open a new page as shown below. One can create database, tables and other database objects in Synapse. Also, one can create linked databases to access data from external data repositories using the features offered in the Linked tab.
The below screen shows the Linked tab. By default, the Azure Data Lake Storage Gen2 account, which we provided during the creation of the Synapse workspace is shown here, as this storage account is already linked. Some sample files that I have stored in this storage account is shown on the right pane as shown below. Based on the repository, different options can be seen on the toolbar like creating a new SQL script, new notebook, new data flow, new dataset, as well as file-based operations like creating or deleting a new file or folder as shown below.

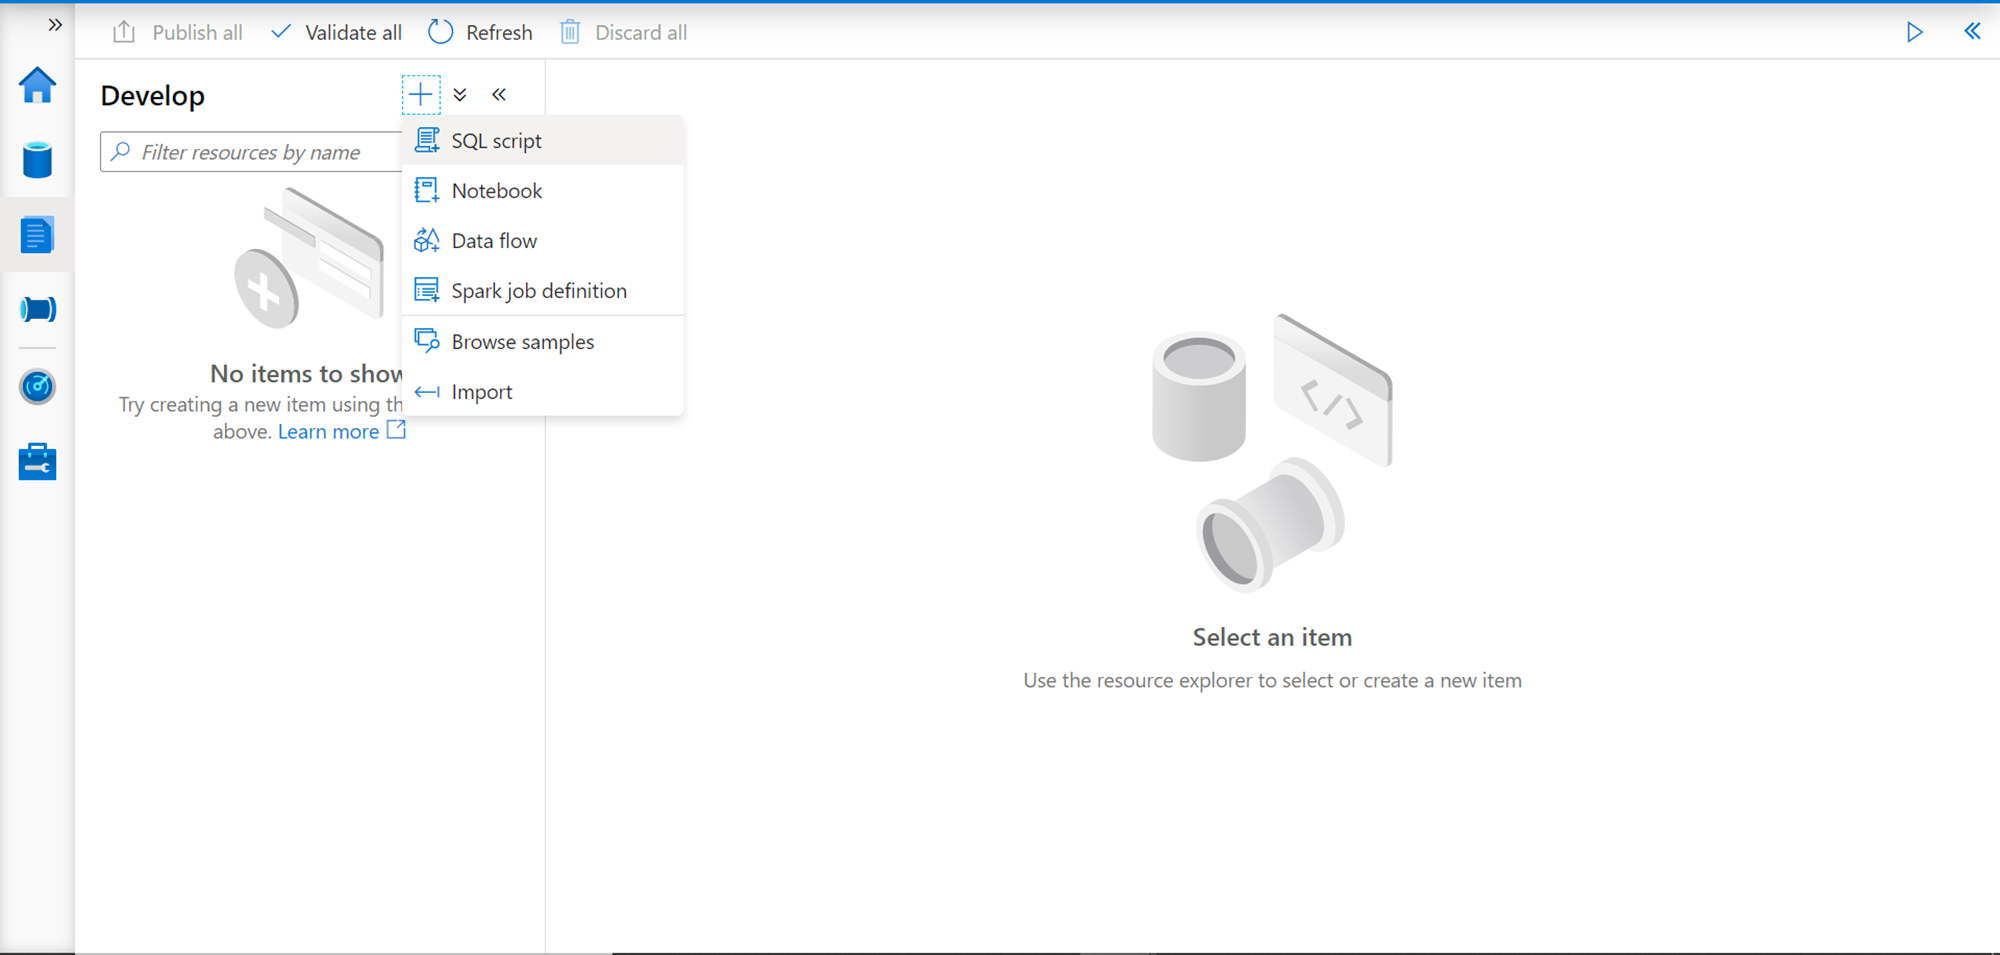
The next tab in line is the Develop tab as shown below. When you click on the plus sign, it would provide options to create new artifacts like SQL script, Notebook, Data flow, etc. These are the exact same options that are provided when you open the Azure Synapse Studio as we saw earlier.
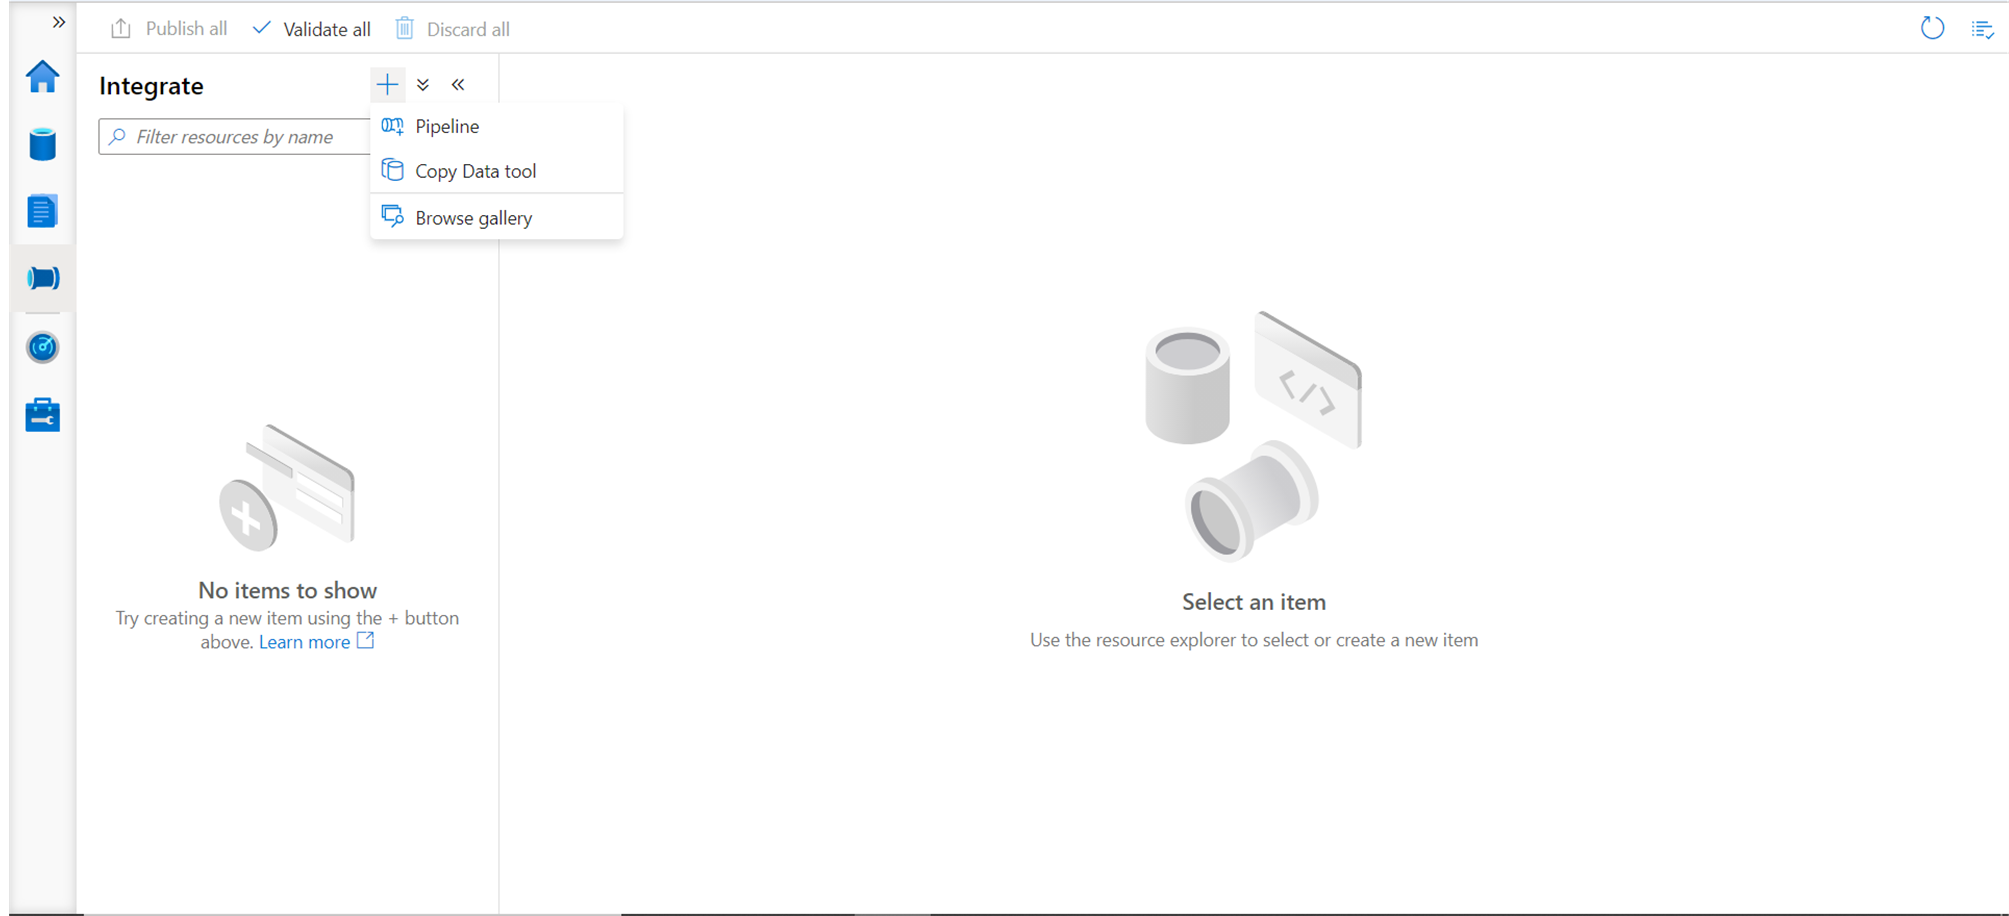
The next icon in line is the Integrate section as shown below. Azure Synapse is a data warehouse and data is generally integrated from various types of repositories with Synapse Analytics. We can create data pipelines, jump directly to the Copy tool which allows us to create data pipelines step by step using a wizard, or browse a gallery of samples or previously created data pipelines to reuse the same for integrating data.
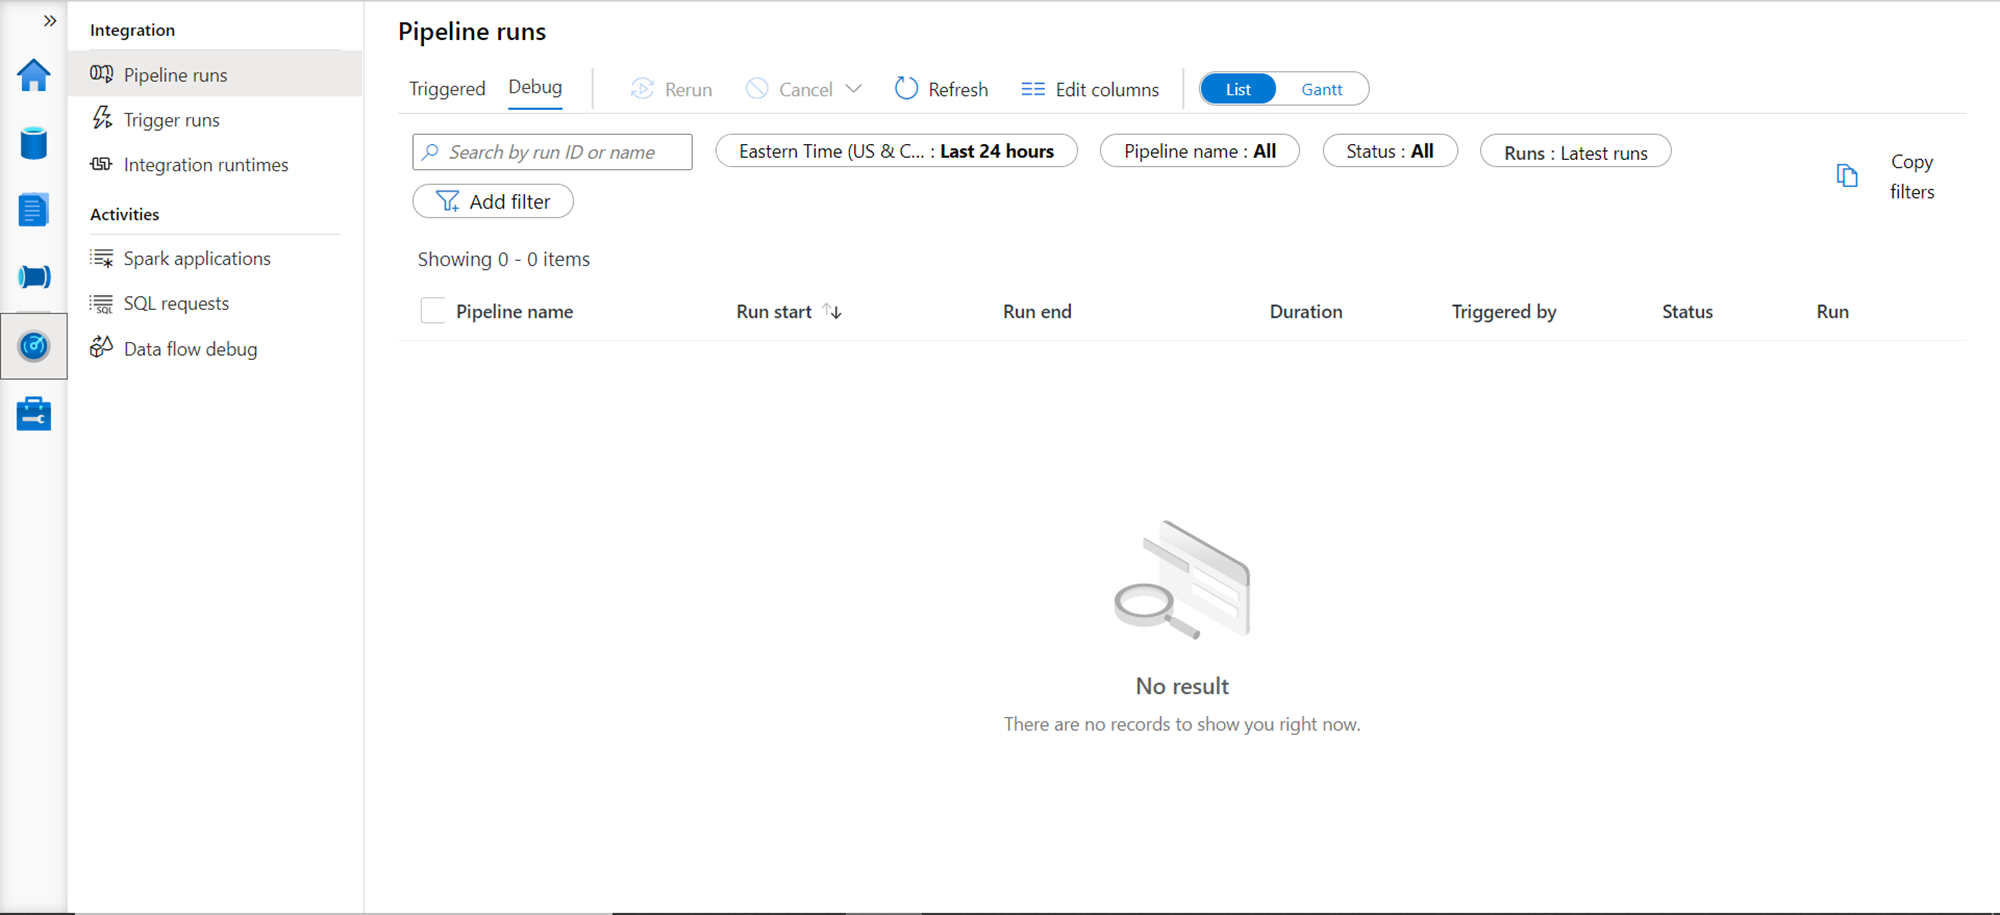
The next section in line is the Monitoring section as shown below. Synapse Studio is not only a developer console but also an administrative console as well. If you look at the options shown below, from this view one can monitor the pipeline executions, triggers that initiated a pipeline execution, and different integration runtimes. It also provides different options to monitor spark applications and those job executions that are generated from those applications, ad-hoc SQL queries or requests that are executed, as well as options to debug a data flow as well. On the right-hand pane, the view can be visualized as a list as well as a Gantt chart, which can be very useful to track when multiple time-critical loads are being executed in parallel. Apart from this, there are various options to filter this data based on time-zone and other filter options. These filters can also be reused by using the copy filter option, which can be applied to other different views in the Azure Synapse Studio.
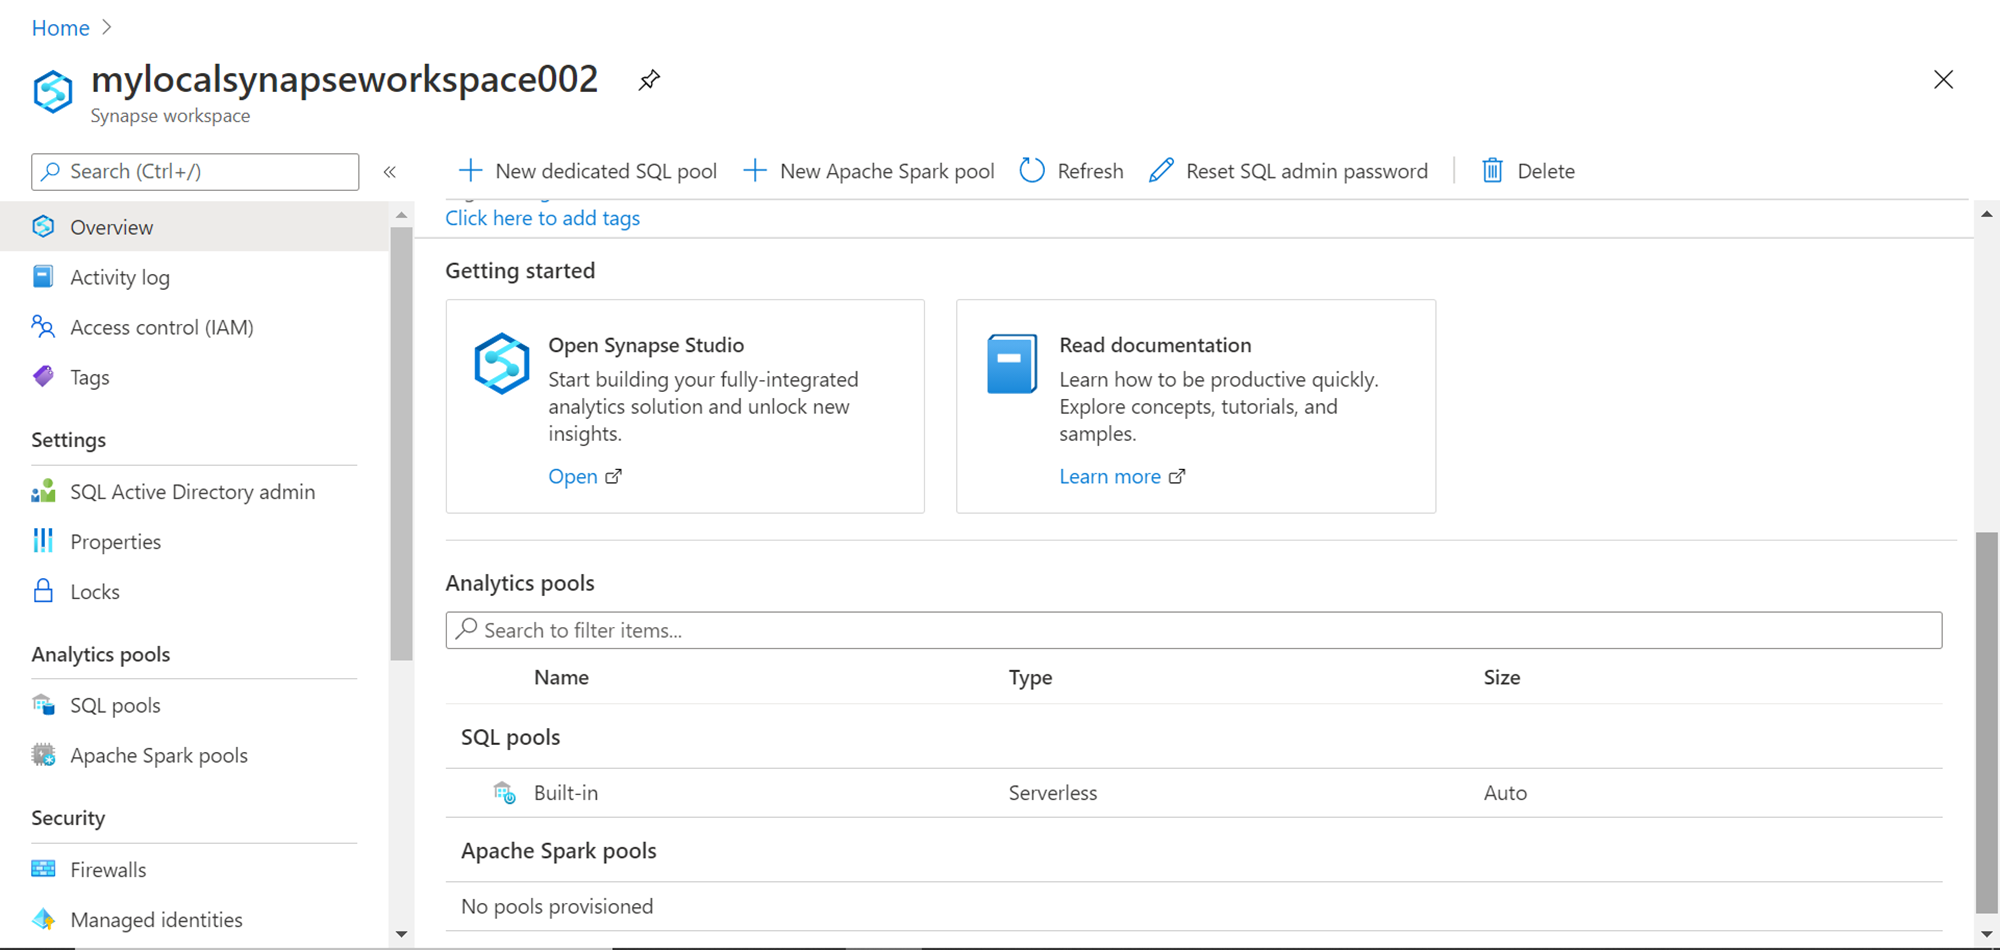
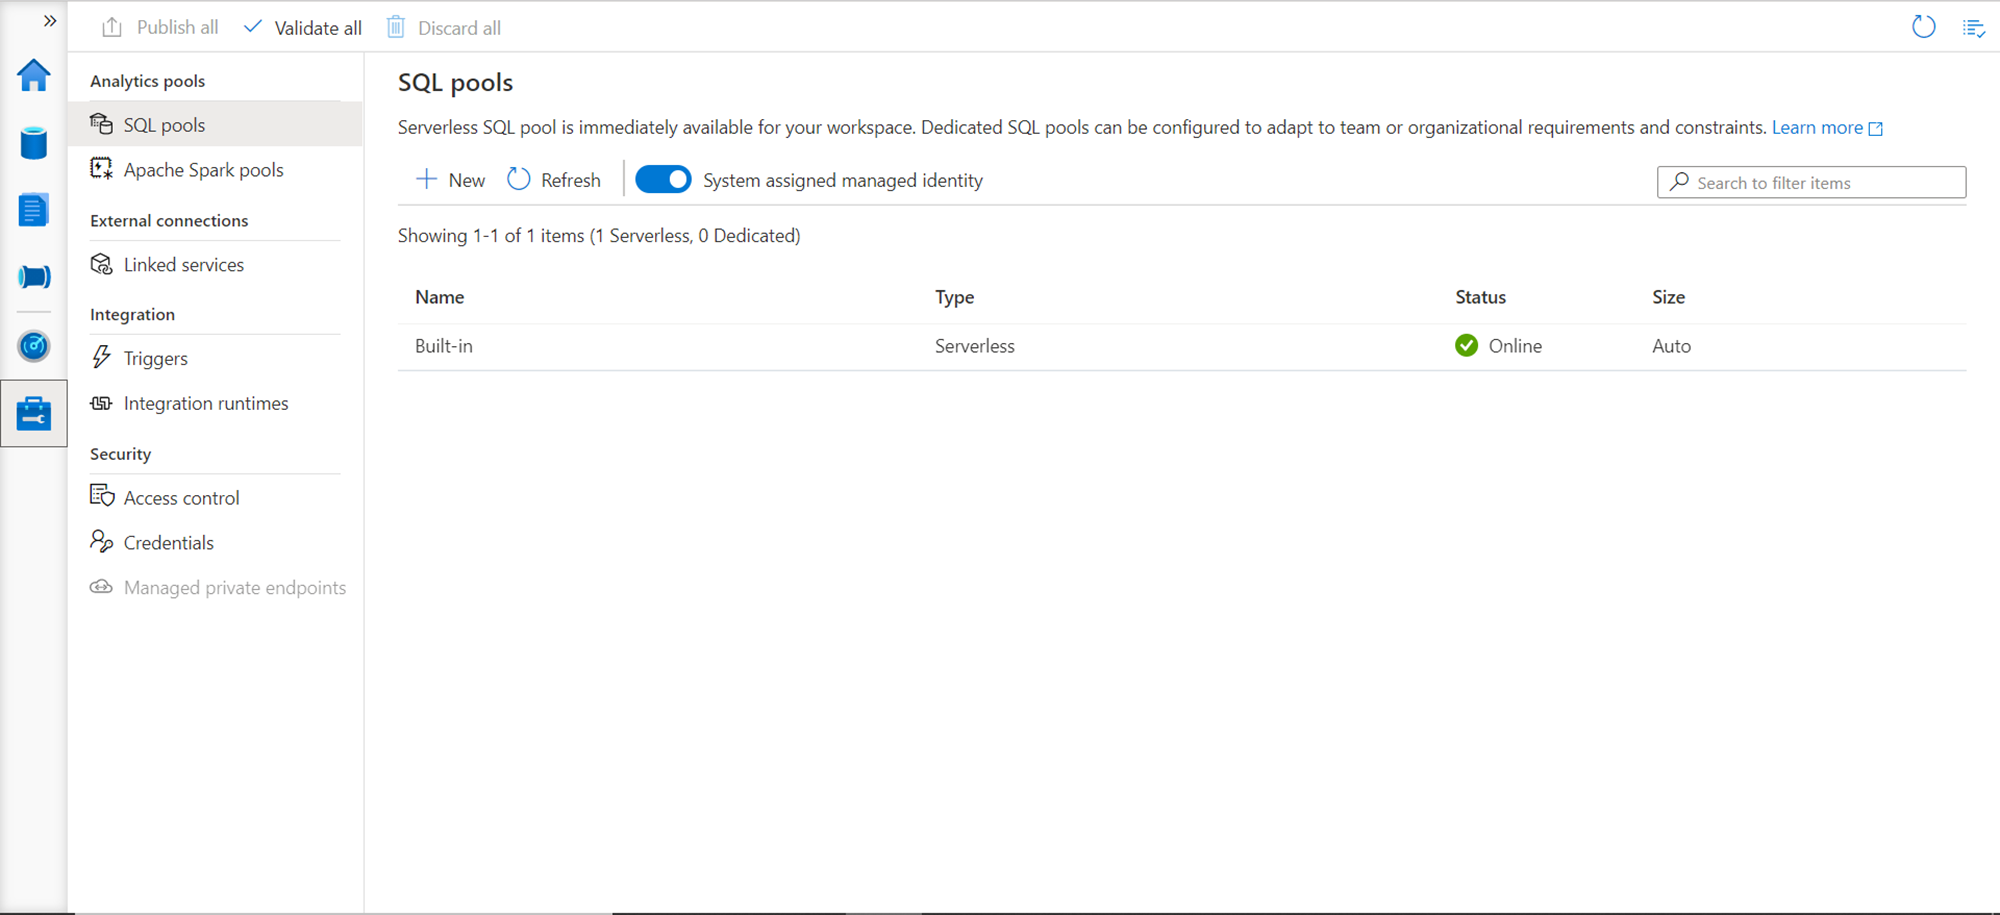
Finally, the last icon in line is the Tools section as shown below. The first section is Analytics pools which are the SQL pools and the Spark pools. The built-in SQL On-Demand pool is listed in the SQL pools section, along with the details that it’s of serverless type, its available and it auto-scales. One can click on the New icon in the toolbar to create new SQL pools. As we have not created any spark pool, if you click on Apache Spark pools, it would not have any spark pools listed. One can create linked services to register external data repositories in the external connections section. In the Integration section triggers and Integration runtime can be registered. And in the Security section, one can configure access control to this environment to different users and group, modify the credentials that we configured for administrative access, and manage any private endpoints for secure network connectivity (if any).
This concludes and covers all the areas of Azure Synapse Studio, which enables anyone who is new to Azure Synapse Studio to get started with it.
Conclusion
We started with a setup of synapse workspace and initiated access to Azure Synapse Studio. We explored various options, views, features, and tools offered in the studio and understood what it offers and when to use the same. An induction to Azure Synapse Studio provides the right level of awareness to use this tool to its maximum potential.
Table of contents

He has worked internationally with Fortune 500 clients in various sectors and is a passionate author.
View all posts by Rahul Mehta
- Finding Duplicates in SQL - February 7, 2024
- MySQL substring uses with examples - October 14, 2023
- MySQL group_concat() function overview - March 28, 2023