

This article will show how to work with SQL on-demand pools and understand the fundamentals of working with this pool in Azure Synapse Analytics.
Introduction
In the previous parts of this article series of Azure Synapse Analytics, we learned the basics of Azure Synapse Analytics, different pools it offers, Azure Synapse Workspace as well as Azure Synapse Studio. The most basic auto-provisioned pool in Azure Synapse Analytics is SQL on-demand pool. This pool allows to create different data objects as well as access data from different data sources. In this article, we will see how SQL on-demand pools work and understand its fundamentals in Azure Synapse Analytics.
Sample data and Pre-requisites
Before we start working with SQL on-demand pool in Azure Synapse Analytics, we need to have the required setup in place. Firstly, it is assumed that a Synapse Workspace has been created with the required dependencies like the Azure Data Lake Storage account as well as the file system as explained in the earlier part of this series. Also, it’s assumed that one has the required privileges to access data stored on the storage account. Some form of awareness with Azure Synapse Studio is also expected as explained in the earlier part of this series. Once this setup is in place, we can proceed with the next step.
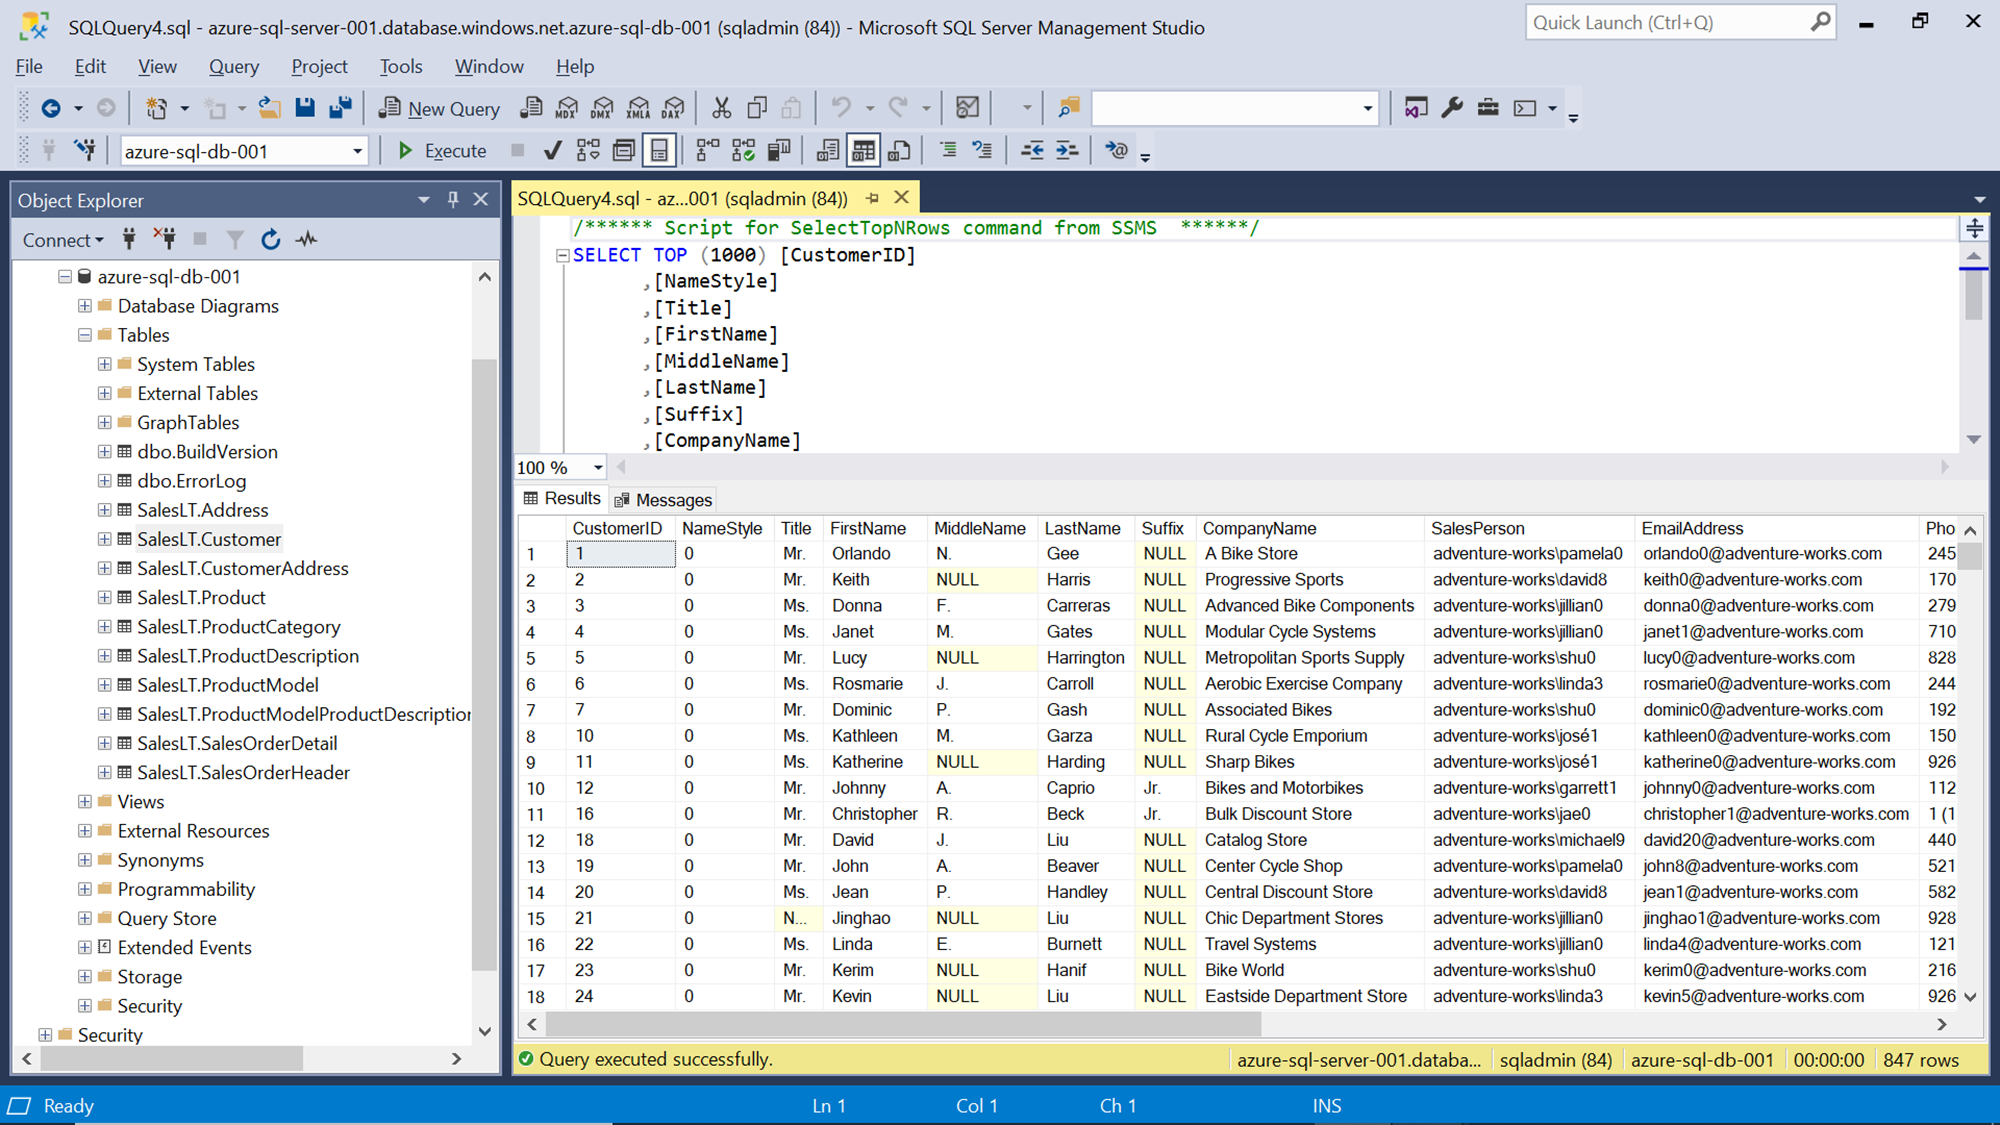
To start working with the SQL on-demand pools in Azure Synapse Analytics, we need some sample data in place. If you already have some data to work with, the same can be used. If not, there’s an easy way to get sample data in the form of files. When we create a SQL Azure database, there’s an option to create it with sample data. It has a reasonable schema with a modest level of data, which can be used as a sample dataset. Shown below are the tables, as well as data in one of the tables.
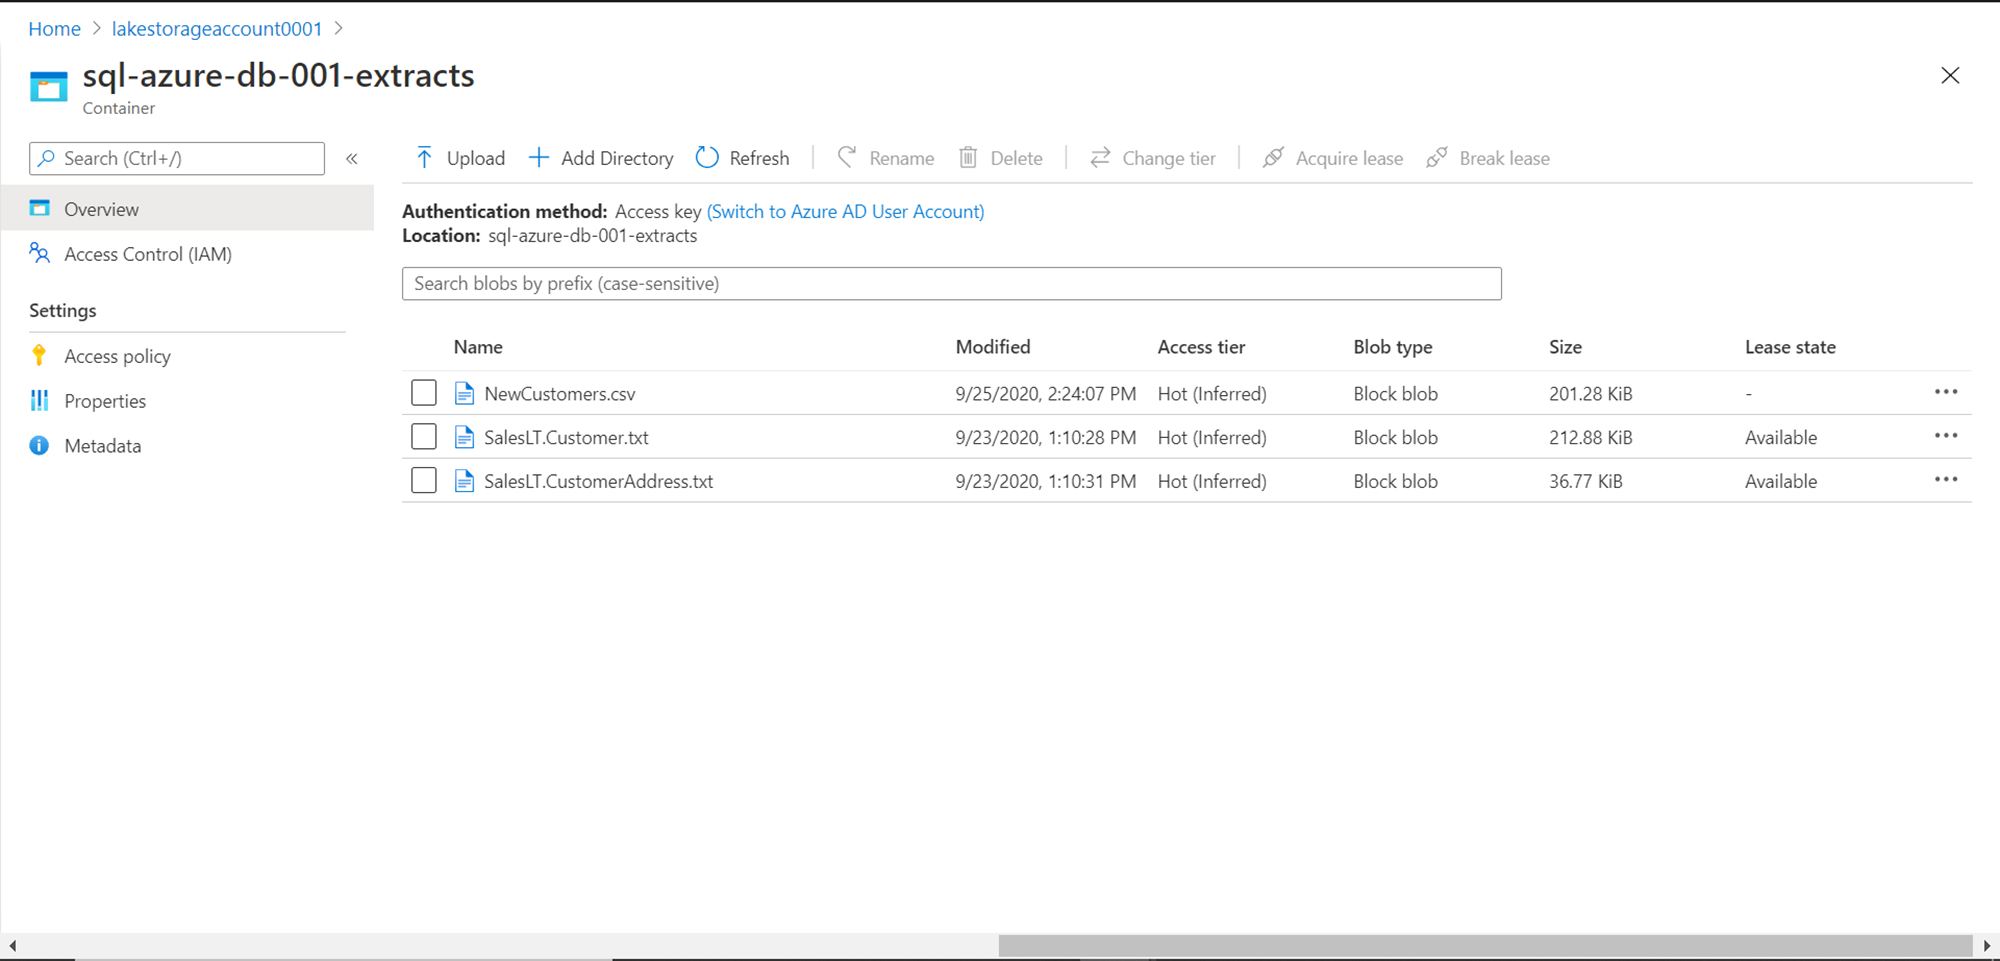
We are going to use data, but not directly from SQL Azure. Once this data is exported in the form of files and stored on the Azure Data Lake Storage account, it would look as shown below. Here we have data from some of the tables, which is stored in a comma-separated text file format. We are going to read or process data from one of these files using SQL On-Demand pool in Azure Synapse Analytics.
SQL On-Demand Pool
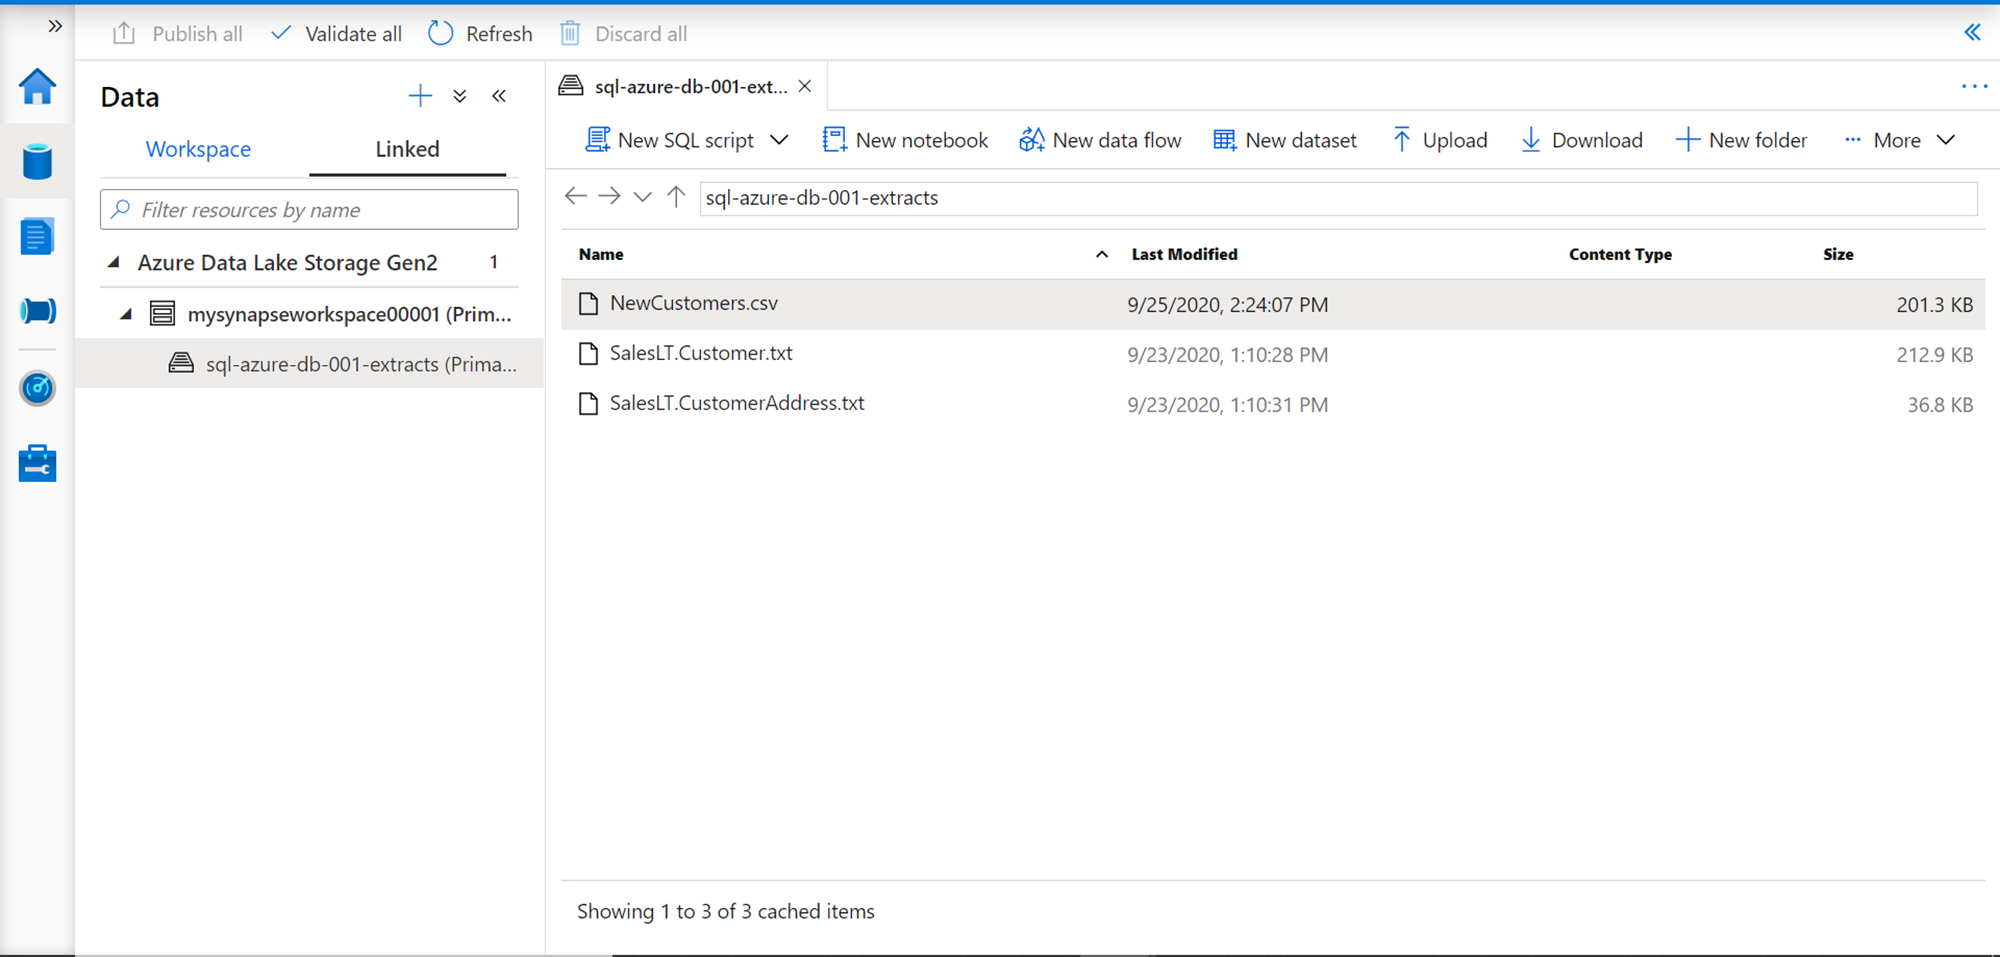
Navigate to the Synapse workspace and open Synapse Studio. On the tools pane, you would find the Data section. Click on the icon and it would open the data dashboard. There would be two tabs on the explorer pane – Workspace and Linked. Click on the Linked tab, which would open the Azure Data Lake Storage Gen2 account associated with the Synapse Workspace. Expand this account and you would be able to see the files that are stored under it as shown below. On the right side of the pane, we would find different options to perform different operations on this file like uploading/downloading files, creating new folders, new notebooks etc.
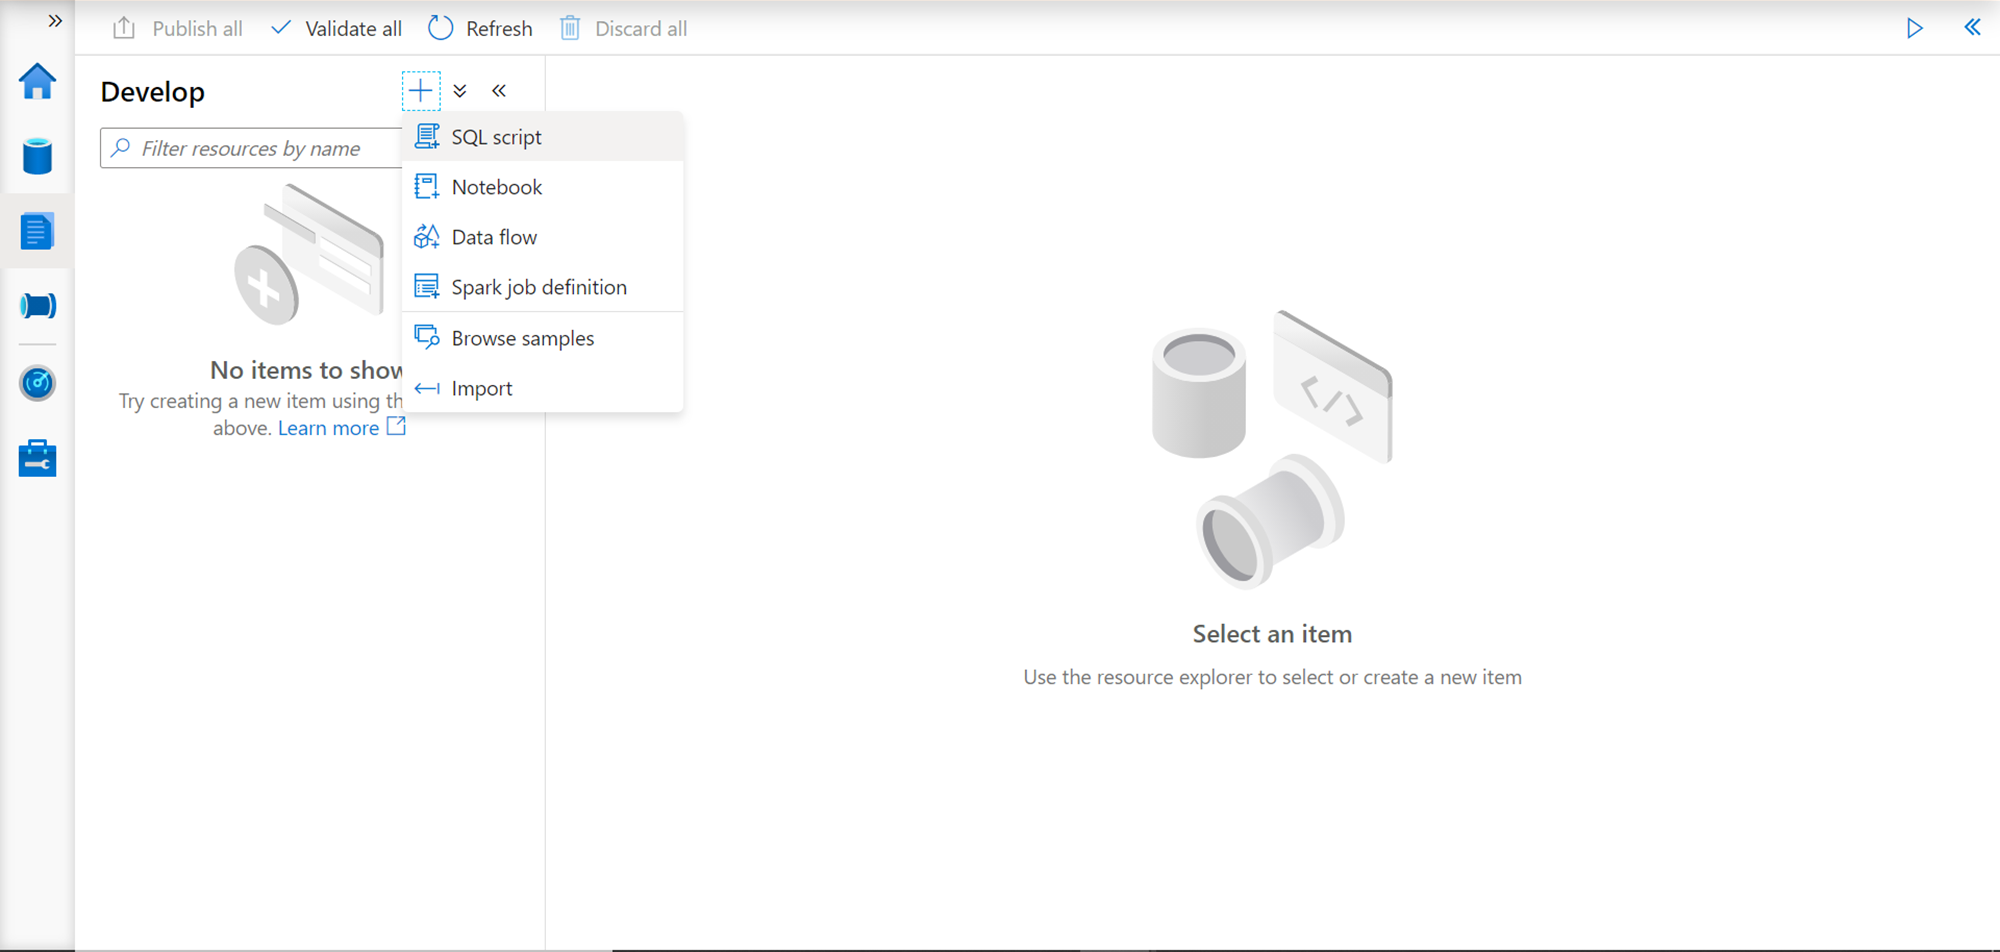
Now that we have the sample data, it’s time to create some database objects in the auto-provisioned SQL On-Demand pool and access this data. For this purpose, click on the Develop icon in the tool pane on the left-hand side. You would find it blank as we do not have any objects created. Click on the plus sign and it would provide different options to create objects like SQL Script, Notebooks etc. as shown below.
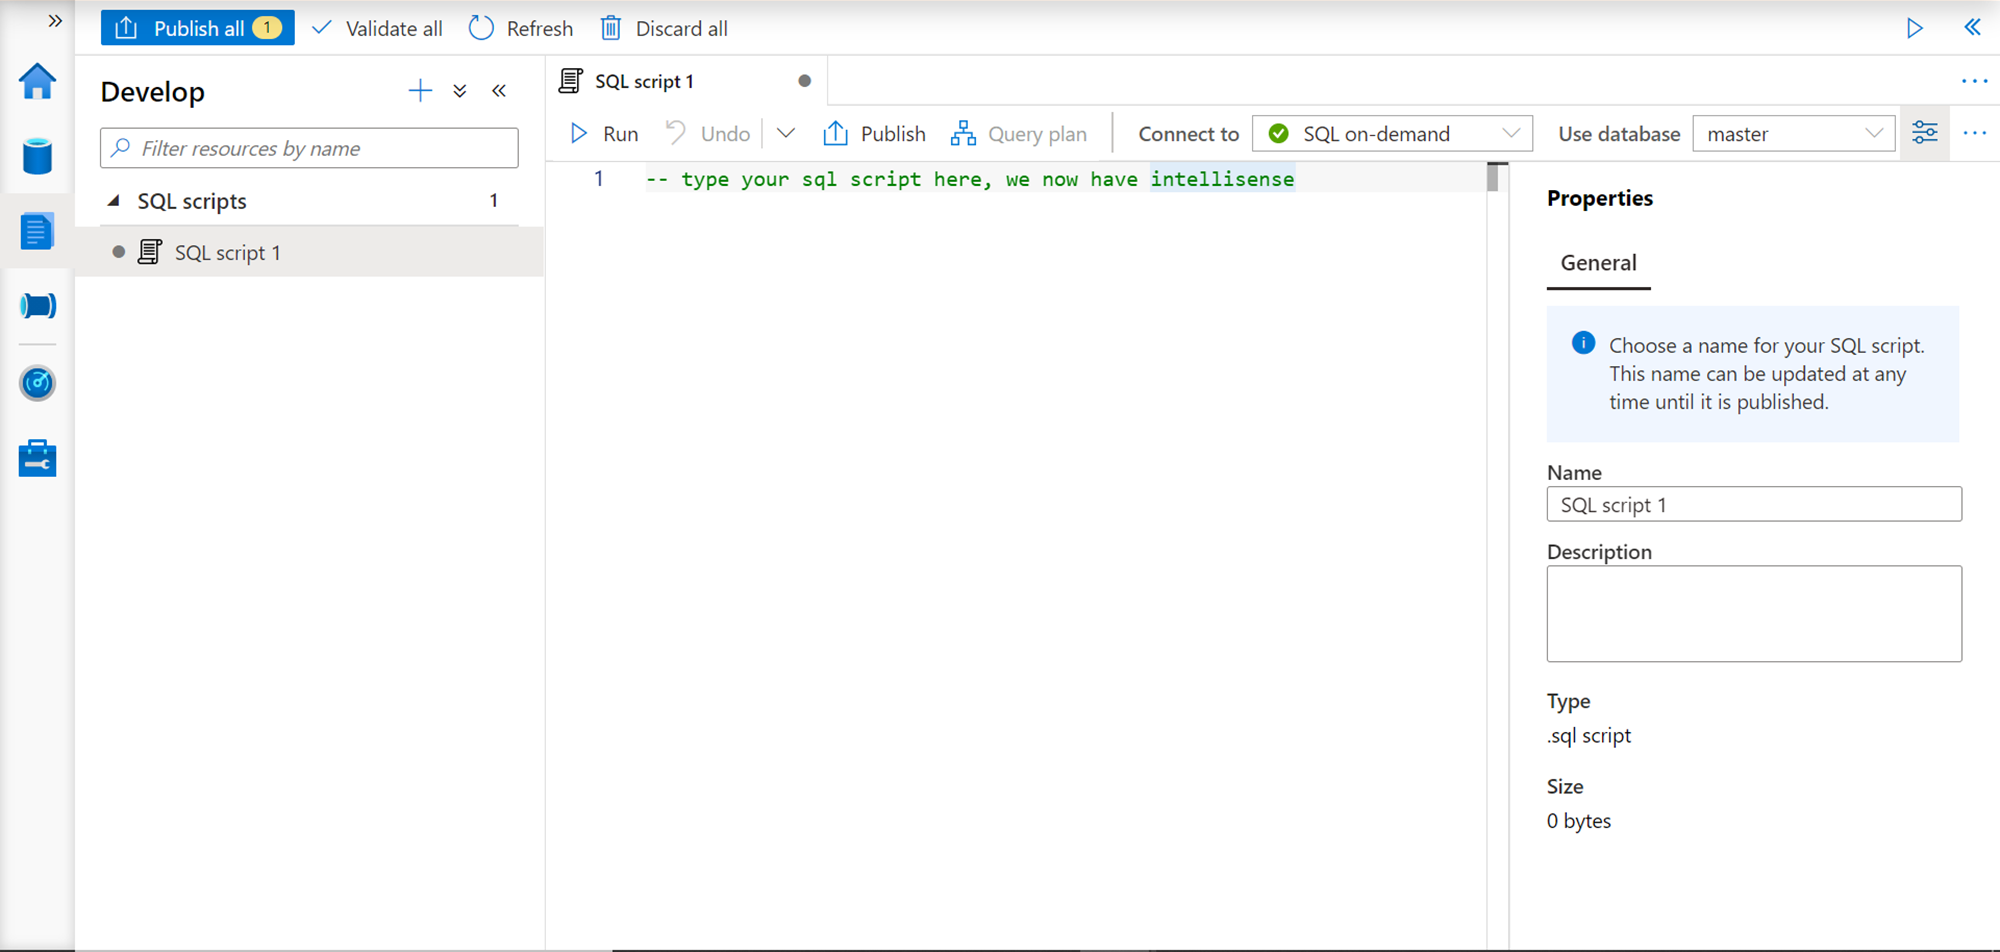
Click on the SQL Script and it would open an interface as shown below. This interface can be used to develop SQL scripts. Like Visual Studio, while developing these scripts, it would provide intellisense as well. On the right-sided tool pane, we can see that the “Connect to” dropdown shows SQL on-demand by default, as that is the only pool available by default. In the “Use database” dropdown, the default selection in the master database, as that is the only database available by default. In the properties section, we can provide the name of the SQL script as well as any description to annotate the purpose or functionality of this script.
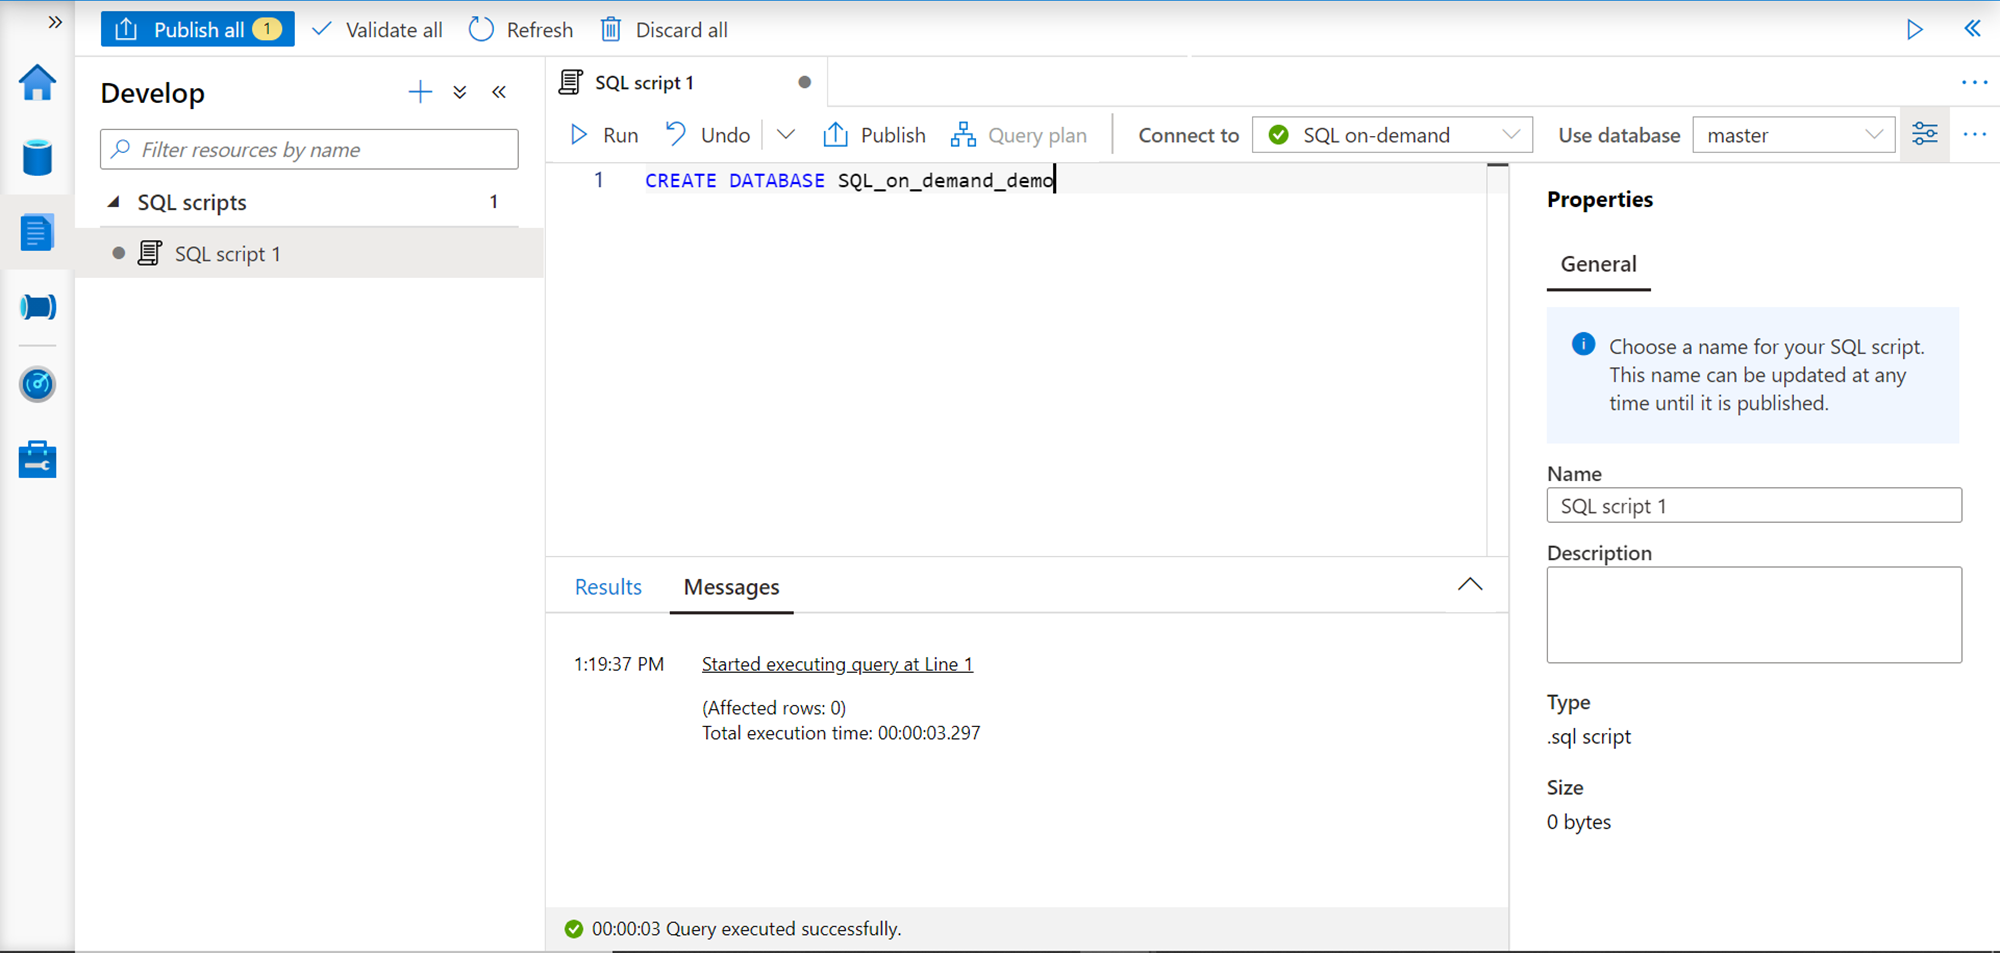
We intend to create new database objects for our specific use. It’s always a good practice to create database objects in your own custom database, instead of using a master database. So as the first step, we will create a new database using the SQL on-demand pool and the regular T-SQL style CREATE DATABASE command as shown below. Click on the Run button, and you would find a confirmation message instantly that command execution was successful.
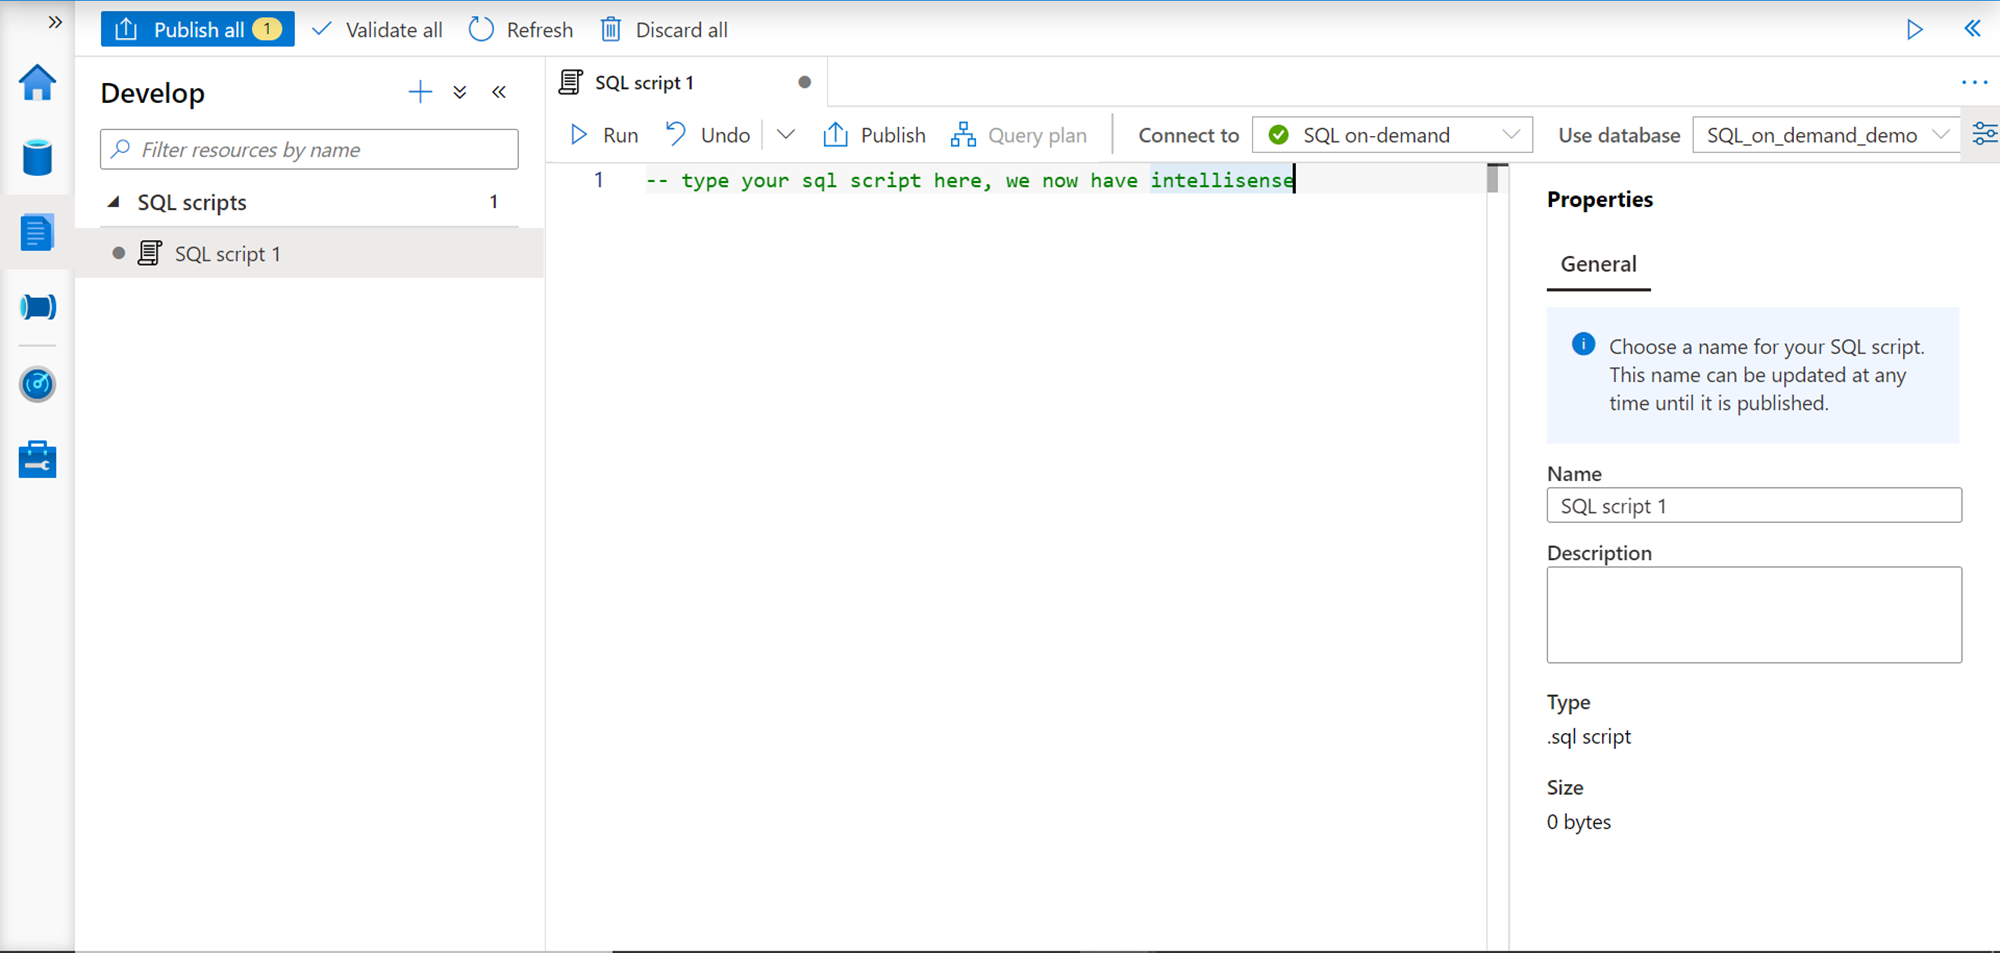
Now that our database has got created, we need to switch the context to the newly created database, the same way we switch the context of the database with the USE statement in T-SQL or the way we switch context using the database drop-down in SSMS. Here we can change the database context from the “Use database” dropdown as shown below. After changing the context to the newly created database, we can start executing other scripts and commands to create new database objects.
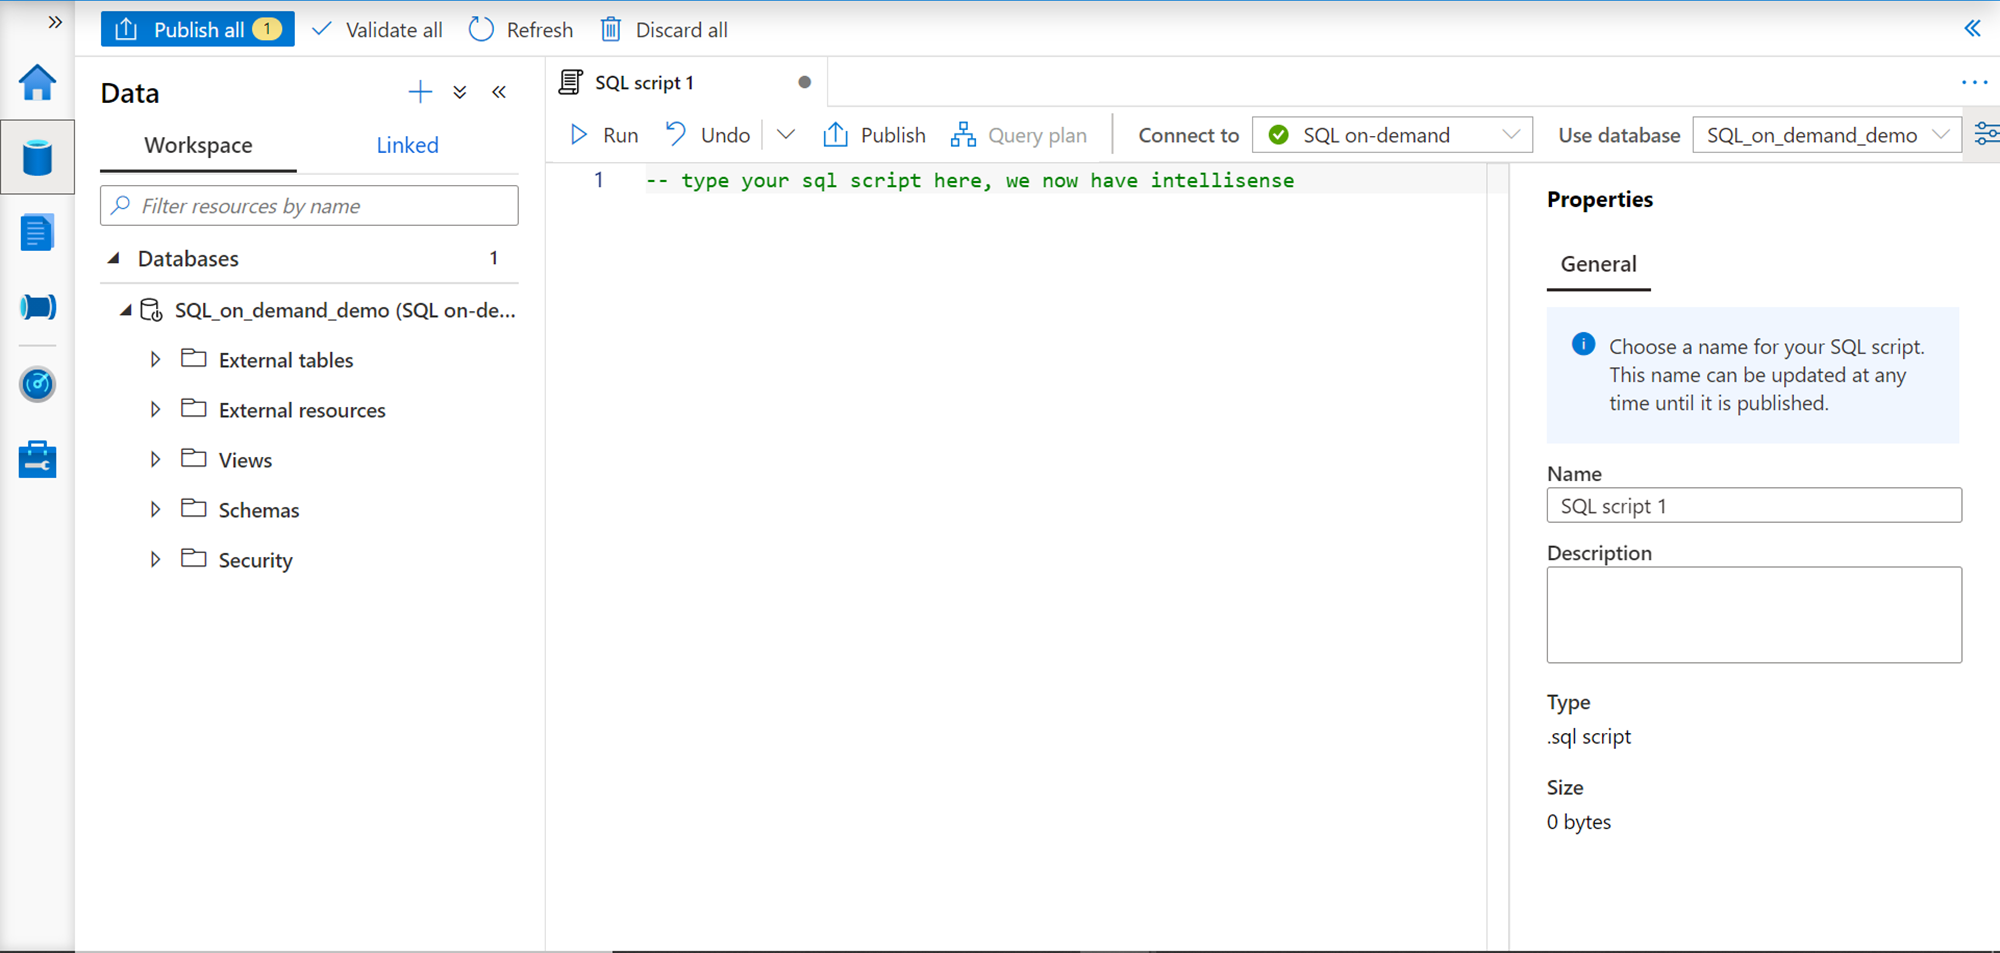
Before we create new database objects, we need to know what all database objects can be created in a database created using SQL on-demand pool. An easy way to know this is by navigating to the Data section, by clicking on the Data icon on the left-hand pane. Under the workspace tab, we would be able to see the newly created database and the hierarchy listed under it shows the different database objects that can be created under it like tables, views, schemas and other security-related objects.
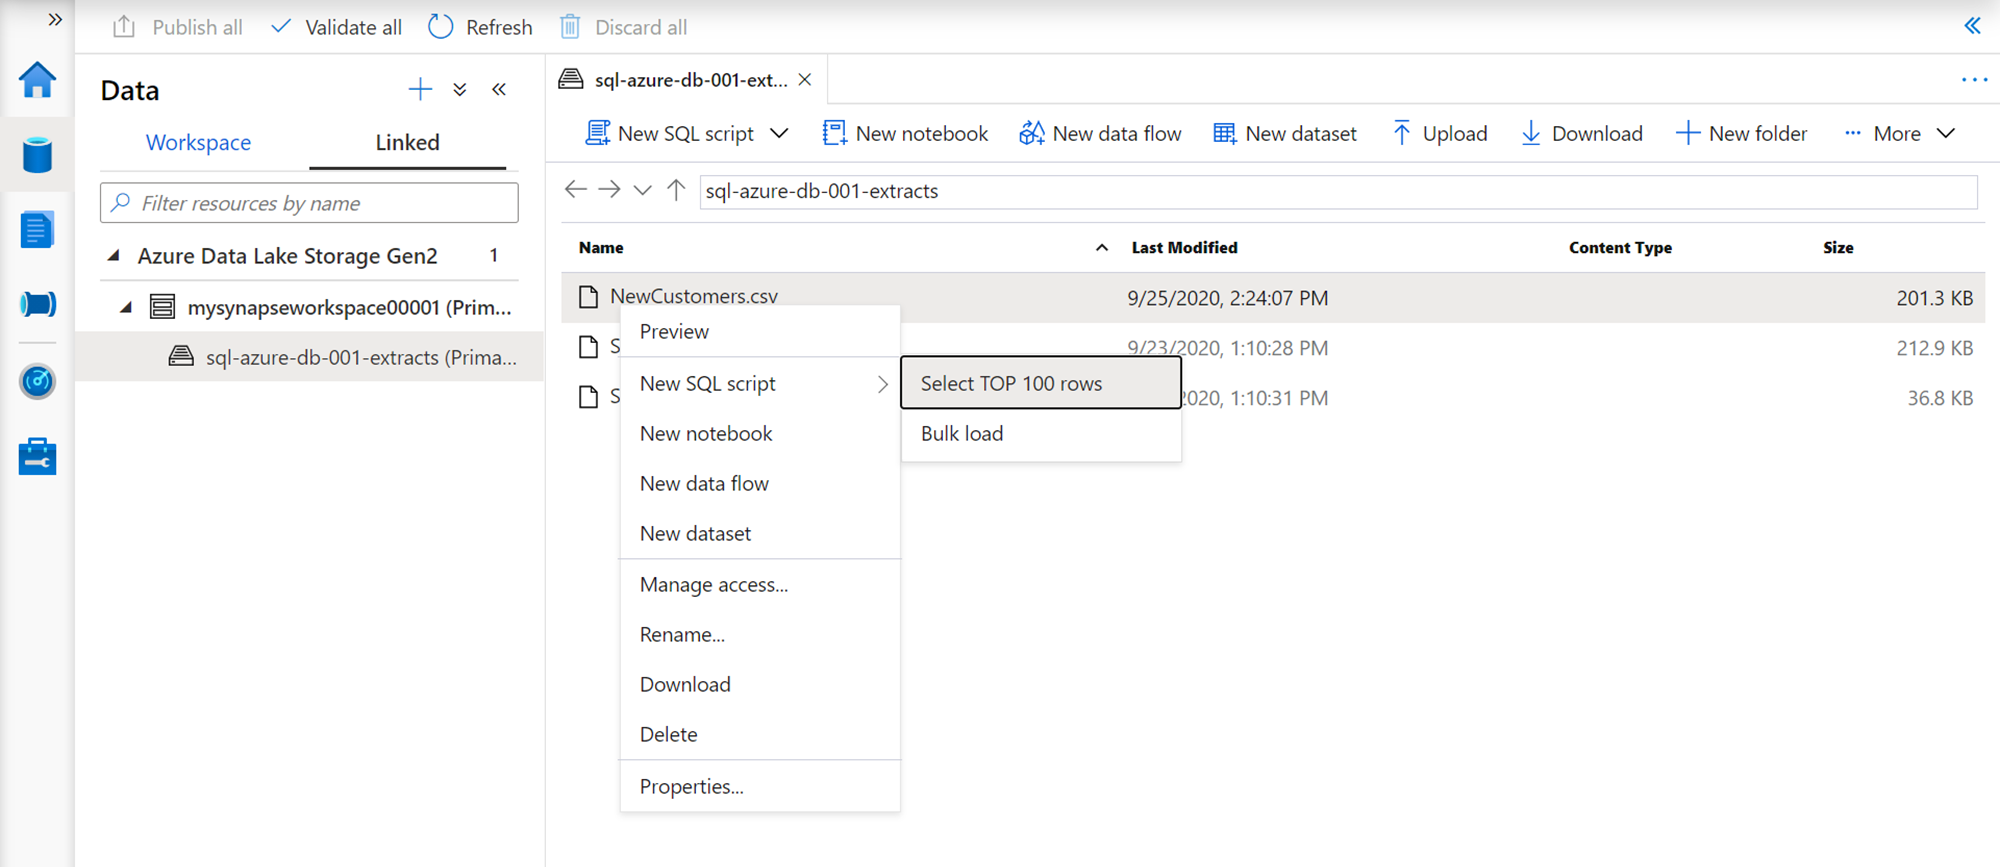
One of the primary benefits of using SQL on-demand pool is that it allows us to create structured views on semi-structured or unstructured data stored in the Azure Data Lake Storage account by creating database objects. Click on the Linked tab, expand the account to see the files listed in the details section, right-click the desired data file and you would find a context-menu as shown below. From the New SQL Script menu option, select the sub-menu item named “Select TOP 100 rows”.
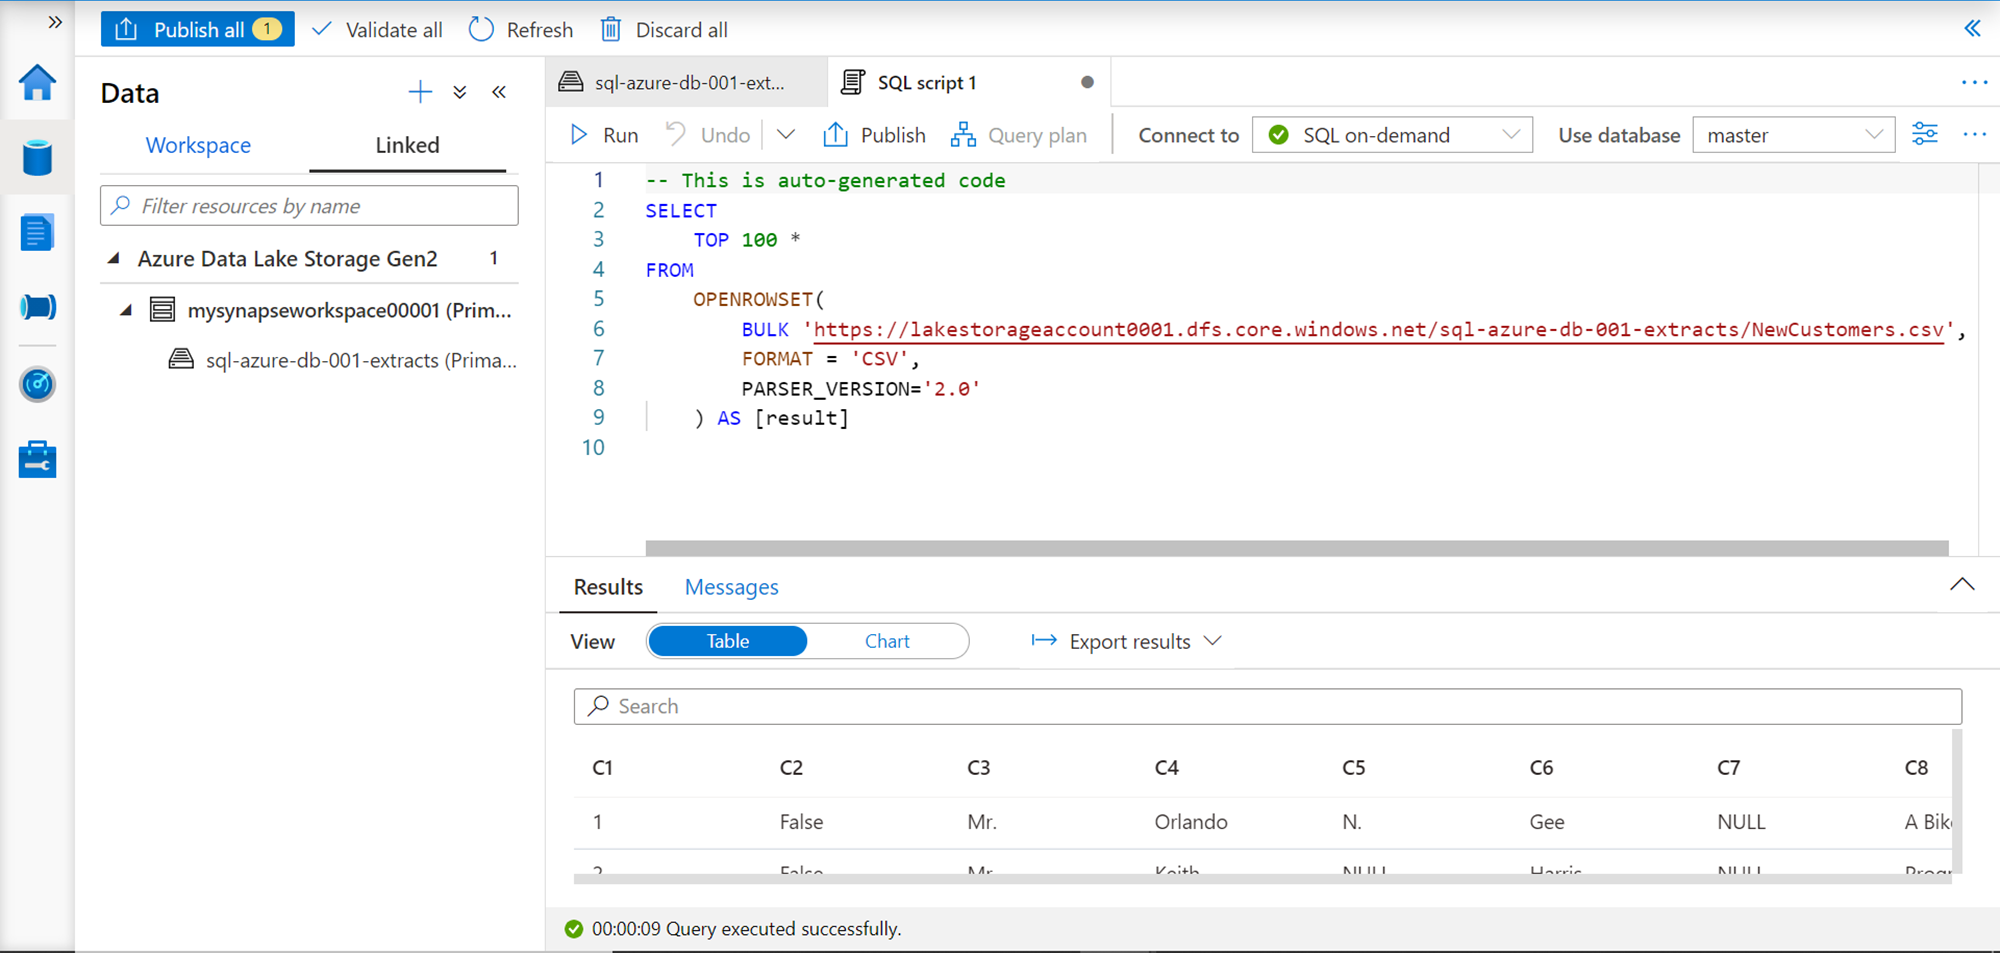
Once clicked, it would open a new tab with a query as shown below. It’s a simple select query that uses the Openrowset function, where we are using the BULK keyword and passing the file location as the argument, specifying the format like CSV, and reading the output in the result. The query would get executed as soon as its generated, and the result would be shown in the bottom half section of the pane as shown below.
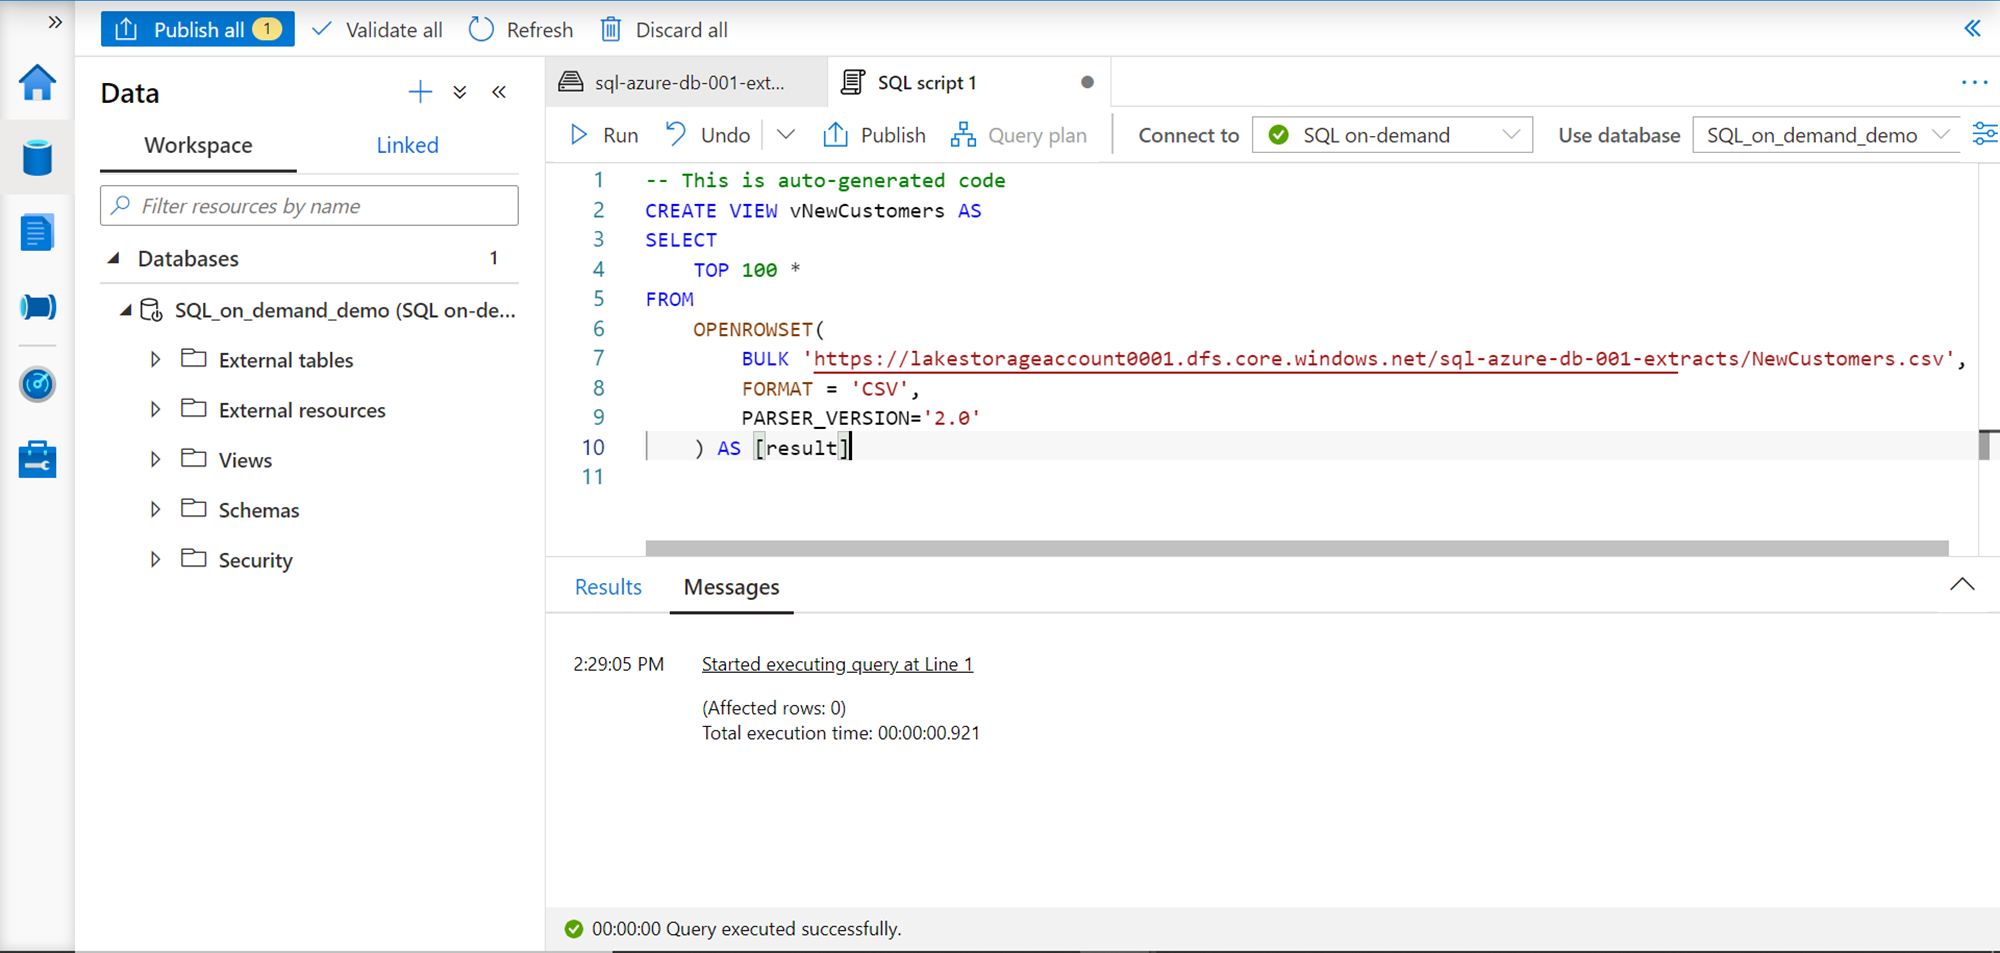
Let’s say that we intend to access this data often, but we do not want to use the Openrowset function every time. We may want to select specific fields, want to format it or even apply some logic before we get the desired data and schema output. A logical way to achieve this is by creating a view on top of it. We can create a view very easily by just adding the “CREATE VIEW [viewname] AS” statement before the SELECT query as shown below. Before executing the query, ensure that the database context is switched to the desired database. Click on the Run button on the toolbar to execute this query so that the view gets created.
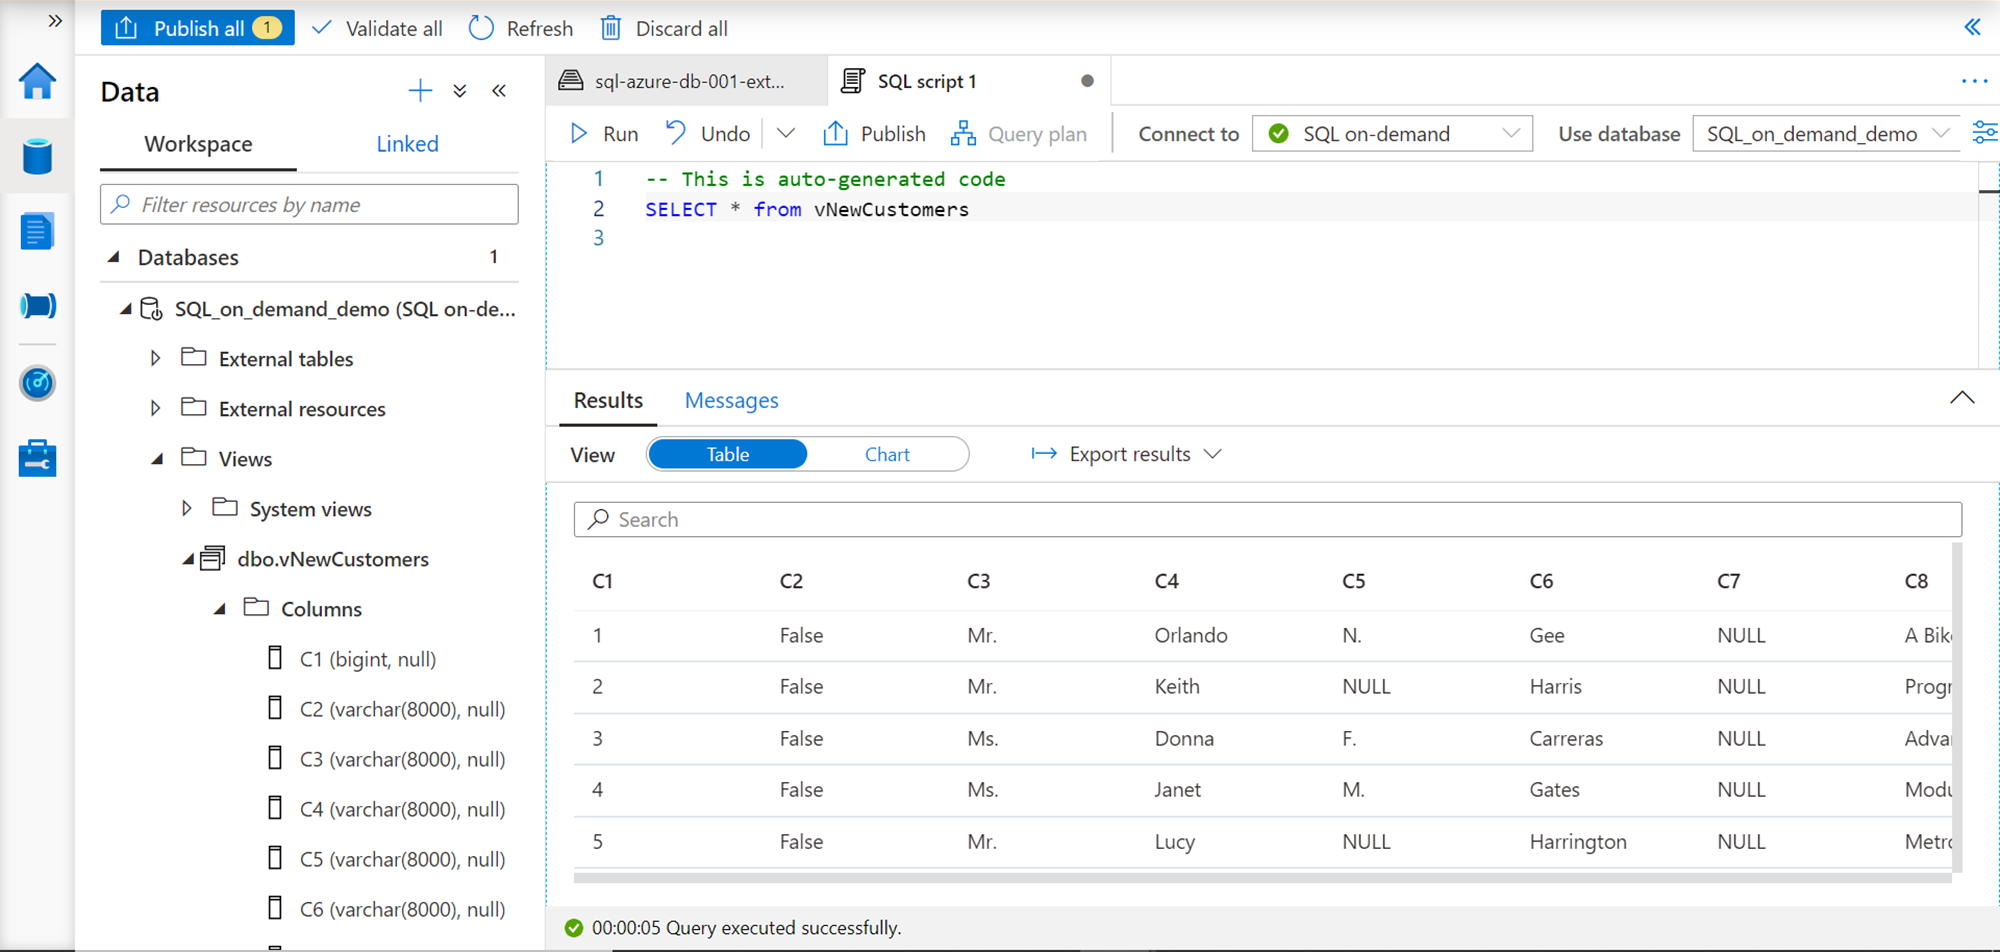
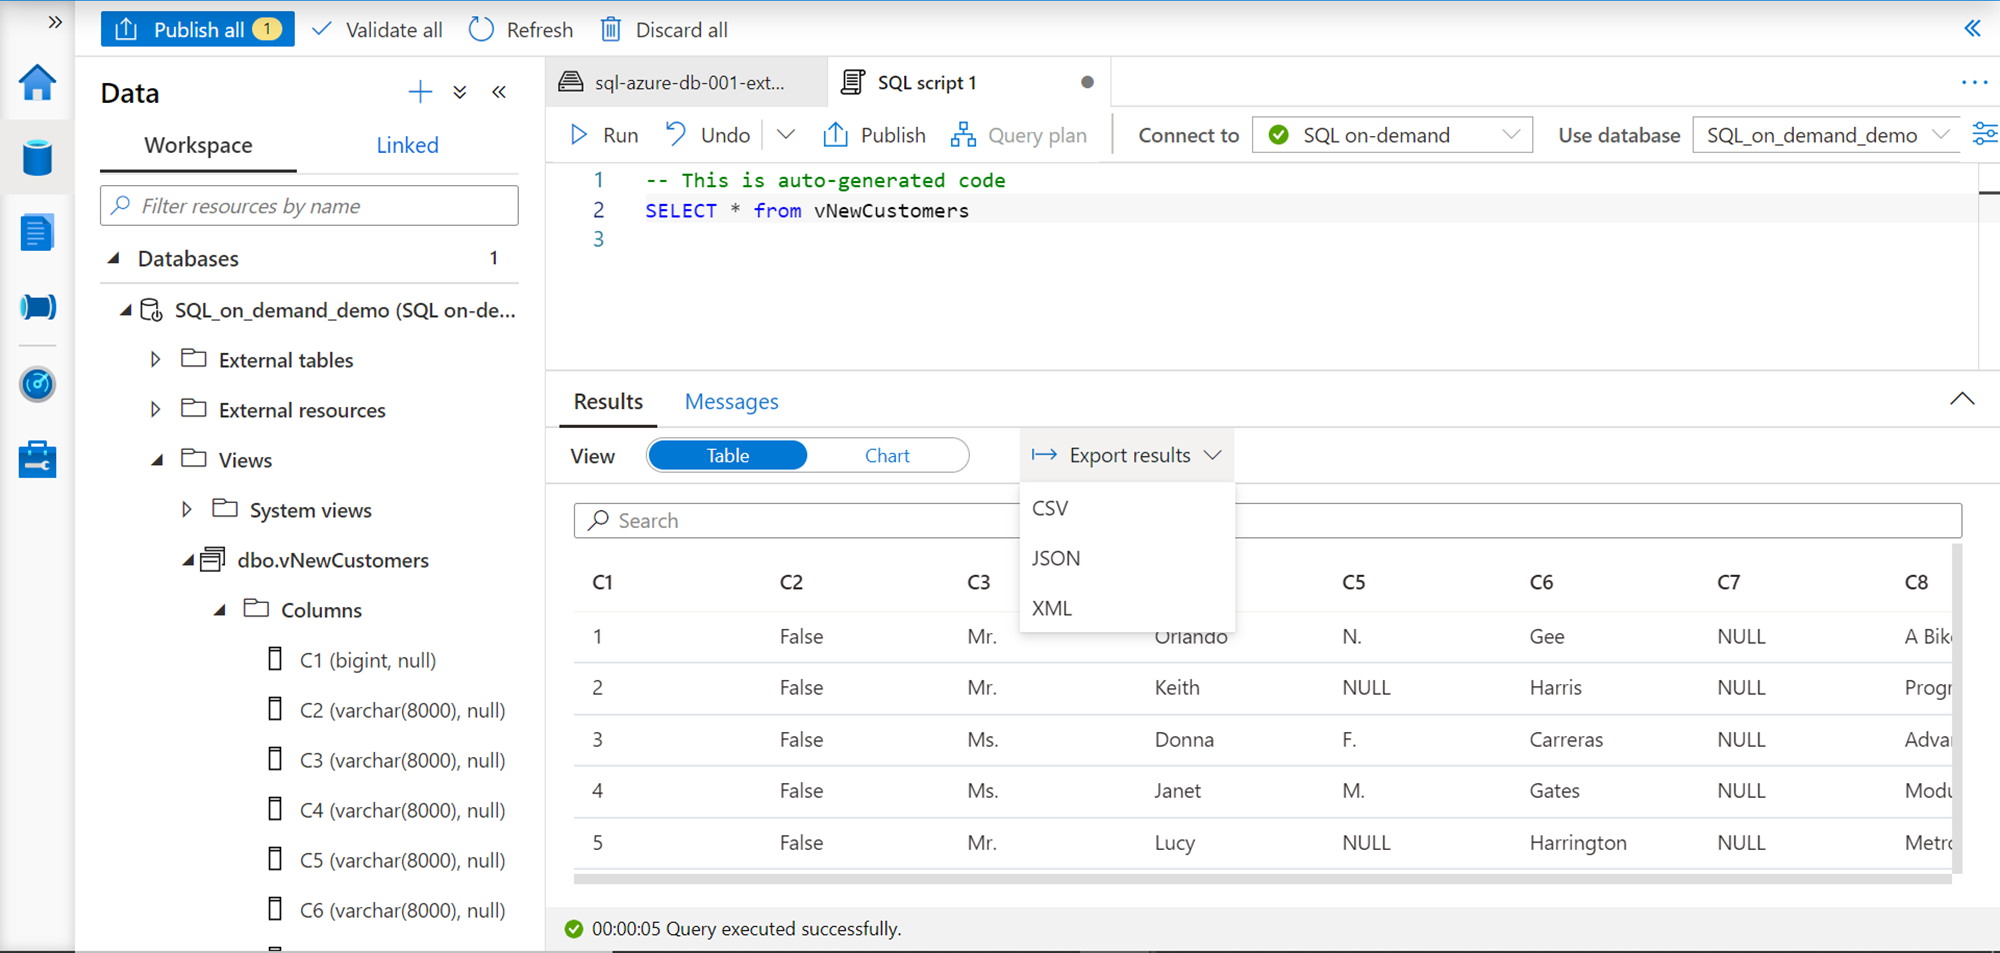
Once the view is created, we can expand the view folder in the Databases section, and we would be able to see the newly created view in the list as shown below. We can access the data in the CSV file just by querying this view using the SQL On-Demand pool, and the result would look as shown below. This gives us the ability to access unstructured data in a structured format, without the need to re-model or relocate this data in a different schema or repository.
Let’s say, we intend to export this data in JSON format, this editor interface provides a quick interface to export this result in JSON, CSV and XML format as shown below.
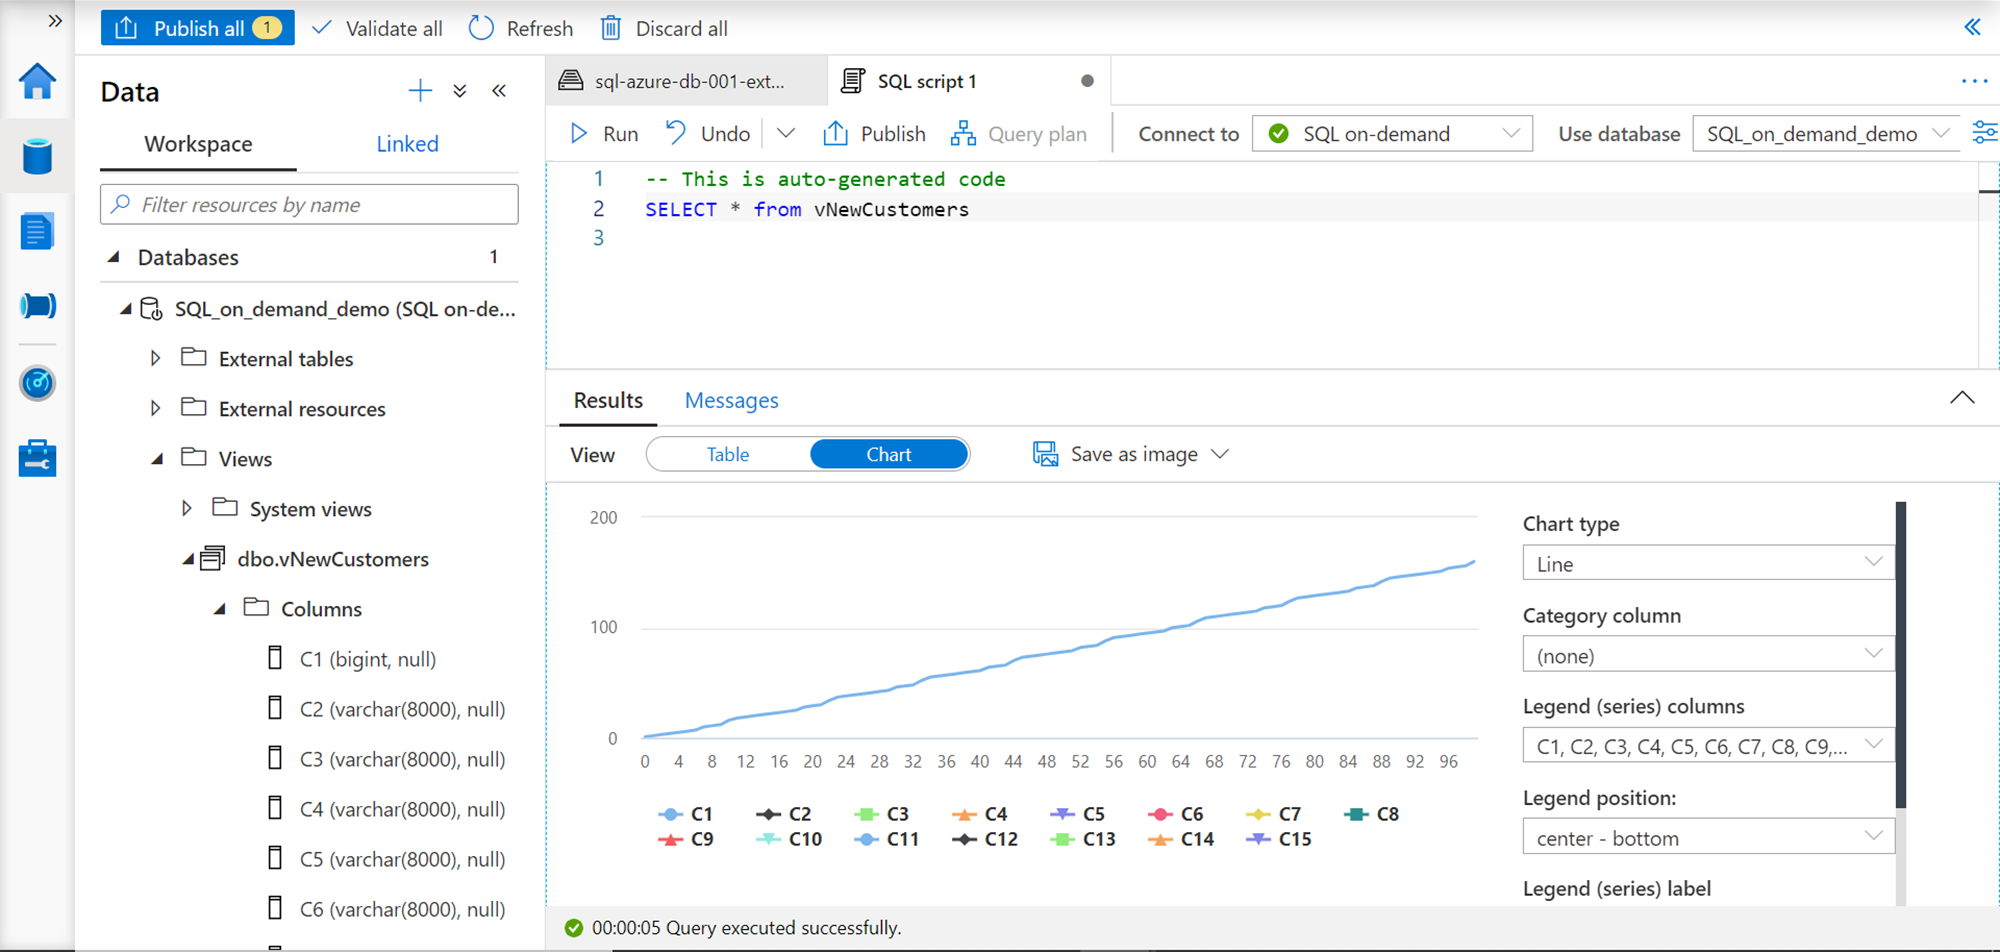
Often analysts and developers export or download result set locally, to create charts and graphs for analysis. This interface provides an easy and quick way to visualize the results as well by clicking on the Chart option as shown below. It provides options to select different chart types as well as modify elements of the chart like legends, categories etc. to analyze the results in-place.
In this way, using SQL on-demand pools we can create structured views on unstructured data and read as well as process this data using Azure Synapse Analytics and familiar SQL language.
Conclusion
We started with the assumption that Azure Synapse Studio is in place and understood a simple mechanism to create sample data. We used this sample data, created a database, and using the sample data, we created a view to access this data using the familiar SQL language. In this way, one can get started with SQL On-Demand pool. Azure Synapse Analytics SQL on-demand pool supports the creation of many database objects and offers a variety of features, which we will cover in the upcoming parts of this Azure Synapse Analytics series.
Table of contents

He has worked internationally with Fortune 500 clients in various sectors and is a passionate author.
View all posts by Rahul Mehta
- Finding Duplicates in SQL - February 7, 2024
- MySQL substring uses with examples - October 14, 2023
- MySQL group_concat() function overview - March 28, 2023