
In this article, we will install and configure SQL Server Linux (2017 version) on SUSE Linux in the Amazon EC2 Instance.
Introduction
SQL Server works on both Windows and Linux operating systems. You can use RedHat, Ubuntu or SUSE Linux for SQL Server. You can build the database infrastructure in the on-premise and cloud infrastructures.
With the Amazon Web Services, we can use SQL Services in two-mode.
- AWS RDS SQL Server: It is a managed database service for SQL Server by AWS. Amazon manages the infrastructure such as server, OS, storage, network, back, high-availability, security on your behalf. You can launch an RDS instance and use it directly to run for your databases, queries. It provides limited functionality as compared to a regular SQL Server
- AWS EC2 with SQL Server installed: In this method, we can build a virtual machine in the AWS cloud and installed SQL Server on top of it. It is similar to a traditional on-premise SQL Server, but this time your infrastructure (server) is in the cloud
In this article, we implement the following tasks:
- Launch an Amazon EC2 instance with SUSE Enterprise Linux version 12
- Install SQL Server Linux (2017) and client tools on Amazon EC2 instance
Let’s start our deployment for this article.
Pre-requisites
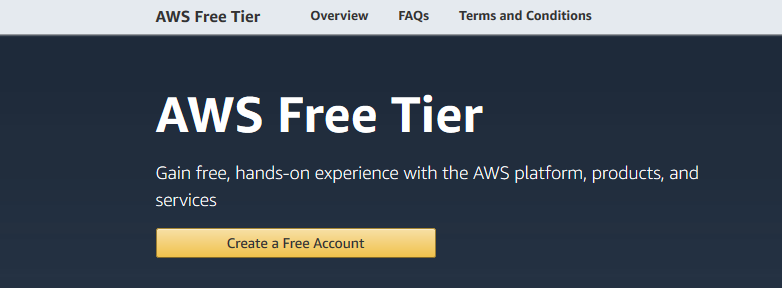
You should have AWS console credentials. If you do not have an AWS login, sign-up using a free-tier account in Amazon web console.
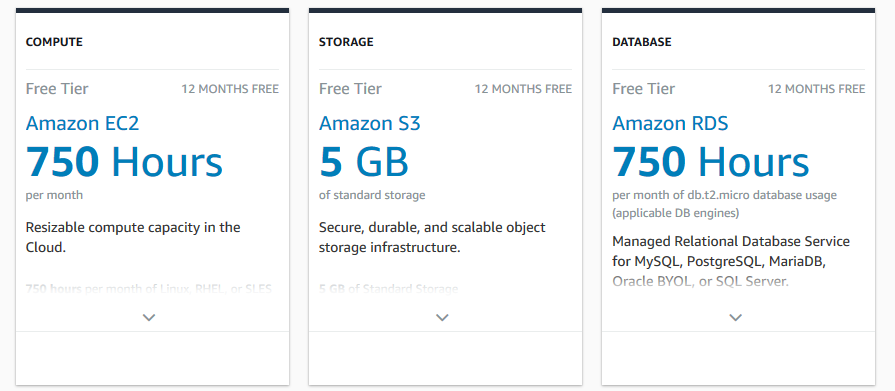
Here, you can see a few free-tier account benefits:
Launch Amazon EC2 instance for SUSE Linux Enterprise Server
To launch an EC2 instance, log in to the AWS Web Console and go to the EC2 dashboard from Services-> EC2.
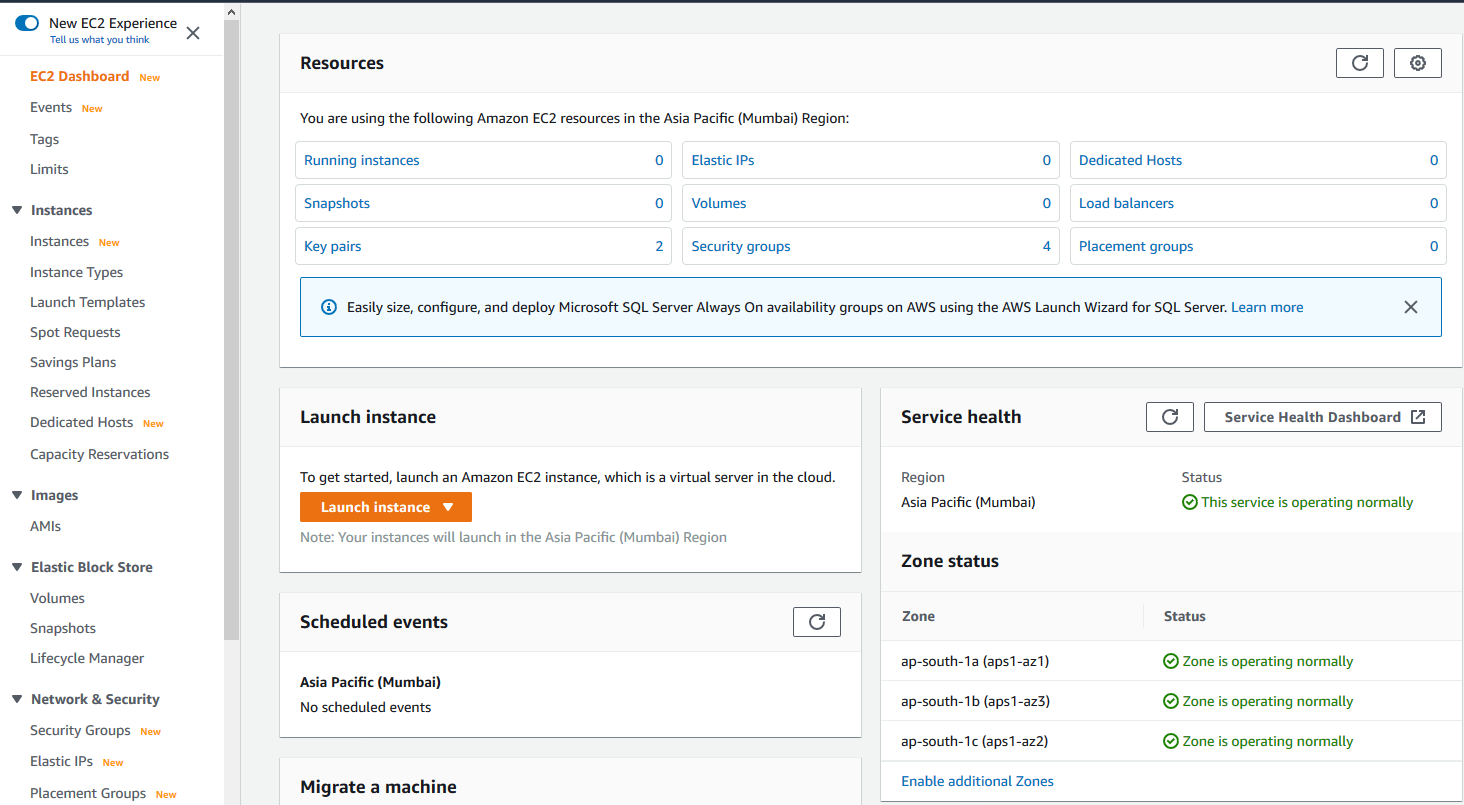
In this dashboard, you can verify I don’t have any running EC2 machine( Running Instances =0). Click on Launch instance.
Step 1: Choose an Amazon Machine Image (AMI)
In the first step, search for the required Amazon Machine Image (AMI). You can search for the specific operating system as we searched for SUSE in the below image.
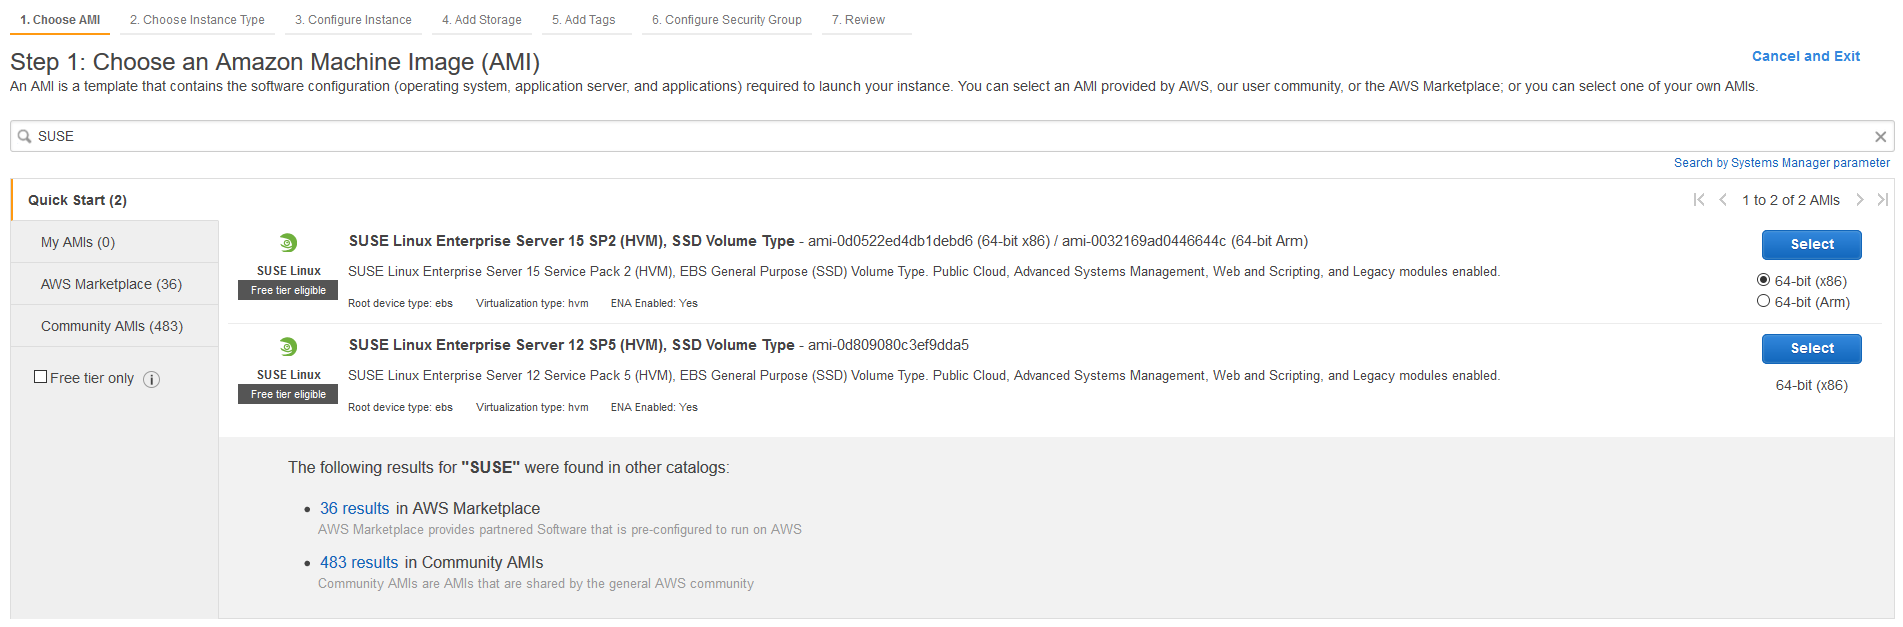
In the above image, we see SUSE 12 SP2 and SUSE 12 SP5 version images. Currently, SQL Server Linux supports SUSE 12 version. Click on Select for SUSE 12.
Step 2: Choose an instance type
AWS provides various configurations for the server’s compute requirements. On this page, you see vCPU, Memory and network performance for these instances. In case an instance is eligible for free-tier, it puts marks free-tier available.
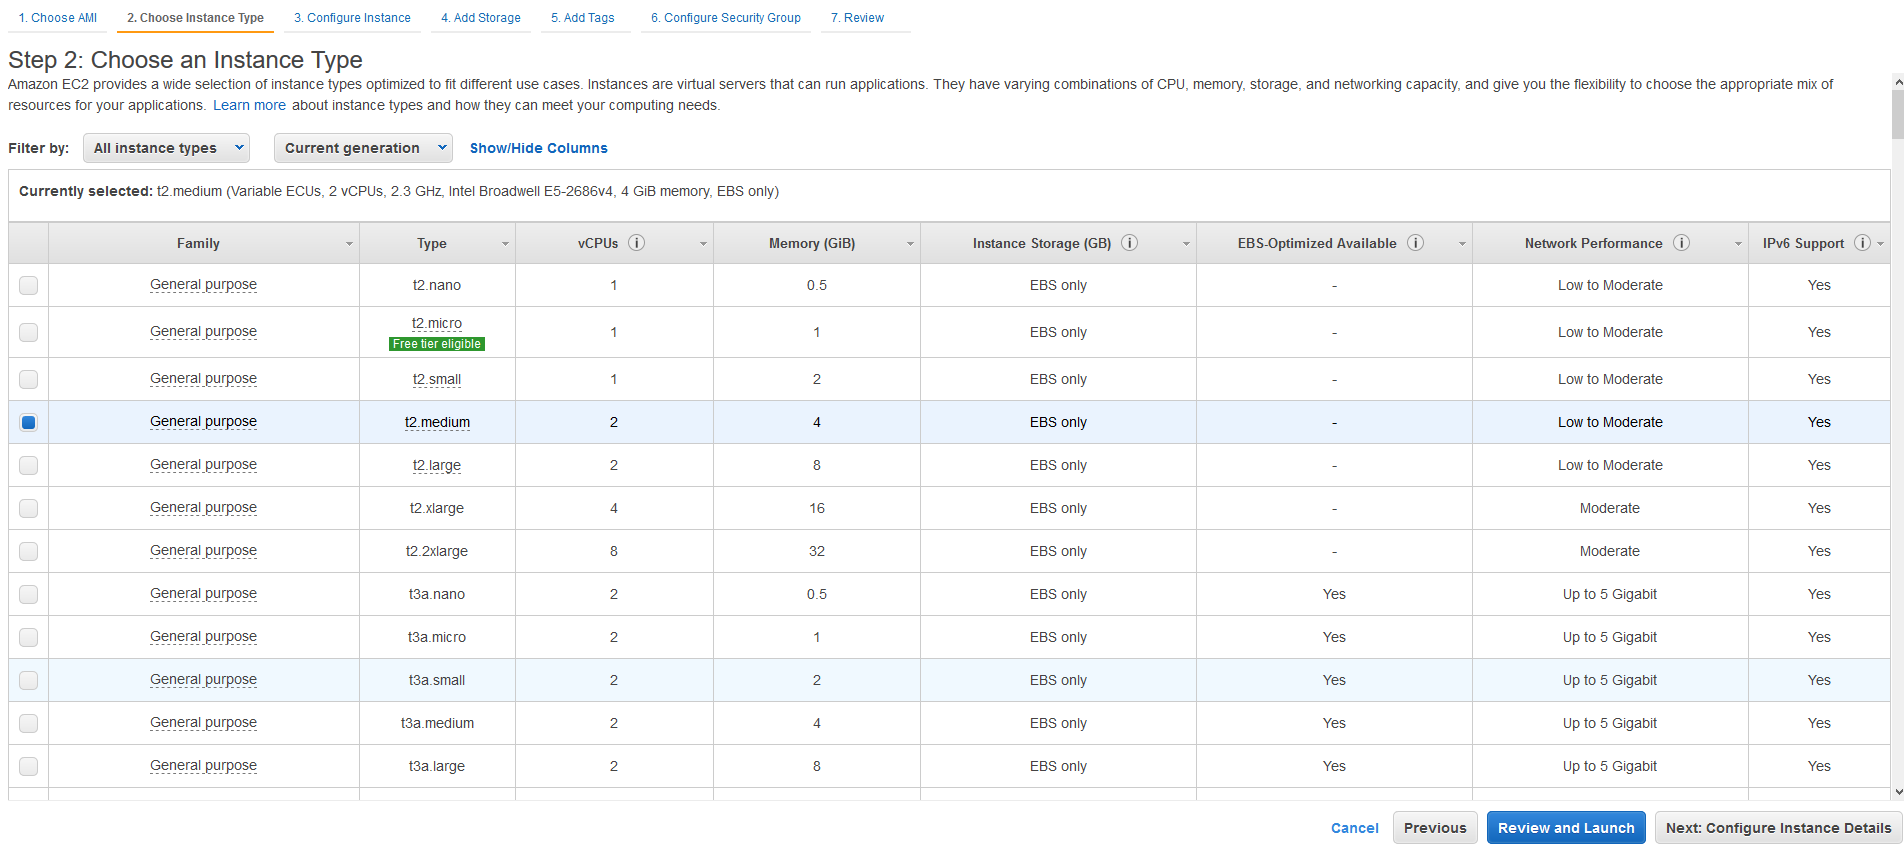
In this article, we go with the t2.medium instance with 2 vCPU and 4 GiB memory.
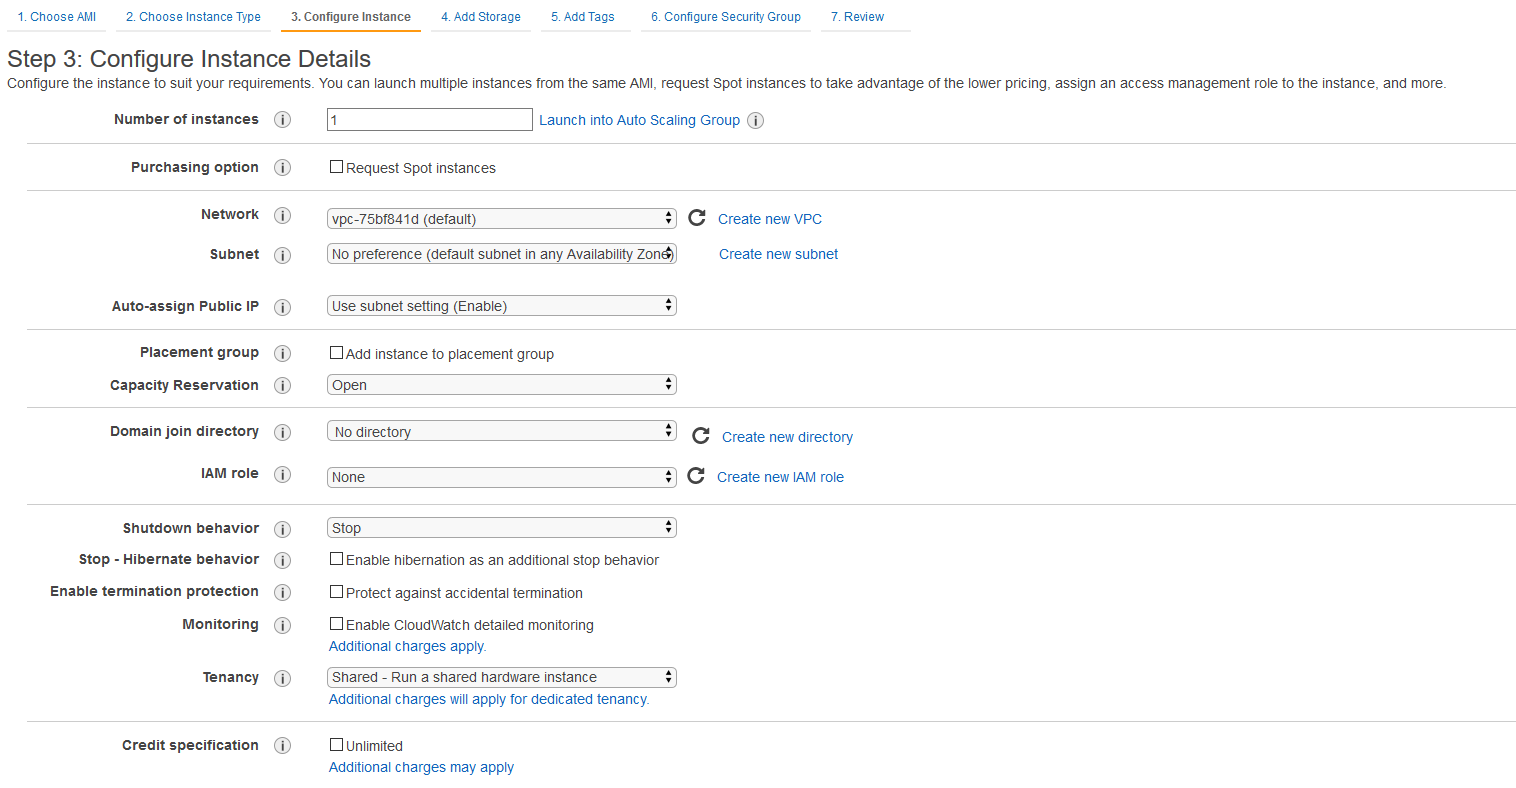
Step 3: Configure Instance details
In this step, we can configure the number of instances, network, IAM role, shutdown behavior and domain. You should configure these details carefully. In my case, it is a lab setup so we can use the default configurations.
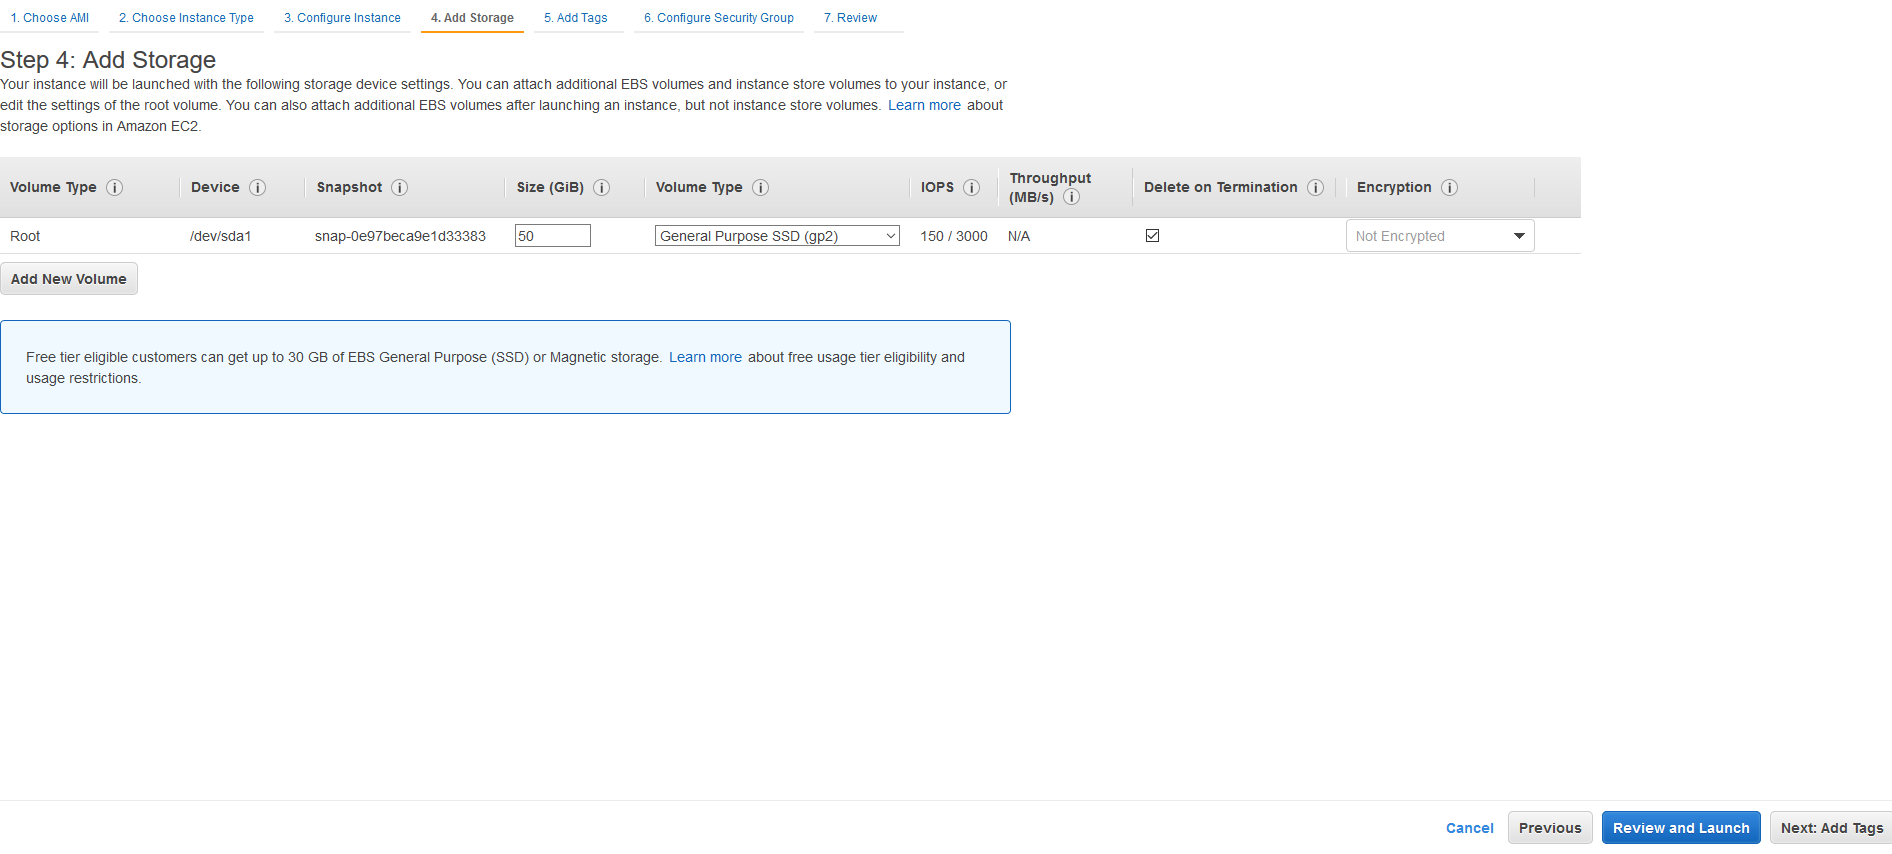
Step 4: Add Storage
In a free-tier account, you get up to 30 GB of general-purpose SSD storage. Choose the storage size that fits your database, backup requirements. By default, it deletes the storage (delete on termination) if you terminate the EC2 instance.
Step 5: Add Tags
In this optional step, we can assign tags in a key-value pair for our AWS resources.

Step 6: Configure Security Group
In AWS, the security group combines firewall rules for your EC2 instances. You can create an existing security group or create a new group from this AWS console.

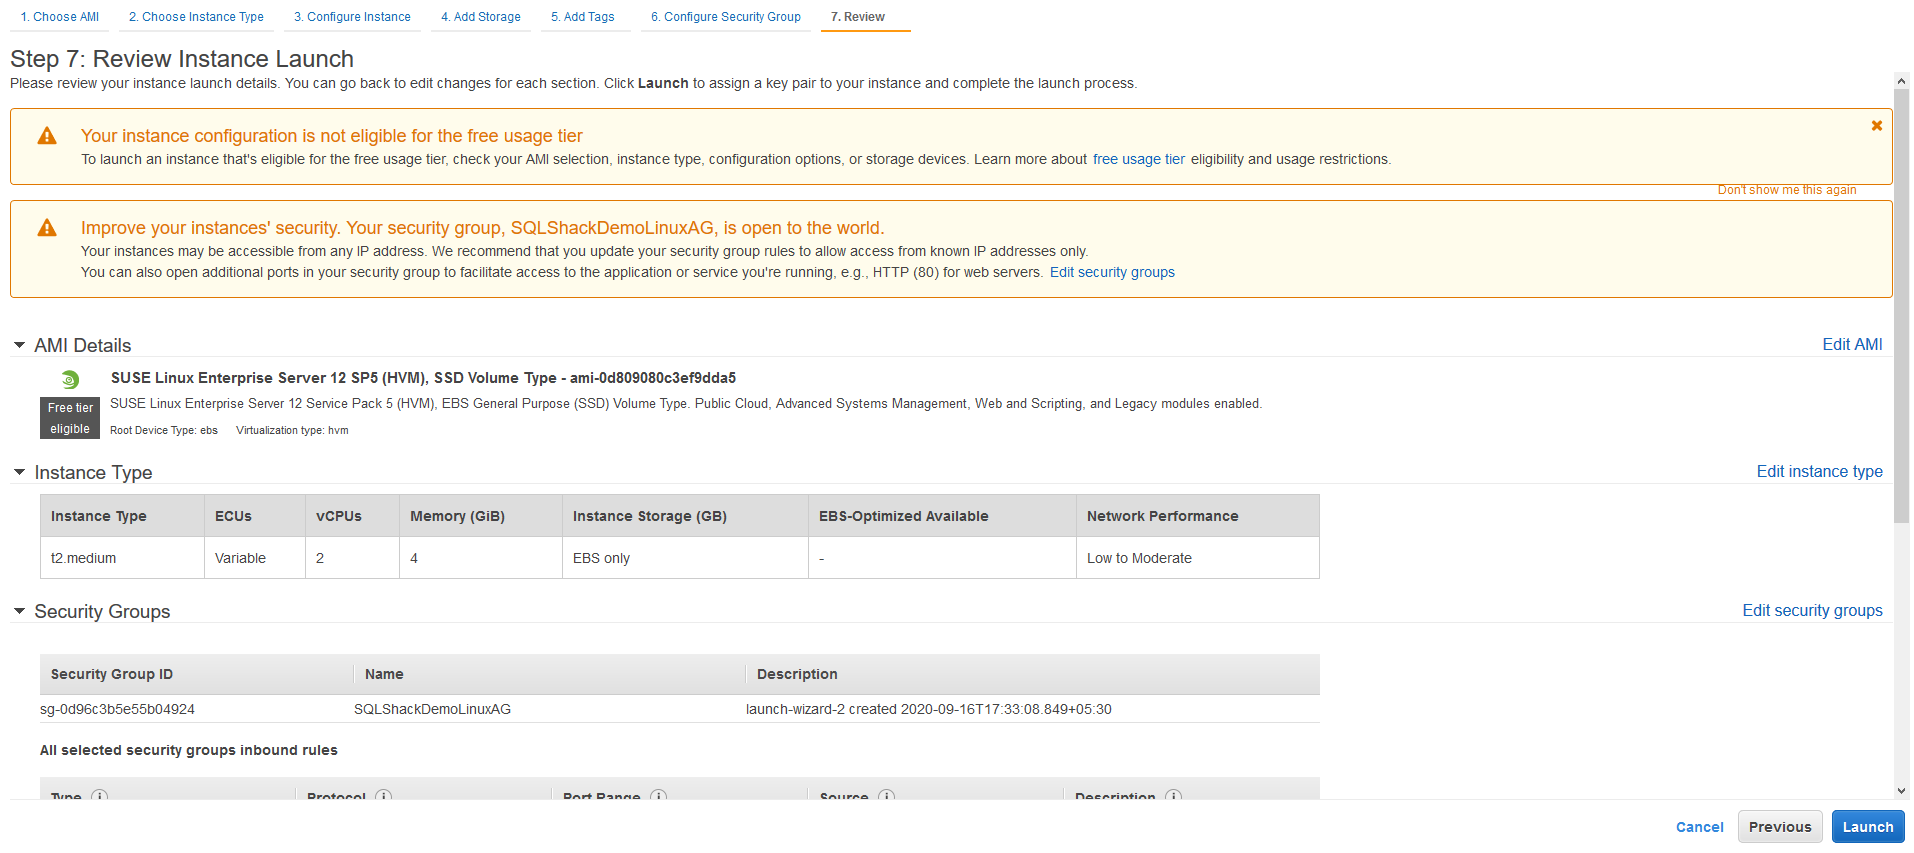
Step7: Review Instance Launch
Here, you can verify your instance configurations. You get two warning messages in the below image.
- I used t2.medium instance for the EC2, and it is not eligible for the free-tier account. Therefore, it gives a warning message
- My security group ( firewall) rules allow all IP’s and ports access. It is not a desirable security group for a production server
We can ignore these warnings and go ahead with launching the SUSE Linux server.
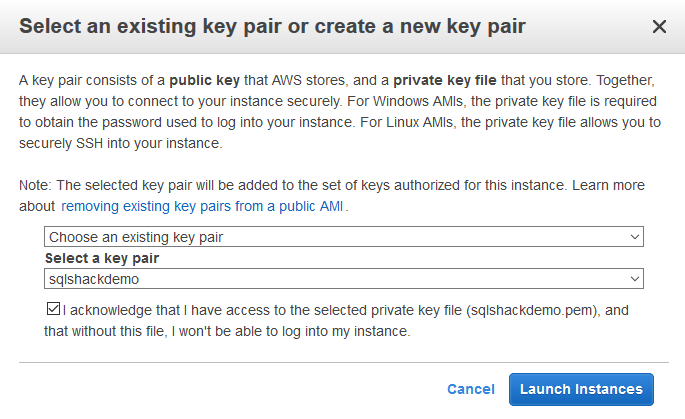
You require a key pair ( public key and private key) to connect the EC2 instances securely. AWS stores the public key in the AWS stores. If you do not have an existing key pair, select the option – create a new key pair and specify a name. It asks you to download and save it securely.
- Note: It is the first and last time AWS allows to download key pair. In case you did not save it properly, you cannot regenerate it. You need to create a new key pair and assign it to the EC2 instance
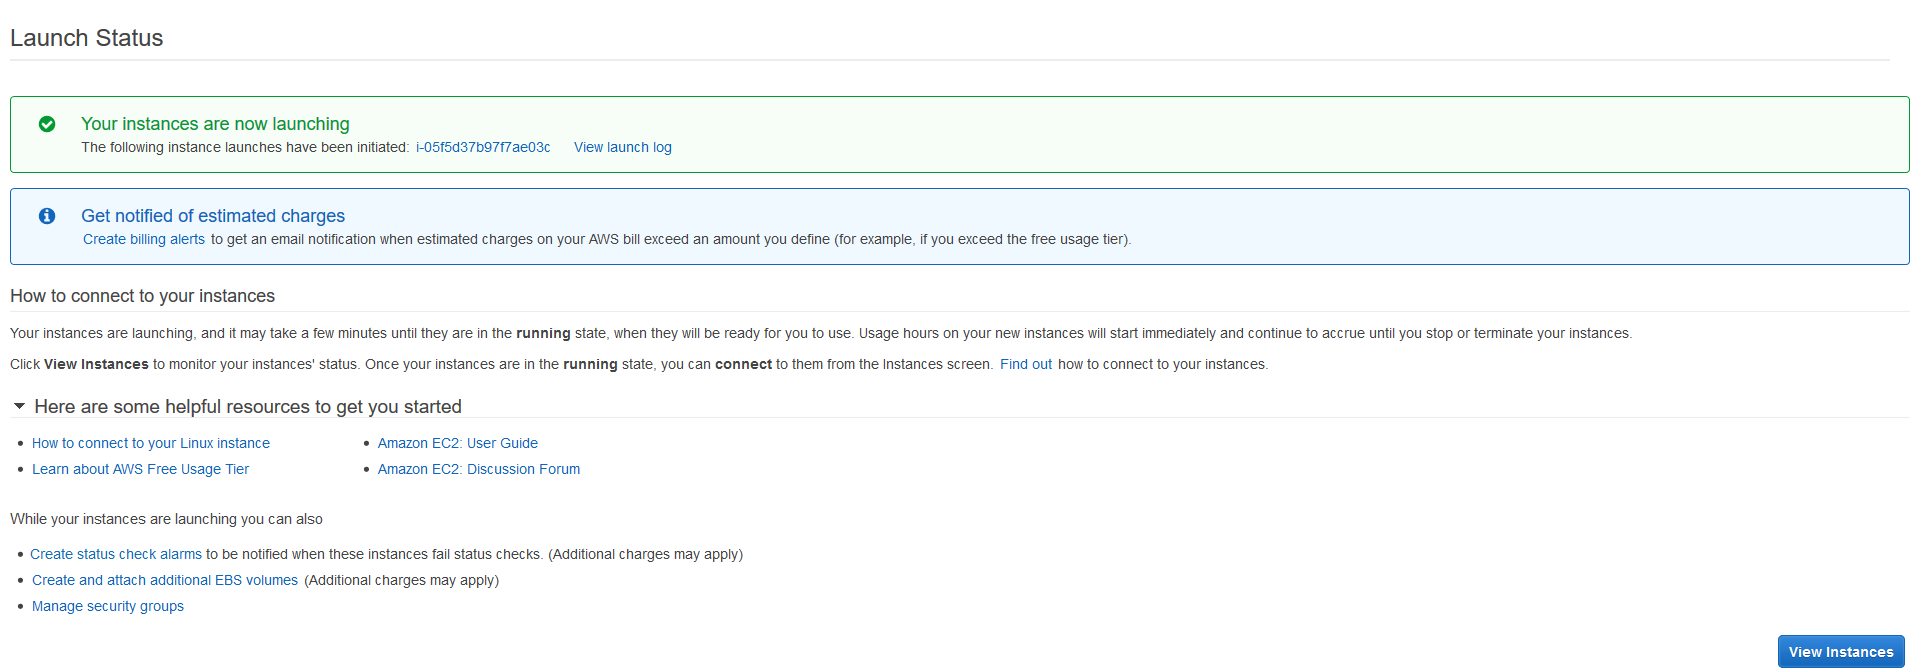
It takes a little time to launch the AWS EC2 instance with your specified configuration.
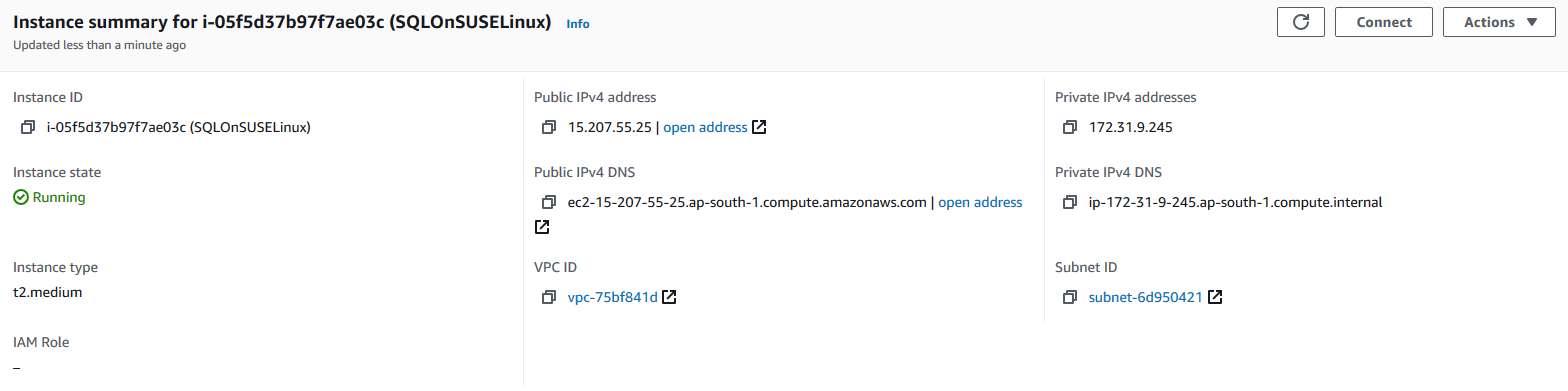
My SUSE Enterprise Linus 12 EC2 instance is in running state, as shown below. Note-down the public IPv4 address and public IPv4 DNS.

Install and Configure SQL Server Linux (2017 version) on SUSE Enterprise Server 12 for Amazon EC2 instance
To connect the SUSE Linux Amazon EC2 instance, we use PuTTY utility. We need a PPF format key file. You can refer to the article, Connect Red Hat Amazon EC2 Instance and follow the process to convert PEM into the PPF file.
Launch Putty, enter EC2 public IP address and connect.
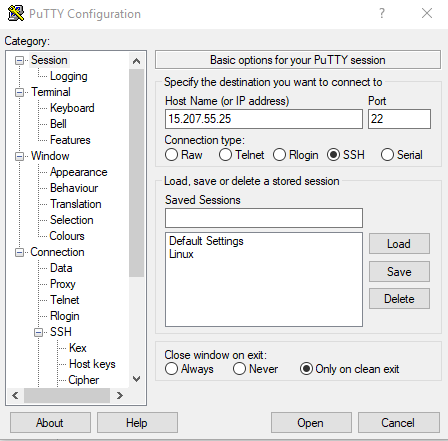
SUSE Linux uses the default ec2-user for authentication purposes. It does not prompt for a password because the authentication happens using the key-value pair.
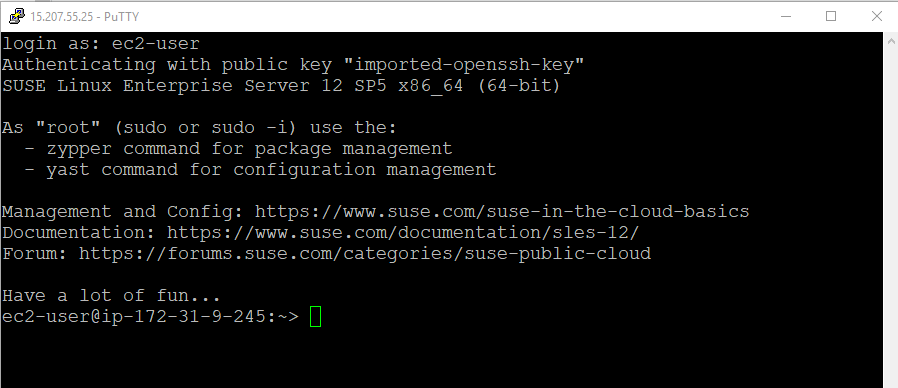
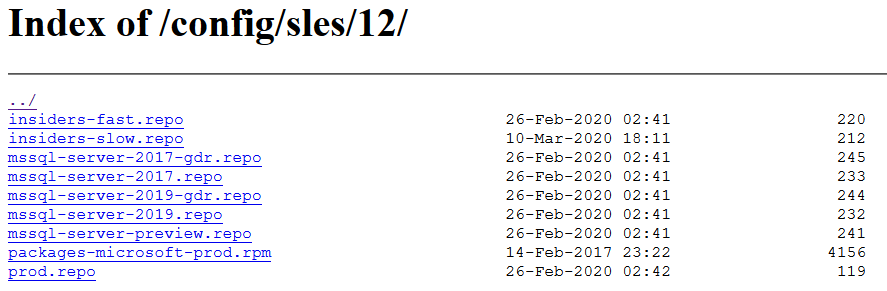
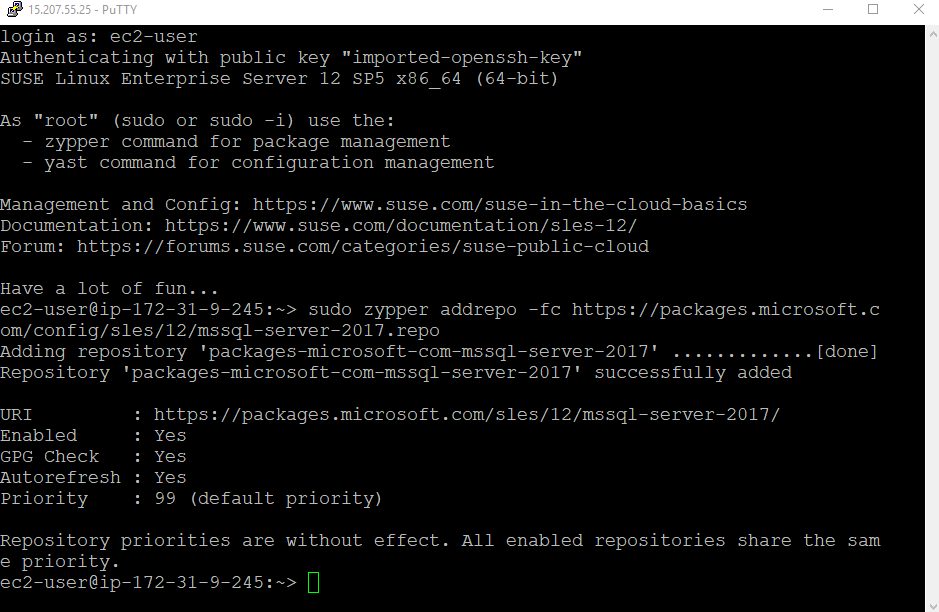
Download SQL Server Linux (2017 version) SLES repository configuration file
SUSE Linux uses Zypper as a command-line interface to install, remove, and update the repositories and software. The below command downloads the repository from the Microsoft package repository, as shown below.
|
1 |
>sudo zypper addrepo -fc https://packages.microsoft.com/config/sles/12/mssql-server-2017.repo |
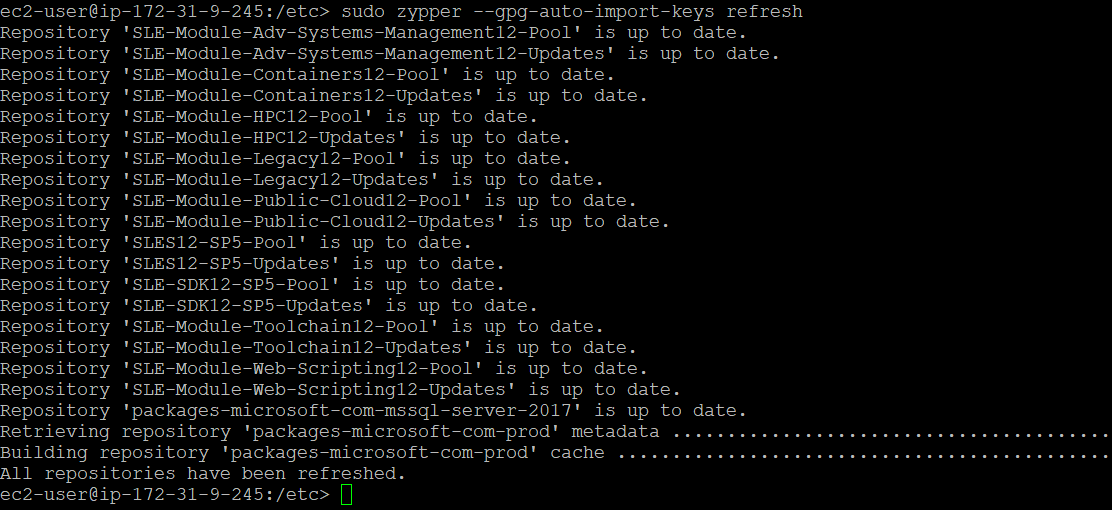
Refresh your GPG keys
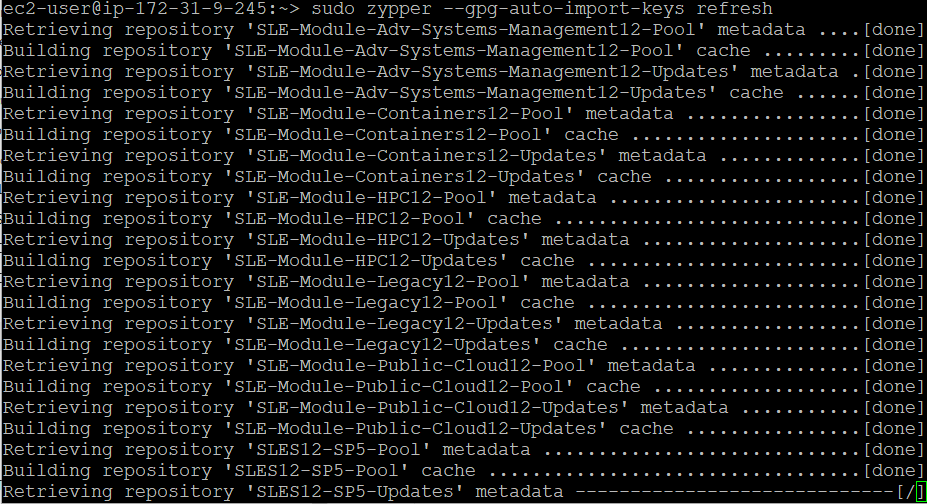
In this step, refresh your GPG keys with the below command.
|
1 |
>sudo zypper --gpg-auto-import-keys refresh |
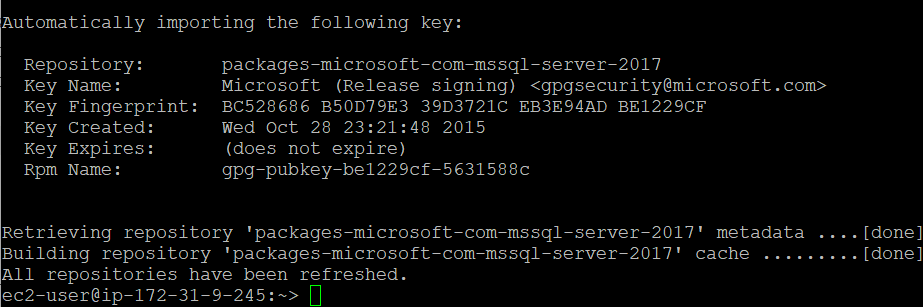
In the output, we see that it checks for each repository and updates for SQL Server Linux (2017 version) repository.
It returns the SQL Server 2017 repository, key name, its created and expiry date. It uses the Microsoft package signing key as shown below.
Import the Microsoft package signing key using the RPM command.
|
1 |
> sudo rpm --import https://packages.microsoft.com/keys/microsoft.asc |

Install SQL Server Linux (2017 version) on SUSE Linux
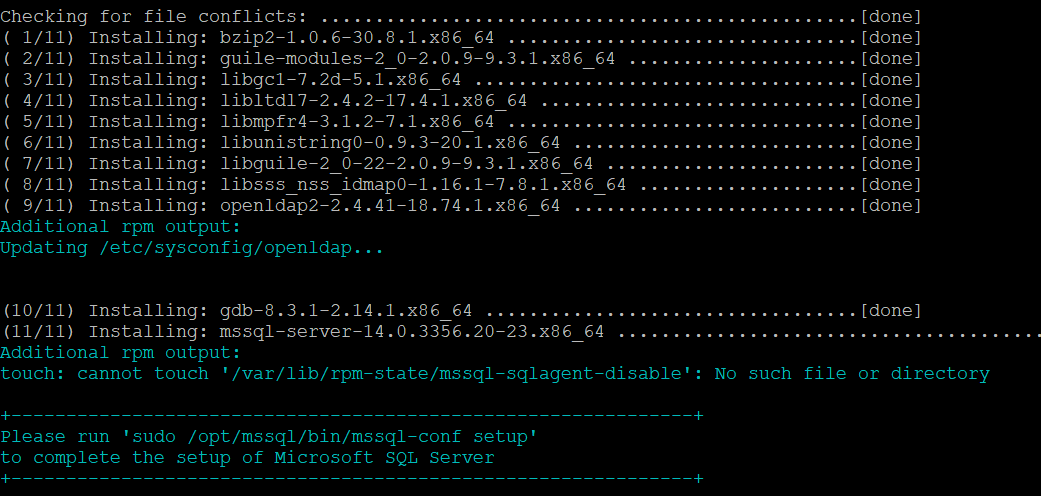
Now, we are ready to deploy our SQL Server 2017 instance on the SUSE Linux AWS EC2 server. It downloads the required packages and installs them.
|
1 |
>sudo zypper install -y mssql-server |
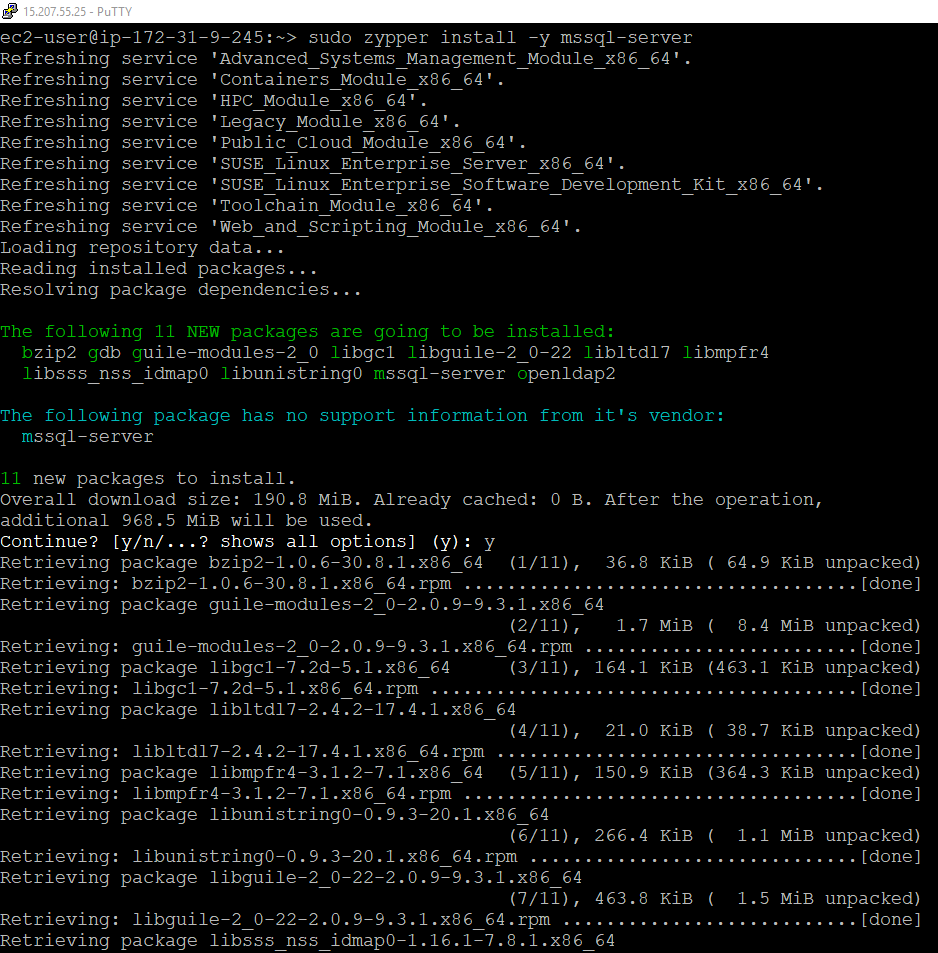
This command installs the SQL Server but does not configure it. It specifies you to run a command mssql-conf for SQL Server Configuration.
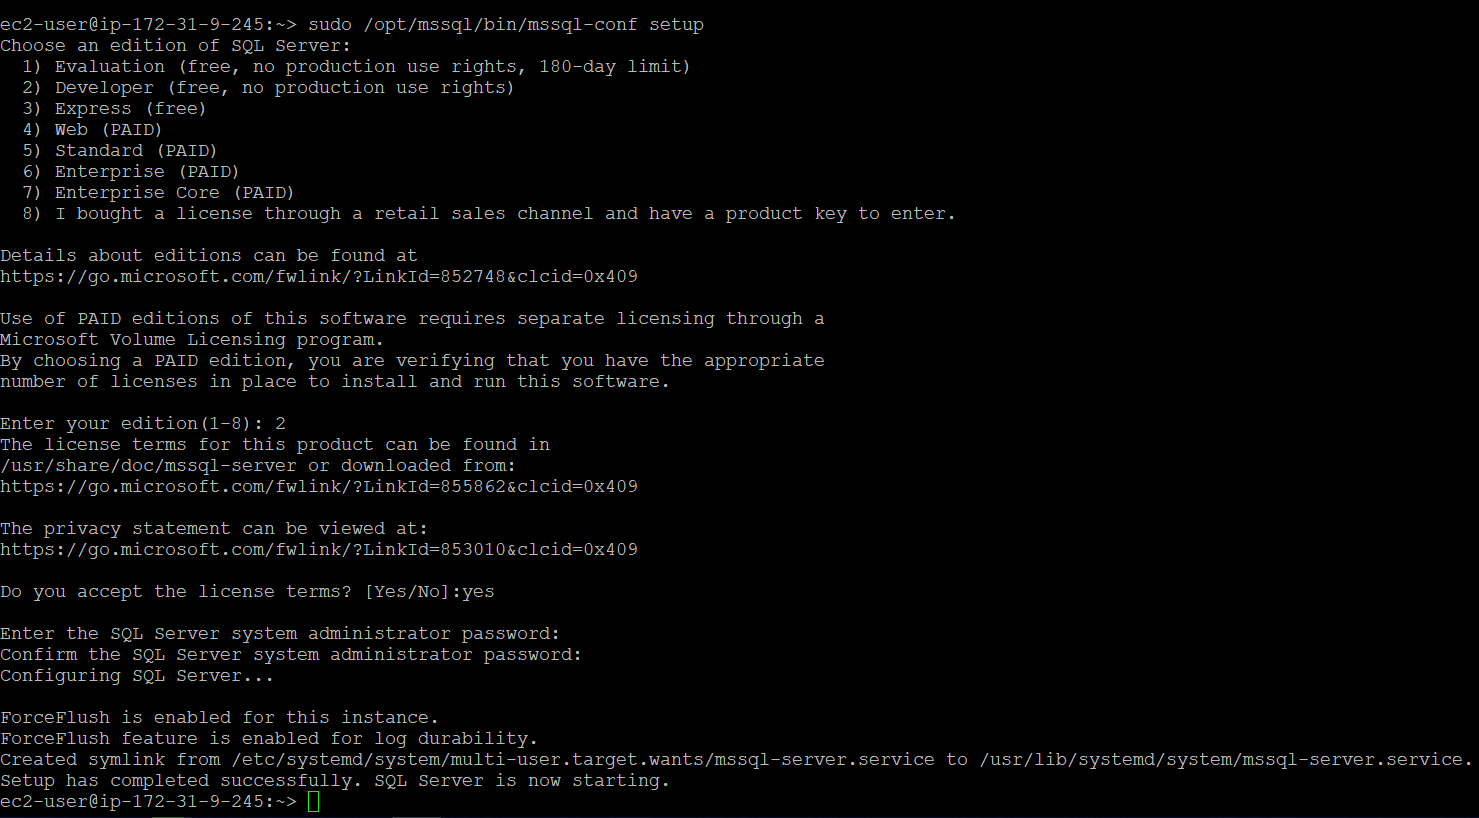
Configure SQL Server Linux (2017 version) on SUSE Linux
Use the below mssql-conf command and provide the following inputs.
|
1 |
sudo /opt/mssql/bin/mssql-conf setup |
- SQL Server edition: We can choose from Evaluation, Developer(free), Web, Standard, Enterprise Core editions
- SA password
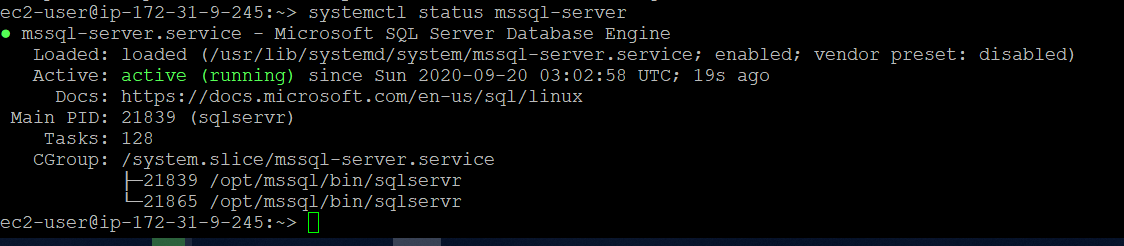
Verify SQL Service status
Once the SQL Service is installed, use the systemctl command to verify the service is in running status.
|
1 |
systemctl status mssql-server |
Install SQL Server client tools
You can connect the SQL Server Linux (2017 version) on SUSE Linux using the following client tools:
- SQLCMD
- Azure Data Studio
- SQL Server Management Studio (SSMS)
From the above list, we can install SQLCMD (command-line) and Azure Data Studio (Graphical) tools to connect SQL instance and execute your queries.
First, we install the SQLCMD command-line tool in AWS EC2 SUSE Linux. Download the client tools repository and refresh the keys.
|
1 |
>sudo zypper addrepo -fc https://packages.microsoft.com/config/sles/12/prod.repo |

|
1 |
>sudo zypper --gpg-auto-import-keys refresh |
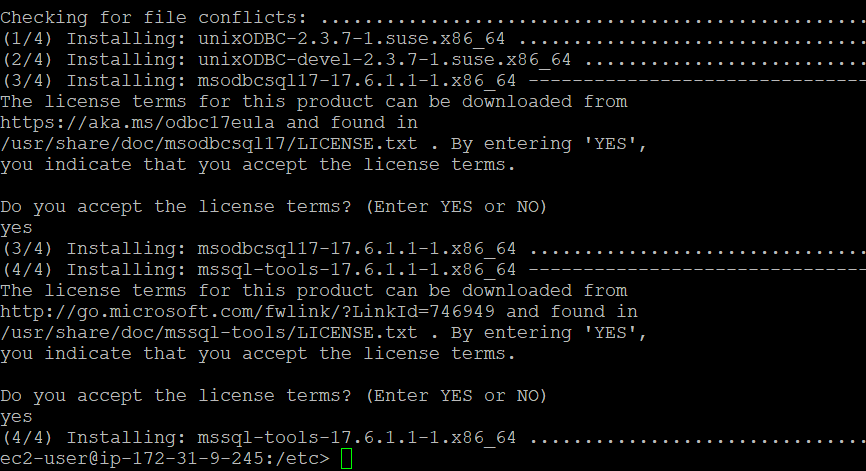
Install SQLCMD command-line tools
|
1 |
>sudo zypper install -y mssql-tools unixODBC-devel |
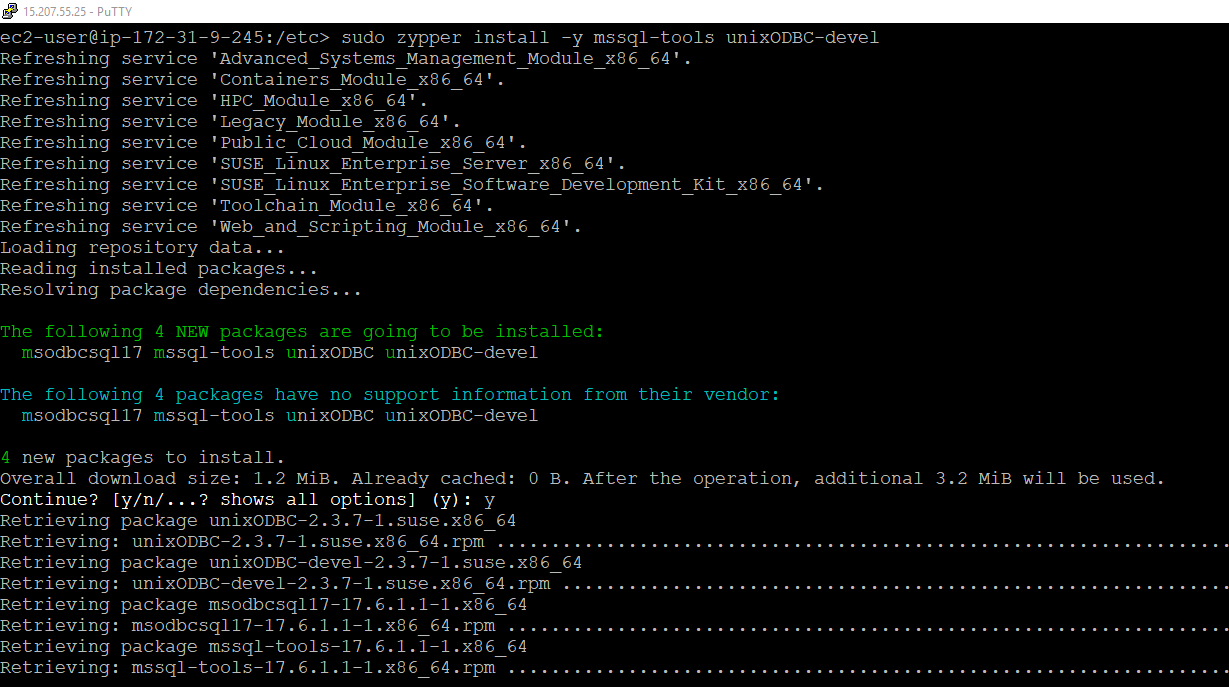
Accept the license terms, and it installs the mssql-tools as shown below.
Add the /opt/mssql-tools/bin in the PATH environment variable
In the step, add the mssql-tools path in the Linux environment variables. It helps you to directly use the command-line tools without specifying the full path every time.

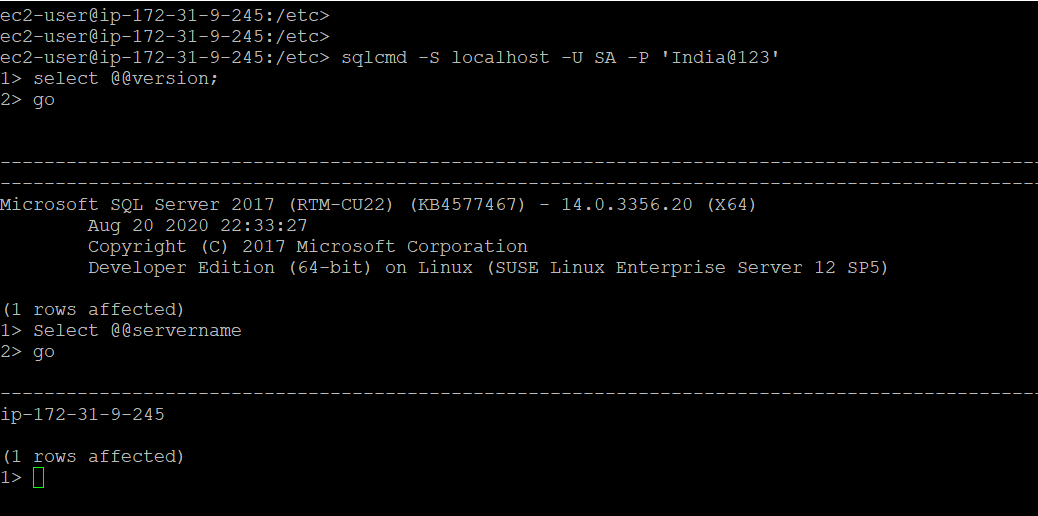
Connect SQL Server 2017 on SUSE Linux for Amazon EC2 instance
Once we have installed SQL Server tools, we can use the SQLCMD to connect SQL Server and verify its edition, version using select @@version t-SQL.
|
1 |
>SQLCMD -S localhost -U SA -P ‘India@123’ |
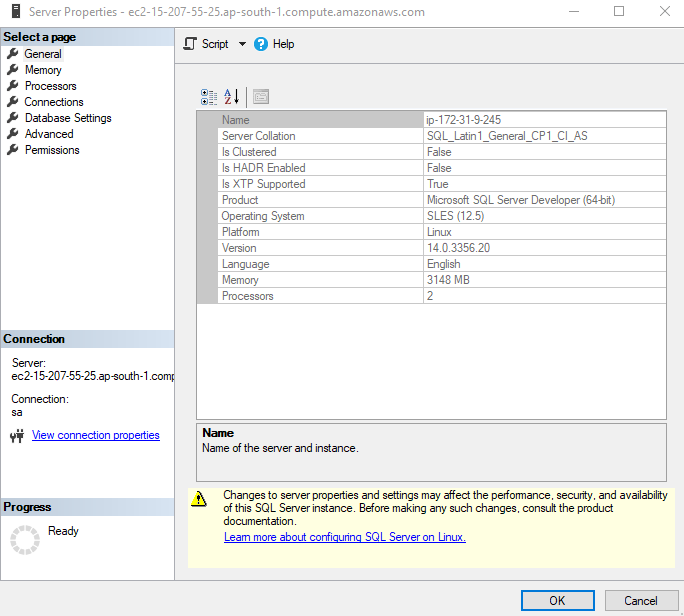
Connect SUSE Linux using a remote SQL Server Management Studio
Database professionals use SQL Server Management Studio (SSMS) for performing both database administration and development activities. We cannot install SSMS on the Linux platform, but you can access the Linux SQL using a remotely installed SSMS.
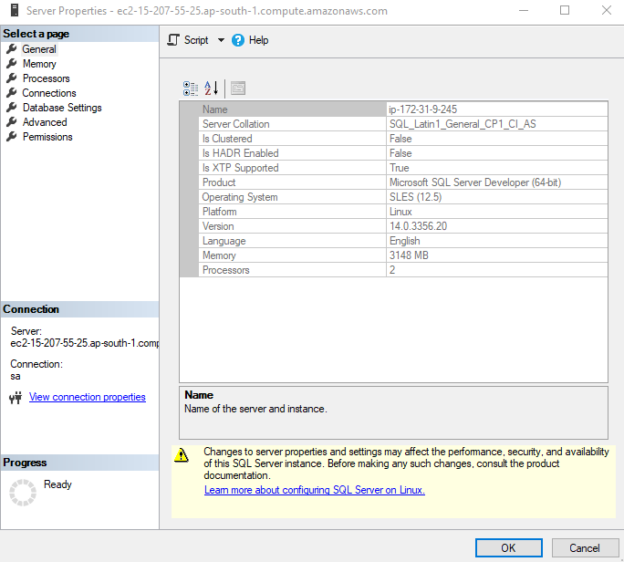
Launch the SSMS, specify the public IP or endpoint in the server name and connect with SA authentication. After connecting to SQL Server, open the SQL Server properties. We can verify the SQL Server developer edition for SUSE Linux Enterprise Server (SLES) 12.5 is 14.0.3356.20. It is the latest cumulative update(released on 10th Sep 2020) – CU22 for SQL Server 2017.
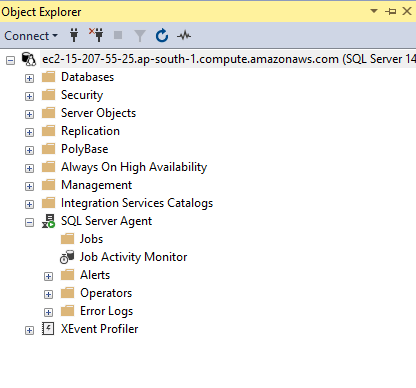
Enable SQL Server Agent for SUSE Linux in AWS EC2 instance
We can use SQL Server Agent in Linux as well for jobs scheduling. Starting from SQL Server 2017 CU4, We need to enable the SQL Server agent. Earlier versions are required to install the SQL Server agent as well. In this article, We installed CU22 for SQL Server 2017; therefore, enable it using the below command.
|
1 |
>sudo /opt/mssql/bin/mssql-conf set sqlagent.enabled true |
Restart SQL Services to activate the SQL Server agent.
|
1 |
>sudo systemctl restart mssql-server |

Now, refresh the SLES Linux in SSMS, and it shows the enabled SQL Server Agent.
Conclusion
In this article, we launched an Amazon EC2 instance for SUSE Linux Enterprise Server (SLES) and installed SQL Server Linux (2017 version) on it. You should consider practicing SQL Server features on both Windows and Linux operating systems.

I am the author of the book "DP-300 Administering Relational Database on Microsoft Azure". I published more than 650 technical articles on MSSQLTips, SQLShack, Quest, CodingSight, and SeveralNines.
I am the creator of one of the biggest free online collections of articles on a single topic, with his 50-part series on SQL Server Always On Availability Groups.
Based on my contribution to the SQL Server community, I have been recognized as the prestigious Best Author of the Year continuously in 2019, 2020, and 2021 (2nd Rank) at SQLShack and the MSSQLTIPS champions award in 2020.
Personal Blog: https://www.dbblogger.com
I am always interested in new challenges so if you need consulting help, reach me at rajendra.gupta16@gmail.com
View all posts by Rajendra Gupta
- Understanding PostgreSQL SUBSTRING function - September 21, 2024
- How to install PostgreSQL on Ubuntu - July 13, 2023
- How to use the CROSSTAB function in PostgreSQL - February 17, 2023